
The bathroom has become one of those ongoing projects that just lingers…
When we started it dragged on, mainly cause I got the plumber to do the tiling and it turned out he’s a great plumber but not such a great tiler. It took forever. In the end I just wanted him gone so I opted to finish the room myself.
Not that much to do… Or at least that’s how it seemed till I listed it:
Patch holes in the window frame and paint
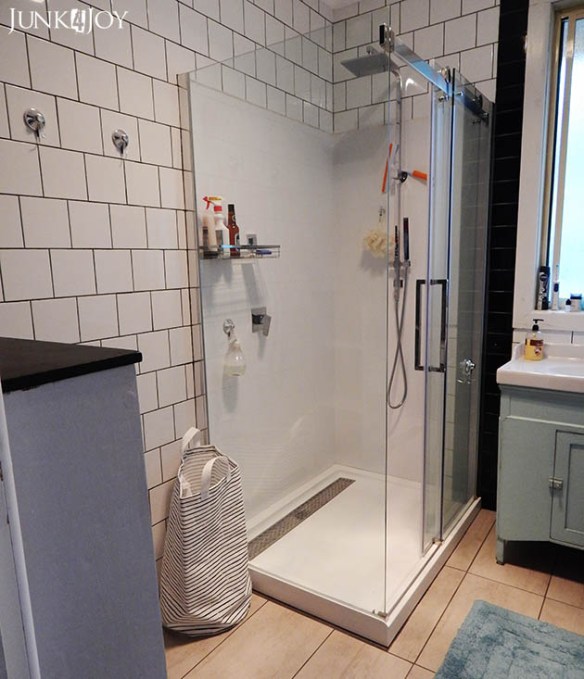
Remove silicon around the shower where it was stained by the grout and replace
Seal the grout
Paint the wall that wasn’t tiled
Put in skirting boards on that wall, quad in the corners and trims around door
Gap fill and paint woodwork
Put up the towel rail
Sort out a shelf/shelves for above the vanity
Finish the cabinet for storage
Paint and mount the mirror
Make a cabinet out of a window to finish the storage corner
Suddenly, it wasn’t such a quick job to finish…
This week I managed to cross a few items off the list – some cause I did them, some cause I eliminated the need to do them! Always a bonus when you rethink your plans and eliminate steps!

What I did get done:
Attached the towel rail
Broke the vintage mirror I had sitting on the window sill
Sealed the grout
Finished the cabinet
Did most of the door trim
Here is the cabinet’s story. This cabinet was on a pile to go to the rubbish tip. I rescued it cause I could see potential in it. By the time I got it it was missing its doors, shelves and was a total mess.
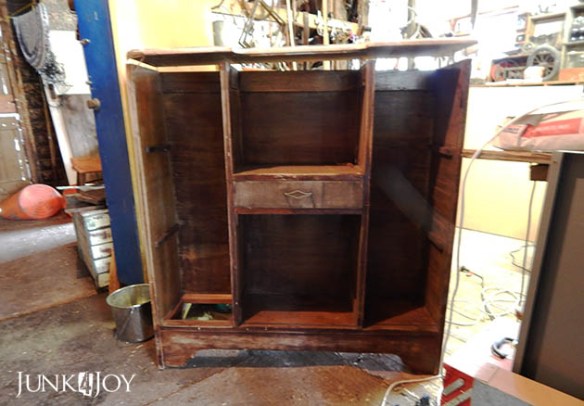
None of that worried me, I liked the shape. Problem was, it was too wide for the space I had. So I cut it down. I basically had to pull it apart and put it back together again in a narrower shape.

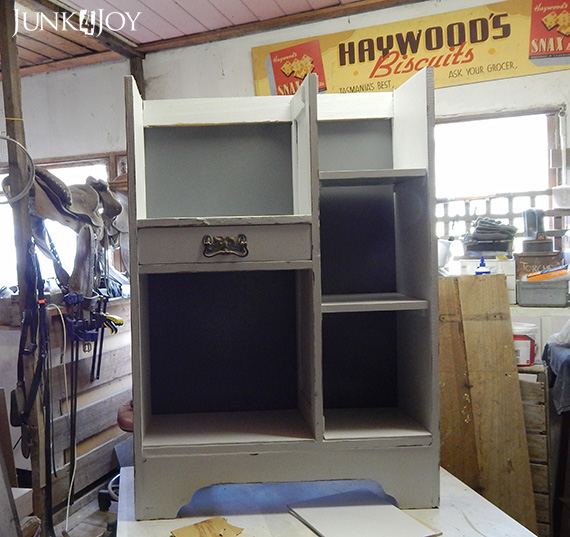
I painted it with a very pale grey DIY chalk paint and put a new dark grey back on it. The dark grey back almost matches the concrete effect wall the cabinet sits against.

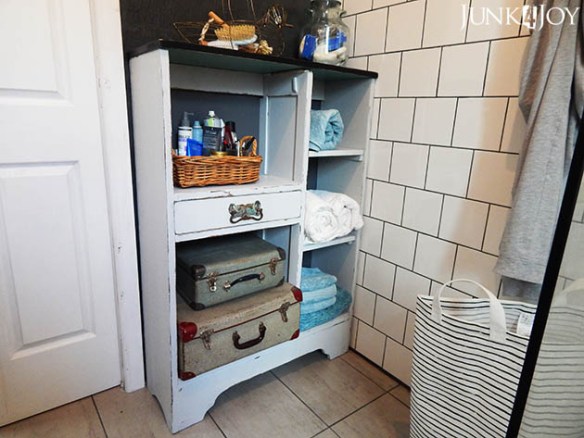
The plan is/was to put towels in the larger shelves on the left and make boxes (or buy baskets) to slide into the smaller shelves on the right. These boxes (or baskets!) will hold the kind of stuff you don’t want on display – makeup, hair stuff, whatever. That way, since the cabinet is not in front of the mirror, I can take the box/basket to the vanity to do my hair or makeup… then put it all away again.
Since I wanted to start using it, I’ve gone ahead and made do with what I have for now. I some towels on the right and used some old suitcases to hold other stuff. It’ll do for now!
When I put up the towel rail I was able to put 3 of the screws into the joins between tiles, into the grout. However the last screw had to go into a tile.
Have you ever tried to drill into a tile? I hadn’t. I had to go buy a special drill bit.
I never want to do it again. I bought an acrylic suction type shelf for above the sink. MUCH easier… It gets things off the window sill and out of the way.
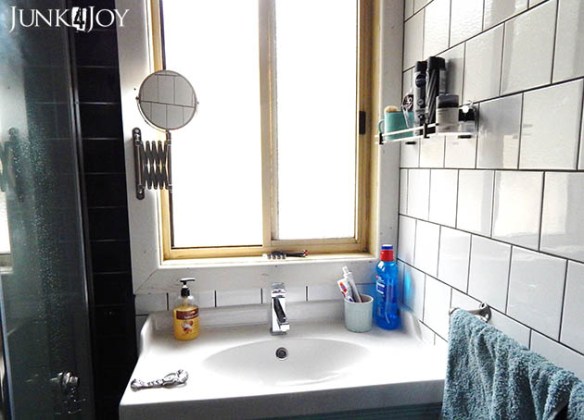
I also added a small IKEA mirror for doing makeup.
But I didn’t explain why the vintage mirror got broken… Well, when I sealed the grout I had all the house windows open plus the fan on in the bathroom, but I was still choking on the fumes. When I finished spraying I ran out and left the mirror where it was, leaning against the open window…
When I got back into the house after grooming I found the mirror on the floor, broken to bits. Sigh…
Oh well. At least its not the mirror I planned to put in the bathroom long term. It was a temporary mirror. I still have to paint the long term mirror.
So what’s left to do? Well… I need to finish the door trim. I had enough timber to do it but I cut the top bit too short, then cut another bit and did the angle wrong. Measure 3 times and still get it wrong… I bought some new trim and will finish it this week.
Needless to say I’ll then need to do the gap filling and painting of all woodwork.
What I eliminated from my list was the skirting board behind the cabinet. Without it the cabinet sits flat against the wall. Perfect.
What I’m changing my mind on is the quad in the corners. I dislike quad so I’m going to try gap filler in there and see if I can make it neat enough. If I fail I’ll go ahead and use the quad.
My plan is to make a smaller cabinet to sit on top of the larger one, with a window as the door. Step one is complete: I found the window I have earmarked to use as a door. Now on to making the actual cabinet…
That’s the fun bit!
z
Shared at:


Looks good! I don’t think I would ever attempt to remodel a bathroom. You rock!!!
LikeLike
This is my third bathroom and by far the hardest!
LikeLike
That is quite the ambitious diy job you’ve done! So good to be able to take over and finish it yourself and do it even better. I love the cabinet transformation! The suitcases are so perfect too! Drilling into tile does take patience a a diamond drill bit, but now you can drill into ceramic cups and all sorts of crafty things. Wondering what “quad” is, not familiar with that here. Keep up the good work and thank you for the inspiration to try to do some of my own renovating!
LikeLike
Quad is just a bit of timber in a kind of V shape you can put in corners to hide ugly edges. LOL
Thanks! 🙂
LikeLike
Pingback: (faux) polished concrete side table | junk4joy