upcycled baking tray sign

Dada!
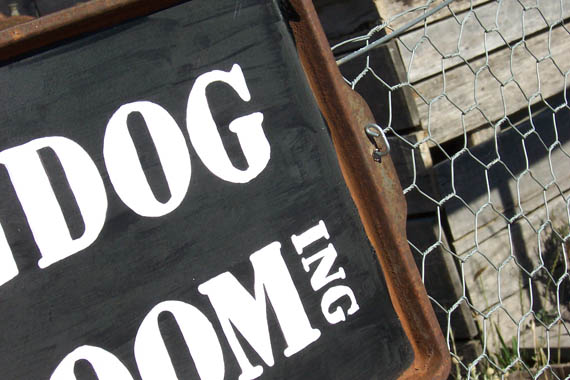
As promised…. (drum roll) here is the better dog grooming sign!
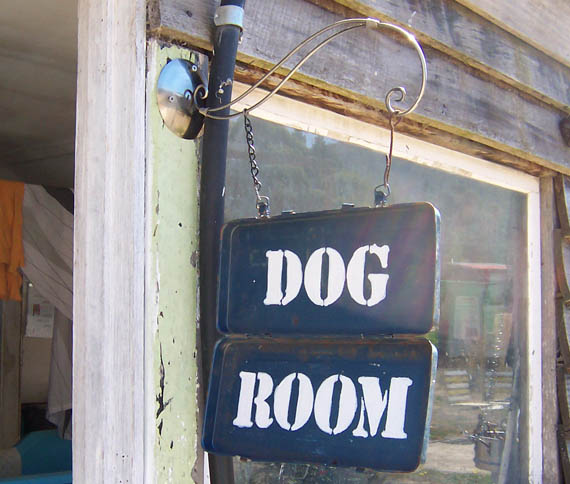
This one was made using a rusty old baking tray which had seen better days – it began its life as an eager young tray, looking forward to doing its best, cooking oven fries and such. Then it started to lose its good looks and was banished to defrosting dog food. Things went from bad to worse when all the defrosting lead to corrosion and rust… causing it to be tossed out into the yard where it spent the last 2 years covering a hole its human meant to fill.
Then one day said human was thinking of making a sign and walked by the now much bigger hole and saw the poor rusty tray just lying there, waiting for the ultimate death (the tip). Suddenly life looked up for the old tray – it was brought inside, sanded within an inch of its life to get rid of the loose rust, then painted over with black rust guard paint to protect it.
But back to me…
When designing this sign on the computer (I use InDesign for all my type stuff) I found the best way to fit Dog Grooming and an arrow was to be a bit imaginative – hence the sideways ‘ing’. 
I think its cute.
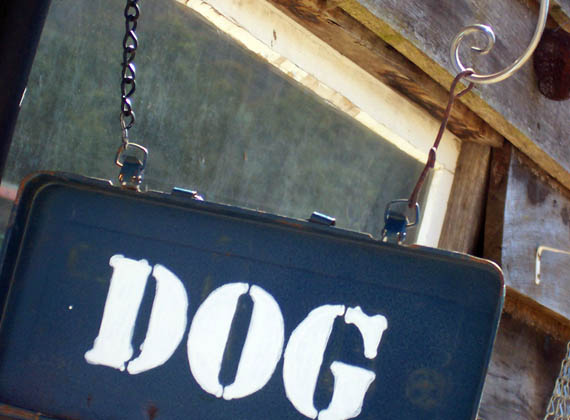
Anyway, I used a symbol font for the pointing finger cause arrows are just too boring. Then I used Stencil as my font cause it kind of lends itself to being cut out… don’t you think?
I printed it out, cut it out using a scalpel (yes, you heard me… scalpels are so much easier to cut stencils with than stanley knives). I then traced the letters using a pastel pencil.
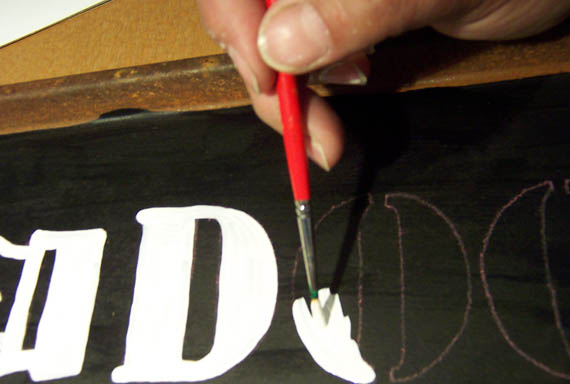
I used some of the enamel primer I am using on the house to fill in the letters, joining them up so they no longer look stenciled. I did this twice to get a smoother look.
I think it came up pretty well.
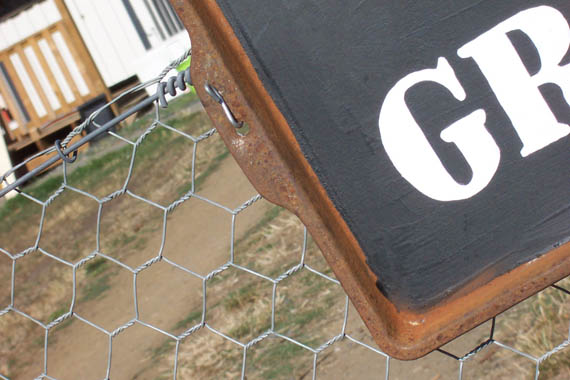
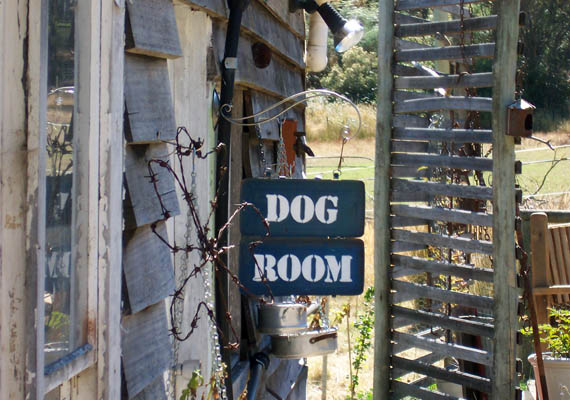
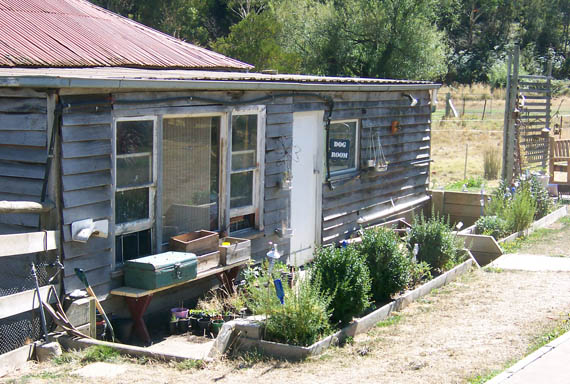
I asked Wayne to drill a hole on the handle to match the one that came with the tray and then he made 2 wire hooks to fix it to the fence near the front gate.
No one can miss it now!
z

Shared at:

Knick of Time

Beyond The Picket Fence

the dog room sign

 
I have a new ‘Dog Room’ sign!
When I’m grooming dogs I find that people who’ve never been to our place before will wander around the yard aimlessly, not knowing where to go. I used to have the blackboard on the front porch with instructions: ‘Dog grooming in the shed behind you’, but since I started painting the house the chalkboard has been moved.
I thought it was time I did what I’d always planned and put some signs up to direct people to the right place.
The first thing I did was consider what I had on hand which would I could use to make a sign. I had plenty of timber, but I also had this cute little wire thing I’d found at a tip shop which I thought would make a great wall hanging sign holder.
I have no idea what this thing was used for originally, unless it was to hang bananas on… I drilled holes in it and voila! A bracket to hang a sign off!
I also have quite a few of these old metal tool boxes. The smallest one I had was a perfect fit for the hangy bit thingy. 
(You only get the best technical terms here!)
So… since I was already painting the house and had the undercoat enamel tin opened, I used some of that paint to paint the letters on the metal box.
I had made myself a stencil (for a sign I’ll share tomorrow) so I simply re-used it to do this sign. For this sign I decided to shortcut the process. Instead of drawing the letters and then painstakingly painting each letter by hand as I did with the other sign (the neat one), I just painted over the paper carefully as you would a proper stencil.
Given I was using a paper stencil I’d cut myself and not a proper one, I had a bit of ‘leakage’ under the stencil. Not to worry. I wanted this sign to look a bit rustic. After all, its going on the side of a very rustic old house-come-shed-come-grooming-room/workshop/feed storage/laundry and whatever else we need it for.
You’ll notice the chippy paint on the old timber windows, the unpainted boards, the general aura of abandonment and disrepair…
Of course I had to hang the sign on the bracket. I only had one piece of chain I could pry open to attach on both ends. All my other chains are too heavy and too impossible for this job. So I improvised. I got some rusty old wire and made myself a hook for the other side.
It now hangs off the door frame (the entrance to the hydrobath room with the grooming room to the left) between my dying herbs in colander planters (you may remember them from this post when the herbs were new and still happy to be alive) and the four leaf clover Wayne made me out of rusty barbed wire.
PS: I cannot grow herbs. I’m going to put succulents in those baskets. Or plastic plants. At least I can’t kill them…
This is the view as you drive into our yard. I think people will get it. Don’t you? Especially with the new sign at the gate directing them to look that way.

Stay tuned for that sign tomorrow!

z

Featured at: 

Beyond The Picket Fence

Shared at:

Beyond The Picket Fence
Homespun Happenings