enamelware caddy

You know I have been busy lately. Not an excuse, just a fact. Somehow, among the many busy things I’ve been busy with, I’ve managed to do a few small projects.

Like this cute enamelware caddy.

So, what’s it made of you ask? Well, an enamel bowl, an enamel dish and a wooden salt grinder.

Yep. A salt grinder.

I sprayed the grinder black, drilled a hole into the bowl and there was a convenient hole in the top of the grinder to join them together. The bottom was glued onto the dish.

Its now a handy spot for keeping stuff. Whatever stuff you have that you have need of a spot to keep it in. A desk tidy to hold office stuff. A bathroom tidy to hold bathroom stuff. A kitchen tidy to hold kitchen stuff.

You’re limited only by your imagination (and the size of your stuff).

This is one of the items I’ll be selling at my garage sale on the Garage Sale Trail on October 22.

z

when a fry basket becomes a cloche

Don’t you love a quickie? Quickie project I mean!

I’ve had this base for quite a while. I originally made it for a birdwire cloche I’d made but ended up finding the perfect antique silver base for instead. So this wooden base just sat in my workshop, gathering dust.

As I prepare for the garage sale, going through everything I own and evaluating it, I found the base and thought, I wonder if the old sieve food cover I made would fit it? I know I have photos of that but I can’t find them right now so take my word for it… Anyway… Nope. It didn’t fit.

So I looked around and what did my eyes alight upon? A fry basket.

I tried and and it fit perfectly!

All I had to do was give it a wash, spray it antique white and find a knob that suits. I went with a tiny wooden knob which more or less matches.

And voila! A quick project finished.

Isn’t it nice when things just work?

And a quick project only takes 30 min and one year to complete.

z

indian sign

Yippee!
A project I began and finished entirely since breaking my finger!

I had this large piece of plywood, with a thin metal border from when Wayne bought a wood splitter. It arrived in a lovely ply crate which was, unfortunately, destroyed during the unwrapping stage.

I went into the garage to see the unveiling and snuck off with the intact top. I put it in the silver shed where I store a lot of ‘future projects’ (ie junk I have plans for) and forgot about it. For at least a year, probably closer to 2 years… A few months ago I saw it while searching for something, thus it was near the front of my mind when I was wondering what kind of project I could do with one hand.

I had always planned to paint the Indian Motorcycle logo on it for Wayne’s garage. I mean, he’s a cowboy, he loves anything american indian, and its a great sign for a garage…

First I undercoated it with a 3 in 1 primer, sealer undercoat I had on hand. Then I projected the image I wanted onto it so I could trace it. I’m no sign writer, I needed the help!

I worked on it in the grooming room (since it wasn’t being used for grooming!) so I could keep it a surprise for Wayne. I only worked on it in spits and spurts as the inspiration and energy hit me so it took a full 3 weeks to complete.

I began painting it with artist acrylics but they didn’t give a nice finish. The face and head dress (which is a pale beige but looks white in the photos) are textured and not smooth. I had to buy some tiny (and expensive) pots of water based enamel paint. Its liquid and goes on smooth. However they have limited colours – I used those for the red, yellow and black.

The sign will hang in the garage, probably be put up next weekend if we’re lucky. Its something thats best admired from afar… the black outlines are a bit wobbly in places.

Wayne is pretty impressed with his gift. Its for putting up with me constantly complaining about my finger and for using it as a good great excuse for not cooking.

UPDATE

Wayne has hung the sign in the garage.

z

shared at:

our new old kitchen trolley

Today I thought I’d share the fun makeover of a sidewalk find.
Last year I picked up this pitiful serving trolley from the side of the road. The top was broken off, it had no lower shelf and it had at least 3 layers of bad painting… one of which was peach.

Well, that had to go!

I’d always planned to have a movable kitchen trolley in our kitchen but there’s really no room for it. Here you can see the original little side table I planned to make into a trolley for the kitchen.

I brought it in cause Wayne had bought a couple of appliances that were taking up space on our kitchen bench. I needed more space. But this little green side thingy wasn’t the right size… it was nice and narrow and had a drawer (missing in the photos for some odd reason) but it was too long, forcing the table over too far.

See that big blank wall? Watch this space…

Anyway, the little trolley is a bit better in proportions. Its not as long so the table doesn’t have to get shoved over too far, and its not too wide, allowing the dishwasher door to open when its in place! AND its taller and already has wheels!
It was meant to be! Thank you hard rubbish collection day!

This is a project I got the bug to do one afternoon and I almost finished it the same day. Basically it took me one afternoon and 4 weeks to finish.
Thanks to a broken finger.
I used the off cut of the pine slab I had left over from making the kitchen shelves. I cut it to fit on the top. Since it was a lot thicker than the previous top, it sits up above the trolley sides.

I cut the bottom shelf out of a piece of leftover plywood from the TV cabinet/room divider. (I’ll need to buy more plywood to finish that now as I keep using the bits I planned to use.)

The reason it took so long to finish was the whole circumcised finger thing. That put a damper on my creativity for a while. The main work was done though, all it needed to be finished was a couple more coats of polyurethane.

I could do those with one hand.

Once those were done I only had to lug it up to the house using one hand, one arm and one hip.
In pieces.
Then I put it in place and started using it.
Done.
Not bad for a piece of rubbish.
z

shared at:

recycled milk bottle armchair – alternative furniture

You know how sometimes there’s an idea in your head you just can’t find the time to do, yet you just can’t let go of?
Well this armchair is one one those.
I’d wanted to make usable furniture out of cardboard, papier mache and other recycled materials for a long time. I had this vision in my head …and one day I decided it was time to make it reality by building it at work in one of my creative programs.
I work in day support for people with intellectual disabilities and am lucky enough to have some creative programs.

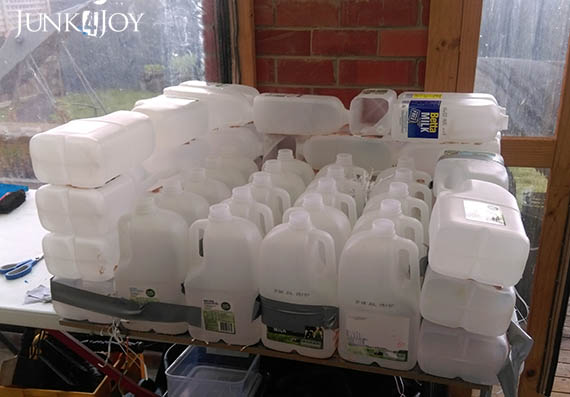
We began by using a pallet base for strength. We used milk bottles as the main building material, using tape and glue to create the shape we wanted.

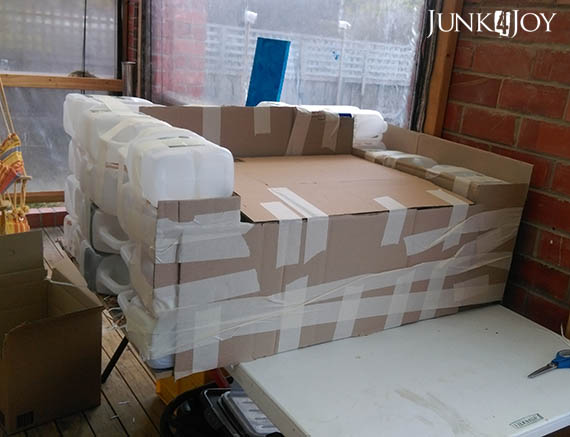
Next we cut and folded thick cardboard around the bottles to give the chair smooth surfaces.

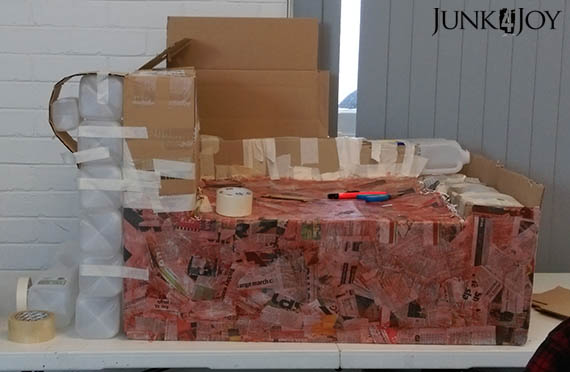
The chair is quite big and it took weeks and weeks to build. We did many, many layers of papier mache to hold it all together.

At one stage we even began to colour the glue so we could tell how many layers we’d done!

As the chair began to take shape we found we had to add more bottles in order to get the size we wanted. We used cardboard. milk bottles and shredded paper to create the curved arms.

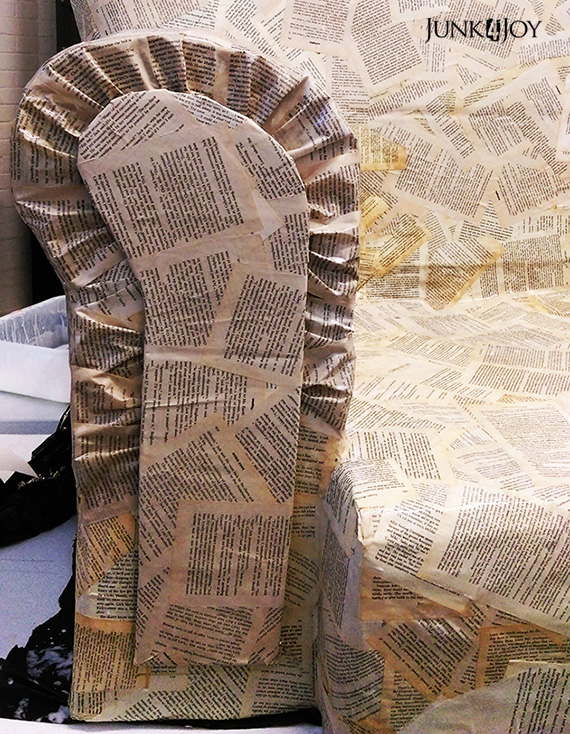
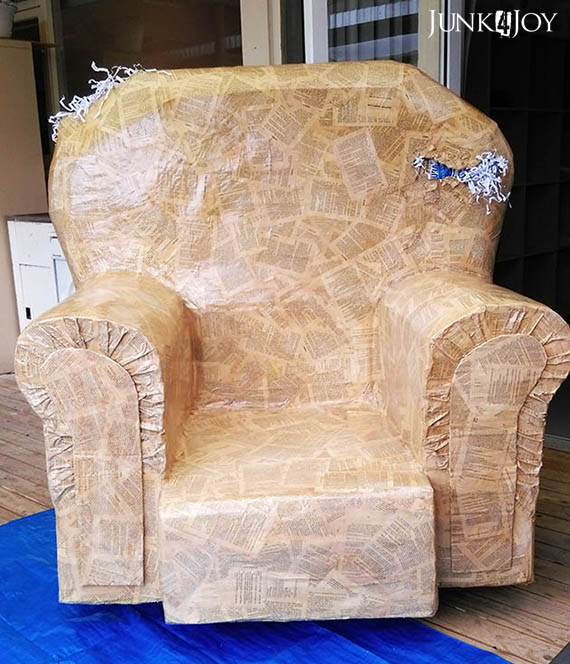
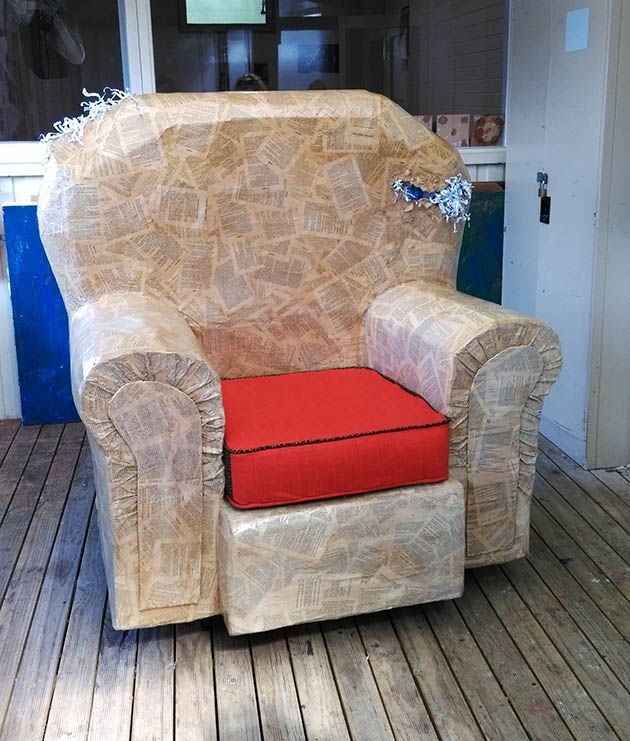
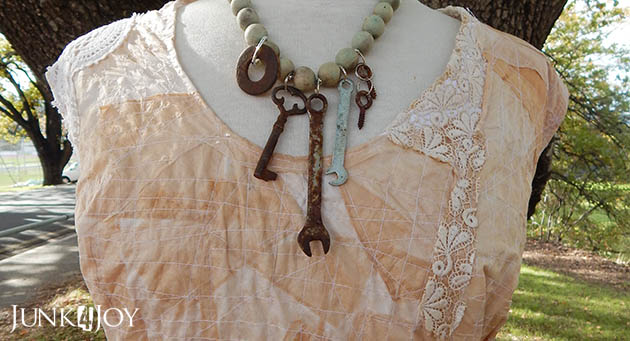
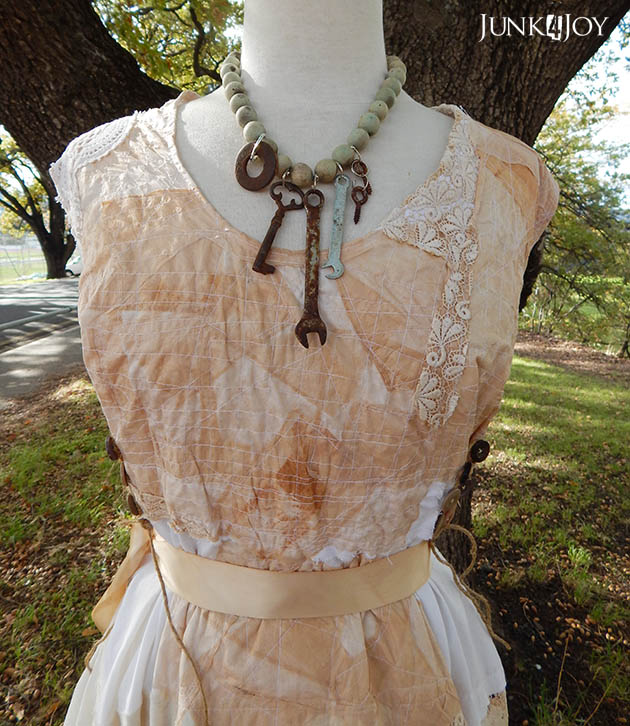
Once the chair was ready for its final layer we swapped out newspaper for book pages. We added detail on the arms so it looked more like a ‘real’ armchair.

The pages were stained using a mix of coffee and tea.

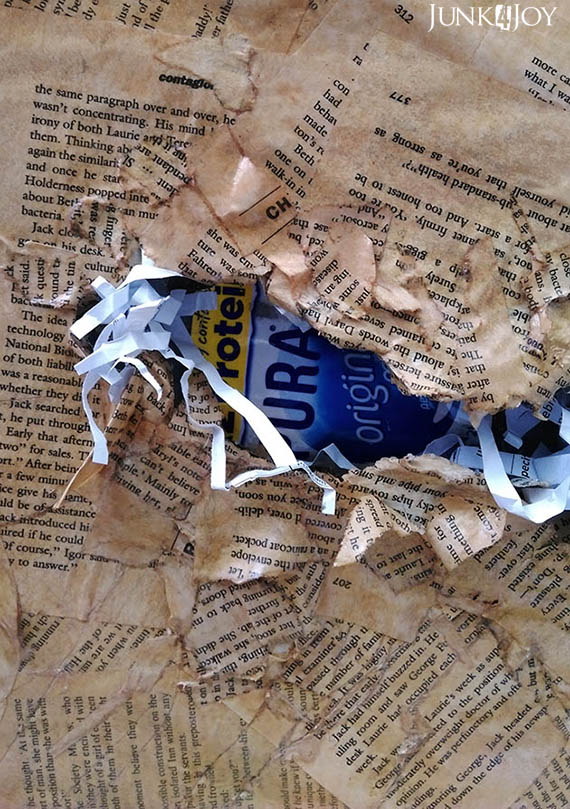
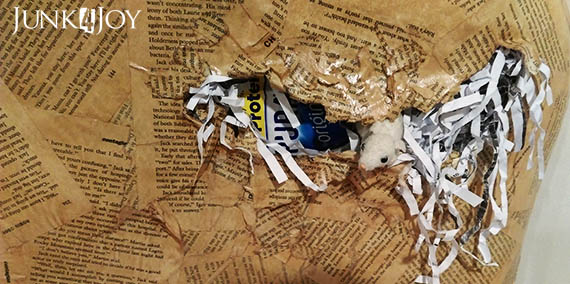
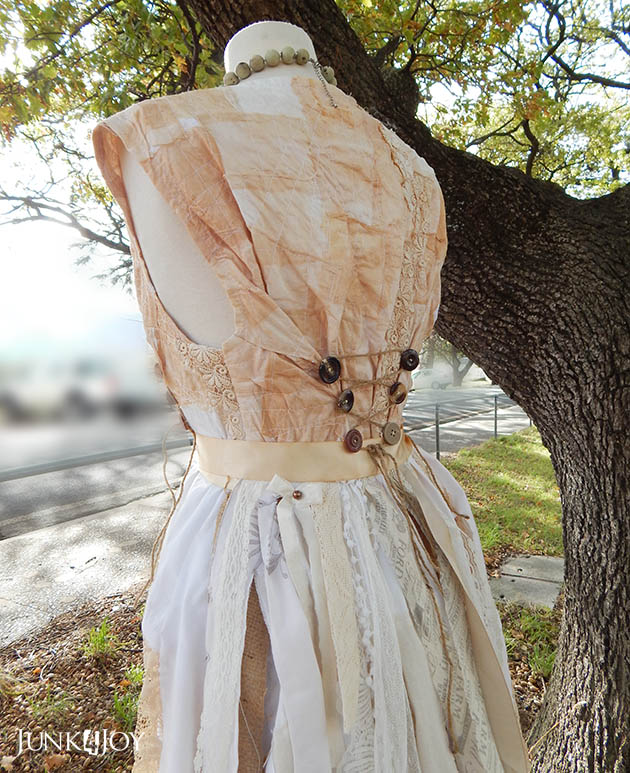
After all the work to put the chair together, we ripped a hole into the back so you can see the milk bottle and shredded paper construction.

I mean, what’s the point of it if you can’t see what its made of?

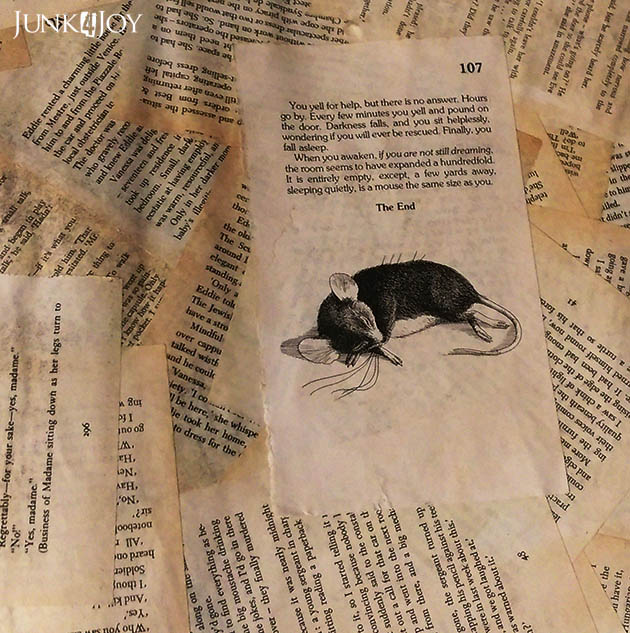
A little surprise on the back with this cute mouse illustration.

There’s another ‘rip’ on the other side too, as if a cat’s had a go at the chair.

Or a mouse?

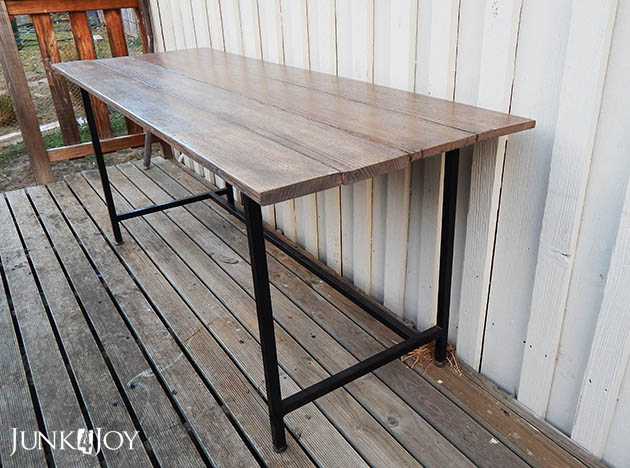
Lastly we coated it all with clear polyurethane for protection.
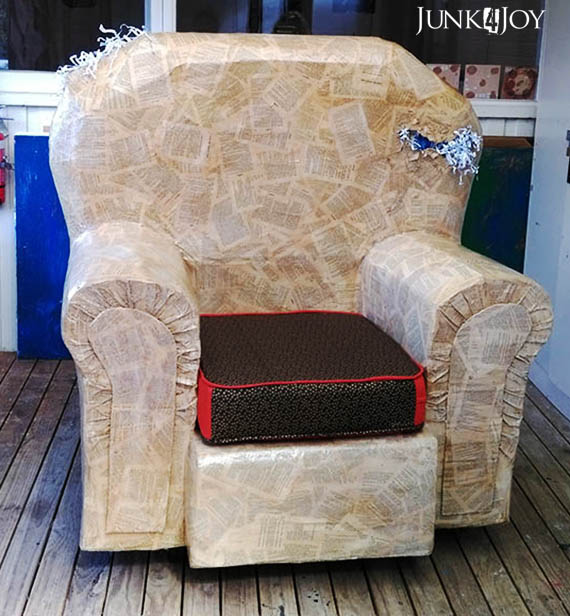
We made a seat cushion for it, recycling an old sofa cushion with a new, reversible cover. Castor wheels on the base make it easier to move around and finish it off.

We entered our armchair in Art From Trash, of course.

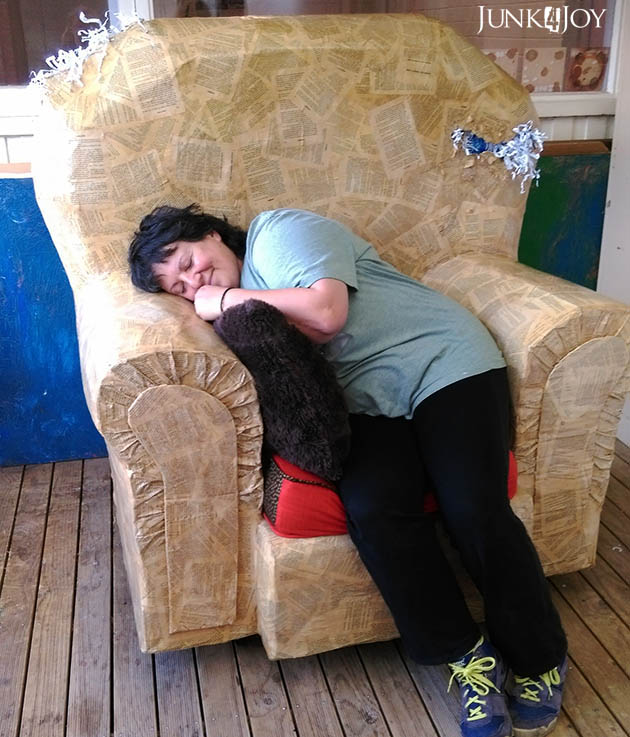
Its pretty comfy for a cardboard, milk bottle, papier mache chair!

z

shared at:

re-purposing used tea bags into a fish

What do you do with your used tea bags? I dry mine out and collect them of course.

Doesn’t everyone?

Ok, I’m not normal.

I just love the tea coloured stains – I’ve used tea to dye things before, and used flattened tea bags on the dress I made recently.

Anyway, the tea bags and a trout seemed the perfect match for an art project. For Art From Trash of course. This is another of the projects I created at work with the help of one of the guys.

First I drew a trout on a large piece of paper (from a roll so it was long enough). Traced this onto some thin MDF and cut it using a jigsaw.

Since it was going to be a considerable size and moving it in a car would present a problem, I kept the trout in two parts. I glued strips of wood to the back of both pieces at either end. These served two purposes – the ensured the trout hung out from the wall a bit instead of sitting flat against it, adding dimension. It also gave me somewhere to attach hinges, making this a foldable piece of art!

Practical as well as pretty!

My assistant helped me paint on the face, tail and fins by adding all the spots. Then we began the long process of gluing on the tea bags together.

I left the strings on them on purpose – I think the movement of the strings in a breeze gives the illusion of movement.

In order to blend the 2D painted surface into the rich texture of the tea bags I used flattened bags which let the painted colours show through.

Add a hole for the ‘fishing hook’ and it was ready to hang.

Once we’d finished I sprayed it with clear varnish for protection. While that was still tacky I sprinkled it with some very fine aurora borealis glitter – cause, you know, trout shimmer!
This is the finished trout. 

 And here it is at Art From Trash.

Yep. That is a sold sticker! It sold pretty much straight away, and I’ve had enquiries as to whether it has any siblings.

It was a great success at the show.

z

steampunk faerie jacket

Today I’m sharing the work wearable art entry in the Art From Trash competition. This steampunk jacket was made by a ladies art group I work with.

It started with a jacket from the tip shop and a ton of odds and ends.

We collected anything we thought would work on the jacket and basically hand stitched it all on to get the look we were after.

We really wanted a bustle and that was added using layers of tulle from the discard bin.

We used stud earrings and other small bits of jewelry on the bustle to give to added interest.

One of the sleeves was cut short and re-finished with black velvet lace and beads.

We decided to run the decoration down one lapel and down one side of the back, bringing it together on the lace sleeve.

All the ‘junk’ we sewed onto the jacket is quite heavy so we had to make sure it was balanced. 
It turned out well and the ladies were all proud of being part of the project.
z

faerie dress or something like that using tea bags

I’ve wanted to share this dress for ages, soon as I finished it really, but had to wait till after the art show. I’m doing it now with some hesitation… typing with one finger takes ages and seems to block my creative thinking.

However, here goes. I’ll give it a try.

So.

I wanted to make something special for the 2016 Hobart Art From Trash competition. I wanted to use lots of fabric scraps, lots of whites and natural colours. I wanted to use tea bags.

My dress was inspired by dresses like this:

and this:

in my frocks or art board on Pinterest. Aren’t the just FABULOUS? Wow. If I was younger and slimmer this is how I’d dress!

Anyway, I went through all my scrappy bits. I had tons of cotton fabric pieces in various shades of white so I began the dress by sewing together pieces and then sewing used tea bag fabric to the bodice.

Here’s a glimpse of the front before the tea bags. I dyed some of the lace, ribbons and fabric with tea to tie it all in together better.

Since I’m no seamstress, I had a few glitches along the way … mainly figuring how to fit the dress in such a way that it would be adjustable to different sizes… and to make it so it could be worn by a real person, not just a mannequin in an exhibition.

Lacing up didn’t work

A belt worked better, but still wasn’t quite right.

The armpits were too big and messy…

In the end I could avoid it no longer. The dress needed darts at the bust. That helped shape the bodice.

I also kept the lace-up idea – using it on each side of the front, under the breasts, and the back. Mismatched buttons and jute string are decorative but also useful in fitting the dress at the waist.

The dress itself has a few scrappy layers on the skirt, but in order to make it richer, I added an ‘overskirt’ using a thick, tea dyed satin ribbon. The ribbon adds an extra layer of fabric and ties at the front like a belt.

I dressed it up with an old, discoloured wooden bead necklace which I hung rusty items on.

I’m in love with it. But it is for sale if anyone is interested in it for display or to wear!
Thus ends a long post with many photos and not so many words!
z
Shared at:

industrial rustic table

Today I’m revisiting a project I did a couple of years ago. Not sure exactly when I made this table, but it was Wayne’s second desk for quite a while.
The base of the table is an old office desk from the tip shop. The top was ruined when I got it but that was ok, I got it with the plan of putting a salvaged timber top on it. That’s one plan I actually followed through on!

Up till now I’ve been quite lucky with salvaged timber – when we bought our farm there was tons of old wood just lying around the place, exposed to the weather and rotting away. We saved and reused, then stored what was left over. Wayne fixed and extended the stable using this wood. We revamped our woodshed using it. We’ve gone through a lot of it, but its not all gone yet.

I went through what’s left of the timber to find 4 pieces that matched. I didn’t. But I found some which were close enough. That’s the beauty of rustic… it doesn’t have to be perfect!

I had to brace the timber under the table to hold the slats together, and I used the holes in the metal frame to screw the top on. I then gave it a light sand to make sure there were no loose bits and to even out the worst of the wear.

Of course that ended up taking away the gorgeous grey weathered look I wanted.

Easy fixed. Using a mix of acrylic artist paints I gave the timber a wash, brushing on watery paint then rubbing it off, till I got the colour I wanted.

I used black wood putty in nail holes and filled the gaps between slats with gap filler. When that was dry I gave it a couple of coats of semi gloss polyurethane to make it easy to keep clean.

It was great as a desk. For a while. But it doesn’t have drawers. So I made Wayne a new desk (the less said about that one the better!), and this one is now for sale. If I had a large kitchen I’d keep it for an industrial rustic farmhouse look… but our kitchen is too small for such a long table. Its too cool to end up as a workbench, thus I’m trying to find it a new home.
Sometimes you just have to part with things in order to make room for new creations!
z

a fancy oval chalkboard

This is the story of a makeover which didn’t quite work the way I planned.

I was given this oval frame in three pieces. Its some kind of resin, not timber, so I had no idea how I would fix it.

I let it sit around for a couple of years while I pondered.

In the end I decided that cutting some thin MDF to fit inside the frame and using trusty liquid nails might be the way to go.

Well, it wasn’t.

Not really.

Its holding together okay but I wasn’t able to clamp it properly, so the joins aren’t as good as I hoped.

They’re visible. Really visible.

Oh well. Not to worry.
I got out some silver paint (I thought I had gold but didn’t) and rubbed it on to try and disguise the cracks where the liquid nails was showing through. Silver looks better than liquid nails any day! I think I’ll get some gold and finish it in gold at some later date.
I hung it in our entry/pantry for our shopping lists. Its not perfect, but its different, and for me a change is as good as a holiday.
It replaces a plain long oblong chalkboard I’ve had for years. ‘Cause even a pantry deserves a bit of flashy!
z
PS Please forgive the awful photo of our yucky pantry/entry… Its taupe and dark and gloomy (as opposed to the bright fun kitchen) and I like covering our fridge in magnets!