a measuring cup pencil holder, a wire shelf and a shutter shelf


A little more cleaning up…

Its not finished yet. There is still another 3/4 of the workshop to finish, but I made a start last night.

Before:

After:

Of course, I would have gotten more done if I didn’t get distracted. The way I seem to work is: stare at the mess, dither about where to start, pick up something, put it down, move it over to another surface, look for a container to put it in, think a shelf would look nice there, look for things to make a shelf out of, necessitating moving more things over just a bit to make space, find a measuring cup I got at a tip shop and decide it would make a great pencil holder, find wire to make that, then start cutting wood to make brackets cause nothing I have will work, then make a shelf out of a broken wire basket cause I always planned to do it but never got around to it, and now I have and its good to finally do it, but oops, there’s still a huge pile of stuff to put away so I pick up things and put them in their place, realise there are now too many things so create new places for things and labelling them so I can find them again… and suddenly its 9pm and I’m blowing black stuff out of my nose.

But my new toolbox is now full of tools…

and that wall is looking like a working workshop instead of a jumble sale.

The drawers are only there temporarily… till I find my electric plane. Then they’ll go back into the tv unit/divider.

You may notice a few other things in the picture above… the stencils given to me by a good friend cause she knows I’ll love them and cherish them and call them my very own. My new measuring cup pencil holder (that dark little triangle lost in the gloom), my new wire shelf and, last but not least, the new recycled shutter (louvre door to be exact) shelf.

The one I always planned to put up but didn’t have the necessary bits or the patience to buy them. What the heck, right? Make do is the name of the game!

Don’t try this at home.

Hey. It works. Don’t judge me cause I’m imaginative!

Meanwhile let me share my gorgeous new pencil holder. Its a measuring cup I found at the tip shop last weekend. I’ve never seen one like it before.

Please ignore the hole in the wall. I didn’t do that. The wall came pre-punched.

Do you wanna see the wire shelf?
I’ve had this wire basket for quite a while and the wire on the corners has come undone and its not in the best condition. I always thought it’d make a good shelf.

So, while in the middle of cleaning and organising my workshop, I naturally had to stop and make this little fella.

Firstly I had to wire the corners to stop the wire bits from sticking out and causing bad things to happen.

Then I trimmed some offcuts of plywood as the shelves. The bottom shelf just sits in place but the one in the middle is wired in place. I drilled holes to feed wire through and hold the shelf in place.

I attached it to the wall with those plaster wall plugs… which of course weren’t the right size for the job. Oh, they’ll take the weight ok, but the screws weren’t long enough to clamp the wire back in place properly.
Thats ok.
As long as its pretty!
z

this year’s christmas tree

Its not exactly what I’d planned, but I love it.

I had planned a 3D tree, made using old timber on a central rod. Then I found the old crib sides I used to use as dog barriers when I lived in Fentonbury and thought “hey, I’ll use the slats!”…

So I cut them up for branches. I drilled holes in the middle. I cut blocks to go between the branches. I drilled holes in those. I created a base for the rod. I put it all together and went “yeech”.

Then I found myself with all these cut up slats – luckily not all had holes in them – so I went for plan B.

And this is what I ended up with:

Pretty huh?

Yes, I know its a bit wonky… but you know me. Nothing is ever quite perfect. I’m of the ‘close enough is good enough’ school of DIY.

I used the base I cut the slats off as the bottom, I like the way it grounds it. I had to stick the trunk slat back onto the base so I used an old hinge.

I then decorated it with the timber stars I bought a few years ago and some brown, natural looking, florist wire I’d had for years (I knew I’d find the right project for it one day!)

Its hanging in the middle of the living room, right over the air conditioner. Basically, its on the only bare wall I have. I’d been wondering what I’d put there, well, problem solved for the next few weeks. Gives me time to think about future displays.

Did you notice I put the presents under the tree (on top of the air conditioner?) They won’t stay there. When I clean the old grate we use to hold firewood for the wood heater I’ll put the presents in that.
Don’t know about you, but I love wrapping presents. I’ve had a thing for plain brown paper for years now, adding different embellishments each year to pretty them up. This year I made large bows from burlap ribbon and a brown linen type ribbon.
The spotted paper was something I saw at a shop while browsing… I thought “I’m not paying that for wrapping paper!” so I made my own. I love the way it looks having plain and spotted paper wrapped gifts together.
I’m all excited now. I can’t wait to get stuck into getting the house ready for Christmas and mom’s visit.
I’ve already started in the garden. There’s been weeding and some new planting (to fill in gaps) and heaps of general cleaning in the yard. Still much to do on that front!
I’ve also started building my tv unit/room divider. 
Its a big job and I can’t believe I’m doing it, but after months, years even, of thinking about it and hesitating and doubting myself, I suddenly got hit with inspiration. Before I had time to rethink it I’d measured up and gone out and bought plywood.
Its half done now. I’m thinking it’ll be a work in progress. The base part is done except for putting the legs on. Then I can move it into the house. It’ll need polyurethane to protect it and I’ll need to do the back, but it can be used and I can rearrange the living room the way I’ve been planning to for ages!
Later I can build the rest of it. The idea is to make it so it can be pulled apart in case I want to move it one day, thus making it in 2 stages works for me.
But more on that later. When I have decent photos to share.
Other than that I’m doing great. Well, other than the wisdom tooth I had pulled out last Friday cause it was loose (and turns out it had an abscess). And the fact that its now more sore than it was on Saturday. Thank goodness for strong pain killers! 
I’m falling apart.
z

Shared at:

birdwire light fitting

I went through a phase a couple of weeks ago where I was updating, making, changing light fittings. If you know me, you know I’ll do nothing for ages cause I’m worn out, then do all kinds of things which aren’t on my to-do list, then begin working on things which are on my list, then get side tracked with spur of the moment things.
The light fittings were like that. I began by doing the office/guest room swap and thought it’d be a good idea to change light fittings in those rooms while the furniture was out of the way.
Somehow I managed to stuff up the light connection (no idea what its called, but its the bit that’s in the ceiling and holds the globe) so the guest room has no light currently.
The office has a light (a working one I might add) but it hasn’t got a light fitting. I want a pendant in here as the ceiling is high enough.
So, having given up on the guest room light and having put off the office light, I went ahead and changed the light fitting in the wardrobe room. For those that don’t know, that’s a tiny room in our house which I converted into a wardrobe for Wayne.
Yes. You heard me right. In our house the man has the walk in wardrobe cause he has more clothes.
Anyway, back to what I was saying… The original light fitting in there was a real quickie I whipped up using wire and an old lamp shade. 
I never liked it much.

The new light fitting is made from some leftover bird wire I found in the shed. It was a bit crushed but that made it perfect. Imperfection is what I’m all about. Sometimes its even on purpose!

I had this shallow shade frame so all I did was attach the bird wire cylinder to it. Originally I had a long Edison bulb in it but they really don’t give off much light. Now it has a big white ball glove in it.

I think Wayne’s happy with it. Its a light. It comes on when he hits the switch. He’s happy.

z

Shared at:

zip junk necklace


Have you ever looked at junk or steampunk jewelry and thought “I want to make one of those”?

I do every time I see them on Pinterest, so I decided it was time to try making one of my own… my own way.

It was so much fun! I’ve always had tons of junk (obviously!) so I had a lot of things to choose from.

I started with an old zip as the base. Then I began building on it using old bits of jewelry, buttons, beads, a tiny spanner, rusty safety pin, bits of chain… even a rusted through bottle top… all kinds of things.

(I really am a magpie!)

Its not just a necklace, its a piece of art! I had it entered in the Salvaged Art Competition last month but before that I had it hanging on the wall and it looked great.

z

what i’ve done and how i spoiled myself

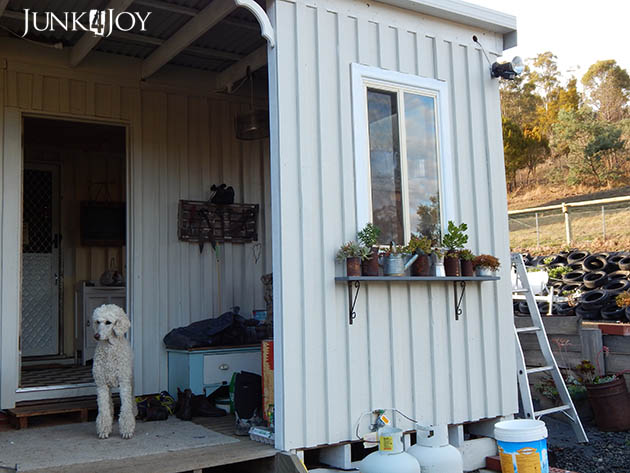
Since Wayne has been in hospital and recouperating, I’ve been the one feeding the horses morning and night.

As such, I’ve had to go into the feed room morning and night… and every time I opened the door I was greeted by the aroma of mouse pee.

Eech. Yes. Mouse pee. I felt like scrubbing out the inside of my nose every time I went in there.

See, I sorted out and cleaned up the feed room about a year ago. Since then it deteriorated and deteriorated into the mess it was up until this morning. Sorry, there are no before pics.

Part of it was my fault. I used to store all my timber in the feed room along the left hand wall. I also stored some old kitchen chairs in there that I planned to fix. I did remove my timber a while ago but the chairs were being used to toss horse rugs over.

All good in theory. Then came Wayne. The pile of horse rugs got bigger and messier, no longer tossed over the chairs but piled on them, falling off them, pooling on the floor. Bags of horse feed with small mouse holes in them stood along in front of the old freezer we store horse pellets in. The old bench I use for general horse medical stuff was covered in molasses, mice began to nest in the rugs, empty feed bags and the plastic bags carrots or licorice come in were all over the place…

I would go in there every now and then and pick up bags and put them in the rubbish. Every now and then I’d sweep the floor, wipe up the molasses spills… but I finally had enough.

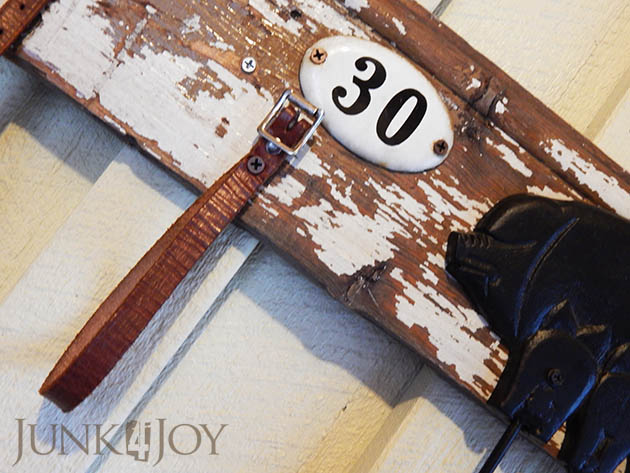
Today I went in there and hit the place with a vengeance. Firstly I sorted the horse rugs into a ‘cut off the buckles and throw the rugs away’ and a ‘keep’ pile. Then I bagged up all the rubbish and swept the floor. I put all the feed bags into a large chaff bag to give to a friend who re-uses them.

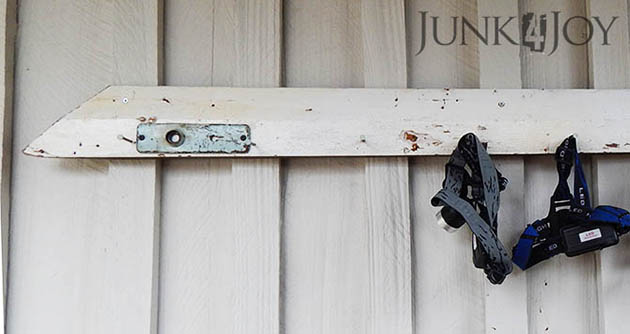
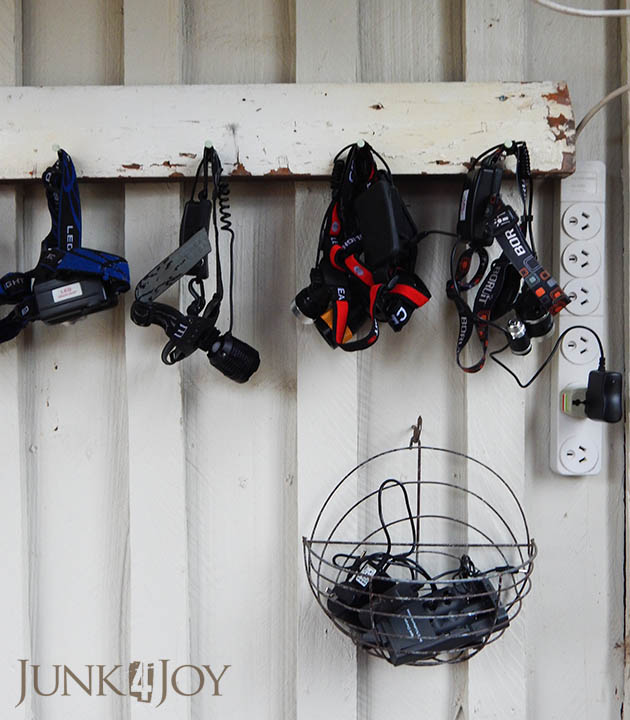
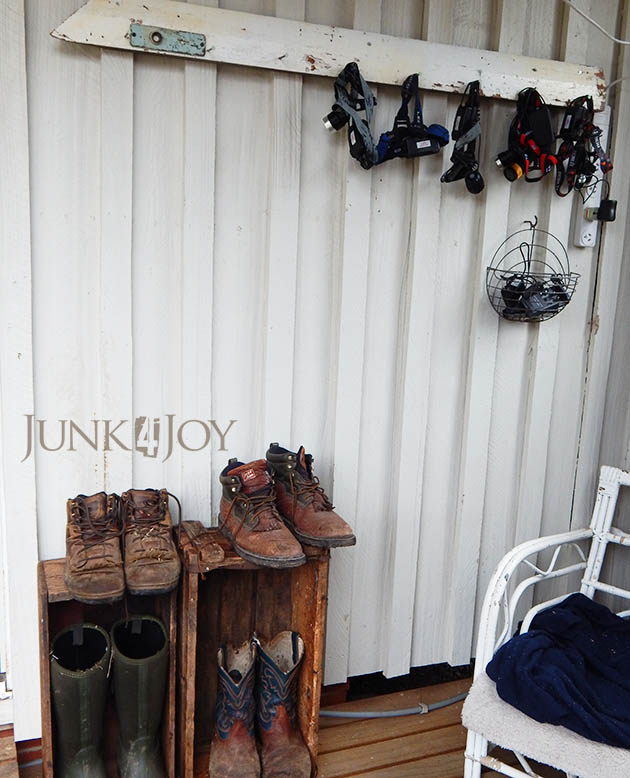
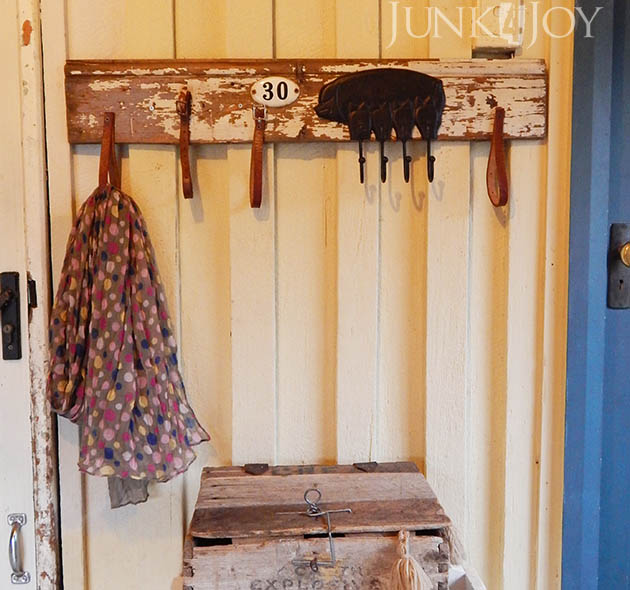
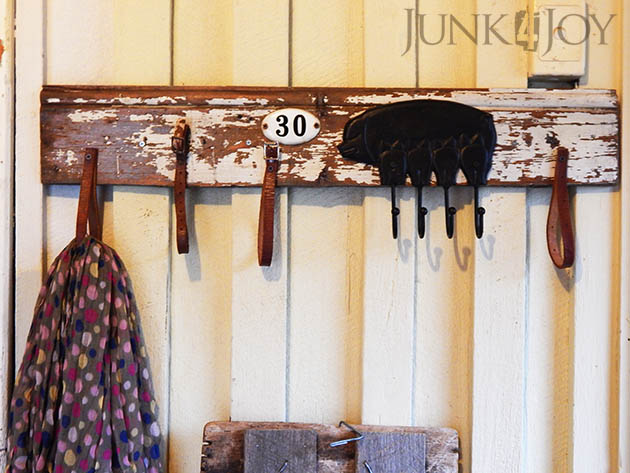
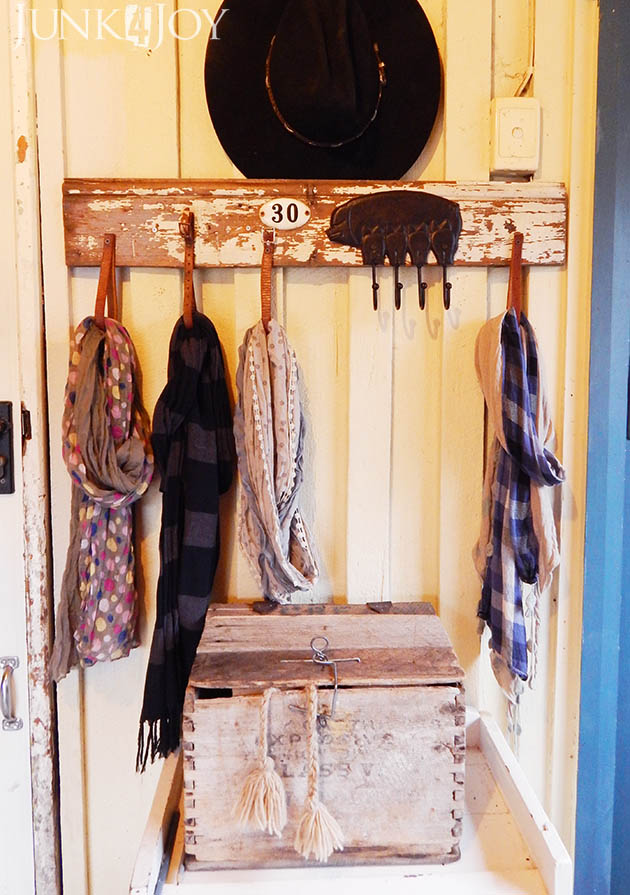
Then I got a couple of pieces of leftover pine lining (left over from our kitchen remodel) and put them on the walls. I had to use a nail to find the studs to screw the pine into (its an old house, the studs are all over the place!). I used whatever large hooks I had for rugs to hang on.

Would you believe the place no longer stinks?

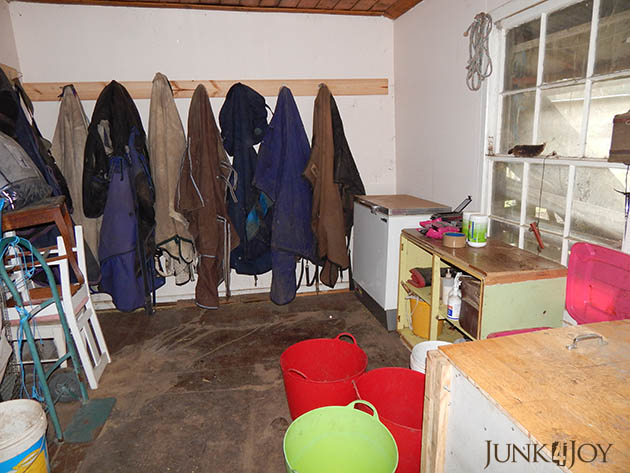
I’m so pleased with the new, clean feed room. Which will no doubt stay clean till Wayne is well enough to take over feeding the horses…

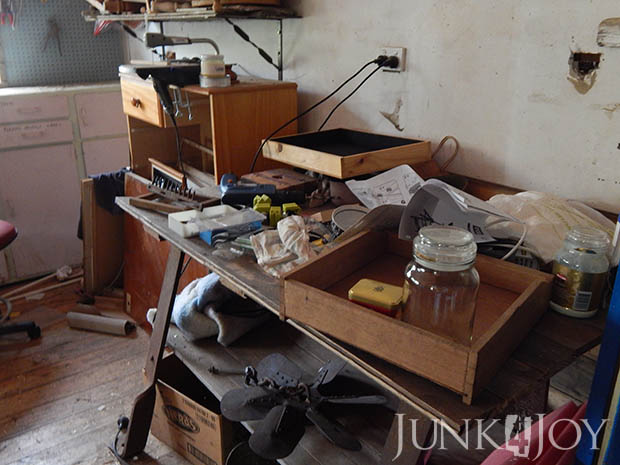
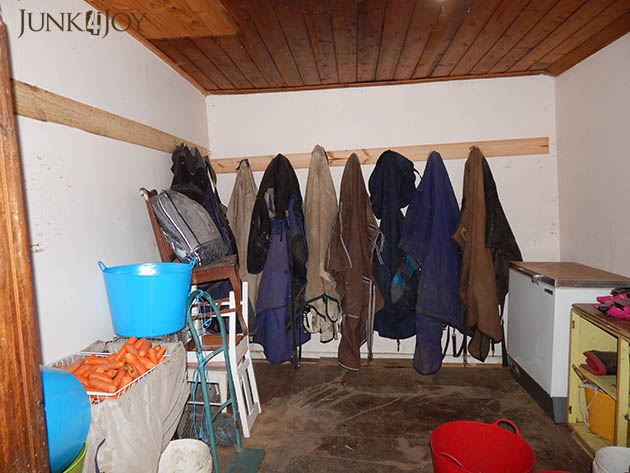
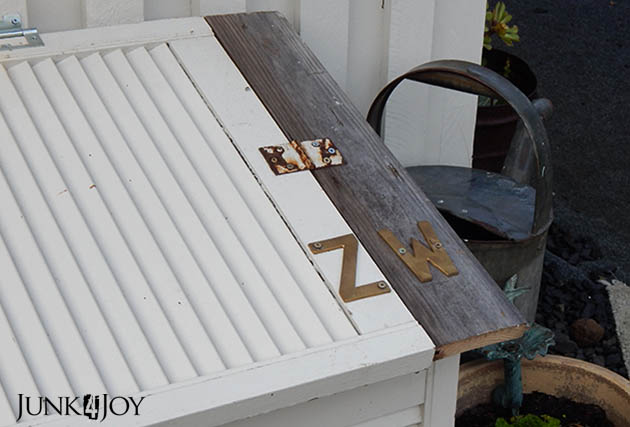
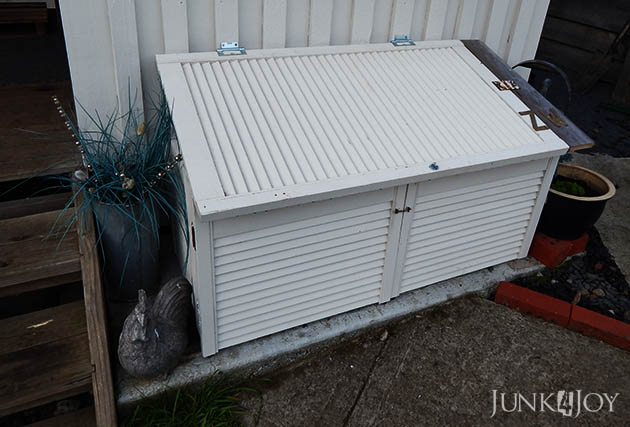
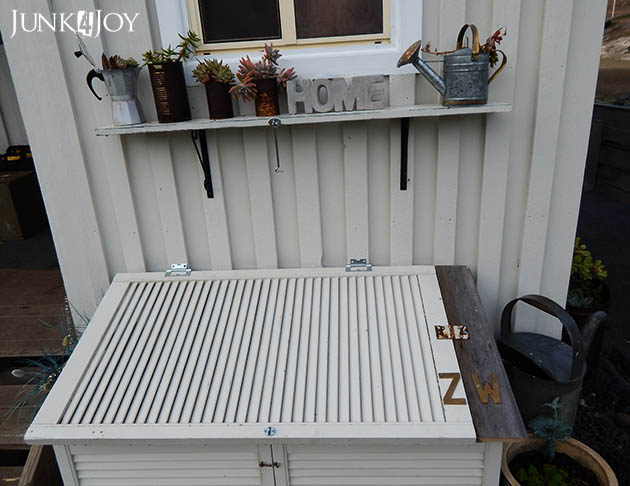
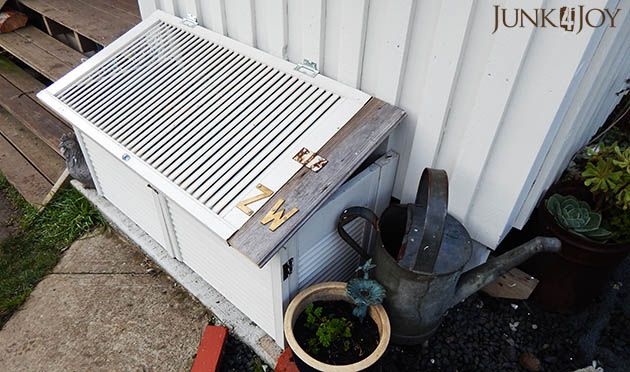
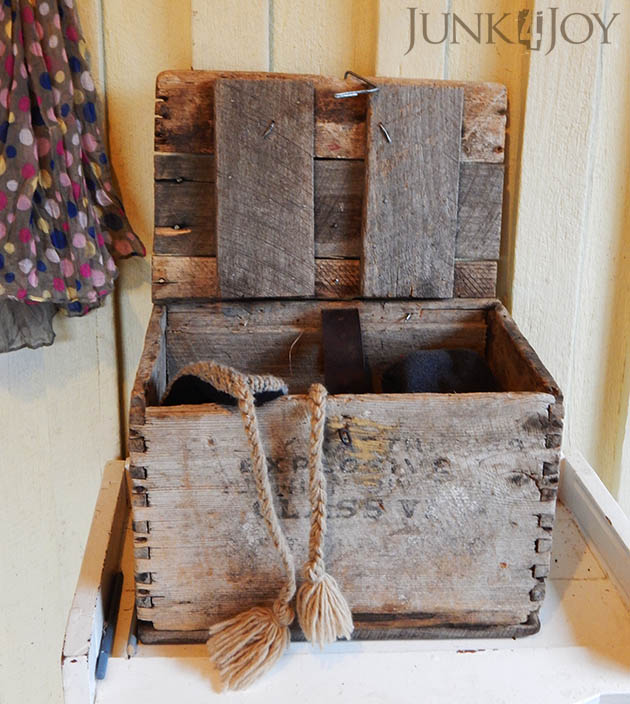
The large box on the right holds 2 bags of chaff. The old bench in the middle holds medical bits and pieces, the old freezer holds pellets. I put the old pink bin in between the chaff bin and the bench for rubbish. Hopefully it’ll get used.

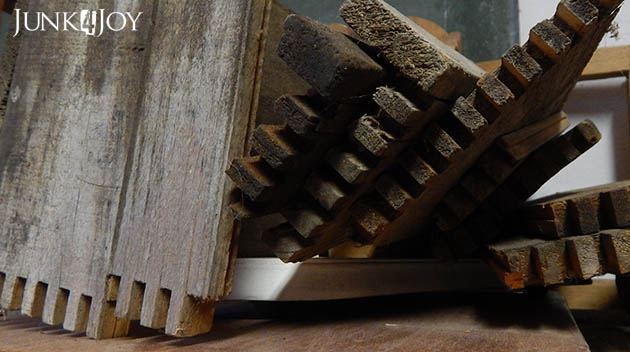
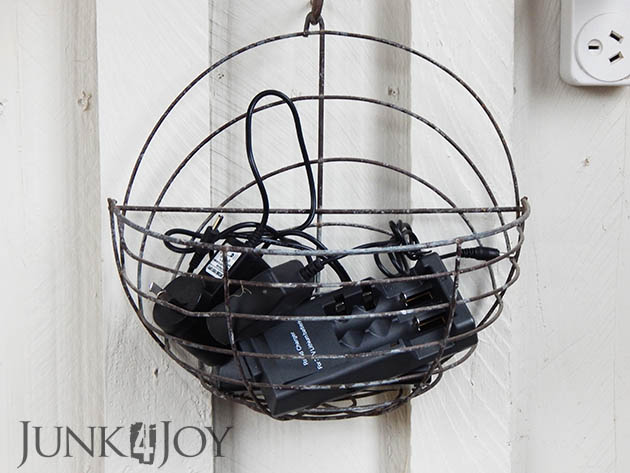
On the left I’ve piled up feed bins and some buckets and my carrot basket. I made that out of a galvanised metal basket I bought at a tip shop and some old legs off a side table I pulled apart. Its perfect, I lined it with an old summer horse rug so the smaller carrots don’t fall through and it keeps them fresh as it allows air to circulate around them.

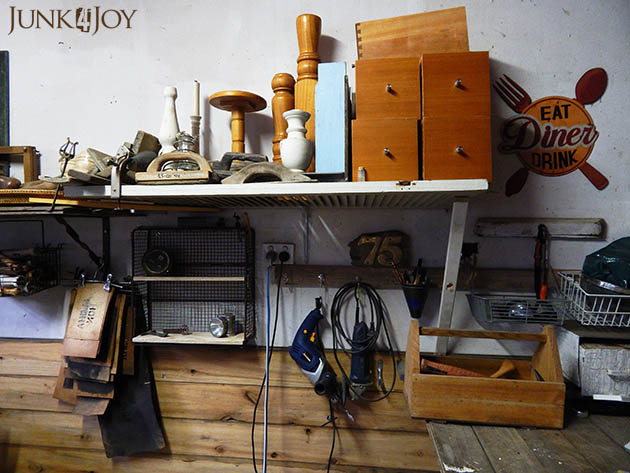
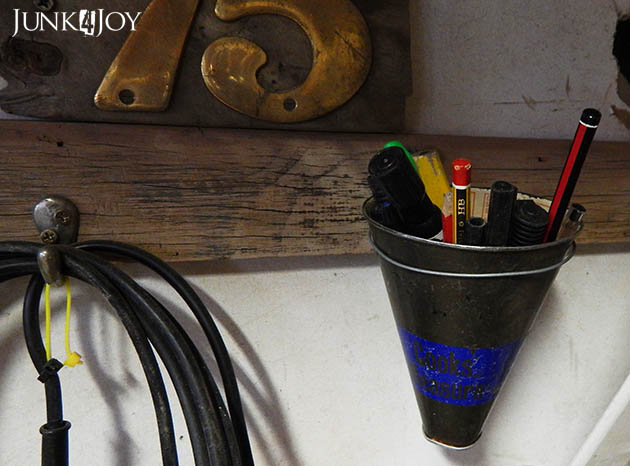
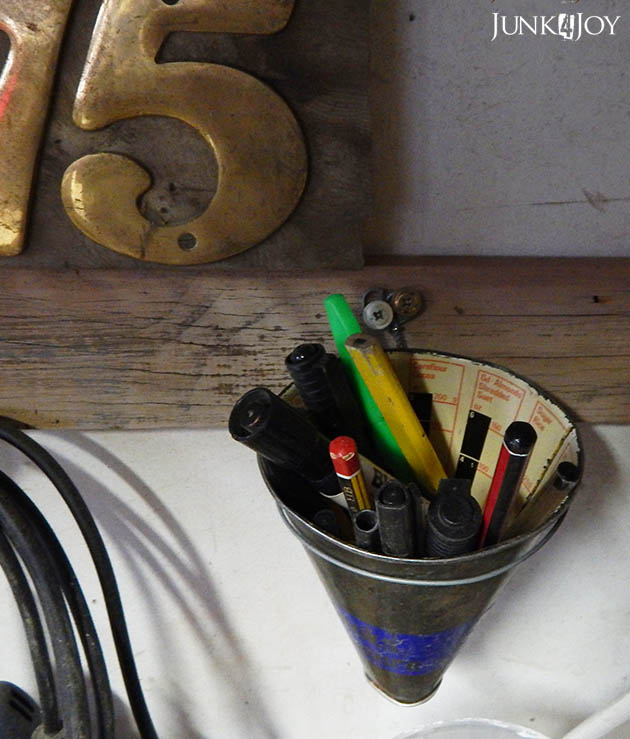
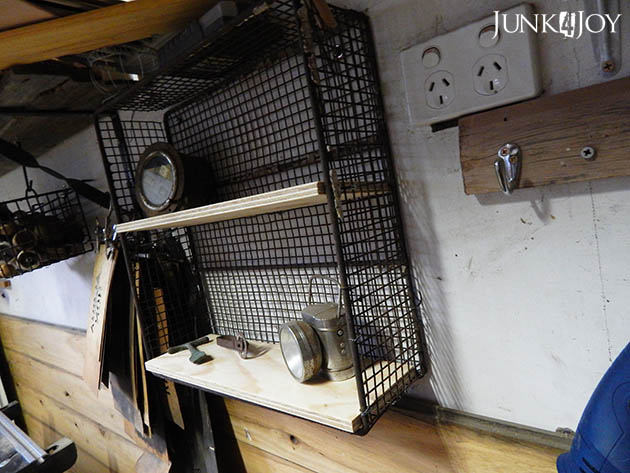
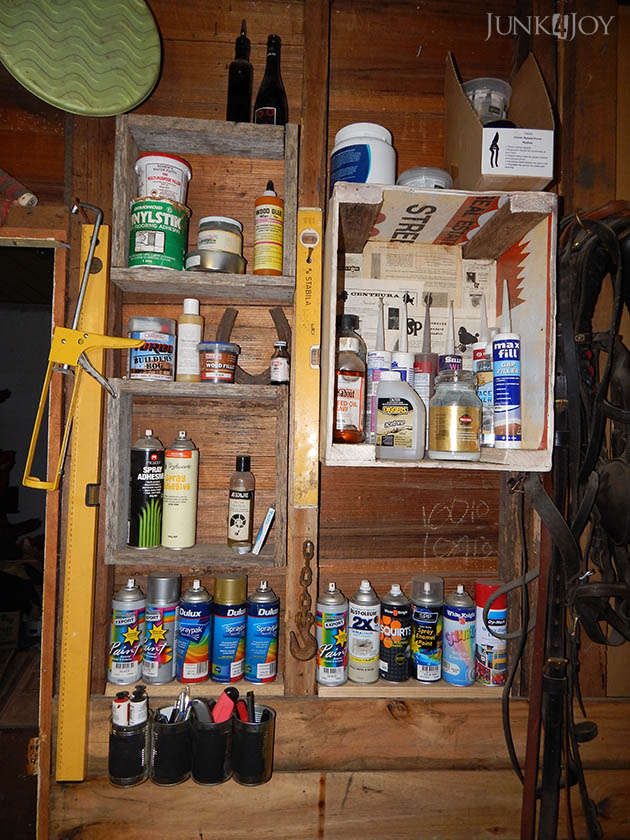
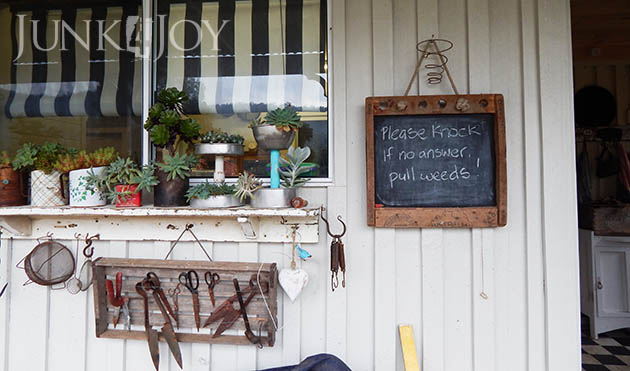
Meanwhile, here are some other small updates to my workshop in the casita. I re-used some old boxes to make shelves. I love this new little storage corner for things like spray paint, glues, fillers, etc. Nails hold my levels and some old tins screwed into the lining on the wall hold pen, paint tubes and box cutters. Where the wall lining stopped there was a gap I often lost things down. I fixed that by putting in a bit of timber and creating a new shelf.

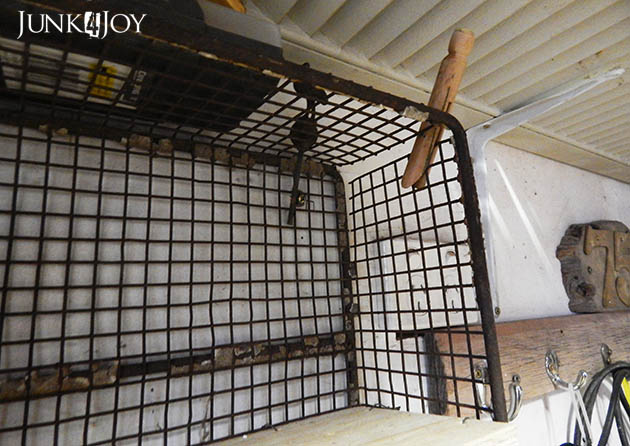
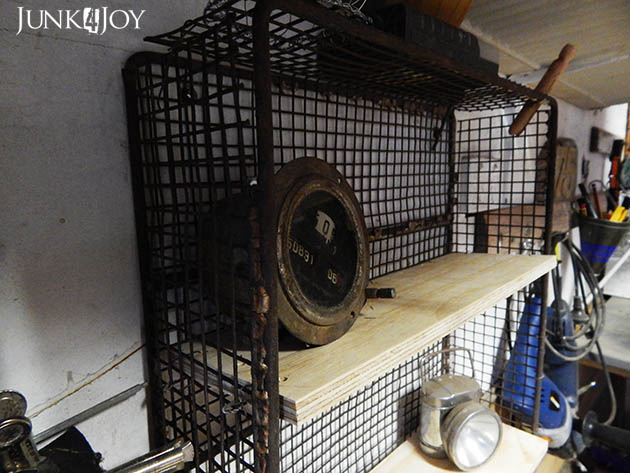
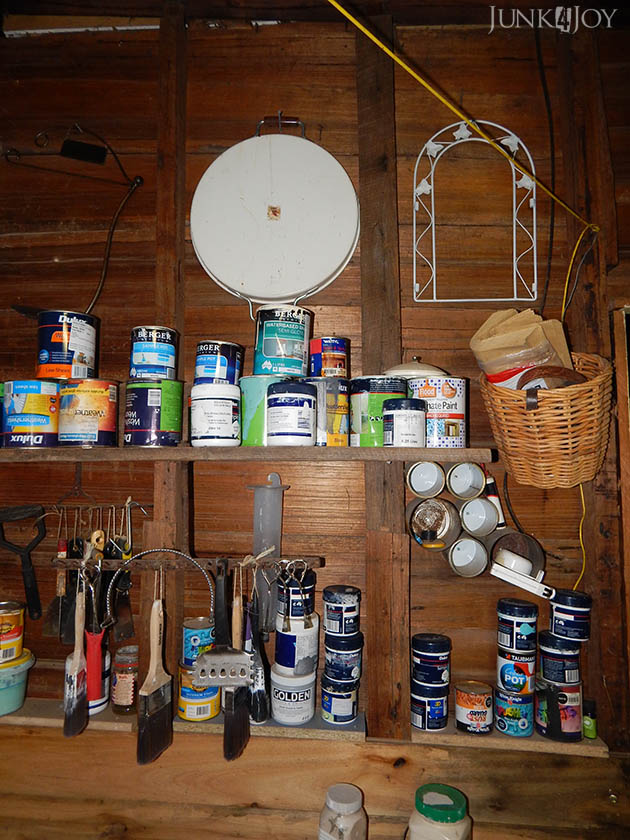
On the other side is my original shelf which used to hold not just the small paint tins but also the spray paint. A basket for odds and ends, some tins for paint scrapers and more shelves made where the wall lining ends. One old rake head holds brushes and another holds scrapers.

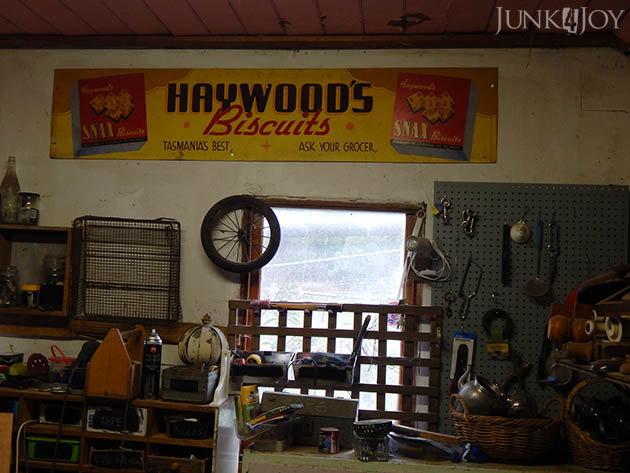
And my Haywood’s sign is up on the wall properly!

I’ve also done some rearranging of work benches and stuff but I’m not ready to show it off yet. I mean, I did organise it, but then I got to working on things I never finished so… its messy again.

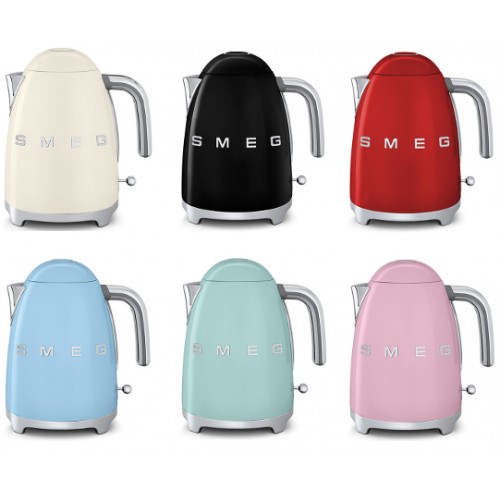
Meanwhile our old kettle has been playing up. Everytime we boiled water it was like a flood on the benchtop. I decided it was time for a new kettle.

I also decided I deserved a little spoiling so I got one of these:

Yep. That’s right. I bought a Smeg kettle, one of those kettles which, for the price, should not only boil your water but should make the coffee and serve it to you in bed. I got it in the mint green of course, to match the kitchen doors.

I love my new kettle.

z

another thing you can make with old shutters

This is a project I finished last weekend but which I couldn’t photograph till this yesterday. It was still gloomy and overcast but better than trying to photograph it in the dark after work.

So, here it is! Our new ‘gas bottle and bin hiding’ box!

This is what you’d see as you came to the front of our house – my little window shelf with the pretty succulents and a small cement slab holding gas bottles and stuff to go to the rubbish bin. Not particularly attractive. Which is why I never have any photos that show it.

I always planned to make some kind of cupboard to hide them. I had these old shutters (louvre doors really) which I’d bought at an op shop a few years ago. I’d used them to make a screen to cover the hot water cylinder when it was on the front porch. When we moved the hot water cylinder to the side of the house we no longer needed the screen.

But I never throw anything away if I can help it. Things have more than one lifetime around here.

The shutters were too big for the new gas bottle box so I had to cut them down. I had two narrow ones and two wide ones so I worked out which would work best – the narrow ones on the sides, the wider ones in front as doors. 
They were already painted the same colour as the house so they were perfect. I cut them down to the right height and joined them at the corners using hinges. I used small brackets to attach the sides to the wall and keep it all in place.  
The lid is hinged above the box so that it slopes. This is for two reasons. Firstly I just thought it looked nice. Secondly I don’t want this to become another flat surface for things to accumulate.
Now all we need to do is lift the lid, use the hook to keep it open, then swing the doors open to access the gas bottles. 
There’s a small bin in there for empty bottles and I put the kitchen rubbish on top of it every night cause I hate stinky rubbish in the house. In the morning we take it down to the bin on our way to work. Having the rubbish inside the box means less temptation for the dogs to go excavating for goodies. 
Not that they would.
My dogs are well behaved.
But in case a possum comes visiting. You know.

Of course, nothing ever comes together easily. The leftover bit of door I planned to use for the lid wasn’t long enough. The solution was obvious: I found an old bit of timber to extend it to the right length. 
I even added some initials.

Did I ever show you the gorgeous little watering spout I got at a garage sale?

So here it is. Our new gas bottle box.

Ok, one thing finished and crossed off the list.

Another 5 million to go.

z

Shared at:

wire work by him

I can’t ever say Wayne doesn’t give me romantic gifts. He’s always making me hearts and flowers out of barbed wire. This is one of his creations, its about 8in tall and made of barbed wire, old roofing iron and a chunk of old wood.

The other day he got some new copper wire and made this cute little cowboy boot. I’d been sending him all kinds of links of cowboy boots made out of wire but Wayne always does things his way. Its a boot with a spur and a lasso.

(Ok, I made the rowel – that’s the spikey bit on the spur – cause I wanted it to look cuter.)

Then there’s this trapped man. Its a tortured sculpture, isn’t it?

I love his wire work. He’s so imaginative, which is why I wanted to show off some of his stuff.

z

a place for everything – even headlamps

Got home the other evening and found a stomach on the garden path.

Yep.

A stomach.

No hair. No feathers. No head. No beak. No feet.

Nothing.

Just. A. Stomach.

A ruminant’s stomach.

Seems the poodles thought it was time to up the challenge for me. Every time I find one of their kills, there’s less of it to identify it by. I was able to identify the last specimen by the feathers and some guts.

This time all I got was a stomach. With munched up grass in it. I’d guess rabbit or wallaby… and given they haven’t yet caught a rabbit (that I know of), I’d say wallaby.

At this rate I’ll soon be an expert at identifying species from the inside out.

sigh.

Ok. At this point let me just say that I don’t like my poodles killing anything, even rats or mice. Though whatever is living in our ceiling is asking for it…

I especially hate it when they kill wildlife or our ducks, chickens or geese. But they have a strong prey drive and they will kill any intruder in their yard. Its a fact of life and I’ve had to accept that my gorgeous fluffy dogs are real dogs… predators even.

But on a cheerier note, at least a more creative one, I finally created a place for Wayne’s huge collection of headlamps.

He has a million of them. Battery operated, rechargeable, you name it, he has it. He bought one so he could go out to feed the horses in the dark. Then he bought a second as a spare. Then he got a rechargeable one. Then he found a brighter one. It goes on and on.

I don’t care how many he has. They come in handy when I’m searching the yard for clues such as hair, feathers, a head… What I have a problem with is him recharging them all over the kitchen counters.

I had to create a spot for them which met these requirements:

  1. store all the headlamps in once spot and not all over the house
  2. a spot handy to grab one on the way out 
  3. a spot handy to put it back on the way back in
  4. the ability to store and recharge in one place

I had no idea how to do this. I didn’t know what I wanted it to look like or where to put it.

In the end I went for quick and easy. I grabbed a bit of chippy old skirting board I had in the shed, drilled holes in it and jammed in some really big nails. I added a cool chippy green-blue door thingy. Just for fun I painted the heads of the nails pale green-blue to match.

I chose to put this new headlamp hanger on the front porch, in the enclosed area. Unfortunately there’s no power there so I had to use a long extension cord going from the outdoor power point in the middle of the porch and a power-board mounted on the wall. I’ll be managing the cords better once I find my box of cable clips…

I added this cute half planter basket to hold the chargers.

In order to do all this I had to move a few things over to the other side, so the kitchen window ledge is looking a lot busier.

I’m happy. The headlamps are off the kitchen counter. Wayne is happy cause he no longer has to search for headlamps I’ve moved.
Win win.
z

scarf organisation

Everything in our home is multipurpose. I mean, it can (and often has) been used previously in many places and for many different uses.
Take this little pig with her piglets. She once lived in the kitchen to hold keys. The old enamel house number is from Wayne’s childhood home, it also lived in the kitchen at one stage.

Now, they’re together again as part of my new scarf hanger.

This was a quick and easy project that took me weeks to photograph and share. Between us, we have a zillion coats, jackets, beanies, hats and scarves. I made a whole lot of coat racks to hold the hats and coats, I put up an antique coat rack which I got from my grandmother’s house in Greece for our scarves and beanies… but I wanted to keep my prettier scarves separate from the practical warm ones.

I looked around at what I had and found this chippy bit of timber lining. All I did to this was wash it and scrape off the loose bits of paint.

I found a thin leather belt I’d collected from a tip shop, and a small bit of leather which was probably some kind of collar, maybe… also from a tip shop. I cut these to the right length to make loops to hold scarves. Mainly cause I didn’t have anything I liked to act as hooks for this project.

I left the buckles on a couple of the leather straps just for something different.

I added the pig for other odds and ends and added the number just because.

Its the first thing you see when you walk into the mudroom, hanging between the door to the house and the door to the toilet. Below it, on a small cabinet, is a rustic box Wayne revived, now holding gloves. That box used to be my ‘in house’ toolbox in a previous life.

So there you go. A little something new for the house to make life a little more organised.
I hope.
z
Shared at: 

rustic rooster

I’m tired so this post will be big on photos and light on witticisms. 
I’m having trouble keeping my eyelids open… I apologise, however I did want to share my second entry in the Art From Trash exhibition.
This entry is about 70% recycled and 30% art. I really wanted to combine my art with my trash. 
I used a piece of thin MDF which I got off the back of a 2nd hand frame, I decoupaged pages from an old book onto it. I then drew this gorgeous rooster on it using pastels.

Once the artwork was finished I sprayed it with matt picture varnish to set the pastels so they don’t smudge. And then I framed it.

I’ve had these bits of wood in the casita since we bought the farm. They’ve obviously come off an old house… probably this one. I’m thinking they’re door or window frames.

Whatever, I loved the chippy look so I kept them thinking I’d make something out of them one day. And the day came!

I’m not a particularly good framer. In fact, I suck at it. But I did what I could, I used small brackets at the back to hold the frame together, then I used old hardware on the front of the frame to add a bit more rust to my rustic…

My rooster is for sale, hopefully he’ll find a good home cause I really don’t have the space for him at home. 
Then again, I can always make space…
z