rustic rooster

I’m tired so this post will be big on photos and light on witticisms. 
I’m having trouble keeping my eyelids open… I apologise, however I did want to share my second entry in the Art From Trash exhibition.
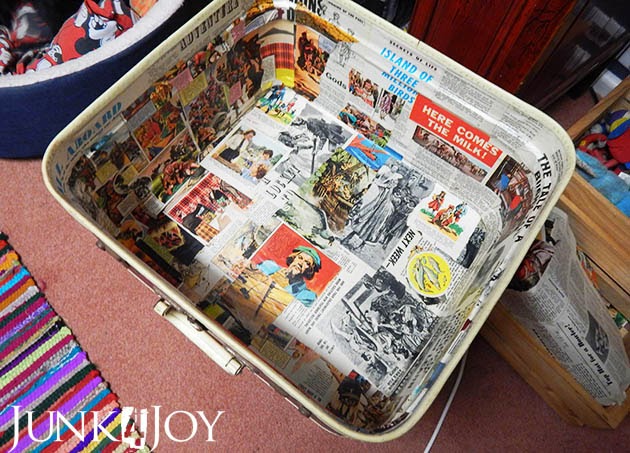
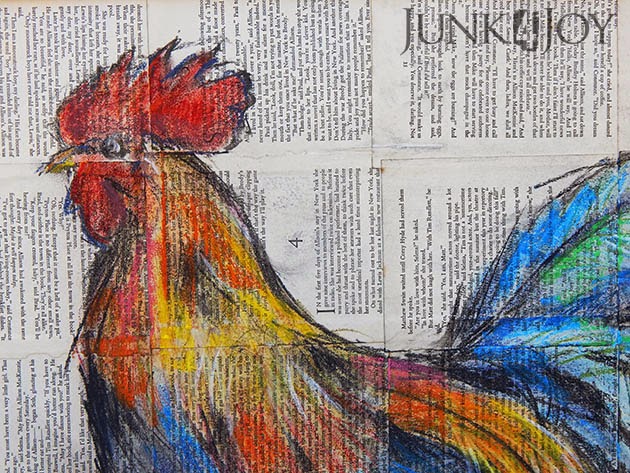
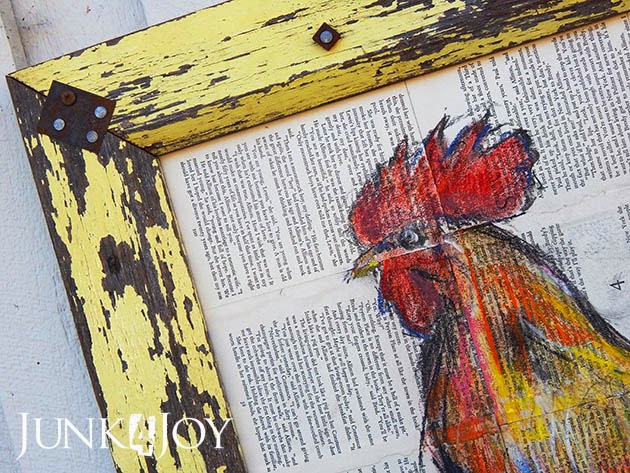
This entry is about 70% recycled and 30% art. I really wanted to combine my art with my trash. 
I used a piece of thin MDF which I got off the back of a 2nd hand frame, I decoupaged pages from an old book onto it. I then drew this gorgeous rooster on it using pastels.

Once the artwork was finished I sprayed it with matt picture varnish to set the pastels so they don’t smudge. And then I framed it.

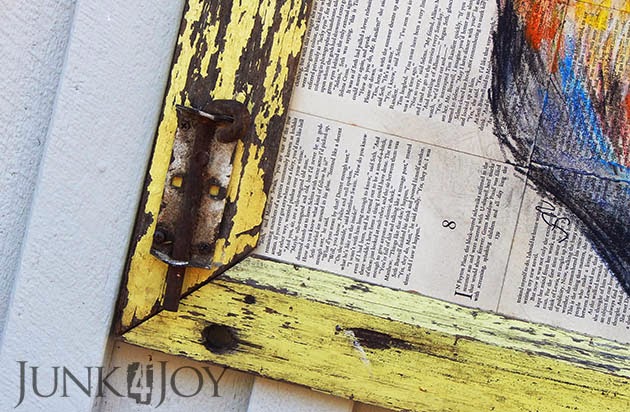
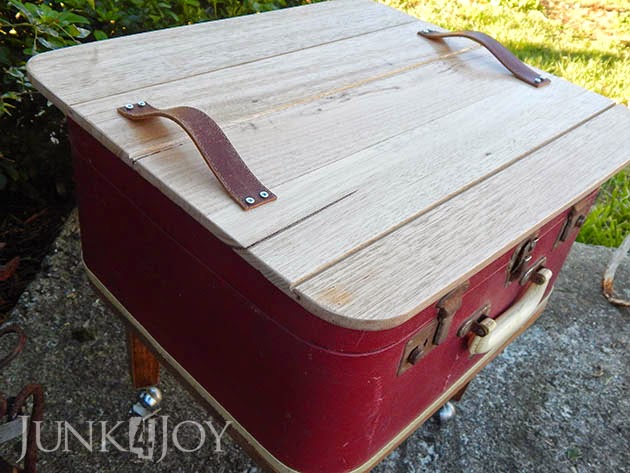
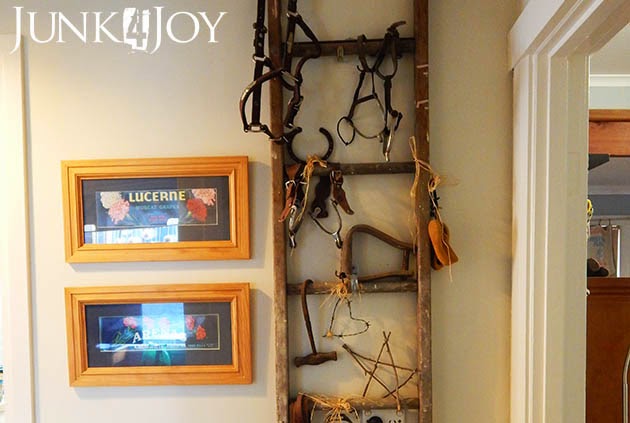
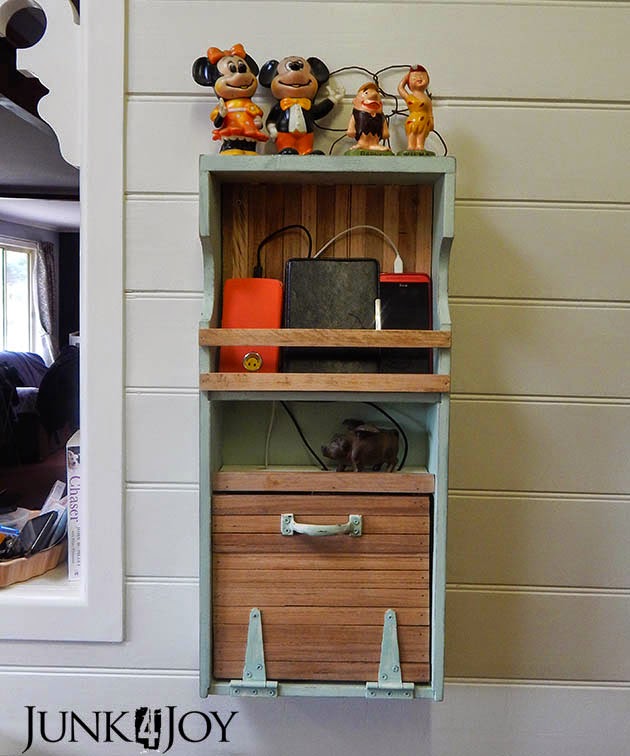
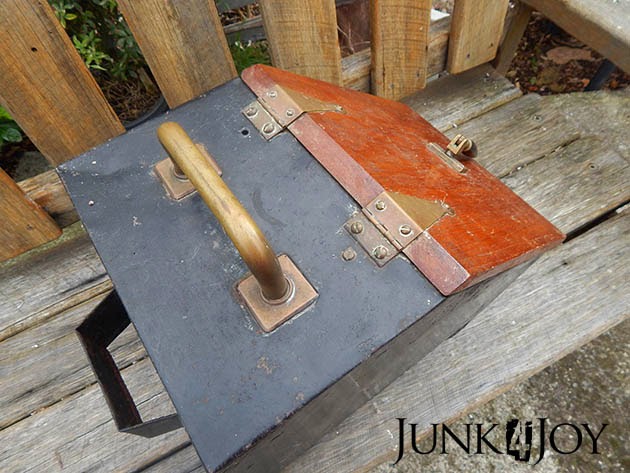
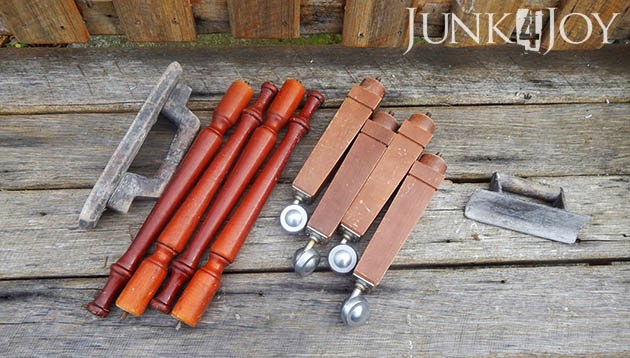
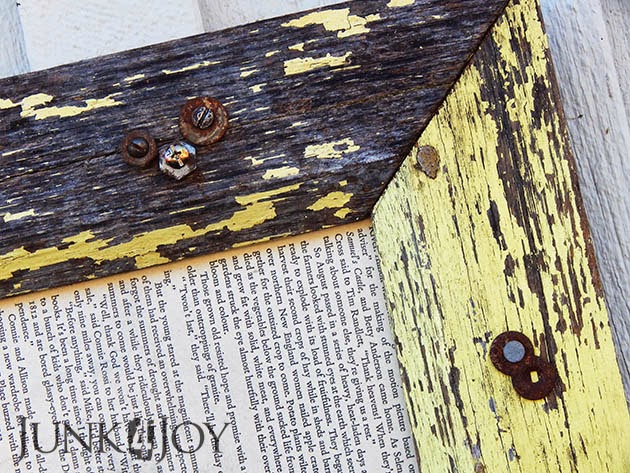
I’ve had these bits of wood in the casita since we bought the farm. They’ve obviously come off an old house… probably this one. I’m thinking they’re door or window frames.

Whatever, I loved the chippy look so I kept them thinking I’d make something out of them one day. And the day came!

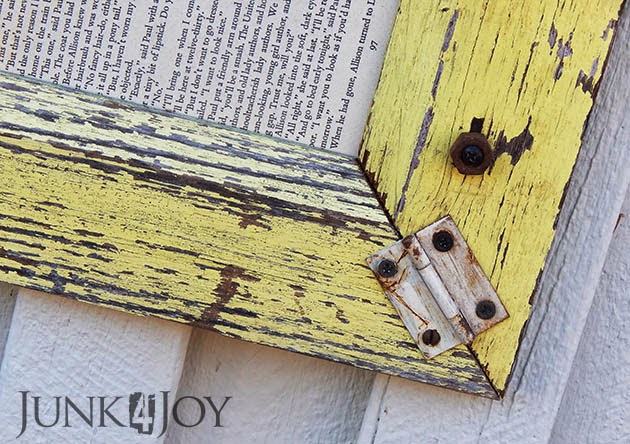
I’m not a particularly good framer. In fact, I suck at it. But I did what I could, I used small brackets at the back to hold the frame together, then I used old hardware on the front of the frame to add a bit more rust to my rustic…

My rooster is for sale, hopefully he’ll find a good home cause I really don’t have the space for him at home. 
Then again, I can always make space…
z

travelling sidetable with serving tray top

I did say I had some stuff to share… well, here is the first one. I call it the Travelling Sidetable and its one of my entries in the current Hobart City Council Art From Trash exhibition which opened yesterday. I know it wouldn’t really have made a difference but it didn’t feel right to share this till the exhibition opened.

I’ve had this little suitcase for some years now. I used it to store craft supplies for the first couple of years, then its been in the shed waiting for a makeover since.

The top was ripped when I got it so I always planned to make it into a side table, but I left it under a window one day and the poodles jumped all over it totally destroying the top, ripping it off the sides and pretty much making it beyond repair.

I ripped what was left of the top off but kept the rim with the locks. I glued the cream edging back on and glued the top to the bottom as well to make it one solid piece.

The inside wasn’t in bad condition but I’d had a craft glue spill that lifted some of the lining when I pulled it off, so the inside needed something to jazz it up. A friend gave me some educational magazines aimed at kids in the 60’s. They were so old fashioned and the cheap paper had yellowed… they were perfect! I used some articles and illustrations from those inside. I loved the colours and some of the headlines.

Of course it needed a new top. I had found that the packers used between products in pallets were usually offcuts of tasmanian oak. The hardware store throws these out so I scavenged some pieces from their pile. I glued and clamped them together, then traced the suitcase shape on the back, allowing for about an inch overhang all round. I reinforced the back with strips of timber, both to hold the slats together and to ‘lock’ the top in place on the suitcase.

I sanded the top and gave it a few coats of leftover polyurethane from when I did my kitchen, office and hallway floors. That made the colours really pop.

In order to fit legs on it, I cut some thick MDF and used liquid nails and some button head screws to attach it securely to the bottom of the suitcase. The legs came from the tip shop and they already had castors on them which was a bonus. I just cleaned them up and rubbed some dark wax on them.

Meanwhile, I cut up what was left of an old belt I’d used to make handles on a tray ages ago and used small screws to attach each handle, effectively making the top into a handy tray.

Everything used to make this suitcase sidetable came from tip shops, op shops and bins, thus its 100% recycled material.
z
Shared at:

small things big impact – home sweet home

Day 9 – Home sweet home

Of course, while doing making small changes which make a big difference, I couldn’t resist the new outdoor elves.

Firstly, I repainted the small shelf outside the house the same colour as the house and distressed it a bit to show the dark grey beneath.

Then I relocated the concrete HOME sign which I’d bought at Kmart a while ago from.

It looks really nice against the rusty tin cans, and its nice to see as you walk up to the steps.

Next I couldn’t resist adding some ‘junk’ to large shelf under the kitchen window.

You know the definition of junk, right?

Anyway…. I added some junk to the shelf. Cause I love having interesting things to look at. And there were a ton of holes in the shelf back anyway… it was asking for it!

I love it when I visit someone’s home and they have things to look at – little surprises in the garden, clever things on walls, interesting things in the house. Its like an adventure exploring homes like that.
I want that here, not just for visiting explorers, but for myself. It gives me joy to look at stuff I love, and having it out on walls or under shelves means its visible to enjoy, and not stored in boxes taking up space in the shed.
z

small things big impact – updating the boring bedroom light

Day 7 – bin chandelier for the bedroom

In yesterday’s post I said take note of the upcycled bin light… cause here it is again! Only a bit fancier now.

This was our light since we moved in. I’ve been dreaming of a better light for our bedroom for a few years now. I couldn’t make up my mind what I wanted, but I definitely wanted something with crystals and sparkle. I’d look at it every weekend, while laying in bed with a cup of coffee, and cringe.

These were the light fittings we had in all the bedrooms. I’m slowly replacing them with more interesting ones.

So how’s this for more interesting?

I had some chandelier crystals, I had the bin with a hole in it, just waiting to be reused… I actually found bayonet to E27 screw in globe converters on ebay so I was able to put in an edison bulb.

A quick and easy job that only took me 4 years and 20 minutes.

A friend of mine said she didn’t like it so much cause… “it looks like a rubbish bin”.

Umm… That’s kinda the point. Its an upcycled bin, not a light fitting. Its a bin with aspirations…

Isn’t the point of upcycling and repurposing to use something for a purpose it wasn’t originally intended for? Well, tick that box.
Anyway, it probably won’t be our forever bedroom light fitting (I have visions of randomly twisted wire…), but for now Wayne thinks its ‘cute’. That’s high praise from him!

What next? No idea.

Stay tuned.

z

small things big impact – the office light

Day 6… The office light

Since we’re on the subject of lights… this is the new office light!

Do you remember the office makeover (part 1, part 2 and then the clean up after it became a mess again)?

Anyway, this is the light fitting I had in there at the time… it was a work in progress which was barely started. A rubbish bin which I’d hung a few crystals on to see how it would look.

Hm. Not quite right. But remember that rubbish bin. You’ll be seeing it again soon.

Meanwhile, the new light is gorgeous. I found it at a tip shop about 2 years ago. Its made up of parts: the rim and the glass dome aren’t connected, they come apart. I mean, the rim is just balanced on the edge there, its not attached. Its a really interesting light and when I saw it at the tip shop I had to have it.

The glass dome allows light to shine all over the room, not just below (as is the case with the hallway light I shared). Perfect for the office where I need to light the entire room.

Of course, it didn’t look quite like this when I found it. Firstly it was grimey. Secondly it was peach.

Sigh.

What is it with me and peach? I’m haunted by that colour!

No before pics. I don’t think I actually took any photos of it at all before the makeover. I just wanted that peach gone!

I sprayed it Rust-Oleum Almond same as the hallway light. I know it looks lighter, but its just the photos.

This light had been living in the pantry (in all its peach glory) since I got it, but it was time to bring it out to be admired. The pantry will get another light eventually, when I make one. Cause as I said, I won’t spend $$$ on light fittings when I can find beauties like this in tip shops.

Another small job finished – the right light in the office.

Meanwhile, got home after work tonight and found the dogs had done some remodelling in the casita. Again.

Another thing to add to my list of things to do: clean up the mess.

z

small things big impact – lighting the hallway

Day 5 – New pendant light

Like my new hallway light?

This is what it looked like when I bought it at the tip shop a few weeks ago:

Plain silver (aluminium I think, soft, cheap) inside and out. Complete with dints.

I straightened out most of the dints and spray painted the outside Rust-Oleum Almond. Yes, we finally have Rust-Oleum products here. But they’re not cheap.

Seriously, paint isn’t cheap in Australia.

Anyway, I love Rust-Oleum spray paint. It goes on so smooth. Not like some of the cheaper brands which was all I ever tried before.

I sprayed the inside gloss white for that two tone look, but taped up the rim so there’s still a silver rim. It looks amazing.

Of course I couldn’t use the pendant kit I had in mind (nothing ever goes as planned) so I had to use another… this one has a brass cap, the top ceiling bit is silver, making it all a mishmash. Kind of like a lot of things I do…

Eh. Who cares. I’m in love with my new light.

In case you’re wondering why the pictures are so close to the ceiling, this is a tiny hallway. So tiny you can stand in the middle of it and touch all four walls and five doors. I decided to hang some of my frames above the doorways. See below:

On the bottom left almost off the frame is the guest room, behind that is the office door, straight ahead is the bathroom door, to the right is the kitchen door. And the living room door is behind me as I take the photo.

I recently painted the hallway (and office) 3/4 strength Dulux China White to match the kitchen and I love the brightness of it. Yeah, the kitchen walls look yellow but that’s just the light in there.
The hallway is where I’ve put my framed fruit labels (I have a collection of them), and I’ve moved the ladder back in there. That was above our bed for a time.

See the difference in colours? Above is with flash, below is without.

But back to what I was bragging about: my beautiful new pendant light which cost me $1 at the tip shop.

I love it when something I got for next to nothing can look so good. And I have a serious problem with spending a ton of money on light fittings when I can do something like this.

z

Shared at:

small things, big impact – improved phone charging station

Its a new month and I’ve had an idea. I’m going to share the small things I’ve been doing lately that make life a little better around here. Its mostly those small things which I’ve been meaning to do for weeks, months, years… that I’m finally making a point of getting around to.
Ok, don’t cringe. I probably still won’t post daily, but for the month of May I’m challenging myself to not only finish a few of the niggly jobs I’ve been putting off for ages, but also to share them in the hopes that I’ll inspire someone to get up off the couch and fix that loose hinge, broken door handle (darn, that reminds me…) or whatever.
I actually started on this challenge last weekend, before I knew it was actually a challenge. Now its all up to me to keep up the momentum.
So, here is Day 1.
Improved phone charging station

I like to change things around a bit… Most of the time I re-arrange furniture (which Wayne LOVES), but I also like to update, change and re-make things I’ve got.

Like this phone station. I made this last year to hold the phone and as a place to charge up our mobile phones. Back then we had normal dumb phones.

Now we have smartphones and they’re bigger than the old ones…

BTW, who saw that coming? Mobile phones kept getting smaller and smaller, then suddenly the trend was reversed and they got bigger and bigger, the bigger the better.

With the new mobile phones and kindles all needing charging…

…and there’s another thing. Back when mobile phones were small and stupid, every single phone had a different charger cause heaven forbid they made things universal. Every household in the world had a drawer full of mobile phone chargers which didn’t fit any phone in the family.

Now, the kindles and smartphones use the same chargers. Will wonders never cease!

So anyway, as I was saying, the new smartphones and kindles didn’t fit on the narrow shelf which used to hold the old mobiles. And sitting them on the top shelf was to risk them sliding off and breaking.

It was time for an update.

This is what it looked like before:

This is what it looks like now with the addition of a couple of timber strips across the front, making a safe charging space.

A small, simple change which makes life a little easier, or neater.

Now if I could just convince Wayne that we should never cook in the kitchen, I might be able to keep the entire room neat…

z

Shared at:

coal box upcycled to vegetable bin

We have a new potato and onion bin.

Up till now I’d been keeping our potatos, onions and garlic in old flour bags in the vintage wire fruit basket thingy I’d bought a few months ago.

But you know potatoes like the dark… so when I saw this coal box at the auction last week I had to have it. Now the wire basket stand is holding fruit like it was meant to, and our potatoes are all snug in the pantry in their own light deprivation box.

All I did to the coal box when I brought it home was give it a clean and line the bottom with newspaper. It has some rust dots on it but I think that adds to the character.

I generally prefer things in their original rusty, imperfect state – and the handle is very unusual.

Here it is in its new home.

It fits perfectly in the little nook right next to the bit of timber I put in to hold the shelf up where it bowed under the weight of the microwave.

I may not always do things ‘pretty’ but they work!

z

Shared at:

junking finds

I may have been flat out busy, but somewhere along the line I still managed to do some shopping. In tip shops. My favourite place to shop.

I found some great stuff, I even found a few things I was actually after.

What happened was I spent one day doing the rounds of the shops looking for particular things to finish projects or for displaying items in upcoming exhibitions.

One find which wasn’t on the list but I had to have was this baker’s basket. Galvanised iron, big… what’s not to love?

And its from a greek bakery. How appropriate is that?

I already have an idea of what I’m going to do with this beauty. Stay tuned.

This hay bale hook was inside a coal bin I bought at an auction (will be sharing that separately). Isn’t it gorgeous? Wayne has a collection of these so it won’t be wasted, even if I don’t make it into something else.

I got a collection of legs, and more hand sander thingies. I can’t resist those things.

And these two cute stools. I actually bought them both for the legs – as a way to display some seat pads made at work, but they’re cute. They will be remade into side tables most likely.

Lastly, here are a couple of things I got last time I went to the auction house and forgot to share. I adore the vent top, isn’t it lovely? for now I have no idea what I’ll do with it, but I’m going to display/use it somewhere.

All in all, a successful shopping trip.

z

a slightly dirty clock

I had a very busy weekend. A really busy one. I did more cleaning in the casita. I finished some niggly little jobs, I started some projects, I folded and put away washing, I vacuumed the living room.

Yeah, I know.

Wayne was shocked too.

This is one of the small things I finally finished.

I’d got a cheap clock from Kmart when I decided I wanted a clock in the living room. It broke soon as I got it home so I left it in the workshop thinking I’d use the face to make a new clock. I bought a new clock mechanism off ebay and it all just sat there, in the shed, waiting…

We didn’t really need a clock in the living room back then, I had the time up on my TV …but about 2 months ago my TV suddenly lost the ability to speak so it had to go.

Lucky for us, combining two households when we moved in together meant we had doubles of lots of things. Including TVs. We didn’t sell any of the doubles cause we knew that the day we sold them we’d need them. We’ve already been glad we had two washing machines.

Now its the TV’s turn.

Anyway, I can’t figure out how to display the time on Wayne’s TV, so a clock in the living room is a bit more of a need now.

I got the bits together: the new mechanism, the clock face, a battery and an old rusty flan tin. One of those ones with the removable bottom bit. Which I didn’t have anyway as this is a tip shop find.
I’ve had this tin rim for a long time, I picked it up thinking that one day it’d make a great clock. And do it has!

Putting it together was really easy and quick. I didn’t even clean the tin or try to remove any of the rust. I think it adds character.

Its now hanging in the living room above the stacked bookcases and where you can see it easily while watching TV.

I’m loving my new clock.

z

Shared at: