Unknown's avatar

About zefiart

Blogger, DIY-er, poodle lover, graphic designer, dog groomer, recycler, artist, wonder woman in my spare time.

katy perry doll

katy4

Yep. I tackled the cupcake dress!!

This is another of the dolls winging their way to the UK and she was the one that took the longest to make.

Obviously.
katy2

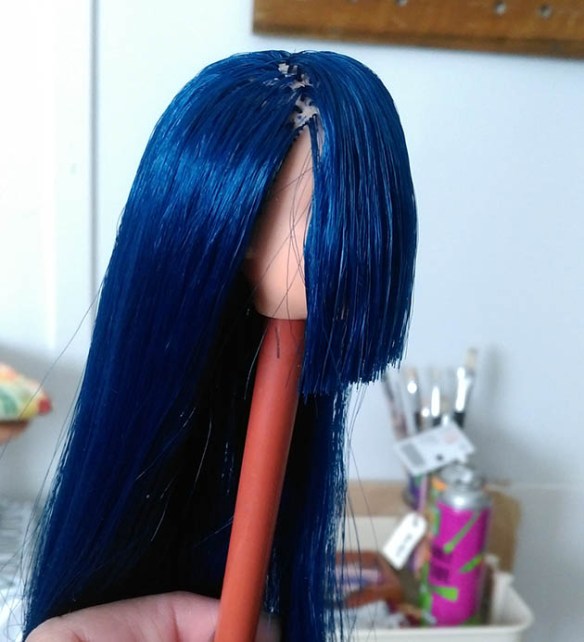
Most of the hair rooted – faceless doll heads on pens is a common sight around here…

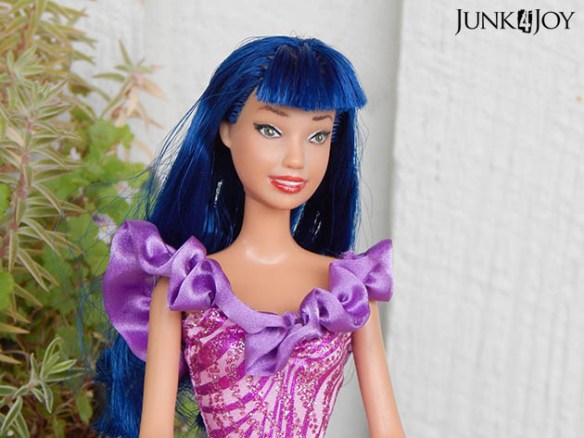
Firstly I had to order blue hair from my favourite local seller (Custom Doll Hair AU), then I had to re-root my barbie head with said blue hair. And paint on her face, of course.

katy3 (2)

I bought a dress which was suitable as the base for my cupcake skirt. And some cupcakes from ebay. There was no way I could make that many cupcakes in this lifetime…
katy5

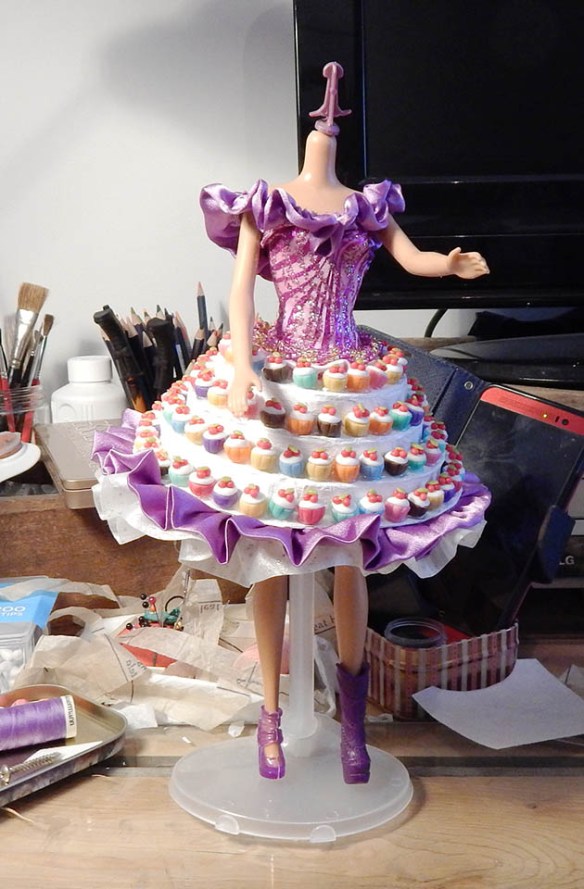
The only way I could figure out to make the skirt was papier mache. My old standby. I love papier mache and can make anything with it. I’m pretty good at it, even if I do say so myself. ๐Ÿ™‚

So I built myself a ‘scaffold’ from cardboard (ok, its more like a layered cake) and tissue paper. It only took 3 goes to get it right. I gave it 3 coats of white acrylic paint and made 2 different layers of ruffles which I hot glued to the bottom.

I made a matching ruffle for the top of the dress, which I stitched onto the straps and neckline. I then cut the dress to the right length and attached it to the skirt using hot glue. Not while it was on the doll.

Obviously.
katy4 (2)

Headless doll. Another common sight around here.

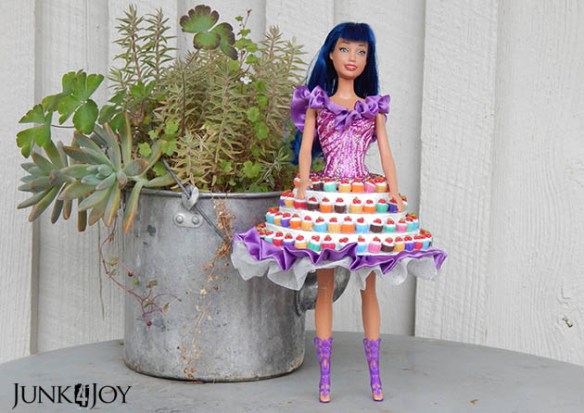
Once I picked the shoes I preferred and had her all dressed up she was ready!
katy3

She needs one of those stands that holds her up by the legs cause there’s no way that skirt is going to allow her to have a regular ‘around the waist’ stand. What can you do? Its the price you pay for looking so fabulous!

z
 

another amy

amy9

My life seems to have been dolls dolls dolls for the last few months. But the good news is I’ve finally finished the last 3 custom dolls so I can now maybe do something else with my spare time!

And since they’re now finished and will soon be on their way to the other side of the world, I can share them!

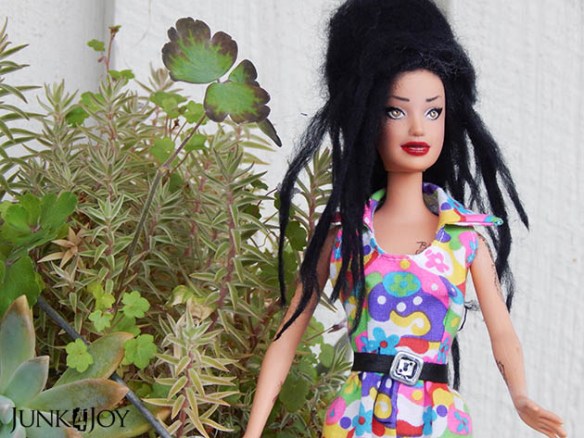
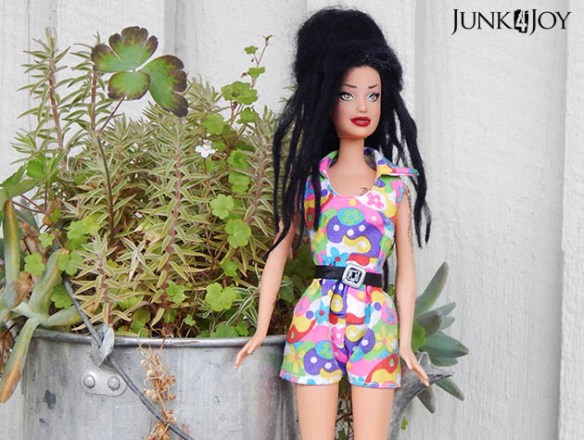
First up is another Amy Winehouse. This time made using a second hand barbie doll. You can see my first Amy doll here.

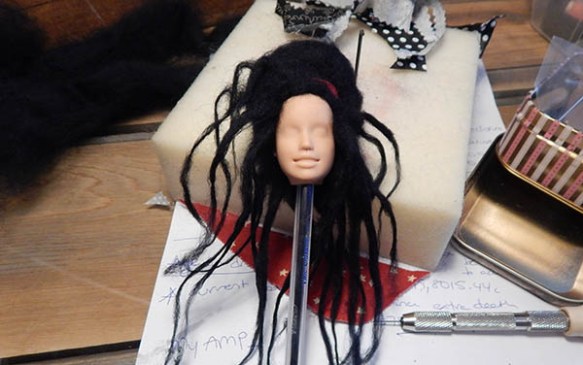
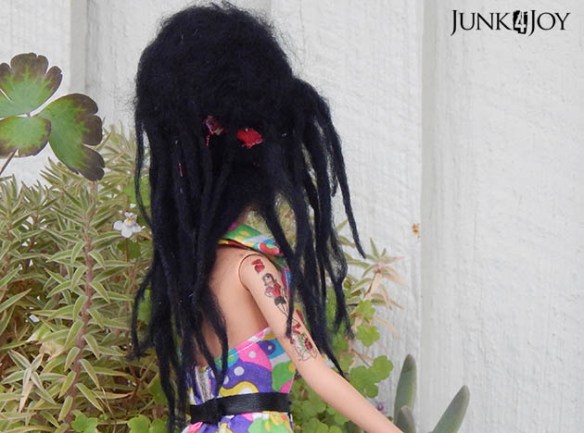
In order to do this Amy I began by removing all the (blonde) hair from the doll. I wanted to try using felt for her incredible hairdo so I used a combination of glue and the rooting tool to attach Amy’s beehive and messy hair.

amy1 (2)

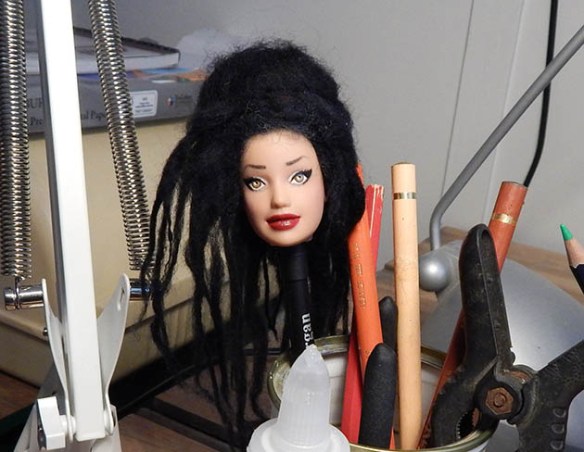
Then, of course, I had to give her a face…

amy6 (2)

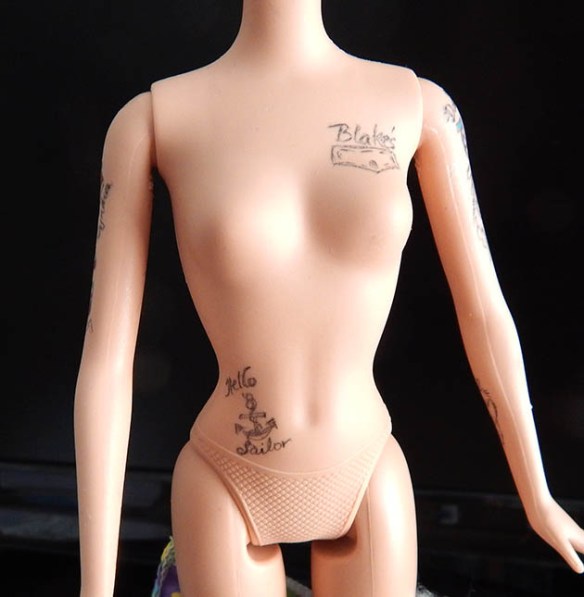
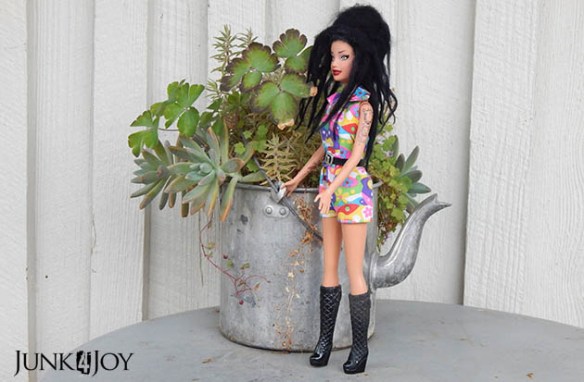
No Amy is complete without tattoos, and this girl is no exception. She has all the tatts, even the ones you can’t see under her funky 1960’s style shorts/dress.

amy7 (2)

amy2

amy4

amy7

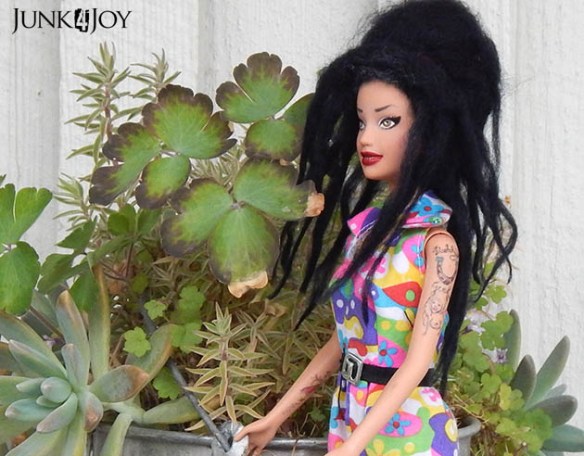
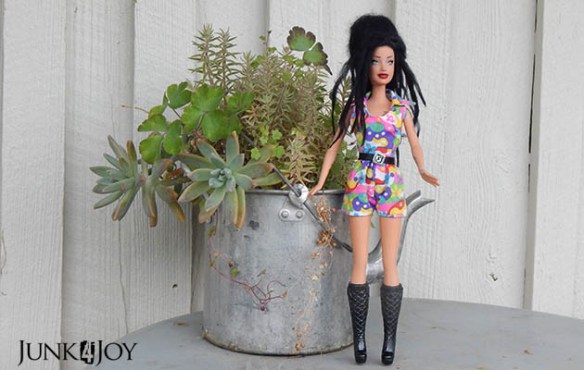
I couldn’t find black boots so I painted a pair of silver boots and gave her a black belt to tie in the outfit.

amy1amy6

The outfit Amy’s wearing is actually an original Barbie outfit from my collection of clothes and I chose it cause it really seemed to suit her style.

amy5

I’m quite pleased with how the hair turned out.

… next I’m going to try using felted wool to make Captain Jack Sparrow!

z


amy doll

beforeafteramy1

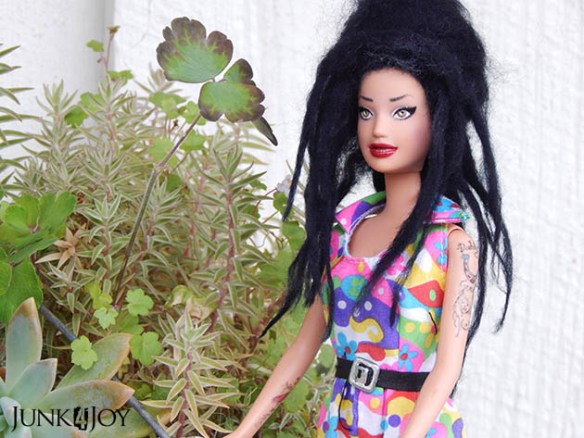
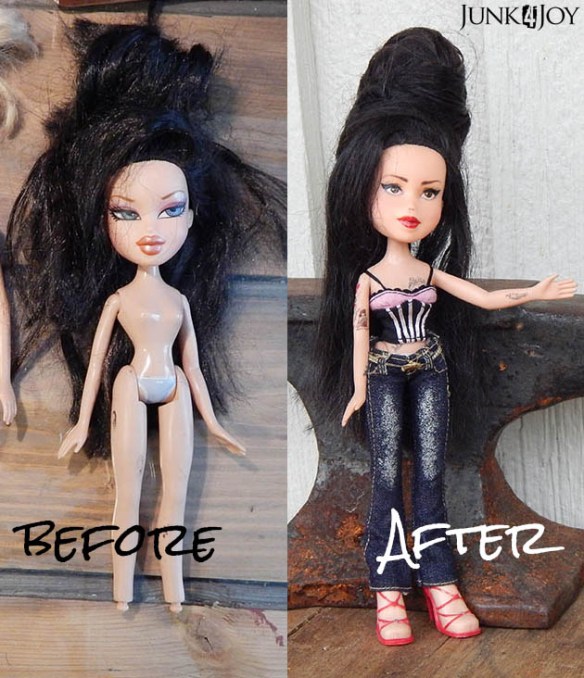
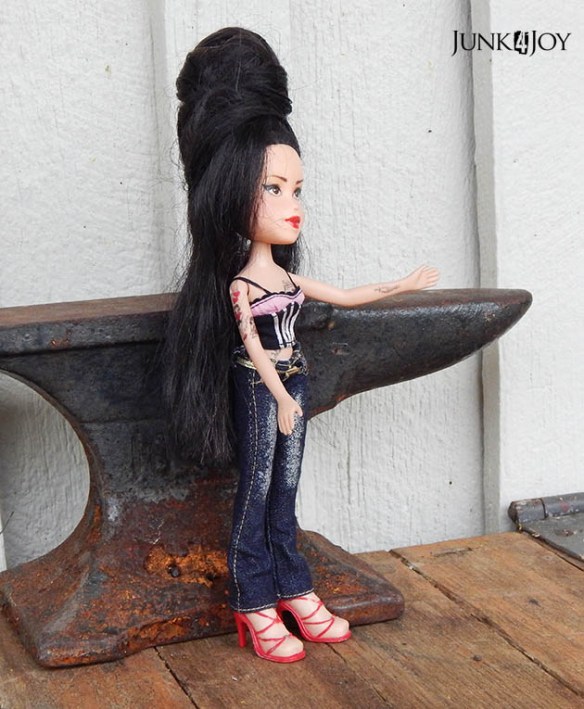
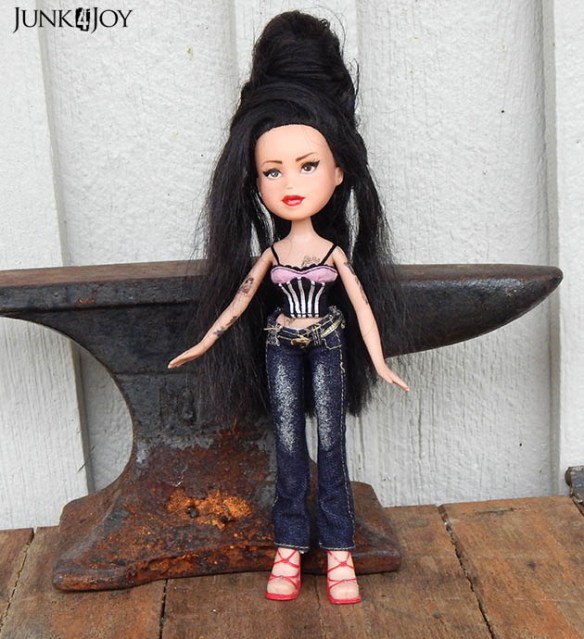
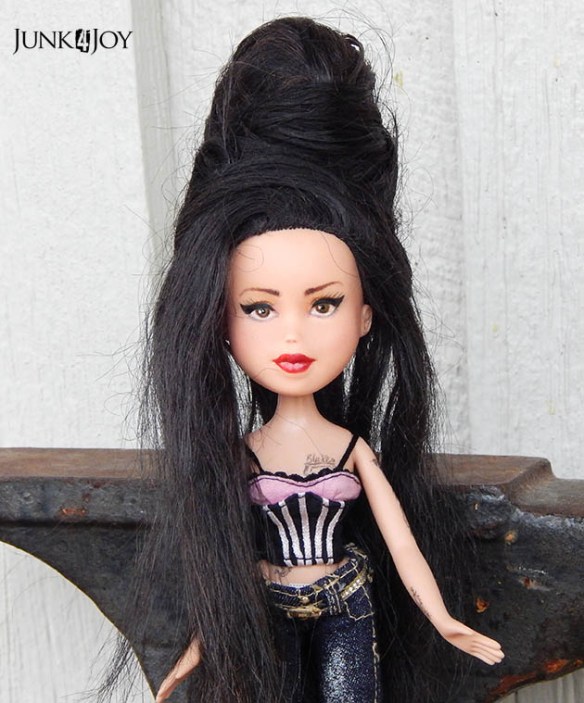
Time to share another doll repaint. This is Amy. Winehouse of course. I decided to make her for a couple of reasons: the beehive hair and the tattoos. I like both of those!

This doll began as a Bratz doll with a really messy head of thick black hair. She was ideal. I didn’t have to re-root her. Phew. Re-rooting can be fun in its own way… its a kind of repetitive, zen-like kinda thing. But it can take so long! So when I get the chance to skip it… well, I’ll jump at the chance!

amy2

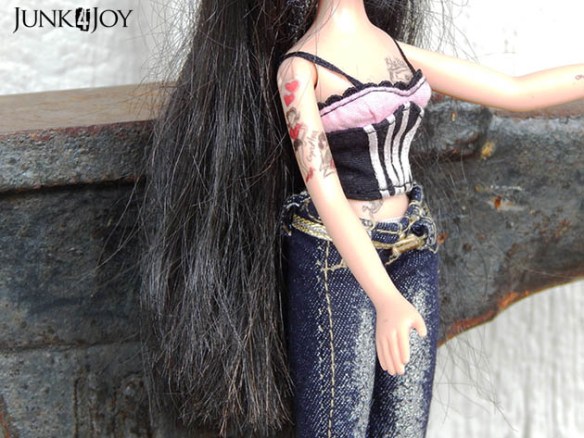
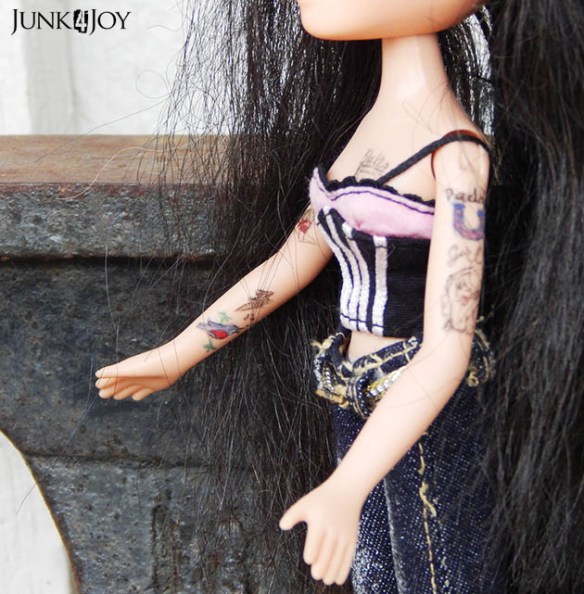
I loved doing her tattoos. Not an easy task of such thin arms, but fun to do nonetheless.

amy3amy4

When I made Amy she was a doll I made for my own amusement. By that I mean I was only pleasing myself. I dressed her in original Bratz clothes that I felt suited her style and listed her in my Etsy shop. She was sold to a lady in Spain. Yay.

amy5amy6

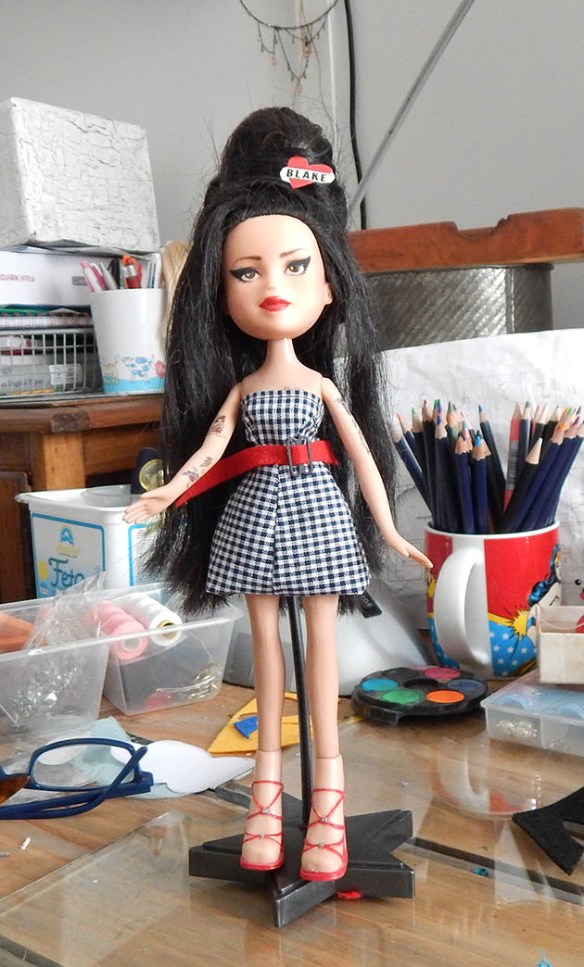
With the sale came a request for a bit of customization. Her new owner wanted bigger eye liner and a different outfit. I made a black and white checked dress and a Blake hair pin. The photo below isn’t her finished unfortunately. I think I somehow missed taking finished photos of her. (oops.)

amy9

This photo shows the dress un-hemmed, the belt undone and untrimmed, and the first attempt at the hair pin.

Trust me, she looked better when it was all finished.

z

Shared at:

1-Funky_Junks_Party_Junk_link_party.29-AM

abby doll

beforeafterabby

Given that I’ve been flat out lately, spending my days grooming dogs, working on custom dolls, watching TV and wasting time, I thought I should share some of the dolls I failed to share.

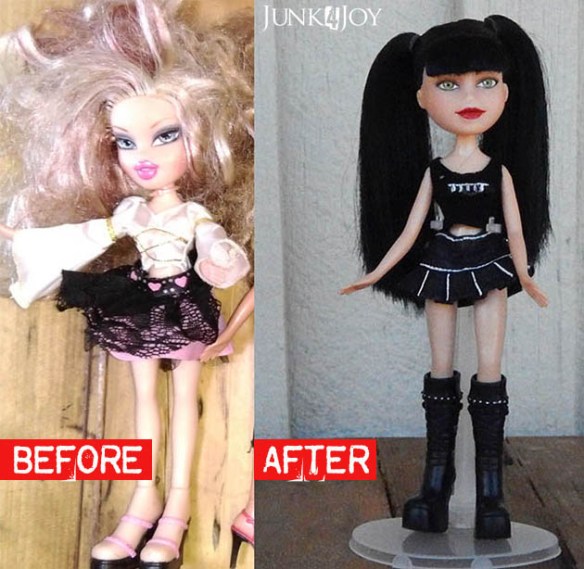
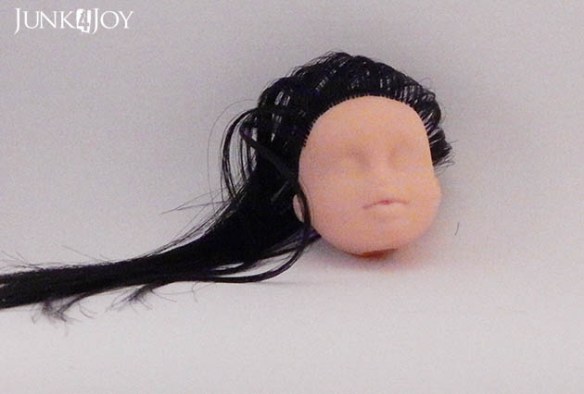
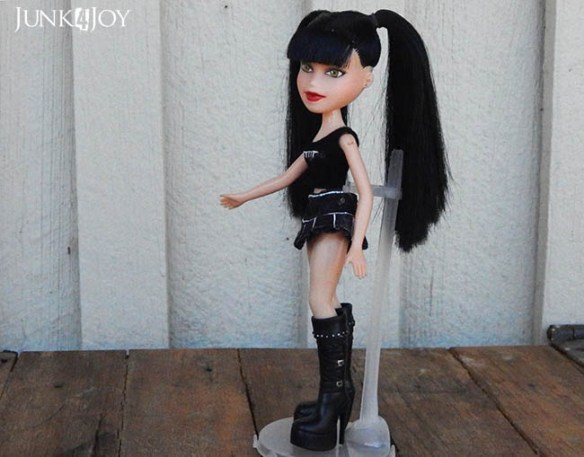
Abby from NCIS was the first doll I ever tried re-rooting. (Which is not something rude, but the act of replacing the original hair with new hair.) I did it ’cause I needed a Bratz doll with pale skin and black hair. And I didn’t have one. So I watched some YouTube videos and went ahead and bought some black hair from CustomDollHairAu on Etsy. She sells luscious hair blends and tools as well. I now have a collection of gorgeous hair blends and a lot of doll heads I plan to re-root one day…

reroot1..

Anyway… I got started re-rooting with a needle, the hard way. Well, ok, not hard as such, but the longer way… It took ages to re-root the whole head but I loved the result. And to be honest it’s a kind of relaxing zen sort of activity.

Since then I’ve re-rooted 2 more dolls and I tried the rooting tool… I watched the videos. I tried doing it. I stuffed up. I watched more videos. I tried again. I stuffed up again. I broke so many needles it wasn’t funny. I have no idea what I was doing wrong.

I went back to the needle.

abbyfn4

If it works for you, stick with it, right?

abbyfn2abbyfn3

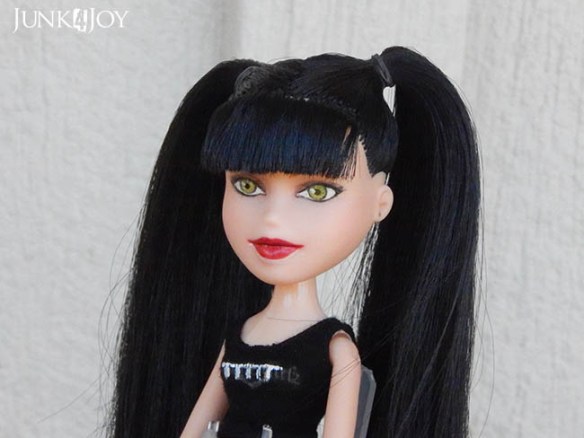
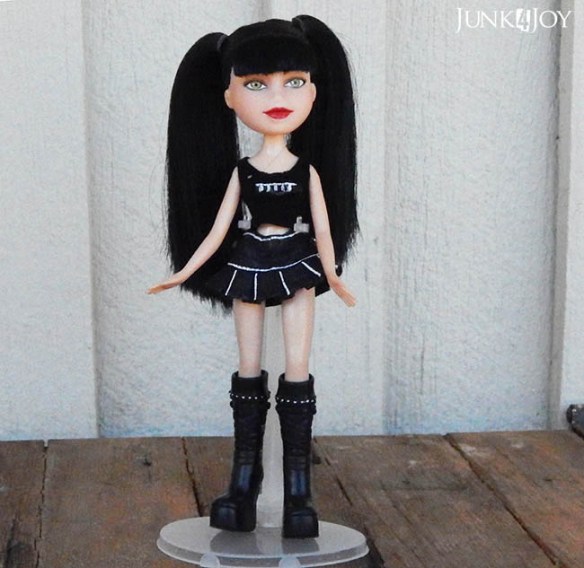
For this particular doll makeover I repainted her face, re-rooted her with black hair and adapted original Bratz clothes and boots to achieve the Abby look.

All in all, I was very happy with my first re-root!

This little girl has been sold through my Etsy shop.

z

helen of troy

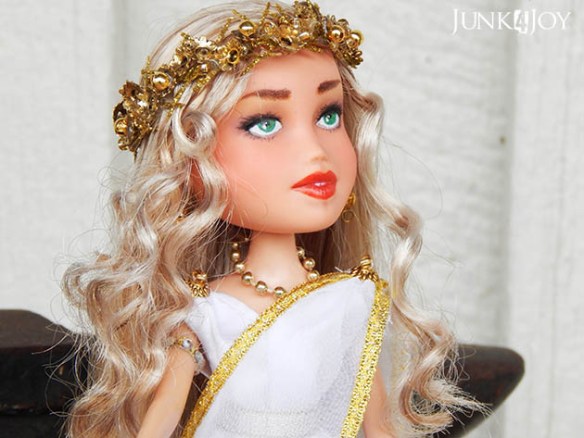
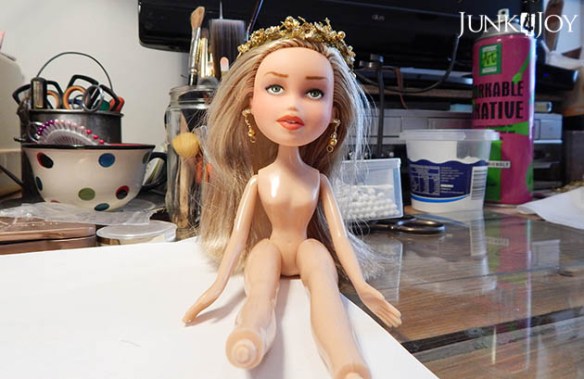
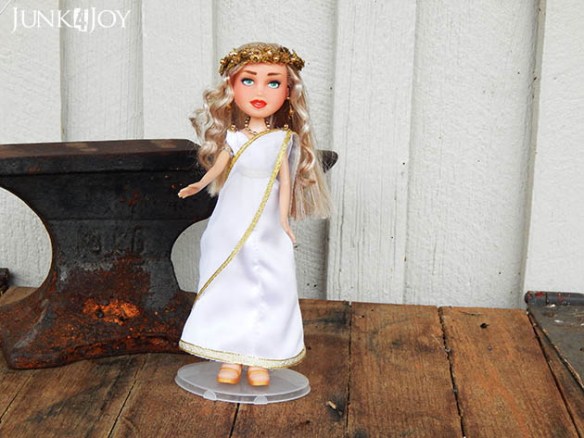
Not too long ago I got an order for a Helen of Troy doll. Now that she’s in her new home I thought it’d be a good time to share her.

helen4

I was asked to make a doll to match Helen from the movie. I had a few photos as reference so I found a doll to use and began work.

face2

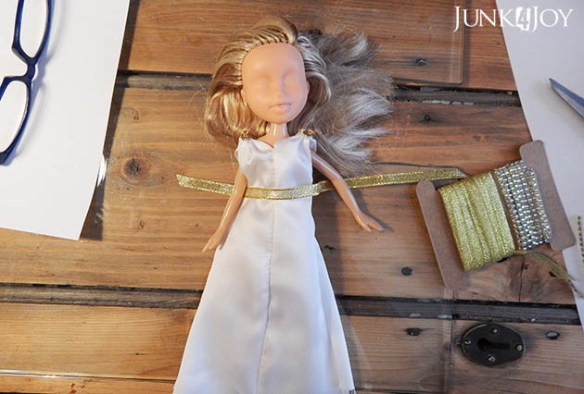
First I had to buy various beads and gold bits and pieces. Then I had to make an outfit.

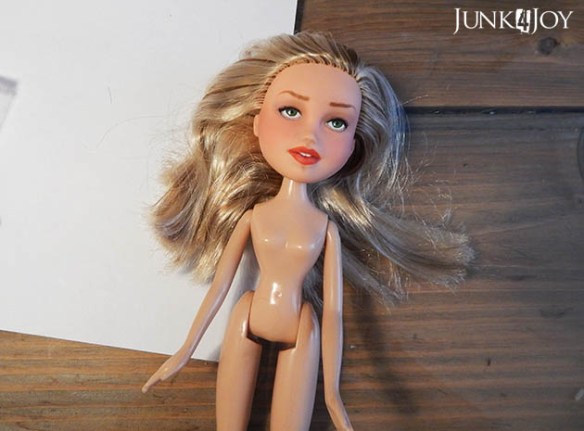
Of course, I had to work on the doll too. Most dolls I work with need their hair restored from frizz to pretty (if not completely replaced). This time I was lucky, I was able to restore her hair.

helen1

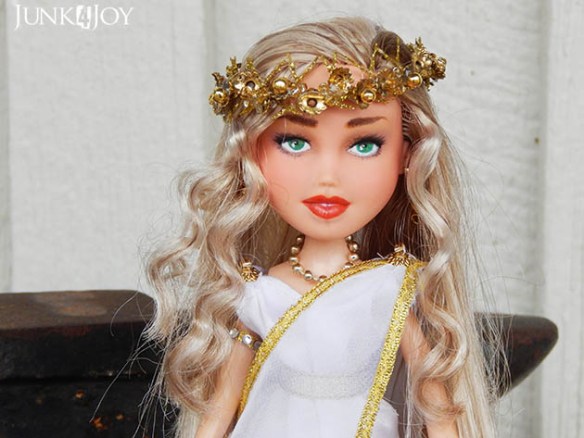
After removing the factory face, I painted in my own Helen of Troy face.

helen2

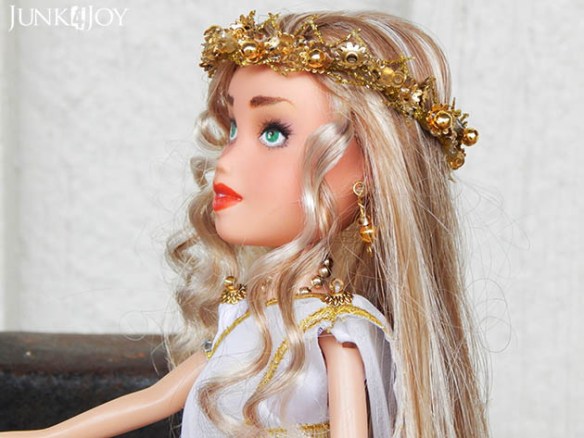
I made her a crown and earrings out of the gold bits I bought. I made her some jewelry as well.

helen3

Her sandals are Bratz sandals which I repainted gold. I curled her hair and here she is.

helen2 (2)helen5

helen1 (2)

Her new owner is thrilled with her. And I’m pretty pleased at how she turned out too!

I’m currently working on three more special order dolls. I’ll share them when they’re finished!

Aside from that, I don’t have a lot to share. I’ve been very busy but I have a few little things on the go, so stay in touch!

z

a quirky business card holder

What do you do with vintage electrical plugs? You make business card holders out of them of course!

Well… I do anyway.

You saw my first such offering here. It was time for more. I have more on the way, but this one is special.

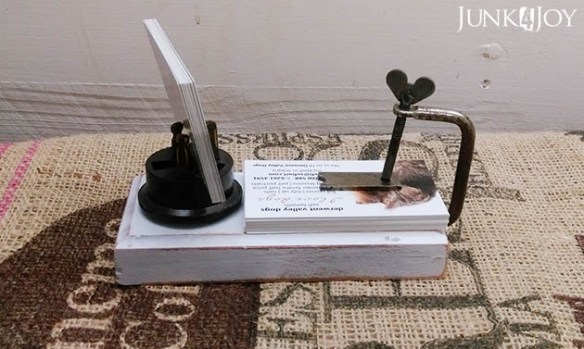
bch1

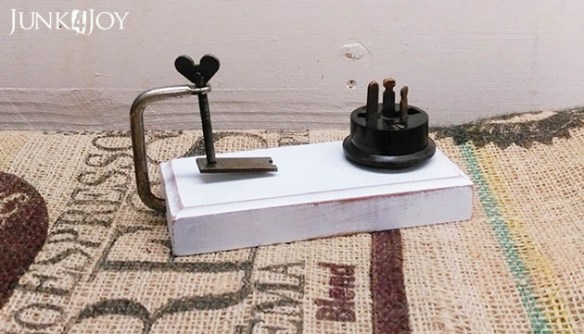
I started off with a dark brown electrical plug and a wooden mount (in old houses here in Australia light switches were mounted on wooden blocks to hide the wiring, cause wiring was usually ON the wall, not inside it). But this was a large wooden block, meant for two light switches… what to do with the extra space…?

bch2

I rummaged in my various boxes of extra handy assorted junk that I collected cause I knew I’d find the perfect use for it one day and found this odd little clamp.

It was perfect!

bch5

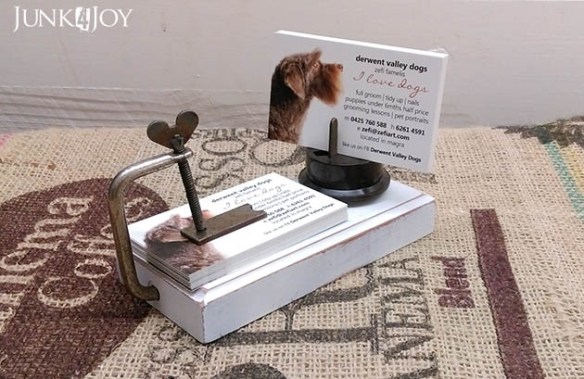
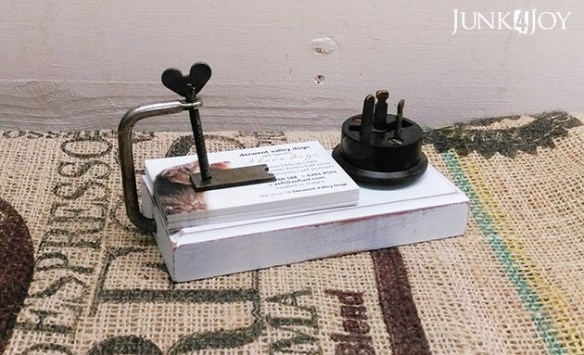
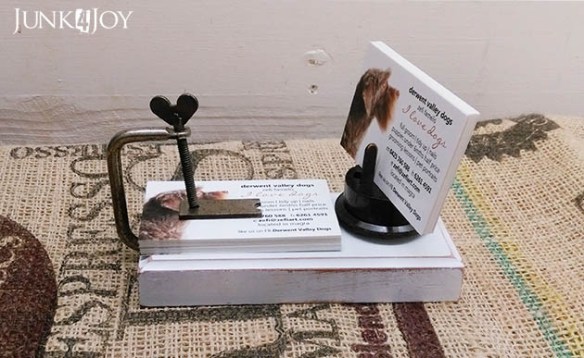
I sprayed the clamp with some varnish to seal the rusty bits (cause I love rusty bits), added a touch of oil to the bolt, then drilled a hole in the side of the block to hold it in place. The little butterfly clampy bit does a great job holding down a stack of business cards.

bch3

You know. For extra business cards. In windy conditions. Display some on the plug, keep extras on hand under the clamp.

bch4

How can you not love this quirky little piece? I bet no one else has a business card holder like this one!

Soon to be listed in my Etsy shop.

z

Shared at:

1-Funky_Junks_Party_Junk_link_party.29-AM

i once wrote a book

Like many people, I lived under the illusion that I could write (and illustrate) books for a living. Especially children’s books.

Do you know how hard it actually is?

Anyway, one day I actually did write a book which I self published on Lulu.com, the DIY online publishing place. This was quite a few years ago, there may be other places now, but back then I think that was it.

This is the book:

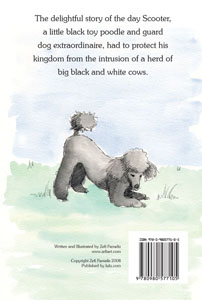
WrapCover.inddWrapCover.indd

ScooterBook6x9.inddScooterBook6x9.indd

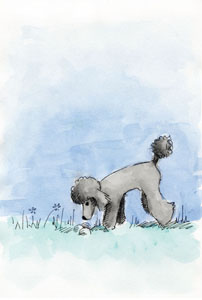
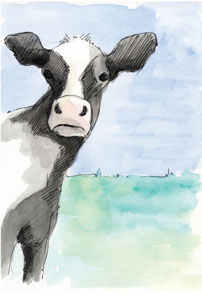
Scooter was my second toy poodle ever. He was the first one I got while living in Australia. He was a real character, a little man with a huge attitude. He was hilarious. When we lived in Fentonbury the paddock next door was sometimes home to cattle and Scooter was game to take on anything. This is a true story. It happened one day while I watched. It was too good not to capture and share.

I think I sold about 10 copies. All to me. Ok, maybe a couple to a friend or two. The problem is that Lulu charges so much, its a ridiculous price to pay for a slim book!

I actually made heaps more selling the original watercolours on ebay.

I began illustrations for a book about Billybear, my other toy poodle, but never got past that to the story. One day I’ll finish it. Maybe.

You can see a bit more about my Scooter book and, if you have $$ to spare, you can order it online here.

Meanwhile, remembering this book got me to thinking about writing in general and beginnings specifically. I remember hearing somewhere that starting was the hardest part. I beg to differ. I can start anything, at any time.

Its finishing (or continuing) that’s the hard part!

In my mind I’m always writing first paragraphs for books. Its fun!

Like this:

The man lay in bed, watching the neon light outside the cheap motel window flash pink then red then white. He couldn’t sleep. He was too conscious of the loaded gun on the bedside table next to him. If he failed tomorrow he was as good as dead.

Or this:

Megan was woken by the cold. She reached for her comforter but something was wrong. She couldn’t move her arms or legs. Her eyes flew open and she looked around the dark unfamiliar room. She was lying on a mattress on a dirty floor, cable ties around her wrists and ankles. She remembered the man in the mask and she began to cry.

Yes. I obviously love crime and suspense books. Does it show?

heheheh

Ok, how about:

Amy looked up as Troy put a large coffee on the table in front of her. Soy milk latte with a dash of vanilla, just the way she liked it. He sat down opposite her and smiled. He was such a nice guy, considerate, kind, attractive. They had heaps in common. He had a good job. Her parents loved him. Yet Amy looked watched him stir sugar into his coffee and felt like the walls were closing in around her.ย 

The second paragraph? So much harder to do! LOL

z

Shared at:

1-Funky_Junks_Party_Junk_link_party.29-AM


gloss black cake stand

cakestand3

So… one day someone posted on Facebook about wanting to buy a large wooden cake stand.

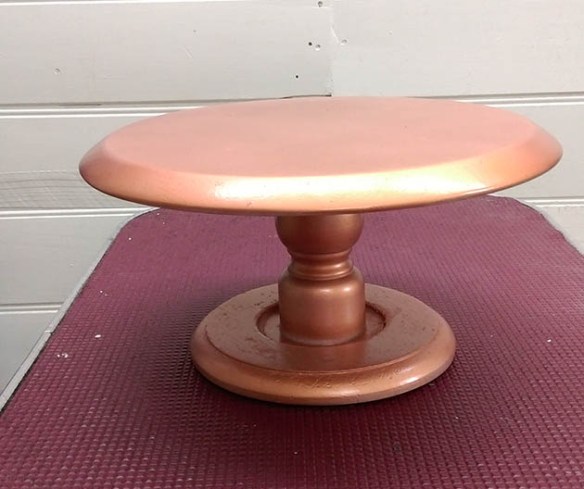
I contacted her as I had a couple I’d made using recycled bits and pieces. Wooden platters, lamp bases, whatever. This is one of them.

copper2

Yeah, I decided to try copper coloured paint instead of my usual pastel chalk paint. Not sure if I like it…

Anyway, back to the lady and the Facebook post.

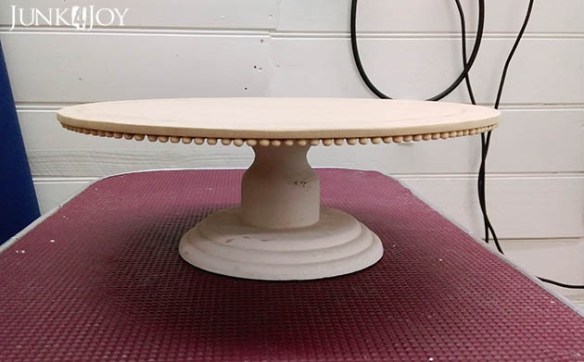
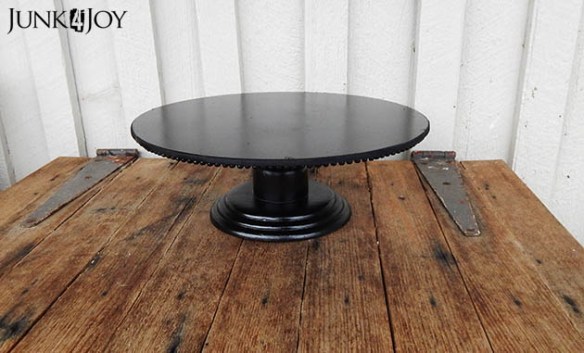
Turned out she wanted an extra large cake stand. 36cm across. I didn’t have anything that big so I cut the circle out of some MDF. I cut it at 38cm. A bit of breathing room for the cake….

But it was boring. Just plain MDF… BO-RING. meh.

I could do better.

bigcakeplatter2

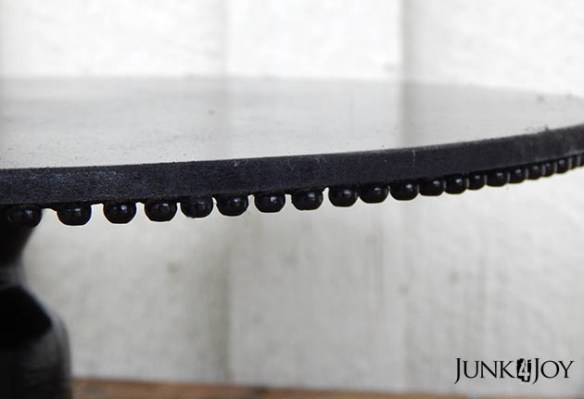
What do you think? Can you tell what I did? I used small wooden beads I ordered on ebay. I got those little suckers and glued them to the bottom of the circle. I love them. They add a bit of fancy to the cake stand.

cakestand1

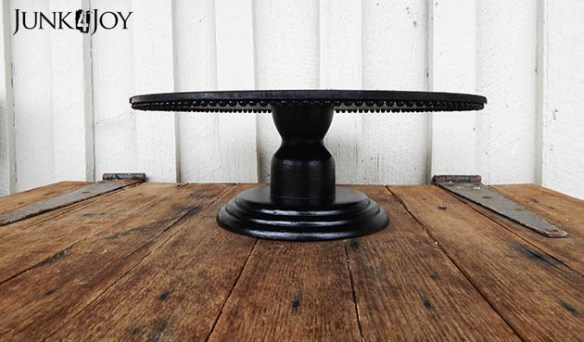
Its going to be used for a black & white themed 21st birthday party, so the lady wanted it gloss black. I gave it 2 coats of black after giving it a coat of sealer. Done. Just like a bought one.

cakestand4

Very darn cute. Those little beads just make me smile.

A fun project and a happy customer. What more could I want?

z

Shared at:

1-Funky_Junks_Party_Junk_link_party.29-AM

i found the floor!

27657984_1587570791361198_8256823710776247834_n

At least that’s what I tell Wayne.

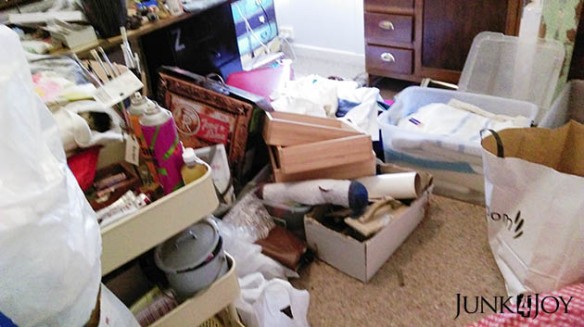
But the truth of the matter is that even I can’t live with this:

office4

Yes. Disgraceful. I know. That is my office.

To be fair, that was about halfway through cleaning up, the goal being to find the floor. As everyone knows,ย  you have to make a bigger mess to clean up a mess.

I have so many hobbies and have so many THINGS that I plan to do creative things with, that the office is chock-a-block full of stuff. Its hard to keep it all contained, let alone organised.

Especially when in the middle of a project or five.

Part of the problem is that I don’t work on one thing from start to finish, then put all the bits away before starting something new. I’ve never got the hang of focusing…

That means I have 3 commission barbies on the go right now, necessitating hair, rooting tools, fabric for clothing, shoes, etc to accumulate on the desk. I also have some wire projects in various stages of un-finished-ness. Add wire cutters and pliers and wire to the mix… Then, just for the fun of it, I have a couple of small sewing projects – nothing too boring. Top it off with fabric, scissors, beads, buttons… oh and paper to draw up patterns.

You’ll notice the photos somehow avoid showing you the table…

office5

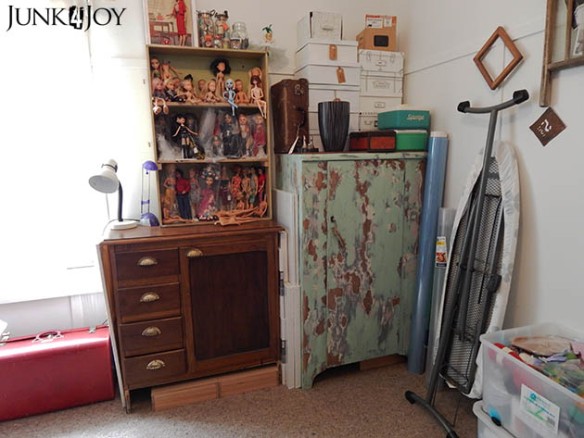
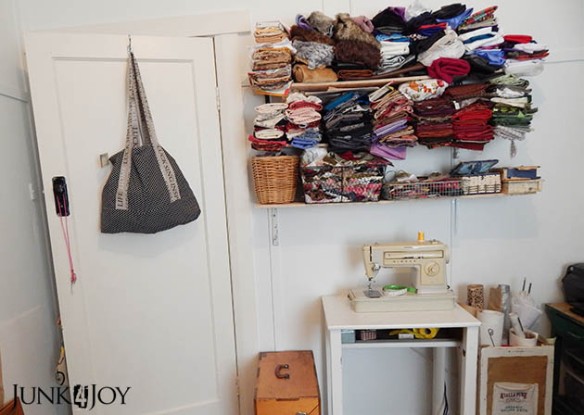
I ended up moving a few bits of furniture to make the office a bit more user friendly. This side of the room is dedicated to dolls. The cupboard holds glues and sprays, felting wools, as well as some boxed items for future projects. The boxes on top hold dolls and accessories. The little wooden cabinet holds old diaries, notebooks and folders and the drawers hold doll accessories. The shelf on top holds all the dolls that are finished or in progress.

office6

The opposite wall now holds all my fabrics and sewing machines. The fabric does need to be sorted and folded better, but for now the top shelf holds doll costume fabrics and the bottom shelves hold my crazy critter type cotton fabrics.

Much better.

I wonder how long it’ll take till I fill it up with crap again?

z

step ladder

ladder1

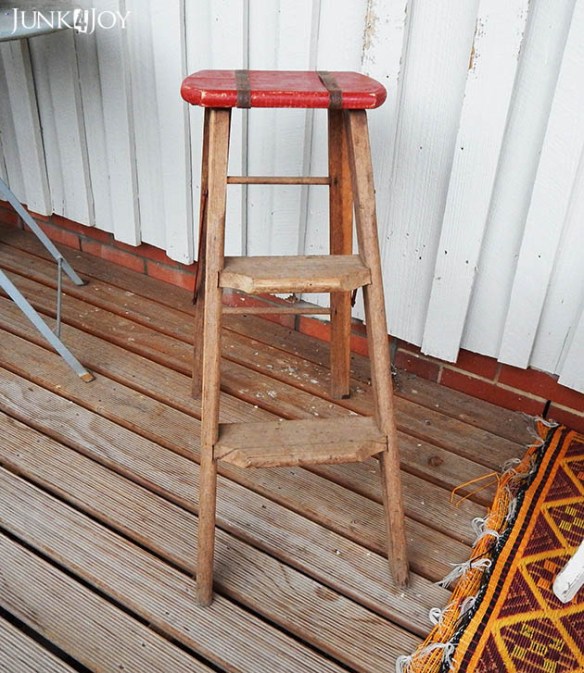
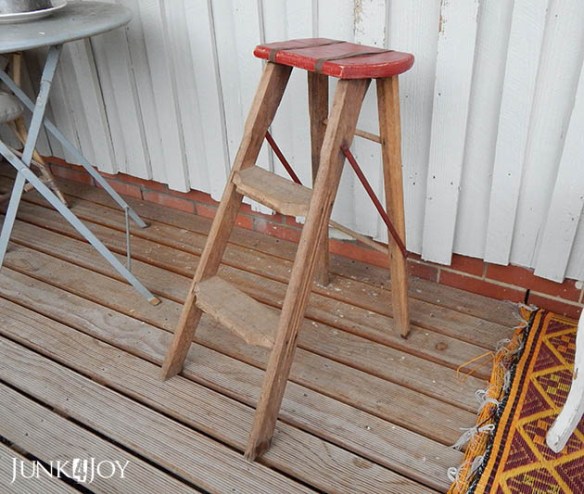
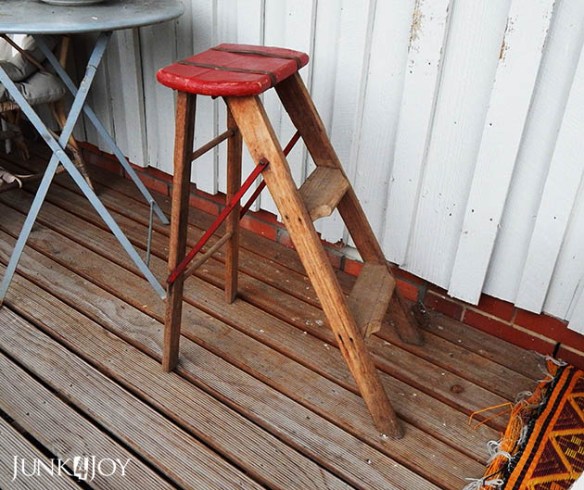
When I first saw this little step ladder it was looking pitiful. The top was broken in half and the red paint was mostly rubbed off.

I got it at an farm sale a couple of years ago. I put it in the shed with all the other projects I would get to one day.

ladder2

You know one day, don’t you? Its that day that may or may not come around sometime this year, or three years from now. In this lifetime. If you’re lucky.

Well, one day came for this little step ladder… though, to be totally honest, it had a few false starts. First I moved it from the shed to the laundry area. Left it there for a while. Then I moved it to the storage room. And left it there a while longer. Then I got tired of moving it so I got out the glue and clamped it tight and left it a little longer to dry.

ladder3

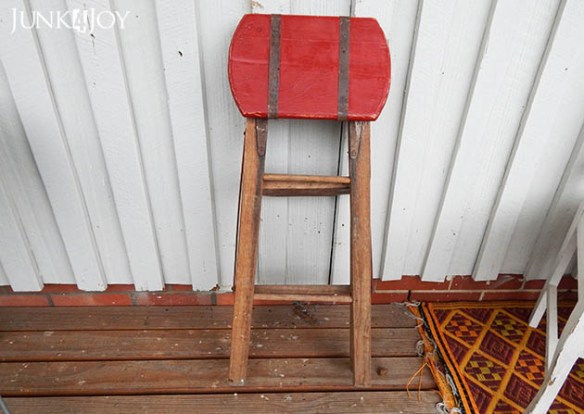
But I couldn’t rely on glue alone to hold together the top. There’s too much strain on it. Not that I recommend anyone use it to actually step on! GOSH. No way. Its a cute step ladder, but its step laddering days are over. Its more a plant stand or side table these days.

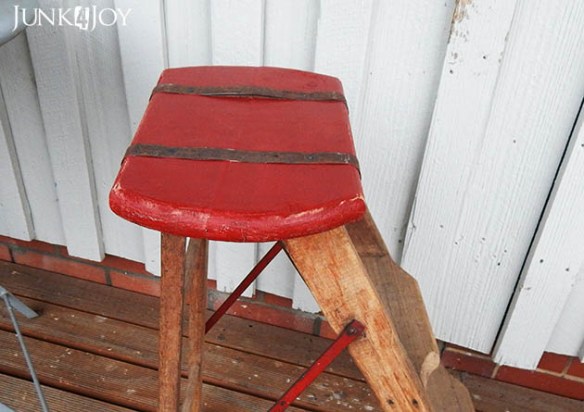
Anyway, my solution to the broken and glued back together again top was to bind it with some metal strapping.

ladder4

I don’t know what this strapping came from, but we’ve got quite a bit of it rusting away in our top paddock. I’ve collected some to stop it from rusting any more and Wayne has used it for a few of his projects.

I think it really suits the little step ladder.

ladder5

I also repainted the top. I forgot to mention that. Nothing else needed painting or fixing, just the top.

It turned out great. And now it has a new home. I sold it at the market on the weekend. I couldn’t find a spot for it here. I already have enough side tables and ladders, mores the pity… sigh…

z

Shared at: