Unknown's avatar

About zefiart

Blogger, DIY-er, poodle lover, graphic designer, dog groomer, recycler, artist, wonder woman in my spare time.

our junky garden

In the last week I’ve managed to get a bit of work done in the garden. Not on my own… I had some help otherwise I’d be lying on the couch moaning in pain right now.

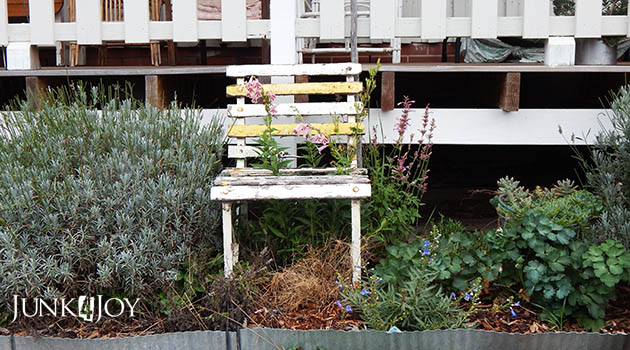
One thing I did by myself was move these broken old chairs into the front garden bed. Partly to stop the dogs from digging, partly as garden art. I got these chairs at the tip shop ages ago. The guy there thought I was going to fix and restore them. I had no such notions. I only bought them as garden art.

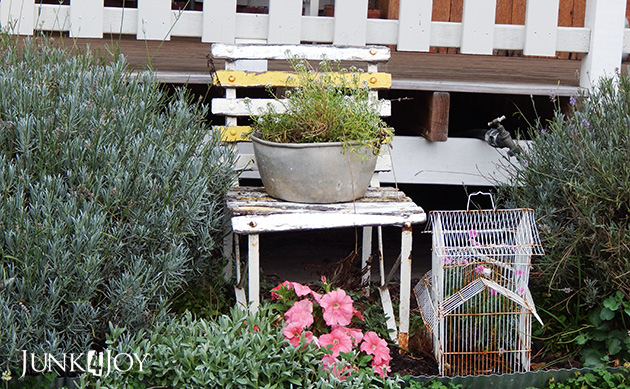
There used to be a gorgeous burgundy penstemon growing where the chair (below) is but the dogs dug it up and killed it. I have another one in there now but till it grows up enough to grow through the chair like the one above, I have an old jam saucepan sitting on it.

The birdcage is protecting a newly planted daisy.

I love my junky garden art.

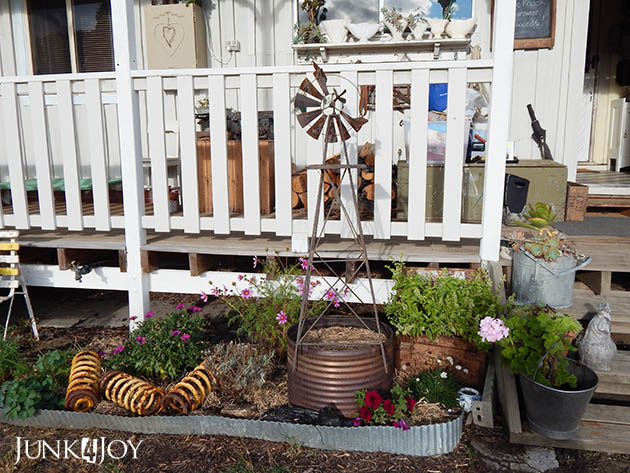
Close to the front door the old washing machine drum which used to hold lettuce now has sweet peas in it. I’m using the broken windmill as a climbing trellis for them when they grow.

I do have plans to restore the windmill.

If you’re wondering about the springs… dog barrier.

Need I say more?

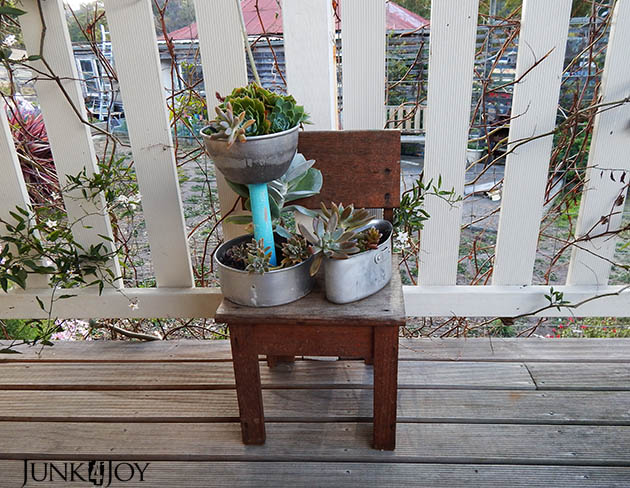
I found this little chair at the tip shop a couple of weeks ago. I had planned to fix it up but for now its holding some of my succulents on the front porch.

AND…. (drumroll)

I bought a maple!

Its a japanese maple, no idea what type exactly. I had one of these in Melbourne many years ago and I sure hope this does well. Till now we’ve had no trees in the house yard and that’s just wrong. This is tree no. 1.

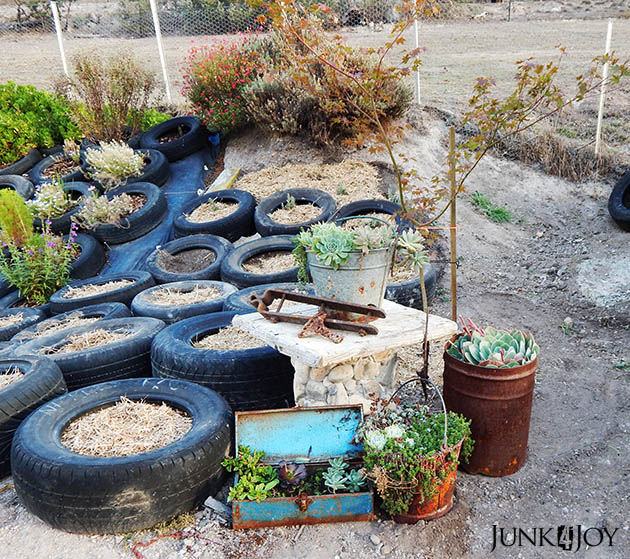
I dressed it up with a few junky planters so it wouldn’t feel so alone on the side of the woodshed. The soil there sucks, but we dug a deep hole and filled it with soil, fertilizer and manure. Fingers crossed.

I did plant some trees just outside the yard – one canadian maple which bit the dust, one orange tree which was eaten by the geese, three birches near the dam of which one survived. The others were eaten by the geese. Seven birches near the water tanks, and five pussy willows, all of which have survived and are growing despite having been pruned back by the horses on numerous occasions.

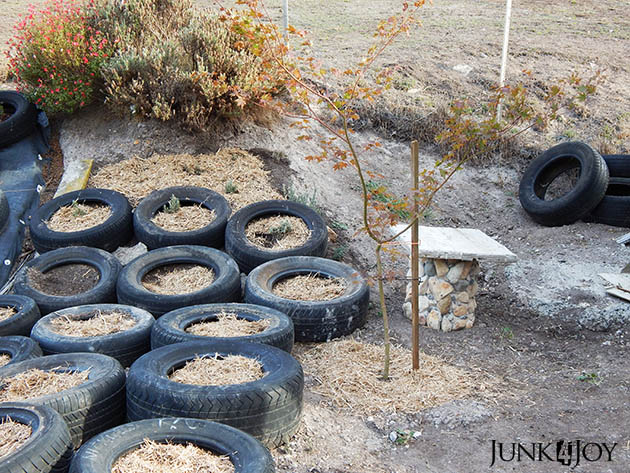
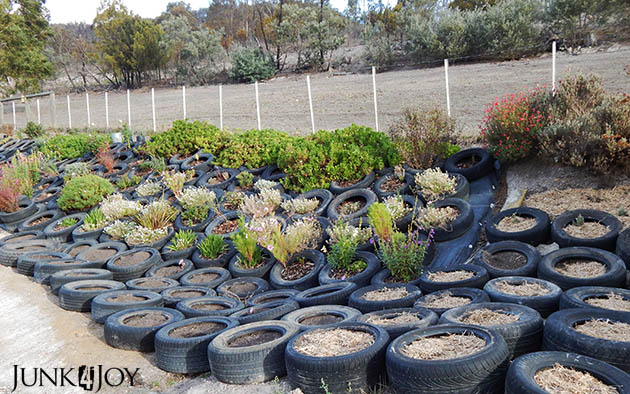
Meanwhile, you may have noticed the tyres around the maple… We’ve now added tyres down lower in front of the new drainage ditch, creating an extended garden area. For now I’ve got some spring bulbs in the tyres closest to the maple but need more plants to fill the other tyres.

I bought a new camellia which I put in a container on the side of the house. Advice of a friend: put it in a container in the spot you think you want it to live, that way you don’t have to dig a hole and plant it till you know if it likes it there.
Excellent advice.
Procrastination 101.
The white banksia rose I moved twice and almost killed has come back. Its now in a pot in the spot I intend to plant it eventually. I like this way of gardening. Why do today what you can put off till tomorrow?

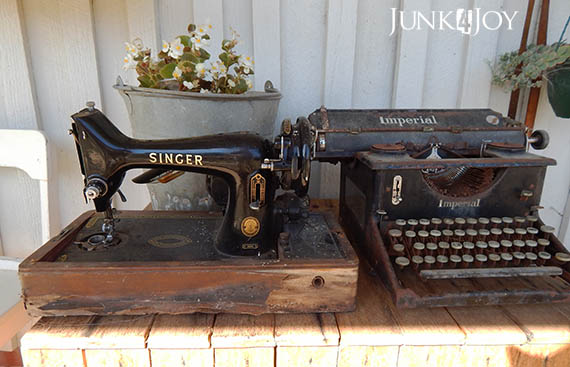
Other than that, I got this old singer from the tip shop. The base is broken but I’d love to find a way to grow a plant around it. Same with the typewriter. I got them both with the plan of making them into garden art. I can put a small pot into the centre of the typewriter, something which will grow up and hang down over the keys a bit. The sewing machine… maybe I can remove the base and sit it in a container and grow a plant around it…
There’s still more to do, but isn’t there always? I’ve spread sugar cane mulch, got the vegetable garden cleaned out of weeds and attacked the weeds. Again. We’re coming in to winter here so I won’t be doing an awful lot to the garden till spring. I just wanted it to look tidy.
z
Shared at:

an embarrassing desk makeover

This is an embarrassing post… But in the interest of reality, here goes…
I’ll start at the beginning: 
Those of you who know me know that I like rearranging furniture. I also like re-assigning furniture and making it over. And over. Then moving it again.
It keeps me busy and Wayne confused.
When we first moved into our home I created an office for both myself and Wayne. He got an extra large desk and I got a cupboard door on filing cabinets. He never used his desk, preferring to work in the kitchen, so I created an office space in the living room for him using my original corner office desk. 
There was nothing wrong with that desk… It was large. It was practical.  But it didn’t have drawers and it was made of melamine.
I dislike melamine.
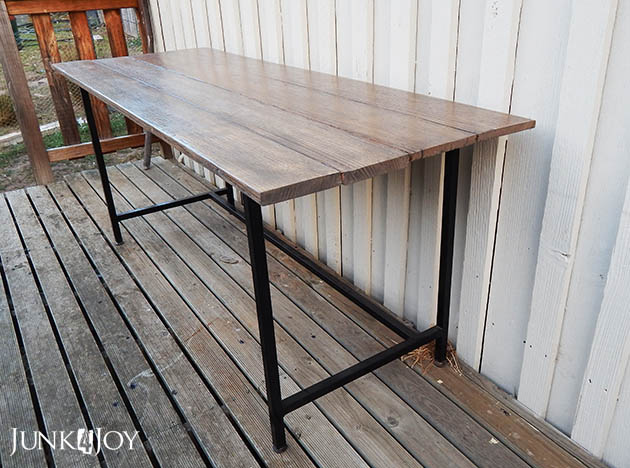
So, I replaced it with something more my style.* I had this old office desk with metal legs and a crappy top. I put weathered timber on top and all was well with my soul.
Wayne lost his corner desk and had to adjust to less desk acreage.
*Cause it might be his desk, but its my style!
This new improved desk had the same issue as the corner melamine desk. No drawers. Wayne ended up with about 54 odds and ends to hold all his stuff. When you don’t have drawers you have a small filing cabinet, an el cheapo metal and plastic drawer unit whose drawers fall out every time you pull them out, and a couple of bookcases… 
No so pretty. Not the style I was going for.
Just before Christmas I decided it was time to move Wayne’s office space. 
Again.
(No, he has no say in this.)
I put a divider in the middle of the living room for the TV and moved Wayne to the other side so the first thing you see when you walk into the living room isn’t his messy office desk.
Then, just to keep things interesting, I decided to change his desk. 
Again.
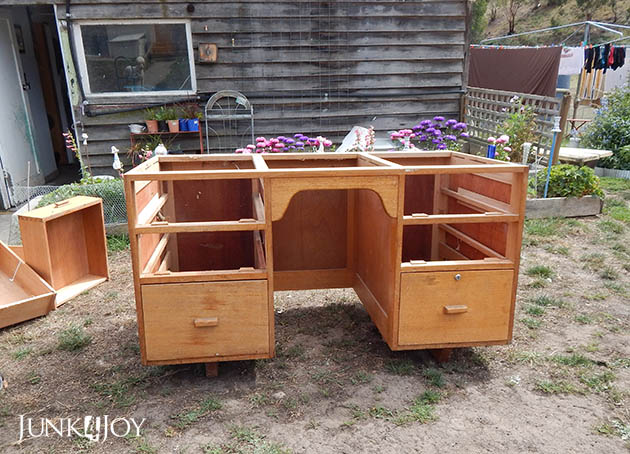
We had this old desk in the garage since we’d moved here. I got Wayne to remove the top cause it was beyond repair – he’d been sitting his chainsaws on it. As you do. It was covered in oil. 

The main issue with this desk was that the leg space was so narrow. Just imagine all the times you’d knock your knees on this!
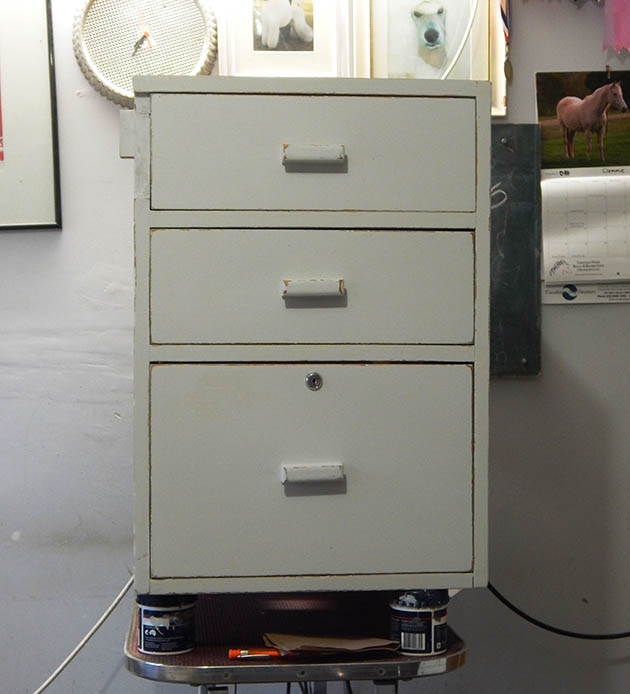
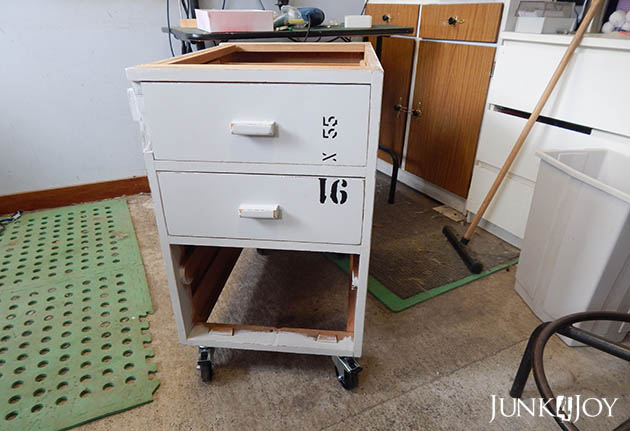
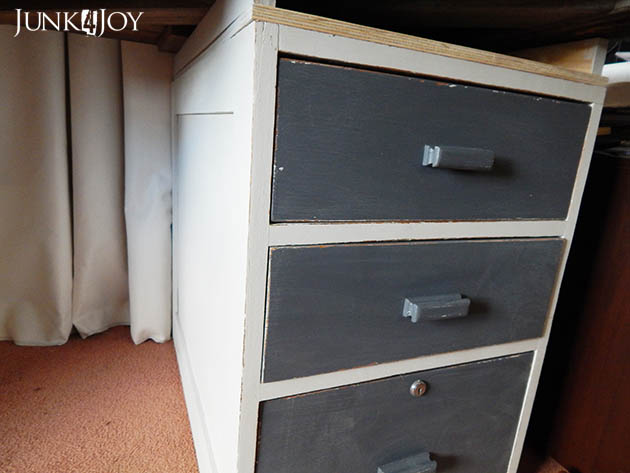
I took the saw to it and cut it apart (in a really messy way), leaving me with two drawer units. The plan was to paint these units, put them on castors and plonk a large shed door on top.
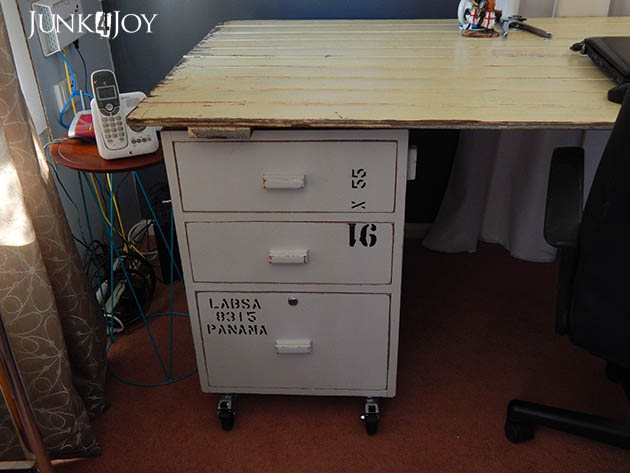
It all started well enough. I gave them a light sand, then mixed up my own chalk paint – in white. Of course.
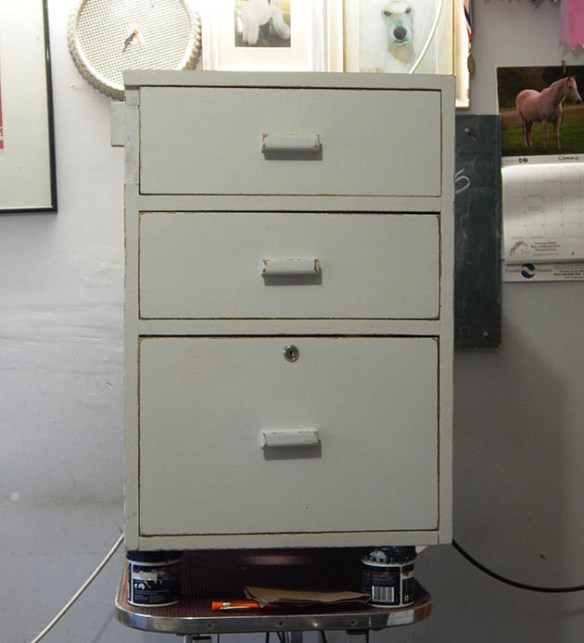
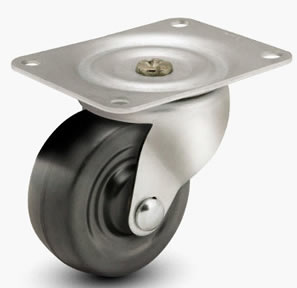
I added castors.

I painted some random numbers on it, cause I have stencils you know.

And yes, I know I put it on upside down.

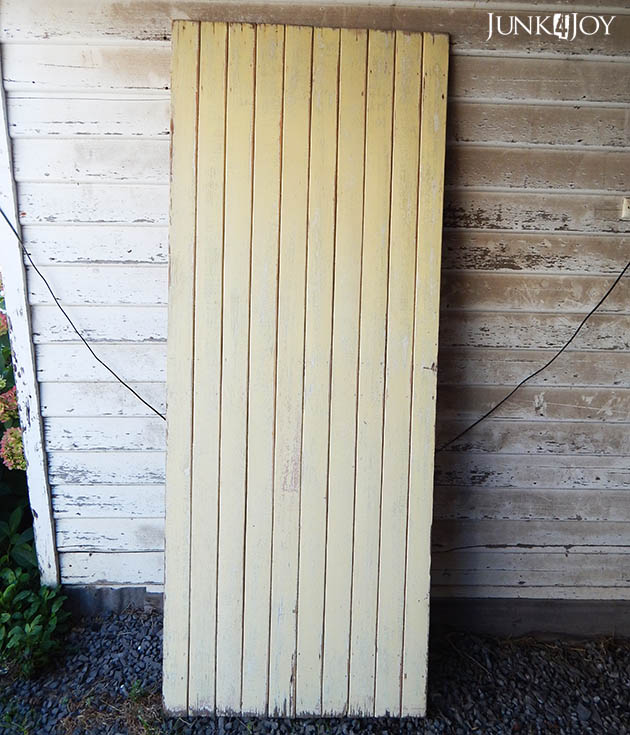
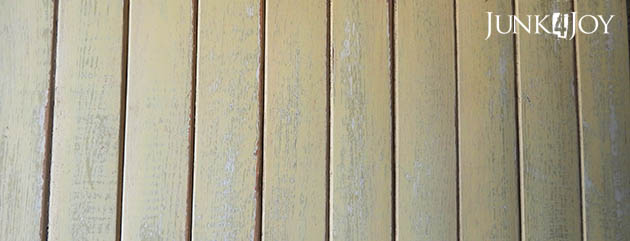
This is the door I had earmarked for the top. Its half of a huge hinged garage door.

I love the chippy cream paint. 
I didn’t put a top on the units, just plonked this baby down on top of them. I mean, why bother, right? No one would see it.
I got all the pieces up to the living room (that is one heavy door!) and put it all together. Wayne began moving his stuff in…
I hated it. Not just cause of the upside down stencil either. It just didn’t look right.
Then, while I was wondering what I should do to fix it, Wayne broke it. One of the bottom drawers got stuck on a castor lock and he heaved and broke it.
I thought about repainting it. I mean, I had to fix it anyway… but what colour?
I thought about black, but I didn’t have any black. I did have dark grey… Same colour as our feature wall… I thought ok… how about I paint it dark grey? 
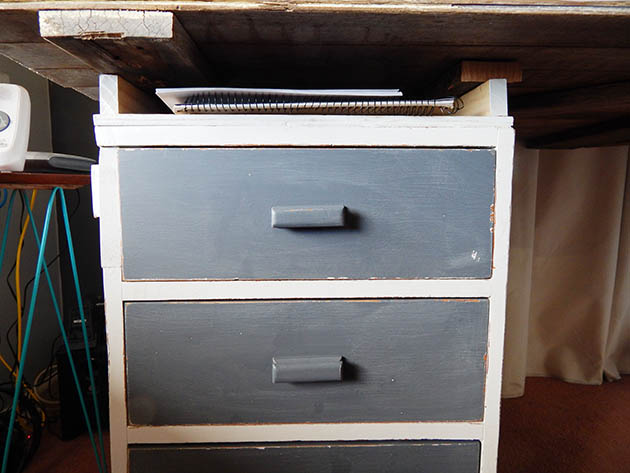
I painted the drawer fronts first. Not sure I liked that either so I didn’t paint the units.
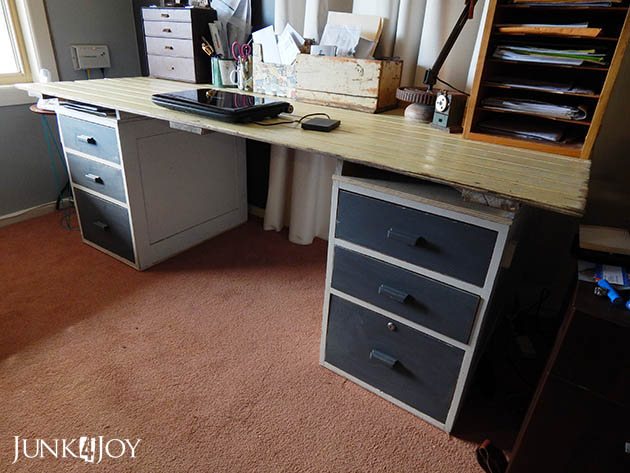
I used offcuts of plywood, which I had planned to use to finish the TV unit, to put a top and bottom on the units. The plan this time was no castors, just a flat bottom. For the extra height needed, I put a little shelf on top. This provides a handy place for Wayne’s large sketchbooks.

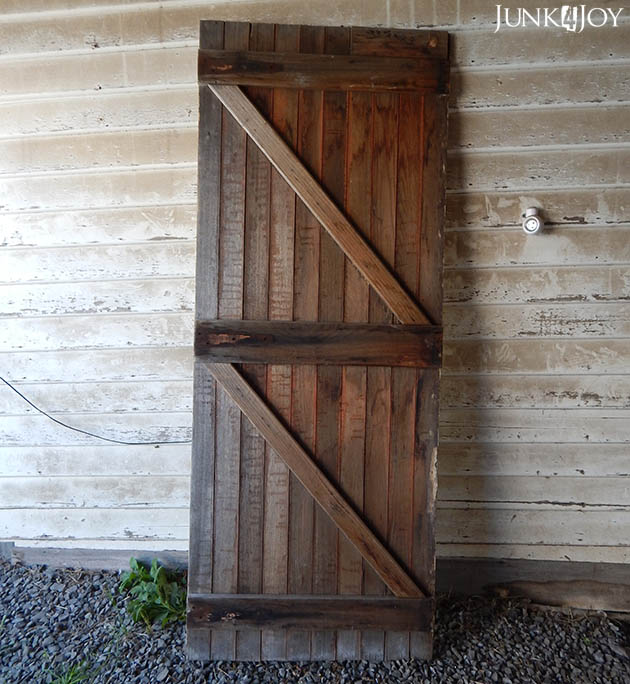
Its still not right. Its messy looking, but given that its a door with Z braces on the back, not much I can do about that part.

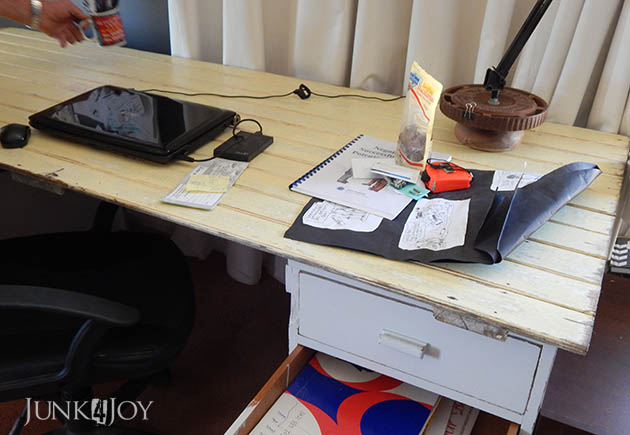
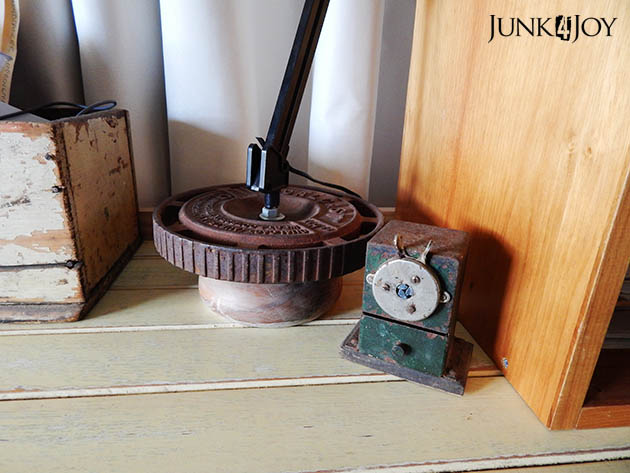
The one thing I did do to the door is attach a small piece of pine along the back to stop things rolling off behind the desk. You can just see it below, behind the lamp base.

For now its more or less finished, and I can pull it apart easily any time.

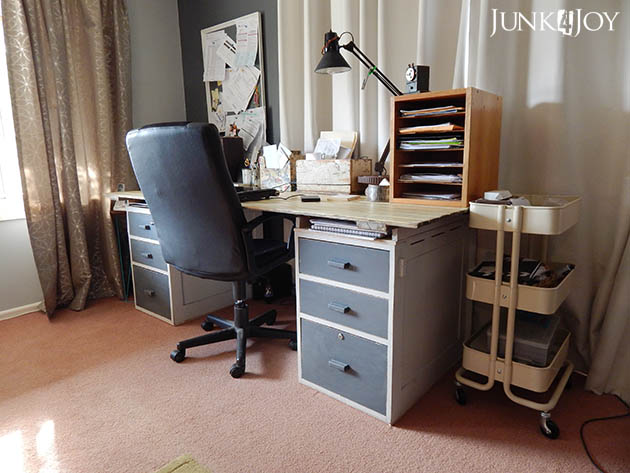
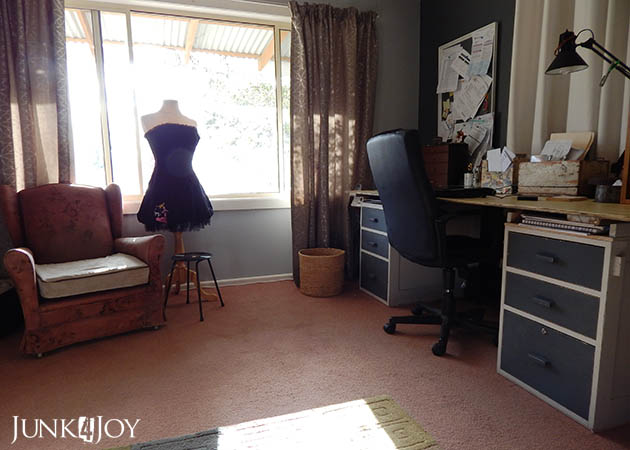
The dressmakers model and the cream Ikea trolley are mine. In case you’re wondering. I’m working on a wearable art piece on the model and the trolley holds my pastels.

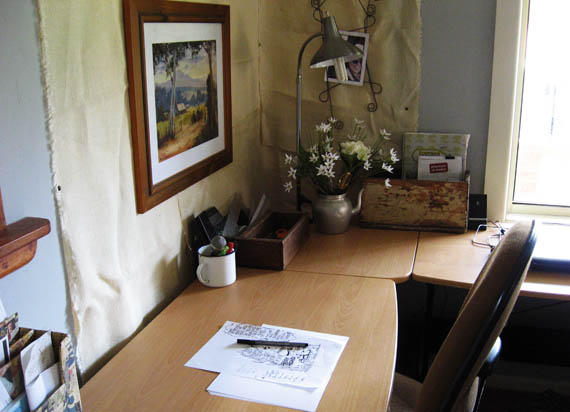
This is how the desk area looks now. Cosy.
But I’m still not happy with the desk. I’m thinking all black drawer units and natural timber on top would be the best way to go. I haven’t painting anything black since my student days…
I need to buy black paint.
Wayne won’t be happy if I pull his desk apart and start over…
z
easy fabric wall hangings

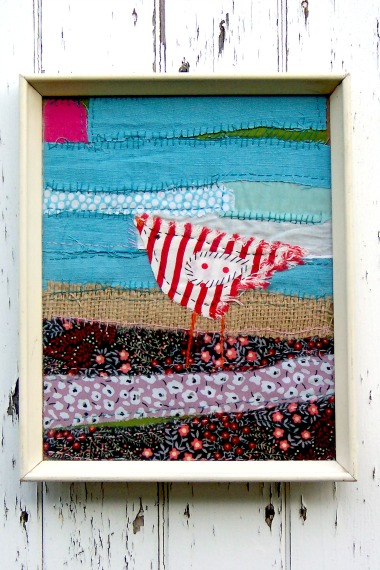
Does anyone remember the little bird project I did a long time ago? I made the little bird by hand stitching the fabrics onto a piece of felt and I really enjoyed doing it.

When I was trying to think of a project I could do with a group of participants at work, I thought it’d be a great idea to do something similar. I mean, we have tons of fabric… Some of it is even halfway decent!
The main problem was that doing it the way I did the little bird involves a lot of hand stitching and the people I work with are disabled. Their abilities are mixed… some have the dexterity to do fine work, others have no fine motorskills to speak of, and none of them can do fine stitching.
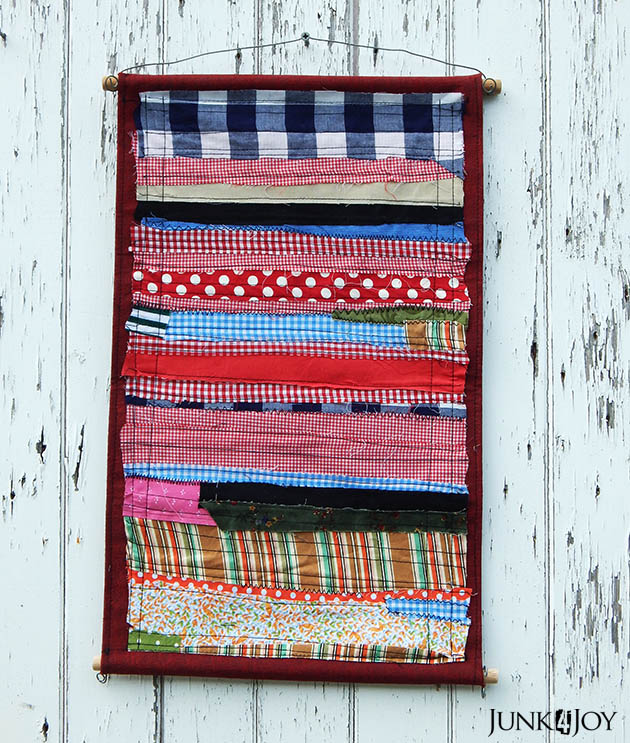
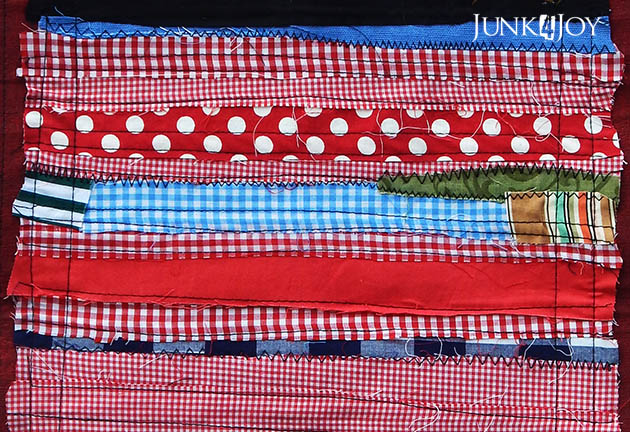
My first attempt involved ripping fabric into strips and asking one participant to select the colours she wanted, then lay them out on a piece of fabric to create a picture. She chose the colours and laid them out in colour blocks.
The plan was that I would then use the sewing machine to sew the pieces down.

Of course, the minute I picked up the backing fabric all her scraps moved or fell off so I had to stitch them back one by one. As a result, I couldn’t help myself… I added a few accent bits here and there… Kind of defeats the purpose of getting people to do their own art!

I couldn’t help it! It went against my grain to leave it in plain colour blocks… the fabric got mixed up. Yeah. That’s my story and I’m sticking with it!

Given that I’m trying to let the participants make their own art, this method wasn’t an ideal way to do it…
I found a video on YouTube of a lady who does crazy quilting. She recommended using thin iron-on fabric to keep the pieces together!
Now, why didn’t I think of that?
Well, for one thing I’m no expert in sewing and I’m pretty sure I’ve never used iron on stuff before… In fact, I’m not even sure I’d heard of it before! 

So, I went out and bought some. I got the second thinnest (cause the lady on YouTube said ‘thin’) and got to work.

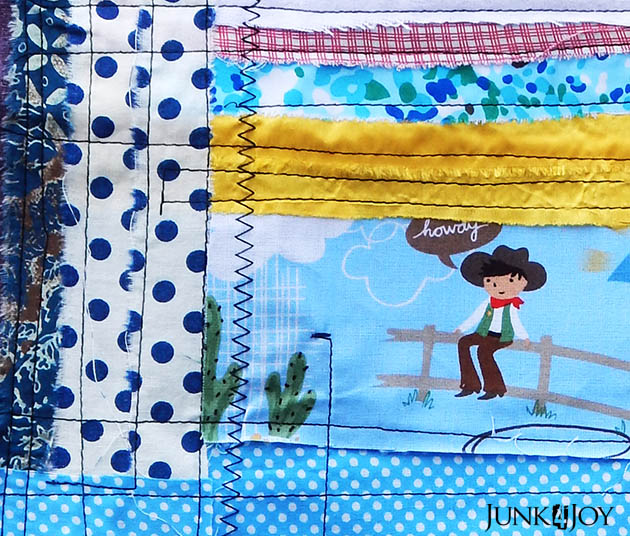
I had a bag of scrap fabric which was given to me by a friend. It wasn’t ripped up in long strips like the first experiment so the pieces were different shapes and sizes. This gave the participants more variety in shape as well as pattern and colour.

Once they had their pieces laid out, I ironed them in place, then stitched them down with the sewing machine.

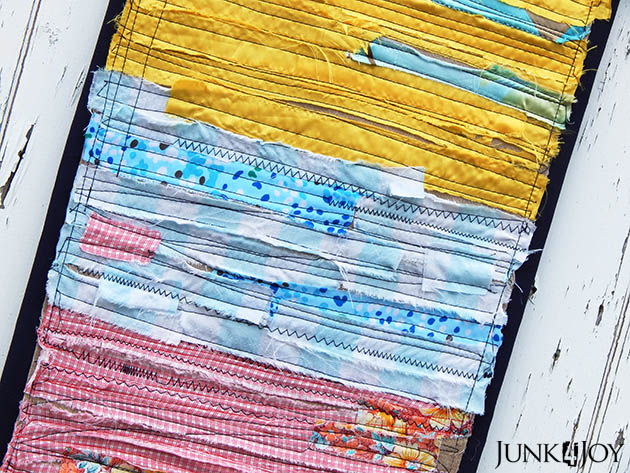
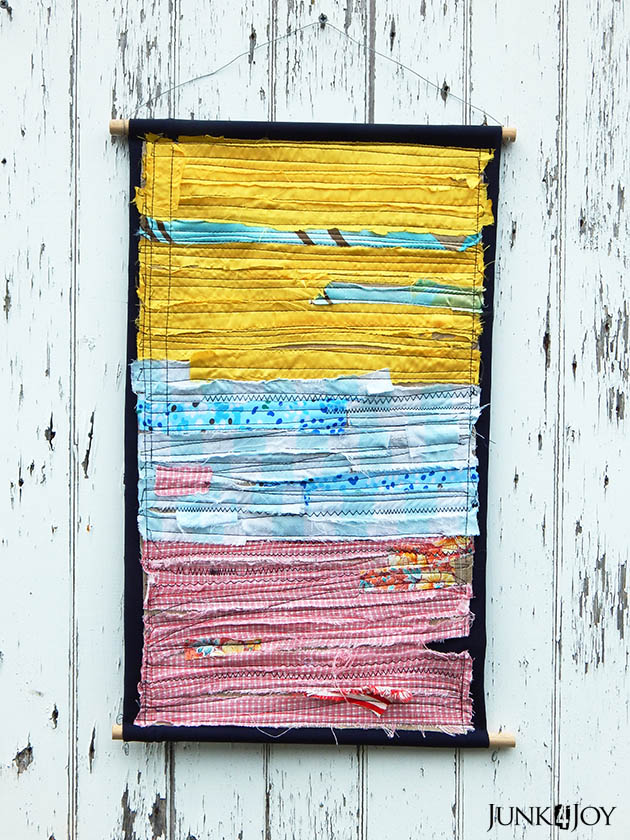
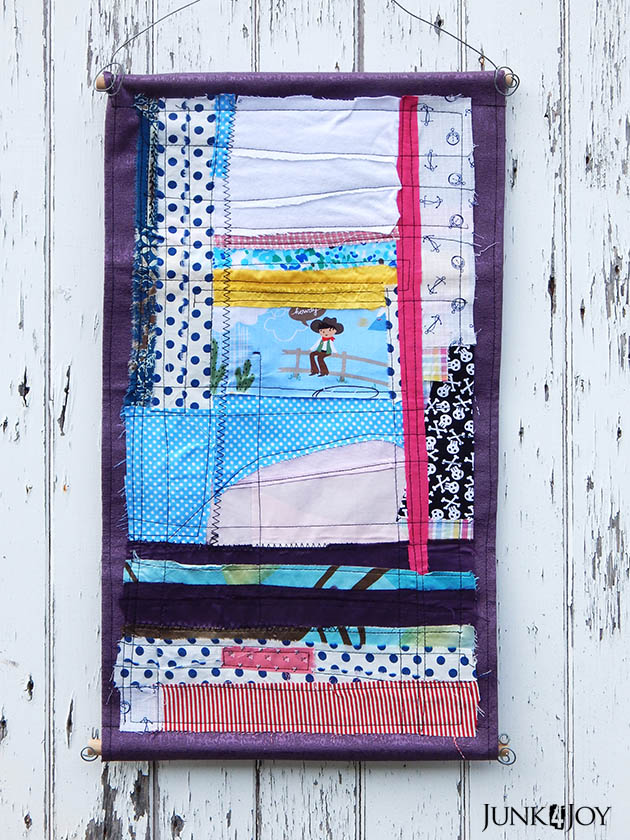
It worked much better. I’m sharing three of the creations we’ve made so far. There are a few more which I’ll share when they’re done.

Aren’t they fabulous? I want to make some cushion covers for my new couch using this method!

For the work project I’ve made these into wall hangings by sewing the art to a backing piece of fabric with pockets for dowels top and bottom. It makes it easier and much quicker. They can now go home and be hung on the wall straight away.

Mission accomplished. We found a way to let the participants create their own work with minimal staff input in the creative part.

z

Shared at:

easy easter bunnies

I don’t do much for Easter. Its just a break from work really, and an excuse to eat chocolate.
It was different when I lived in Greece… it was the only time we went to church in my family – other than weddings, christenings or funerals. Easter is the best time in the Greek Orthodox church in my opinion. There’s something really special about the build up and celebrations of Easter.
Though I must admit, I really didn’t enjoy fasting for lent…

In Greece, Easter is a big thing. It wasn’t just the lamb on a spit, or the red eggs… it was the fact that after fasting for weeks you were finally allowed to eat real food – milk, eggs… chocolate.

Now I live in Tasmania and I don’t do Greek Easter. Partly its cause I have no family here and barely know any greek people to share Easter with. I tried going to the Greek Orthodox church in Hobart once and it just wasn’t the same… so I just do the Aussie thing: hot cross buns and chocolate eggs.

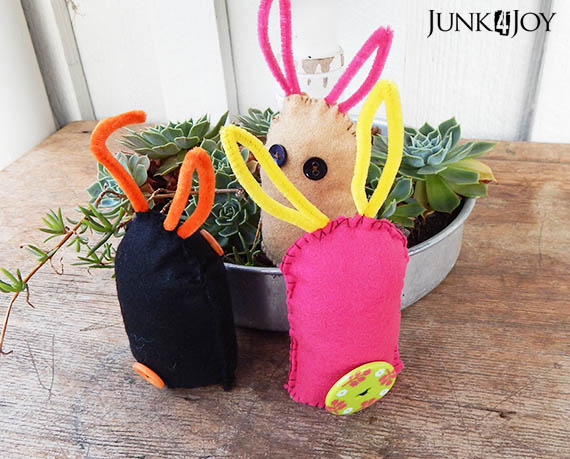
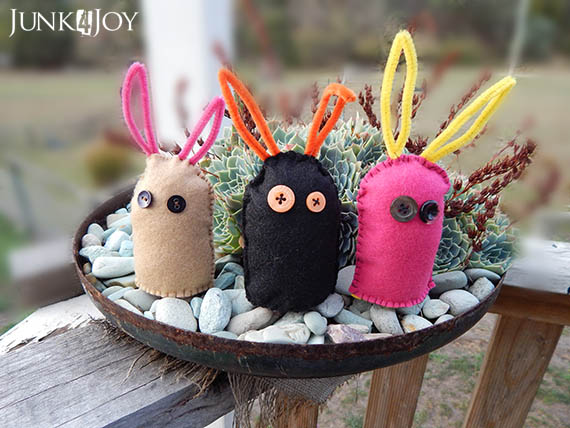
Enough about my sad story. I was going to share these cute little bunnies. They’re so easy to make and are a great way to decorate an easter basket for kids or friends.

I don’t have a pattern for you, but its real easy. 
All you need is some felt, some pipe cleaners and some buttons. 
First cut out two simple round top shapes for the front and back and an oval for the bottom, making sure its the right size for the rounded tube rabbit body. Its not as easy as you’d think, I had to reduce the size of my bottom (the rabbit’s bottom, not mine unfortunately) once, then I had to reduce the width of the rabbits, but once I worked out the right size I could make a ton of rabbits quickly.
Next choose buttons for eyes, a larger button for a tail, and a pipe cleaner for the ears. Bend them in half, then in half again, doubling over each end to form ears. Make sure you sew the eye and tail buttons onto the appropriate piece of felt (front or back) in the appropriate place, cause its easier to do it that way. Trust me, trying to sew buttons on while working inside a tube ain’t fun. Using a plain blanket stitch, sew the two rabbit parts together, not forgetting to add in the ears when you get to the top. Before you sew on the bottom, fill the rabbit with whatever stuffing you have on hand, then sew on the bottom.

So there you go.
Easy.
I do give great instructions even if I do say so myself…
z

Shared at:

another record table

Yes, I mentioned a new record table. It was in the photo I shared in my last post. I forgot I hadn’t actually posted about it…
Honest mistake.
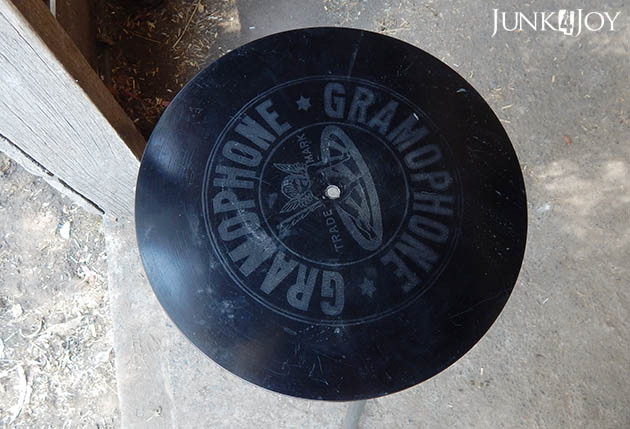
So, here it is, in a rustic setting.

I don’t know if you remember, but I did make a record table before. I had a stool base with hairpin legs but no top and thought a record would make a great top for it.

It was great. I sold it at one of the markets.

I regretted it.

I made another one. Not as pretty. No hairpin legs. This one was a stool with a top when I found it. A ratty top which I promptly dispatched to the great broken stool home in the sky.

All I did to make this table was give the legs a wash, buy new rubber stoppers as it only had one left, dust off the old gramophone record and use a crapload lots of liquid nails to glue it together.

Simple.

Effective.

Cute.

I put it in the living room and for ages I used it to hold my coffee cup as I watched TV or worked on the laptop. Then one night I forgot myself and put my feet on it.

I don’t recommend you do that. Gramophone records are really brittle.

Out came the liquid nails again. This time I glued the new record to the old one, making it double thickness.

Its back holding the remotes right now. And I have a footstool for my feet.

It pays to remember what things are for. Footstools are for feet. Brittle 33.5 record side tables are for a cup of coffee. And perhaps a bowl of popcorn. A small one.

z

Shared at:

easy industrial stencil art

Somewhere along the line, my rustic shabby country farmhouse has turned a bit industrial. I mean with the poles in the middle of the living room there weren’t many places to go…

So I embraced the poles (not literally, though there was that one night when I thought I’d try pole dancing… best forgotten. Forget I mentioned it…) and built a TV unit/room divider between them.

Now I have a proper separation between the ‘work’ and ‘entertaiment’ areas of the living room. Instead of trying to hide the poles (ever tried to blend in poles in the middle of a room? impossible) I painted them black and made them a feature.

This resulted in a slightly more industrial feel to the decor.

Plywood and poles will do that.

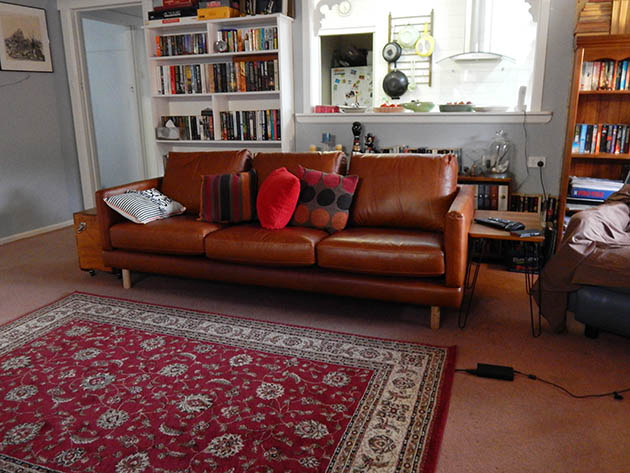
I also bought a new leather couch and ended up with a scandanavian style instead of the old gentleman’s club style that I thought I wanted. The colour and style really suits the new rustic industrial farmhouse decor.

Here’s a preview of the new couch in place, including the mess all around it…

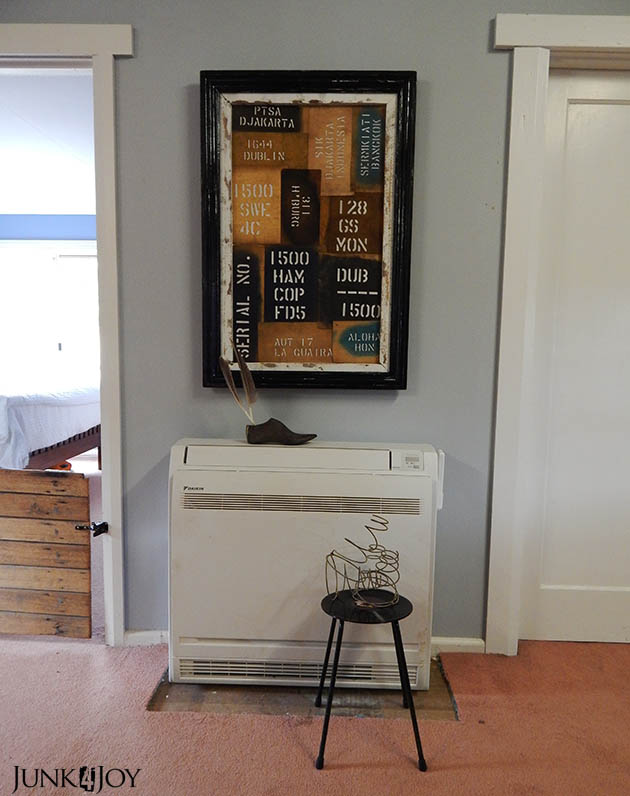
Anyway, I decided it was time to up the industrial aspect of the living room with some original recycled artwork.

Plus, it was time to take the christmas tree down!

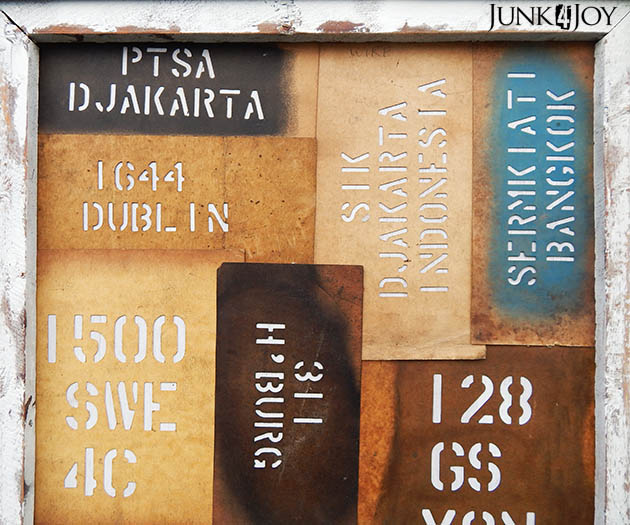
These stencils are all real, factory shipping label stencils, some have even been used. Many times. Others are just plain old. They were given to me by a great friend and soon as I saw them I knew I wanted to make this artwork.

I recycled an old frame I got from the tip shop. I had originally put fabric in it to match some cushion covers and hung it over the bed in my house in Fentonbury when I was selling it.

Since then its been in our bedroom, just sitting there.

Waiting.

Till yesterday.

Yesterday I took it down to the casita, took out the fabric, laid out the stencils in a way that pleased me, used a ton of glue to hold them in place (there’s no glass on this) and then decided the frame looked wrong in distressed white.

So I taped off the inner rustic timber ‘mount’ and sprayed it gloss black. Then, after it was dry but before it had cured completely, I used a paint scraper to scrape a bit off here and there to show some white through.

Much better.

I especially love the splashes of blue!

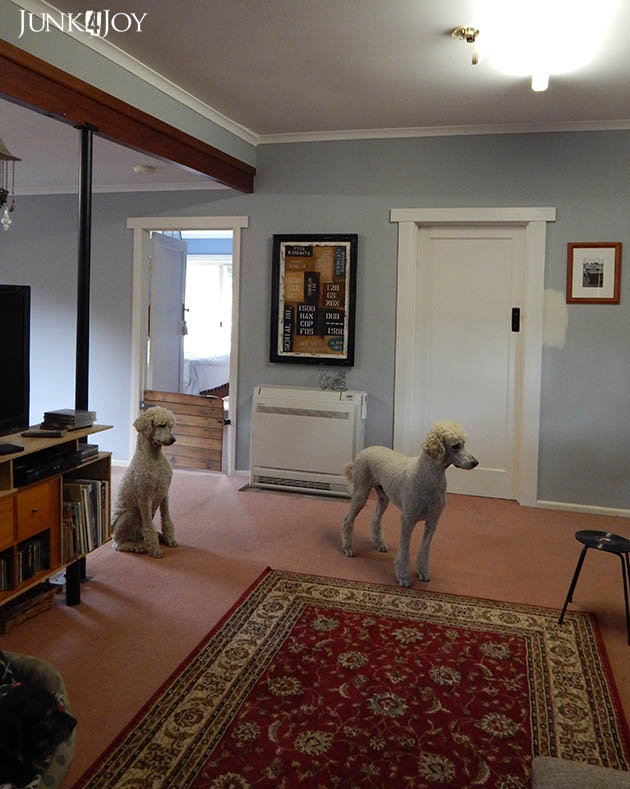
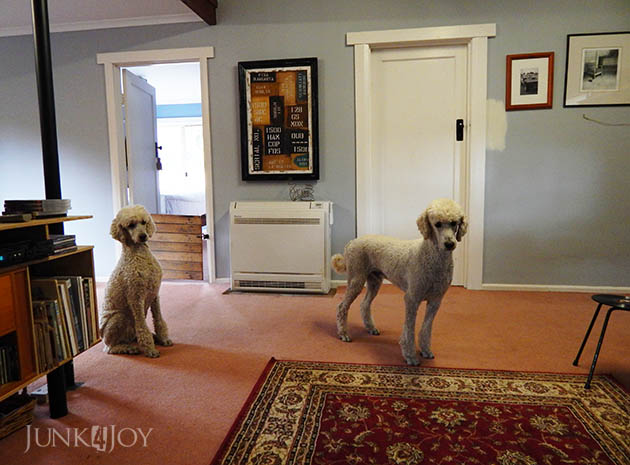
It kinda looks good there now. It goes with the black poles and the little record side table. Which I haven’t shared yet… oops.

We’re getting there.

All I need to do now is paint the living room white. Or a grey that isn’t blue. Get rid of the carpet and put down some kind of floor that’s easy to clean and doesn’t make me gag. Finish the TV unit. Get a bigger rug. Find a solution to the world garbage problem.

I’ll get right on to it.

Easy.

z

Shared at:

saddle storage in the workshop

Sharing another project I did before the eye/cataract saga. Back when I could lift things and bend over without fear of detaching a retina…
Eh. Its only a temporary setback.
You may or may not remember that we’ve been storing the saddles and other tack in the workshop area of the casita. 
My workshop.
Where I keep my tools and do messy things with paint and sawdust.
Anyway, we can’t store them in the feed room for obvious reasons so its basically that or move them to another shed which is out of the way and we have to carry things when we want to use them……. though, with the amount of riding we do lately, would that be such a bad thing….?
Hm…
Must think about that…
Meanwhile, it doesn’t matter cause I’ve finally sorted out saddle storage in a way that takes up less space, is safe for us (ie no saddles falling on heads) and is safe for the saddles (ie no saddles falling on heads).
It was easy. Basically. It just took a long time to do from inception to completion. And I used only things I had on hand.
I have a fence in the middle of the workshop area of the casita. It was there cause the shed was being used as a shearing shed when we bought here. When we cleaned the place up and put in a new floor, we didn’t worry about removing the entire fence. Its been handy for tossing horse rugs and even hanging saddles off.
The problem of putting saddles over the fence, however, was that they took up space on both sides of the fence, thus limiting what I could do on the other side. So what I did was basically make a kind of saddle ‘tree’ to hang them off, thus limiting the spread…
I began by attaching a long piece of hardwood to the fence in several places and up onto an exposed beam in the ceiling so it was secure. This became the ‘trunk’. I then made three triangles out of timber and attached them to the trunk, each one a ‘branch’ for one saddle. The bottom branch holds Wayne’s western saddle (very heavy) so that got an upright support as well.
To finish it off, I used an old piece of pipe I had, cut to length, to create a rounded rest for the protection of the saddle upholstery. Mind you, I also put saddle blankets over the pipe and over the saddles for added protection.

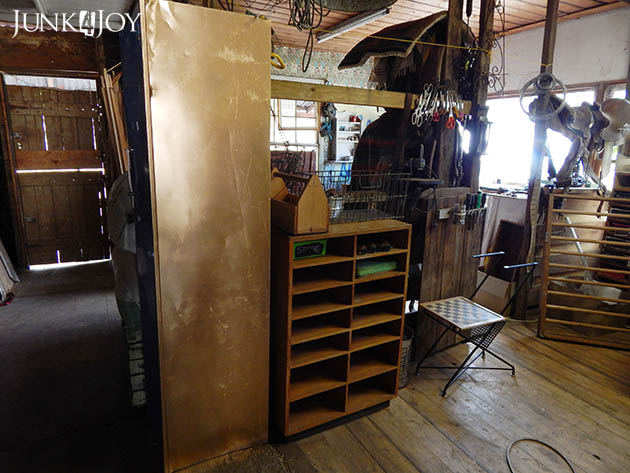
The other side – minus saddles hanging over, taking up space. I’m can now push cabinets and other things up against the fence and have more room to work.

While sprucing the place up, I even sprayed the side of this old locker gold for a bit of class…

Looking good, in a messy/creative/working kind of way.

Of course, there’s always more to do. But the saddles have a home now, so cross that one off the list.

z

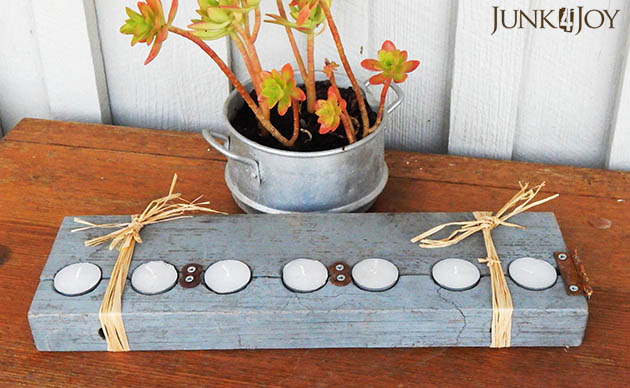
rustic tea light holder

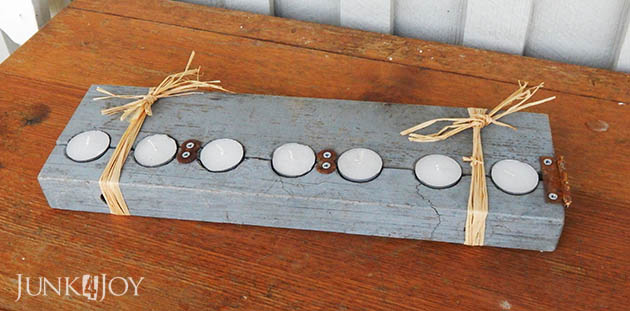
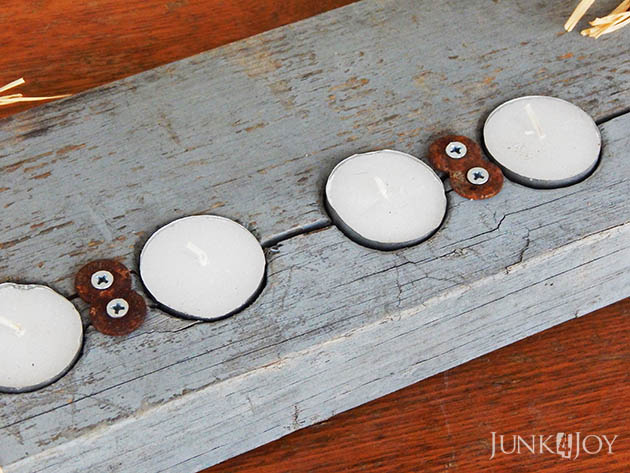
This is one of those projects I had lying around for ages. Its probably from some kind of gun safe, two bits of old timber with holes, just waiting for a makeover. I had it for so long I can’t remember where it came from.

I started making into a tea light holder a couple of years ago but then just left it in the shed till it got buried under piles of other projects ‘to do’.

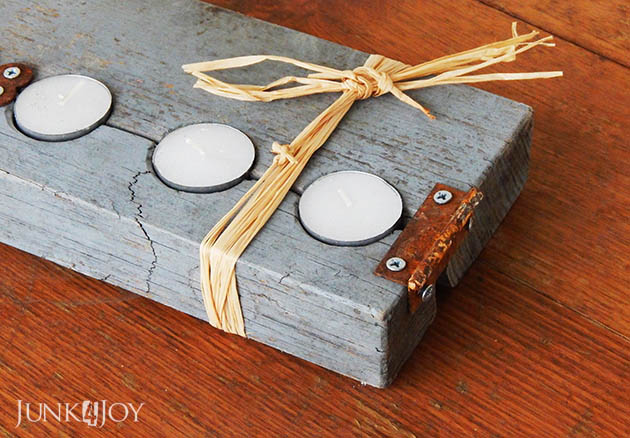
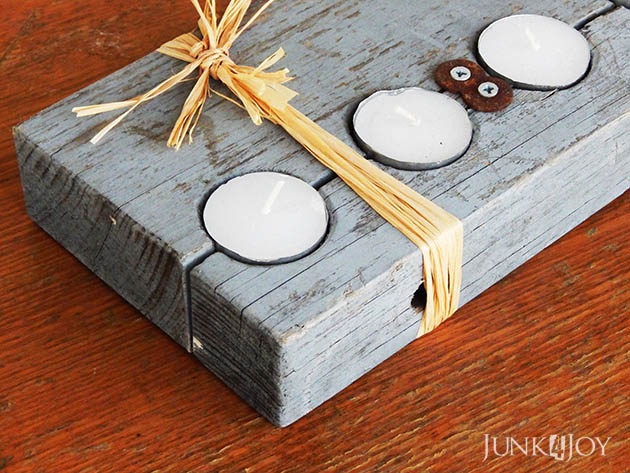
Then one day I just sort of got inspired to finish it with some nuts and a rusty hinge.

It might not be exactly fire safe as far as tea light holders go…. but hey! You can put LED tea lights in it!

And its rustic and cute.

Those things count for a lot in my world.

I took it to a local shop and it sold straight away.

So there you go. Rustic and cute won out over fire safe for someone other than me!

Meanwhile I know its been a long time since I posted last. The cataract surgery in my right eye was not easy to get over. For the last month I’ve had tired eyes, dry eye, blurry vision and I’ve just been too tired to do anything online or any craft at all.

Luckily, my left eye, which was done 2 days ago, has been the total opposite. Its been a success from day one. Almost no pain after surgery, very little blurry vision or discomfort. Thank goodness as I was getting pretty depressed about the whole thing.

Both eyes are much better now and I can see well… except now my near vision is worse than it was before and I need to wear glasses (at least those magnifying ones from the chemist) in order to do any close up work. That means that sewing or fine craft work means glasses. Since I can’t get used to wearing glasses and looking up OVER them rather than through them, I get awful dizzy spells when I wear them. I’m sure I’ll get used to it.

The good news is that apparently my eyesight won’t get any worse from this point on so I’ll have plenty of time to get used to the new eyes.

z

horses in the garden

Long ago I said that I’d never have a nice garden cause we kept letting the horses into the yard. I loved having them in there and they loved the time with us.

Then I put in garden beds cause I wanted flowers and pretty stuff, and I banished the horses.

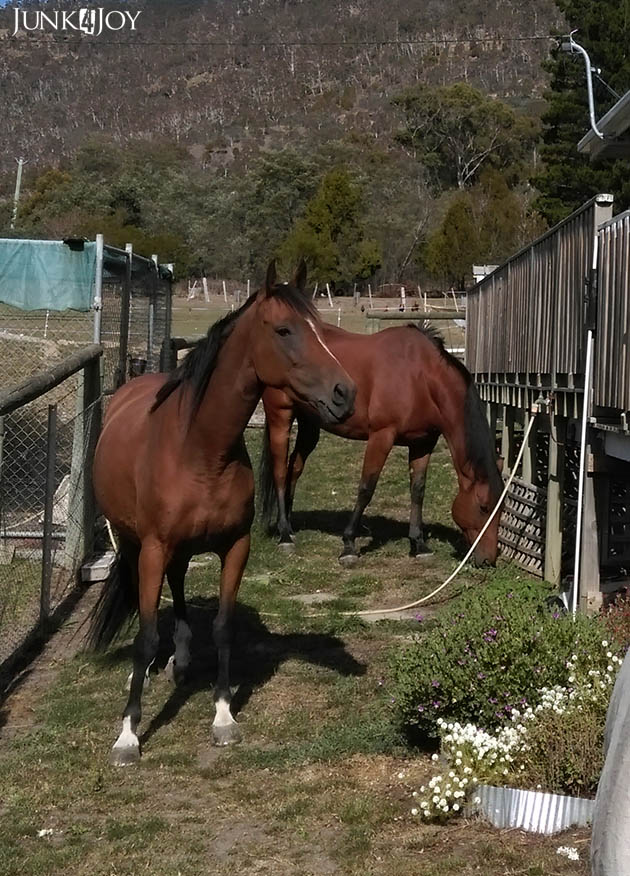
Well, the other day the horses were back.

First time it was an accident. Wayne drove ol’ Blue from the paddock into the yard and the horses followed him. Opportunists that they are.

They’d been eyeing off the greener grass on our side of the fence for ages and there was no way they were letting that opportunity go by without grasping it.

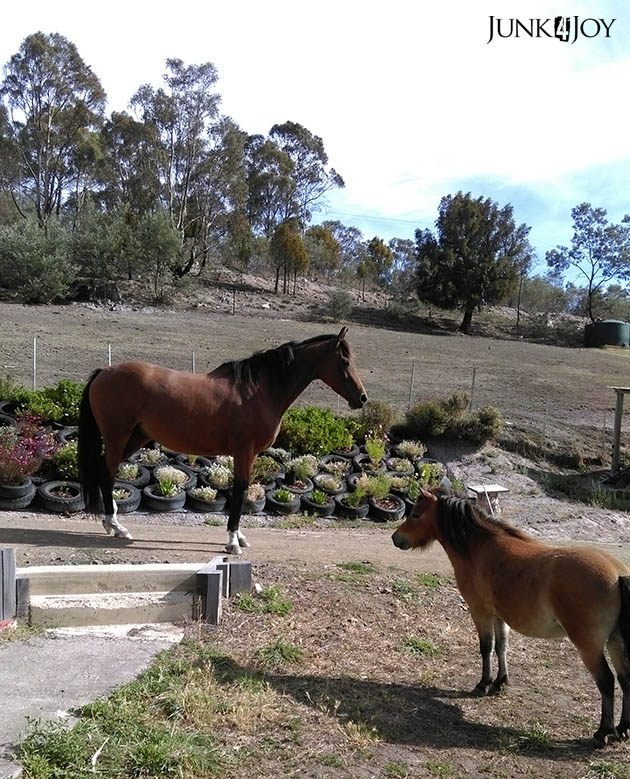
Yeah. Its not that green. But take a look at the paddock beyond them. That’ll give you an idea. At least in the yard there were clumps of clover and tufts of that grass that isn’t lawn.

We had to keep an eye on them of course. Every time one of them so much as looked at a flower sideways, expletives would rain down on them from two directions. Luckily, the green clumps and clover were more than enough for them and no flowers were lost in the visit.

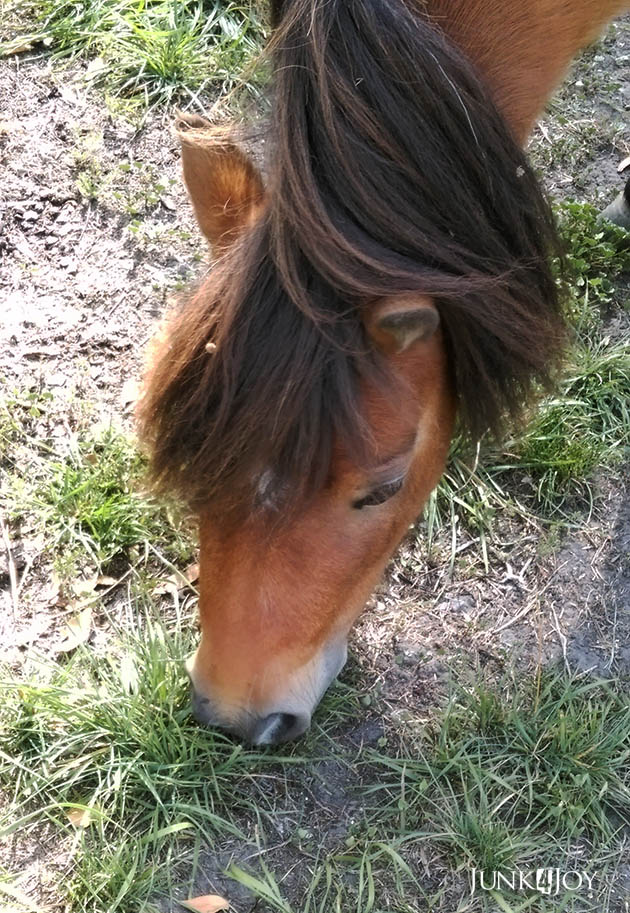
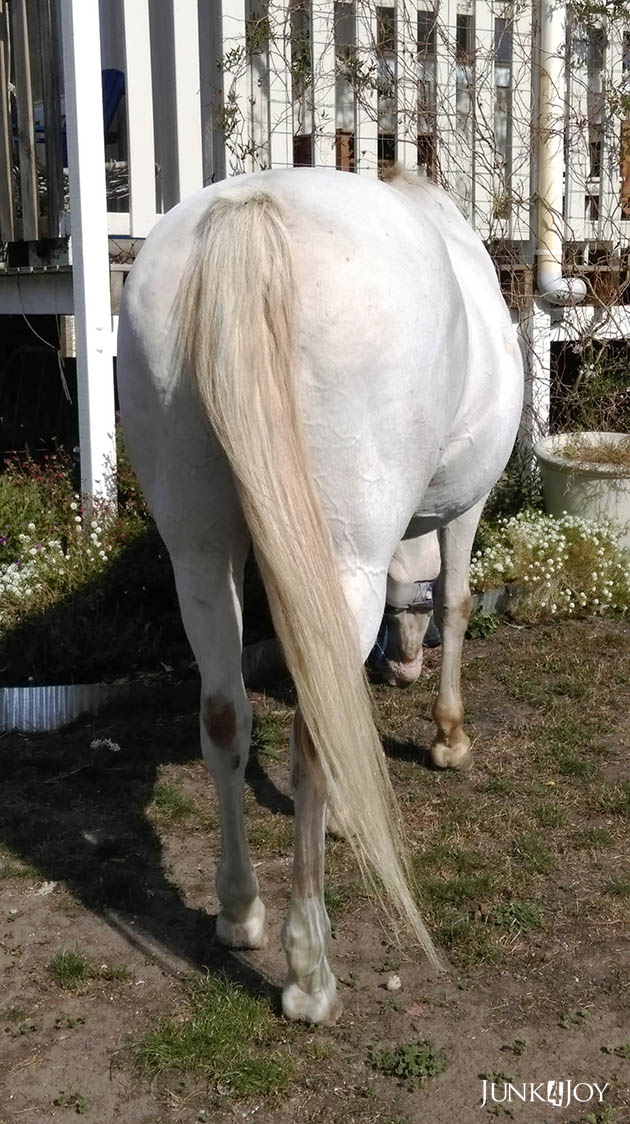
There’s something so lovely about having horses in the yard. I love giving them a pat as they wander past and watching the dust poof off them. I love the sound of them chewing. I also rather like their help with “mowing”.

And I love horse butts. So strong and round.

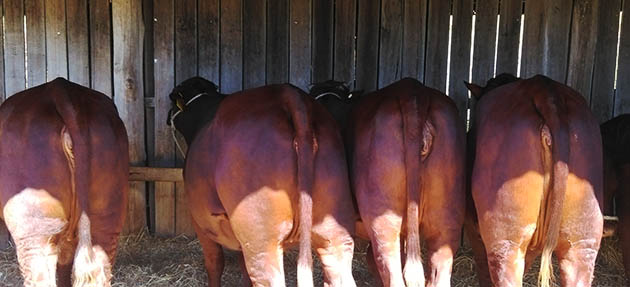
Almost as good as cow butts.

Taken at the Hamilton Show yesterday. I got to pat a lot of cows and a lot of beautiful horses.

Life in the country is good!

z

new cabinet for the grooming room

New, old, whatever. Its the same thing to me.

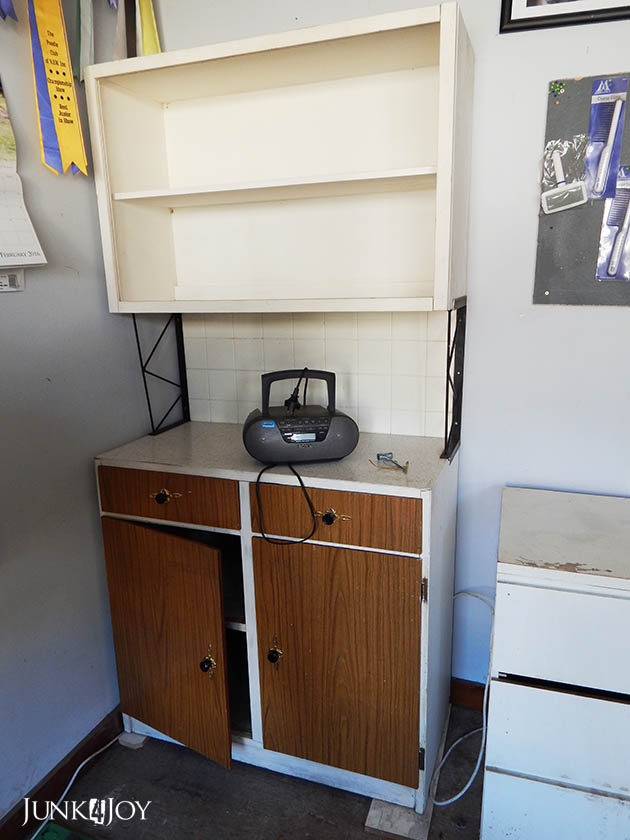
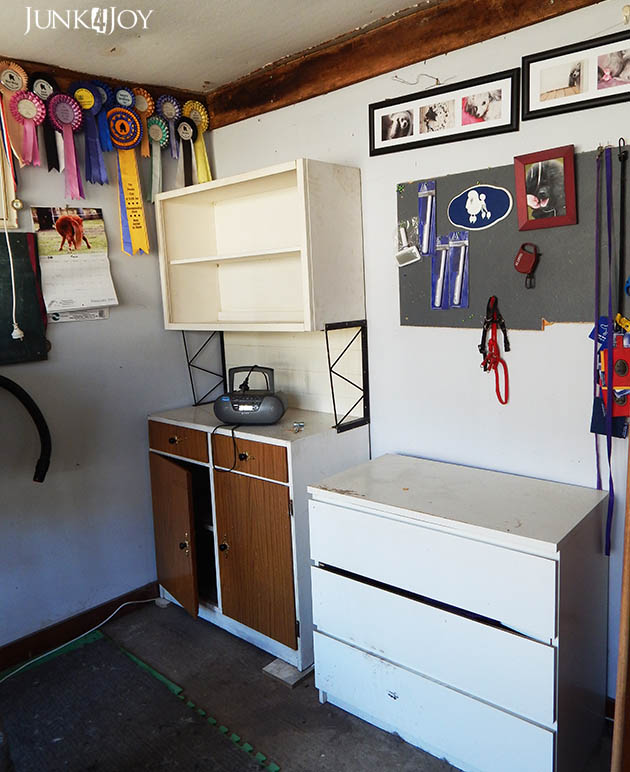
Its the new cabinet for my grooming room. Up till recently I had a monstrous pink bookcase/desk combination in that spot. Nothing wrong with it… other than it was pink.

In fact, I gave the pink bookcase to a friend who’s using it as extra storage space in her kitchen. Of course she’ll repaint it.

But for my grooming room, I like this better! It reminds me of a gorgeous old kitchen cabinet thing I had in Melbourne. That one was bigger – 3 cupboards and drawers. And it had etched glass in the top bit. I bought it at the Salvation Army and it was original yellowed white paint with the same fake dark timber doors. I painted the doors pale yellow. left the naturally antiqued white, changed the handles and adored it. Unfortunately when I moved to Tasmania there was nowhere to put it in my new house so I gave it to a friend.

I believe in what goes around comes around. I gave someone something I loved, I got something from someone else.

Now I have this cute little old cabinet for the grooming room. Maybe I’ll repaint it one day. Maybe not. The fact that its smaller and not so PINK means that corner is already brighter.

These photos were taken before I filled the shelves with my myriad tools and potions. The room even looks sort of tidy and organised.

I like it.

The other side (the one I didn’t photograph) is stacked full of stuff I took out of the silver shed…

I cleaned out the silver shed, then filled it right back up with a friend’s stuff.

I’m not good at empty spaces.

Its a character flaw.

The friend who’s stuff I’m storing is the friend who gave me this little cabinet.

What goes around, comes around.

z