Unknown's avatar

About zefiart

Blogger, DIY-er, poodle lover, graphic designer, dog groomer, recycler, artist, wonder woman in my spare time.

my new office, or while the cat’s away, the mice will play

 
Welcome to my new office.
Thing is, I had a nice office before. Let me remind you what it used to look like…
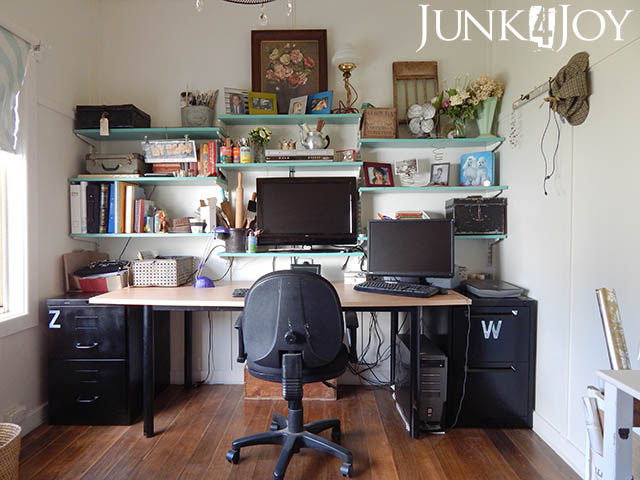
The office used to be the room beyond the bathroom, the room furthest from the living room. When making it over I ripped out the carpet and finished the floorboards, painted the peach blind, painted the walls, put up shelving… I did a lot of work making it a gorgeous room.
Then I never used it.
It was cold in winter. I used it as a store room. I’d open the door, toss something in, then close it again.
Meanwhile, the guest room was depressing. I painted it taupe when we moved in and its a dark room, with a small window. It was gloomy. On the down side the room was unwelcoming. On the up side, none of our visitors stayed long. 🙂
Anyway, I got the idea to swap the rooms. Make the guest room the prettier room, with the big window, lots of light and fresh air. Bring the office closer to the heater, with the carpet to keep it warmer, and make it more usable.
I began operation Room Swap on Friday, once Wayne had gone off to spend a weekend with friends watching the Grand Final and male bonding.
Here is what the guest room looked like once I removed almost everything and before I began painting.
I started painting before I got the bed out cause I needed help to do that. The colour I chose was Dulux Mountain Snow half strength. Its a much cooler white than the one I chose for the kitchen. It might be a bit stark with its undertones of grey, but I really wanted to crisp up the room. The taupe was really getting me down. Here it is after one coat on the bottom part.
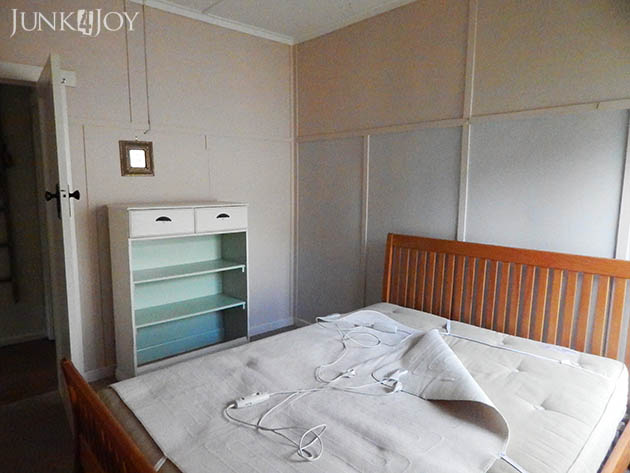
After 2 coats.
And here it is finished. Its very white and bright, especially since I haven’t got any window coverings.
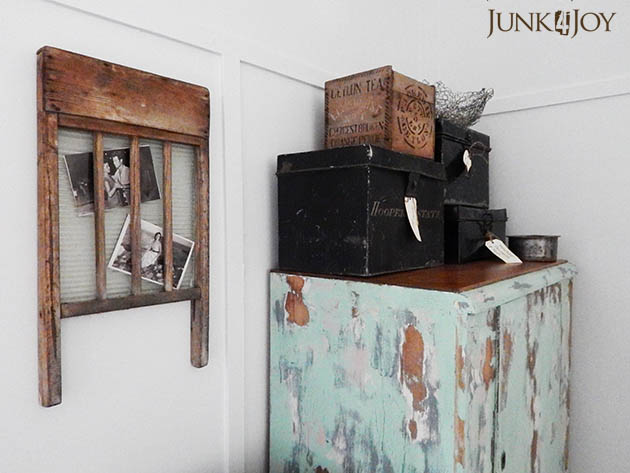
Here is the same corner once the room was finished. Notice my new wardrobe? I’ve put shelves in it and am using it to store craft stuff. I’ve never distressed anything this much before and I’m not sure I got the balance quite right.
The desk I was using in the old office wouldn’t go through the door to the new office, so I had to make do using the filing cabinets and an old shed door.
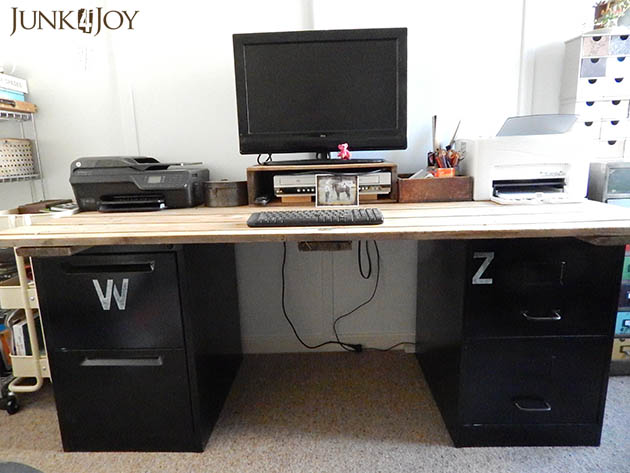
All I did was sand the door, it hasn’t been finished in any way. I used an old crate to hold the dvd player and the TV I use as a large monitor. I no longer have a desktop and just connect the laptop to the TV when I need a bigger monitor.
Its a work in progress. I’m not showing you the other side as its still a bit of a mess, with things which need proper homes.

I love how the light comes in through that window and how bright the room looks in all white. Though it is hard to photograph it.

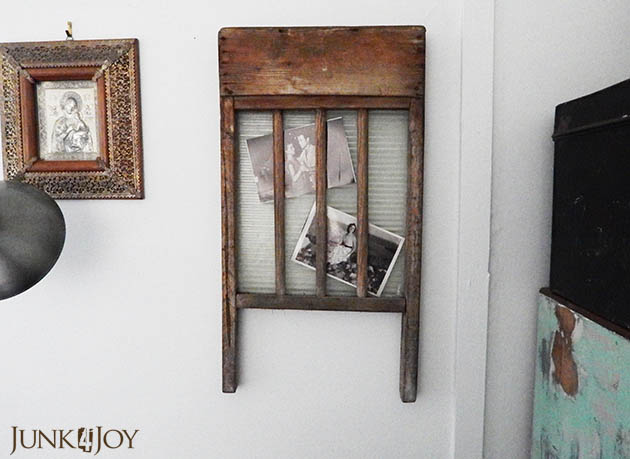
My favourite part of the room is the wardrobe and armchair. And the old wash board with photos of my mom. Even the old icon my aunt gave me when I was in Greece last time.
It took me all weekend. I just finished this afternoon, finally got (almost) everything out of the living room and cleaned the rest of the house. I have not finished the guest room… yet.
Here’s a preview of the new guest room…

I told you I’ve been busy.
z

Shared at:

a cute paper towel roll holder

Do you ever get sick of all the things that seem to gather and multiply on your kitchen bench? I do.

And one of those things is the $2 wire paper towel roll holder I’ve had for years. It gets shuffled over this way and that but its always there, another bit of clutter.

So while I’ve been running around moving furniture and painting rooms (more on that later) I got sidetracked and made a new roll holder.

I’m like a magpie with ADD when I’m busy, but I got inspired when I was looking for something in my workshop and knocked down a pile of wooden junk useful items I’ve collected. Among them were these spindles which I looked at and thought, “hm… that’d make a great paper towel roll holder…”

I had the perfect cast iron bracket (only one) so I cut a bit of timber for the top. Naturally I painted it the minty green I’ve used in my kitchen as a highlight colour.

It was all going great till I realised I’d cut the spindle too short.

I do this all the time! Nothing I make is ever quite perfect. Its always a bit off or a bit too long or a bit crooked… I did measure. I just cut off the wrong end of the spindle to the right height…,

In full solution mode, I looked around for something to add length. I have a broken shovel handle which was perfect. I cut a slice off that and joined it all together.

… I won’t bore you with details, lets just say it wasn’t pretty. The result is this odd looking chunk of wood at the bottom but guess what? It works! The thicker bottom bit holds the roll in place so it doesn’t rattle around too much.

I capped it off with one of the knobs from my kitchen cupboards (again, a little crooked cause I can’t drill a straight hole…)

My methods aren’t exactly professional, but in the end it worked out great.

When I asked Wayne if he liked it, he said “Its cute.”

I’m pleased with how it turned out. Now I just have to put in the shelves above the coffee tray and the kitchen will be finished.

After 2 years.

Meanwhile, I know I’ve been really silent on the blog. I’ve got great excuses. Firstly I was sick with a bad flu for about 2 weeks. I felt lousy and really didn’t feel like doing anything at all, must less finding interesting things to post about.

Then I went to Victoria for a week, where I stayed with a friend and groomed her toy poodles for 3 big shows. The shows went great, I got a good fix of toy poodle love and then I got back to work just in time for a week off!

Way to plan! 🙂

My week off has been flat out. Grooming dogs I had to put off while I was away or sick. Swapping out the office and guest room. Painting walls. Moving furniture. Mowing grass that seems to grow a foot overnight. Replacing plants which didn’t make it through winter.

I’ll leave you with some photos of the poodles I groomed – I love the smell of hair spray on poodles!

Armani
Kismet
Zena

I miss having a toy poodle… I almost stole a baby puppy Iris had at home. Maybe one day again…

z

Shared at:
a wire teapot

What do you get someone who has everything?

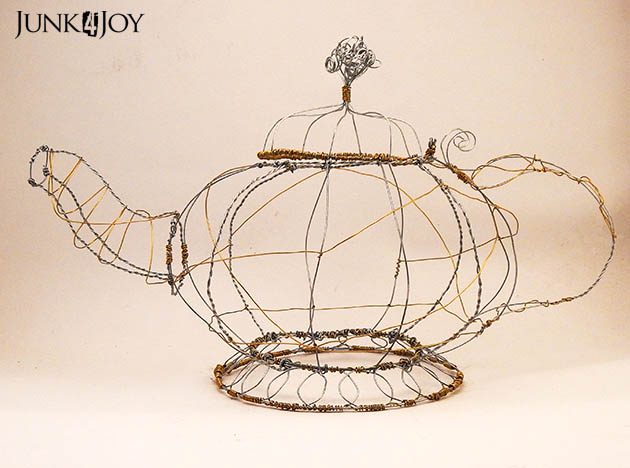
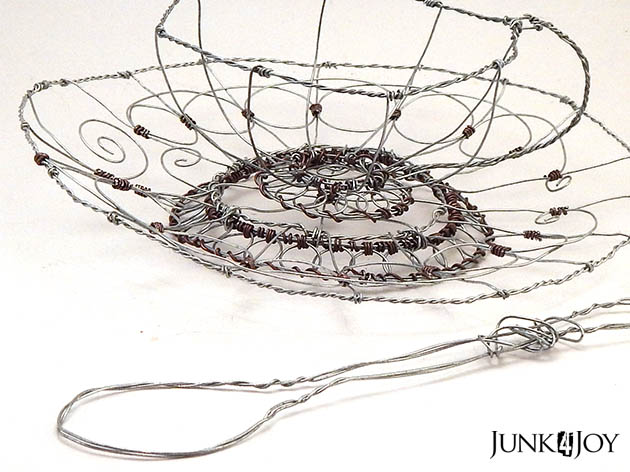
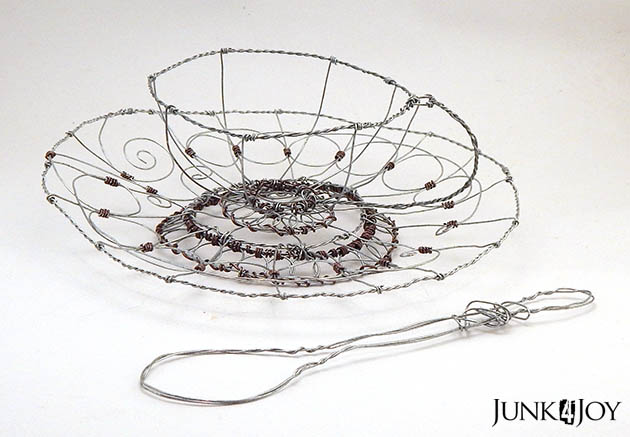
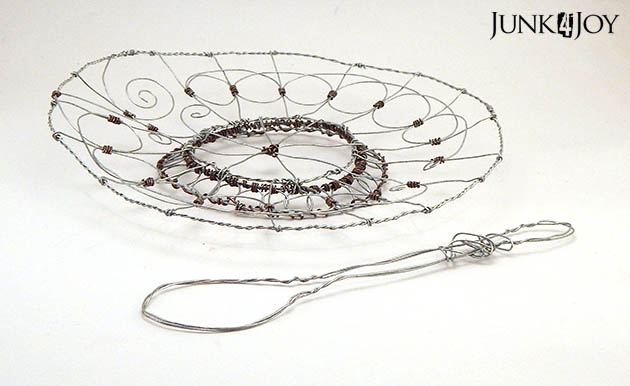
A proper sized teapot made of wire of course!

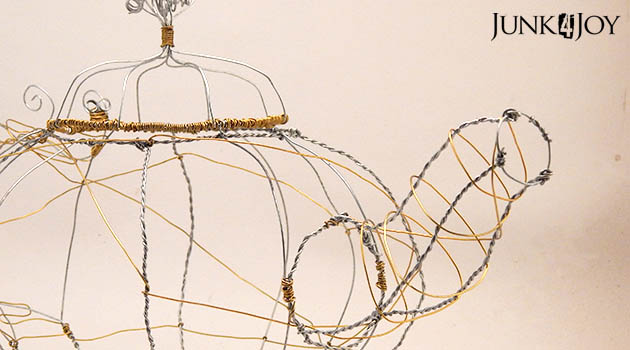
This little beauty is made of a combination of galvanised and copper wires. 

I had planned to enter this in a competition but changed my mind. Its now for sale at the Handmade Emporium in New Norfolk along with other items I’ve made.

z

subway sign for a baby’s room

I’ve always loved subway sign art in general, and having one with baby’s details on it would be the perfect gift.

When my brother’s partner had a baby earlier this year I had the perfect excuse for creating my own subway art for his bedroom.

I found on an online store which does canvas prints and got measurements for one of their canvases. I used Adobe Illustrator to design the sign to the right size. It was like a jigsaw puzzle, fitting the words in together.

I love doing stuff like that.

Once I had the artwork finished I saved the file as a jpg and uploaded it to the site, selected the canvas size I wanted, made sure it looked how I wanted and ordered it.

Its a decent size at 16 x 20 inches.

It arrived last week and I’ve got it all packed up to go.

How cool is this going to look in baby Angelo’s room?

z

simple jug suncatchers

There is nothing new to share, but since I have a bit of time (nothing but time) I figured it was time to catch up on some projects I’ve had to share for ages.

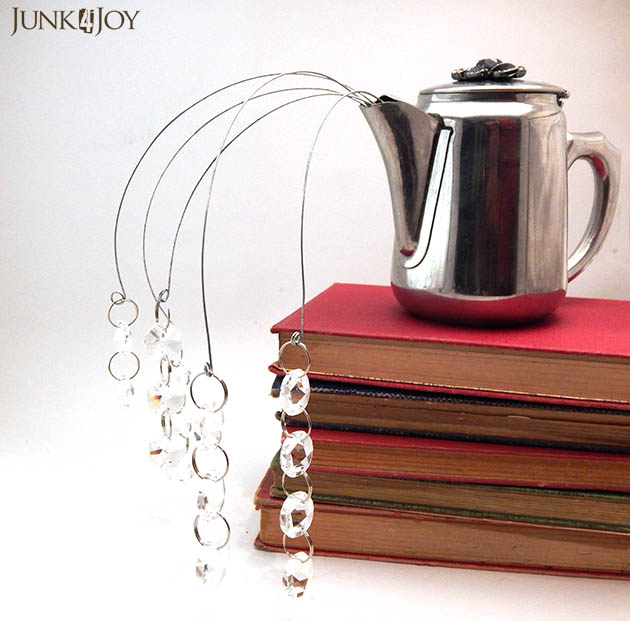
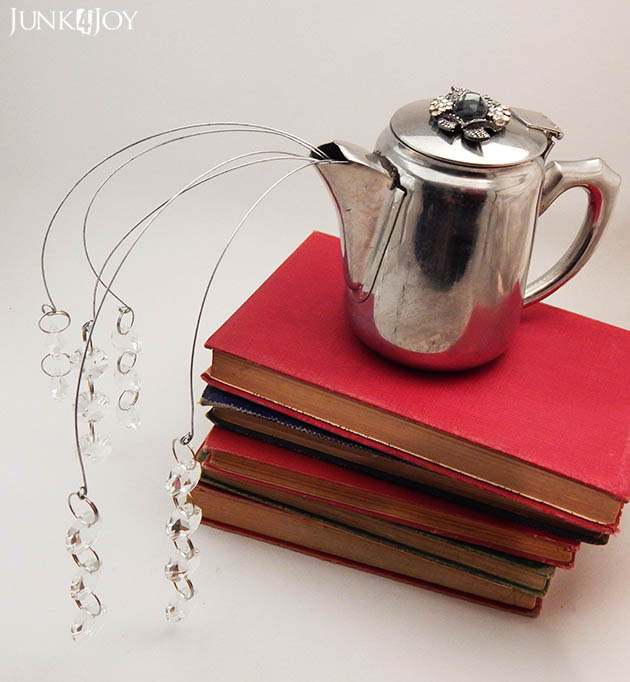
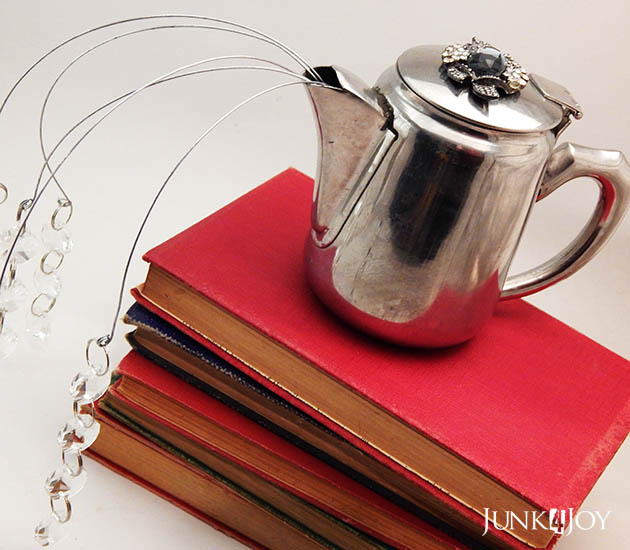
Below are a couple of simple stainless steel jug suncatchers. I made these as part of a commission for a birthday gift. Basically I had an order for one so I figured I may as well make two while I was at it.

They’re really, really simple.

1. Find stainless steel coffee pots, milk or water jugs at an op shop.

2. Bend wire into spout.

3. Attach chandelier crystals (or beads, or whatever you want) to the wire.

4. Admire.

The second one had a broken knob on top so I glued on a broken earring for added bling.

Easy and pretty. Normally I’d use old teapots but my collection was low on those so I used what I had.

Another variation, for when you have a jug without a lid, would be to put a succulent in the pot – suncatcher with plant! What more could a girl want?

z

not quite what i envisioned

The title was meant to refer to the project below, but its now also referring to my weekend… my week…

Its definitely not what I envisioned. I had plans to groom and work in the casita, tidy the house (which needs it, believe me) and generally be active. Instead, I’ve been in and out of bed since Thursday.

Seems I have one of those illusive flu bugs going around. It started with a kind of premonition type pain in my head and throat on Monday night. Tuesday I had headaches and a dry cough. Wednesday I was getting chills, coughing and sneezing and feeling irritable.

Then Thursday I woke up with a chesty cough and feeling like I’d been hit by a bus. I stayed at home most of the day but had to go to the chemist in town.

I thought that taking a day off would nip it in the bud and I’d be back at work on Friday…. Uhuh. I woke up worse on Friday. So I went to the doctor. She gave me some antibiotics just in case there’s a bacterial component, said drink lots of fluids, don’t skip eating and rest, rest, rest.

I’ve had to cancel all the grooming appointments I had this weekend and the worst of it is I don’t even have the energy to work on my own craft projects in the comfort of my armchair!

What makes it worse is that I’m having elective surgery on Tuesday so I need to be well by then… and then I’ll be recovering from that!

Talk about it all hitting at once.

But enough of my woes. Thought I’d share something with you that didn’t turn out as planned and, though its not a total failure, it sure ain’t what I envisioned.

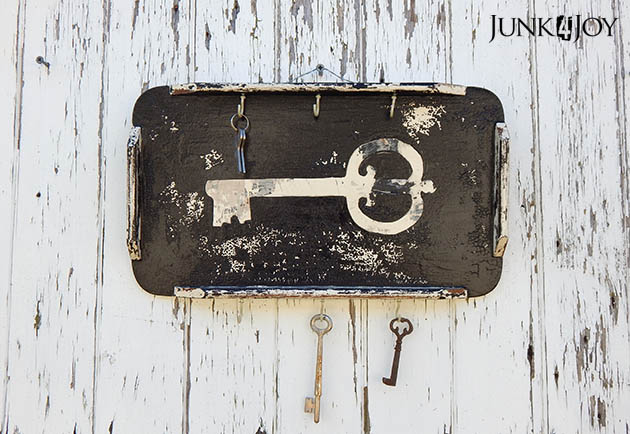
I had this little tray. I wanted to make it into a key rack. So far so good, right? Easy.

It was painted in a cream oil paint with some acrylic over it, not very good, so I sanded it, cut out a key shape in contact paper, then sprayed it using a black and then ivory. I sprayed the hooks ivory as well.

I then sanded it back to distress it.

I hated it. It was bland.

So I decided to use oil based blackboard paint to liven it up.

This is what happened:

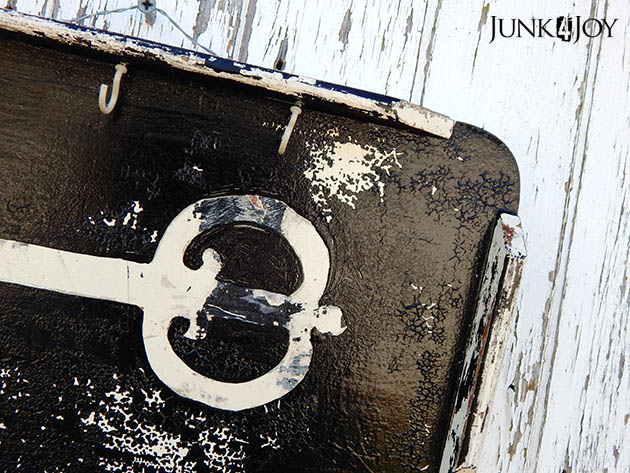
The paint just chipped off!

Ok. I love chippy paint, but I didn’t want to lose it all!

So I rubbed off the loosest paint, then sprayed it all with clear varnish.

The chips are now stable. And the whole thing is gloss.
Oh well, can’t have everything!
I put the hooks in (drilling into the side like that was a challenge and the hooks are all crooked as you can see…) and put a wire hanger behind it.
It is what it is.
Someone might love it.
I hope!
z

a hardworking little box

Guess what?

This post isn’t about something made with wire!

This is a little project I’ve had on the go for quite a while… Took me ages to finish it, then ages to get around to photographing it. But here it is…

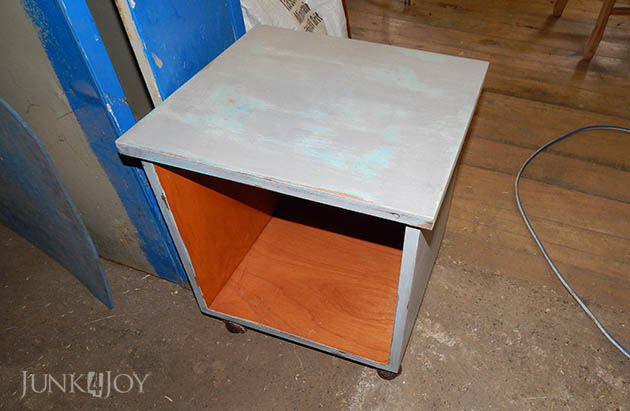
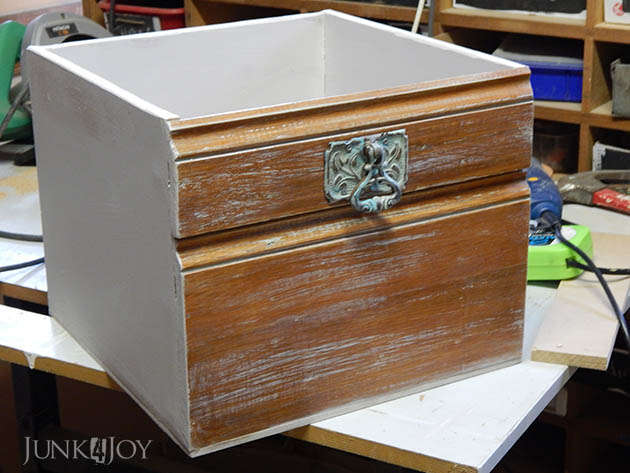
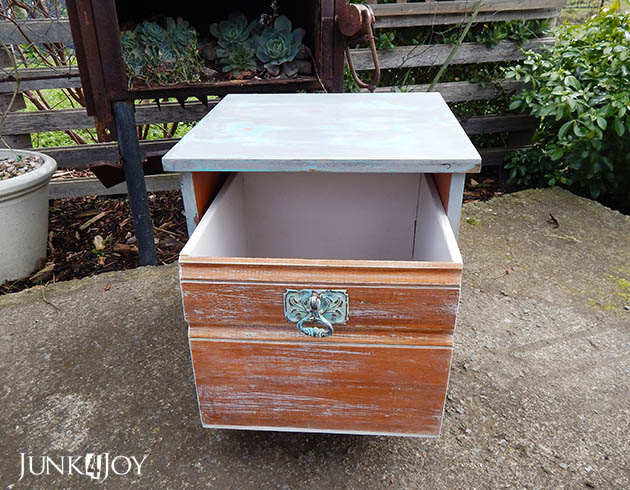
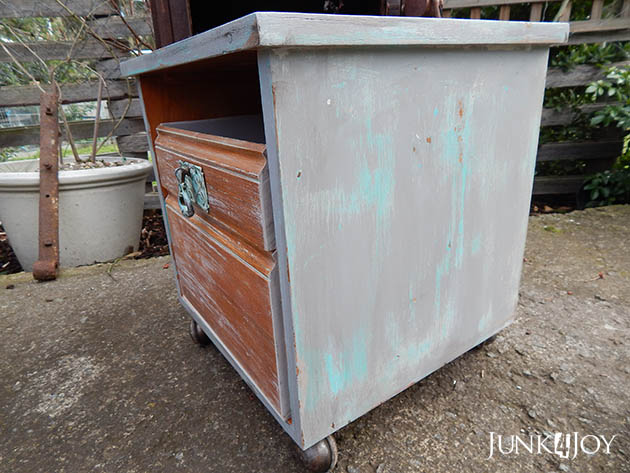
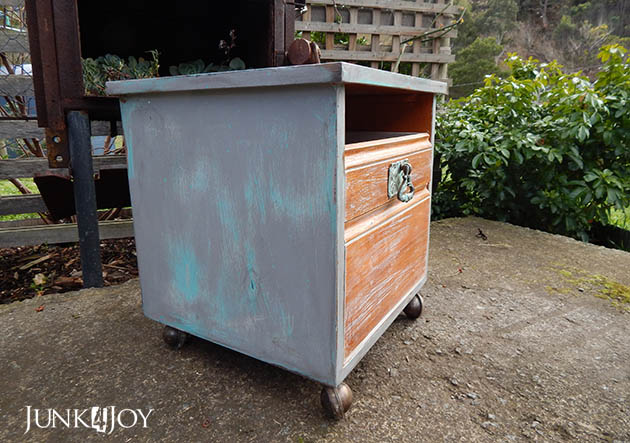
I started with a plain box on castors I picked up at a tip shop. I couldn’t find any before photos and, natually, I didn’t take any before I began work on it. It was all the same colour you can see inside in the pic below – an orangey stained timber.

Yeech.

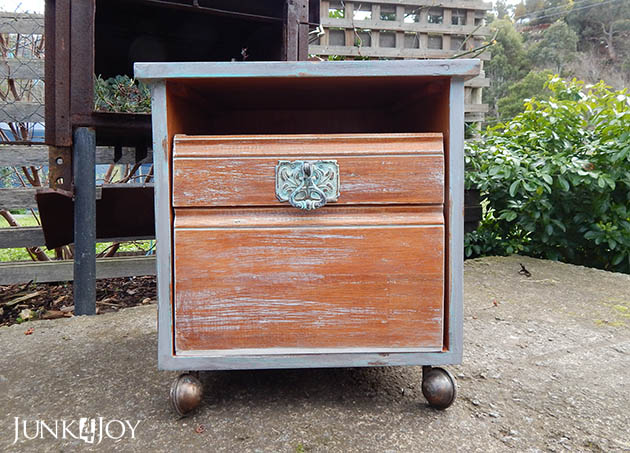
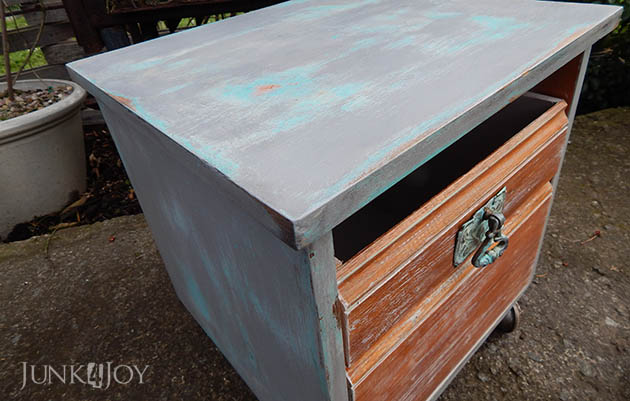
First thing I did was sand back the outside and give it a coat of paint.
Or four.
I started with white, then pink, then turquoise and lastly a pale grey. Mainly cause I couldn’t make up my mind, but also cause I wanted it to look patchy.
That was the easy bit. Then I had to make a box for the drawer. In theory, how hard is it to make a box?
hmph,
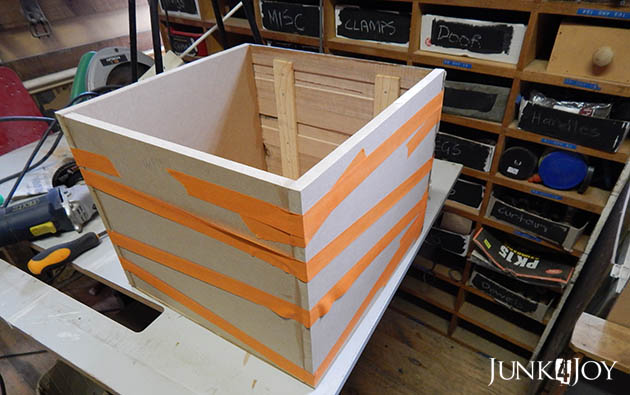
I made the front using a collection of timber bits from the hardware store bin. Then I used some 12mm MDF to put the box together. I cut the pieces, put glue on them, then delicately balanced it all together and used masking tape to hold it together till it dried.
Yes. Masking tape.
What do you use?

Here’s the front view of the box – its made up of three offcuts glued and nailed together, then stained to match the interior orangey colour. I also dry brushed the front with some of the grey.

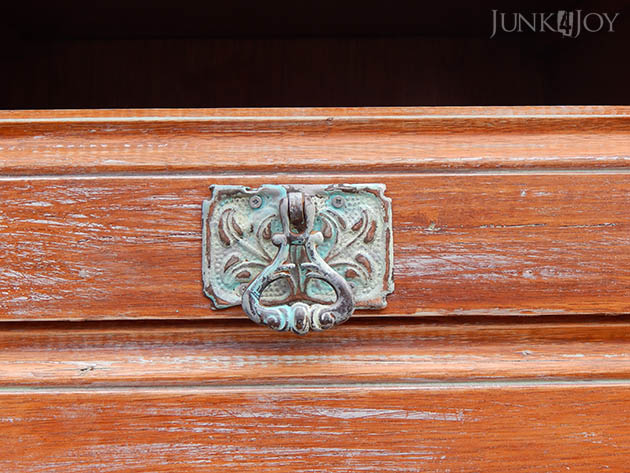
I chose a rusty antique handle from my collection. It had some green patina on it but I added to it to give it more character.

Here it is finished.

Not bad for a project that took me something like 3 months to finish…

So, what would you use it for? A handy side table with storage. A bedside table for a futon bed. Put a cushion on it and its a footstool.
I’m sure it’ll come in useful for something!

z

rustic windchime

So much for my plans of posting a bit more regularly. All the best intentions and all that… things just get away from me.
I may have mentioned I’m currently working 5 days a week. I gotta tell you, I’m loving the extra money. What I’m not loving is the time squeeze on doing my own stuff.
I’ve got a couple of projects on the go in the casita, one is finished and just waiting for me to be at home during the day, preferably when its not raining, so I can take pics of it to share.
Perhaps tomorrow will be the lucky day!
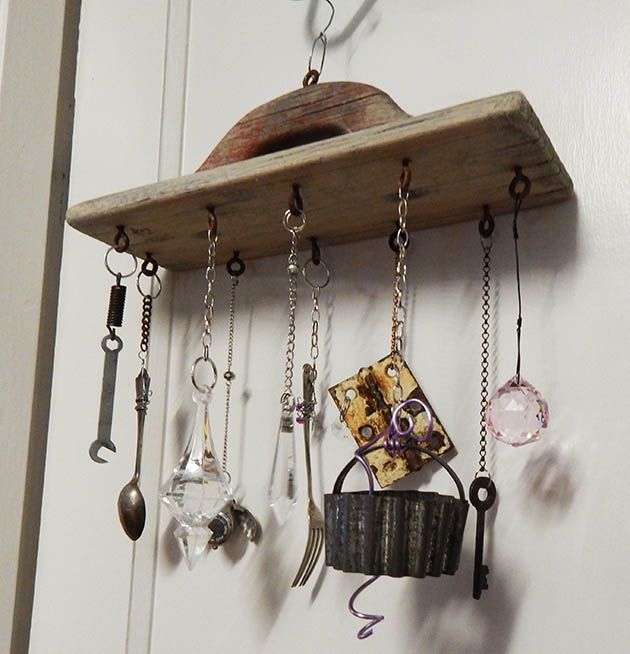
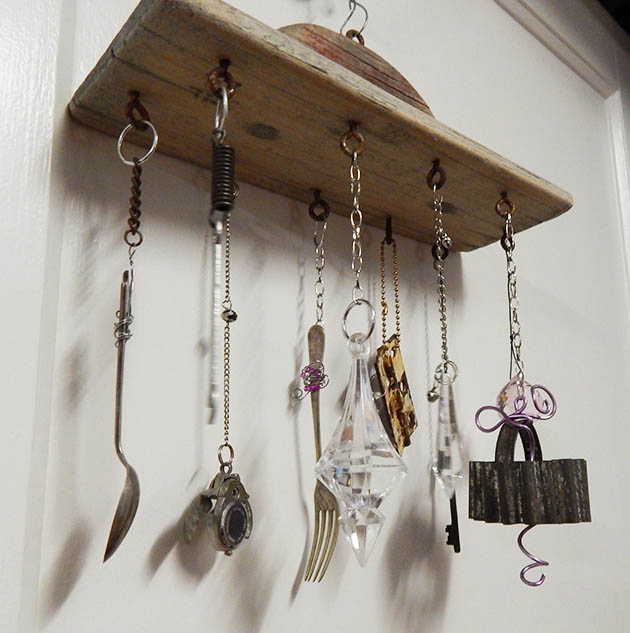
Meanwhile I thought I’d share my latest rustic windchime. I just love these things. I have the first one I ever made hanging in the middle of the living room cause the wind on the porch almost destroyed it. I think I’ll be moving it to the mudroom or enclosed porch when I remember to do it.
I find these old hand sanders in tip shops occasionally and collect them. I then use my pre-rusted eye screws to hang all kinds of junk from them. I love to add some crystals for a bit of sparkle and copper wire for a bit of colour.

I still haven’t cleaned up the office or moved things around as planned. Without a working light in there its kind of hard to do anything in the evening, but honestly, its such a mess in there that it fries me brain if I even think about tackling it.

Heck. I still haven’t put away the washing I folded last weekend. Every time I need undies or socks I just grab them out of the basket, why bother putting them in the drawers?

Sigh.

I’m not a very good housewife. Turns out my grandmother was right. She said that if I couldn’t iron properly I’d never make a good wife and no one would want to marry me.

Right on both counts!

Anyway, I don’t iron – well or otherwise. If I can’t wash and wear it, I don’t buy it.

But I did learn something from my mother: if you hang things on the line properly (and fold them!) then you don’t need to iron.

Turns out she hated ironing too.

z

Featured at:
more wire work and plans

Sharing more pretty wire stuff.

Just cause I can.

And mainly cause right now its about the only thing I have which is both finished and photographed.

Last weekend I’d planned to clean up the office (again) and bring in the new/old wardrobe I want to use in there for storage.

The office hardly gets used any more. Not since I got a laptop and got rid of the ol’ coal burner (my old desktop) and since winter set in.
See, the office is the furthest room from the wood heater. Its darn cold in there in winter. When I had the desktop in there and I had to use it every day, I kept the door opened all the time and had a small bar heater under the desk for my feet. Even then my fingers would often freeze.

I’ve decided I should swap the guest room and office. The guest room is a dull room right now. Its got a beigey brown carpet, taupe walls, a small window, the bed and tons of stuff I have to move out whenever we have visitors.
The office on the other hand is pretty. I removed the salmon carpet, did up the floorboards to match the kitchen and hallway, painted it white so its bright and cheerful, and it has a huge window which lets in the morning sun.

I’m thinking about putting the bed under the shelves and opposite the large antique map. The office is a long narrow room, meaning there’ll be just enough room on either side of the bed for a bedside table, but the end of the room will be spacious enough to allow for the small cupboard I use as a linen cupboard. The map will make a great view from the bed and the shelves will look interesting around the bedhead.

The guest room is a square room with lots of wall space since it has such a small window. The carpet keeps it warmer in winter, and since its not salmon it can stay a while. Being closer to the wood heater means less chance of freezing fingers, plus its closer to the wifi modem. I want to move the printer, the printer/scanner, and the odd office bits out of the living room and into the new office.

Its bad enough Wayne has an office in here and I work in here, we don’t need all the office stuff in here too.

So, last weekend I planned to clean up the office and bring up the new/old wardrobe to hold craft supplies as I mentioned. Then I thought, why move it up if I’m going to swap rooms? Makes no sense to move it twice, right?

I can’t swap rooms till I get rid of Wayne for a weekend, though. He doesn’t handle the mess of moving furniture well, and the swap would need the entire contents of the office and guest room being moved into the living room. A great time to do some really good cleaning, sorting and organising. I’ll paint the guest room white to make it less depressing before moving all the office stuff into it, and I can have fun decorating the new guest room.

All of which will take way more than one weekend to do!

sigh.

Meanwhile, today I wiped myself out. I’d done some grooming, had a late breakfast, then knuckled down to work. It was sunny so I pooper-scooped and tried weeding. The weeds won. There are just too many of them. Next time the weather is good enough I’m spraying the suckers.

I took apart our Whirlpool washing machine (I watched a Youtube video, how would you do it?) to try to sort out the annoying lint problem. Of course what I found in our washing machine wasn’t exactly like I saw on Youtube, but heck, it still works and the lint problem can’t be worse than it was! And it still works. That’s gotta be a win.

I made a drawer for the sidetable/box on castors I’ve been working on. I started on a cut down chair which will be a bedside table for the new guest room. I was busy sanding the chair when I was suddenly hit by a wave of exhaustion. I could barely walk to the house and it took all I had to shower and wash my hair.

Maybe it was low blood sugar. I totally ran out of fuel.

Tomorrow is another day. Remind me to eat lunch.

z

fairy bed

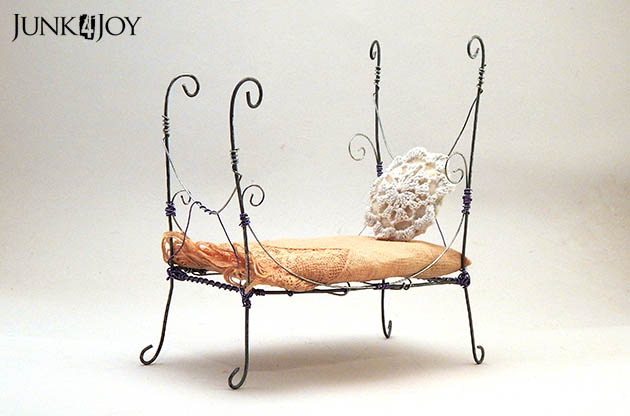
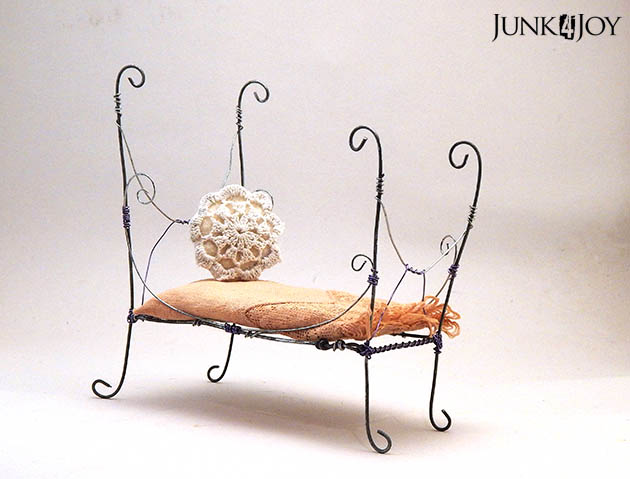
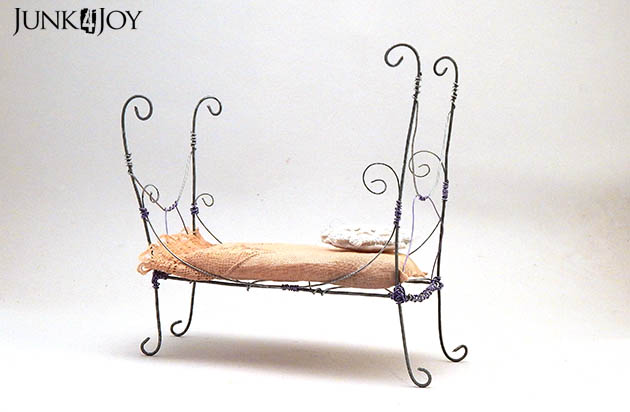
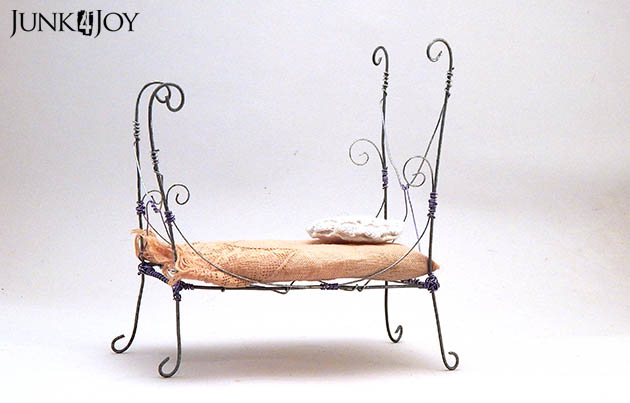
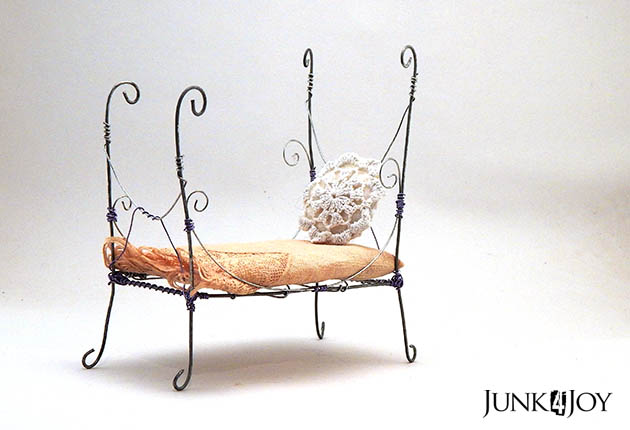
I just love these little wire beds. I love making them and I love looking at them.

How pretty is this?

Ok, so it might have no real use, unless you have a dollhouse or a visiting fairy, but its so delicate and fine and… just… well, pretty!

This is the second wire bed I’ve made and its a bit fancier than the first one. It has a mattress made from a tea dyed napkin – it was stained and in the throw out pile so I decided to use the best bits.

It also has a little ‘crochet’ cushion, made from a piece of doily.

I actually made this little bed a couple of months ago but didn’t have my ‘light box’ in the office where I could use it easily.

Plus, to make matters worse, I tried to change the pendant light in the office to test a new one, and ended up stuffing up the light fixture. I now have no light in the office.

I think I need an electrician.

In the end I rigged up two floor lamps, a desk lamp, a box and a white sheet and got some pics.

One of these days I might actually have a proper set up for taking photos of things. I just need good lighting like the kind I use when making films…

Anyway, I got pretty decent pics of the bed so I’m happy.

z