Unknown's avatar

About zefiart

Blogger, DIY-er, poodle lover, graphic designer, dog groomer, recycler, artist, wonder woman in my spare time.

not quite what I’d planned to do…

I had a plan.

I was going to do a ton of stuff while at home this week.

I was going to empty the office and sand and polish the floor. And the small hallway floor. And paint both spaces. And finish a couple of projects.

But I told myself, this was not the time to start new projects. I had to concentrate on the office. And hallway. The floors. And walls.

Well… I started on Sunday. It took me two days to empty the office of furniture. Mind you, I had to move it all somewhere, right? The living room seemed the most reasonable spot for it all.

Again.

Plus, I had to set up the old coal burner (my old pc) cause the new whiz bang laptop has gone to hospital. I think it had a loose cable in the hinge area which caused interference when I moved the monitor… which, by the very nature of a laptop, you do often. Not good.

Actually, it wasn’t just that… I’ve also got a sore back. Since last week. Just in time to do the hard work I’d planned. Great.

No wonder it took me 2 whole days to empty the office. No need to push myself too hard, right?

Being Superwoman, I’ve been working through the pain and not let it stop me, just slow me down.

I also spent a fair bit of time shopping on ebay.

Ugh. I just couldn’t stop!

I need an intervention… I shouldn’t be allowed near ebay…

Still, I’m getting there. I think. I’ll let you know soon.

z

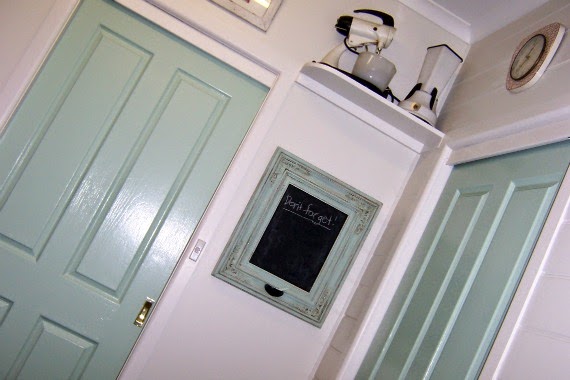
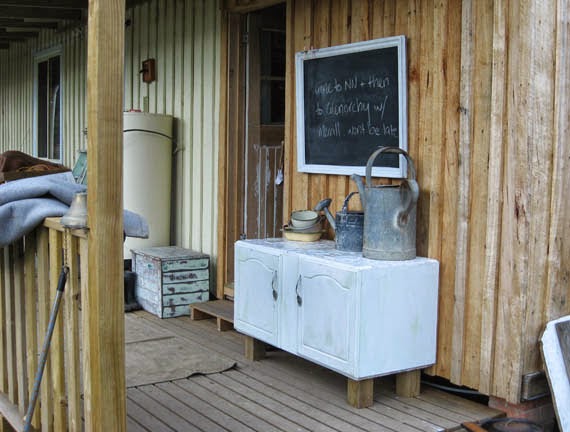
a new chalkboard for the new kitchen

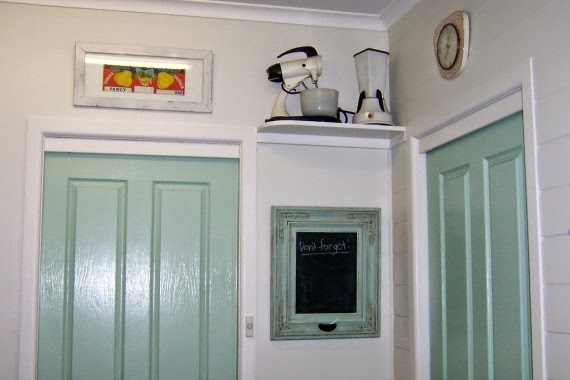
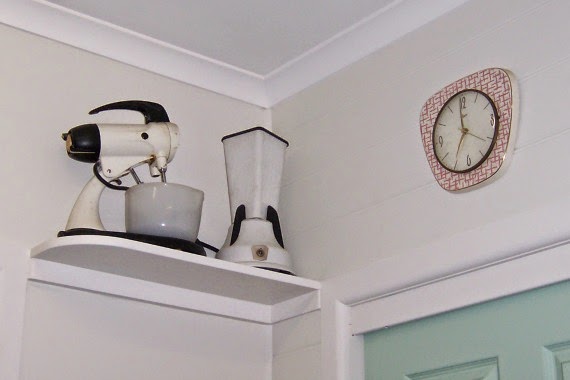
One of my friends said this corner of the kitchen looked wierd, with the little shelf and the mixers. Well, this corner is still the same as its always been since we bought the house. Only difference is its now a different colour.

And this narrow strip of wall always held a calendar.

Not even a really nice calendar most of the time.

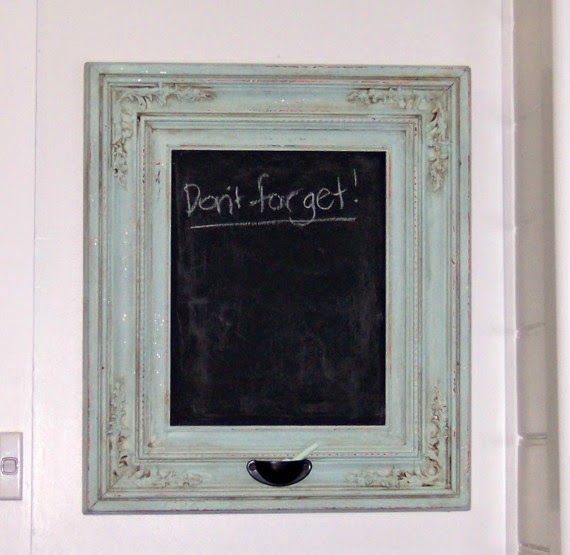
When planning the new kitchen in my mind, I always thought a new chalkboard would look nice there… for our shopping list.

We already have a long narrow shopping list chalkboard near the fridge, but I have something else planned for that spot. Plus, I wanted a much more elaborate frame for the kitchen and this one fit the bill.

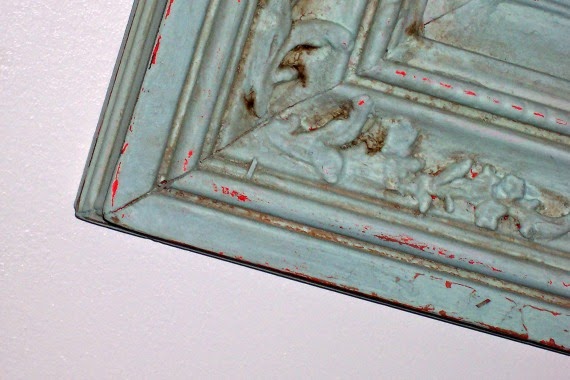
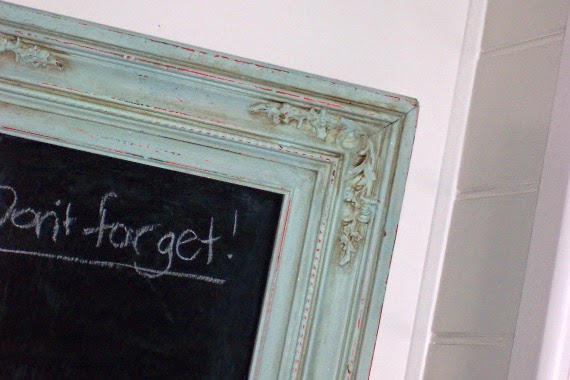
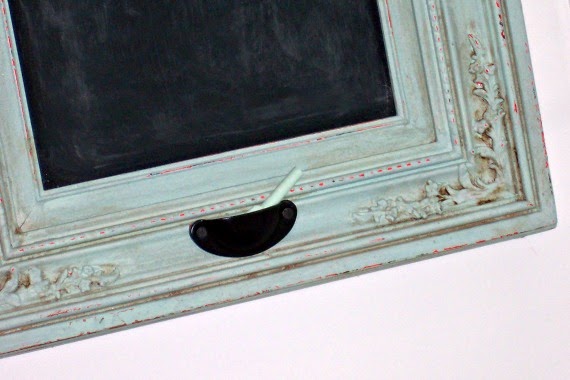
It had been painted a bright red before I got it and I thought that would make a nice contrast to the greeny/aqua colour I painted it. I used milk paint for the first coat and acrylic for the second. No idea why. It just seemed like a good idea at the time. It gave it a roughed up look which is fine by me. I added a little ‘age’ (or grime) with some burnt umber artist acrylic to make the details stand out a bit more.

Compared to our long shopping list chalkboard, this is pretty small. Maybe we’ll save money with smaller shopping lists… More likely we’ll just write smaller.

I used a drawer pull as a chalk holder. Old trick, yeah. But I had 10 of these pulls. I bought them for the kitchen drawers and when they arrived they were too small. Alright for my delicate girlie fingers, but not for Wayne’s manly ones.

In other words, I had spare drawer pulls, I may as well use them, right?

This is the only creative, house-related thing I managed to do all this weekend.

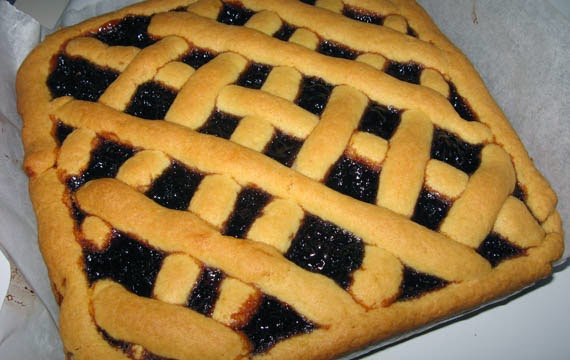
Though I did bake again! I made a pasta flora. Its a greek jam tart.

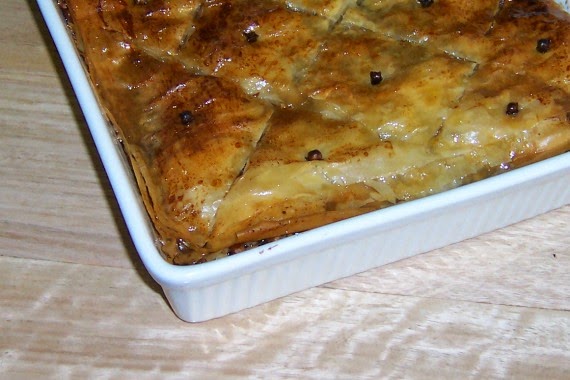
I also made another spanakopita cause I’m addicted. Sorry, no photos of that, but here’s a photo of the baclava I made last weekend.

Yum.

z

Shared at:

Beyond The Picket Fence

pom pom suite – more art from trash

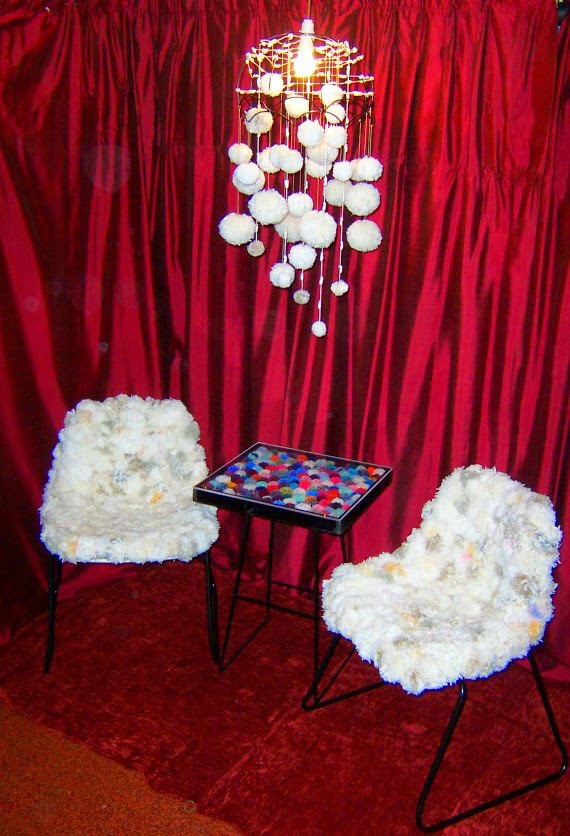
This is another entry in the Art From Trash Exhibition. This time its a collaborative piece (or pieces) made at work.
I work on different programs at work, and we try to enter interesting things in competitions when we can. This suite is something that took us almost a year to pull together.
The concept was inspired by an image I saw on Pinterest of a chair covered in coloured pom poms. I found two old plastic fabric covered chairs at the tip shop which were perfect for our project. I had the broken stool legs at home, as well as a shallow tray/box from previous tip shop explorations. 
With the help of a couple of ladies at work, we sanded off rust and spray painted all the metal work glossy black. And cleaned up the chairs.
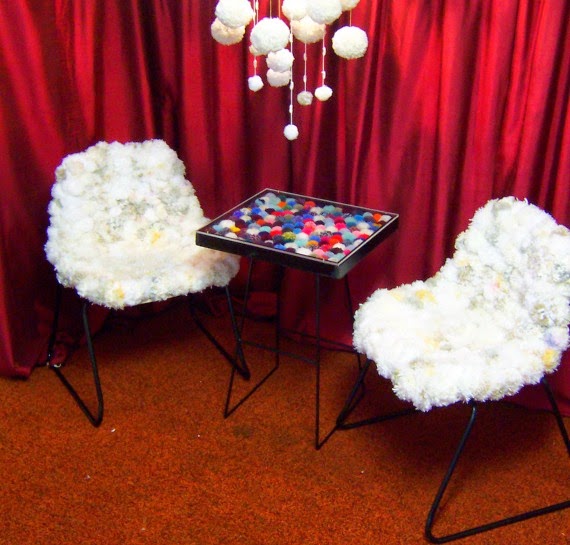
A whole lot of ladies helped make the billions of pom poms needed to cover the chairs. These were stitched into the chair upholstery to create very comfy padded seats.
We made heaps of tiny pom poms using the fork method I saw at Eclectically Vintage. These we put into the table top box, which we attached to the stool legs. I had a thick piece of perspex cut to size for the top, which is held on by screws.
We created a fun little sitting arrangement.
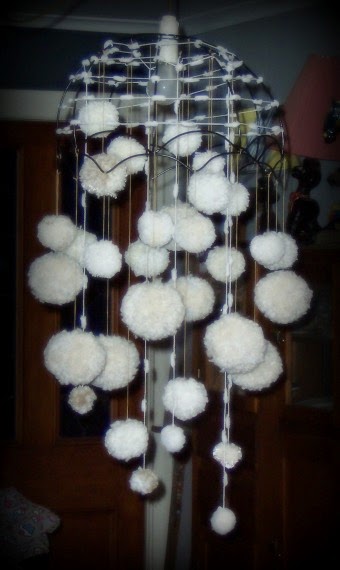
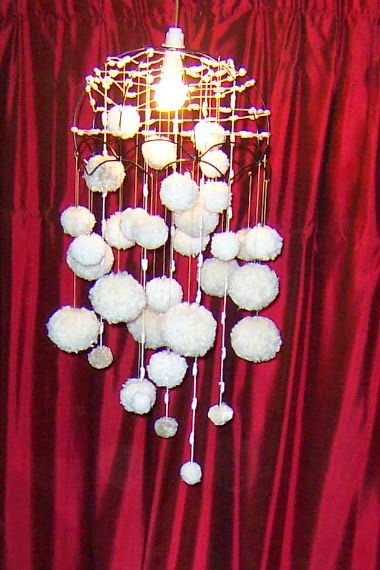
To finish off the ‘suite’ I made this chandelier at home using an old lamp shade stripped off its original covering, some fancy wool and more pom poms.

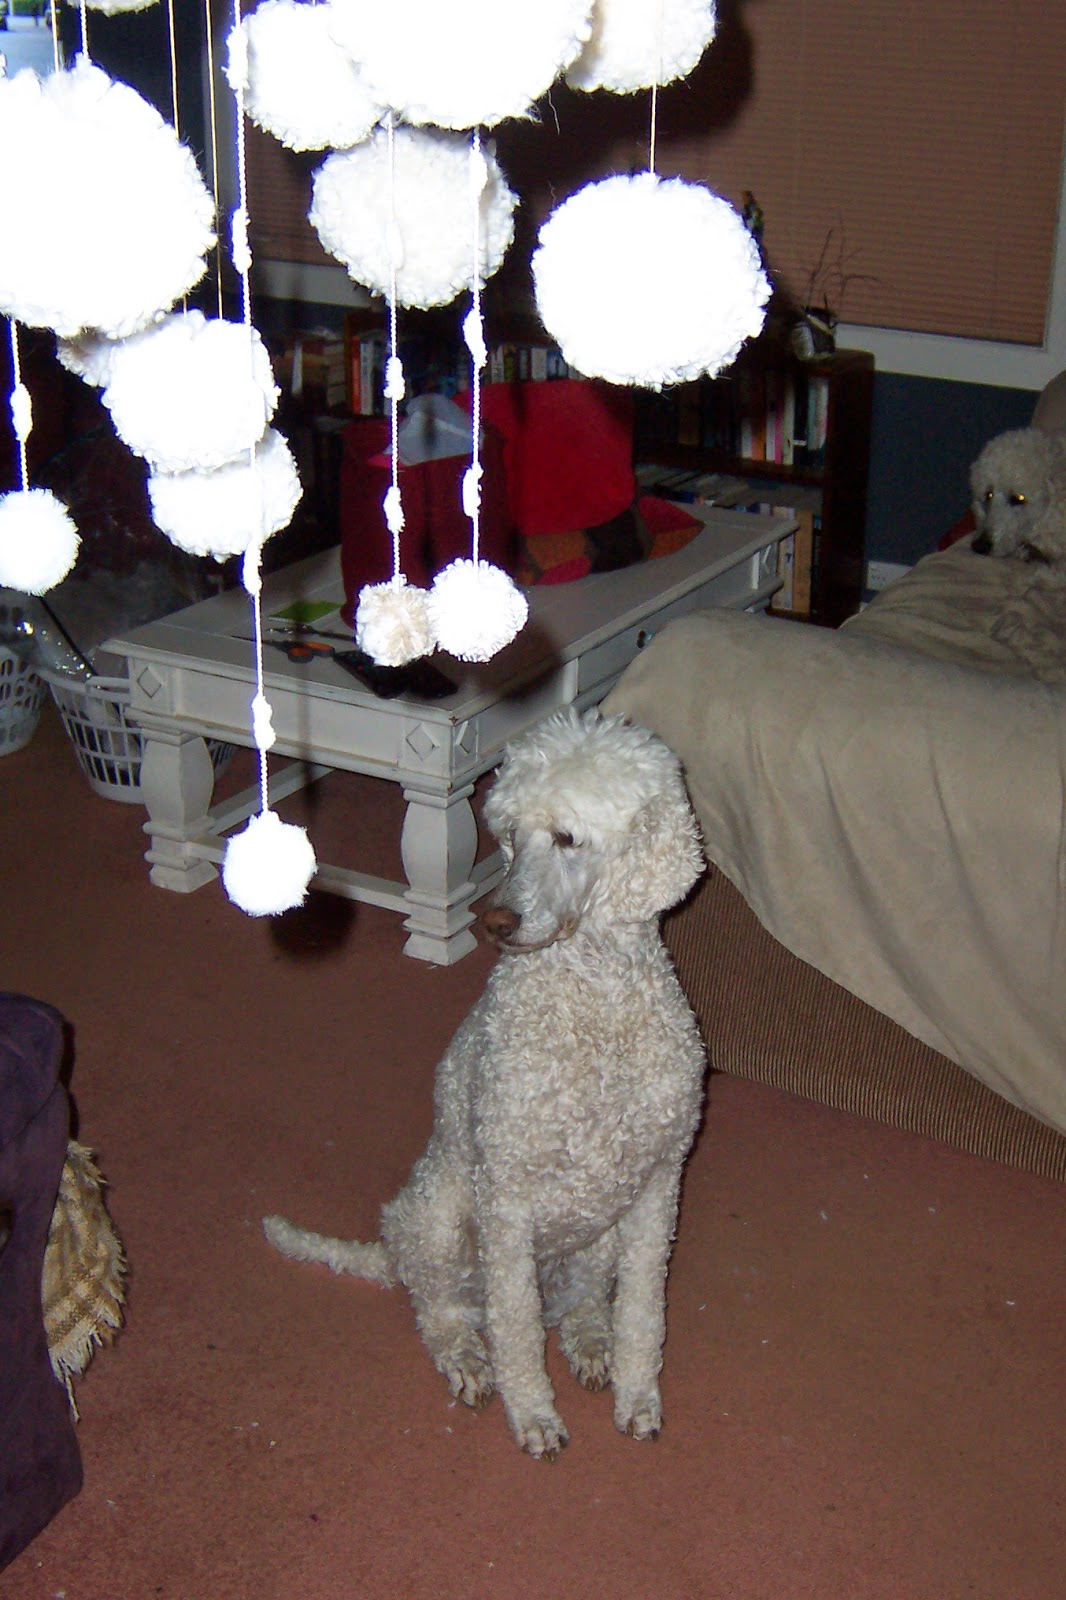
I love how it worked out. So soft and feminine. Here’s Montana keeping an eye on things. She agrees, though I think she wanted to eat the pom poms.

In the spirit of entries being made of ‘trash’, we made the whole suite out of things people had mostly discarded. The chairs, table and lamp shade all came from the tip shop. The light fitting in the chandelier came from a 2nd hand lamp I bought to revamp. The wool was mostly from op shops or donated (I ran an ad on gumtree.com asking for white wool and a really nice guy actually sent some!).
I just love making things out of ‘nothing’ and the guys at work love seeing what they helped create being exhibited and admired.
Who doesn’t?
z

junkyard dogs – art from trash

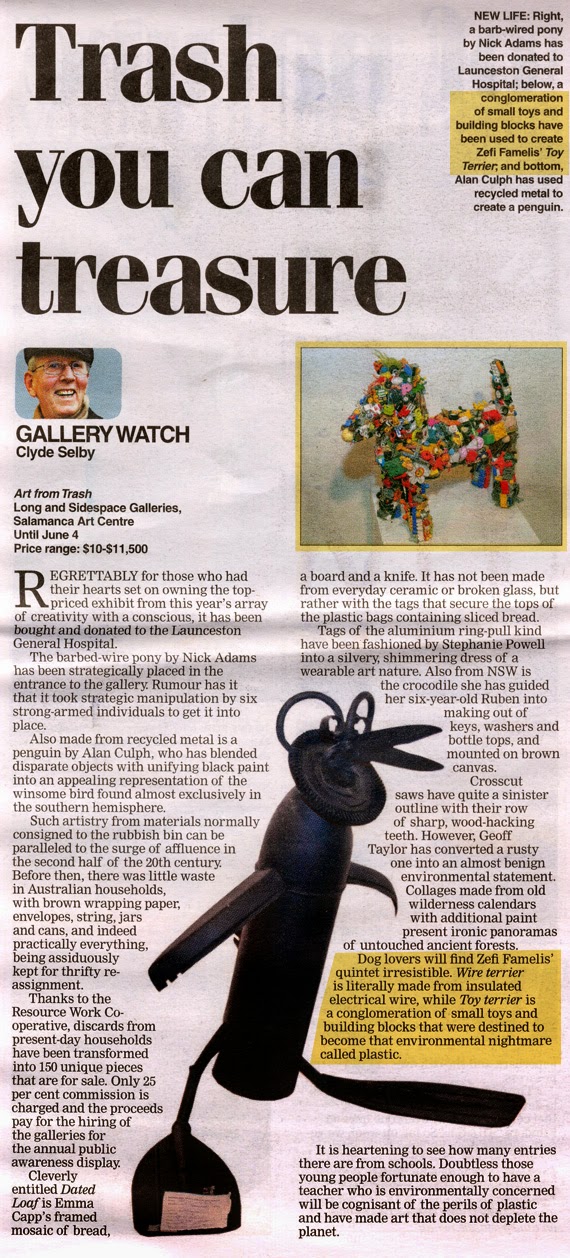
Every year the City of Hobart Council has an exhibition called Art From Trash. Its one of my favourite events of the year. This year I entered my Junkyard Dogs – partly inspired by the little dog I made during my art course last year. Remember Hair of the Dog
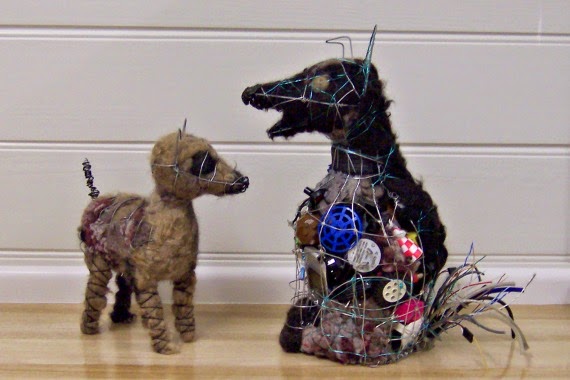
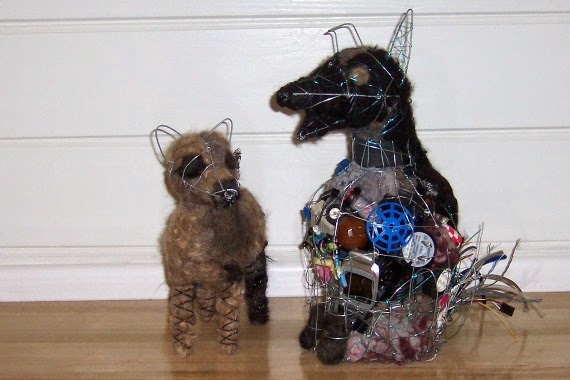
Well, here he is again, with one of his new mates:

Let me introduce you to them properly.
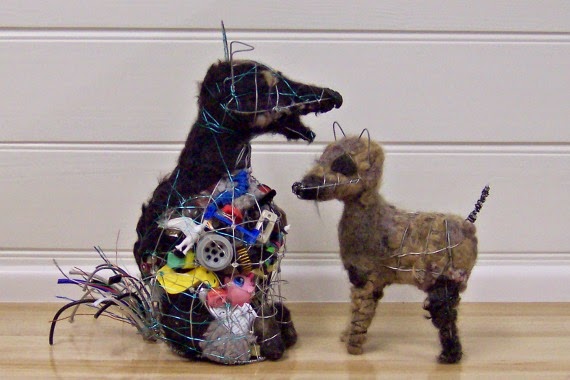
First there was Tiny Terrier, the first art from trash dog. He’s made of a wire frame and felted dog hair… plus some dryer lint and possum fur I found in the woodshed.
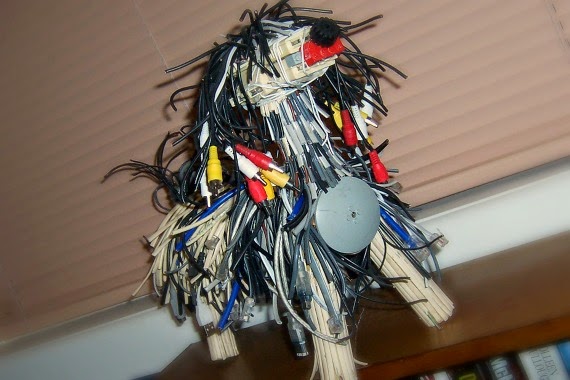
Then there’s Wire Terrier:

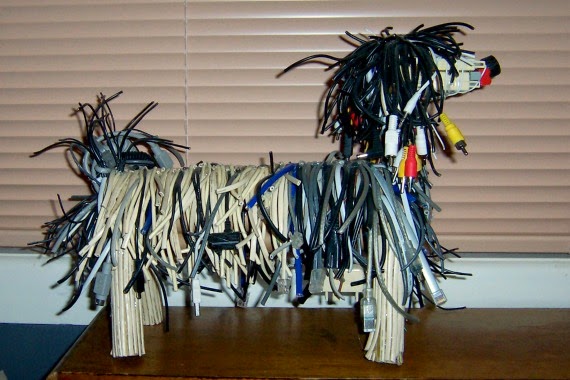
He’s made of electrical, phone and computer cables. See, while cleaning up the house a while ago I found all these cables which belonged to printers, phones, computers and stereos I haven’t had in years. A whole box of them. I actually put them on the porch to take to the rubbish. Then I had second thoughts. I could make something from them!
So I made another dog. He’s made of a cardboard frame with all kinds of cables and a few legos.

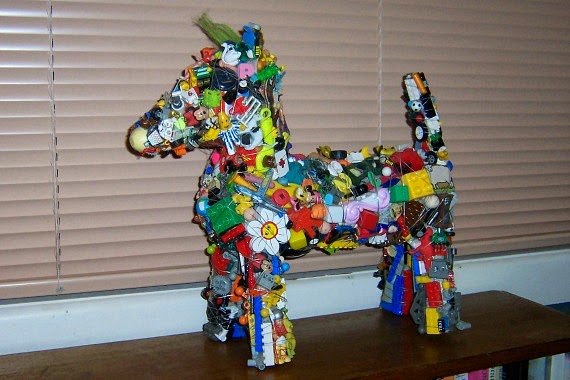
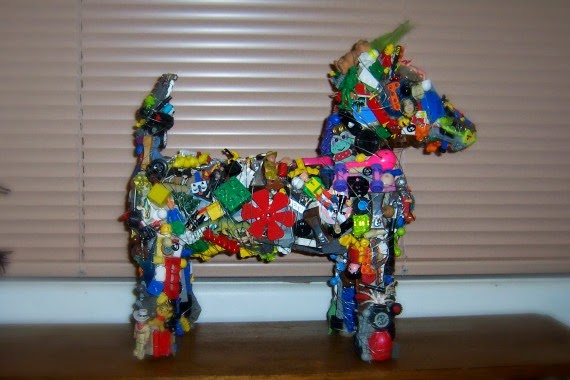
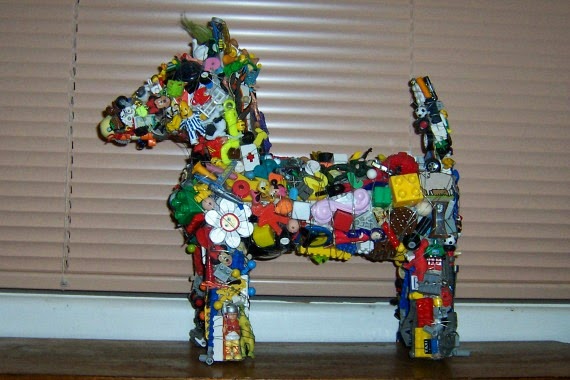
Then there’s Toy Terrier.

He’s made of toys and a bit of wire on a cardboard frame. A whole lot of small toys and toy parts a friend collected from her daughter’s bedroom floor. She was going to throw them away but of course, I could do something with them!

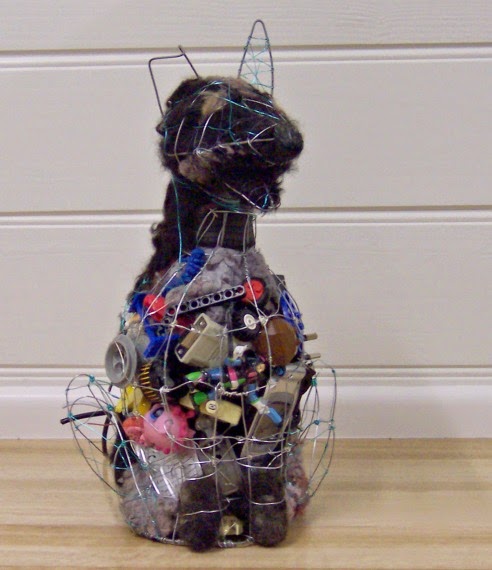
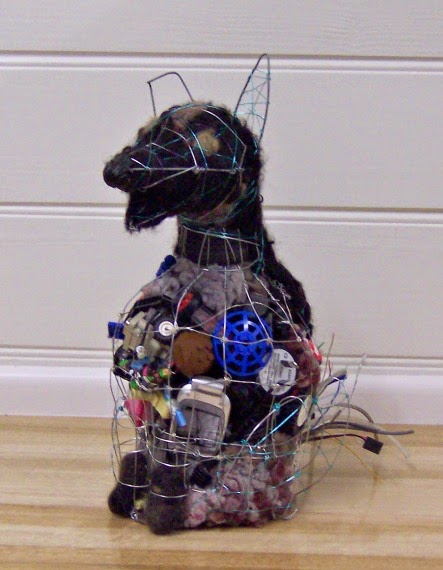
Lastly there’s Bubble and Squeak (the name kinda says it all). He’s a mix and match of all the materials I used on the other three dogs. Befitting a junkyard dog.
He’s made of a wire frame, a hollow bowl shape which holds all kinds of thing… toys, a broken mobile phone, chargers, old ink cartridges, electric plugs. His tail is made of cables and an old metal spring. His legs are all hollow wire frames, but front legs end in felted dog hair paws. His head is full of felted poodle hair and dryer lint, which flows down to cover half his back.
These guys will be in the Long Gallery in the Salamanca Art Centre till June 4th. I already know Tiny Terrier won’t be coming home and I must admit I felt a bit sad saying goodbye to him. I believe Toy Terrier is also going to a new home. 
Seriously, I don’t have space to keep everything I create, but sometimes its hard to say goodbye!
z

then and now – the kitchen

While its still fresh in all our memories, here are some then and now photos of the kitchen.
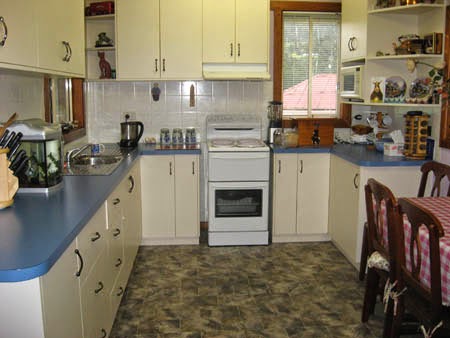
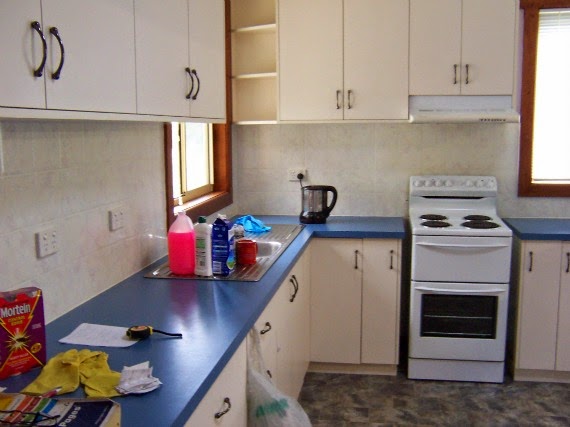
This is what the kitchen looked like when we viewed the house for the first time – with the old owner’s stuff in it:
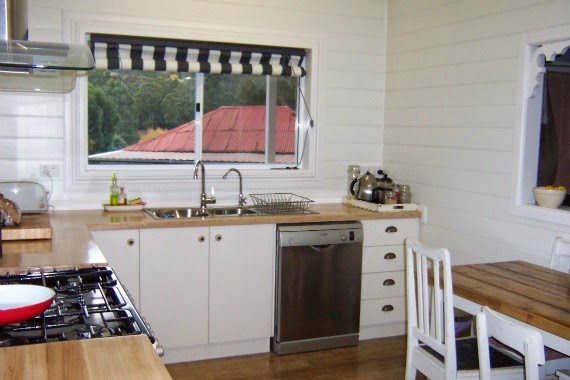
And here it is now:
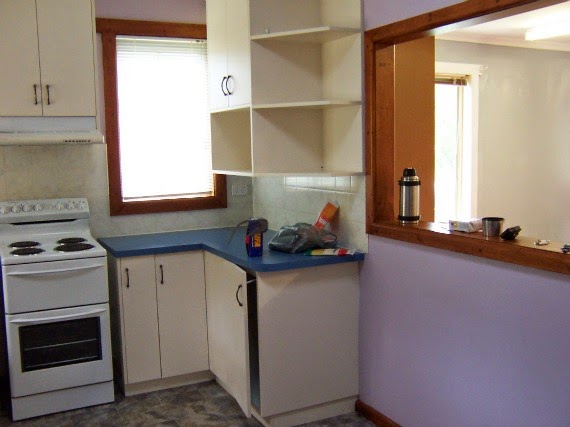
This the side with the window/pass/whatever you call it into the living room on the day we moved in:
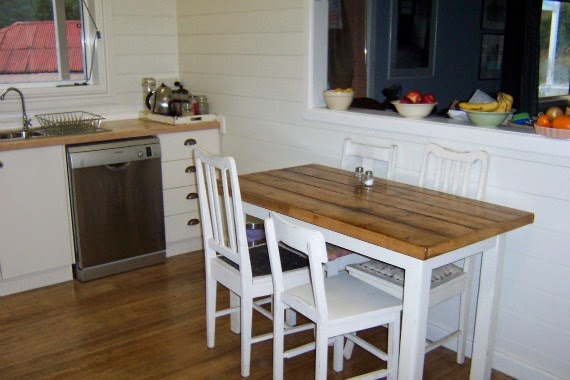
Here’s the same wall now:
Here’s the basic layout the day we moved in: 2 windows in awkward places due to the upper cabinets, stove in the middle of the front wall, sink to the left.
This is the layout now: big window in the middle of the room, sink under window, stove the left, no upper cabinets. 
I took a set of photos showing walls so I can sketch on and work out where to put my shelves. I’m thinking 3-4 on either side wall, all same length on the left and staggered from shortest to longest on the right. I’m thinking the top shelf will run across over the window as well…
I’m thinking tassie oak shelves, matching the benchtop in colour and finish.
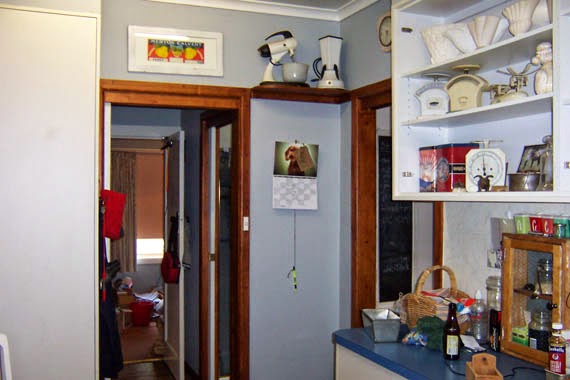
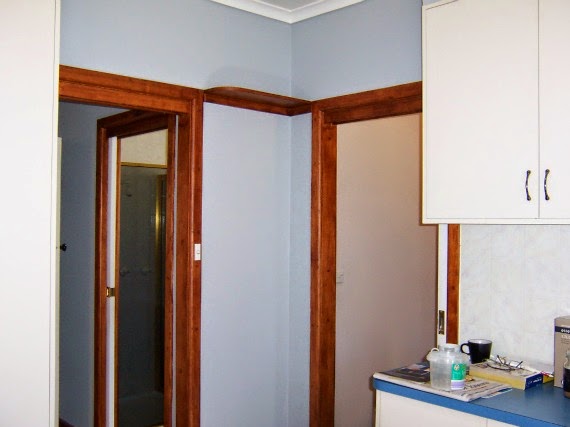
The entrance to the house is through the mudroom, the pantry and the kitchen. (Don’t ask!) The door to the kitchen and another door leading to the rest of the house create a funny corner with two doors. This is how it looked the day we moved in:
This is how it looks now:
Naturally, I made small changes to the kitchen along the way to make it more me… which basically means cramming it full of collectible old bits and pieces… I hated the top heavy upper cabinets so I removed the doors on one set to create open shelves.
Here is the same area with the open shelves:
Here is the same corner now.
The plan is to put some kind of pot rack on the wall next to the door…
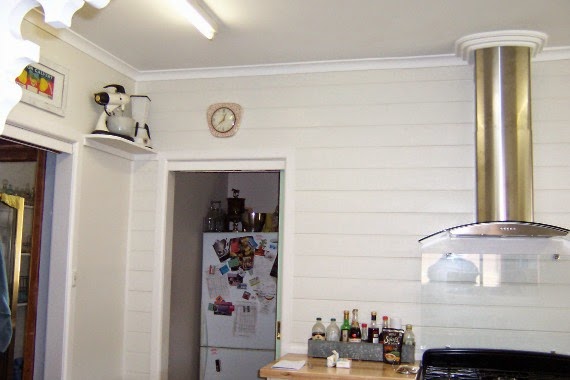
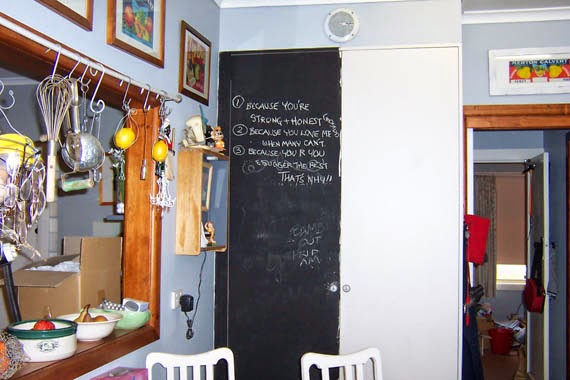
We had a large built in pantry in the back corner of the kitchen. Very handy admittedly, but when I moved the pantry to the old entry, I decided I wanted something prettier there… Here it is with the ill-considered and badly executed, huge fail chalkboard pantry doors:
Now my antique kitchen dresser pretties up that corner. With its extra support legs which need staining to match! Its old and was sagging in the middle so it needed some strengthening. 
When designing the new kitchen I looked over all the gadgets I owned and decided I didn’t need half of them. I’m streamlining. I still need to sort where to put some of them, but I’ll get there. I haven’t even started on the pantry yet…
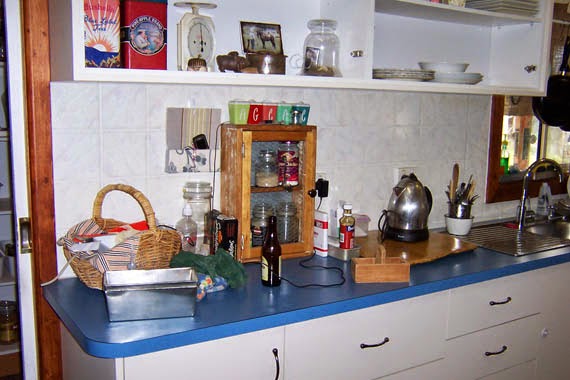
The kitchen bench then – always full of stuff:

The bench now:
I love it being clean and uncluttered. We used to drop everything on the corner as we came in the door. I’ve outlawed that now. We have a phone station for phones, I’m making a key rack, and I’m thinking about how and where to create a drop zone for other stuff. 
For Wayne mainly.
I’m over his constant search for his wallet, glasses, keys, etc.
So, here’s what we did to achieve this transformation:
Removed 2 inconvenient windows.
Put in a new window in the middle of the front wall.
Bought a new stove, rangehood, dishwasher and sink.
Had new cabinets custom made.
Had a solid timber benchtop made (which I finished)
Moved the hot water cylinder to another spot.
Moved the electric power meter to another spot.
Put in new wiring for the new stove and rangehood.
Lifted lino and masonite and I refinished the original timber floor.
Fixed the uneven original timber floor.
Moved the sink/plumbing to another spot.
Lined 3 of the walls with pine.
Painted all the woodwork Dulux Antique White USA.
Painted the whole kitchen a Dulux China White 3/4 strength.
Mounted an old tempered glass door behind the stove as splashback.
Painted the doors a minty greeny aqua colour I made up.
Did I miss anything? The months of mess. The months of having nothing to cook on… waiting for tradesmen… the frustration when things didn’t work out or we discovered unpleasant surprises when doing something we considered a ‘quick job’…
So there you have it.
Then:
Now:
To celebrate, today I’ve spent HOURS cooking up a storm to try out the new fan forced large oven which promises to cook 3 dishes at once evenly. I made lasagne, spanakopita (greek spinach pie) and baclava.
I’ll let you know how they go.
z
then and now – the ugly house

I’ve been thinking about the amazing before and after photos on the blogs I follow. And the TV shows I like. They’re amazing. Even when I don’t particularly like the style, I see the amazing transformations and feel inspired and more than a little envious.

I mean the after rooms are always perfect, styled to within an inch of their lives, great colours, interesting mix of textures, fantastic furniture, creative vignettes… Magazine quality rooms.

I may occasionally be able to set up a perfect corner in my house to photograph, cropping out the mess of stuff I’ve had to move out of shot in order to create that corner of perfection. But I can never show you a complete finished and styled room.

Even if I finish a room (the only room here close to being finished is the kitchen!) I won’t have the right furniture. Or I’ll have a stack of things I have no real place for and that just don’t fit in. Or I’ll have clothes airers drying clothes in front of the wood heater (this place is like a chinese laundry all winter,)

So, in the spirit of sharing the progress of our home, from what it was when we first saw it, to how its looking right now, almost 3.5 years later, I decided to do a then and now series.

We’ve come a long way since we bought the farm… at least in some parts of the property. Its good to remember just how much has changed – for the better.

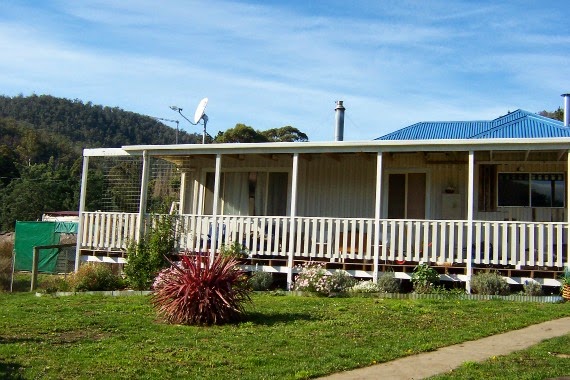
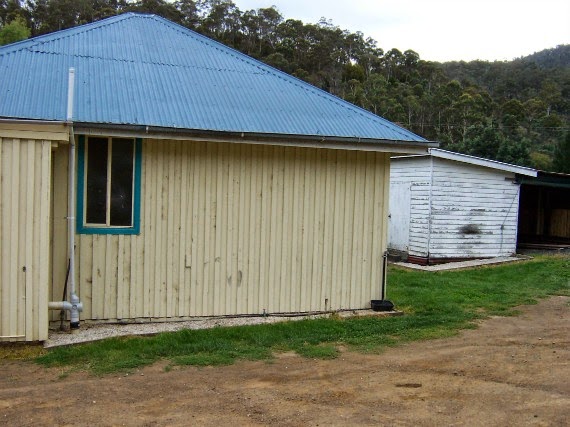
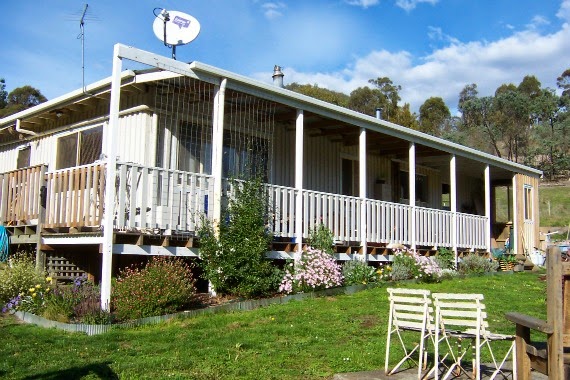
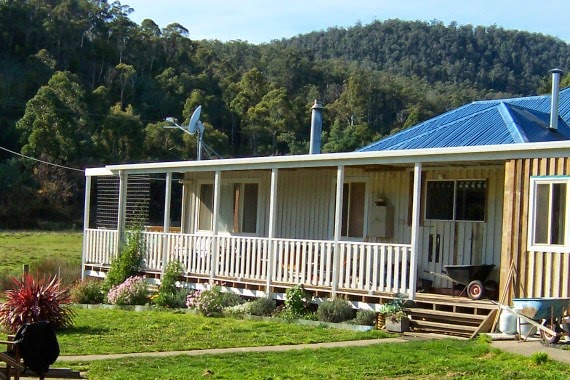
This is how the house looked when we bought it:

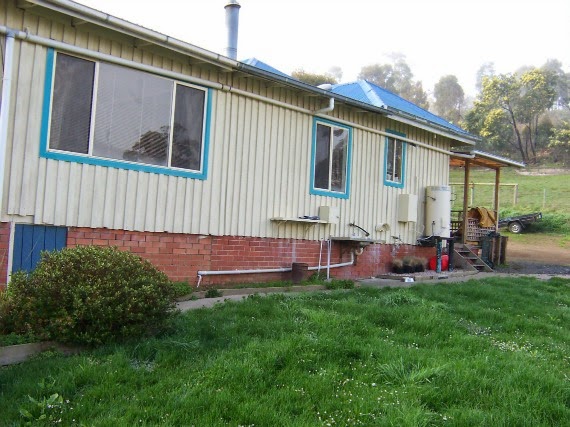
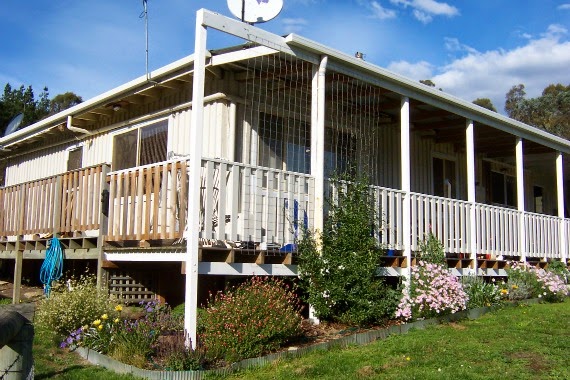
And this is what it looks like now:

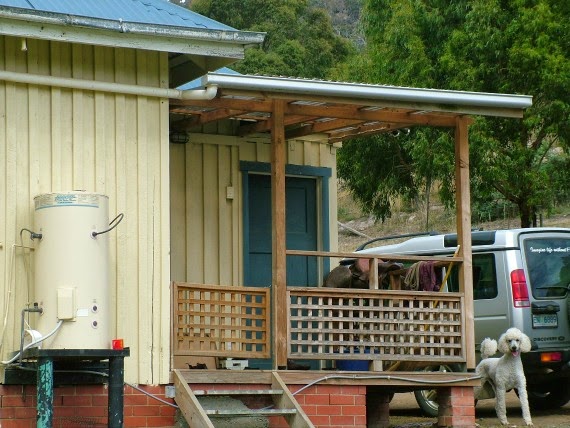
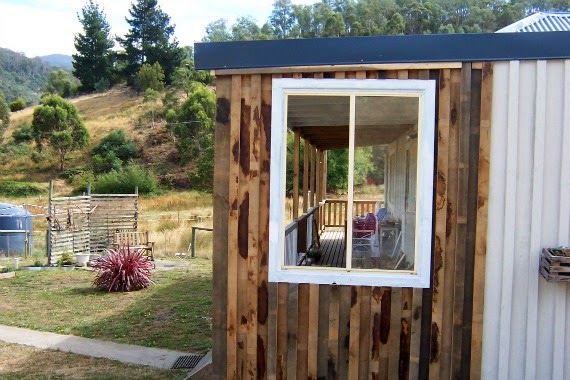
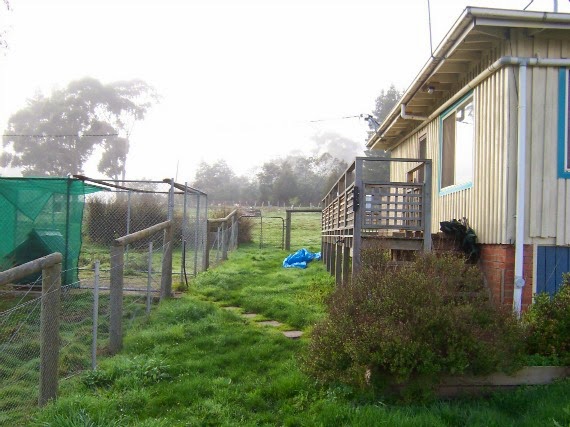
When we bought it, there was a tiny little porch on the end near the driveway, with an outside toilet (the blue door):

We enclosed the tiny porch, making a mudroom, and bringing the toilet into the house:

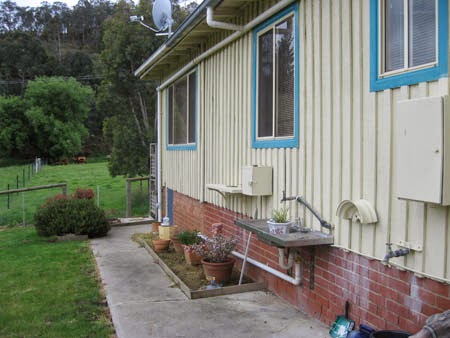
Of course, the hot water cylinder (which used to be on a blank wall) was now on the porch:


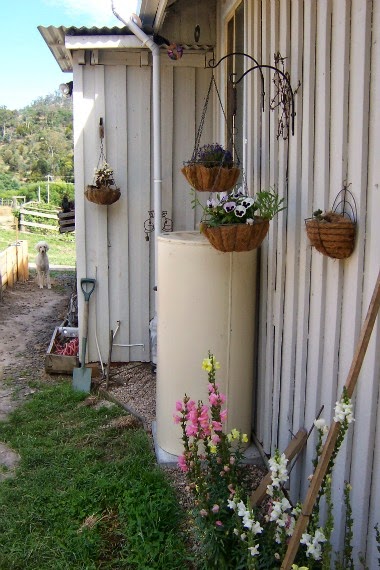
So this year we moved it to the driveway side of the house:
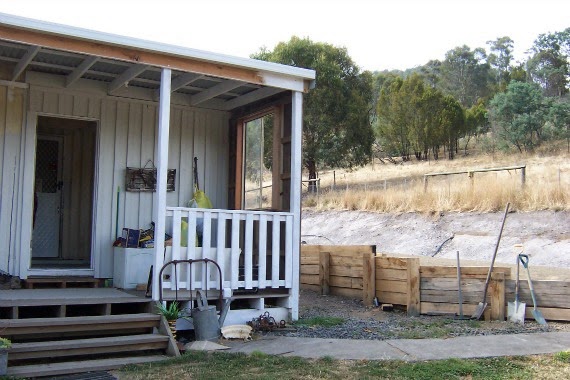
We also enclosed the end of the porch to give us a dry zone and protect our boots from horizontal rain:
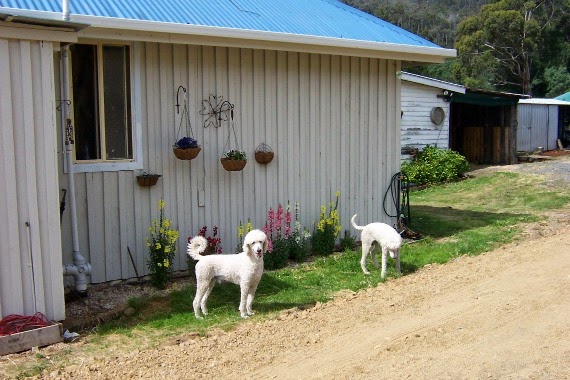
This is what the driveway side of the house looked like before:

Here it is after some painting and planting but before the hot water cylinder was moved and the retaining wall was put in.

What we’ve done:

Enclosed the tiny porch.
Added a big porch which we joined up to the small one on the back of the house.
Replaced the small kitchen window with a bigger one.
Planted flowers.
Painted the house.
Moved the hot water cylinder.
Levelled the driveway and put in a retaining wall along the side.
Replaced the trellis on the small back porch with slats to match the new porch railing.

Its been a long, meandering road.

Again, here is the house when we first bought it:

And here it is now:

Then:

And now:

Then:

Now:

Even with wheelbarrows on the porch and painting waiting to be done, its a lot prettier now, wouldn’t you agree?

z

memory lane

Used to be I made all my own cards – for Christmas, birthday, moving, everything. Used to be I made them for others as well.

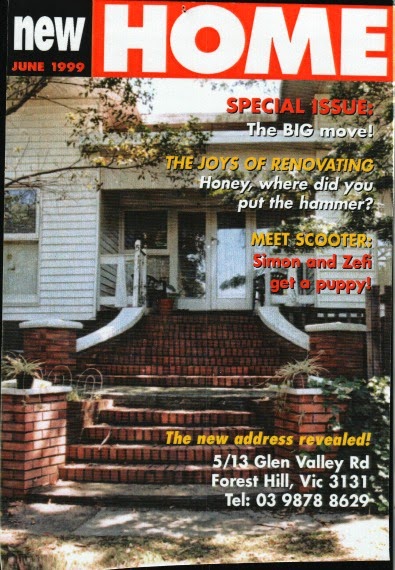
The other day while sorting out some filing (over a year’s worth which had piled up in a box in a forgotten corner of the office) I found my moving card from when I  bought my house in Melbourne.

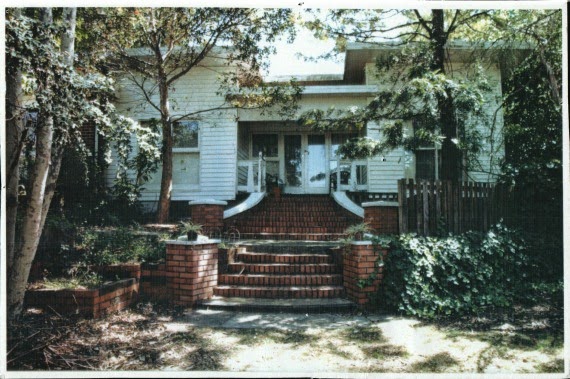
This is the house in Melbourne.

It was gorgeous. An original 50s style place with a deco entrance, set way back from the road on a huge block which was subdivided to build units on either side of the old house.

This is the moving card when I bought the house with my then partner.

I had such fun making it.

I should take the time to search for and share both that house makeover (I have recorded most of it in photos in an album) and the cards I’ve made over the years. You might enjoy seeing them and I would enjoy revisiting the memories they conjure.

Like everything else, its a huge job. Finding, sorting, scanning photos.

Worth it though I think…

Stay tuned for some more recent before and afters at Wind Dancer Farm. I’ve been spending some time recently looking at how much the place has changed since we’ve lived here and decided to go ahead and share some of the changes, whether big or small, finished or not. More to remind myself to keep my chin up. Its happening, even if its not perfect… yet.

z
roadside salvage drawer to phone station

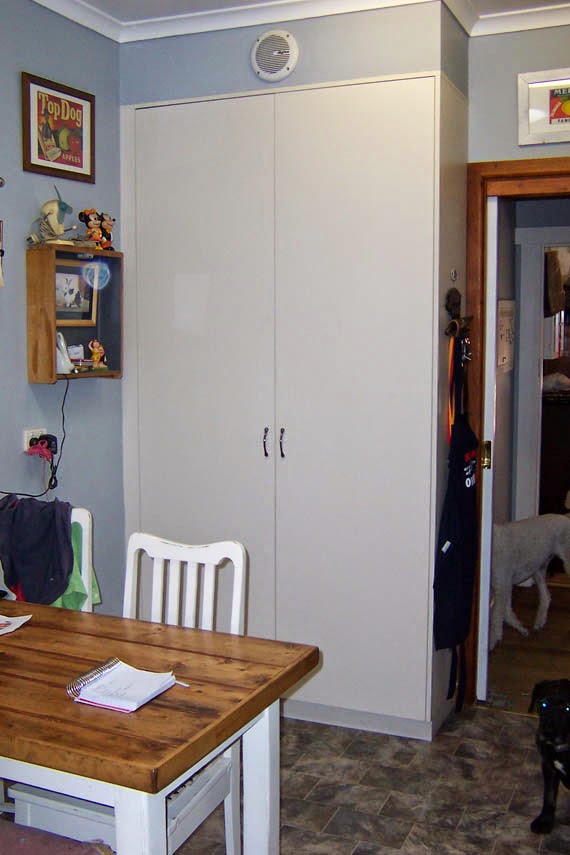
One of the problems in our kitchen is that the telephone jack and a power point (where we plug in the phone and one phone charger) were kind of ‘in your face’ in that they were to the right of the ‘servery’ into the living room, but not lined up vertically or horizontally. Hard to hide in other words.

Here’s a photo of the ‘pre’ kitchen and you can see how I dealt with it before. An old drawer, with a hole cut out to expose the phone jack, held the phone, a framed print of a rabbit (cause why not?) and some of my 50’s collectibles.

Of course the powerpoint was lower and to the left, so that remained exposed along with the accompanying ugly cords.

When we were doing the kitchen and Handyman was lining walls with pine, I asked him to move the power point and phone jack so that they were closer and neater.

I wanted to create a ‘charging station’. A place to keep and charge our mobile phones and landline. And hide the mess of cords and plugs.

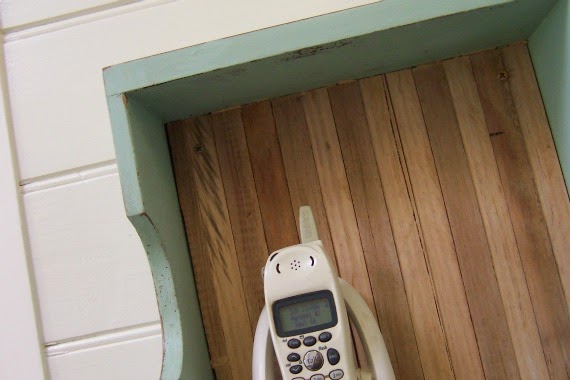
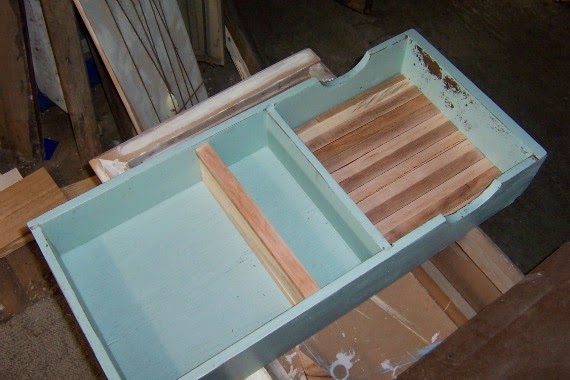
I have a ton of stuff in my workshop and the shed, including a stack of drawers I picked up off the roadside one day. I evaluated them and thought one of the drawers would be perfect. It had an unusual shape – it was long, one section had 4 holes, and a dip in the sides. No idea what a drawer like that would be for.

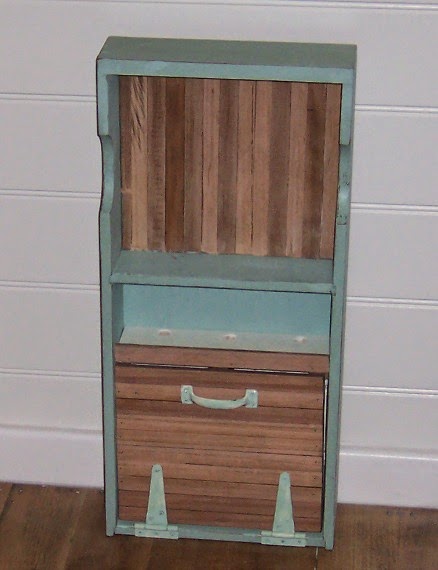
Here it is after a coat of milk paint.

I took off the handle on top, filled the holes. then did a few coats Lichen milk paint to stop the paint flaking off too much in some spots.

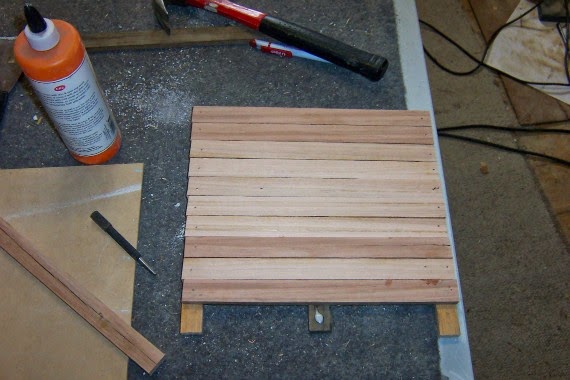
I had to somehow hide the holes in the back… We buy our timber from a local guy who mills his own wood and cuts his own boards. Last time I was at his place I picked up a few of the trimmings he’d cut off the ends of his boards when dressing them. They were the same width but irregular thicknesses so I sorted through and picked the bits which were more of less closest in thickness.

I cut them to size, sanded the weathered layer off and glued them to the back of the drawer.

I really need to go back and get more of them. They’re great!

This was the plan: the top shelf would hold the landline phone station. The bottom section would have a shelf added up the top to hold our mobiles. Below would be a door to hide the power points, cables and chargers.

I made the shelf out of an offcut of pine since I planned to paint it and it didn’t have to match. I put a ‘lip’ on the shelf in tassie oak, matching it to lining and so mobiles won’t fall off. I drilled 3 holes in the bottom shelf (one for the landline cables, one for each of our mobiles) and one hole in the original shelf for the landline cables.

Now I needed a powerboard, giving us enough power points for 2 mobiles and a cordless phone.

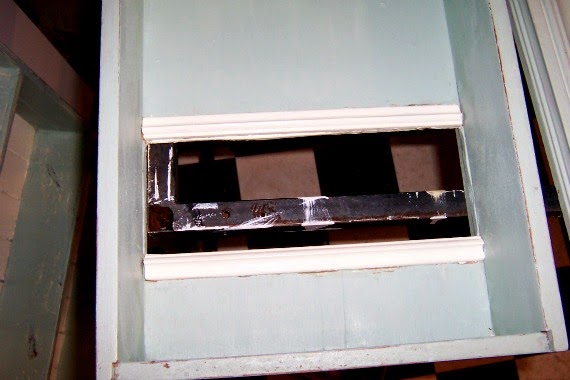
Since the idea was to hide the mess behind a door, I cut a hole in the drawer… badly. Necessitating the addition of trim to neaten it up. eh. That part will be hidden most of the time. 

The worse problem was that when it was finished, I screwed it to wal, plugged everything in, then discovered that the mobile chargers were too fat for the door to close properly!

Sigh…

I had to cut out the entire bottom back of the drawer to give them a bit more room.

Goodbye trim.

I’m such a professional!

Anyway… next came the exciting part. The door.

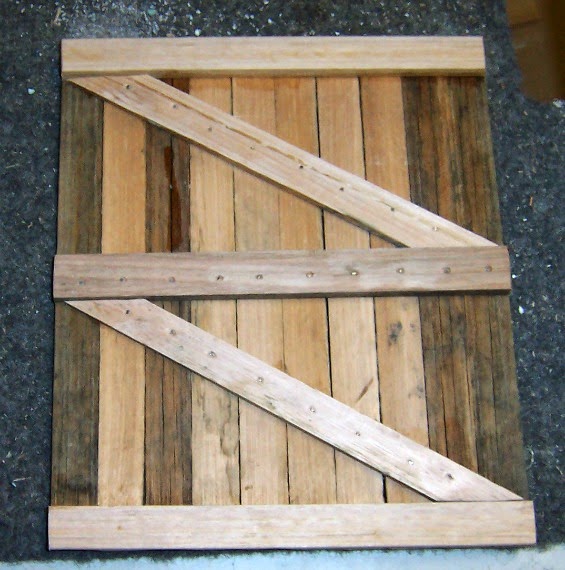
A barn door with Zs at the back.

I always wanted to make a door with Zs at the back.

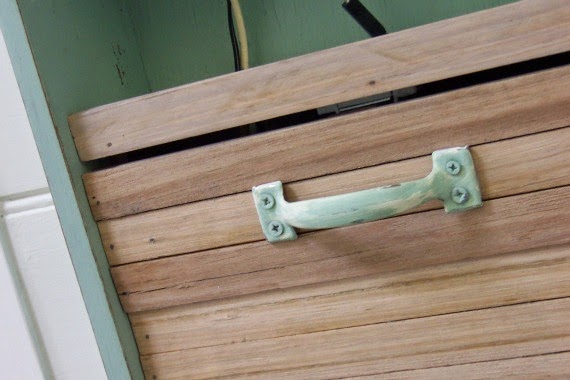
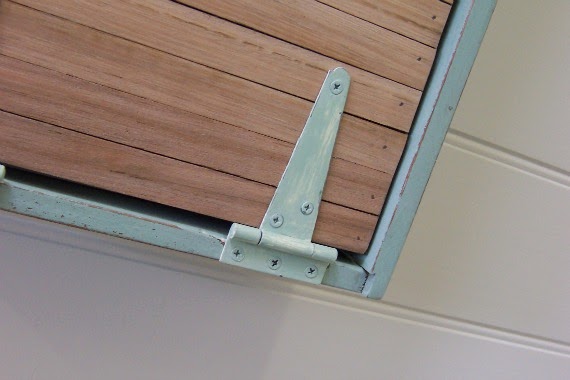
I bought the smallest T hinges I could find and a silver handle I kinda liked. But I didn’t want them looking new, so I painted them. Tons. So they’d look like they’d been used for years on many different cabinets.

I also got a magnetic catch as a closer since I planned to swing the door downwards, like an oven door.

Here’s what it looked like when it was finished.

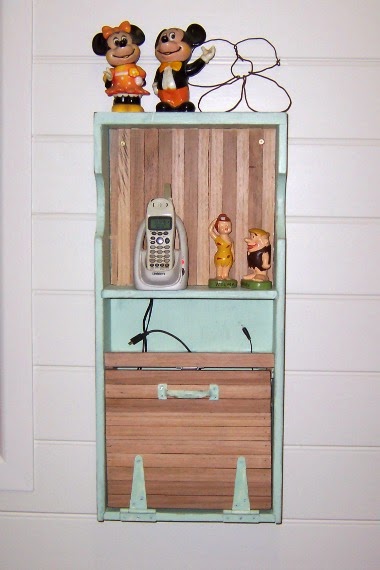
And here it is in the kitchen, ugly cords hidden, Mickey, Mini, Wilma and Barney back in their spots. Plus a rusty wire flower Wayne made me.

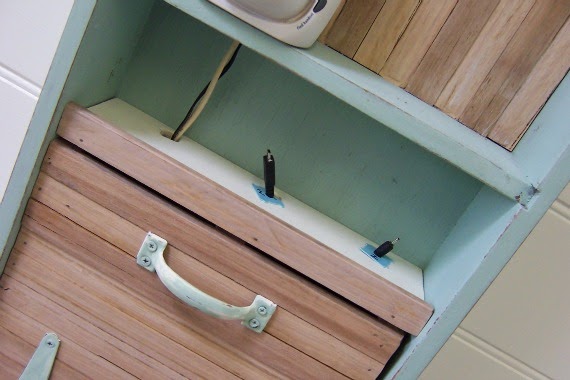
Here are some details…

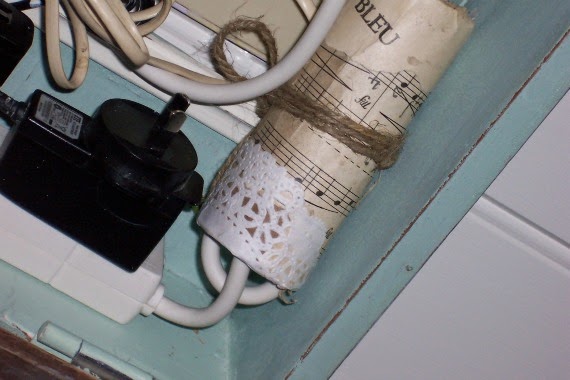
(Btw, I used bread bag clips to keep the charger cables from falling down behind the door.)

Lastly, inside I decided to try one of the cord organising tips from Pinterest… I got a hand paper towel roll, decorated it and discovered the plug wouldn’t go through the middle. I had to slice it open to slot the cord into it, hence the jute string holding it together.

The only things I had to buy were the hinges and power board. Overall its a success I think!

z
Featured at:

Beyond The Picket Fence

Shared at:

at last…. kitchen reveal part 1

Welcome to my new kitchen.

Its finally finished and usable. I cooked dinner yesterday for the first time in 6 months… amazing!

So how about a quick tour?

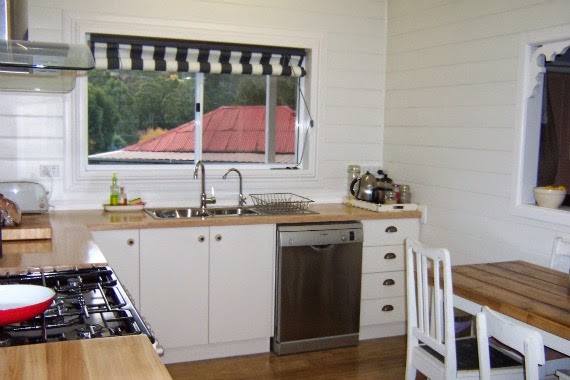
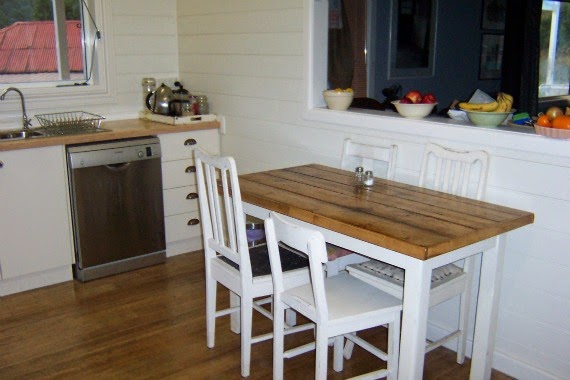
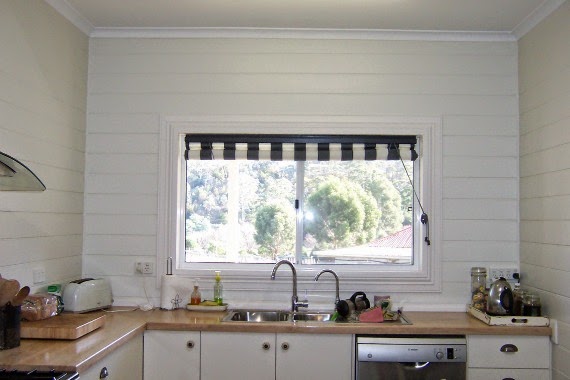
First, the new, improved, bigger window centered in the middle of the wall. With the sink below it. I can now see out of the kitchen without cricking my neck and banging my head on cupboard corners.

I ended up going with an outdoor blind for the window covering, mainly cause I couldn’t make up my mind with so many choices, and cause I just liked the grey and white stripes.

I will be putting shelves up to hold everyday items and display items and cause I just love open shelves. Till then, I’ve put the kettle and hot drink stuff in one of my old made over wooden trays to stop them from spreading all over the benchtop.

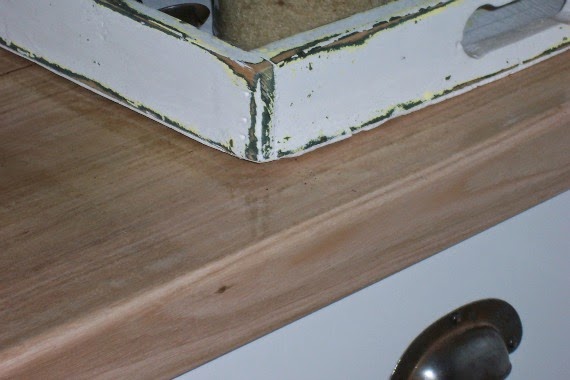
This close up also shows the tassie oak benchtop we had made especially.

I love it!! I spent a couple of days sanding and varnishing it to get it just perfect and it was worth it.

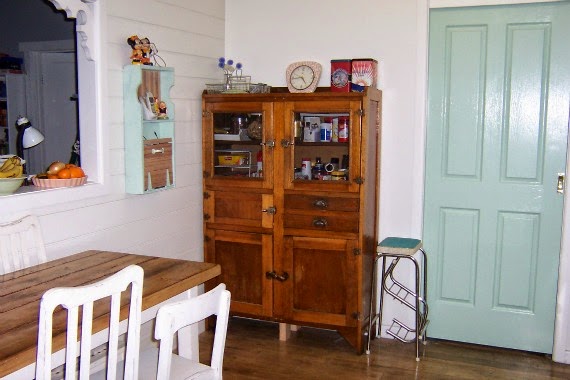
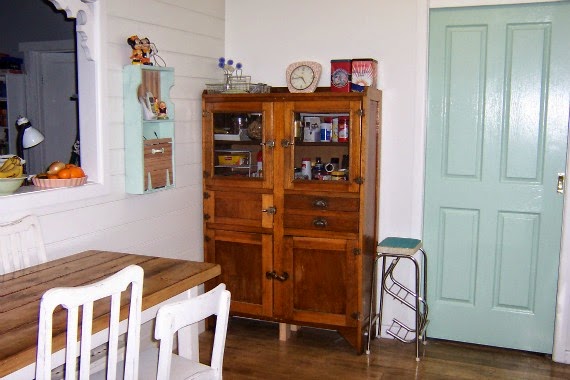
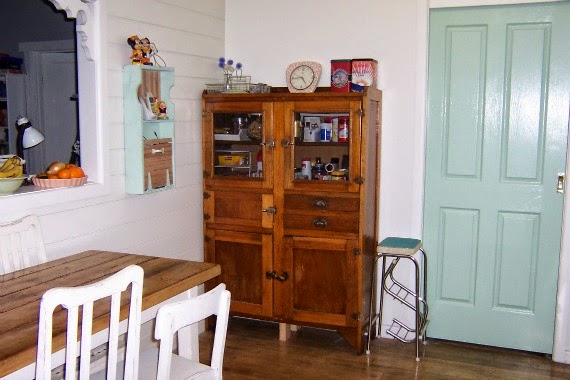
The opposite wall from the window has had the pantry cupboard removed and now holds one of my antique kitchen dressers. This one had to have some minor work done to it as it was sagging in the middle (had to put a support in the middle under the top and add a couple of legs in the middle underneath).

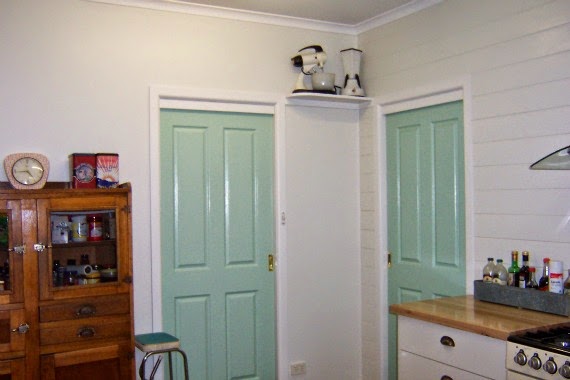
A 60s step stool just fits in that corner and comes in handy for reaching things in the pantry and the colour just happens to work well with the colour I chose to paint the doors.

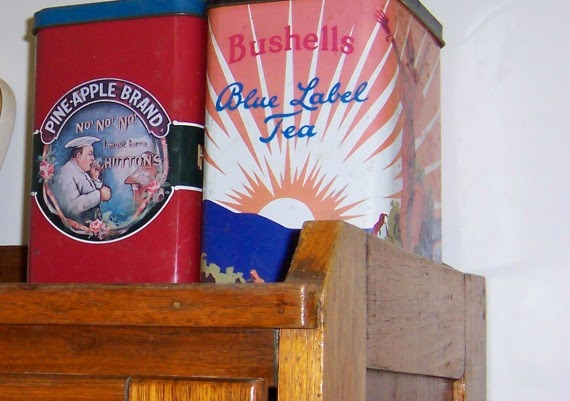
Some old tins act as display and storage for small stuff.

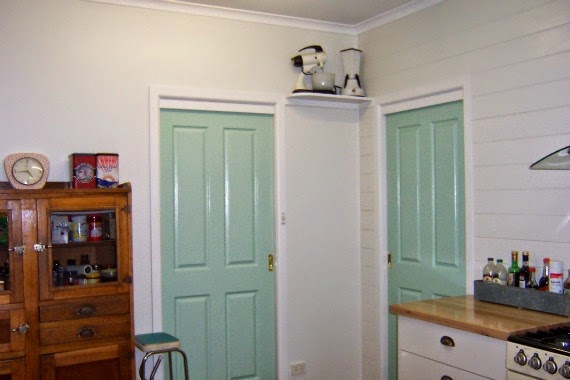
The door to the right leads to the entry area where the fridge, microwave and pantry live. The door on the left leads to the hallway and the rest of the house. These doors are almost always open, but I wanted to bring a bit of colour into the room.

The kitchen is all white – Dulux Antique White USA on the woodwork and on the cabinets. Dulux China White 3/4 strength on the walls… a slightly creamier white. The minty green I used on the doors is a colour I mixed up myself and had the guys at the paint store match for me.

I had mentioned experimenting with milk paint (the jury is still out on that) and my favourite colour in that was one called Lichen. My minty green is very similar to that but a bit greener. I wanted to match that antique green you see so often on old things.

I’m actually very pleased with the colour. First I tried the caramel colour I got a sample of thinking I’d match the stove but in a darker tone.

Yuck.

That failed.

Which is when I went to green. I love it. The result is a kitchen thats fresh and clean looking.

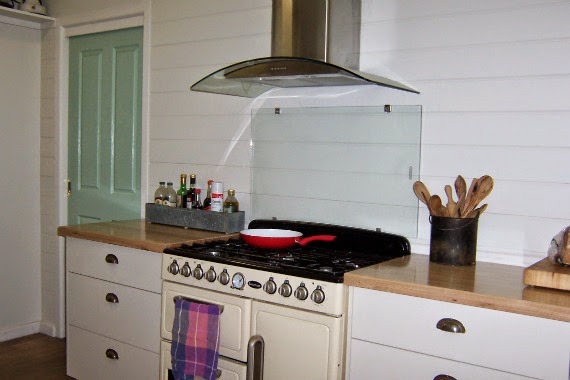
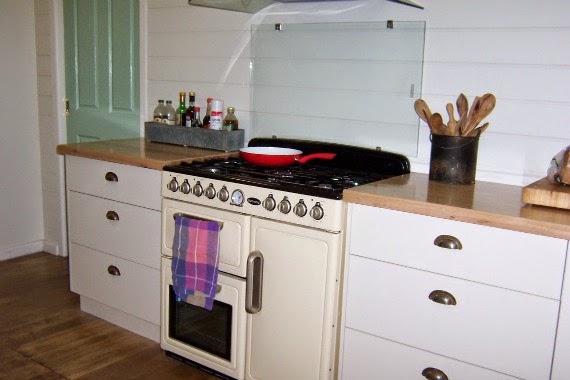
As a backsplash for the stove I got an old glass door from the tip shop and mounted it to the wall with clips. That was my economical contribution to the kitchen. Backsplash – $5. Clips – $14.95.

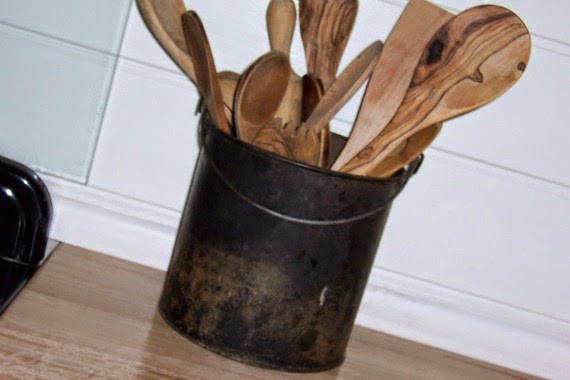
Ok. Ok. You have to excuse the un-colour-coordinated towel. I was in such a hurry to get things in working order! Why not notice the good stuff, like the old billy (which id used to make tea over an open fire) holds my wooden spoons…
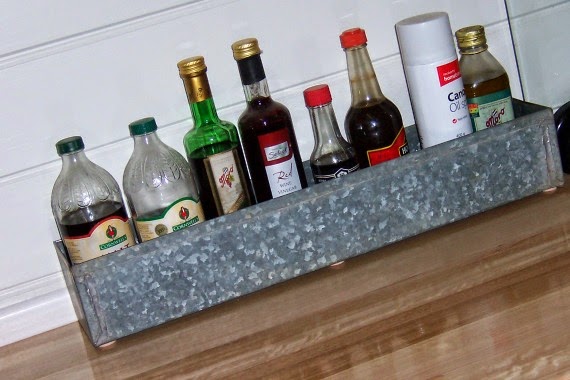
and an old galvanised box holds oils and vinegar close to hand. With felt bits underneath so it doesn’t scratch the bench.
Actually, these were meant to live in my planned mobile kitchen cart but I don’t think I have room for it.
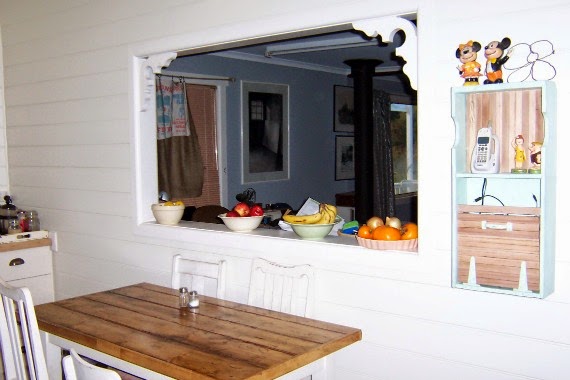
On the right of the kitchen is this big window into the living room… a handy thing really, as you’re not disconnected from the rest of the house when you’re cooking, you can watch tv and it allows heat from the woodheater to circulate through to the kitchen.
The ledge comes in handy to display bowls which also hold fruit. Now if we can stop ourselves from piling crap up there we’ll be right!

To the right of the ‘window’ are the phone jack and a power point. I’ve always had a drawer as shelf thing there to hold the phone but this time I went all out and made a proper cabinet out of an old drawer for our phones. I’ll be sharing this in another post later on. Stay tuned.

I have since placed a greek rag rug given to me by an aunt in Greece in front of the sink to add some warmth. Coincidentally it has some of the bluey green in it! (Your mom Mina, tell her I love it!)

My old mixer and blender are back in their spot on the tiny shelf between the doors and my old clock is back on the wall. This was an electric clock I bought on ebay many years ago and which came from Tasmania. Its back again, now battery operated!

So there you have it.
I really need some sleep. I’ve been working 14 hour days lately just to get the house back in order, back to being clean and tidy.
Later!
z
false alarm – kitchen update

Ok, I’m curious how the women out there in blogdom can do these great reveals where they show ‘after’ photos featuring perfect rooms all set up with the right curtains, the right cushions, the right furniture, the right artfuly placed ‘random’ items.

Even when my kitchen is finished, it won’t be finished enough for that perfect ‘after’ photo.

For one thing, I plan to put up shelves and I don’t want to put them up till I live in it a while and decide where I want what…

For another, I won’t have the perfect dishes for a while, and I won’t have the kitchen dresser painted for who knows how long…

I guess you won’t so much get a ‘finished’ photo but periodic ‘after’ photos every time I add to or change something… cause I’m nothing if not in a constant state of updating, rearranging and changing things.

Meanwhile, yes, you heard right.

The kitchen isn’t finished yet.

It would have been finished but for the sink…

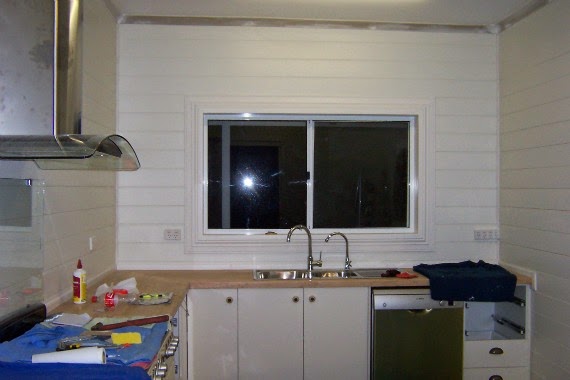
See, when Handyman was doing the plumbing, moving pipes from the old sink position to the new one (back when we had a hole in the floor), he calculated that the sink would be centered in the window and put the pipe there. But when he put the sink in the bench and showed it to me, the sink looked too far to the left.

Visually, the sink looks centered when its further to the right, cause the eye sees the bowls as the center.

So, Handyman moved the sink to where the boss (me) wanted it and now he has to find a joiner of some sort to connect the offset pipes.

Here are some photos I took this morning.

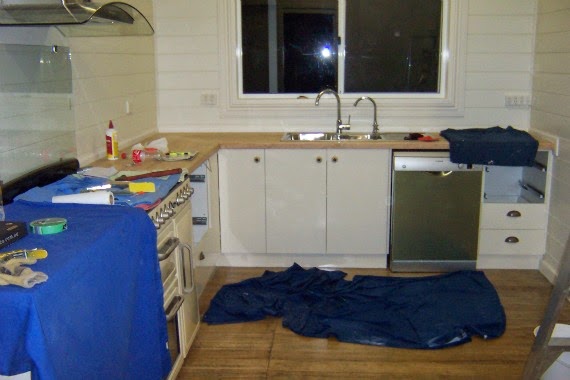
You can see the rangehood and glass splashback, the stove, the dishwasher with its protective film still on it, the sink with our two taps..

Same wall but you can see the cornice that needs painting and the handprints on the rangehood stainless steel cover.

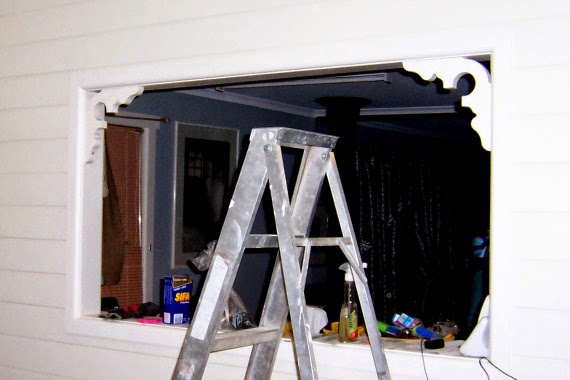
This is the window into the living room. Note the decorative corner bits. Love them.

Now I have a dilemma. What type of window covering do I put on the window? A roller blind? Curtains? Lace? Doily curtains? Modern? Shabby? I have no idea. Well, I have an idea but I’m not sure. Any thoughts from my silent readers?

The window faces east so summer afternoons are hot hot hot. And on winter evenings I need a window covering that will keep the heat in. The rest of the time I want the window open to the view.

I await your thoughts.

z