new sewing & craft box

Did you notice the pretty first aid box beside the TV in my eyelet curtain post? Its my new sewing/craft box!

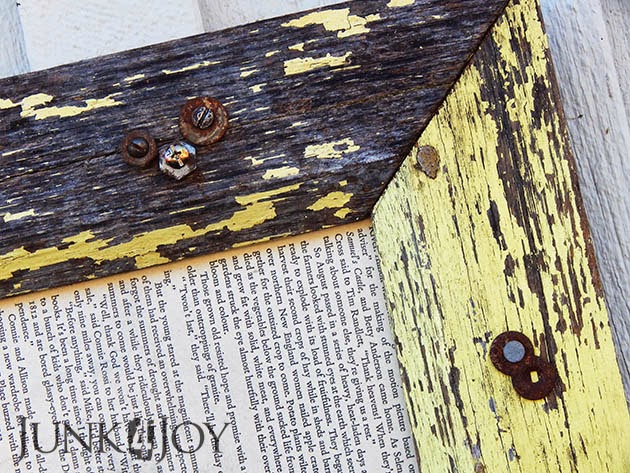
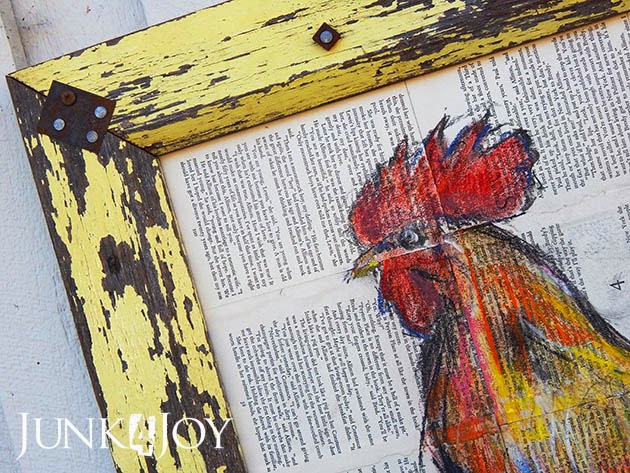
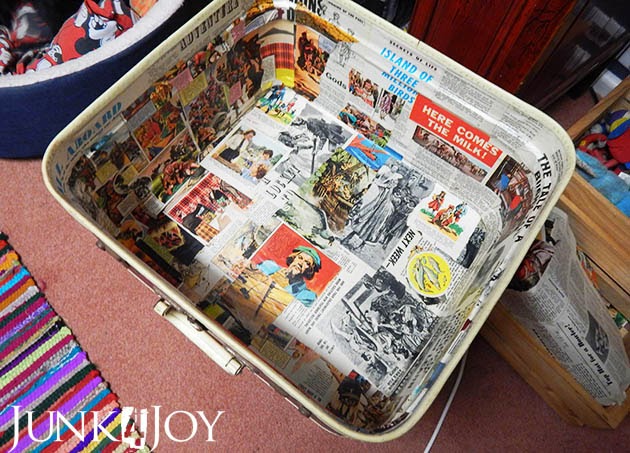
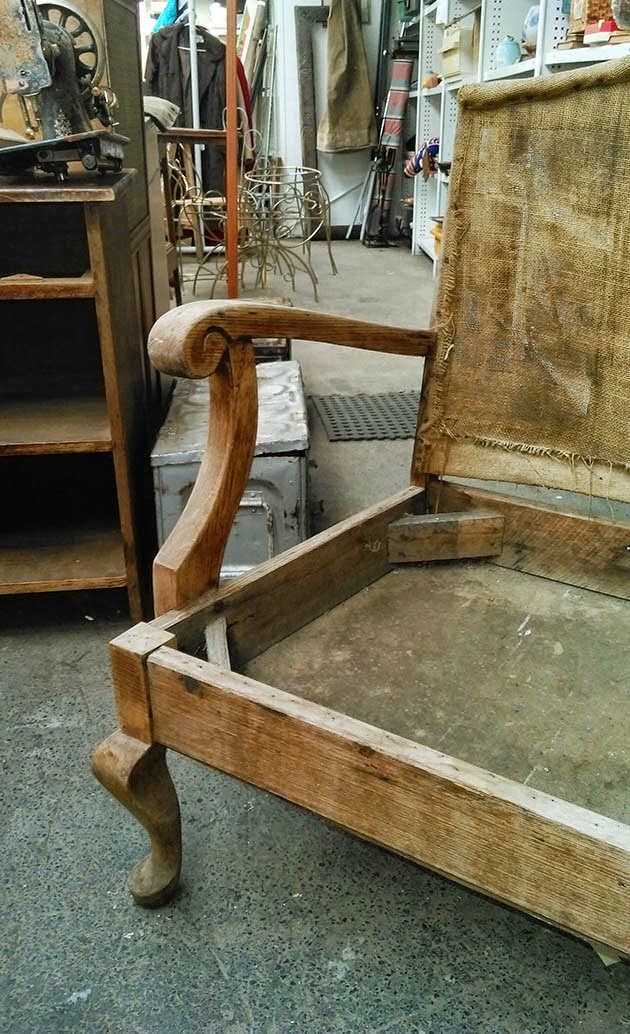
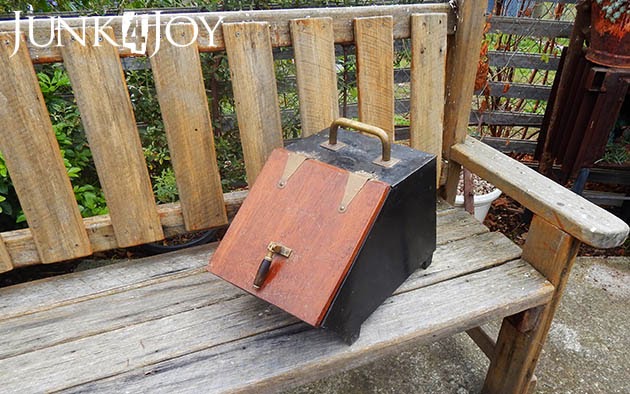
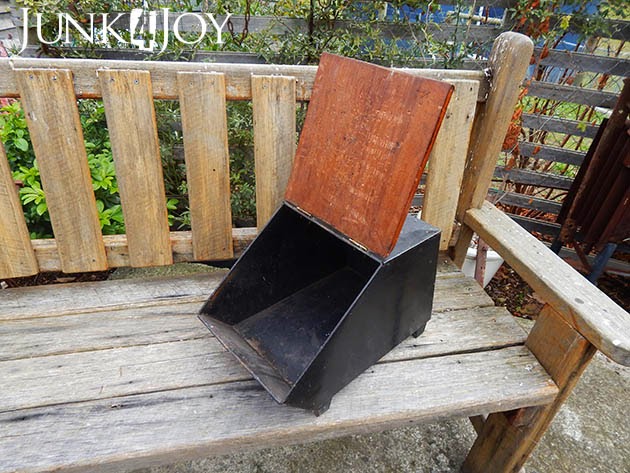
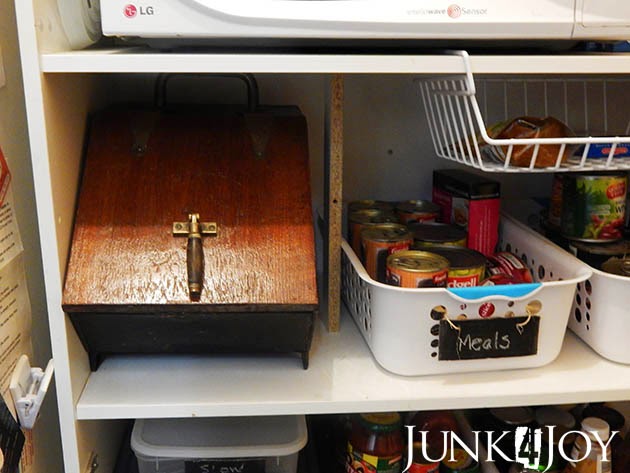
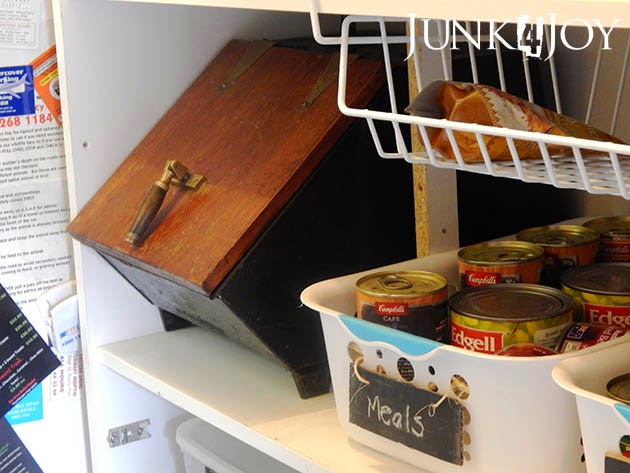
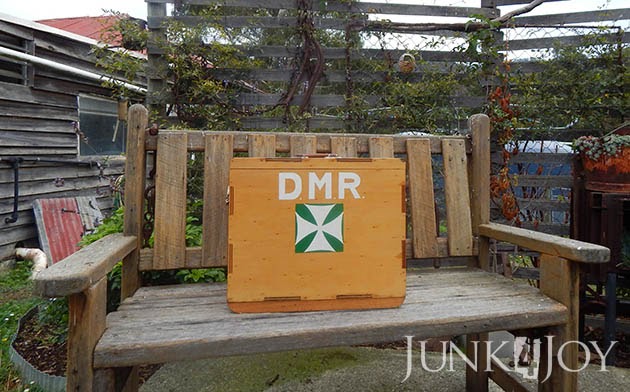
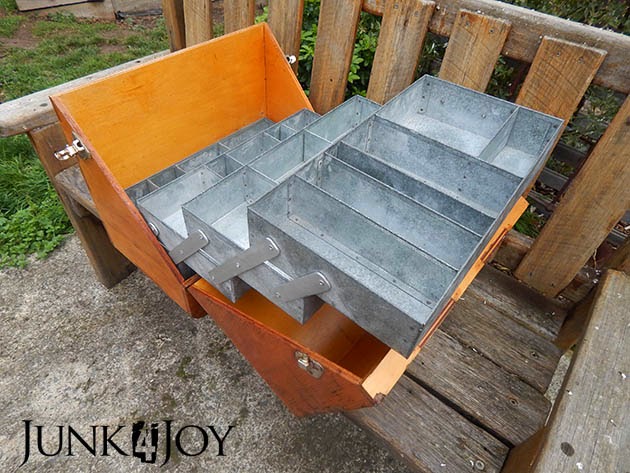
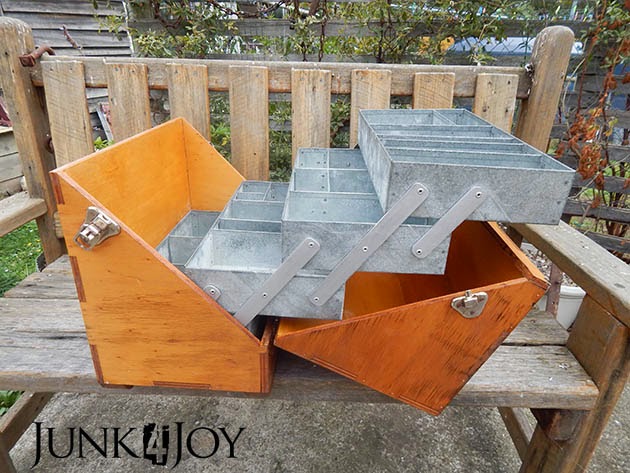
This was a gift from a couple of good friends. It was among some work things which were going to be thrown out. They took it home, cleaned it up and had planned to use it as a tool box or something, but lucky for me it really wasn’t suitable. Take a look at what’s inside:

It opens like a concertina, metal shelves sliding out at an angle. Problem is, the box itself plus the weight of the shelves means that if you put anything heavy on the shelves the whole thing tips over.
Obviously first aid supplies are light. How much can gauze dressings and band aids weigh?
I had planned to put beading and craft things in it, but they can be heavy too, so I went with sewing bits and pieces. You know, threads, needles, bobbins, buttons, pins, elastic, small things you have no use for, bits of ribbon and lace…

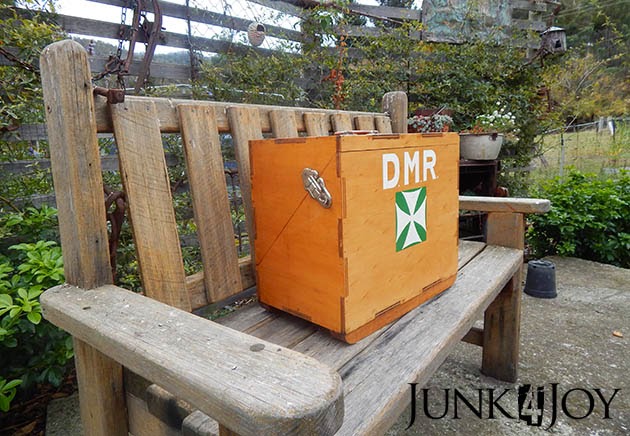
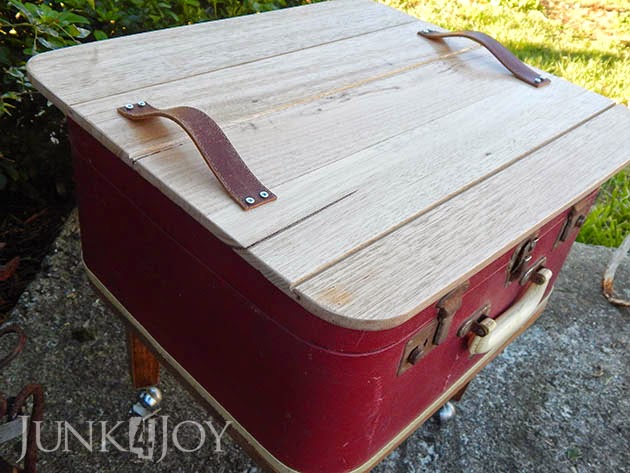
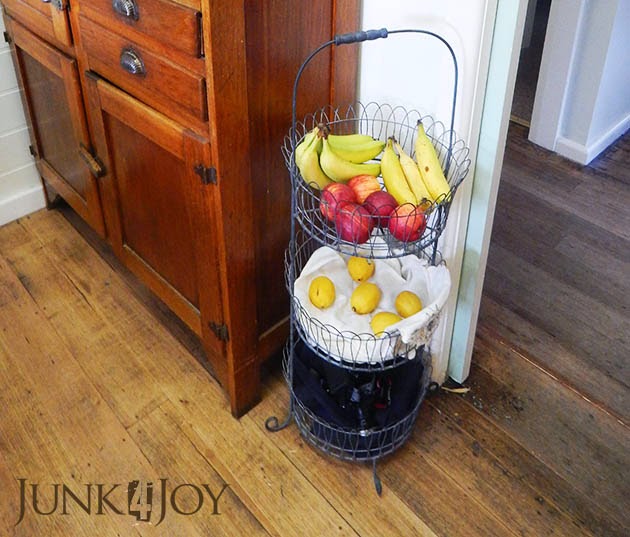
Since its heavy, and I mean HEAVY, the first thing I did was put small wheels on the bottom. I figured that once it was in the house I could just roll it from here to there and never have to lift it again.

And cause I tend to craft and sew in the living room while watching TV (no wonder the house is always a mess!) its close at hand with anything I need.

Pretty cool huh?

This is all part of my trying to organise myself and our home in such a way that I can make things without having to lug things around and spread them all over the living room all the time. When I started doing up the office I took all my crap stuff out and put it in plastic containers in the casita till I could sort it and organise the right storage for it. Its mostly still out there, but over the last couple of weeks I’ve been bringing in a box at a time and going through it. Some things are staying, a lot are going to work for art and craft programs there.

The stuff that’s staying now has some cubby storage to keep it organised.

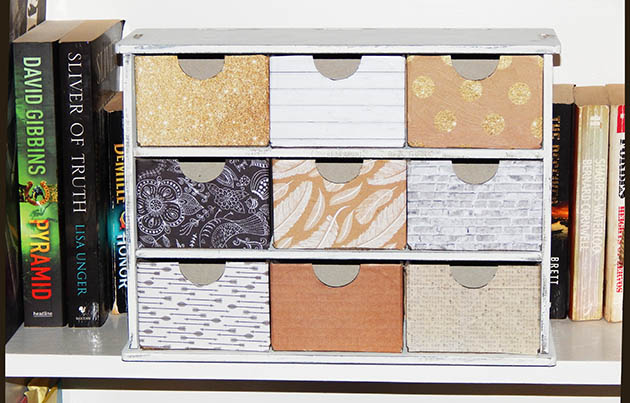
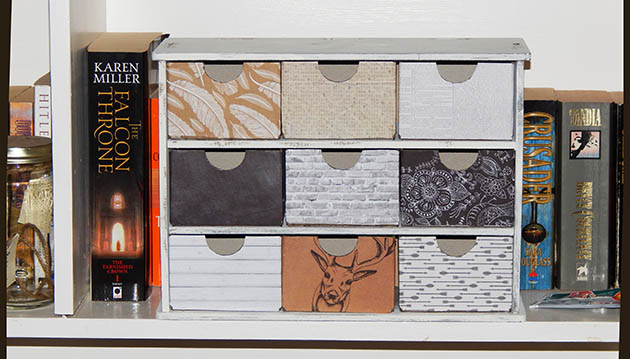
These are just the cheap little MDF and cardboard cubbies that they sell at Kmart. I used scrapbook paper to decorate them so they’re quite cute (not the best job…) I figure I need at least one more of these, but they make it so easy to find things – everything in its own drawer.

I also have a tip shop small wardrobe which is waiting for a makeover in the casita. Its going to have some shelves put in it and get a facelift, then it’ll move into the office to hold my neatly organised and sorted craft bits and pieces.

I’m getting there.

z

art from trash – some photos

I really wanted to share some photos of work at the Art From Trash exhibition which ends next week. Some of these photos were taken by myself but most were taken by the official photographer and I got them off the Art From Trash facebook page. Please visit their page to see more work.
I mostly just wanted to share the works that Wayne and I entered or have connection with through our jobs.
Firstly, here are Wayne’s entries. This one is called Nucleus and is made of old metal, wire and wood. It looks best in the sunlight with the sun glinting off the silver and copper wires, contrasting with the rust and old wood. Its approximately 45cm tall.
This one is called Big Bang and is over a metre tall. Its free standing and is also made of different wires and metals. You can’t tell in the photo, but there are silver and copper wires all mixed in together with rusty metal. Photos don’t do it justice.
You’ve seen this one before. Its my Travelling Sidetable.
And of course, my Rooster In Print.
This is the Cosmos Collection, a collection of animals made from plastic and other ‘junk’. These were made as part of ‘making art from trash’ workshops run at Cosmos (where Wayne and I work) in association with the Tasmanian Art Gallery.
Another Cosmos entry in the AFT is this Rock’n’Table, made by participants in our art programs. Obviously made of rocks and a slab of old wood.
Below is the work of a guy I tutor in art privately. Sam Bosworth is a very talented young man with autism and I love working with him and watching him develop his wiring skills. This entry is called Fly Wire and is made of old coat hangers, old plastic toys and wire. 
You can’t really see the many different coloured wire in the pieces.

And in case you missed last year’s AFT, these were my entries – the Junkyard Dogs.

This little guy is made of wire, plastic toys, dog hair and electric cables.

This guy is plastic toys and wire.

This one is old cables and cardboard.

Lastly, the smallest in the bunch, wire, dog hair and a dash of possum hair and dryer lint.

I’ll leave you with a fun one – this is one of last year’s Cosmos entries. The Tin Man was something I assisted one of our participants to make.

So much fun! That’s the best part of my job: working with people with disabilities to create art.
z

rustic rooster

I’m tired so this post will be big on photos and light on witticisms. 
I’m having trouble keeping my eyelids open… I apologise, however I did want to share my second entry in the Art From Trash exhibition.
This entry is about 70% recycled and 30% art. I really wanted to combine my art with my trash. 
I used a piece of thin MDF which I got off the back of a 2nd hand frame, I decoupaged pages from an old book onto it. I then drew this gorgeous rooster on it using pastels.

Once the artwork was finished I sprayed it with matt picture varnish to set the pastels so they don’t smudge. And then I framed it.

I’ve had these bits of wood in the casita since we bought the farm. They’ve obviously come off an old house… probably this one. I’m thinking they’re door or window frames.

Whatever, I loved the chippy look so I kept them thinking I’d make something out of them one day. And the day came!

I’m not a particularly good framer. In fact, I suck at it. But I did what I could, I used small brackets at the back to hold the frame together, then I used old hardware on the front of the frame to add a bit more rust to my rustic…

My rooster is for sale, hopefully he’ll find a good home cause I really don’t have the space for him at home. 
Then again, I can always make space…
z

travelling sidetable with serving tray top

I did say I had some stuff to share… well, here is the first one. I call it the Travelling Sidetable and its one of my entries in the current Hobart City Council Art From Trash exhibition which opened yesterday. I know it wouldn’t really have made a difference but it didn’t feel right to share this till the exhibition opened.

I’ve had this little suitcase for some years now. I used it to store craft supplies for the first couple of years, then its been in the shed waiting for a makeover since.

The top was ripped when I got it so I always planned to make it into a side table, but I left it under a window one day and the poodles jumped all over it totally destroying the top, ripping it off the sides and pretty much making it beyond repair.

I ripped what was left of the top off but kept the rim with the locks. I glued the cream edging back on and glued the top to the bottom as well to make it one solid piece.

The inside wasn’t in bad condition but I’d had a craft glue spill that lifted some of the lining when I pulled it off, so the inside needed something to jazz it up. A friend gave me some educational magazines aimed at kids in the 60’s. They were so old fashioned and the cheap paper had yellowed… they were perfect! I used some articles and illustrations from those inside. I loved the colours and some of the headlines.

Of course it needed a new top. I had found that the packers used between products in pallets were usually offcuts of tasmanian oak. The hardware store throws these out so I scavenged some pieces from their pile. I glued and clamped them together, then traced the suitcase shape on the back, allowing for about an inch overhang all round. I reinforced the back with strips of timber, both to hold the slats together and to ‘lock’ the top in place on the suitcase.

I sanded the top and gave it a few coats of leftover polyurethane from when I did my kitchen, office and hallway floors. That made the colours really pop.

In order to fit legs on it, I cut some thick MDF and used liquid nails and some button head screws to attach it securely to the bottom of the suitcase. The legs came from the tip shop and they already had castors on them which was a bonus. I just cleaned them up and rubbed some dark wax on them.

Meanwhile, I cut up what was left of an old belt I’d used to make handles on a tray ages ago and used small screws to attach each handle, effectively making the top into a handy tray.

Everything used to make this suitcase sidetable came from tip shops, op shops and bins, thus its 100% recycled material.
z
Shared at:

what is a tip shop? and who shops there?

So, what is a tip shop?

Sometimes I forget that not everyone knows that a tip shop it, and in fact, neither did I till I moved to Tasmania.

I’m not sure they even have them on the mainland…

A tip shop is a recycle shop (more or less) which sells stuff which people have thrown away, to other people who:

1. love junk
2. have no money to spend on ‘good’ stuff
3. love old stuff
4. don’t like spending tons of money on ‘good’ stuff
5. prefer to make over stuff they find someone didn’t appreciate, to make something wonderful.

Basically, the ‘tip’ is the rubbish dump. Thus a tip shop, is the rubbish dump shop.

Doesn’t sound so nice when you put it that way, does it?

But I love tip shops, and I’ve gotten a lot of great stuff from tip shops. Even greater once I finish with them.

Let me explain –

First a trip through a tip shop to illustrate what they’re like. Sort of.

Then a few projects made using tip shop finds:

pallet top bench
kitchen table
rubbish bin lid photo display
kitchen chairs
industrial desk lamp

There’s more. Way more. But that explains what tip shops are and how great they are!

z

PS The only reason the armchair in the photo is not already in my shed is cause I have no time!

small things big impact – the office light

Day 6… The office light

Since we’re on the subject of lights… this is the new office light!

Do you remember the office makeover (part 1, part 2 and then the clean up after it became a mess again)?

Anyway, this is the light fitting I had in there at the time… it was a work in progress which was barely started. A rubbish bin which I’d hung a few crystals on to see how it would look.

Hm. Not quite right. But remember that rubbish bin. You’ll be seeing it again soon.

Meanwhile, the new light is gorgeous. I found it at a tip shop about 2 years ago. Its made up of parts: the rim and the glass dome aren’t connected, they come apart. I mean, the rim is just balanced on the edge there, its not attached. Its a really interesting light and when I saw it at the tip shop I had to have it.

The glass dome allows light to shine all over the room, not just below (as is the case with the hallway light I shared). Perfect for the office where I need to light the entire room.

Of course, it didn’t look quite like this when I found it. Firstly it was grimey. Secondly it was peach.

Sigh.

What is it with me and peach? I’m haunted by that colour!

No before pics. I don’t think I actually took any photos of it at all before the makeover. I just wanted that peach gone!

I sprayed it Rust-Oleum Almond same as the hallway light. I know it looks lighter, but its just the photos.

This light had been living in the pantry (in all its peach glory) since I got it, but it was time to bring it out to be admired. The pantry will get another light eventually, when I make one. Cause as I said, I won’t spend $$$ on light fittings when I can find beauties like this in tip shops.

Another small job finished – the right light in the office.

Meanwhile, got home after work tonight and found the dogs had done some remodelling in the casita. Again.

Another thing to add to my list of things to do: clean up the mess.

z

small things big impact – a bit of a toilet roll holder

Day 3 – a rustic toilet roll holder

When we first moved into this house, the toilet was almost an outhouse. It was on the porch, outside the house. It was, literally a “room with a view”. You could sit there, doing your business, and look out over the valley.

We really haven’t done anything with the toilet since then, other than bring it into the house by enclosing the small porch to make a mud room. Its still ‘outside’ the house and you still freeze your butt off going out there in winter, but its no longer “exposed”.

I’ve been wanting to improve the toilet since we moved in, but its never been a  priority.

I mean, really… its not top of the list of places you want to show off, right?

I do have plans. I bought paintable wallpaper to do the walls, I plan to fix the weather damaged door,  put in a shelf… all kinds of exciting things. Among which was a different toilet roll holder.

I’ve seen toilet roll holders made of non-toilet roll holder items and, being as we’re horse lovers, I always thought a bit would make a good one.

Among all of Wayne’s horsey things was this huge bit for a horse in harness. Its old and the colour is just gorgeous. You can’t really tell in the photos, but it has a green patina to it.

I did consider trying to cut the bit somehow to make it into a roll holder, but I didn’t want to ruin it… so I decided to use it as it is. That way I can recycle it at any time in the future.

Basically all I did was search my stash of junk for a bit of timber which was the right size to hold it. I found this hand sander thingy (I never know what to call these things yet I’ve done stuff with them before). I sanded it (ironic) and gave it a couple of coats of polyurethane, then added hooks underneath to hold the bit.

I had two options for the actual roll holding bit. One was this rusty metal spike (my favourite) or a piece of copper pipe I cut to size and flattened the ends so it would fit through the gaps.

I prefer the rusty spike, obviously.

I really dislike the brackets I have on it now, but it’ll have to do for now. They’re all I could find. I’ll be fixing this up when I finally ‘do’ the toilet.

Oh, I also put on a new toilet seat, but no need for photos of that. We all know what a toilet seat looks like.

These surely were two small changes that had big impact.

z

Shared at:

coal box upcycled to vegetable bin

We have a new potato and onion bin.

Up till now I’d been keeping our potatos, onions and garlic in old flour bags in the vintage wire fruit basket thingy I’d bought a few months ago.

But you know potatoes like the dark… so when I saw this coal box at the auction last week I had to have it. Now the wire basket stand is holding fruit like it was meant to, and our potatoes are all snug in the pantry in their own light deprivation box.

All I did to the coal box when I brought it home was give it a clean and line the bottom with newspaper. It has some rust dots on it but I think that adds to the character.

I generally prefer things in their original rusty, imperfect state – and the handle is very unusual.

Here it is in its new home.

It fits perfectly in the little nook right next to the bit of timber I put in to hold the shelf up where it bowed under the weight of the microwave.

I may not always do things ‘pretty’ but they work!

z

Shared at:

retro flour sifter planters

Last week I shared the new shelf outside the kitchen window.

I haven’t yet moved it down the 6 inches I think it needs to be moved, but I have made one change.

I moved some of the plants to make room for my flour sifter containers.

I think that technically, three of something makes it a collection, so here is my sifter collection. One is really rusty but the others still look respectable.

Not that rust isn’t respectable!

They all have (had) working parts when I got my sticky little fingers on them, so I lined them with hanging basket fibre stuff, then filled them with potting mix before adding a selection of succulents.

Yep. I like them outside the kitchen window, along with the 2 tiered caddies I made out of baking tins.

Other than that, I’ve done a whole lot of nothing at home. Did I mention I was sick for most of last week? Yep. Holidays are not the time to be sick.

Turns out it was food poisoning.

The Dr said it sounded like gastro, along with the flu, just bad luck to get them together. But I watched a segment on A Current Affair last night about bacteria found on chicken. And the symptoms the guy on TV listed were all my symptoms to a T.

Guess what I had for dinner a couple of nights before I got sick?

Makes sense. If it was viral Wayne would have got it too!

I think I’ll avoid pizza and take away food for a while…

z

Shared at:

Beyond the Picket Fence

moving forward on the house painting

We have a week off work for Easter. Naturally my list of projects to do is huge.

Massive.

Long even.

One thing I planned to do, providing it didn’t rain, was finish painting the outside of the house. Its not too much to want a single colour on all the walls…

Around here painting the house is more an ongoing project than a ‘do it once and don’t do it again for 10 years’ kind of thing.

I think I started painting the house about 4 years ago.

I’m a speedy worker.

Its still not finished by the way… the back porch needs the high areas done and, realistically, it needs another coat already due to the exposure on that side.

So, when we built the front porch I had painted all that front area (except the beams up above). Then we put in a new window in the kitchen and needed to patch walls. And we decided to enclose that area of the porch so there was a lot of raw wood to paint.

This past summer I gave all those spots an undercoat and thought that, really, how hard could it be to finish the job with a couple of topcoats?

One thing I’d been planning on from the start, was a window shelf for plants under the kitchen window. I had this little grey one from the living room so put it on the outside of the enclosed porch. The brackets need adjusting so its come off now, but I was dying to see what it looked like.

Kinda cute.
It sits above the gas bottles for our kitchen. Another project for that mythical ‘one day’ is to make a box to hide both the gas bottles and the rubbish bin. Two birds – hide the bottles and keep the bin safe from the dogs.
Not that my dogs rip open rubbish bags. They prefer live chickens… sigh.

I had bigger plans for the kitchen window. This old shelf was in the white timber shed which is being used just for storage. I got Wayne to remove it yesterday and with his help (its a heavy sucker) I screwed it onto the wall under the window.

All I did was give it a good scrub and a light sand to get rid of loose paint. I love the chippy look and the various colours showing through it.

One thing I’m doubting now is its position. I think I need to put it lower. The kitchen window isn’t deep and having the plants overlap the window so much makes the window look narrower, and from inside I feel like I’ve cut out some of the view.

What do you think? I’m thinking of lowering it by about 5-6in.

Another thing I plan to do is cut a frame for that window. All our other windows have aluminium frames which were blue and I’m (still) in the process of painting white. A frame around the window will tie it in with the other windows better.

So, after doing about 2 hours of work on the second coat this morning I had to stop. I felt exhausted, weak, had chills and a bit nauseous. I hope I’m not coming down with something. Not on my holiday!

I think I’ve done enough for today.

z

Shared at:

and