DIY grooming bench (the ugly bench finished)

I shared the ugly bench I made for drying dogs the other day. Its a bit rough and ready, made from leftover bits of timber and offcuts I had lying around, but its strong and sturdy and fits perfectly where I wanted it.

bench1

The bench stands in a corner opposite my hydrobath and its my drying area. It holds a small dog crate for cage drying small dogs, and fits over my show trolley for drying larger dogs. I stash my stand dryer in front, with two of its legs under the trolley, and my blaster sits on the floor in front of the wall my poodles destroyed going after some critter.

bench2

That’s what it looked like when I finished it. The top was thick MDF, not water proof and thus not ideal as a drying bench.

This is what it looks like now:

bench4

bench5

I visited the hardware store and bought some ribbed rubber matting. I bought enough in length to turn over the ends on either side, and had planned to cut the width off to simply turn over the sides as well.

However, when I laid it on top of the bench I thought “Hey… this is perfect!” By not cutting it and simply rolling it up the wall and fixing it onto the plasterboard with screws, I’ve successfully waterproofed the wall as well! Whoo-hoo!

My plan is to eventually reline all the walls in my washing/drying room using anything I can find that’s cheap (or preferably FREE) so it won’t look as tacky. Till then I’ve got myself a totally non-slip, waterproof, sturdy drying bench I don’t get a sore back drying dogs on!

I’m on a roll!

z

Shared at:

1-Funky_Junks_Party_Junk_link_party.29-AM

the ugly bench

I did warn you. It ain’t pretty.

bench1

I’m not a builder. I’m not a furniture maker. I’m a furniture recycler, re-maker, re-configurer. I take things someone else made and change them. I don’t often make things from scratch.

And here’s the reason why:

bench2

I’m not very good at it. Sure, I can make things, but they’re never quite… right.

They might not be stable enough. Or quite the right size. Or not quite straight.

bench3

A little dog tries out the drying cage. I think he approves of my handiwork though he wishes he was somewhere else.

At least I get good marks for trying, right? Not to mention, I actually measured right and the trolley fits underneath it perfectly!

The drying bench is made out of 2 different size hardwood posts ‘borrowed’ from Wayne’s stash as legs, thick MDF from our kitchen makeover as the top, small size treated pine timber bought by me in the wrong size for something a few months ago, and leftover bits of pine lining from the grooming room reno as side braces.

Its 100% recycled.

Today I bought some rubber non-slip ribbed matting which will sit on top to make it waterproof and safe for dogs. I’ve already used it a few times and its a great height and size.

I’m happy.

P.S. If you noticed the ‘wall’ behind it, don’t worry. I groom in a shed (aka the ‘casita’) which houses my grooming room, my workshop, our feed room, tack room and what passes as a laundry. It needs work. And that’s an understatement.


z

barnwood rustic tray

About time I shared something I’ve actually made with my own little hands, right?

Here is a tray I made using offcuts of recycled timber, left over from one of our outdoor projects – most likely the stable makeover.

rustictray

I began this project when I found this old bit of wood which had some paint and lots of machining marks on it. I sanded it back but loved the look of the paint so left plenty on it. It gives it character.

First thing I did was cut the piece of wood and join it together to make a tray. I used glue in between the pieces but since I don’t have a biscuit joiner to do the join properly I had to find another way. I wasn’t going to rely on just glue to hold it together.

clamped

I used one of these little galvanised metal thingies to hold it together underneath. I don’t know what these are actually for, but I’ve found them very handy for holding wood projects together… Cause I’m not exactly an expert woodworker…

rustictray2

Once it was dry and the metal joiner thingy was in place, I put rubber stoppers on it to give it a nice stable base.

Did I fail to mention the timber has a slight curve to it? I think it adds character. Then again, imperfection gives everything character!

rustictray1

I added a couple of my favourite handles. I got these at a sale in a cabinet hardware store and I will, to my dying day, regret not buying all their stock. I haven’t been able to find any like these since.

rustictray3

rustictray4

rustictray5

I finished it off with a coat of wax. A coat of 2 different waxes mixed together in fact – a nice beeswax and an antique black wax.

I love the way it turned out.

Now to get onto some more DIY projects!!!

z

Shared at:

1-Funky_Junks_Party_Junk_link_party.29-AM

c5d16-talk-of-the-town-button-knick-of-time

old window window chalkboard #2

(This was originally published on my Blogger blog, but for some reason when I moved to WP it came across as a draft only. I’m republishing it now as it was featured on Your Funky Junk!)
Time just flies when you’re having fun busy. Don’t know how it is with everyone else, but working from home sure doesn’t mean I have more free time. If anything, it means I have more to do than ever.
I mean, there’s the grooming, which is work and must come first. Then there’s caring for the house jobs, garden and animals. Often the house and garden don’t get their share of care. And then there’s crafting and DIY-ing and just plain making stuff. Sometimes that gets pushed aside as well in favour of work or rest.
Still, I’m managing to do a bit here and there between the bigger jobs like renovating the chook shed and making the new roosting box for Stalag 13. Here is one such small project… the second of the old king billy pine window frames made into chalkboards.
This gorgeous window frame was given a shelf at the bottom – new pine aged with steel wool and vinegar.
Its got a chalk holder as well, this time a sliding door pull I found at a tip shop, sitting down into the shelf.
This frame had much less paint on it so I left it more natural, giving it a couple of coats of polyurethane to seal and protect it and to bring out the grain of the wood.

I really am seriously considering keeping all my chalkboards and covering a wall with them. I think it’d be fantastic. If I had a big wall in the living room or kitchen… which I don’t. Too many doors and windows… the price you pay when your house isn’t big enough for the stuff you make.
… Maybe I can remove a door or two… we don’t need all our doors, surely…
z
Featrued at:

old window chalkboard #1

So… as part of the whole getting my mojo back thing, you know, getting inspired and finding the time and energy to finally get to some of the projects mouldering in the various sheds, I have finished a couple of items and started a few more. I’ll be sharing these over the next days, weeks, months even if I get lucky and keep the mojo going.
First up I have this little window recycle. I have two of these little windows. I think they’re king billy pine but I loved the rustic look of them so I didn’t sand them back completely to be sure. I’d say its a good guess as old windows and doors were made of king billy pine which is rare these days. 
I love king billy pine and not only cause of what it is, but cause it reminds me of my toy poodle Billybear… He was the King Billy of my life.

Here is the finished product. Cute. It retains remnants of old paint, mostly on the sides… and where it didn’t I added it to create the framed look.

The best bit of this little chalkboard project, in my opinion, is the rusty old hinge I found and added as chalk holder. Its stiffened up so keeps it shape. Plus I’ve gone over it with a touch of polyurethane to stop the rust from coming off.

If you know me at all, you know I love rust. And old things. And weathered things. I collect almost anything old and rusty. I’m pitifully easy (and cheap) to buy for!
I knew this hinge would come in handy one day.

I gave the whole window a couple of coats of polyurethane to bring out the grain of the wood and to seal it. 

You know, I make a fair few chalkboards. They can be used anywhere, not to mention how handy they are. I’m planning to list this one for sale but in the back of my mind is this feeling I’d love to have a wall of chalkboards…
If only I had more walls in this house!
Really. We have a huge living room with 3 windows, 4 doors and a pass into the kitchen. All the available wall spaces are taken up already. The office is full to bursting with storage and decorative items, so is the guest room… and the kitchen. The only empty wall is in the bedroom but I have plans for that – a photo/memory box wall…
I wonder…
z

Shared at:

storing fabric

Sometimes all it takes to get creative is to have a need.
For instance, a need to store fabric. Or a need to get piles of fabric off the floor, hence a need for a place to store it.
The whole idea of storing fabric is to be able to find the bits you need quickly. The fabric has to be visible, not hidden in boxes and, ideally, sorted by colour.

I needed shelves. I needed narrow shelves. Or a bookcase. 
I didn’t have either. But I had a box.
I had this box, which I’d used as a dog bed when we first moved to the farm, for Barney and Mischa. It was a solid timber box I found somewhere which I cleaned up and gave a lick of paint. The post on how I did this is here.

I made my own dog bed cushions for it and put it in the entrance which is where Mischa and Barney slept as they’d always been outside dogs and I was introducing them to living inside.

After we lost Mischa it didn’t seem right that Barney slept by himself. He moved into the living room with the poodles and the box was put into the store room. Which is where I found it again while looking for something to make my fabric storage shelves from.

It was a very simple re-do. All I did was put small bits of timber on the sides as ledges to sit the shelves on. The shelves were cut from leftover bits of plywood. Easy peasy.
I sat it on the little side table in the office and now I have all my fabrics in one place…. or most of my fabrics… or some of my fabrics… Ok! You got me. I have a large basket full of small offcuts cause I can’t waste anything, a wire basket with real and faux leather bits and a large plastic container with fabrics for doll costumes.
But I do have all my colourful cotton fabrics for things like my anti-bunnies sorted!
z

string holders and evicting bats

Phew. The day is over. A good day, but SO tiring. I got a ton done which is great. I failed at a couple of things too, but hey, you can’t win ’em all.
So, what did I do today that was so exhausing? Well, I started with the plan of putting up the new grooming sign. I worked on that for about 30 minutes before giving up. It was just not working. Good thing too really, cause in the end I decided I needed to rethink the position. More on that soon.
I did 3 loads of washing and the usual chores of feeding and caring for all the animals, and I did a little garden work. Then I decided it was time to clean out the carport. 
Background: We used to keep our chicken feed in the carport and that encouraged mice and rats to live in there. Which encouraged the dogs to dig at the walls and generally cause trouble. About a month ago I started the car and a mouse jumped out of the engine bay. I’ve been parking out in the yard since. 
So, I decided the carport needed a makeover, more to make it safe than to make it look nice. Trust me, its a pretty basic farm carport… Not much I could have done to make it look pretty.
Anyway, I ripped off the sagging plywood which had been put over the barn wood and in the process evicted two rats and one tiny bat.
Yep, a tiny bat! Not a typo! I was so excited when I saw it. At first I thought I’d uncovered a hairless baby rat but then saw its cute little face and wings. I wanted to keep it! I wasn’t quick enough to catch it, it escaped under the wall and out near the dam. I was worried the geese would eat it – I mean, it was full daylight… what do bats do if they’re out in the day? I looked for it but couldn’t find it so I hope it was ok. The geese weren’t around so I know it wasn’t lunch at least.
I threw out a ton of rubbish and rat infested nests and then I nailed a thick particle board to the bottom section of the wall – Its not about keeping rats out as much as its about keeping any small animals (ducklings, chickens, natives) out of our yard. The finished carport is so much neater and I like the exposed slatted wood back wall. And bonus – there is nowhere for rats to nest any more!
After the carport was cleaned up, I opened up a small area I’ve had penned off to keep the dogs from digging. Hopefully now the rats have been banished the dogs won’t need to dig for them and destroy my plants. And I’ll be able to pull weeds. Yeah. I live to pull weeds.

ha.

Anyway, that’s not what I wanted to share with you today. I wanted to share my new rustic string holder. 

I was inspired by this lovely makeover of a thrift shop find by Carlene at Organised Clutter. When I saw it I thought what a great idea, I have to make one of those!

Yeah. Ok. Mine looks nothing like that. 
I had spindles. I had a ton of string. I didn’t have a fancy wall sconce. I also didn’t really have a wall spot to put it. So I just grabbed a piece of timber from my offcut pile and put them together. It’ll do for now.

Its not pretty, but it works. Its not for the office, its for the workshop so it doesn’t need to be pretty. The workshop leans more towards a more rustic-farmhouse-hoarder design style.
Thanks for the inspiration Carlene, and sorry I killed your idea. 
z

one chair-back, three ways

What do you do with a broken chair? Fix it or throw it away, right? Or… you can re-use it as something else. For instance, you can make it into a shelf, a photo display or a coat rack. I know. Just look at Pinterest. There’s tons of ideas there. 
I couldn’t make up my mind what I wanted mine to be, but I found the bits to make it into an adaptable chair-back – it’ll adapt to any situation you put it in! Just pick a room and it’ll fit in with what you need it to do. Or be.
The best bit, I think, is the antique curtain rod holders I found. I’ve had these rusted and bent things for a few years, just waiting for the perfect project to use them on. They’re just so cute with their little flower topped screws for holding in the curtain rod.
I got a couple of bulldog clips – with the requisite amount of rust on them – and added those to the back to hold things… 
So, here are some options: 
1.  Kitchen utensil hanger. It can hold handy kitchen tools and recipes.

2. Garden tool hanger. The bulldog clips are a handy place for seed packets and gardening gloves.

3. Hand towel holder. The clips can hold shopping lists or notes.

I also tried the variation of a tea towel on the rod… it works, but the I think it works best as a hand towel roll holder. Hand rolls really struggle to look good in a kitchen and this kind of dresses it up in my opinion.

So where will it live? I’m not sure. I have to think about it. All three ideas work.
Till then it waits to find its home…
z

Featured at:

Shared at:

electric heater mantle clock?

Some time ago I picked up this old electric heater. I can’t remember where, but I do remember why. It was the shape. I loved the shape of it. I saw it and thought “hey, I can make something out of this”.
I brought it home and snuck it past Wayne so I didn’t have to listen to a lecture about bringing home more junk.
Then I proceeded to bury it under a ton of crap in my shed. Not in order to hide it.

So, when I started my whole ‘clean out the shed, get organised, streamline my life, find the circular saw’ kick, I found this little beauty and briefly considered tossing it out.

Briefly. Very briefly.

I just couldn’t do it. Sometimes a vision is worth pursuing.

I was seeing it as a lamp. Or a clock.

A clock doesn’t need wiring so that won out. I bought a clock mechanism on ebay and proceeded to rip the guts out of the heater. Actually, I didn’t rip it all out. I loved the coiled springs so I kept those, just took out all the wiring.

I had to drill a hole in the front mesh to fit in the clock, then put it all back together.

Then promptly pulled it all apart again… The clock mechanism I got came with simple black hands which just didn’t work. Too dark.

I took it apart and sprayed the hands with Antique White USA gloss. Much better.

I put it all back together. Admired it a while. Then daylight savings ended. Now I avoid looking at it cause I have to take it apart again to change the time.

I really like it. Its a mantle clock with a difference. I mean, how many people have a retro heater which is now a clock?
And its not that hard to open up… I just have to get out the screwdriver and take out 4 small screws. How hard is that? Not hard at all.
…When I find the screwdriver. I know its on the bench. Somewhere…
z
Shared at:

fun junky planters

I’ve been a bad blogger. I’ve let other things (like working and earning money to eat) get in the way of sharing all the exciting things going on around here. I know you’ve missed me and are dying to hear how things are going at Wind Dancer Farm.
Well… not much really. Except that I’m about $1200 poorer thanks to Romeo. First a couple of weeks ago while grooming him, I found he’d got a grass seed in the sheath of his penis. Yikes. And while investigating that I saw he had a lump on his flank. It didn’t look like a grass seed but I took him straight to the vet. There was nothing in the privates, whatever had got in had got out thankfully. He got a course of antibiotics and it cleared up.
The other thing, the lump, the vet was concerned about. The ‘c’ word was mentioned. So Romeo went in for surgery to have the lump removed and a biopsy done. We then waited a week to hear. Romeo limping uncomfortably cause he also seemed to have a grass seed in his left front paw. I searched but couldn’t see anything so I waited to see if it would improve.
The biopsy said the lump was cutaneous reactive histiocytosis. Not something usually found in poodles or even, for that matter, on that part of the body. Wierd. We are waiting and seeing if it was a one off… I’ve got my fingers crossed.
When the stitches came out I asked the vet to check his foot which was not improving. He couldn’t find any indication of a grass seed either and thought Romeo might have broken his toe. He gave him anti-inflammatories.
Well, it got worse and worse till I saw that there was now a hole in the webbing between his toes. I searched and pulled out a grass seed spike and took him back to the vet. They kept him for the day and searched but didn’t find any more foreign bodies. They cleaned it out and sent him home with a red bandage, antibiotics and he’s also on anti-inflammatories again. It should clear up now but till then we call him Limpy.
Poor Romeo.
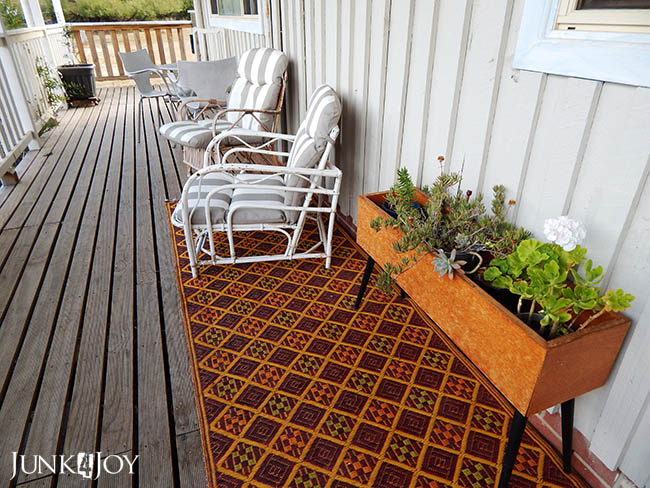
Other than that all is well. The garden is looking shocking but given that a reader commented on my old toolbox planter I thought I’d share some of my whimsical plant containers.
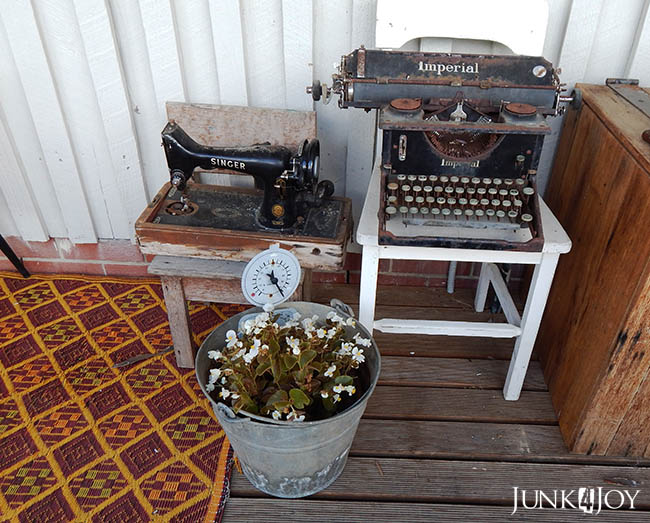
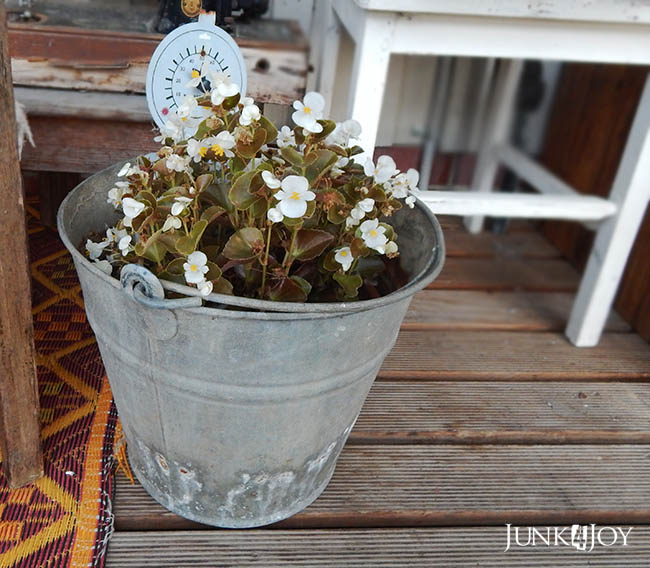
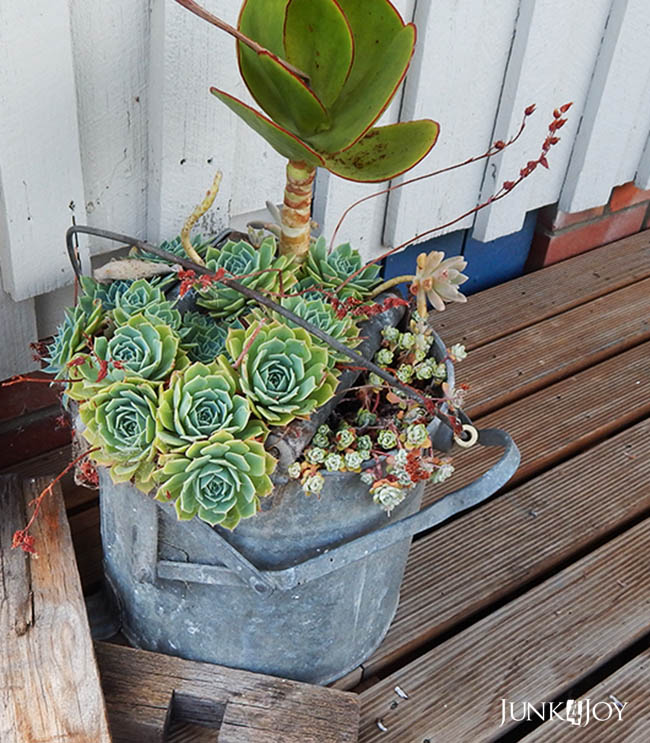
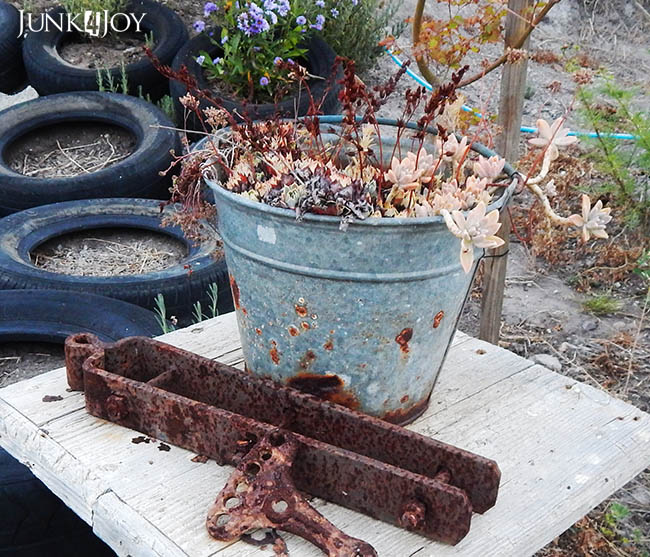
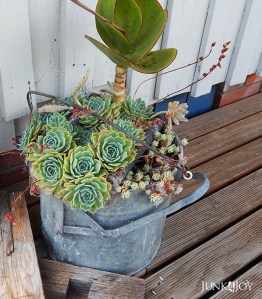
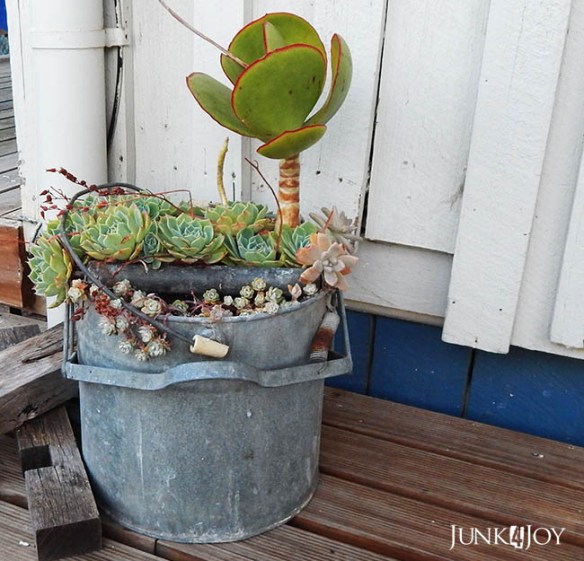
I have quite a few old and rusty galvanised buckets. This one, one of my favourites, sits on the porch cause the begonia doesn’t like it too hot or frosty.

Last year I bought this gorgeous 60s planter from a garage sale and have put small pots with succulents in it, as well as a cutting of a beautiful pinky white geranium I’m growing.

At the end of the porch I have my lovely old mop bucket. We had one of those things when I was growing up. I much prefer it as a planter.

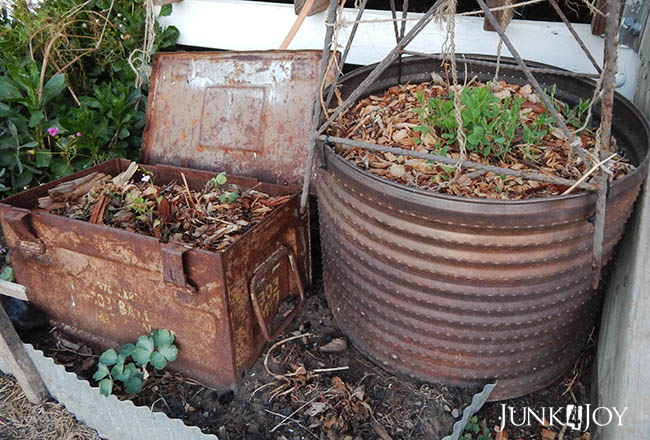
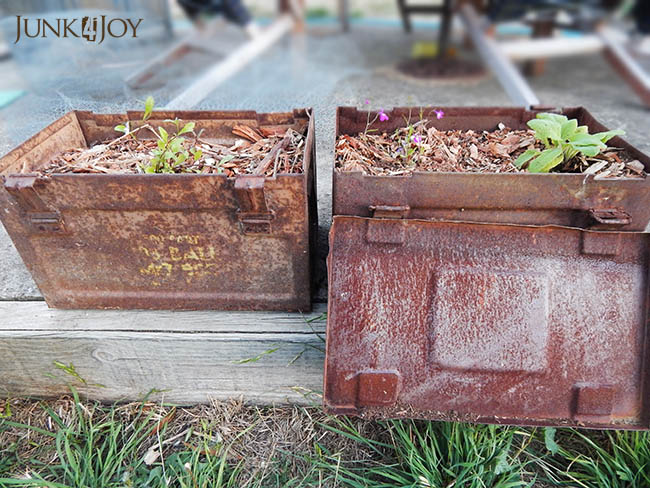
Since its now autumn the garden is looking pretty awful. Most plants have finished flowering and look ratty. But some are coming up again. Like the sweetpeas in the rusty old washing machine tub and the columbines in and around the old ammo box.

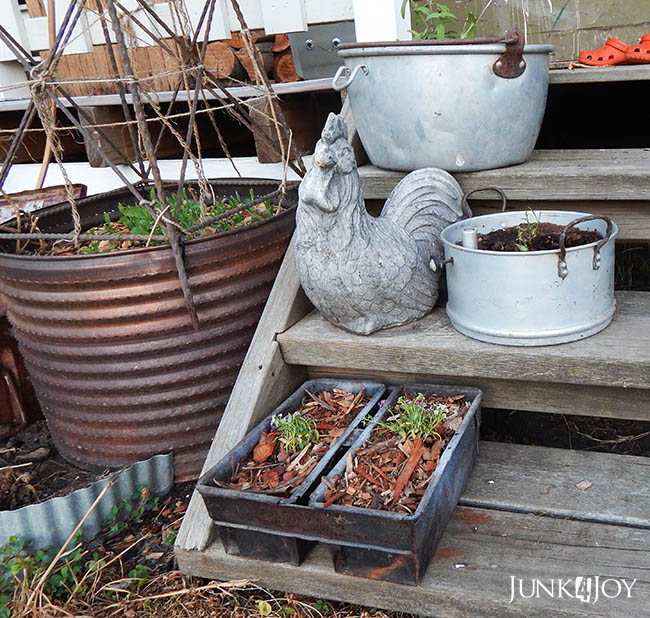
The steps up the porch have some new seedlings in them, alysum and lobelia which will fill and overflow the old pots and loaf tins they’re in.

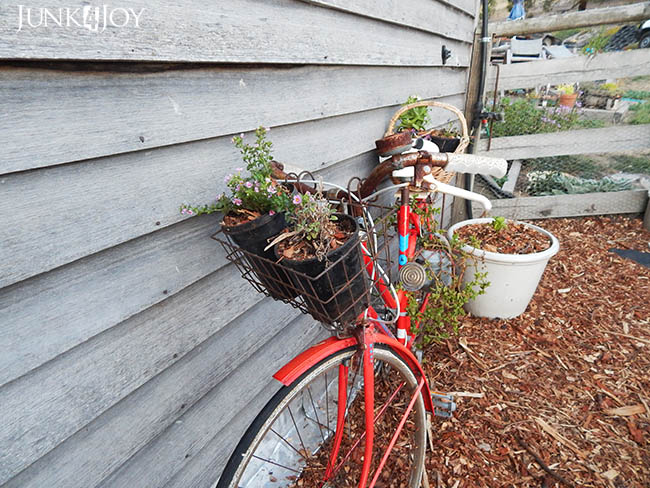
I’ve replaced the succulents in the bike basket with plants which will overflow and cascade as well. Cat mint, which has purple flowers, in one pot and a pink groundcover I’ve forgotten the name of in the other.

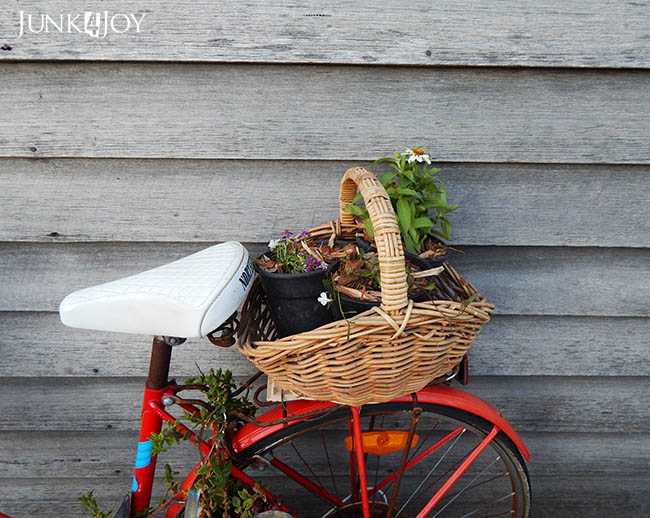
In three pots in a basket on the back of the bike I’ve got a white daisy like plant, some alysum and lobelia. The white will grow upwards and the others should cascade. One day it’ll look great… one day.

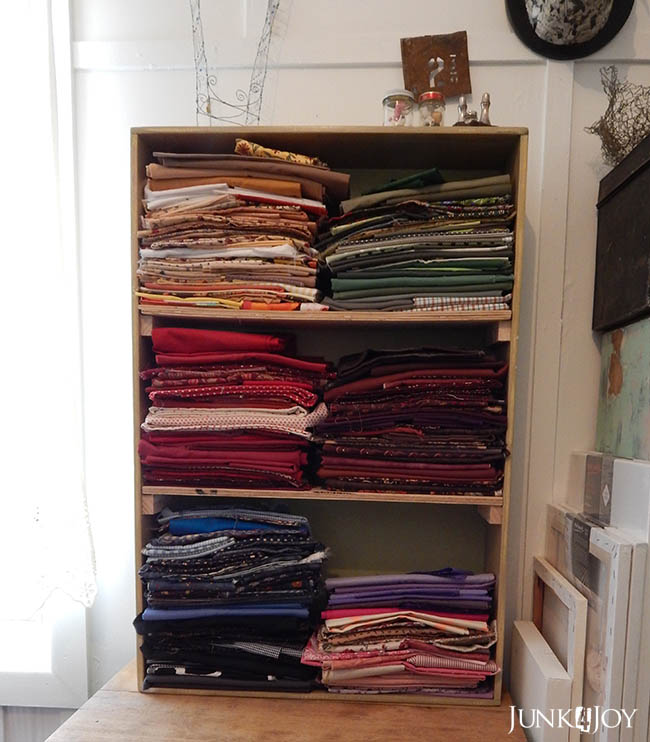
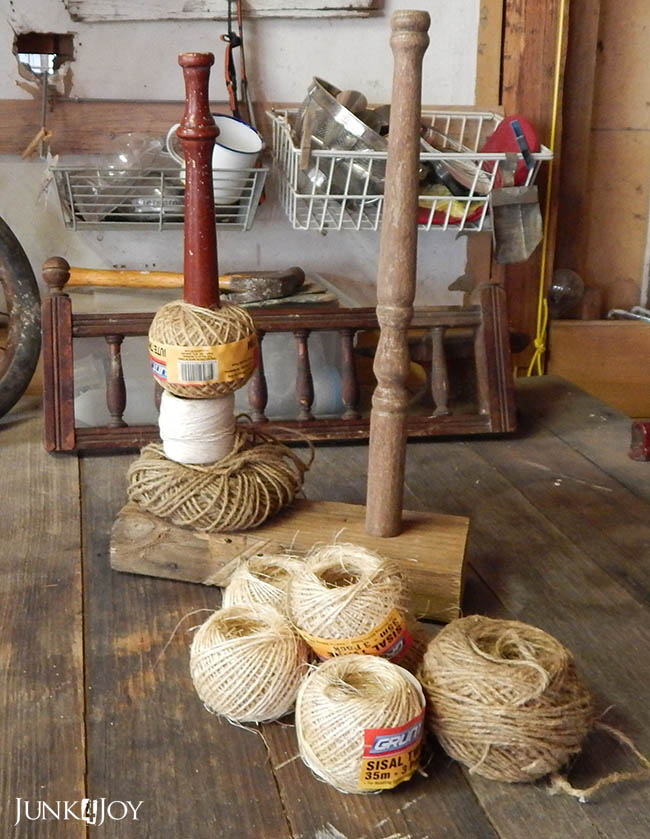
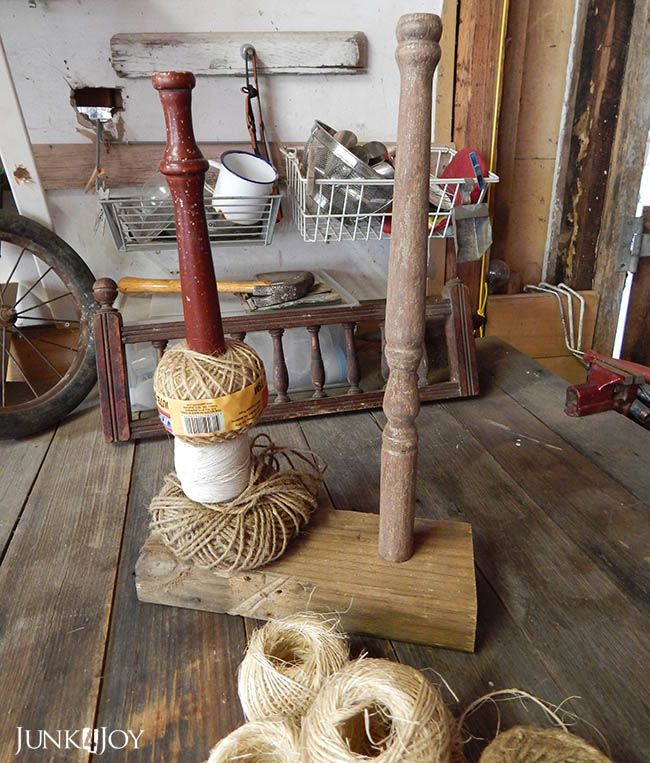
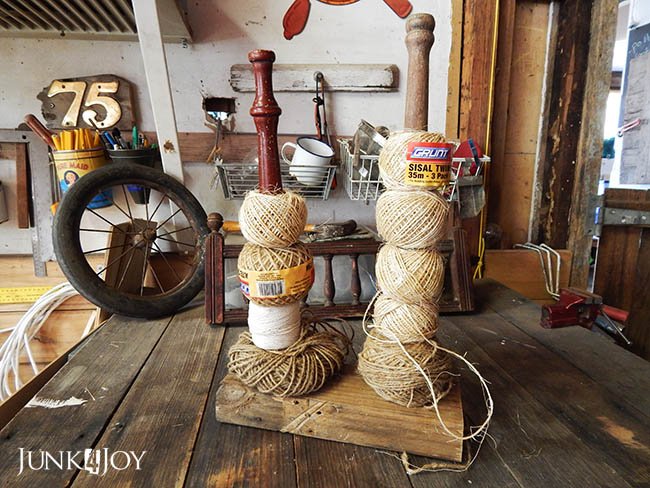
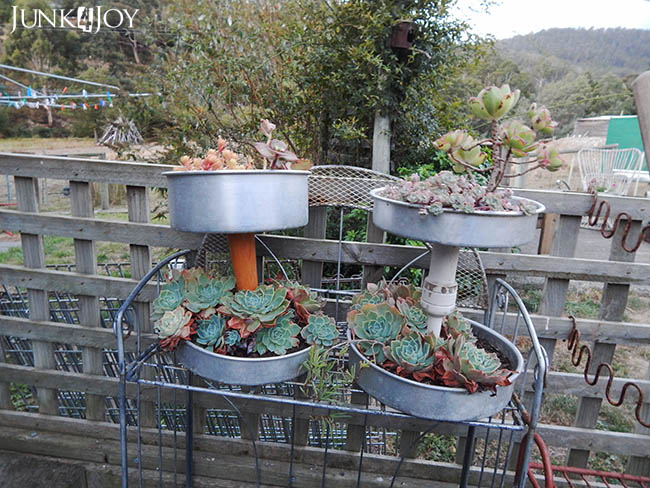
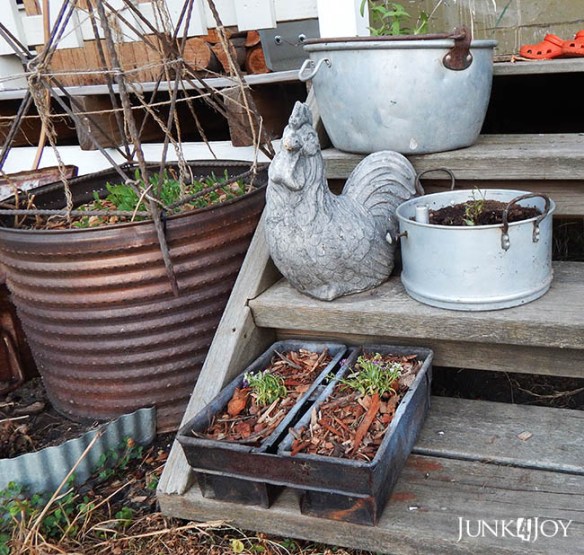
The succulents I put in my stacked containers are coming along nicely. I have three of these but the third isn’t looking too good yet. I made these a couple of years ago for indoor storage but decided they’d work better with plants in them. They’re made of spindles and baking tins.

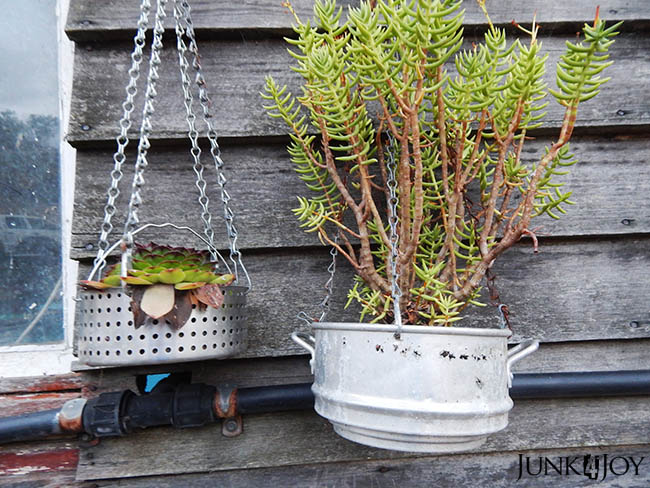
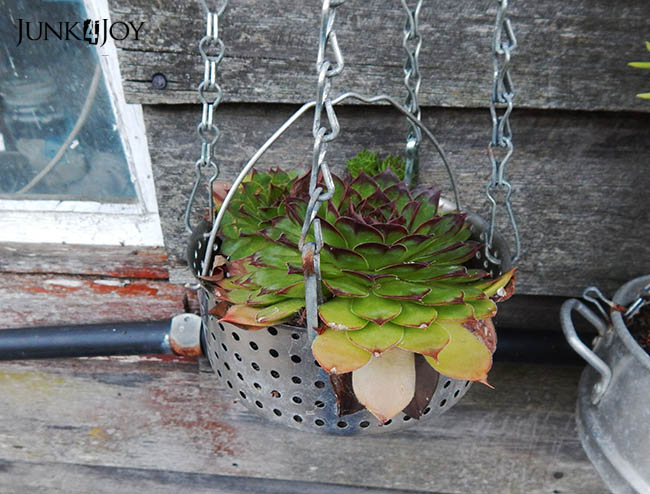
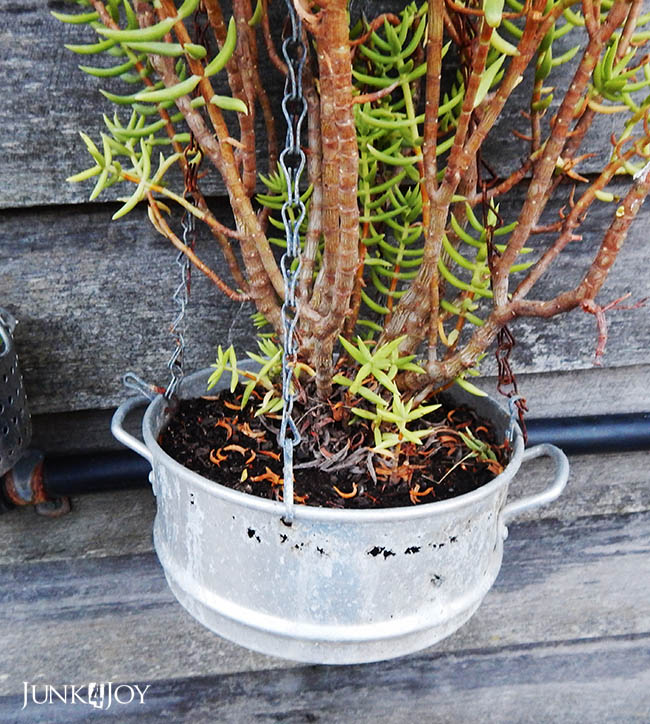
I made hanging baskets out of old strainers and steamers, put succulents in them and hung them on the wall near the door. Only succulents do well in planters with so many holes as they dry out very quickly.

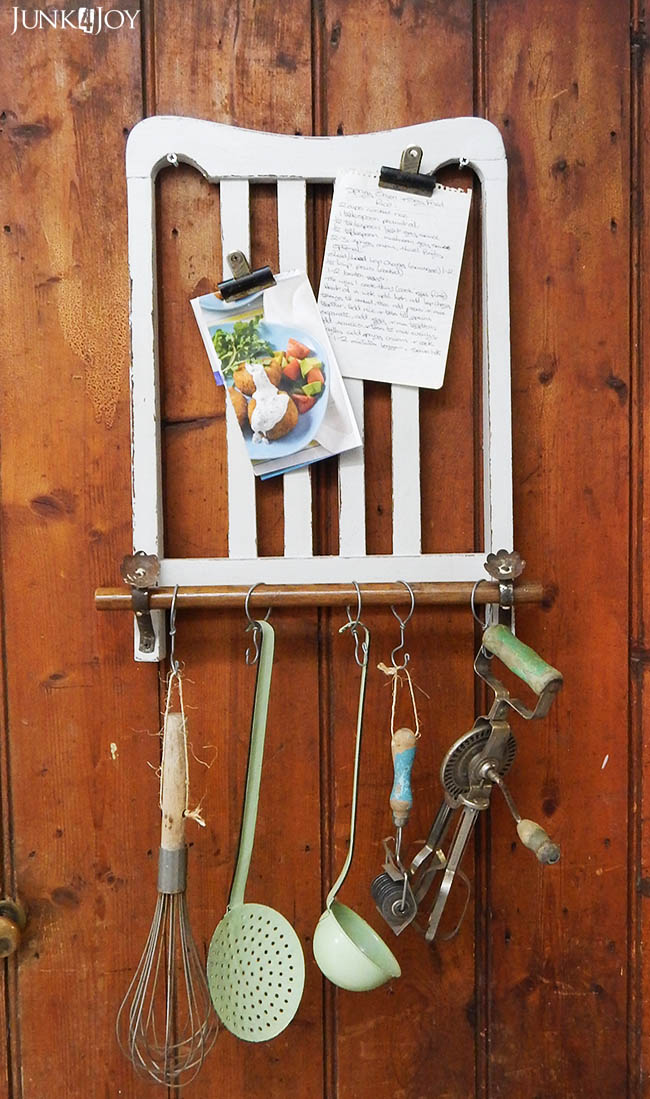
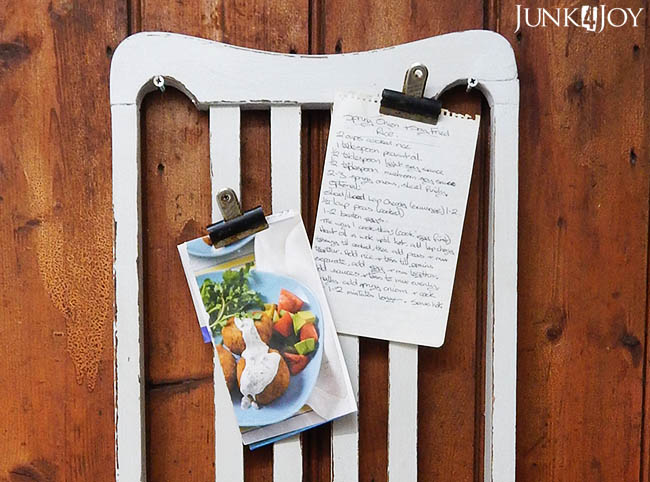
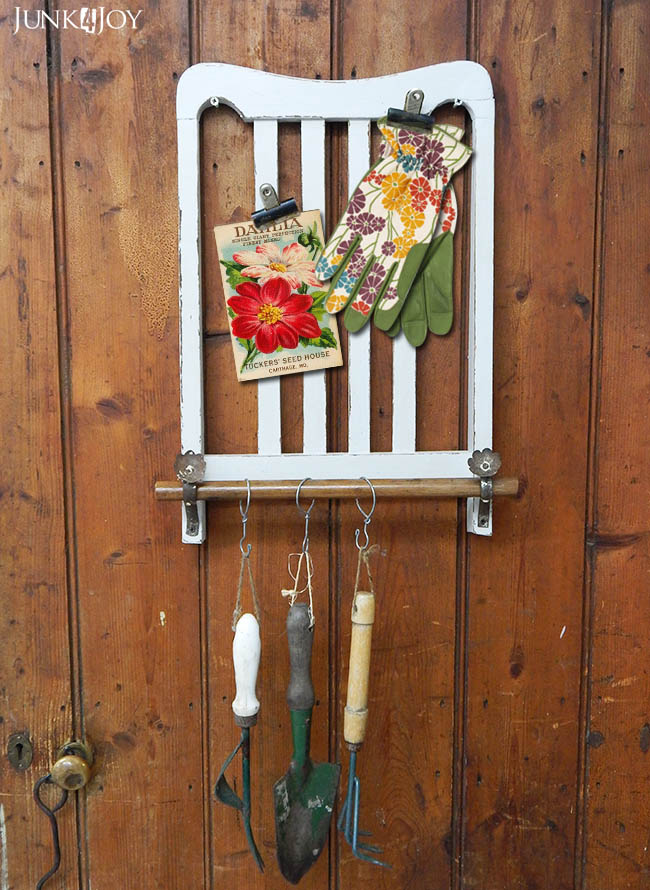
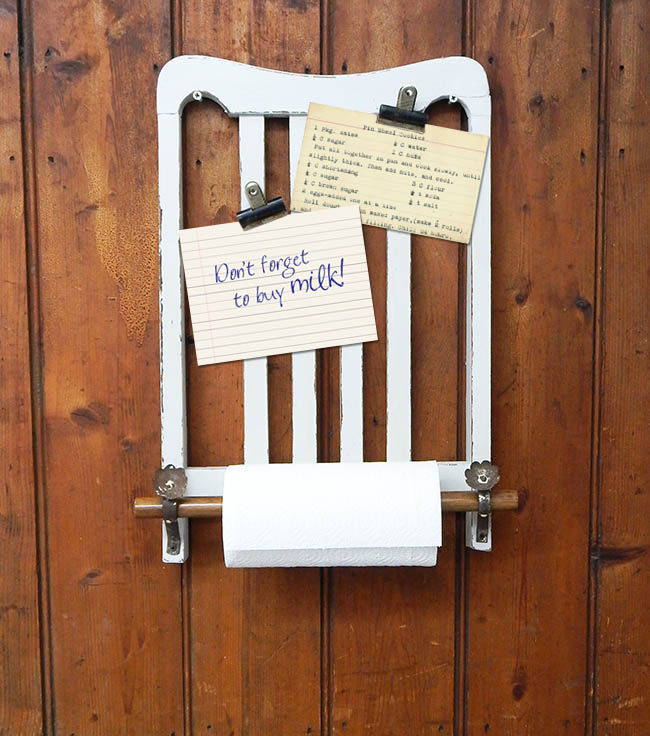
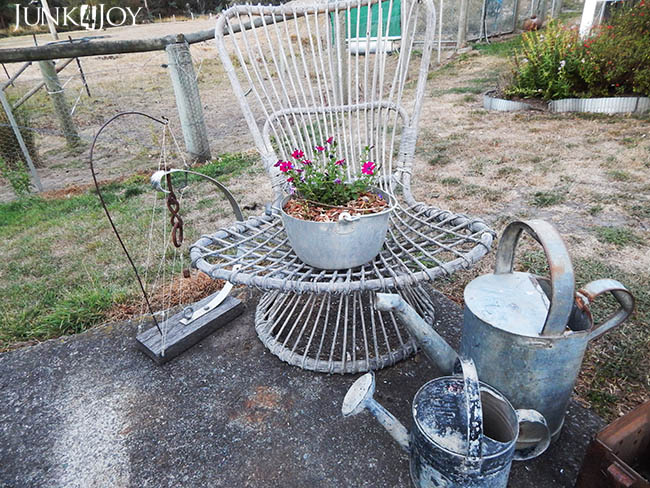
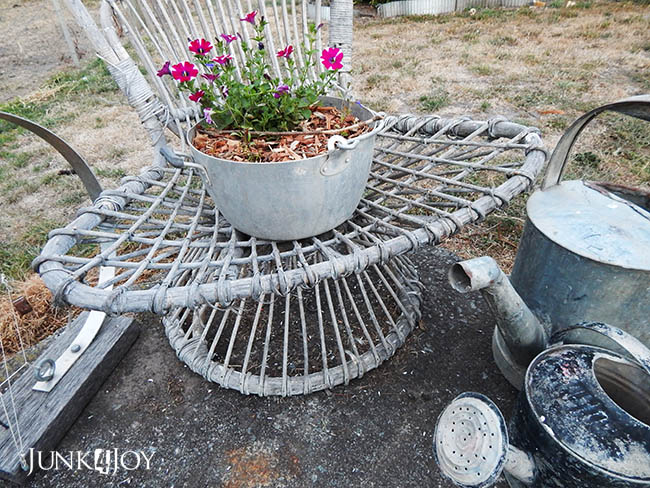
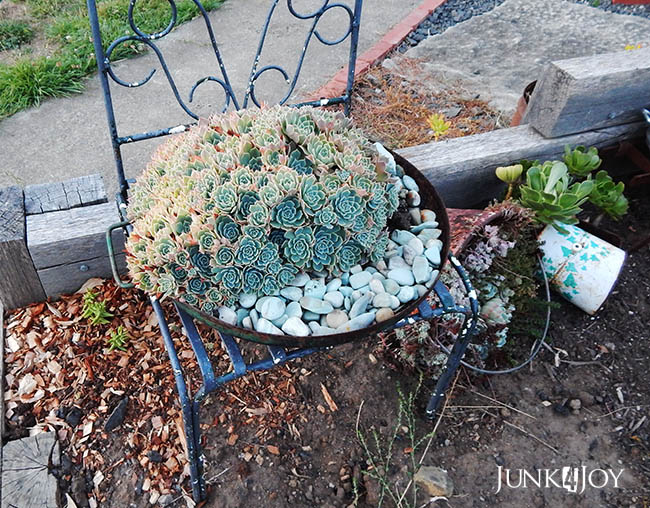
I’ve had this old cane chair for many years, I bought it in an op shop when I was living in Fentonbury. When I got it it was dark brown, I used a wire brush to brush off the flaking paint and sprayed it white. The paint is flaking off again now so I decided to relegate it to a garden ornament.

A bright petunia will full the jam pot. Next spring I’ll put in another one – this time in spring so I have flowers through summer.

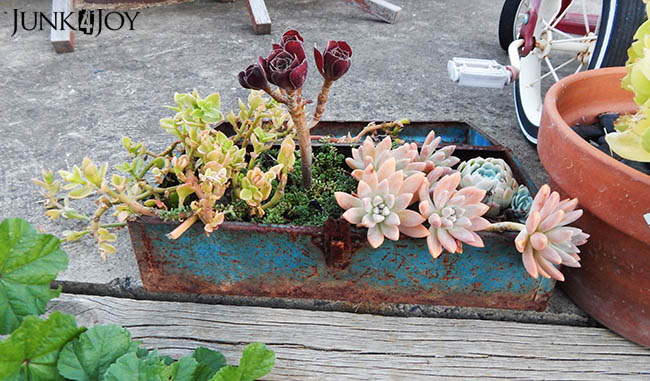
I used to have a lot of old toolboxes with succulents in them but this is one of the last ones. I sold a few of them at the market stall I did in January. I love old toolboxes and this one in blue and rust is just gorgeous.

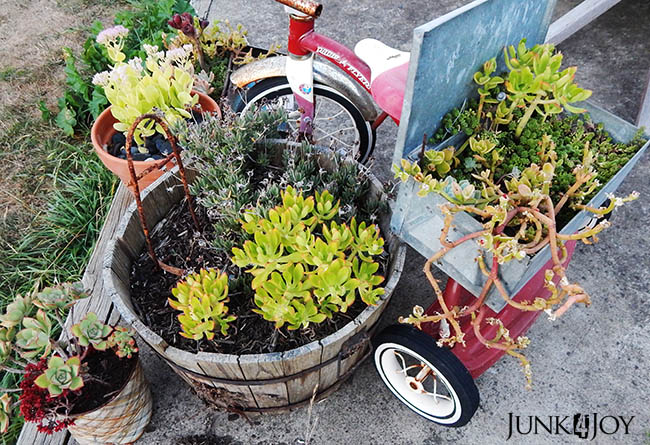
The last one is the one on the back of this little tricycle.

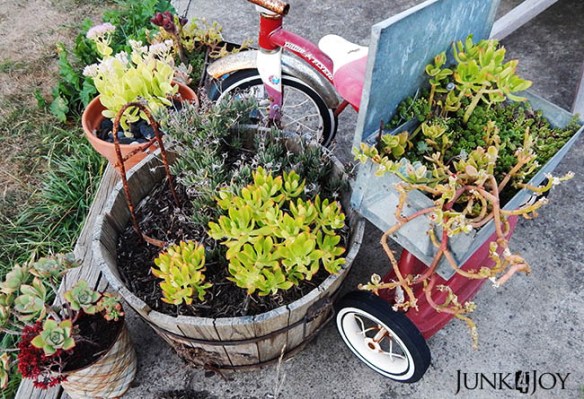
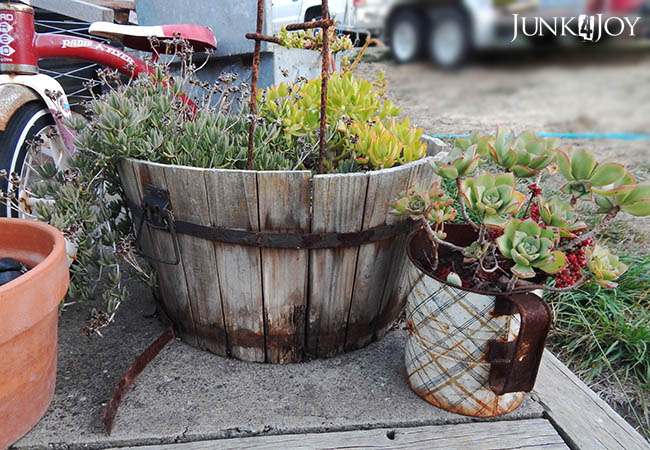
You’ll notice the flour sifter near the old (cheap) half barrel planter that I can’t move without it falling apart. I have 3 sifters but this is one in best condition – ie the plant is still thriving.

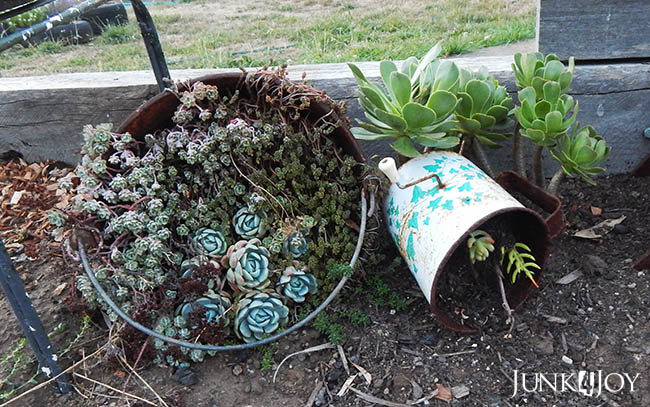
One of the other sifters lies next to an overturned pot full of succulents. Hopefully the succulent in it will grow and spread. If not I’ll just put another in there!
This little area is in a wasted corner of the driveway where the retaining wall meets the steps to the path. I envisage that the succulents will grow and fill the area.
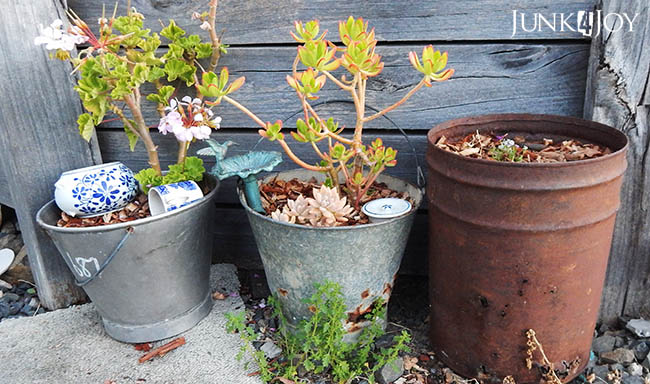
The other side of the retaining wall is decorated with some more buckets and drums.

And more ammo boxes… with more seedlings in them!

Do you get the feeling I love rusty old things? Well, you wouldn’t be wrong!

I do need to get out into the garden and begin trimming things back for winter and, if things go to plan, there’ll be a ton of flowers next spring.
I’ve been holding myself back waiting for the right time to cut things back. I get the urge to do it as soon as things begin to look ratty. Well, time is fast approaching. Time to tidy the garden, plug up all the holes the birds use to nest in, continue making the yard safer for the dogs next summer (ie keep them safe from snakes).
Lots to do.
Always.
z