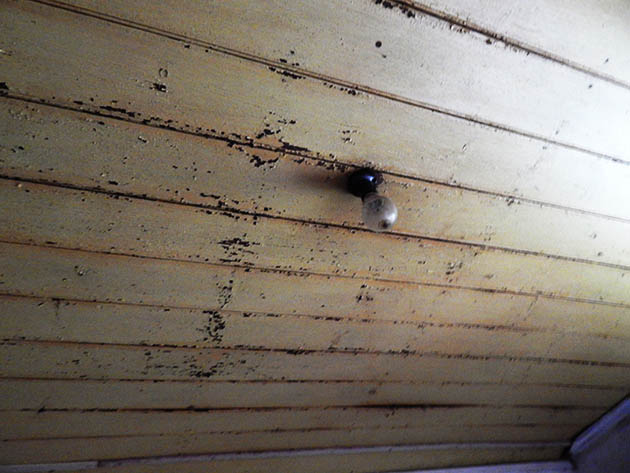
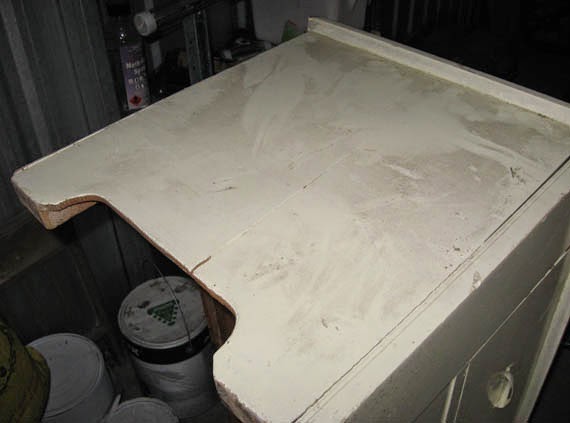
new grooming room stage 1

Oh man!
I feel like I’ve been hit by a bus.
I started work on the future grooming room today. I worked on it for about 6 hrs then had a shower and called it a day. It was a gorgeous day, I should have sprayed weeds and brushcut after ripping out walls, but I was more than ready to sit on the couch by then.
How about a glimpse of what I’ve been doing? This is what the grooming room looked like this morning. It was mostly empty but there were still quite a few things to be moved out for the ‘blank canvas’ I was after.
I managed to lug the cabinet and all the bits and pieces out of the room. Then I swept up all the rat poop. Eek.
This is what the ceiling looks like in there. Badly peeling.

And badly patched.

With plenty of holes. Ugh.
No idea how I’ll deal with that yet.
The walls were filthy, lots of holes in the plaster (drywall for you americans!), old mold in places, and tons of gaps between the floor and the ceiling. Double eek.

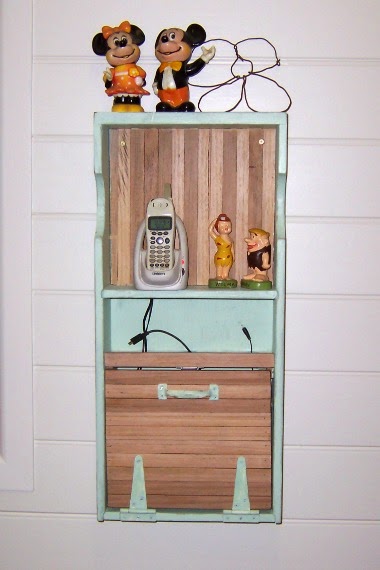
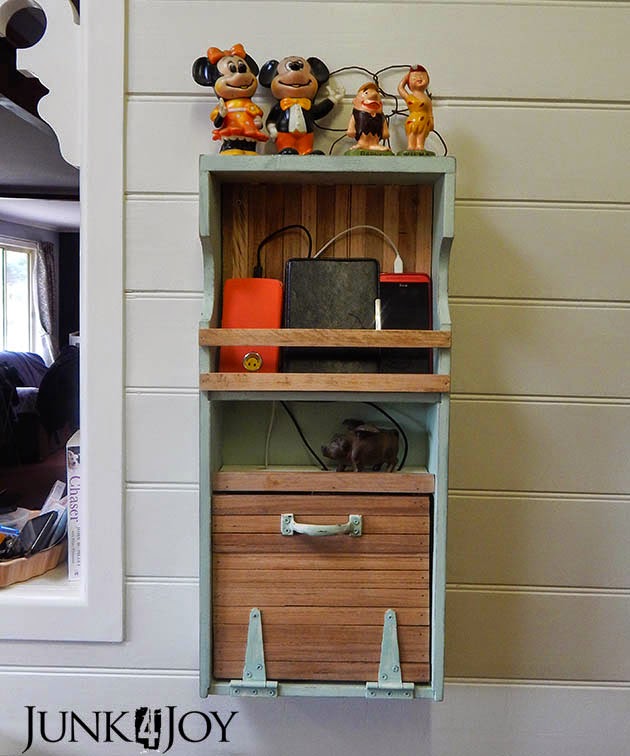
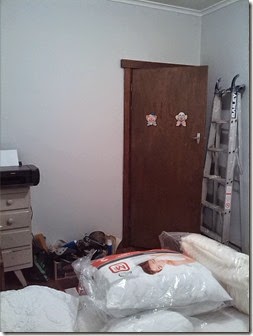
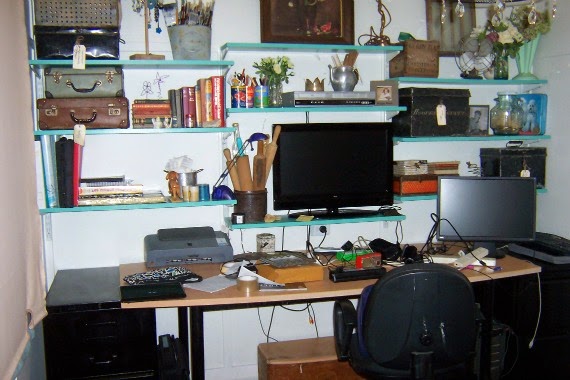
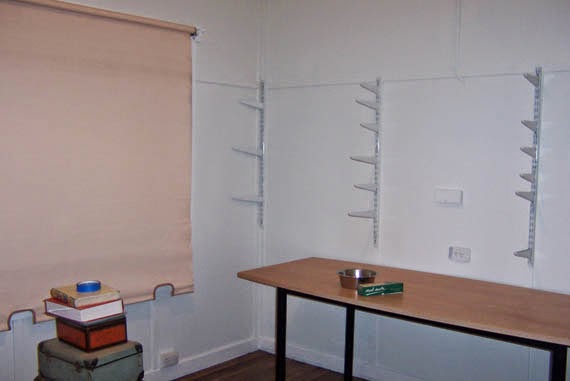
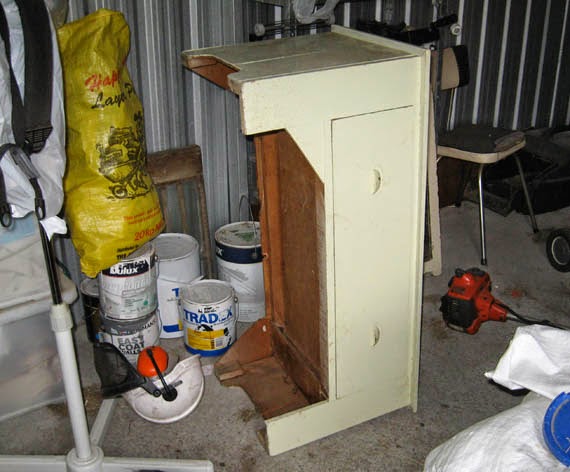
There were quite a few shelves to take down. What I imagined would be a quick job was a monster. Some of the screws were so hard to remove I ended up breaking the plaster and prying one of the suckers off.

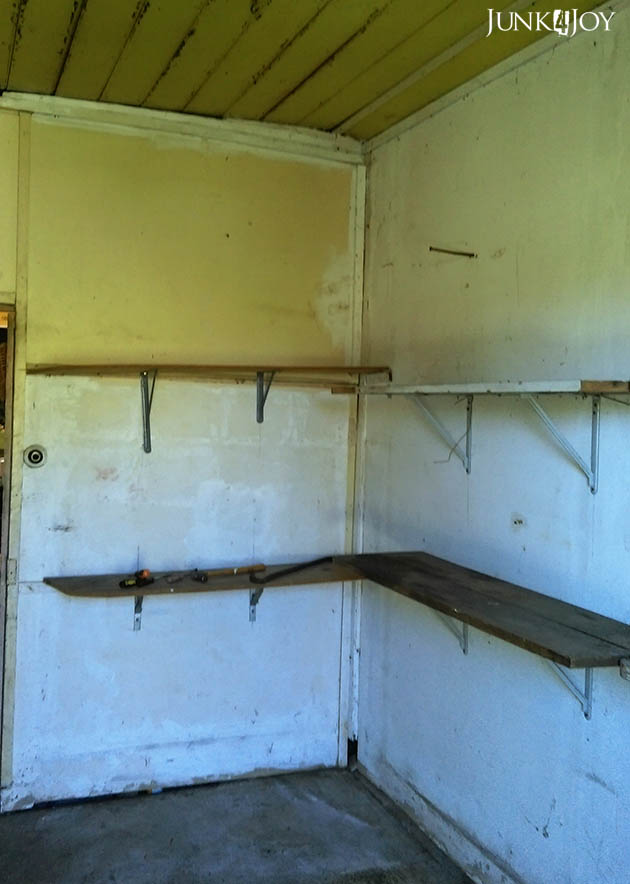
Since I’d already pulled out a section of plaster I thought, what the hell… I’ll pull it all off and pine line the entire room. Fresh start. All nice and clean…

Surely that won’t be so hard, right? I mean, how hard can it be? First I’ll have to dig out my drop saw which is buried under garage sale items, then move the bench (which is darn heavy) to a spot where I can actually use it… then I’ll have to measure (not my best skill), cut and nail the pine to the wall. I have a nail gun. Surely I can do that.

Right?

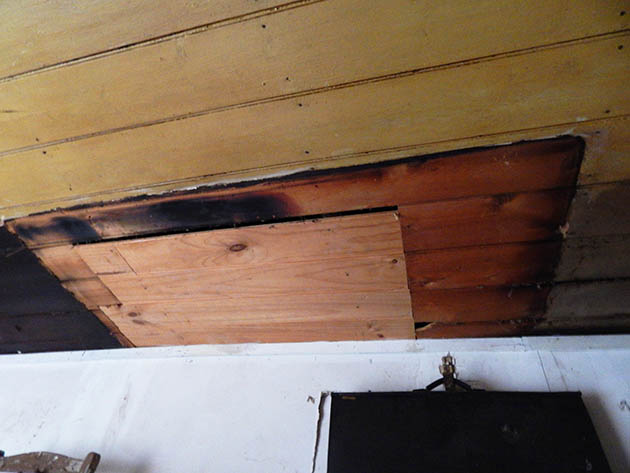
Anyway, when I pulled off the plaster on the wall leading to my workshop, which is lined in timber, I found this gorgeous moth eaten wallpaper. I wish it had been in better condition. I’d have kept it!

I found a lot of other stuff too. Bird skeletons for one thing. Oh fun. 
So, in the end I pulled the plaster off all the walls. This is what the room looks like now.

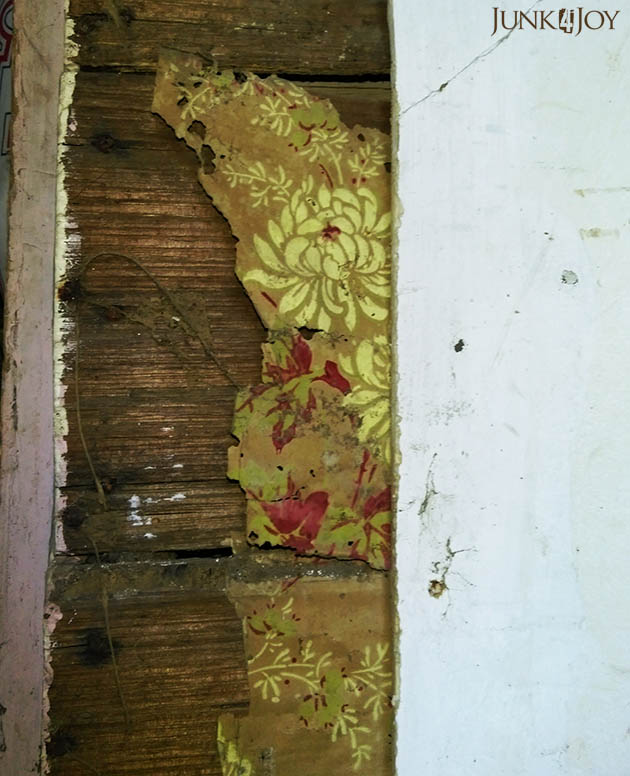
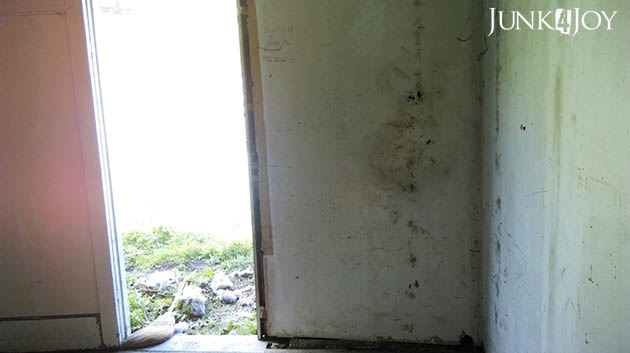
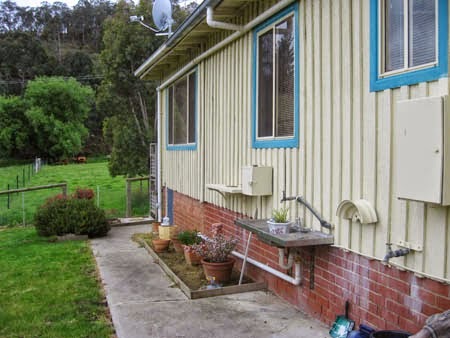
And yes, thats a hole in the outside wall you see there. With years of old bird nests in the wall beneath it. Triple eek.

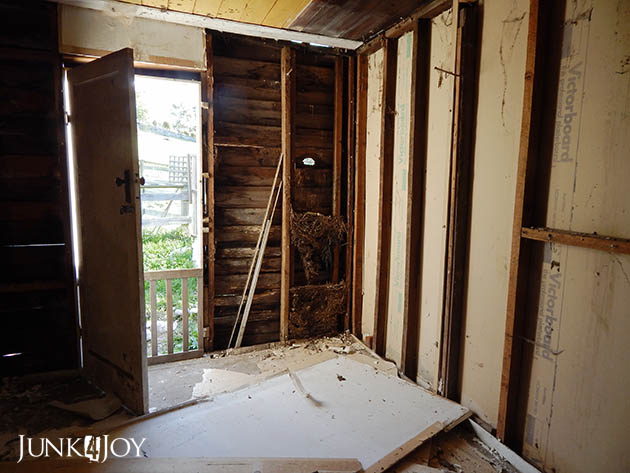
Mouse droppings, rat droppings, dead spiders (no live ones thankfully), tons of bird dust… thankfully I was prepared for all eventualities.

I’ve organised an electrician to come give me a quote and tell me when he can rewire the room. I need more power points and I want fluoro lights. Sure hope he can do it soon.

Tomorrow I’ll go buy the timber lining I need. I’ll buy seconds quality pine so that shouldn’t be expensive…

First job is to empty the room of all the old plaster – that in itself will be a big task and will necessitate a trip to the tip.

I can’t do all the walls till the electrician has done the wiring but I can start. I can also replace the outside door. I’m considering cutting the inner door in half to create a barn door so I can keep dogs in the room but still have circulating air.

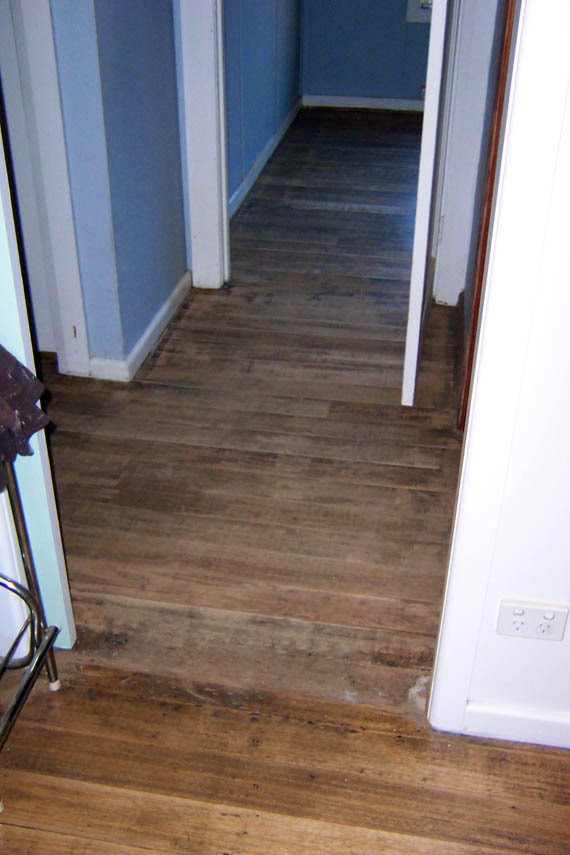
I plan to put some vinyl on the floor to make it easier to clean and better to stand on.

I now have to add “replace the rotten bits of wood on the outside wall” to the To Do List. I never planned to do that. Maybe I’ll just replace the worst ones…

I always under-estimate the time a job will take, or even how hard it will be. Hopefully once the messy stuff is done the rest will flow easier.

I can dream, can’t I?

z

small things, big impact – improved phone charging station

Its a new month and I’ve had an idea. I’m going to share the small things I’ve been doing lately that make life a little better around here. Its mostly those small things which I’ve been meaning to do for weeks, months, years… that I’m finally making a point of getting around to.
Ok, don’t cringe. I probably still won’t post daily, but for the month of May I’m challenging myself to not only finish a few of the niggly jobs I’ve been putting off for ages, but also to share them in the hopes that I’ll inspire someone to get up off the couch and fix that loose hinge, broken door handle (darn, that reminds me…) or whatever.
I actually started on this challenge last weekend, before I knew it was actually a challenge. Now its all up to me to keep up the momentum.
So, here is Day 1.
Improved phone charging station

I like to change things around a bit… Most of the time I re-arrange furniture (which Wayne LOVES), but I also like to update, change and re-make things I’ve got.

Like this phone station. I made this last year to hold the phone and as a place to charge up our mobile phones. Back then we had normal dumb phones.

Now we have smartphones and they’re bigger than the old ones…

BTW, who saw that coming? Mobile phones kept getting smaller and smaller, then suddenly the trend was reversed and they got bigger and bigger, the bigger the better.

With the new mobile phones and kindles all needing charging…

…and there’s another thing. Back when mobile phones were small and stupid, every single phone had a different charger cause heaven forbid they made things universal. Every household in the world had a drawer full of mobile phone chargers which didn’t fit any phone in the family.

Now, the kindles and smartphones use the same chargers. Will wonders never cease!

So anyway, as I was saying, the new smartphones and kindles didn’t fit on the narrow shelf which used to hold the old mobiles. And sitting them on the top shelf was to risk them sliding off and breaking.

It was time for an update.

This is what it looked like before:

This is what it looks like now with the addition of a couple of timber strips across the front, making a safe charging space.

A small, simple change which makes life a little easier, or neater.

Now if I could just convince Wayne that we should never cook in the kitchen, I might be able to keep the entire room neat…

z

Shared at:

no longer an ugly duckling

You’ve come a long way baby!

(Does anyone remember the Virginia Slims ad? or am I just too old?)

I am loving my home. I get so much enjoyment out of stepping out the door onto our front porch and just looking at it and the garden. Sure, the back deck (or the poop deck as its affectionately known) is still a mess, it really needs a roof and bird evictions, and there’s still a healthy farm-like amount of crap around the place… but its home and its becoming beautiful – and I love it.

We went from this:

To this:

What’s not to love?
You can read more about the before and afters here.
Here is the back deck, unpainted, exposed… I have plans for that… one day… till then I pretend I can’t see it.

The deck is welcoming and cosy now. The potato vine has gone bezerk and provides dappled shade in one small area.

Soon the pale yellow banksia roses on the trellis should also hide the water tanks on the left. And once the potato vine spreads a little more to both sides there’ll be more shade in the afternoons.

The plan is that when we roof the back deck we’ll just put more trellis on the corner and make it sort of like an arbour area where you can sit in dappled sunlight with plants growing around you. Perhaps a pink banksia rose… I’d love a purple potato vine but they’re not so hardy, and I’d love a jasmine but I’ve killed two of them so far.

Maybe I’ll stay away from them.

Ah… home. In this pic you can almost not see the bare spots on the weeds lawn where I sprayed Roundup. As I keep saying, if it wasn’t for weeds we’d have no green. 

There is still much to do but at least I can say I’ve managed to do something over the Christmas break. I finished painting the front of the house where we had bare timber from moving the kitchen windows. I undercoated the enclosed porch area ready to paint. And I put up my corner brackets, something I’d been planning to do for the last couple of years.

Now, if I wasn’t such a clutz I’d be out there painting today. Top coating the enclosed area and all the window surrounds.

Instead I’m sitting in the ugly purple recliner trying to move as little as possible.

Why you ask?

I was climbing ladders, on uneven ground, for days painting and screwing in brackets and I was fine.

All I did was water the embankment yesterday and I think I’ve cracked a rib.

I need to rethink riding again… I don’t think I should get on anything with its own feet. I can’t be trusted on my own two feet.

Let me explain: the embankment is made up of old tyres. A bit redneck but in the spirit of recycling, which I’m into big time. Its a steep embankment, impossible to walk up at the best of times. The other day I’d walked along the top tossing down the tyres from the top line that I thought were unnecessary.

Obviously, I didn’t put them out of the way or stack them nicely. I left them where they fell.

My bad.

So, while watering last night I was walking along the bottom of the embankment, a small channel which catches rainwater and directs it away from the house, when I tripped on one tyre, stepped back to get my balance and stepped on another, bounced off it and landed like a sack of potatos.

Hm… not quite. A sack of potatos keeps its shape.

I landed like a sack of potting mix. With a big splat, on my left side, on my left arm and on my ribs. My whole weight just kind of formed around and over my arm so that I had to kind of pry myself up.

After I’d caught my breath… ie about 3 minutes of moaning and groaning in pain.

It probably took me 5 minutes to stand up and pick up the hose again. I’d been lying in the ditch of course so of course I was covered in mud.

Like a trooper, I kept watering. It had to be done, right?

Then I went into the house and sooked to Wayne while I changed and washed the gravel off my arm.

The elbow is bruised but doesn’t hurt. In fact, the right elbow (which was nowhere near the squash zone) still hurts more than the left, but the bruising is impressive.

Its my ribs that hurt. And the weight of my left breast. Youch. (Wayne kindly offered his support. Pun intended.)

I can breath but deep breaths hurt and moving hurts.

Wonderful.

I’ve had broken ribs before. Many times.

You don’t want to know.

There’s nothing to be done but rest and patience. So, whether its soft tissue damage or a broken rib, I just have to wait it out.

Wonderful.

I still have a week off work and I had so much to do.

NOT happy Jan.

z

PS. I watch too much TV and have a head full of quotes and movie trivia.

boring pine chest to pretty pine chest

Here’s something I learned today:

Sanding dust can give your hair great texture. Forget expensive sculpting gels, mud or whatever. Just go sand something.

…It does nothing for your hands however.

Anyway, thought I’d share a successful makeover (unlike so many not so successful ones).

When Wayne and I moved in together, he had two tallboys and a wardrobe. They were plain pine and rather boring. One of the tallboys was a mess, the drawers kept dropping when you pulled them out, the base was falling out of them… its in the casita right now holding odds and ends till I decide whether I can fix it.

The other one and the wardrobe went into our bedroom… I use them for my own clothes cause I made Wayne his own walk in wardrobe

Yes. The man has more clothes than I do! And shoes. What can I say?

I make do with a measely pine wardrobe and two chests of drawers: a smaller one I bought when I lived in Fentonbury and the one Wayne owns.

I always planned to do something with them but I had to wait till I had time and energy. Not so much for the painting, but for the carting and carrying. I’d already painted my chest of drawers white many years ago, so I wanted to make the three of them match better.

At least be less offensive.

I don’t have any before photos cause I didn’t take any. And the external drive I put all my old photos on has decided to not work… I found this photo online which will give you an idea of what it looked like. The one I’ve done up is a 6 drawer tallboy, it doesn’t have the two smaller drawers at the top. The one in the casita has the two smaller drawers, but you get the idea. Nothing fancy, just a plain pine chest of drawers. No cute feet, no fancy bits, just plain jane.

So, first thing I did was empty everything onto the bed (and then the floor cause we need to sleep in the bed!) and take it down to the casita where the tools are. I gave it a very light sand and then painted it with some antique white I mixed up with a bit of unsanded grout. I like the look and feel of chalk paint and have always just made my own.

In the vein of using what I have and not spending extra money, I looked through my collection of handles and knobs. I needed 12, not so easy to have 12 matching ones. So I decided to mix and match and I love the result.

For the top two drawers I used simple black metal handles I got on clearance last year. I wish I’d bought more.

For the lower drawers I used the black cup pulls I’d originally bought for the kitchen but decided they were too small. They’re fine for the drawers. I have delicate fingers…
After the entire thing was painted (and some of the drawers glued and clamped) I gave the whole thing a light sand, revealing a bit of timber here and there… not overly distressed. Just enough.
Lastly I gave it a wax using some lemon scented furniture wax I got on ebay last year. The wax gives it some protection from being marked or getting grimy fingerprints and makes it easier to dust.
If you ever feel like dusting, that is.

All the bedrooms in this house are small. Annoyingly so. Its not easy to decorate and have storage without the room feeling cluttered. Unmatched items make it worse.

Maybe I really need to try and fix the matching chest of drawers…

I wonder if I can change the tracks on the drawers to make them work better…?

z

Shared at:

the answer to everything is WHITE

I like to surround myself with clever and talented people.. (Or maybe clever and talented people are attracted to me cause I’m so clever and talented…) Either way, I have really great friends who inspire me constantly.

One of those friends is my newest BFF, Patrice, who lives just down the road from here. She moved to Tasmania from interstate not long ago and we met through this very blog. She’d just bought a house and was thinking about renovating her kitchen, did a google search and found my kitchen remodel.

Small world.

We don’t see eachother that much despite the fact that you could probably throw a stone from my housed to hers cause we’re both always so busy – what with work and houses to dismantle and put back together… but we love to compare notes and give eachother ideas for even more projects.

Wayne has rued the day I met Patrice.

A couple of weeks ago Patrice got into high gear with her guest room as she was expecting a visitor. I love what she’s done with it. Makes my guest room look downright drab and gloomy.

I’m going to share the pics Patrice sent me of the room before and after. I think the transformation is amazing and its so simple and was done really cheaply.

Basically she just painted everything Dulux Antique White USA and made her own curtains (which she’s not happy with but they’re ok for now or for the next few months or forever depending on her inspiration and financial situation).

This is the room before.

What? Aren’t guest rooms always storage areas?

This is the room now. All fresh and bright.

Painting the walls and bed white instantly brightened the place up. Taking inspiration from the green pillow covers she selected a fabric for the curtains which looked good in the shop but turned out a little too lime for her taste. Ain’t that always the way?

She also repainted this gorgeous little dresser she’s had for years. I think its on its 34th coat of paint now.

It used to be a lot smaller…

You can’t tell in the pic above but she repainted an old chair the same dark green in the cat print. And notice below: no more dark brown door!

Clean and simple, right?

Love it.
I think I may have to find an excuse to go stay over one night.
Just to try it out…
z

which brackets?

 When I finally finish painting the house, I want to put decorative brackets on the posts to really give it some wow.

There are quite a few types out there but I want something simple as our house isn’t really fancy…

I found some I like and put them on the posts using Photoshop (MUCH easier than doing it in real life – not to mention cheaper!). So, have a look and tell me which you think look best.

Option 1.

Option 2.

Option 3. Similar to Option 1 but just slightly different.

Option 4. Much fancier.

I already think I have a favourite but I’m curious to see what others think …

I started cleaning and organising the casita today. I got as far as emptying my workshop area of all the crap I’d piled up, making it impossible to get in and work and making a start on sorting it out.

I cleaned up all the rubbish and put all the odds and ends into the store room (it’ll take me WEEKS to go through all the crap stuff in there to sort it out and put it where it belongs*). I moved the big cubby storage unit to another wall and put a hole in it to be able to access the power point behind it. I removed the square of carpet I had on the floor there and put it under the front porch to stop weeds from coming up. I brought in the metal frame of an old workbench that belongs to Wayne so I can make it into a workbench for myself.

Would you believe he was going to throw it away?

You’ll see how that’s sacrilege when you see it.

Of course I couldn’t put the bench together cause we didn’t have any bolts for it, so I had to go into town to buy some. I also need to find the right wood to make a top for it as well as a bottom shelf.

I wasn’t able to do all the stuff I had planned cause I ended up being out about half the day having meetings and social gatherings.

Eh. I’m on holidays!

z

* The dream is to sort all my junk out in boxes so that when I have the need for a spring, I can go to the spring box, or go to the rusty washer box for a rusty washer. Cause you never know when you’ll need a spring and a rusty washer.

I can’t wait to be able to work in there again and get started on things again!

office makeover – part 2

The office is almost finished. Sure, things around here are never actually really finished, but its now as finished as it will be for a while.

Warning: these photos were taken ‘in progess’ so they’re not all neat and tidy!

The one thing thats glaringly obviously not finished is the blind on the window. Still the old salmon coloured one. Its a colour that haunts me. Since the window isn’t a standard size I can’t just go buy a cheap blind to replace it so I’m considering my options. Till then, I can live with it.

As you can see above, there will always be boxes of stuff for the various projects I have on the go at any given time lined up in the office. But if I keep my promise to myself and work on one (or two, okay, maybe three) projects at a time, I can keep the mess down. Especially if I put away things I’m finished with.

I bought these two colourful rag rugs online. I had planned to sew them together to make one large rug for the office but they’re very obviously different lengths. Well, the guy did say they’re handmade so they do differ! Doesn’t really matter. I’ll be putting my non-slip rug underneath them and they’ll do the job of keeping the office a bit warmer in winter. Plus, they’re easier to wash when they’re smaller.

I spray painted our filing cabinets gloss black so they’d match. Mine was a purpley colour and Wayne’s was a more original beige. Now they’re both black and they don’t stand out like sore thumbs.

The light fitting is a waste paper basket I hurriedly put up and that needs finishing too. I have the crystals. I just need to get it down and fix it up.
I’ve painted the shelves a deep shade of aqua to match the cute little coat hanger near the map which holds some of my scarves.
The wooden box under the desk holds my power board and once I hinge the top on it it’ll act as a footstool when I’m working at the desk.

My sewing machine will live on its little school desk on castors so its always handy when I need it. My paper storage stool had to find a temporary spot too.

I have plans to make that wall above the sewing machine a wall of memories with photos and shadow boxes.

The map is a feature on the wall near the door. Right now its still a blank wall where I pile boxes of materials. I hope to one day, maybe, possibly, put a nice armchair in that corner near the small cupboard with drawers. I have a reading lamp I’m working on for that corner too.

Maybe.

Its not a big room.

This is my new paperweight. An antique iron. Love it.

My tin rusty tin crown sits on top of the dvd player cause I have no idea where else to put it and it always makes me smile when I see it.

A shabby letter holder now holds my paint brushes and the pottery measure Merrill gave me still holds my necklaces.

I’m still using my old suitcases, metal boxes and baskets for storage as much as possible cause I love the look of them. I have less storage space in the office now I moved the dresser into the kitchen so I really do need them.

The shelves are still a bit of a mess of things I like and want to keep around me, plus things I need in order to work. I figure they’ll sort themselves out eventually.

A small timber box I decoupaged holds my usb sticks and other small but necessary gadgets. The shelf wall and desk are now home to a desktop computer with its own monitor, a TV monitor I connect my laptop to when I’m doing film editing and a dvd/video player so I can watch movies in the office if and when I get an armchair in there.

Eventually I’ll be getting rid of the desktop computer so I’ll have a bit less clutter on the desk, but knowing me, unless I’m very careful I’ll soon lose the desk under tons of paperwork to be filed or acted upon. The theory is that when I love a room I make an effort.

The kitchen is still clean and tidy so there may be hope for me yet.

z

office makeover

In case you’re wondering where I’ve disappeared to for the last week or so, few posts… I’ve been on my knees working on the office makeover.

I’ve often mentioned how much I hate the salmon carpet throughout our house. And how much I specifically hated the office carpet cause the dogs (NOT my dogs! Mine are toilet trained.) used it as an indoor toilet.

A bit of background for those of you who don’t know our story: when Wayne and I got together he brought 2 dogs into the relationship: Mischa, a purebred staffie, and Barney, her illegitimate spoodle cross son. Neither of them had ever been indoor dogs. They were escape artists and were penned when Wayne was at work and at night, and rarely allowed into the house. When we moved in here we kept them in the dog run when we were at work and they slept in the garage at night. I soon moved them into the entry way and allowed them in the rest of the house when we were here. When Mischa died I felt sorry for Barney so he’s been a couch dog since. While in the house and out of our sight, they would often use the office carpet as their private restroom.

As a result the carpet in there was disgusting. I’d started removing it before we started the kitchen makeover and when there was another ‘accident’ in there (cause I forgot to close the door) I’d just cut out and throw away the piece of carpet. Why bother trying to clean it up?

So, over the week I had off and Wayne was away, I started the office makeover. First step was to remove the old carpet and underlay (which I re-use as a weed barrier).

Then I sanded the floor the same way I did the kitchen. First I went over it with the belt sander, then with the orbital sander and finer grit.

The floorboards now run from the kitchen, through the small hallway to the office.

After sanding both the office and hallway, I gave the office floor 3 coats of polyurethane. The hallway will have to wait. I ran out of time.

Next I I removed the shelving from the wall. I should really had done that sooner (like before sanding!) but the living room was already squeeze through room only. Once the floor was polished I took eveyrthing off the shelves, piled it into the middle of the room on a dropsheet. I now have to clean it all!
I painted the office walls the same colour as the kitchen, 3/4 strength Dulux China White. It looks so much brighter in there now. I had grown to dislike the blue which I thought was grey when I picked it. I also did the skirting boards, window and door frames in Dulux Antique White USA.

I still have to work out the window covering situation… I was considering painting the old blind but it doesn’t fit on the inside of the window frame, and its a bit worse for wear. I’ll work out what I want there eventually.
I have put a few things in the office, but can’t finish things till I work out the shelves. I’ve painted them and have to decide how to configure them. Now that I’m making films I’m thinking of putting my small flat screen in there as a second monitor. That means working out how to best place the shelves and screw them into the brackets before I can start replacing things to clear the floor.
I’ve put Wayne’s antique map on a different wall and placed my desk under the shelves. The plan is to minimise the crap stuff I put in the office. And try to work on ONE project at a time (says the woman who can’t see the coffee table or living room floor cause of office stuff and fabric to make costumes for a film!). 
The plan is to put an armchair in this corner and only have the sewing machine on a small table with wheels, the computer on the desk, and only the things I use most often in the office. And a rug.
And not jam pack the office with a million things to ‘get to when I can’.
Yeah, yeah, famous last words. However, I must point out that the kitchen is still neat and tidy and hasn’t begun to accumulate junk on surfaces. I love it so much I even wipe and put away anything I have to wash by hand immediately!

Here is a preview of another project I’ll post about when I get a chance… they key box!

And, as a bonus, you get to see part of the pile in the middle of the floor.
I hope to be able to get more done on the office this weekend but back to work means doing things in dribs and drabs. I’ll keep you updated.
z

storage bench with pallet top


A long time ago, in a land far far away on one of my visits to the tip shop, I found this little cabinet. Like the one I posted about previously, this little guy was made as a base to a wardrobe. A small wardrobe. This is the only ‘before’ pic I can find (not one of my best, I confess).

It didn’t have a top at all, had a couple of big cracks on the sides and the drawer was broken. In fact it was a real mess. But I liked the shape and handles, and was already thinking bench and shoe storage.

My vision was that one day I’d put a new top on it, give it some new paint and make the drawer into a door.

It sat in the casita for about a year. Maybe more. It held all kinds of junk for a while. It stood on its side a fair bit trying to look inconspicuous… It hung around gathering dust and possum poop (thanks to the resident possum, Mr Ponsonby who has since been relocated, and turned out to be a Mrs anyway).

Eventually I noticed it again and decided it was about time to do something with it and regain some space in my workshop. Especially given I’d pulled apart and repurposed the old shoe cabinet/bench.

I started off by giving it a coat of paint. At the time I was experimenting with greens so I painted the body green, but the handles were painted in a creamy yellow so I stuck with that for the door. I put a shelf inside the cabinet and painted the inside a slightly brighter yellow.


I pulled apart the broken drawer keeping the front. I had to fill the dovetail joints with bits of timber and gap filler to make it into a door rather than the front of a drawer. (Sorry, no pics of that.) I attached a clip closer and hinges so it now opens downward.

I’d always been itching to make something out of pallet wood (I’ve used pallets for many things but never made anything out of the wood) so I went and collected a couple of pallets from the ‘free’ pile outside a hardware store.

To be honest, I’m not sure they’re totally free, I was told they were by a friend and I chose to believe her, but whenever I’ve taken any I’ve always felt rather sneaky about it. Whatever… most of the ‘free’ pallets are broken or made of really cheap wood. Obviously. They’d never throw out good pallets.

Anyway, I got my pallets home and started pulling apart the only one long enough to make a top out of. I split most of the bits of wood I got off. In the end I got enough better pieces to create the top.

It wasn’t easy. I see so many pallet wood projects and I wonder how people do what they do… either they’re getting much better quality pallets than I got, or they’re just plain better than me!

I finally pieced together a top with as few gaps as possible, matching warped boards together like a jigsaw puzzle. I joined the wood together using 2 slats of wood underneath to hold them together and to give them added strength. (Did I mention this was crappy timber?)

Once that was done I sanded it back really well. It looked great.


Only problem was I wanted a weathered timber look, not a brand new look.

So I looked around for some steel wool to put in vinegar and resigned myself to waiting for the requisite rust to age the timber with.

I couldn’t find steel wool. I think I used all I had patching up holes around pipes in the wall in the kitchen! (Apparently mice won’t chew through steel wool. At least I hope they don’t!)

Well, that was the end of that idea. What else could I do?

I got out my artist acrylics and mixed up a watery solution of burnt umber (a colour you hear about a lot on my blog), grey and black. Grey cause weathered wood is always grey and black cause nails holes always go black.

I slopped the watery solution over the wood and let it soak in a bit, then wiped the excess off with a clean rag.

Not quite right yet.

I got out undiluted colours and painted them on and wiped them off, leaving darker areas. I dabbed black over areas of the wood, especially around holes.


I love the way it turned out.

When it was dry I put 3 coats of satin polyurethane on it to finish it.

Finally, I distressed the cabinet a bit in areas where it would normally get wear and rubbed in some burnt umber to give it an old appearance. Not that it wasn’t old, but the paint was new and burnt umber is like the accumulation of years of dirt.

Funny how I refresh something, make it nice and clean, then make it look grimy before putting it in my house… I wonder what that says about my personality…?

I’m still not entirely sure about the colours. I didn’t want just another white or cream cabinet and I had this colour mixed up and thought it would go well with the creamy yellow. An antique colour mix I thought. Do you think I achieved it?

z


Featured at:

Shared at:

Beyond The Picket Fence

accidental stripes

You know how sometimes things work out in ways you never expected? Well, that’s how it turned out with the striped blind in the kitchen.

One morning soon after I installed the blind I went outside as the sun came up and noticed the way the stripes in the blind and the stripes on the enclosed porch side sort of matched. It was totally accidental – when Handyman was enclosing the end of the porch he used some of the old bits of timber from the front of the house where the window was put in. The new timber is unpainted, the old timber is the light yellow the house was originally painted.

I kinda like it.

I’m considering painting the enclosed area two colours – the antique white I used on the posts and the white pepper I used on the house and the handrail slats. It’ll be way more subtle than it is now, but it might be interesting.

Then again, it might be stupid and it’ll be a ton more work…

So, what else’s has been happening?

Well, the office floor is half sanded. I’ve finished a couple of projects and am close to finishing another. Plus I’ve started on the costumes for the movie we’re making at work.

Other than that, I’ve been having a quiet time.

ha.

More later. Check back soon.

z