Unknown's avatar

About zefiart

Blogger, DIY-er, poodle lover, graphic designer, dog groomer, recycler, artist, wonder woman in my spare time.

what is a tip shop? and who shops there?

So, what is a tip shop?

Sometimes I forget that not everyone knows that a tip shop it, and in fact, neither did I till I moved to Tasmania.

I’m not sure they even have them on the mainland…

A tip shop is a recycle shop (more or less) which sells stuff which people have thrown away, to other people who:

1. love junk
2. have no money to spend on ‘good’ stuff
3. love old stuff
4. don’t like spending tons of money on ‘good’ stuff
5. prefer to make over stuff they find someone didn’t appreciate, to make something wonderful.

Basically, the ‘tip’ is the rubbish dump. Thus a tip shop, is the rubbish dump shop.

Doesn’t sound so nice when you put it that way, does it?

But I love tip shops, and I’ve gotten a lot of great stuff from tip shops. Even greater once I finish with them.

Let me explain –

First a trip through a tip shop to illustrate what they’re like. Sort of.

Then a few projects made using tip shop finds:

pallet top bench
kitchen table
rubbish bin lid photo display
kitchen chairs
industrial desk lamp

There’s more. Way more. But that explains what tip shops are and how great they are!

z

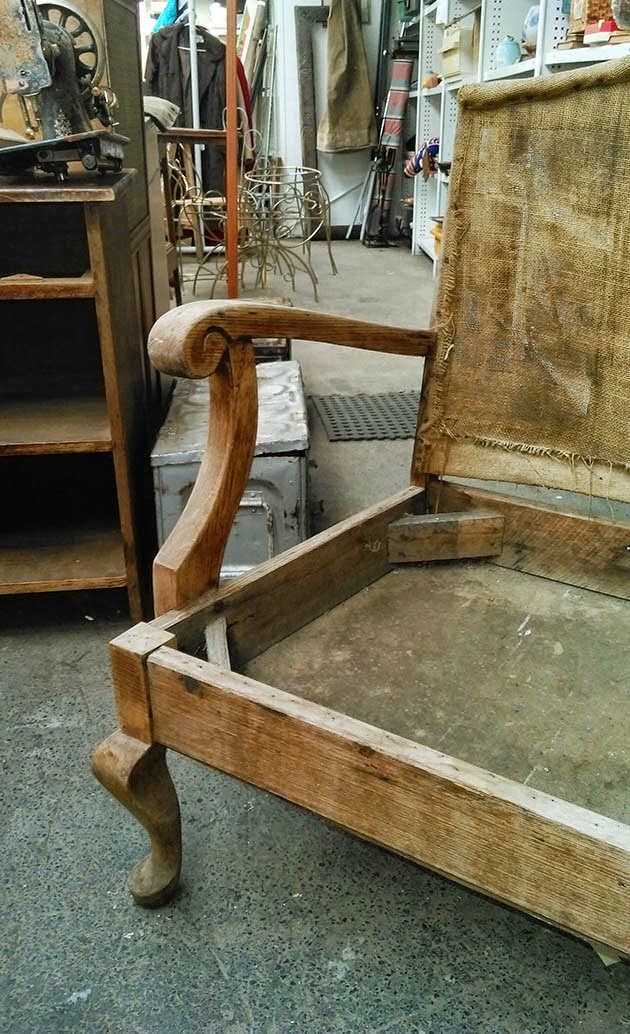
PS The only reason the armchair in the photo is not already in my shed is cause I have no time!

small things big impact – updating the boring bedroom light

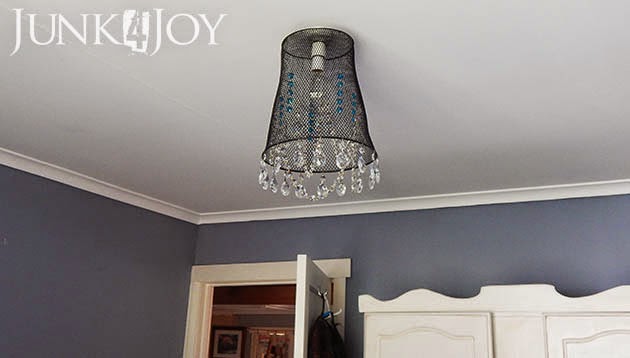
Day 7 – bin chandelier for the bedroom

In yesterday’s post I said take note of the upcycled bin light… cause here it is again! Only a bit fancier now.

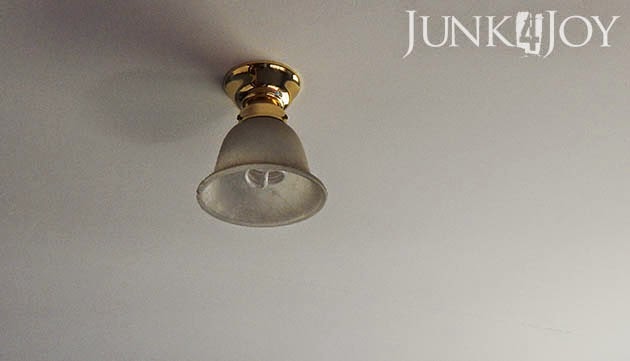
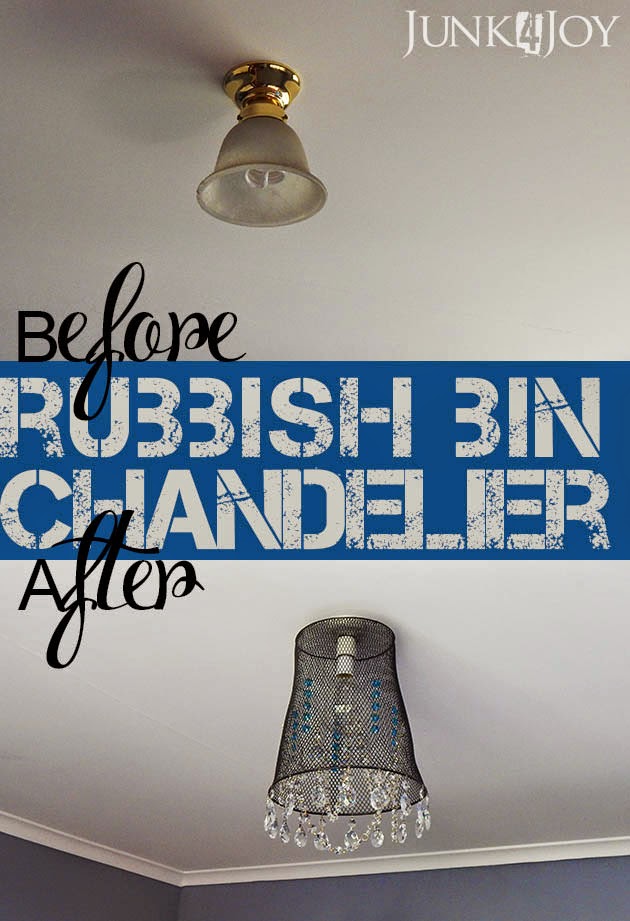
This was our light since we moved in. I’ve been dreaming of a better light for our bedroom for a few years now. I couldn’t make up my mind what I wanted, but I definitely wanted something with crystals and sparkle. I’d look at it every weekend, while laying in bed with a cup of coffee, and cringe.

These were the light fittings we had in all the bedrooms. I’m slowly replacing them with more interesting ones.

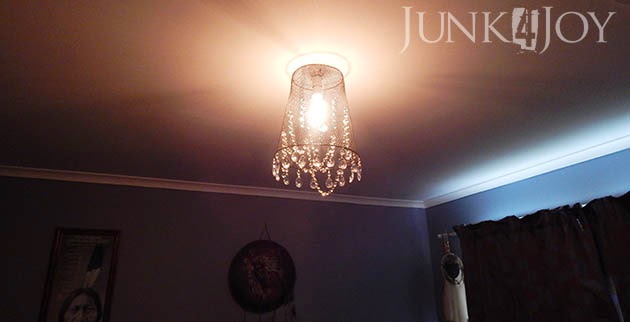
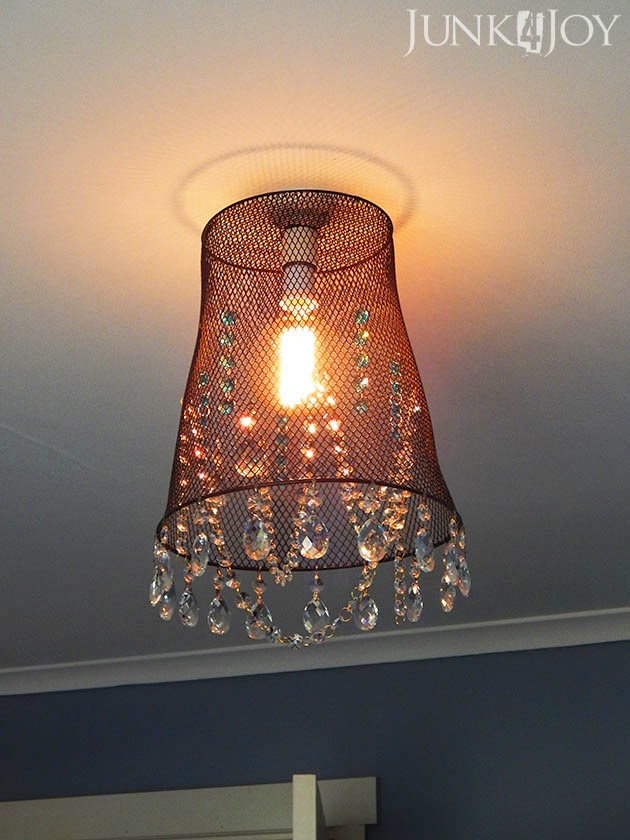
So how’s this for more interesting?

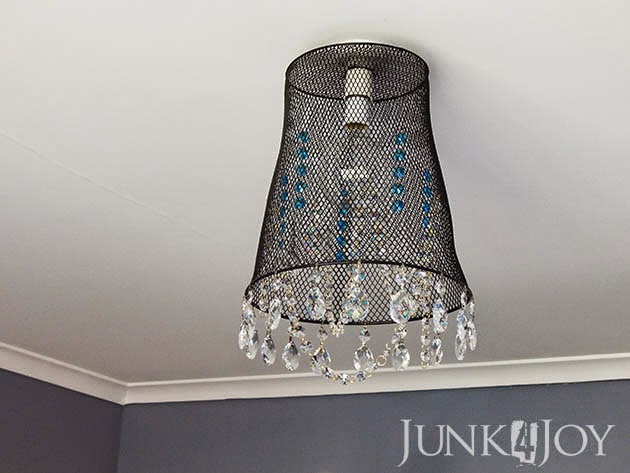
I had some chandelier crystals, I had the bin with a hole in it, just waiting to be reused… I actually found bayonet to E27 screw in globe converters on ebay so I was able to put in an edison bulb.

A quick and easy job that only took me 4 years and 20 minutes.

A friend of mine said she didn’t like it so much cause… “it looks like a rubbish bin”.

Umm… That’s kinda the point. Its an upcycled bin, not a light fitting. Its a bin with aspirations…

Isn’t the point of upcycling and repurposing to use something for a purpose it wasn’t originally intended for? Well, tick that box.
Anyway, it probably won’t be our forever bedroom light fitting (I have visions of randomly twisted wire…), but for now Wayne thinks its ‘cute’. That’s high praise from him!

What next? No idea.

Stay tuned.

z

small things big impact – the office light

Day 6… The office light

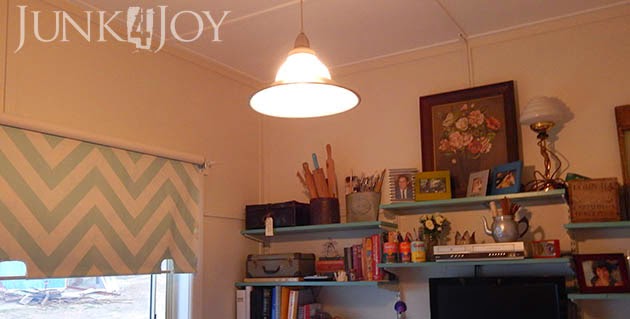
Since we’re on the subject of lights… this is the new office light!

Do you remember the office makeover (part 1, part 2 and then the clean up after it became a mess again)?

Anyway, this is the light fitting I had in there at the time… it was a work in progress which was barely started. A rubbish bin which I’d hung a few crystals on to see how it would look.

Hm. Not quite right. But remember that rubbish bin. You’ll be seeing it again soon.

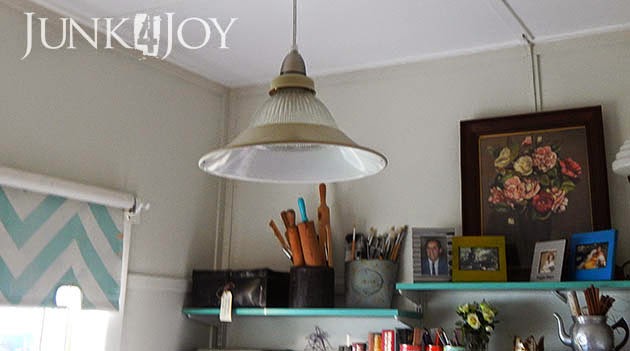
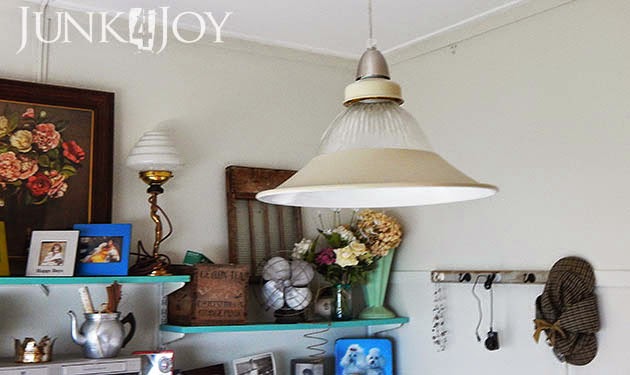
Meanwhile, the new light is gorgeous. I found it at a tip shop about 2 years ago. Its made up of parts: the rim and the glass dome aren’t connected, they come apart. I mean, the rim is just balanced on the edge there, its not attached. Its a really interesting light and when I saw it at the tip shop I had to have it.

The glass dome allows light to shine all over the room, not just below (as is the case with the hallway light I shared). Perfect for the office where I need to light the entire room.

Of course, it didn’t look quite like this when I found it. Firstly it was grimey. Secondly it was peach.

Sigh.

What is it with me and peach? I’m haunted by that colour!

No before pics. I don’t think I actually took any photos of it at all before the makeover. I just wanted that peach gone!
I sprayed it Rust-Oleum Almond same as the hallway light. I know it looks lighter, but its just the photos.

This light had been living in the pantry (in all its peach glory) since I got it, but it was time to bring it out to be admired. The pantry will get another light eventually, when I make one. Cause as I said, I won’t spend $$$ on light fittings when I can find beauties like this in tip shops.

Another small job finished – the right light in the office.

Meanwhile, got home after work tonight and found the dogs had done some remodelling in the casita. Again.

Another thing to add to my list of things to do: clean up the mess.

z

small things big impact – lighting the hallway

Day 5 – New pendant light

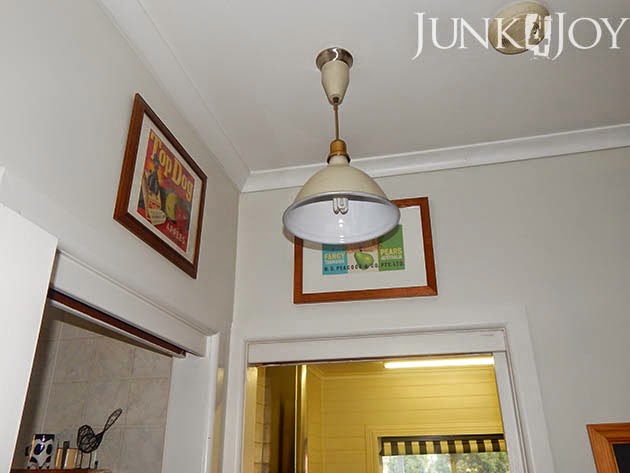
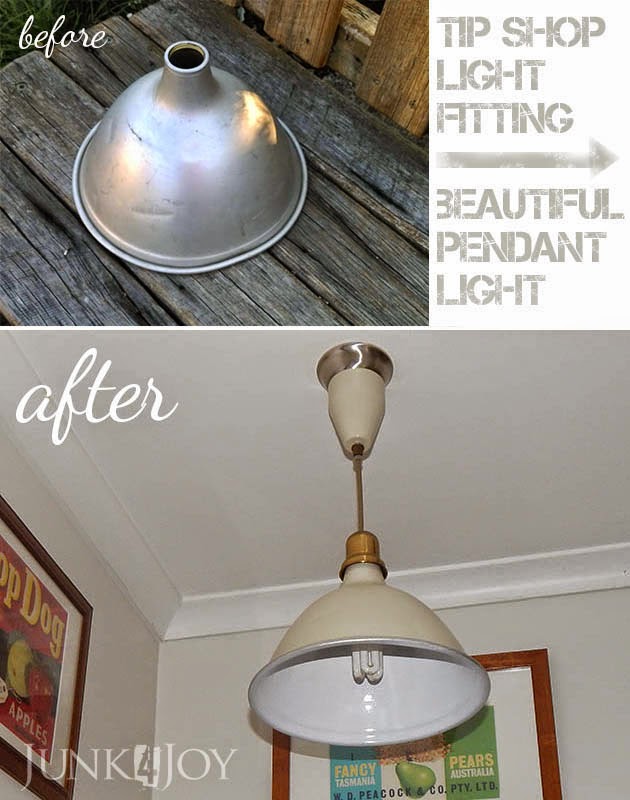
Like my new hallway light?

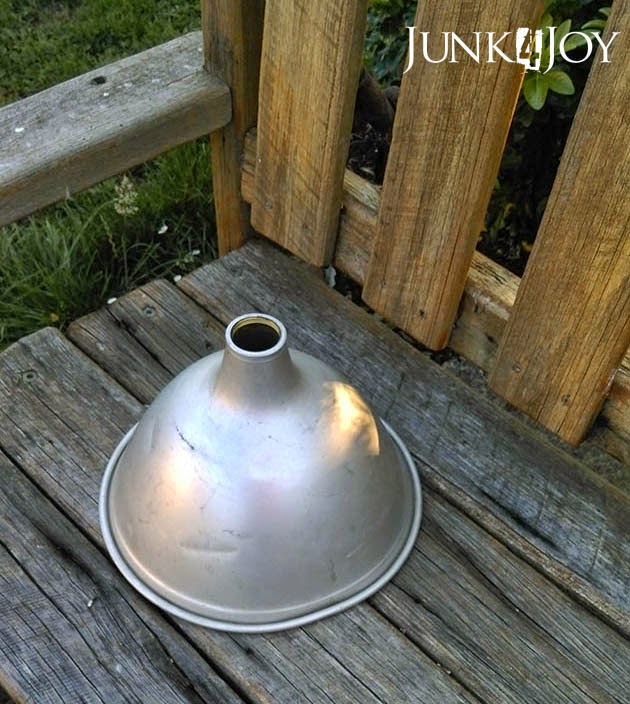
This is what it looked like when I bought it at the tip shop a few weeks ago:

Plain silver (aluminium I think, soft, cheap) inside and out. Complete with dints.

I straightened out most of the dints and spray painted the outside Rust-Oleum Almond. Yes, we finally have Rust-Oleum products here. But they’re not cheap.

Seriously, paint isn’t cheap in Australia.

Anyway, I love Rust-Oleum spray paint. It goes on so smooth. Not like some of the cheaper brands which was all I ever tried before.

I sprayed the inside gloss white for that two tone look, but taped up the rim so there’s still a silver rim. It looks amazing.

Of course I couldn’t use the pendant kit I had in mind (nothing ever goes as planned) so I had to use another… this one has a brass cap, the top ceiling bit is silver, making it all a mishmash. Kind of like a lot of things I do…

Eh. Who cares. I’m in love with my new light.

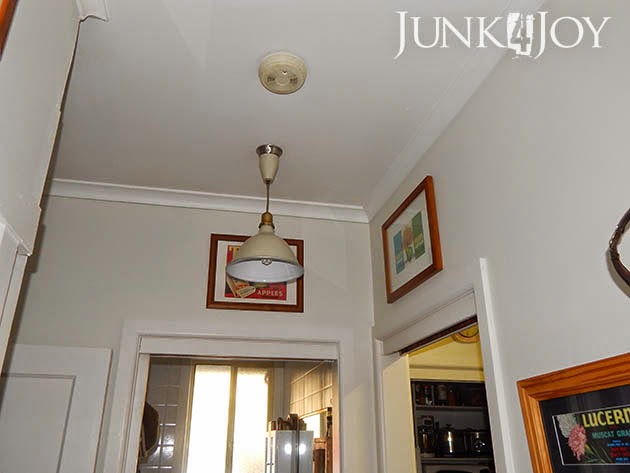
In case you’re wondering why the pictures are so close to the ceiling, this is a tiny hallway. So tiny you can stand in the middle of it and touch all four walls and five doors. I decided to hang some of my frames above the doorways. See below:

On the bottom left almost off the frame is the guest room, behind that is the office door, straight ahead is the bathroom door, to the right is the kitchen door. And the living room door is behind me as I take the photo.

I recently painted the hallway (and office) 3/4 strength Dulux China White to match the kitchen and I love the brightness of it. Yeah, the kitchen walls look yellow but that’s just the light in there.
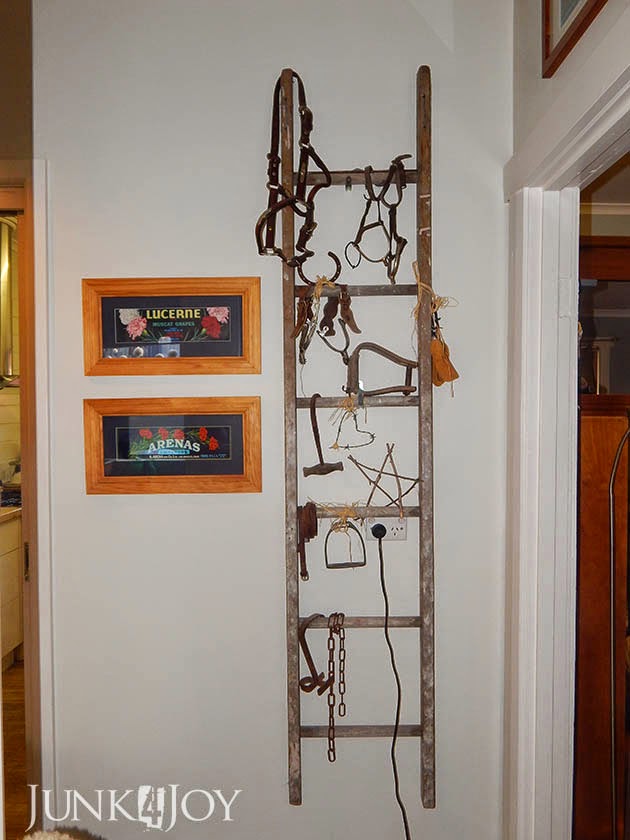
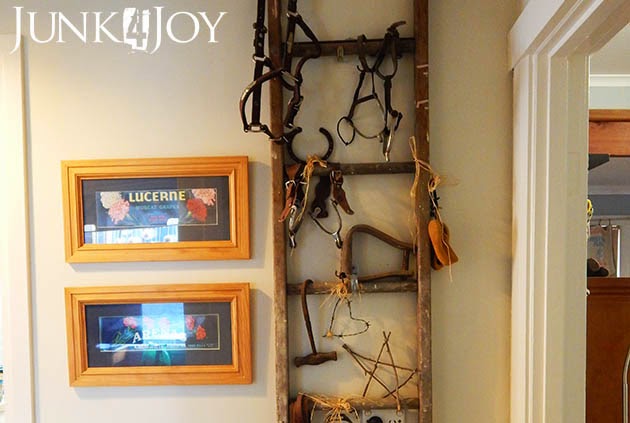
The hallway is where I’ve put my framed fruit labels (I have a collection of them), and I’ve moved the ladder back in there. That was above our bed for a time.

See the difference in colours? Above is with flash, below is without.

But back to what I was bragging about: my beautiful new pendant light which cost me $1 at the tip shop.

I love it when something I got for next to nothing can look so good. And I have a serious problem with spending a ton of money on light fittings when I can do something like this.

z

Shared at:

small things big impact – a bench in the mudroom

Day 4 – A bench in the mudroom

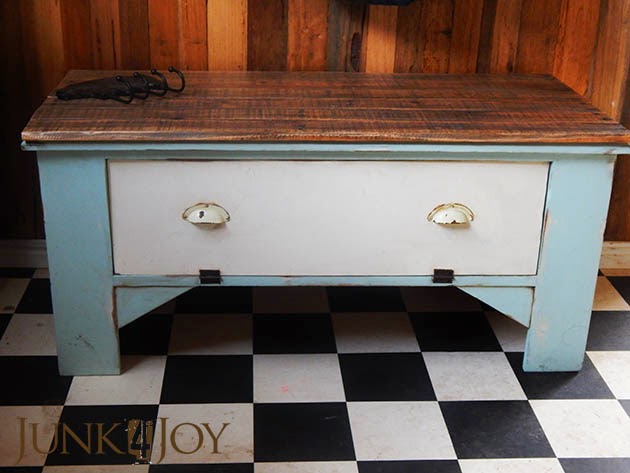
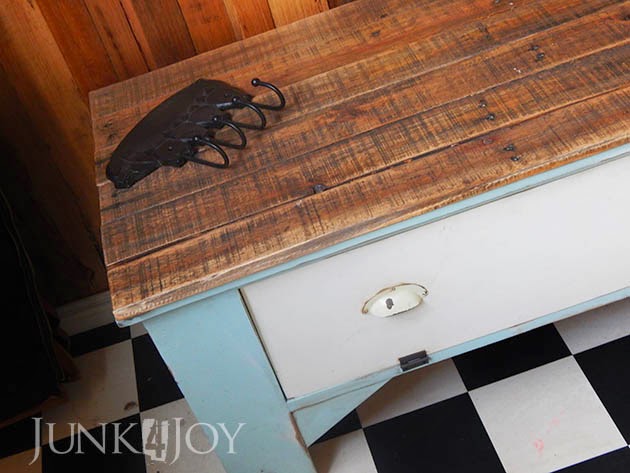
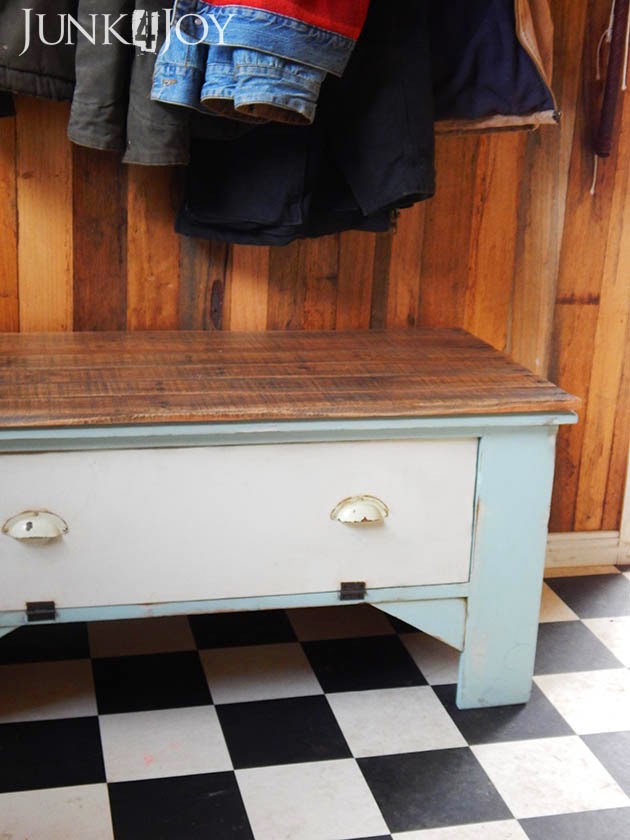
Do you remember when I made this little cabinet for my shoes? I always intended it to live in the mud room as a bench as well as storage. But up till recently we’ve always had a dog bed in that spot, somewhere for the dogs to get out of the weather.

Well, winter is coming, and I decided it was time to move the dog beds off the porch and out of the mud room and into the grooming room. Two birds: warmer dogs and we reclaim our porch and mudroom.

So the cabinet moved into the mud room. Its still not finished in there. I had planned to paint all the walls white, but I decided to leave that wall natural, showing the old weathered timber we lined the walls with. It really shows off the drawer front coat hangers I made.
This is another of the small changes and updates which I’m finally catching up on and which make so much of a difference.
The photos make the mudroom look ok, but its not really. Its filthy, the white squares on the vinyl are so grimey and so hard to clean. Possibly not the best choice for a mud room…
Oh well. Choices are made, things are done, decisions are proved to be wrong. Such is life. 
I still love my floor, but maybe not in this house, in this yard, with these dogs and with this man.
🙂
z

small things big impact – a bit of a toilet roll holder

Day 3 – a rustic toilet roll holder

When we first moved into this house, the toilet was almost an outhouse. It was on the porch, outside the house. It was, literally a “room with a view”. You could sit there, doing your business, and look out over the valley.

We really haven’t done anything with the toilet since then, other than bring it into the house by enclosing the small porch to make a mud room. Its still ‘outside’ the house and you still freeze your butt off going out there in winter, but its no longer “exposed”.

I’ve been wanting to improve the toilet since we moved in, but its never been a  priority.

I mean, really… its not top of the list of places you want to show off, right?

I do have plans. I bought paintable wallpaper to do the walls, I plan to fix the weather damaged door,  put in a shelf… all kinds of exciting things. Among which was a different toilet roll holder.

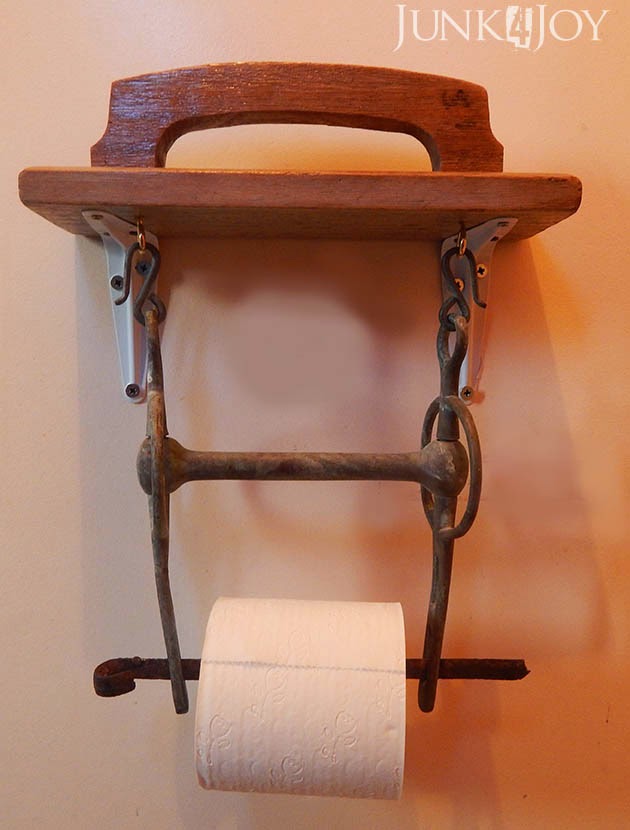
I’ve seen toilet roll holders made of non-toilet roll holder items and, being as we’re horse lovers, I always thought a bit would make a good one.

Among all of Wayne’s horsey things was this huge bit for a horse in harness. Its old and the colour is just gorgeous. You can’t really tell in the photos, but it has a green patina to it.

I did consider trying to cut the bit somehow to make it into a roll holder, but I didn’t want to ruin it… so I decided to use it as it is. That way I can recycle it at any time in the future.

Basically all I did was search my stash of junk for a bit of timber which was the right size to hold it. I found this hand sander thingy (I never know what to call these things yet I’ve done stuff with them before). I sanded it (ironic) and gave it a couple of coats of polyurethane, then added hooks underneath to hold the bit.

I had two options for the actual roll holding bit. One was this rusty metal spike (my favourite) or a piece of copper pipe I cut to size and flattened the ends so it would fit through the gaps.

I prefer the rusty spike, obviously.

I really dislike the brackets I have on it now, but it’ll have to do for now. They’re all I could find. I’ll be fixing this up when I finally ‘do’ the toilet.

Oh, I also put on a new toilet seat, but no need for photos of that. We all know what a toilet seat looks like.

These surely were two small changes that had big impact.

z

Shared at:

small things big impact – a new dog bed

Day 2 – less dog hair on the couch

There’s one thing I just can’t stand. Dog hair. (Or cat hair but I don’t have a cat, mainly cause of the hair.)
That’s why I have poodles. They don’t shed. Or smell. They’re the best that way.
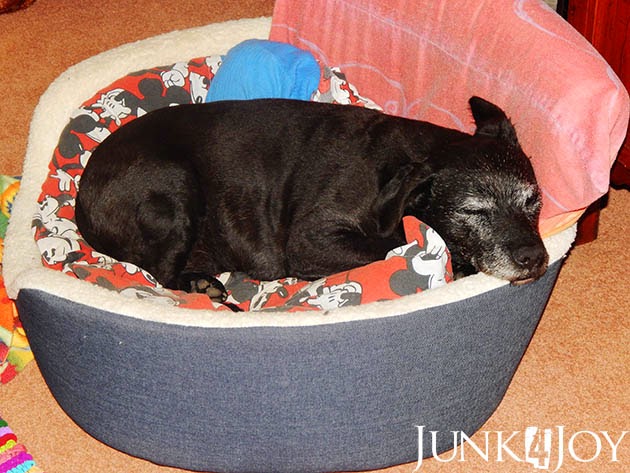
So, after making the catastrophic decision to wash the couch cover and living room throws in our washing machine a few weeks ago, I decided it was time Barney had his own bed.
Let me explain: for ages I’ve been washing all our couch covers and throws at the laundromat cause our washing machine doesn’t handle scunge well. You know what scunge is? Its the hair and lint that collects in washing machines only to be deposited on the next load of washing you do, especially the dark items. 
Last time I had to wash the covers I chucked them into the washing machine thinking “how bad can it be?”
Bad.
Took me 4 wash the washing machine cycles to clean that sucker out. Turns out vinegar and bi-carb in together works, I finally got it as clean as it’ll get.
So, having this new Barney bed is great. Barney has his own spot, he doesn’t have to jump up on his arthritic little legs, and the couch no longer smells of stinky dog while covered in dog hair.
One small step towards a cleaner home.

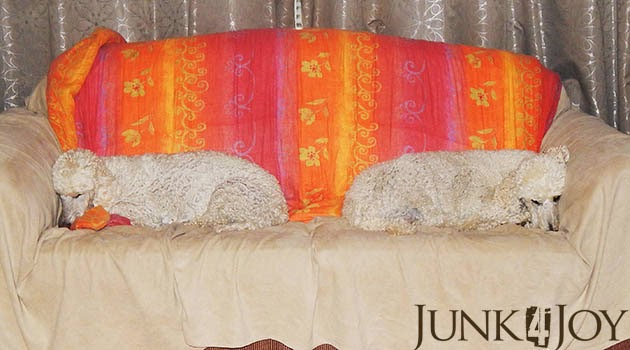
Meanwhile the poodles continue to enjoy the couch. All they give the couch is dirt and the occasional stick from the garden. No doggy smells, no hair.
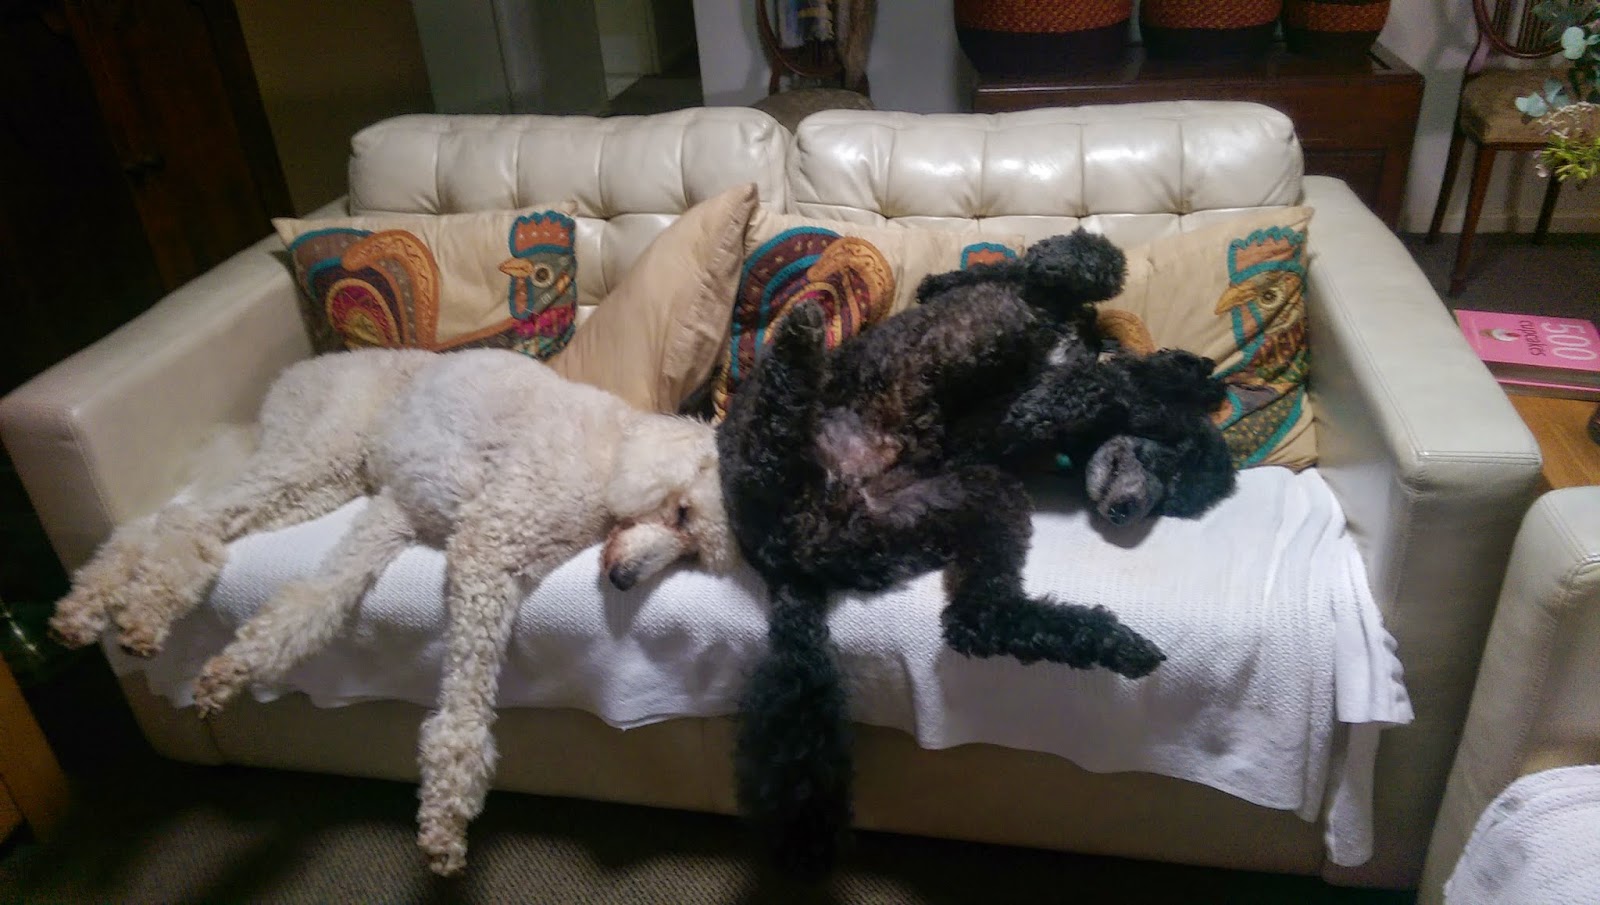
Don’t they look cute? Like bookends. Montana on the left, Romeo on the right.

Here are two puppies from one of my litters. Astra on the left and Zeus on the right. They own that couch!

z

small things, big impact – improved phone charging station

Its a new month and I’ve had an idea. I’m going to share the small things I’ve been doing lately that make life a little better around here. Its mostly those small things which I’ve been meaning to do for weeks, months, years… that I’m finally making a point of getting around to.
Ok, don’t cringe. I probably still won’t post daily, but for the month of May I’m challenging myself to not only finish a few of the niggly jobs I’ve been putting off for ages, but also to share them in the hopes that I’ll inspire someone to get up off the couch and fix that loose hinge, broken door handle (darn, that reminds me…) or whatever.
I actually started on this challenge last weekend, before I knew it was actually a challenge. Now its all up to me to keep up the momentum.
So, here is Day 1.
Improved phone charging station

I like to change things around a bit… Most of the time I re-arrange furniture (which Wayne LOVES), but I also like to update, change and re-make things I’ve got.

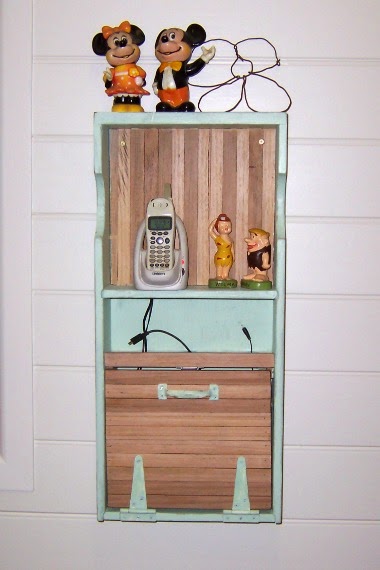
Like this phone station. I made this last year to hold the phone and as a place to charge up our mobile phones. Back then we had normal dumb phones.

Now we have smartphones and they’re bigger than the old ones…

BTW, who saw that coming? Mobile phones kept getting smaller and smaller, then suddenly the trend was reversed and they got bigger and bigger, the bigger the better.

With the new mobile phones and kindles all needing charging…

…and there’s another thing. Back when mobile phones were small and stupid, every single phone had a different charger cause heaven forbid they made things universal. Every household in the world had a drawer full of mobile phone chargers which didn’t fit any phone in the family.

Now, the kindles and smartphones use the same chargers. Will wonders never cease!

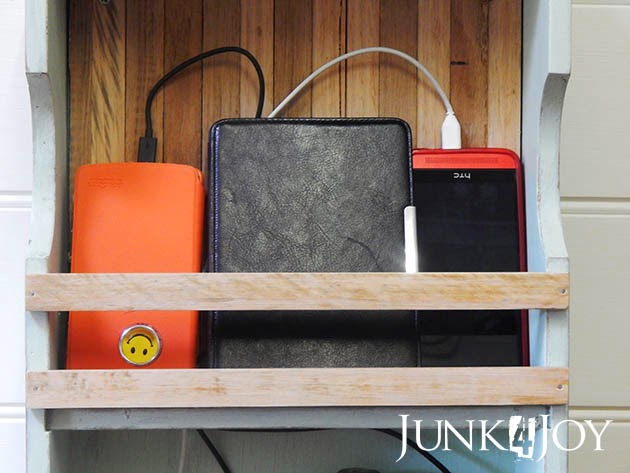
So anyway, as I was saying, the new smartphones and kindles didn’t fit on the narrow shelf which used to hold the old mobiles. And sitting them on the top shelf was to risk them sliding off and breaking.

It was time for an update.

This is what it looked like before:

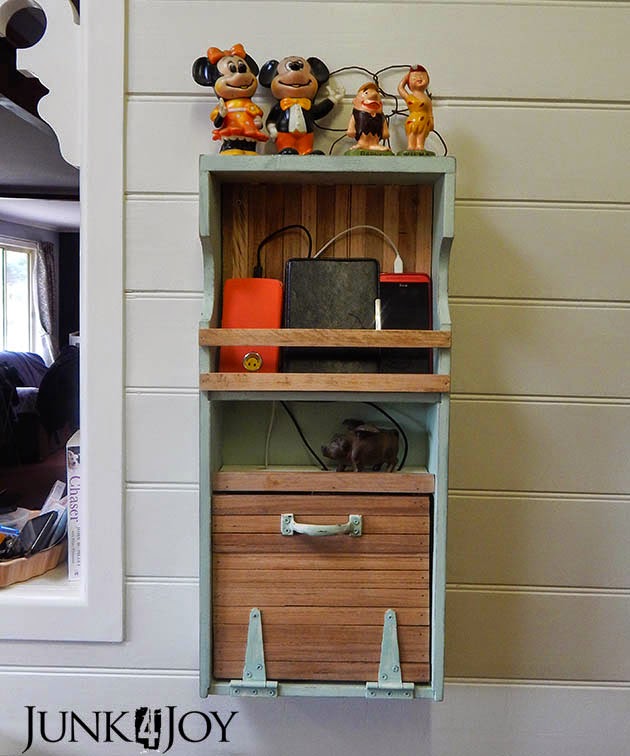
This is what it looks like now with the addition of a couple of timber strips across the front, making a safe charging space.

A small, simple change which makes life a little easier, or neater.

Now if I could just convince Wayne that we should never cook in the kitchen, I might be able to keep the entire room neat…

z

Shared at:

coal box upcycled to vegetable bin

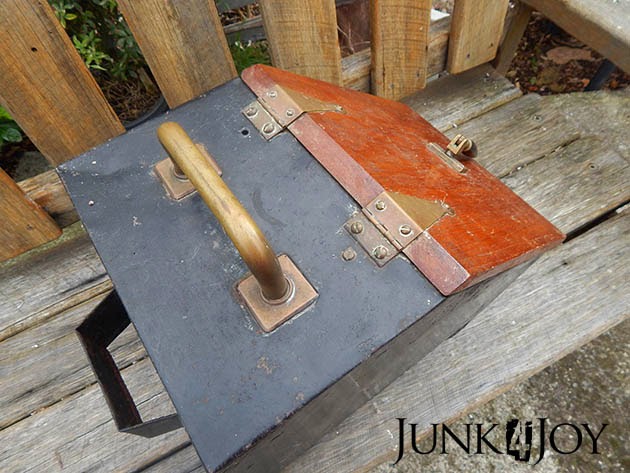
We have a new potato and onion bin.

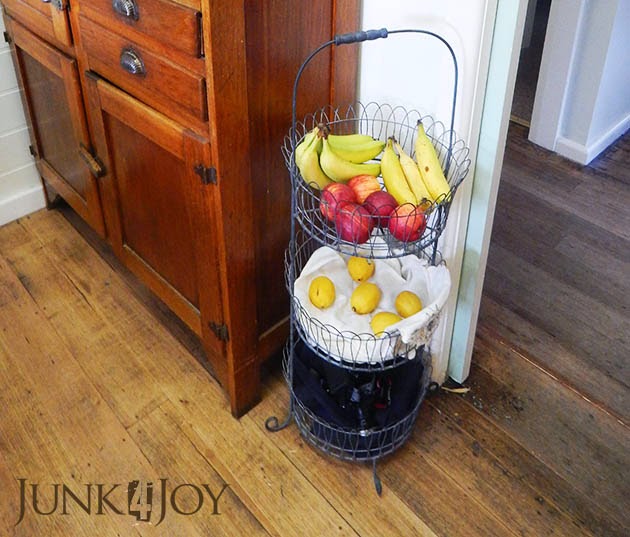
Up till now I’d been keeping our potatos, onions and garlic in old flour bags in the vintage wire fruit basket thingy I’d bought a few months ago.

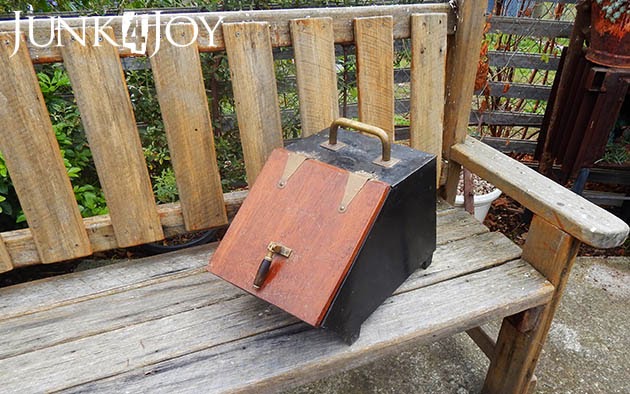
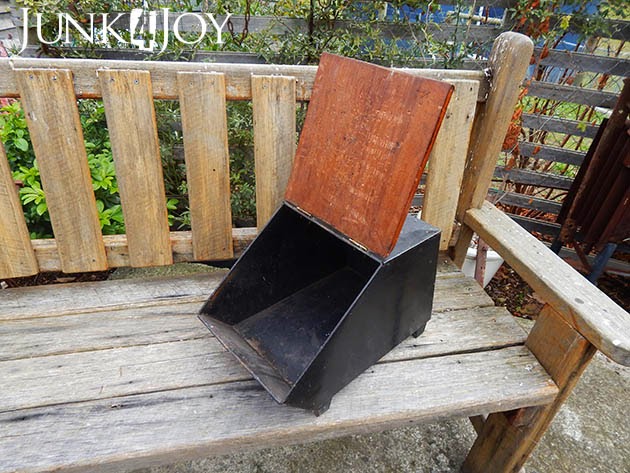
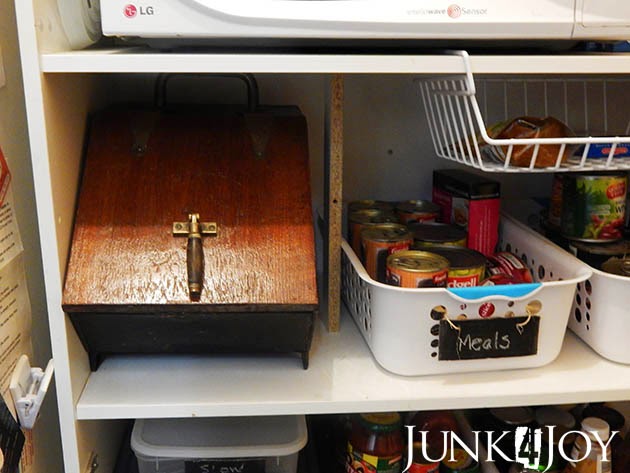
But you know potatoes like the dark… so when I saw this coal box at the auction last week I had to have it. Now the wire basket stand is holding fruit like it was meant to, and our potatoes are all snug in the pantry in their own light deprivation box.

All I did to the coal box when I brought it home was give it a clean and line the bottom with newspaper. It has some rust dots on it but I think that adds to the character.

I generally prefer things in their original rusty, imperfect state – and the handle is very unusual.

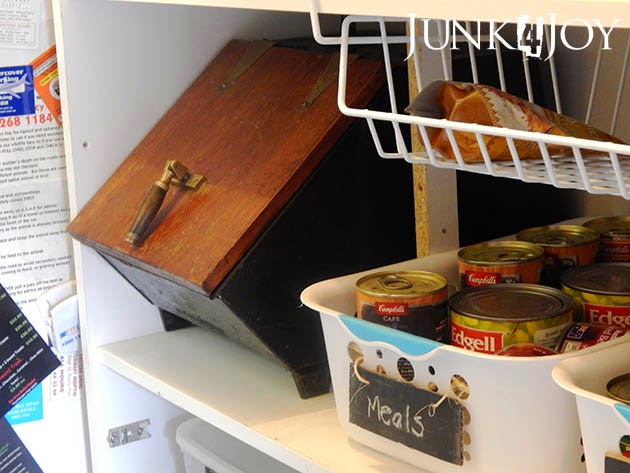
Here it is in its new home.

It fits perfectly in the little nook right next to the bit of timber I put in to hold the shelf up where it bowed under the weight of the microwave.

I may not always do things ‘pretty’ but they work!

z

Shared at:

junking finds

I may have been flat out busy, but somewhere along the line I still managed to do some shopping. In tip shops. My favourite place to shop.

I found some great stuff, I even found a few things I was actually after.

What happened was I spent one day doing the rounds of the shops looking for particular things to finish projects or for displaying items in upcoming exhibitions.

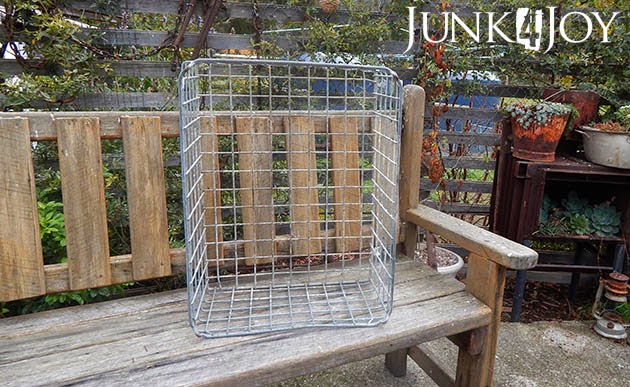
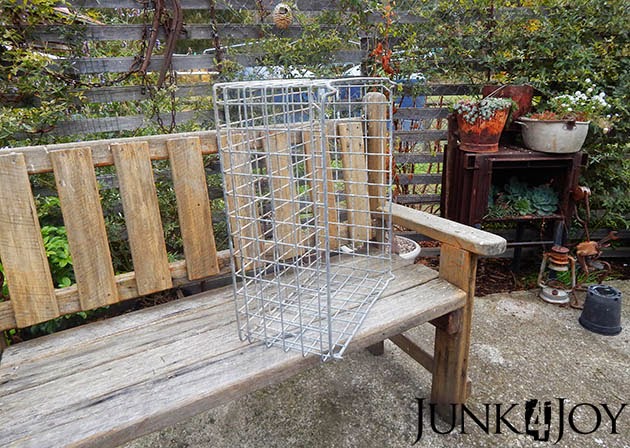
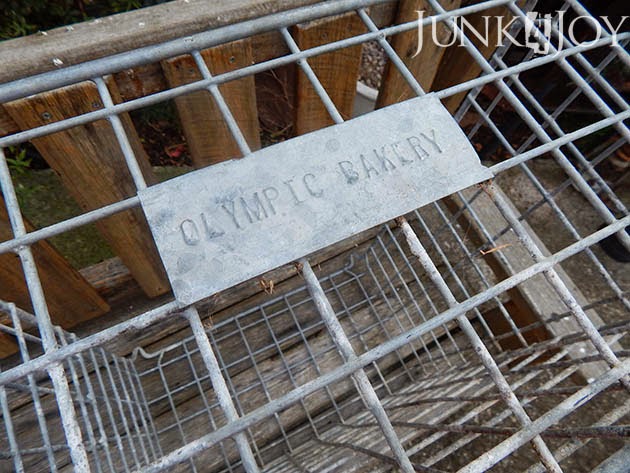
One find which wasn’t on the list but I had to have was this baker’s basket. Galvanised iron, big… what’s not to love?

And its from a greek bakery. How appropriate is that?

I already have an idea of what I’m going to do with this beauty. Stay tuned.

This hay bale hook was inside a coal bin I bought at an auction (will be sharing that separately). Isn’t it gorgeous? Wayne has a collection of these so it won’t be wasted, even if I don’t make it into something else.

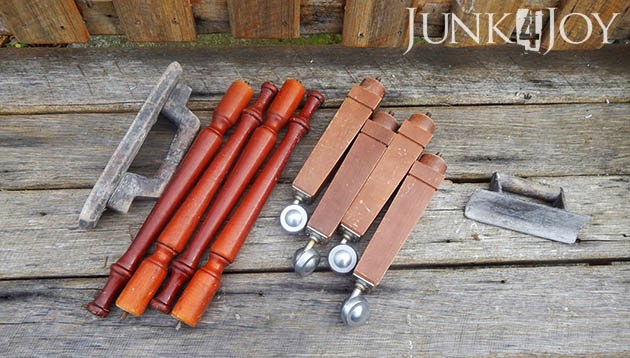
I got a collection of legs, and more hand sander thingies. I can’t resist those things.

And these two cute stools. I actually bought them both for the legs – as a way to display some seat pads made at work, but they’re cute. They will be remade into side tables most likely.

Lastly, here are a couple of things I got last time I went to the auction house and forgot to share. I adore the vent top, isn’t it lovely? for now I have no idea what I’ll do with it, but I’m going to display/use it somewhere.

All in all, a successful shopping trip.

z