Unknown's avatar

About zefiart

Blogger, DIY-er, poodle lover, graphic designer, dog groomer, recycler, artist, wonder woman in my spare time.

a slightly dirty clock

I had a very busy weekend. A really busy one. I did more cleaning in the casita. I finished some niggly little jobs, I started some projects, I folded and put away washing, I vacuumed the living room.

Yeah, I know.

Wayne was shocked too.

This is one of the small things I finally finished.

I’d got a cheap clock from Kmart when I decided I wanted a clock in the living room. It broke soon as I got it home so I left it in the workshop thinking I’d use the face to make a new clock. I bought a new clock mechanism off ebay and it all just sat there, in the shed, waiting…

We didn’t really need a clock in the living room back then, I had the time up on my TV …but about 2 months ago my TV suddenly lost the ability to speak so it had to go.

Lucky for us, combining two households when we moved in together meant we had doubles of lots of things. Including TVs. We didn’t sell any of the doubles cause we knew that the day we sold them we’d need them. We’ve already been glad we had two washing machines.

Now its the TV’s turn.

Anyway, I can’t figure out how to display the time on Wayne’s TV, so a clock in the living room is a bit more of a need now.

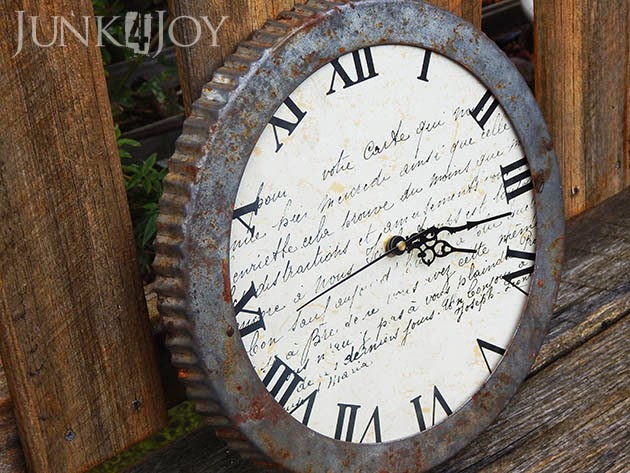
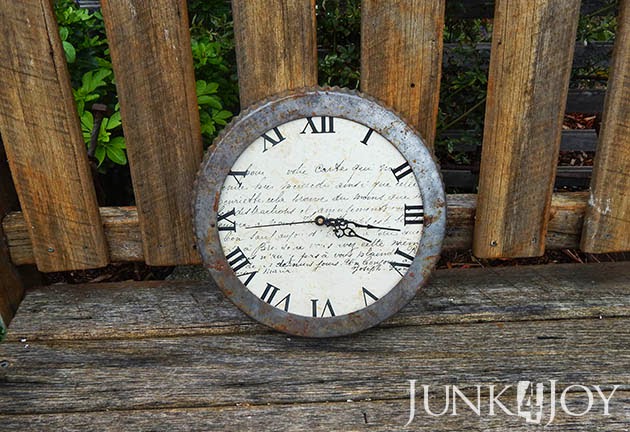
I got the bits together: the new mechanism, the clock face, a battery and an old rusty flan tin. One of those ones with the removable bottom bit. Which I didn’t have anyway as this is a tip shop find.
I’ve had this tin rim for a long time, I picked it up thinking that one day it’d make a great clock. And do it has!

Putting it together was really easy and quick. I didn’t even clean the tin or try to remove any of the rust. I think it adds character.

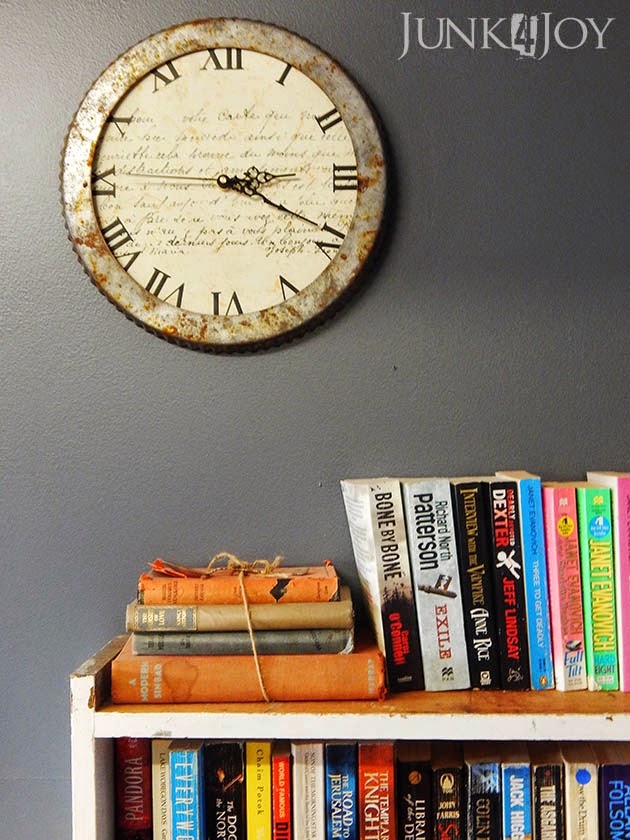
Its now hanging in the living room above the stacked bookcases and where you can see it easily while watching TV.

I’m loving my new clock.

z

Shared at:

gardening with dogs, is it possible?

I’m not sure.

I thought it was. I mean, for a long time things were going great. I planted things, half of them died, but the rest grew up unmolested by poodles.

Then one day the poodles began to dig.

And dig.

Never in the same place.

They dug up some of the new foxgloves I put in along the back fence. They dug up the lupins. They dug up the catmint and new columbines. They dug and broke low branches off the crepe myrtle. They dug and broke the hardenbergia in half. They dug and knocked out the pigface I’d dared to survive in the cement-like, inhospitable slope. They dug small channels under fences.

…I tried to stop it.

I put up fences. I used dog pens and stakes and zip ties.

They knocked them down and moved them.

I put them up again.

They found another spot to dig.

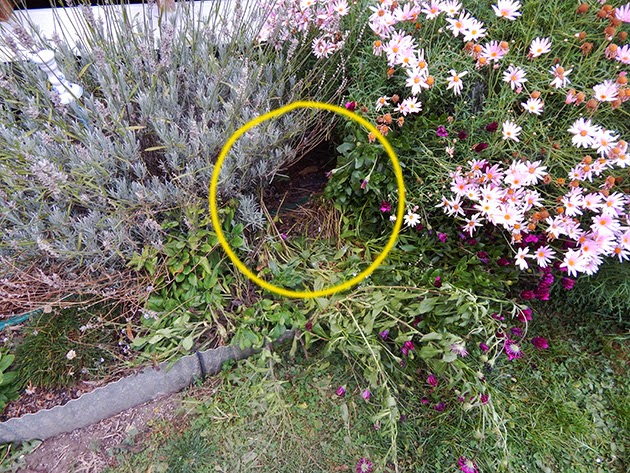
And then yesterday I got home and found this:

Flattened osteospermums and a hole between the english lavender and the pink daisies.

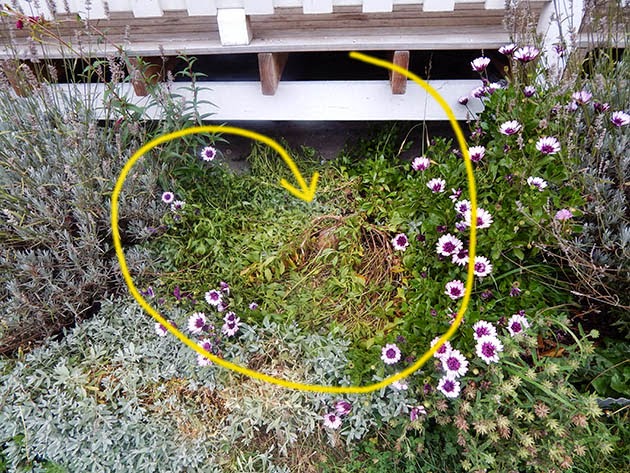
Broken and flattened double osteospermums – looks like someone decided so take a nap there. Thankfully the young penstemon on the left avoided annihilation.

So far.

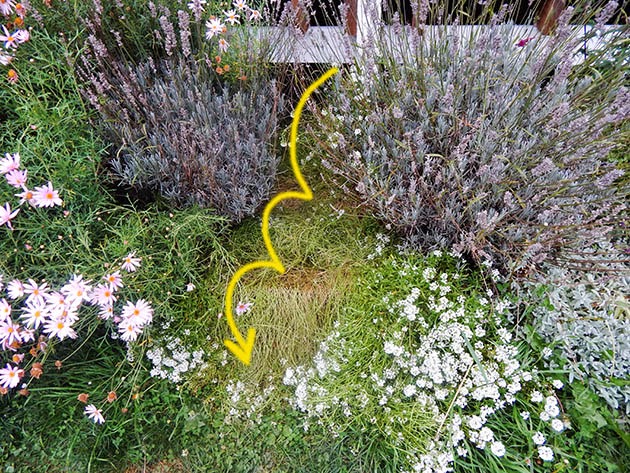
The alyssum wasn’t so lucky. It looks like this was another nice spot to rest.

(Actually, it DOES look like a nice place to lie in the sun… but that’s not the point!)

Ok. I’m not overly worried about the alyssum. That stuff is growing in cracks in the path.

The snow in summer is looking scraggly but that should be ok. And the osteospermums should bounce back. I’ll just give them a trim, I have to do for winter anyway.

Its that I plan to replant the old garden beds in front of the casita with new plants. Last weekend I got my garden helper to remove all the too-large plants from the beds, dig up and mix in new soil in preparation of planting all sorts of smaller flowering plants: mixed bulbs, columbines, whatever strikes my fancy.

The dogs have been leaving footprints all over the narrow beds, which I could cope with. But they’re also digging it up.

Grrrrrrrrrrrrrrrr.

I’m really beginning to get annoyed here.

I get that they dig after critters in the yard. Rats probably, around the foundations of the casita. The odd native animal. Whatever.

But digging in a new bed? There are no critters in there! They’re just loving digging!

I’ve never had diggers before and I’m stumped. I plan to put a fence over the new beds but that won’t guarantee anything.

Sigh.

I think I may go back to toy poodles. At least they can’t dig up a whole tree.

z

just because

Why am I sharing this pic?

Cause I like it.

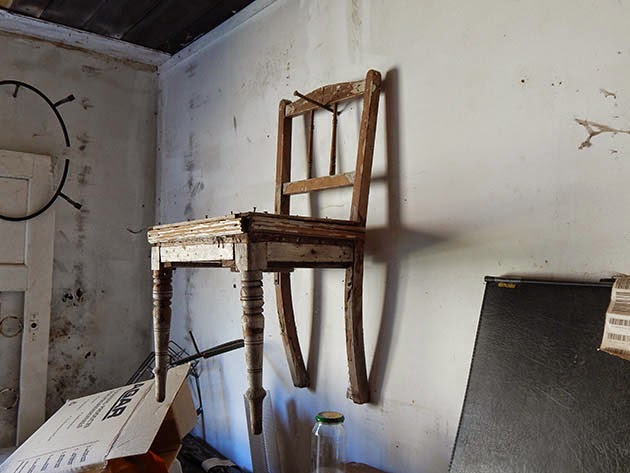
I took it to show a friend the rickety chair I picked up off the side of the road last year, a chair which is beyond repairing to actually seat a human being of ample proportions, but which retains a lot of charm.

When organising the store room (still not organised) I hung it on a humungous nail and left it there.

When I saw the photo I realised there was something I just loved about having a chair hanging on the wall.

Meanwhile, I’ve been busy. Cleaning. Tidying. Organising.

In the casita, not the house. The house remains a total mess. In fact, its messier than it was last week when I put off tidying up.

On a happier note, the chickies are doing well and the hen and chick we moved out to the chicken coop ran off the minute we opened the door to let them out.

We shouldn’t keep chickens. We’re just not qualified.

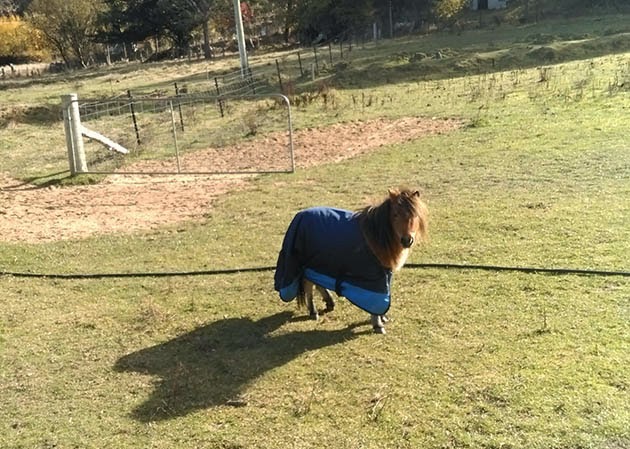
Meanwhile Wayne bought new rugs for Chipmunk…

He looks like he was eaten by a horse rug.

For sale: two small, but obviously not tiny enough, horse rugs. One regular and one with attached neck rug.

Never a dull moment at Wind Dancer Farm!

z

chicken wrangling

This morning we got a surprise.

Another hen has had chicks!

We never thought she’d hatch out anything given that:

  • she wasn’t as fanatical about sitting on eggs as the first hen
  • she was sitting on an empty nest
  • we kept throwing her off the nest
  • once we gave in and put eggs under her, she didn’t sit on them with the single minded dedication of the first chook 
  • we found one half hatched dead chick and figured the eggs were done for
  • even if she did hatch out live chicks, she was nesting in a “sky box” and we had visions of chicks leaping out and breaking their necks soon as they hatched.

Well, she proved us wrong on all counts.

This morning, when we had to go to work, she trotted out three tiny little chickies!

Well, we had to go to work, but leaving them out in the ‘wild’ around here is a death sentence for little people their size.

We managed to lure mom (and chicks) into the pump shed where we closed them up for the day, and when we got home this afternoon we got to work on some serious relocating.

I mentioned we raised the first 3 chickies in Alcatraz. Last weekend we released the remaining two chicks and mom, then promptly lost one of the chicks when it tried to return to Alcatraz, got into the yard and one of the dogs got it.

sigh.

So, we herded the dwindling family back into Alcatraz… till the remaining chick got too big to fit under the fence.

However, plans must change when circumstances change.

The new arrivals meant we need the safety provided by Alcatraz for another batch of chicks.

That brings us back to this afternoon and the chicken wrangling.

Wayne and I went into Alcatraz and began chasing mom and baby around. We caught them and amongst much squalking, we got them up to the hen house where we locked them in with the rooster and other hen. The plan is to keep them in there for a couple of days – till the little one recognises the hen house as HOME and not try to get back into the yard.

Chicken psychology.

Then we moved onto the pump shed.

The pump shed is a very small shed, with a pump in the middle (go figure!) and there’s barely enough room to swing a cat, let alone chase chooks.

Anyway, I got mom on first grab but only saw 2 surprised chicks under her. Panic. Then I looked and the 3rd chick was dangling under mom where I held her.

I promptly lost hold of mom as I tried to grab the baby before I squashed it.

Long story short, I got mom and all three babies and we released them into their new home for the next couple of months: Alcatraz.

Now, if the babies don’t all die of shock, we’ve added another 3 chickens to our family.

See? You thought we lived boring lives in the country! Never a dull moment around here!

z

retro flour sifter planters

Last week I shared the new shelf outside the kitchen window.

I haven’t yet moved it down the 6 inches I think it needs to be moved, but I have made one change.

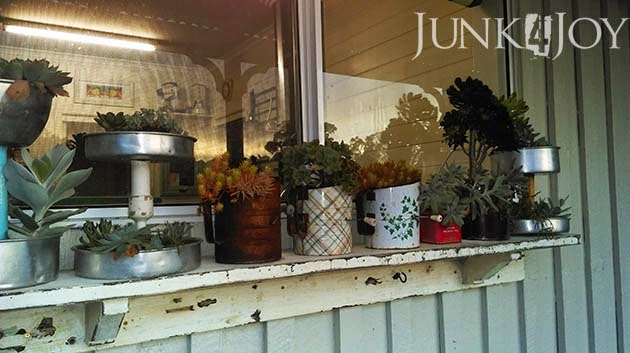
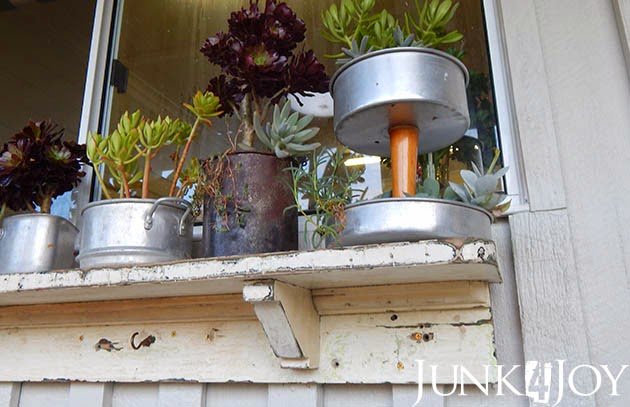
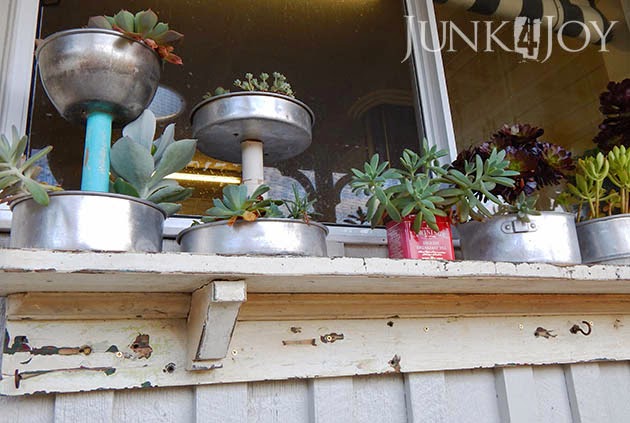
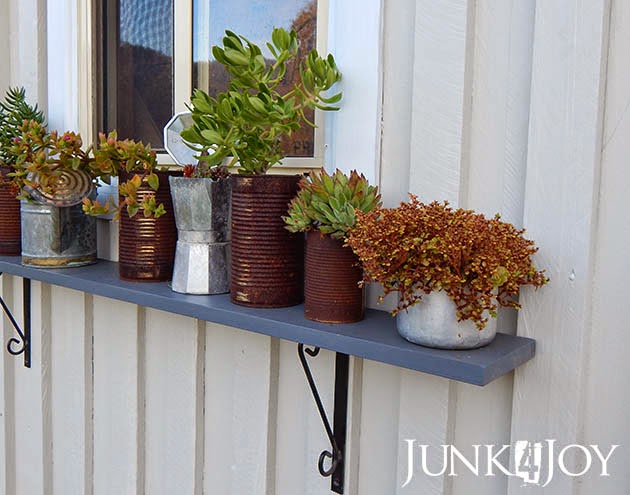
I moved some of the plants to make room for my flour sifter containers.

I think that technically, three of something makes it a collection, so here is my sifter collection. One is really rusty but the others still look respectable.

Not that rust isn’t respectable!

They all have (had) working parts when I got my sticky little fingers on them, so I lined them with hanging basket fibre stuff, then filled them with potting mix before adding a selection of succulents.

Yep. I like them outside the kitchen window, along with the 2 tiered caddies I made out of baking tins.

Other than that, I’ve done a whole lot of nothing at home. Did I mention I was sick for most of last week? Yep. Holidays are not the time to be sick.

Turns out it was food poisoning.

The Dr said it sounded like gastro, along with the flu, just bad luck to get them together. But I watched a segment on A Current Affair last night about bacteria found on chicken. And the symptoms the guy on TV listed were all my symptoms to a T.

Guess what I had for dinner a couple of nights before I got sick?

Makes sense. If it was viral Wayne would have got it too!

I think I’ll avoid pizza and take away food for a while…

z

Shared at:

Beyond the Picket Fence

a day tip shopping

Yesterday was a great day!

It was the first day of my holiday that I’ve been well enough to go out all day. Not only did we visit a couple of tip shops for a look around (and pick up a thing or two) but I even managed to actually eat more than a couple of bites of something!

Life is good.

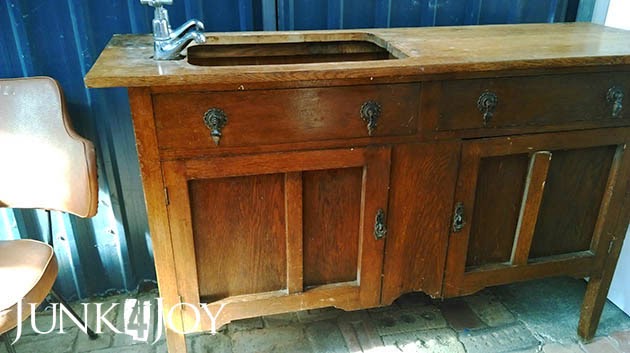
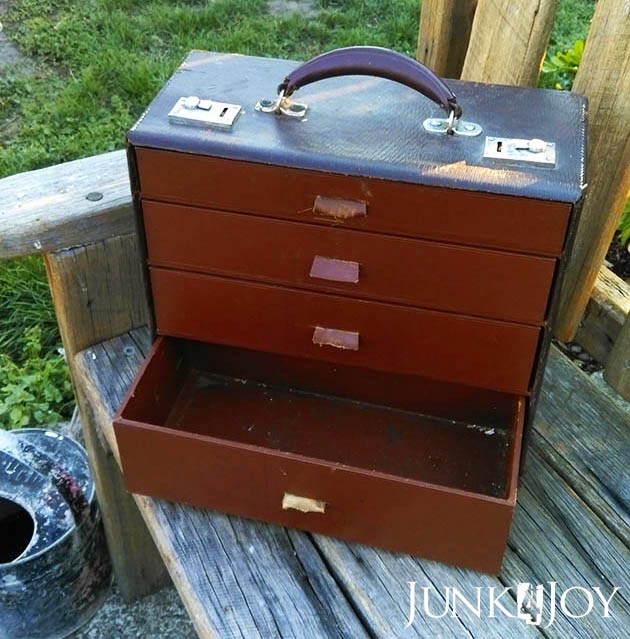
First tip shop we visited I saw this and fell in love.
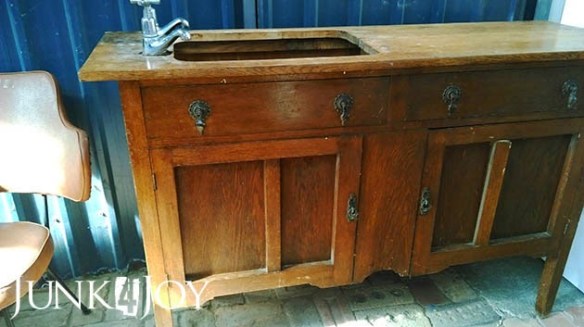
I wanted it so badly.
Yes it was overpriced. Yes it was a wreck.
It needed the entire top ripped off and replaced (easy), the door on the right needed major mending, and it all needed a good scrub and de-moulding, then painting… but it would have looked great in our bathroom!
But Wayne wouldn’t let me buy it. He said “too many projects, not enough time”. Not to mention not enough space. 
And he was right. (Don’t tell him I said that!)
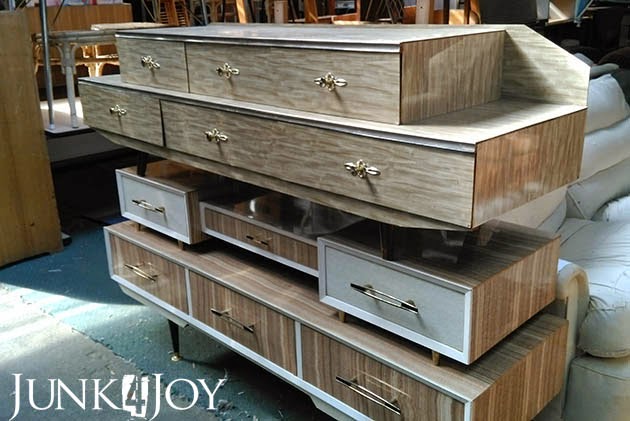
Then I saw this.

Ok… I don’t want it in my bedroom, but how cool does that look!! I mean, they just stacked them up to save space, but take two 1960s dressers, remove the legs on the top one and join them together, or put on much higher legs to make more space between them, and what a great wall unit!

If I had time and space I’d have bought them too, just to do that!

We did pick up a couple of things. This is great. Its missing its top, but Wayne is going to use it to hold his drawing supplies. It looks pretty cool on his desk.

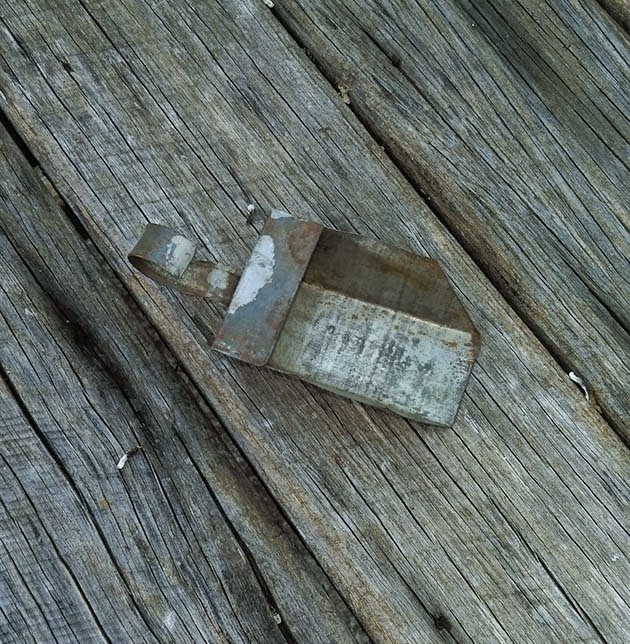
Wayne found me this tiny galvanised scoop.

When I took the photo I didn’t notice the bird poop. Enjoy.

I also got this cheap version of an industrial light. If I can find a fitting to fit it (haha) I’ll use it somewhere. The office maybe… picture it painted my greeny aqua colour on the outside, silver on the inside… yeah!

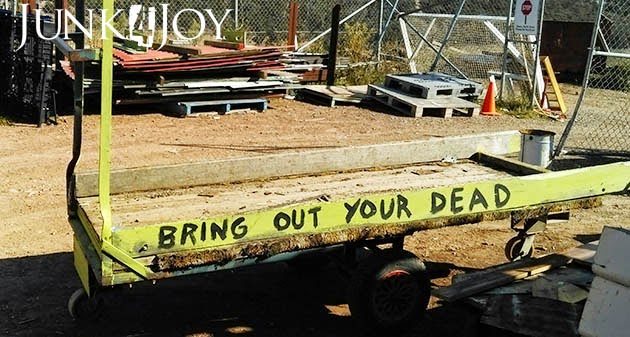
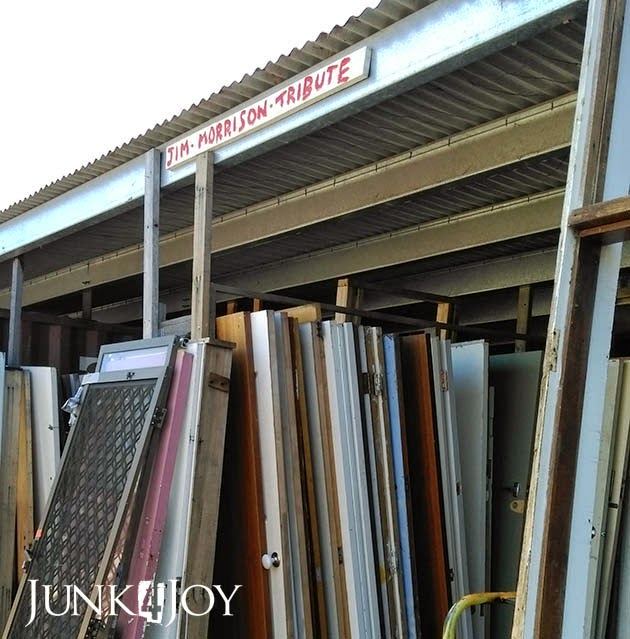
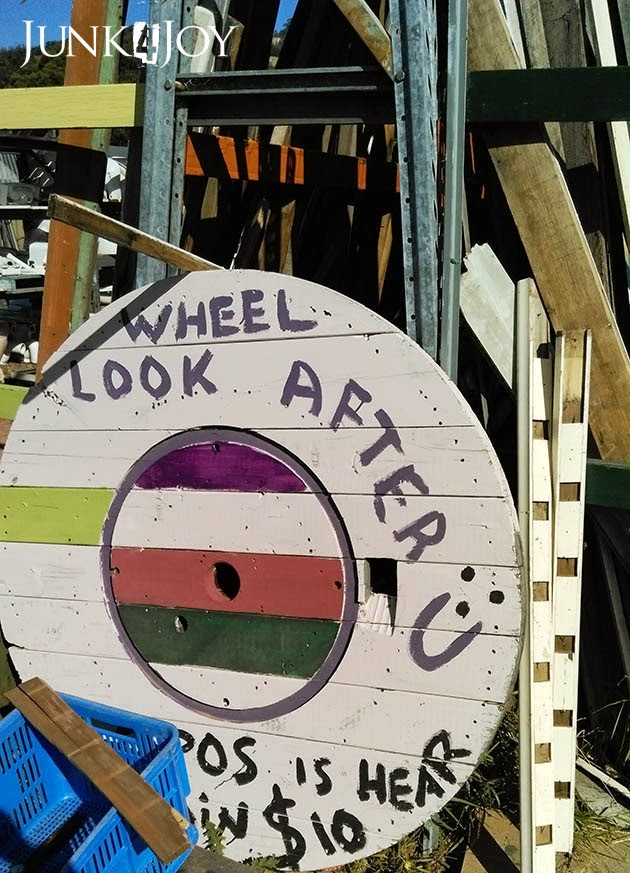
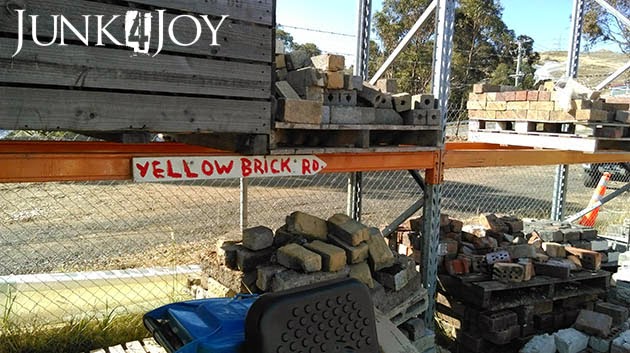
After lunch we visited another tip shop. While wandering around I noticed the sign on the side of this cart. Hilarious!

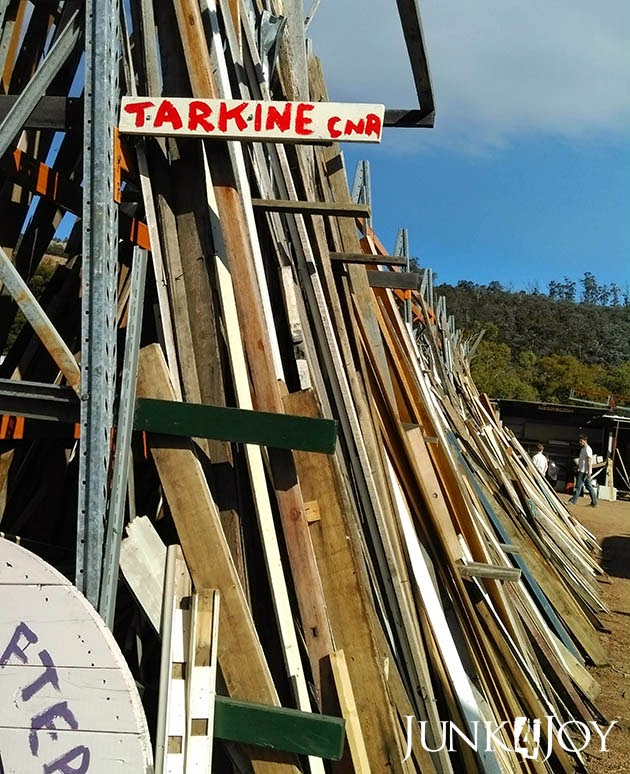
Then I began to notice the signs all over the place. Someone got around the place with a can of spray paint and a sense of humour!

(For my American friends, the Tarkine is an old growth forest here in Tasmania.)

Gotta love this one!… Get it? “The Doors”…

It was the best day! 
z
Update 12 April 2015
It has been pointed out to me that not everyone knows what a tip shop is. Well, not to worry. Until I moved to Tasmania I had no idea either.
A tip shop is a shop attached to the TIP, which is the local dump. Landfill. Rubbish recycling center. Whatever its called in your part of the world.
Basically, tip shops sell what has been either taken to the tip to throw away and the scavengers who work for the council* have crawled around picking up to put in the shop attached to the tip… the ‘salvage centre’… or ‘recycle center’ etc.
OR, its stuff people who have things to throw away have taken to the tip shop cause they think its too good to throw away, but don’t want it any more.
But mostly its stuff that’s been thrown out and been pre-salvaged for your convenience, priced and put on a shelf or a stack for you to go shopping.
Its a great place for salvaged building materials, odds and ends of anything for anything. 
But the overall thing is that its stuff that was disposed of by someone as having no use to them any longer… and as such it was free.
Then the tip shops take anything that has resale/reuse value and they price it and sell it. 
Sometimes at unbelievably ridiculous prices considering it was one step away from landfill!
Eh.
I love scavenging at the tip shop. I go for the rusty bits, the old bits of broken furniture, etc. I’ve often picked up large pieces of plywood for a project or a bit of timber, or furniture legs or whatever.
Our front door came from a tip shop. So did our kitchen table. Our old kitchen chairs. Heaps of stuff.
My only issue is that sometimes prices are just too high. 
On the other hand I’ve often bought a box full of crap good stuff for $5.
We do have thrift shops (like the Salvation Army or St Vincent de Paul stores) which we call op shops (opportunity shops), we have junk shops, and we have antique shops. I love all of them. Cause you never know what you’ll find in any of them!
*Councils runs tips. Some councils also run tip shops to reduce the amount of landfill by encouraging recycling. In New Norfolk the council contracts out the tip to someone and they have the rights to salvage and resell. Its illegal to pick up something from the tip and take it home.
Go figure.
z
moving forward on the house painting

We have a week off work for Easter. Naturally my list of projects to do is huge.

Massive.

Long even.

One thing I planned to do, providing it didn’t rain, was finish painting the outside of the house. Its not too much to want a single colour on all the walls…

Around here painting the house is more an ongoing project than a ‘do it once and don’t do it again for 10 years’ kind of thing.

I think I started painting the house about 4 years ago.

I’m a speedy worker.

Its still not finished by the way… the back porch needs the high areas done and, realistically, it needs another coat already due to the exposure on that side.

So, when we built the front porch I had painted all that front area (except the beams up above). Then we put in a new window in the kitchen and needed to patch walls. And we decided to enclose that area of the porch so there was a lot of raw wood to paint.

This past summer I gave all those spots an undercoat and thought that, really, how hard could it be to finish the job with a couple of topcoats?

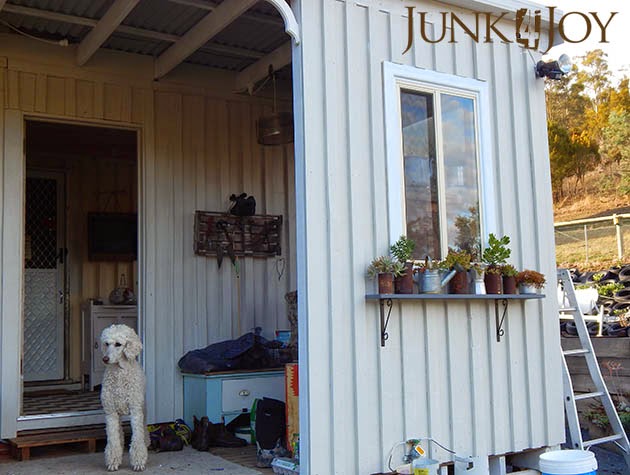
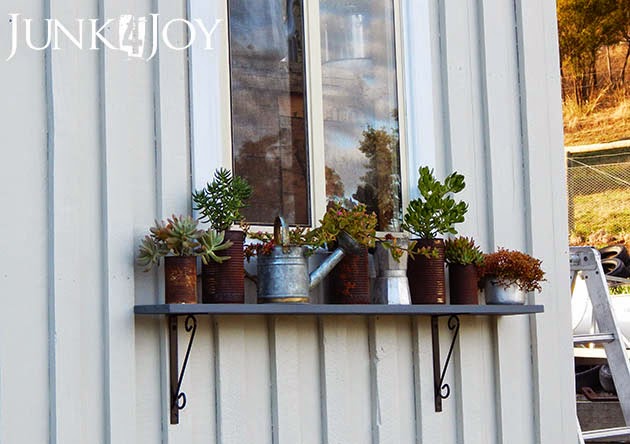
One thing I’d been planning on from the start, was a window shelf for plants under the kitchen window. I had this little grey one from the living room so put it on the outside of the enclosed porch. The brackets need adjusting so its come off now, but I was dying to see what it looked like.

Kinda cute.
It sits above the gas bottles for our kitchen. Another project for that mythical ‘one day’ is to make a box to hide both the gas bottles and the rubbish bin. Two birds – hide the bottles and keep the bin safe from the dogs.
Not that my dogs rip open rubbish bags. They prefer live chickens… sigh.

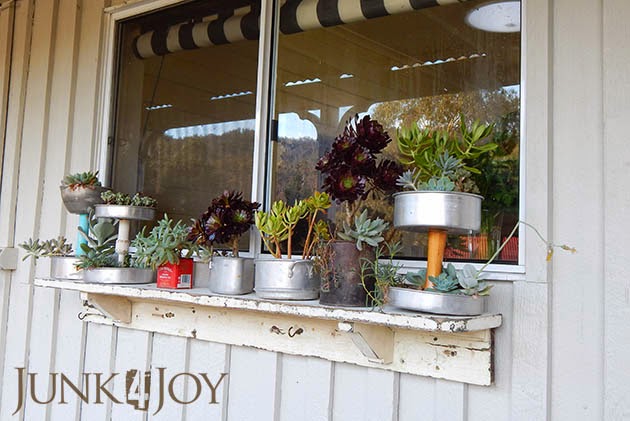
I had bigger plans for the kitchen window. This old shelf was in the white timber shed which is being used just for storage. I got Wayne to remove it yesterday and with his help (its a heavy sucker) I screwed it onto the wall under the window.

All I did was give it a good scrub and a light sand to get rid of loose paint. I love the chippy look and the various colours showing through it.

One thing I’m doubting now is its position. I think I need to put it lower. The kitchen window isn’t deep and having the plants overlap the window so much makes the window look narrower, and from inside I feel like I’ve cut out some of the view.

What do you think? I’m thinking of lowering it by about 5-6in.

Another thing I plan to do is cut a frame for that window. All our other windows have aluminium frames which were blue and I’m (still) in the process of painting white. A frame around the window will tie it in with the other windows better.

So, after doing about 2 hours of work on the second coat this morning I had to stop. I felt exhausted, weak, had chills and a bit nauseous. I hope I’m not coming down with something. Not on my holiday!

I think I’ve done enough for today.

z

Shared at:

and

a new/old labrador tray

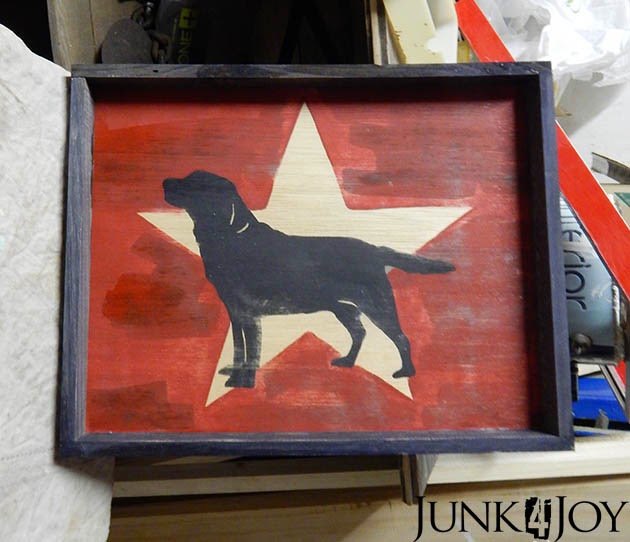
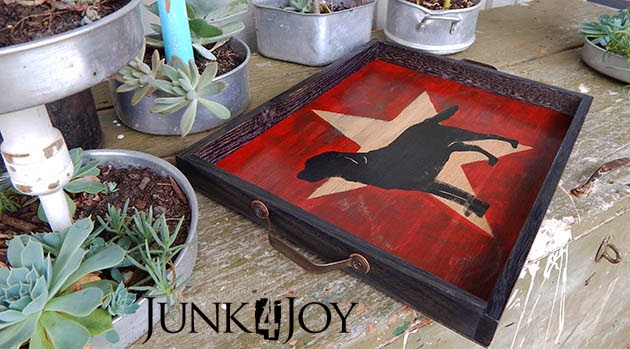
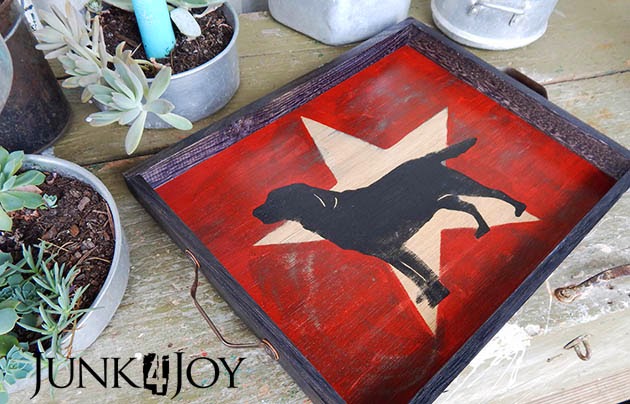
A while ago a friend asked me to make her a tray featuring labradors. I considered her request and came up with the idea of doing a silhouette of a lab, super-imposed on a star in red, yellow and black. Something that would look like an old fuel sign.

I started by choosing a frame I thought would make a nice tray. I then cut a piece of plywood to fit into the frame I’d painted bright red.

I printed out my design on 2 sheets of A4 paper and (using the charcoal on the back method) traced it onto the plywood.

I painted the dog and background using my acrylic artist paints. I loved the natural colour of the plywood so I decided to leave the star unpainted rather than do it in yellow.

When the paint was dry I gave it a sand to make it look old and worn. I tried it in the red frame and didn’t really like it. There is such as thing as too much red.

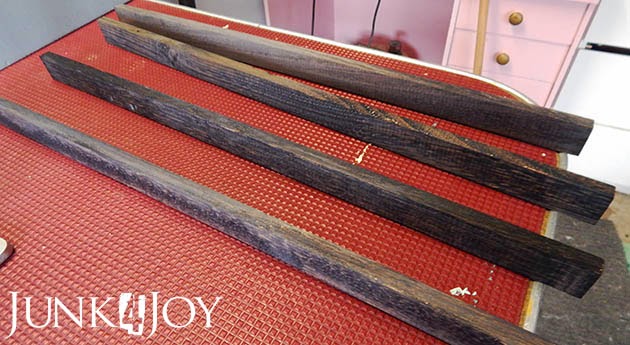
So back to the drawing board. I cut some pieces of tassie oak I’d gotten for free from the hardware store – they were packers in pallets of products they were tossing out.

I did the steel wool in vinegar trick – I planned to age them with the vinegar solution then paint them and scuff them up to expose the aged timber.

Well… something went wrong. I have no idea what or why, but the wood turned black as soon as i painted the vinegar on it!

You can still see the grain, but its like I used black stain instead of vinegar. Wierd.

However, in my “go with the flow, all accidents are happy little adventures” frame of mind I decided to go with it and make it work.

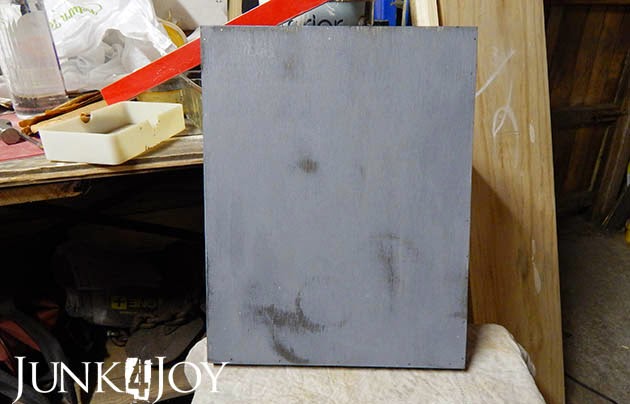
I painted the bottom of the plywood grey and painted a bit of the vinegar solution over the sanded areas to age it. It went black too. But it works for me. It looks old and abused.

Then I made my first mistake.

I painted some of the vinegar on the sanded red areas. It left distinct stains.

Oops.

Go with the flow. Its all part of the adventure, right?

I stained the entire red area with vinegar to try to smooth it out. The blackness bled into the star.

Ooops again.

I sanded it out, did a bit more sanding, then decided it was good to go. Its just a bit more ‘abused’ than it was before.

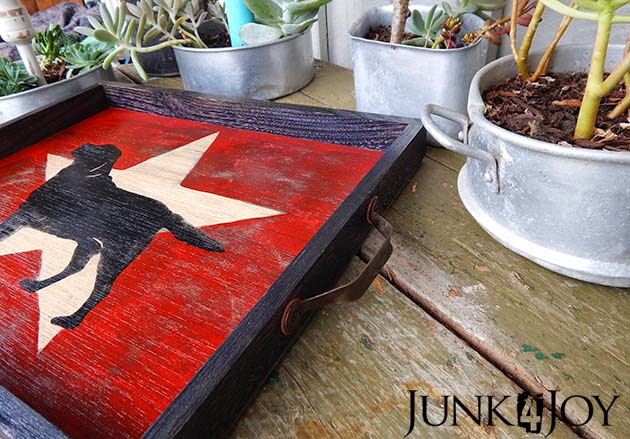
Since this is a tray, and trays are used to carry drinks and food, I gave it a coat of estapol for protection. That’s causing the shine in the photos. Please look beyond that. I’m sure some use will take care of that.

I found a couple of old bent handles I had in my collection – they’d been removed from a couple of drawers I’d used in another project.

I used some pre-rusted washers under the handles when screwing them in place, cause the smallest black screws I had were a tad too long. Didn’t want the pointy end of the screws sticking out on the inside of the tray!

It worked. I actually love the little rusty outline around the handles.

The photos are giving the black a rather blue tinge which isn’t there in real life. Its come up quite good. I hope my friend likes it… Do you friend?
z

Shared at:

the anti-rabbit

I did take ‘before’ photos of this rabbit. 
I did.
But I can’t find them anywhere!

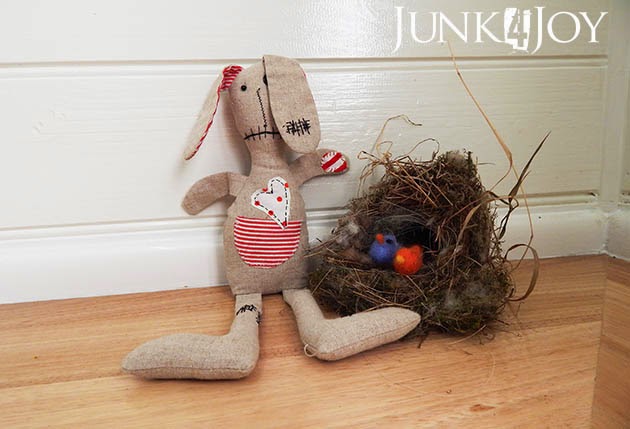
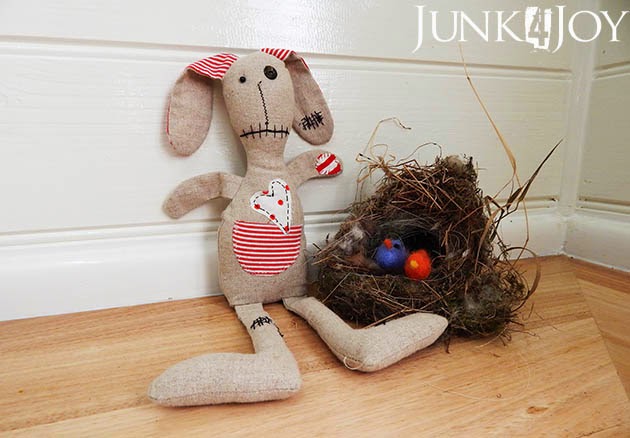
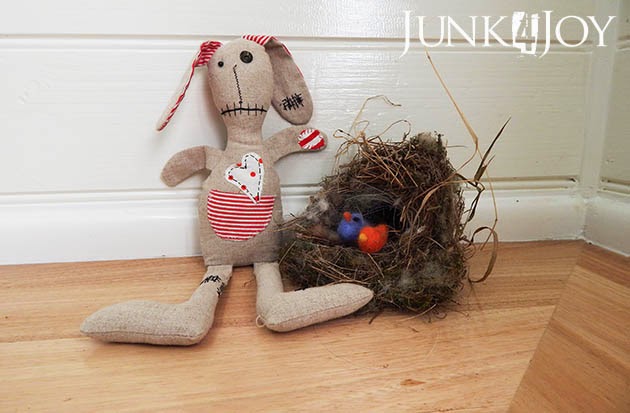
I got him from the ‘free to good home cause they’re too ugly to sell’ pile at the tip shop last time I visited. The poor bunny had one bead eye (as you can see on his right) and the other eye dangled from a thread halfway down his neck.
Pretty gory looking.
He had the pocket and the red striped ears you see, but no mouth and he was just plain… boring.

I thought I could pretty him up a bit… by making him a monster rabbit. The anti-rabbit of Easter, so to speak.

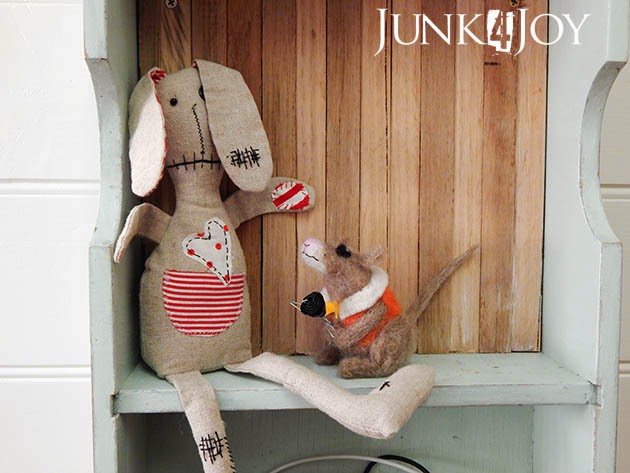
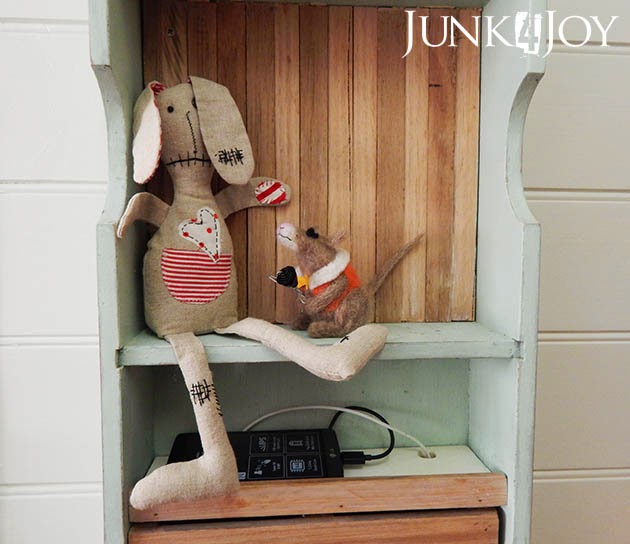
I gave him a zombie mouth, a mismatched eye, a spotty heart and a few darns and patches. I think he looks much better.

So does my little rat-like creature. He’s smitten. Been offering the rabbit flowers since they met.

Hope everyone has a great Easter.

z

Shared at Knick of Time Vintage Inspiration Party!

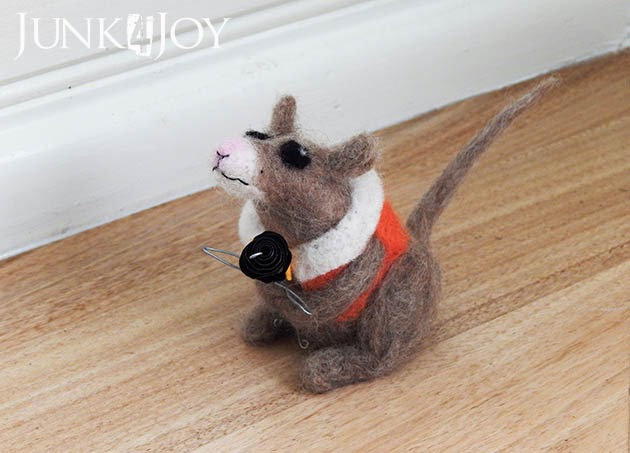
needle felted rat-like creature

I’ve been looking at a lot of incredible needle-felted animals on Pinterest lately. Some people are so talented! The expressions, the realistic shapes…

I decided to make my own little dressed up mouse. Its been a while since I made a needle-felted animal. I love working with felt but I’m not exactly consistent.

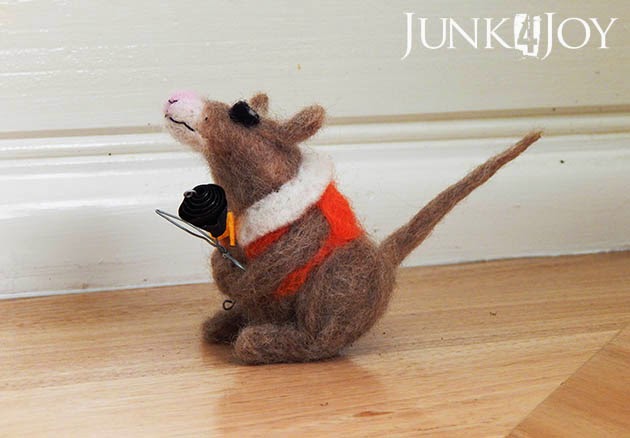
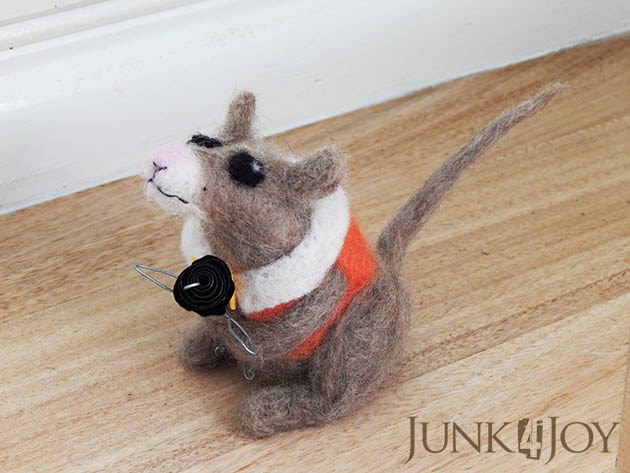
I had planned to make a mouse but he looks a bit more like a rat. Not to worry. He’s still cute.

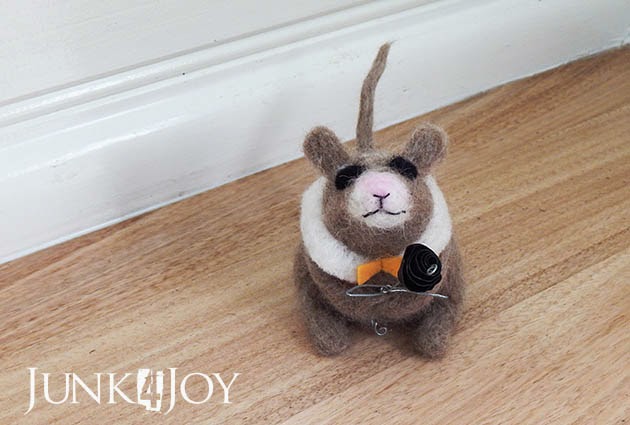
I needle felted him entirely, except for the white collar on his little orange vest, and his yellow bow tie. 

His eyes are needle felted, with a little white twinkle highlight. I stitched his nose and mouth with black thread.

I had these little metal shavings in my shed… I don’t know what they’re from, I found them on the ground when we took a load to the tip last year. Hard to see in the photos, but they look like little flowers to me. I made a little stem and leaves out of wire and gave them to my little rat-like creature to hold.

Yep. He looks cute in his perpetual grovelling, apologetic, flower-offering stance.

z
Shared at: