getting there slowly – kitchen update

Not much has actually happened in the kitchen yet, so the title of this post is misleading. However things are going to be happening. Soon, I hope.
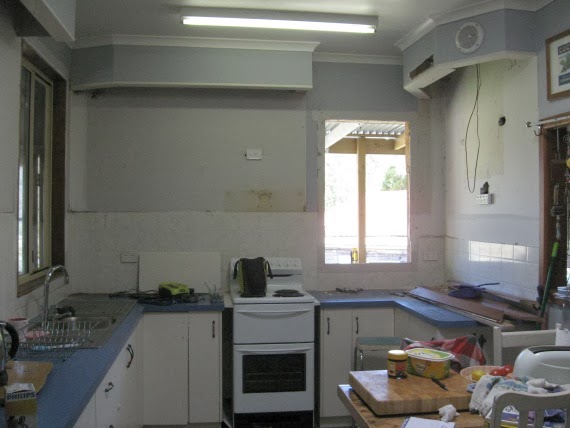
This is where things are at.
Handyman has been over and worked on the end of the porch till he ran out of wood. That’s semi enclosed for now and already making a difference when its really hot, and today when the wind picked up and it rained horizontally.
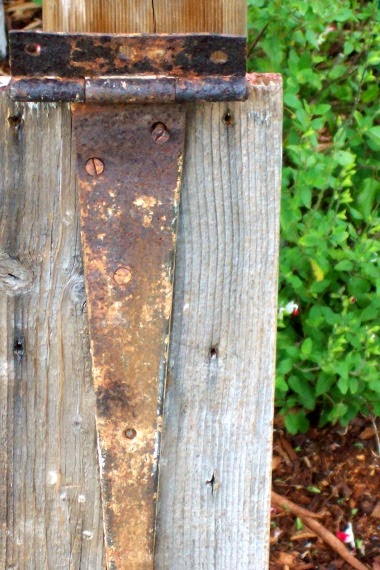
Yesterday evening we sat on the bench at the end of the garden and looked back at the house and I’m loving how its looking. I love the enclosed end of the porch and the way the retaining wall frames the house.
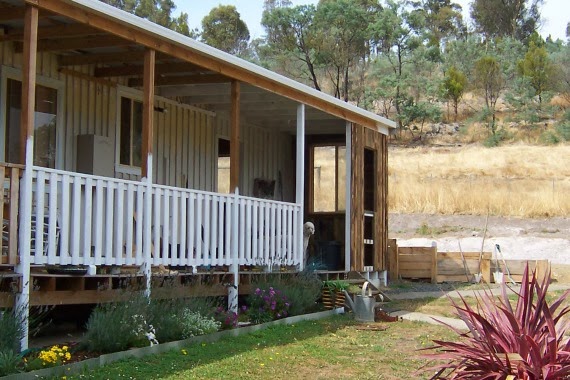
Just squint a little and picture the painting finished… perhaps with some decorative corners on the posts…
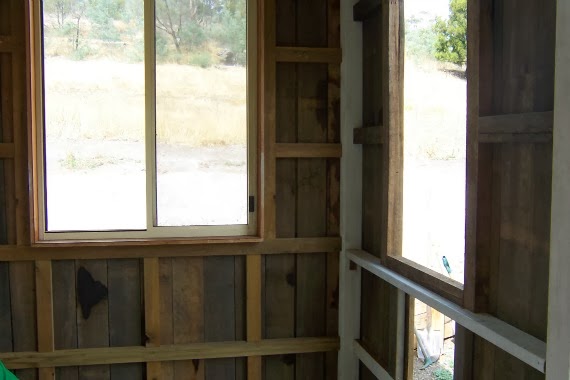
Meanwhile the electrician has put in the new meter box and the gooseneck thingy where the power comes into the house. We’re waiting on the electricity company to come move the power before we can put the new window in the kitchen and finish lining the walls.
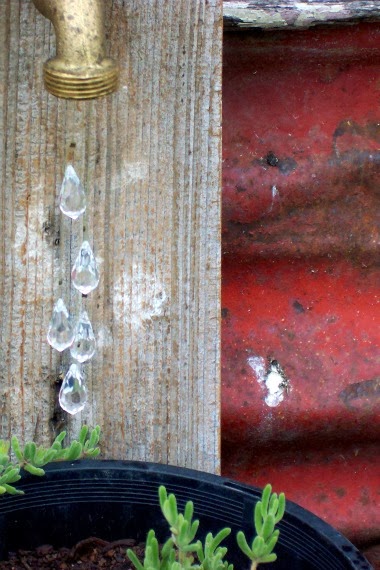
All the power points have been moved and we now have a power point outside for those times when you need power outdoors. Power has been pulled to where it’ll be needed for the new stove, dishwasher and rangehood.
My kitchen maker has been to confirm measurements and will be placing the order on Tuesday (Monday is a public holiday here) and thinks the new kitchen will be ready to install in 3 weeks.
That means that the week before we need to rip out the old kitchen bench and cabinets, lift the lino and masonite on the floor and hopefully find floorboards in decent condition. If so, I’ll need to give them a sand in preparation for the new cabinets to go in. If not we’ll be putting the masonite back and organising vinyl for the new floor.
I really hope we have nice floorboards.
Soon as I get the precise measurements for the new benchtop I can give them to Handyman so he can start making it. Then it can go in soon as the cabinets are in place.
I’ll have to organise delivery of the stove, rangehood and dishwasher so the kitchen can be put together at the same time. I think… The timing of this still kind of stumps me.
I know I need to organise a plumber gasfitter to come get everything ready for the stove and sink before they’re put in place, then come back to connect them up…
Ditto with the electrician when he puts in the bits he needs to wire in.
Remind me never to do something like this again…
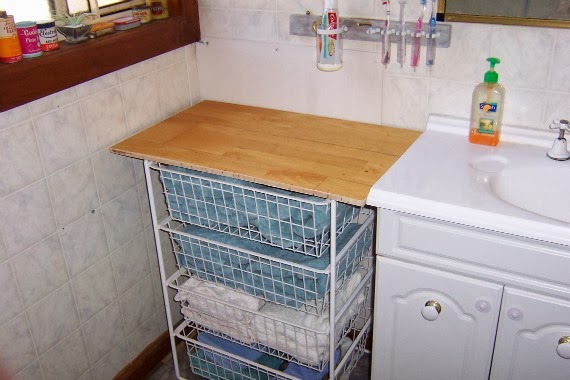
Meanwhile I found this little beauty at the tip shop while looking for something else. I think it might be the perfect mobile island bench for the new kitchen. All it needs is new handles, a bit of TLC, a shelf and castors. Oh, and a new top to match the benchtop Handyman is making.
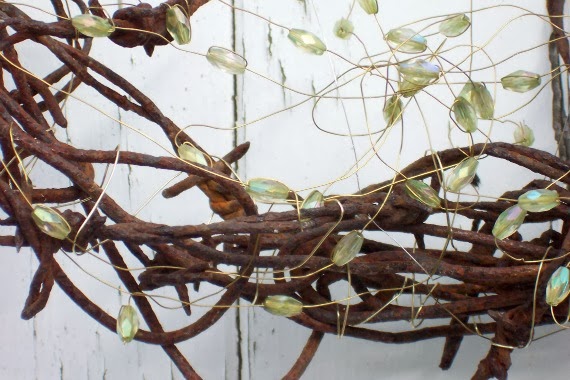
On another note, the garden is going well. I’m waiting for 3 of the 4 of these plants-who’s-name-I-have-forgotten to bloom so I can decide if and where I’ll put them in the garden. I love the pink but I don’t want red.
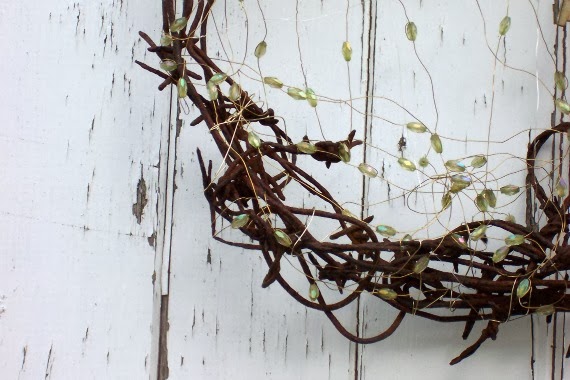
Wierd, but I don’t remember planting these seeds… Remember, I never wanted yellow flowers in my garden and now I have plenty of yellow flowers.
Oh well. The garden is a work in progress. I can always dig up, pull out and move things I don’t like.
Yesterday I planted a ton more seeds in pots so hopefully they’ll start sprouting soon and I can add them to the garden. There are already a few things which are ready to be put in. Its just a matter of deciding where they should go and put them in.
I’ll have a pretty garden yet!
z

barbed wire hearts

Its been a long time since I shared any creative projects.
I’ve been busy OK?
Anyway, here are a few (bad) pics I took of some barbed wire hearts I made not too long ago.
I found some barbed wire at one of the tip shops and collected it to make some hearts. Once the basic heart shapes were made (thanks Wayne, you’re a wire genius and not afraid of barbs), I used finer wire to decorate the hearts.
First I made a spider web. I used some craft glue blobs to create a dew-drop look on the web.

Another is a bit more random in curls and webs.

Last is an extra curly one with pink wire highlights.

One of these days I’ll get creative again. Meanwhile I’ll be better off diverting my creative energy to clean out the guest room. And the office. And paint the railing on the porch.

Strangely enough I’m actually looking forward to actually doing all that. I just can’t seem to find the time!

z

the tshirts which almost ended us

I forgot to mention another thing I did do over the last month or so while I’ve been feeling unproductive…

I did the T-shirts for the work camp.

I’ll go to my grave insisting that Wayne asked me if I wanted to design the T-shirts.

He’ll insist to his grave that he asked me to make the T-shirts.

I would never have agreed to hand draw 38 T-shirts! Even if I had agreed to hand-draw 38 images there’s no way on earth I’d have agreed to hand write anything. My hand-lettering sucks.

Big time.

That’s why I use a computer!

The idea was that there’d be 6 teams (which soon became 7), each team would have a different colour T and a different native animal as their name. The animals had already been chosen. I designed 7 different logos for the teams. (Excuse the pics, the colours are all off.)

The camp staff needed their own Ts representing all the teams. That was another 5 T-shirts. (This is supposed to be a white T!)

Anyway, the fronts were done easily enough. Despite a lot of hard work and a lot of swearing. I suggested we use iron-on transfers for the backs since there was no way I’d get the type done otherwise.

Took me 3 solid days of drawing and ironing but the Ts came out great.

I did mess up one… or three… Ok, only one drawing was really stuffed up (though a few of the goannas looked like they’d been run over by a truck) cause I started really big and found that there was no way I could make the images that large and hope to use the fabric pens to do it.

I stuffed up a couple of the iron-ons as well. Some didn’t peel off properly cause the iron wasn’t hot enough, others got cooked a bit cause the iron was too hot.

Ugh.

Apparently the T-shirts were a hit on the camp.

z

a bigger bathroom – work in progress

As you know, things snowball around here.

First it was a broken oven, suddenly it was a kitchen remodel and a bathroom disruption.

I can’t actually call it a bathroom remodel as Wayne put his foot down. He was ok with moving the hot water cylinder. He was ok with removing the bathtub to get to the pipes and cause we never use it and it really needed to be gone.

He was not ok with me adding to the work (and cost) by redoing the bathroom “while we’re at it”.

In fact, he actually said “Once the bathtub is removed thats it. We live with the bathroom as it is.”

That doesn’t scare me. For one thing, just having the tub out makes a huge difference, and I love the shelves I put in. There’s tons I can do to make room more user-friendly and less gag-worthy.

And in a year… who knows…?

To recap… This is what the bathroom looked like before we removed the bathtub. A tiny square room with lamipanelled walls. Ick. You had to walk in between the shower and wall, then almost turn sideways to get past the corner of the shower and the vanity. Once in, you had a narrow space between the shower, bath and vanity in which to do your thing.

Once the bathtub was removed, we suddenly had space! The entry was still cramped, but then it opened up into a much bigger room than before. With the shelves on the wall for storage and an empty wall opposite I can move the towel rails and hangers from the left and right of the doorway, giving you a sense of more space.

Removing the bathtub left a huge hole in the wall where the laminpanel was broken to get to the pipes. Easy fixed. I got a piece of masonite from the casita (see? keeping things comes in handy), cut it to size and screwed it onto the wall. I then got out one of my many mixed up paint colours and found one that almost totally matches the colour of the walls.

I then looked around the house for a piece of furniture I could put in the space for storage and added bench space. I found an old wire drawer unit I’ve had for yonks. Its hand many roles over the years – bedside table when I was a student, linen storage, dog towel storage. For the last couple of years its been unsused space in the laundry.

A good wash and a top was all it needed to bring it into the bathroom. I had some laminate flooring pieces I got off a friend. I cut one to size and voila – new top!
Laminate flooring clicks together so I had to reinforce by screwing a couple of pieces of wood underneath. I love the extra space it gives me now.
And while we’re at it, I might add a small note on the toothbrush holder. Remember the toothbrush holder I was so happy with? 
Well, turns out test tubes are the worst thing you can use to hold toothbrushes. Water dripping off the ends gathers in the bottom and become stagnant and the stench is unbelievable.
I had to replace them with large gauge syringes. They still get gunky at the bottom and need cleaning now and then, but they let the water out and don’t stink!

I should be posting that in my failed projects!

z

fancy bleach jeans

In between posts about kitchens and navel gazing, I thought I’d continue to post the odd crafty DIY project.

I have this old pair of jeans that I wear when I’m having a bloated tummy day. They aren’t ‘good’ jeans, just a very cheap pair I picked up a few years ago. Strangely enough, they’ve outlived my ‘good’ jeans.

Anyway, they had a light spot on one leg where I’d probably splashed a bit of bleach somehow. Like when I decided stuff the natural shower cleaners, I’m going with the big guns.

Since I’m not ready to totally throw them out, I figured I’d use them to experiment with.

I got out a small watercolour paintbrush, a bit of bleach and started painting.

I did it in two stages as I was winging it. Typical Zefi. I decide to do something then just go off and do it without real preparation or planning.

The fabric absorbed the bleach really quickly so I had to keep charging up the brush, then it would  ‘leach’ into the fabric and spread. Thus the variations in line thickness.

It turned out ok though.

I’d wear them in public.

z

tin crown tweaked

 Remember this tin crown?

I was happy with it. I thought it was finished.

Goes to show what I know!

I put it on the shelf and called it done.

Wayne walked past and tweaked it. A bit. Just a tiny bit.

And now its better.

All he did was bend out the points a bit and suddenly it was better. It was perfect!

Don’t you hate it when someone else can see something you don’t?

z

i’m a big fan

Thought I’d quickly share these photos of the birthday present I got Wayne this year.

I was looking through the old tool section of a local antique store when I saw this little beauty and just had to grab it. Its a heavy duty fan of some kind of machinery.

(We like getting eachother useless rusty things as gifts. Love it!)

I love the chippy paint and the rust. The photos suck, but hopefully I’ll get better photos of it when I put it up somewhere.

Don’t you think it’d make a terrific light fitting for the new kitchen?

Then again, its Wayne’s present, not mine. Maybe it’d look better on the garage wall!

z

we’ve stalled – kitchen update

One day into the renovation and we’ve hit a wall.

A wall with seriously thick power lines in it.

And that’s the best thing that happened today.

This is how it went.

Yesterday the handyman had leveled the slab the hot water cylinder was to sit on. The electrician cut the power to said hot water cylinder since what we thought was cutting the power to it didn’t stop it producing hot water.

On the positive side, we didn’t have to go days without hot water.

I did manage to find an electrician, as you may have deduced.

Today the plumber arrived at 7.30-ish and started working on removing the vanity – so we could remove the bathtub, so we could access the wall behind it, so we could plumb in the hot water cylinder in its new spot. Nothing is ever simple.

At 8am the handyman and the plumber’s sidekick arrived to help remove the tub and do the other work lined up for them.

Handyman had to remove all the top cabinets from the kitchen and 2 windows, then put the new window I’d managed to find, which I drove down to the city to pick up.

Of course cast iron tubs aren’t that easy to move. It took the three of them a lot of hard work to move it out to the porch where it’ll sit till I can sell it.

Anyone wanna buy an original, large, clawfoot tub with all its feet and only 2 small chips in the enamel? If our bathroom wasn’t so tiny I’d have loved to keep it.

Anyway… it was all going smoothly… there was a hole in the floor where they had to cap off the bathtub drain, and a hole in the wall panel where they had to put in the hot water pipes, not to mention holes in the plaster on the other side, almost hidden by the fridge. I only noticed that after the plumber left.

Along with the fact that he didn’t put silicone around the vanity when he put it back in, left the hole in the ground for Handyman to fix and left the gate to the paddock open and the cover off the pressure pump.

What is it with these guys?

So, as I was saying, it was all going well till the plumber put the water back on. Then we had a fountain in the bathroom.

See, while I was out picking up windows he called to ask me which side the hot water was on. I said left. Meaning the sink. He meant the bathtub, where it was on the right.

What? Isn’t it like that in your house? Sheesh…. You’d think I was the only one with odd plumbing!

One minor flood and a ton of wet towels later, the hot water cylinder was plumbed in.

I even have water in the vanity again.

Meanwhile Handyman lets out a sound I could only interpret as not good.

Luckily the electrician was here to connect up the hot water cylinder so he had a look. He shook his head. He agreed. This was not good.

Turns out the power cables to the meter box run alongside the small window Handyman had just removed. There was no way to move them aside and they were right in the middle of where the new window was going to go.

Great. They’d totally stuff up my view.

Ok… now why did none of us even think that might be a possibility? The meter box was right there, staring us in the face… surely if we’d opened it we’d have seen the cables disappearing into the wall above it… sigh.

Decisions needed to be made. Redesign the kitchen and put the window to the one side of the wall or go through the process of moving the cables and meter box.

I said move the box.

So now the electrician has to fill out a form requesting work to be done, he’ll hear from the power company in about a week (if we’re lucky) and the job will get done in about 4 weeks (again, if we’re lucky).

Meanwhile I have 2 holes in my kitchen wall.

This is about where the work stalled… 

We put a tarp over the window into the mud room. That’s fine. Its an ‘inside’ window. Handyman put the small window back in.

Great.

On a positive note, the hot water cylinder is no longer on the front porch. Yeah!

See the cables in the window? OUCH.

And I have this great metal grate which it used to stand on I can do something with.

So that’s where we stand right now.

We have a kitchen with a hole in one wall, no upper cabinets, bulkheads which still need removing and a ton of old cabinets in the casita. I’ll probably use some of those in the grooming room and laundry. Waste not, want not.

z

a nice dripping tap

A few weeks ago I bought a replacement tap for our yard.

I got the wrong one. I didn’t know they came in more than one standard ‘yard tap’ size.

But it didn’t go to waste. I had this weathered bit of timber from an old gate or shed door, complete with a rusty hinge. I have no idea what it came off, all I know is that when I saw it in the scrap pile near the stable I grabbed it.

Like everything I collect, I knew it would come in handy one day.

I had drop shaped crystals. I had fishing line. I had crimping beads.

Most importantly, I had the tap and the board, complete with rusty hinge.

I put them all together and now I have a perpetually dripping tap… in the best possible way.

I haven’t found the right spot for it  yet, but I love the look of it near the plants in the new flower beds.

z

Shared at

Beyond The Picket Fence

rusty wreath reborn

I love rust. Its no secret. When I see a piece of rusty wire, no matter how bad its condition, my heart skips a beat.

I found this old piece of messed up rusty wire out the back of our property somewhere and picked it up. It was pretty mangled. No way to unravel it, so I did the next best thing. I weaved it into a circle, added a few bits of rusty barbed wire and called it a wreath.

You can see how it looked in its first incarnation here.

I lived with it like that for a while but it just wasn’t … finished.

You know what I mean.


It needed something… more. It needed a strand of wire with glittery green beads on it.

And a couple of aged keys.

The wire with beads was given to my by a friend who said ‘I thought you’d be able to use this’… how right she was!

I love the shine of the gold wire and the sparkle of the beads against the flatness and colour of the rusty wire.

I love the tangles of the wire.

I’d say its finished now… it just works!

z

PS On an aside, the ‘search this blog’ link isn’t working… I have no idea why. It used to work!

Shared at: