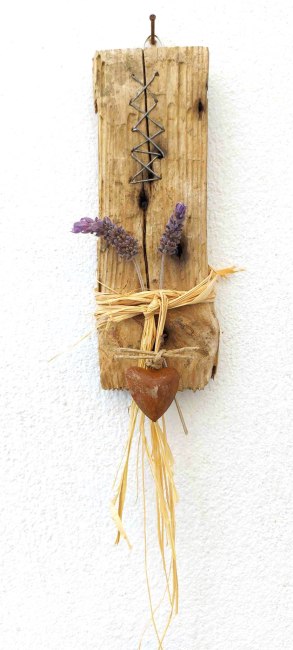
I have always loved stitches where you don’t expect them – in wood, on paper, etc. When I found this bit of wood on the beach, with the big crack down the middle, I thought it would make a great project to ‘stitch up’.
After giving it a thorough clean, I drilled tiny holes for the wire as well as using some of the old nail holes to create the stitches. I added some raffia, a rusty heart and some dried lavender. It might not be a statement piece, but its sweet and I love it.
I love making something out of things I find on my walks and using bits and pieces I collect, finally giving them a purpose.
This was one of those quick and easy, ‘don’t think, just do’ projects I love cause they come out of the blue and are finished in no time at all, yet still give me that feeling of having achieved something special.
Another commission to share today, one which took me forever to do. I mean, I started them fine, back before summer… but then it was summer. Busy with grooming and mom being sick and visitors and all sorts of busy summer things.
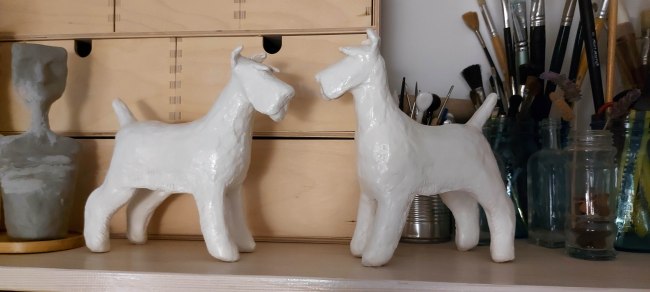
Up to that point I had only done the structure of them, ie cardboard, masking tape and wire so I needed to move onto the clay or papier mâché part. Since the buyer didn’t want these finished in fabric, I decided to use air dry clay for the whole thing.
And I’m glad I did cause I love the way they turned out.
Given the brief for these guys was ‘something easy to dust’ I opted to spray them with white gloss paint, something I’d never done before as a finish for my work. But I’m really happy with the result.
Thought I’d share a quickie work I framed the other day. I say ‘quickie’ even though it was weeks in the making… mainly cause I had no idea what I was going to do.
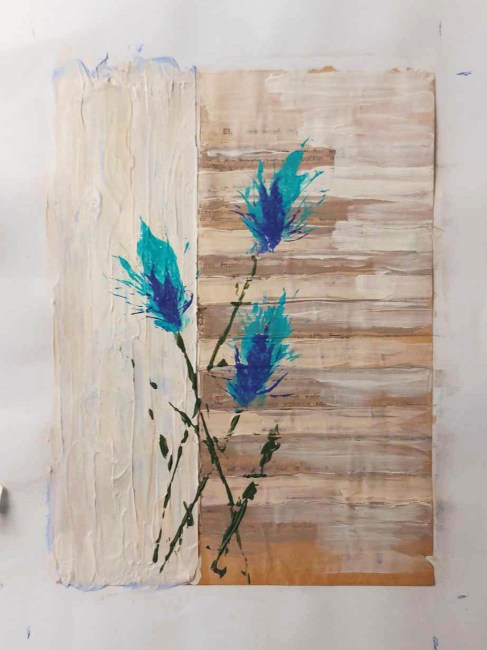
Firstly, I glued an old, yellowed book page from a stack of throw away books I’d collected to a sheet of cartridge paper to create a background to work on like I did here, then I left it for ages, sitting on the kitchen table among the hundreds of things I was going to get to ‘soon’…
While working on one of my large paintings I decided to experiment with the texture building paste I’d bought, so I mixed up some paint and applied it to the paper, thinking I would do a small painting of a wall and stairs. I let it dry and as I looked at it, I felt totally uninspired to continue, so I let it sit and think about its sins a little longer.
Thing was, the more I looked at it. the more I liked the simplicity of the colours on the background and didn’t want to make it into anything other than a background.
Sometime during that period, I saw a FB post about a guy who created art by doing backgrounds then whacking paint covered sticks and branches onto his canvases. Hm… This was only small so I couldn’t go whacking the hell out of it… but I could try pressing something onto it… that might work.
And that’s what I did. Since it was a neutral background, I wanted to do something to bring it to life. I had some of those fuzzy dried flower arrangement things from other projects, so I chose my colours, et viola!
I used the same ‘flower’ to print the image in 3 different colours and I liked it. It’s like nothing I’ve ever done before, but I was pleased.
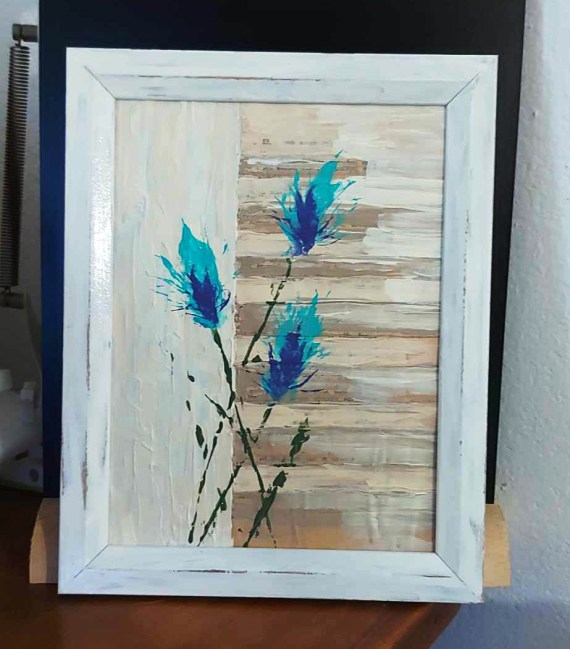
I had a small frame that fit the work, and I had flat white spray paint, so I sprayed the frame, gave it a bit of rub in spots where the paint hadn’t gone on well, and there it is.
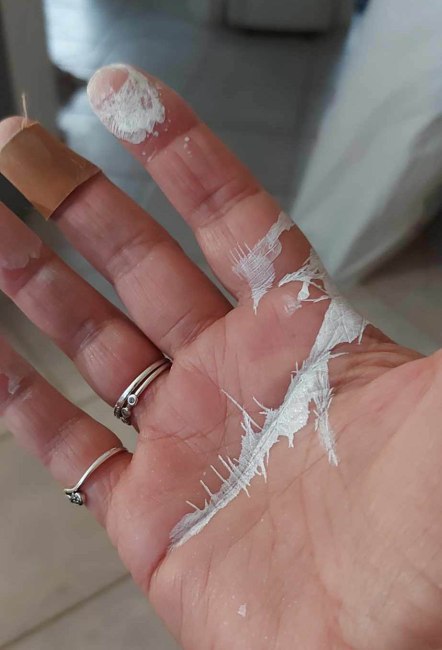
At this point comes the warning/disclaimer. When doing spray painting at home, don’t pull the cap off the spray paint with a vice grip and the determination of a fat man going after the last chip at the family dinner table. I pulled it off (they do like to make them almost impossible to pull off!) and pulled off the spray nozzle at the same time. Putting the nozzle back on caused all kinds of grief as you can see.
But hey, it’s pretty normal for me to have paint all over my hands, my clothes, my shoes… no one expects anything less.
You might notice a bandage on one finger…? I got that while rummaging through a toolbox to find a screwdriver. Instead, I found a razor paint scraper (the kind you use on glass) without its protective cover.
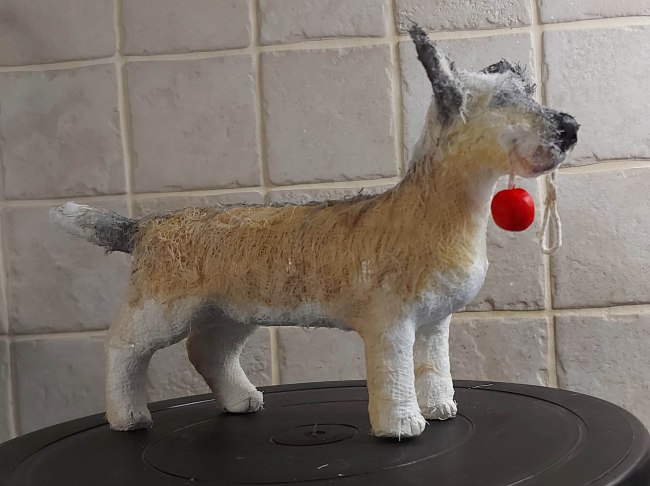
This is one dog I especially loved doing. He belongs to a friend of mine and he’s a beautiful boy with a lovely personality and serious ball addiction.
He’s some kind of terrier mix with huge ears and a crazy coat.
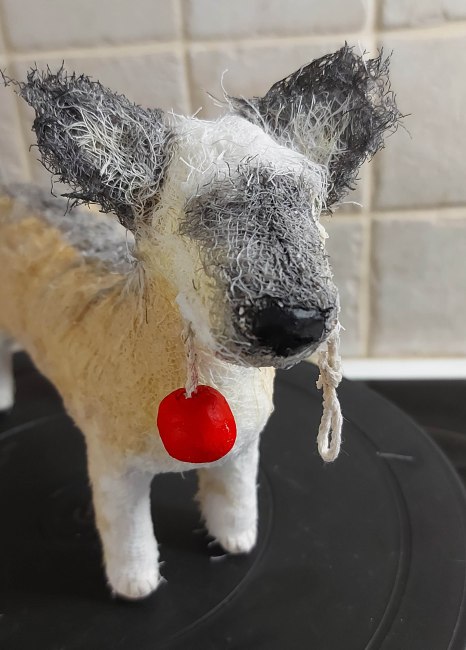
Here is a close up of his face and those massive ears.
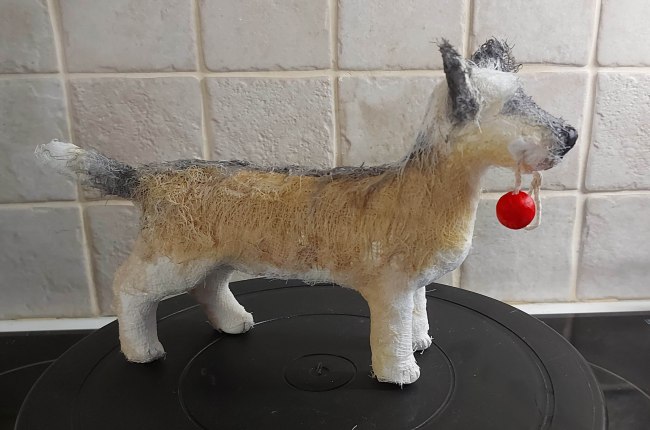
And a little 3D visual.
So, how did I achieve that coat you ask? Well, I thought the best thing for it would be to use gauze. I raided my medicine cabinet and took out some gauze which I dyed by soaking in coloured water: the black was diluted acrylic paint, and the tan was… you guesed it! Black tea!
I then cut up the gauze strips into sections and laid them over the figure in a way that matched Dizzy’s colouring and the direction of the coat.
I then brushed the gauze to loosen it up and give it a more ‘hairy’ appearance.
It worked out pretty well even if do say so myself.
Mind you, the coat is not soft and flowing. I had to fix him with PVA glue to make sure he stayed intact, but he’s a sculpture, not a toy, so I figure that doesn’t matter.
The friend that commissioned him asked about his eyes. I don’t do eyes on my dogs. I’m not really sure why, they just seem better that way. Maybe its because I don’t feel I can do them justice this way, not like I can in my paintings. Maybe its cause without eyes you can project your own eyes onto them, your mind automatically fills in the blanks and imparts the emotions that you want to see in the figures.
Maybe I’m full of crap. But I’m the artist, so I have creative license. Ha.
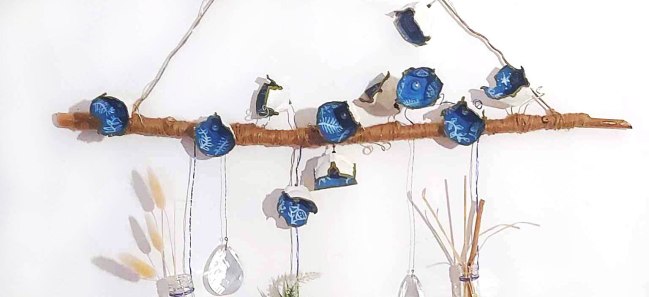
I had the idea to recycle these ‘things’ I didn’t want to throw away into something fun. I had this nice stick and some bottles left over from the larger wall hanging I made a couple of weeks ago so, while I was on a creative streak, I began working on this.
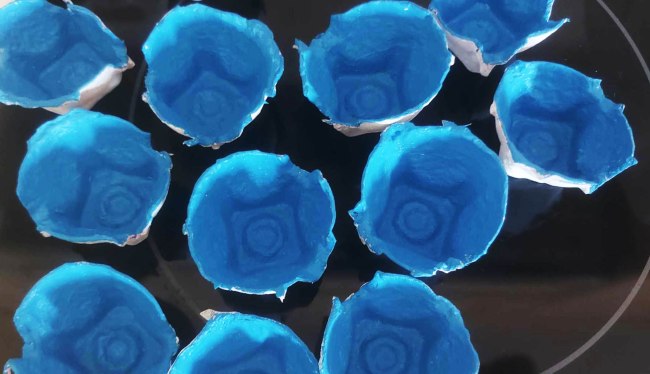
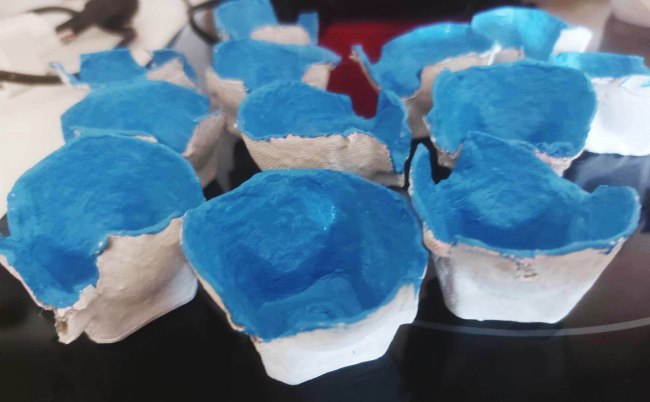
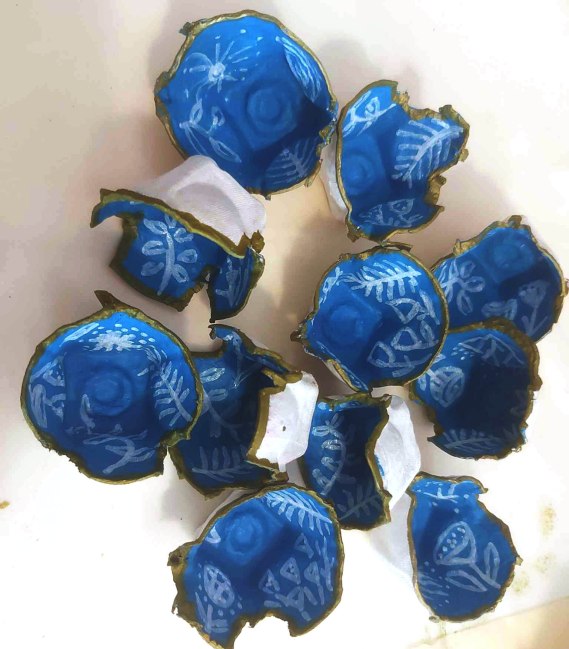
First I painted my ‘things’ white on the outside and a vibrant blue on the inside. Can you tell what they are? Go on. Its easy.
Then I edged them using a gold marker. Have you guessed?
Then I painted shapes inside them using a white paint marker. Have you got it yet?
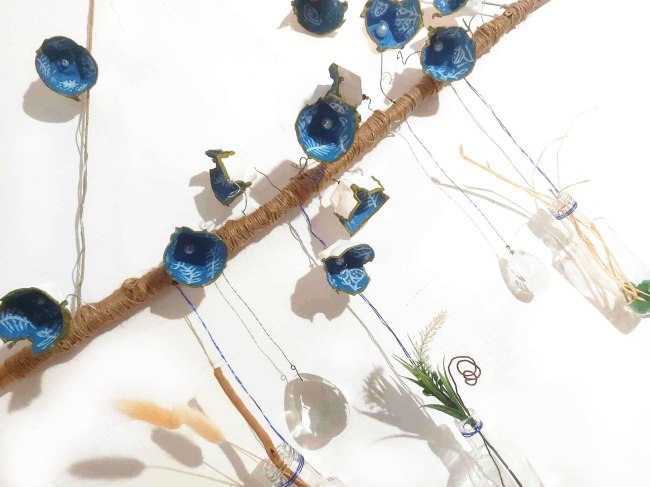
I poked holes in the bottom, added a white pearl onto a piece of wire and attached them by wrapping the wire around the stick.
If you haven’t guessed yet, they’re cut up egg cartons!
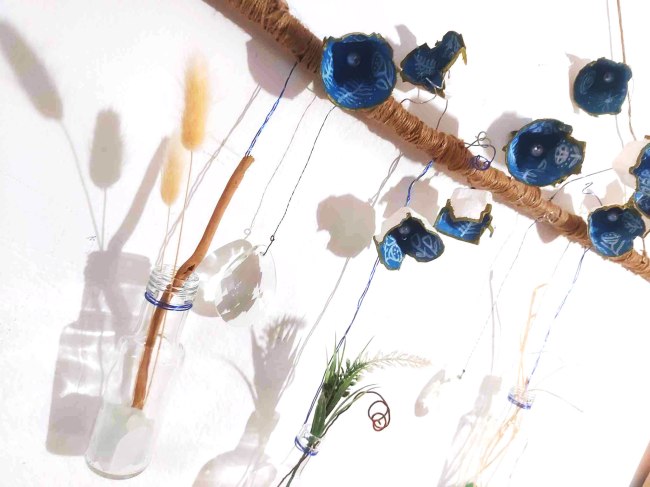
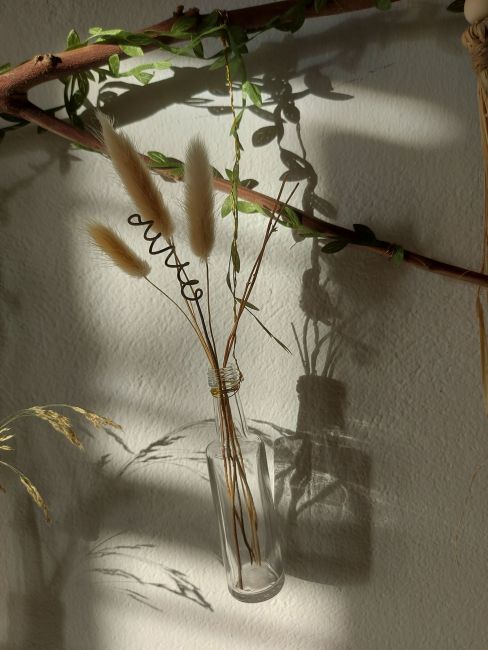
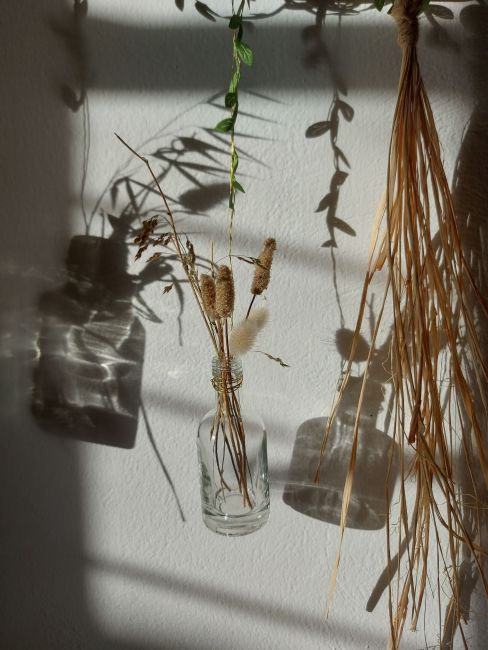
I randomly wrapped the ‘flowers’ onto my stick, added bottles with sea glass, dried grasses and sticks in them, a couple of old chandelier crystals to refract light and almost done.
To finish, I wrapped the entire stick with hemp string to hide the wires.
I think it looks pretty flash and I’m really happy with it.
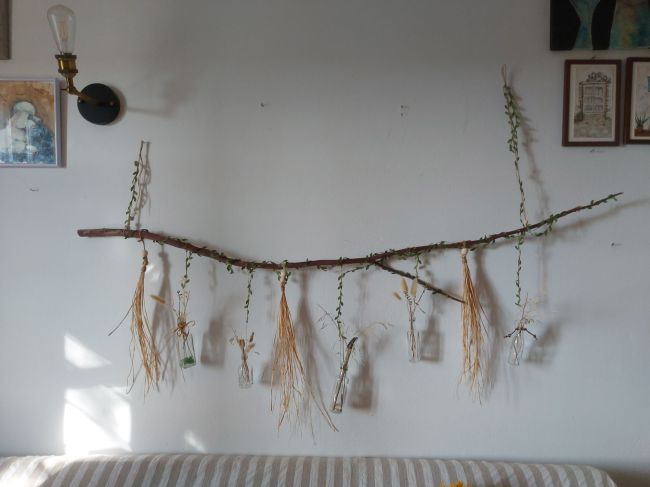
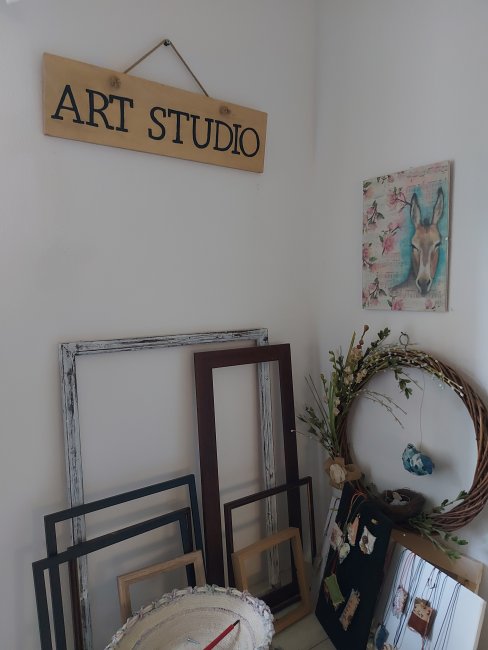
This is what the corner of my living room looks like right now. I’m constantly having to rearrange what I have on my walls. Not enough space for everything… Must sell some stuff to make room… Time to get back to listing stuff on Etsy and Ebay…
Did I mention my brother and his partner are visiting? They arrived today from Athens, they live in Canberra, Australia, so its been a long time getting here.
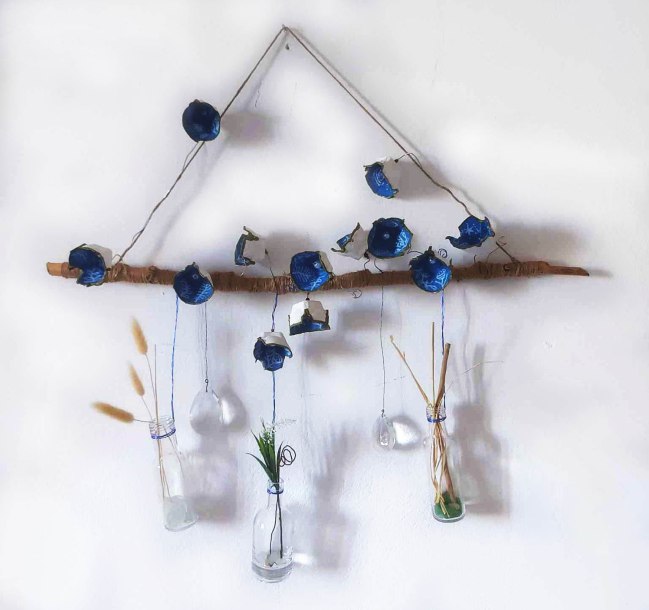
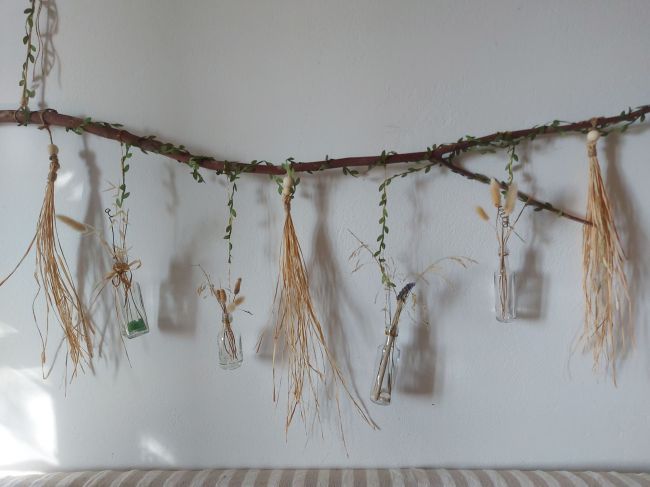
Anyway… while cleaning, tidying, organising and generally making space for visitors in my tiny home, I finished this project for one of my cousins. Its to hang over a bed in one of her studio apartments.
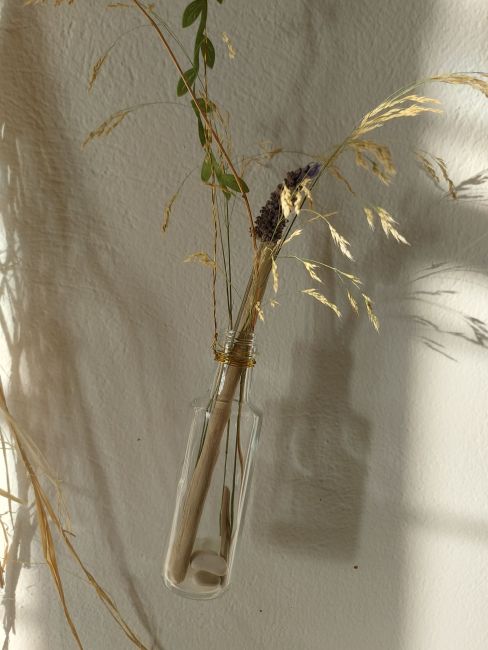
It was easy to make, I just had to find, scavenge, buy and put together the various elements, so it takes a little patience and imagination.
The branch I found while walking Vincent one morning. The little bottles I had to buy. Except one which I recycled. The wooden beads and raffia were from something I’d bought a while ago that I pulled apart. The string ‘vine’ I got online when thinking of making this. The hemp string I already had.
I always have different ropes and strings on hand.
Firstly I had to trim and clean the branch. And make sure there were no bugs on it or in it… Learned that the hard way…
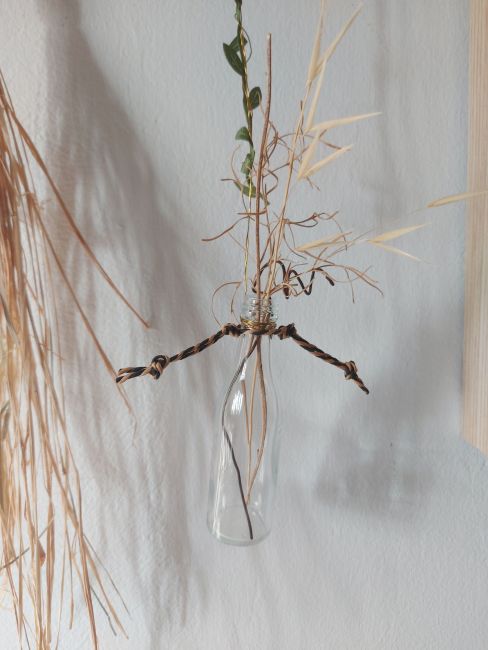
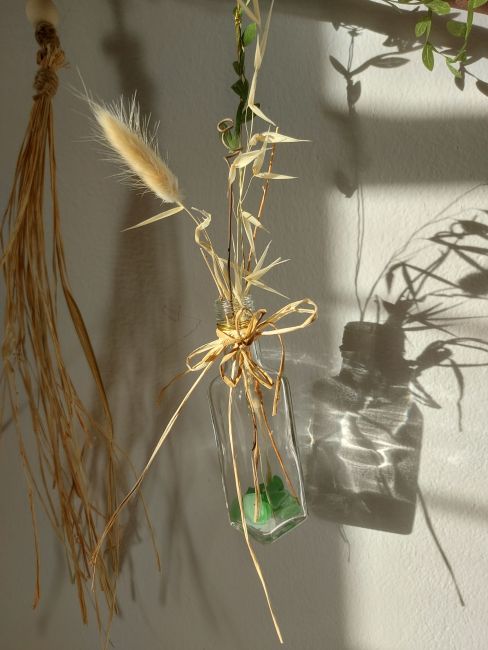
I added some sea glass from my collection to a couple of the bottles (those with larger mouths), then randomly added a few dry bits and pieces collected on other walks.
I found some rusty wire in my collection and cut and twisted that to add a bit of whimsy. Plus I’m partial to rust…
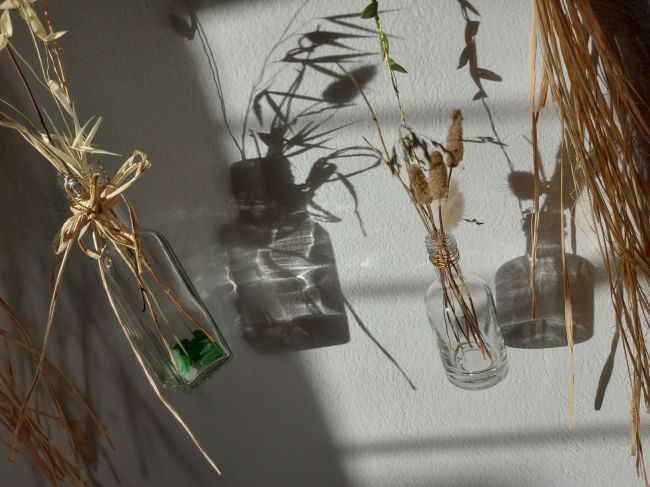
I did have to buy some of those puffy grass things – no idea what they’re called, cause the ones I picked locally were pretty pathetic looking.
And a tiny bit of lavender and a small piece of driftwood, cause why not…
I especially love the way it looks when the sun begins to hit it in the afternoon.
I’m wondering whether I want to part with it now… I love it over my couch in the sun.
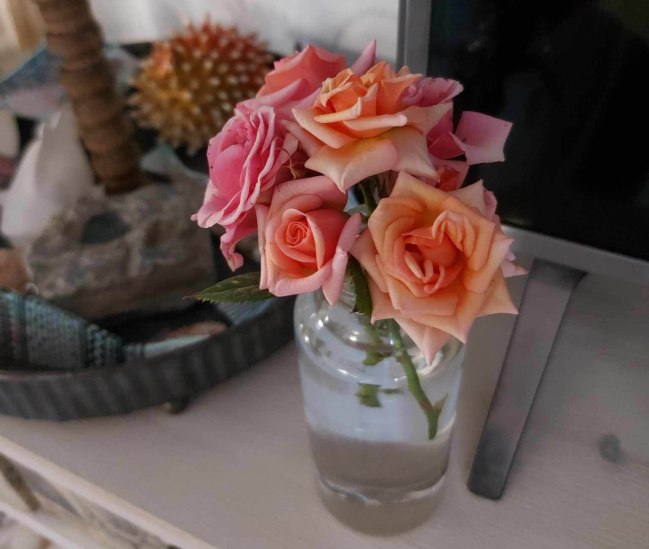
Miniature roses from one of my pots. They smell heavenly and I love the two different shades of pink of the two plants I bought. But there is some kind of disease affecting them. I’ve trimmed off the sickly leaves but don’t know what else to do… I’ve also moved the pots to the front of the house in case they like it better there, and I’m taking a twig to the nursery next week to see what they can recommend.
But back to the title… I got a cold last weekend, it started as a sore throat and I had two days where I couldn’t swallow. Then it went to my head, a drippy nose and sneezing all the time, with the added bonus of a dry cough. Eventually the drips turned into snot (lovely, I know, I love to share!), a blocked nose. I’m still headachy and have progressed to the joys of chesty coughs which come in bursts that hurt.
Oh happy happy days.
I’m told many people are sick on Paros with this cold/flu/not covid/virus thing. And I’m warned that it lingers. I’m not sure, but I did get some stuff from the chemist to ease the pain and lessen the cough… Let’s see how that goes.
My brother Peter and his girlfriend arrived in Athens yesterday (from Australia) and will be here next weekend and I don’t want this lingering then.
Meanwhile, since I was too sick to do much, I spent a lot of time watching makeover and declutter videos on YouTube.
I’m a regular declutterer with hoarding tendencies. I’m also an artist who likes to make things out of all kinds of other things, so I collect stuff to ‘make something with’.
Therefore, at least once a year I go through my cupboards, my craft and art supplies, my wardrobe and kitchen cupboards and get rid of anything that’s expired or I won’t use or wear.
But things are still too disorganised. Or maybe I should say that they become disorganised all too often, no matter how often I try to organise. Cause I’ve always got something ‘on the go’, or waiting for a spot to live, or to be moved on, or whatever.
Right now I can’t see my kitchen counter or the kitchen table yet, but I did go through and organise the bathroom and the living room bookcase.
So, since I’m more or less house bound while I get over this dastardly cold, and since I actually feel a little better today (when not racked with coughing fits) I decided to tackle the kitchen and get things organised in there…
And, like any creative with a shot of ADHD thrown in, I can’t clean, tidy and organise without leaving out ‘I will finish this’ or ‘I will get to this’ projects along the way, effectively never completely getting rid of the clutter.
However, I did a couple of tiny upcycles today to make my life FEEL a little more organised. Or at least ‘pretty’ organised. So here they are.
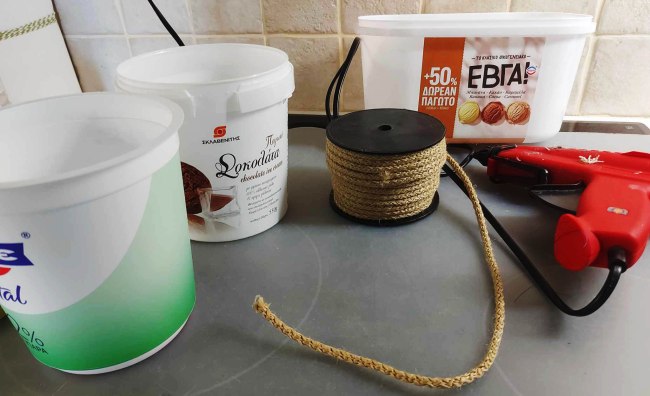
I was about to throw out these various plastic containers I had kept cause they’re handy for putting in leftover paint, bits of unfinished projects, etc. Instead I got out my trusty hot glue gun and some rope and started making them into better looking storage solutions.
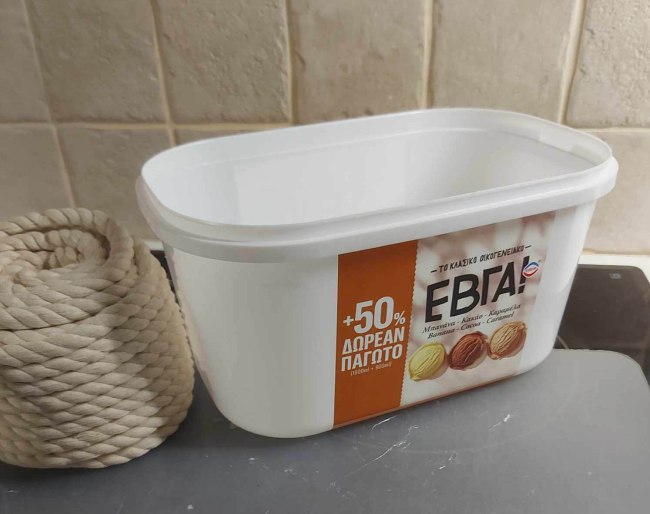
This large ice cream tub was the first one I tackled, using thick cotton rope I had on hand.
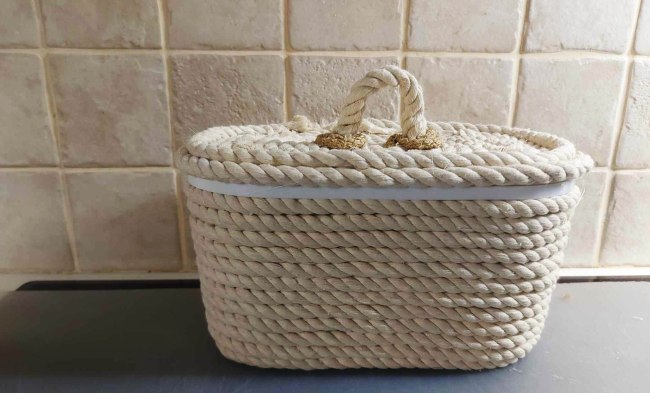
I wrapped, glued, wrapped and glued my way around it till I looked like this:
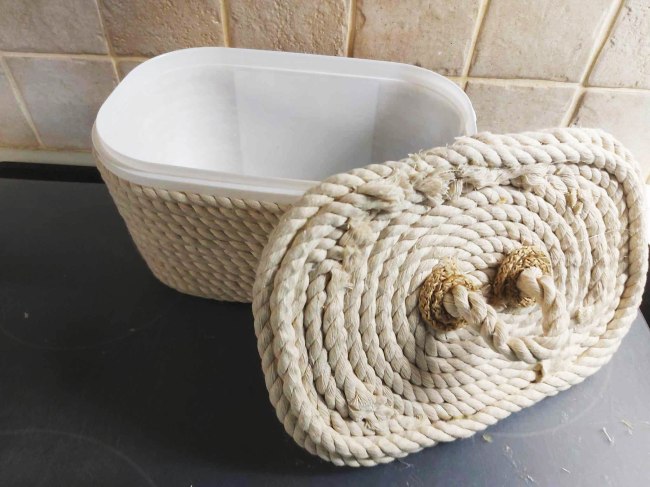
The lid wasn’t my best work, in hindsight I should have treated this way differently, but it is what it is… The cost of this project came to about 4e plus quite a few glue sticks I had on hand, and the tub of ice cream which I had thoroughly enjoyed eating a while back.
This will now hold some of my bathroom accessories, things which aren’t used to often, but can now be hidden away.
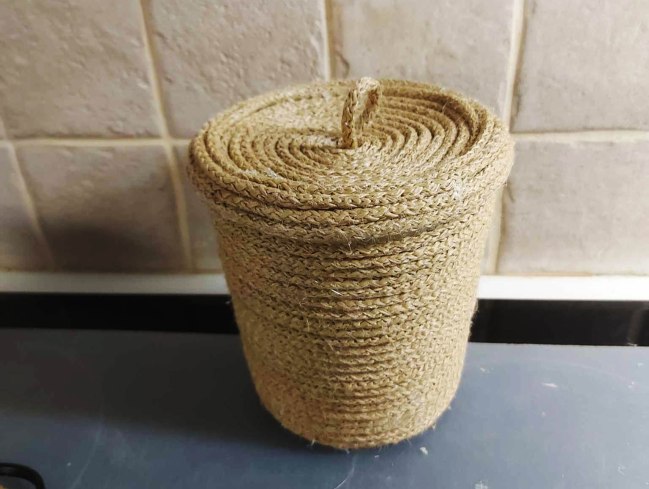
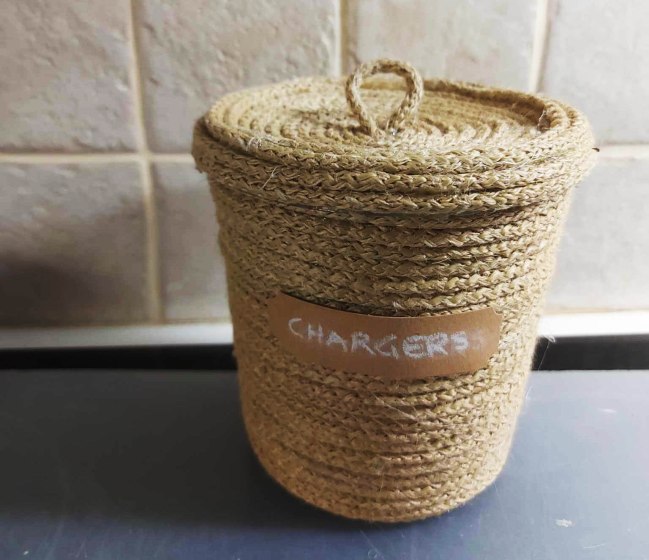
Next I tackled one of the yogurt containers. This is a different rope and it turned out way nicer. I especially love the little loop on top.
This is now holding my phone chargers and Australian plug adaptors which always sit on my kitchen counter and add to the mess.
I actually love this one so much I’m buying more of that rope to do another similar container…
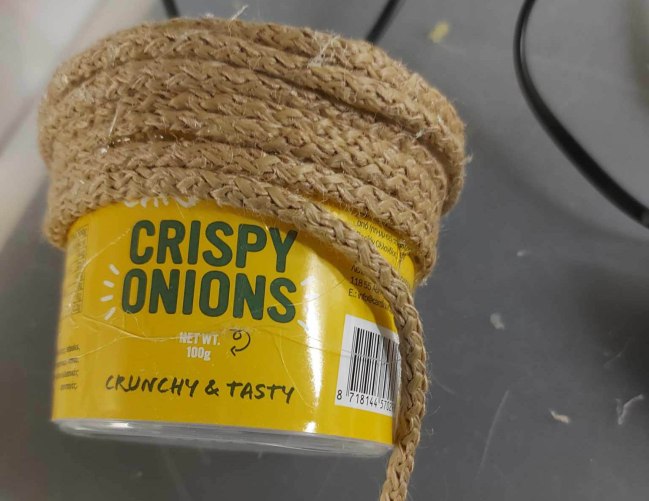
I used up the rest of the rope on two smaller containers: this small container to hold my rubber bands. Nicer than having them in a glass jar I think.
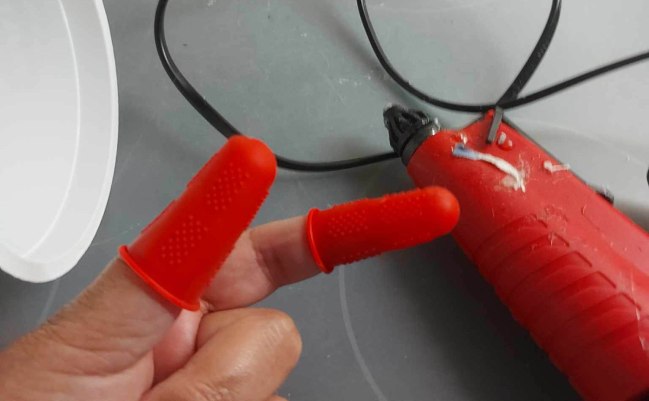
I did these small projects with minimal damage to myself thanks to these handy little hot glue gun finger sleeves I got from Temu. SO handy. If, like me, you only have the scalding hot hot HOT type of glue gun, you need these. Next time I buy a glue gun I’m going with the less dangerous, low heat type. Although now I have these, its no longer a matter of life or death.
Of course, all this was overseen by Vincent who kept one eye on me the whole time.
I’m off to continue on the tidying and organising and working on some of the ‘I’ll get to this’ projects.
I really hope this is the beginning of a creative period. I need one to feel better about myself.
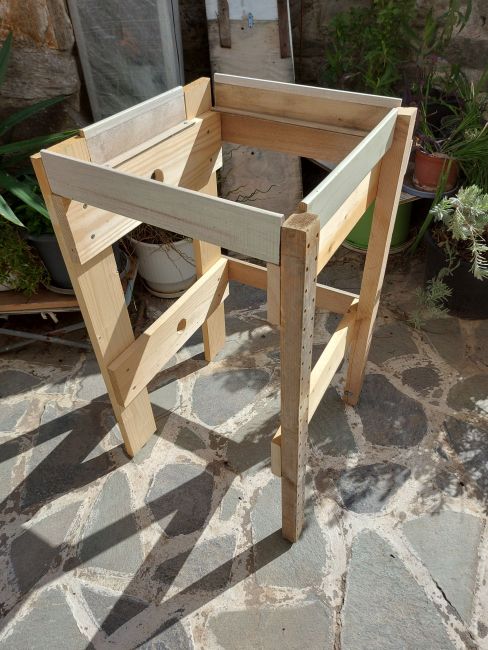
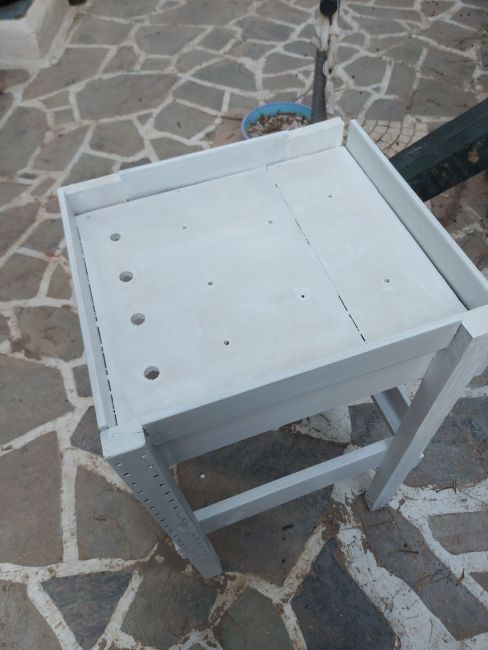
I have no idea what to call this… It’s a helping table – a side table for grooming, a tool table. Whatever it is, it’s a handy little benchlike structure I made to sit next to my grooming table to hold my tools handy and safe while I groom.
I had a general idea of what I wanted in my head and pile of scrap wood on the patio here at home. So, without any real plan, I just began cutting random bits of wood and screwing them together.
I don’t recommend this way of working, but it’s how I roll… flying by the seat of my pants!
You can see various bits of pine, odd corner bits of some kind of wood, thicker bits, thinner bits, wider bits, narrower bits. All different.
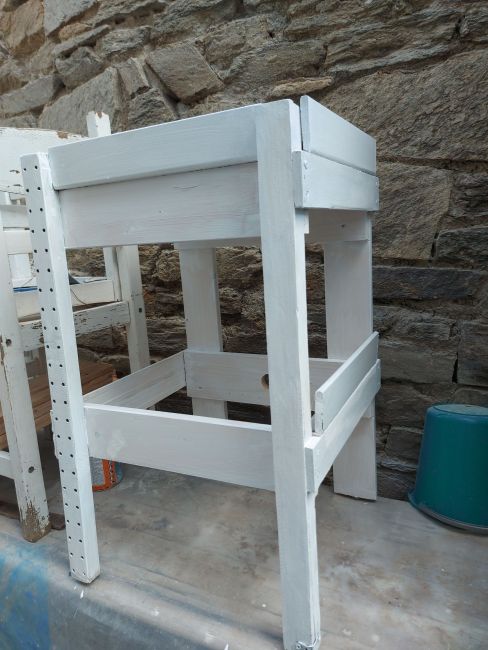
Eh. They all tie in when painted… sort of. After all, it’s not a beauty contest.
One thing I knew for sure when ‘thinking about designing’ this little table, was that I needed a safe place for my shears (scissors to non-groomers!) so they wouldn’t fall off the table. Actually, that’s also why there are sides on the top, to stop anything at all from falling off. But shears are especially delicate… drop those and they’re useless till you get them fixed.
So, besides the corner side bits of odd wood I found on the rubbish pile, I drilled holes into the top to put the shears in.
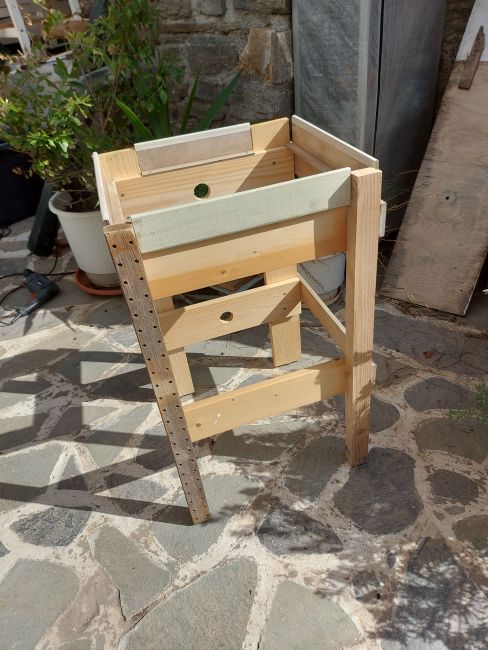
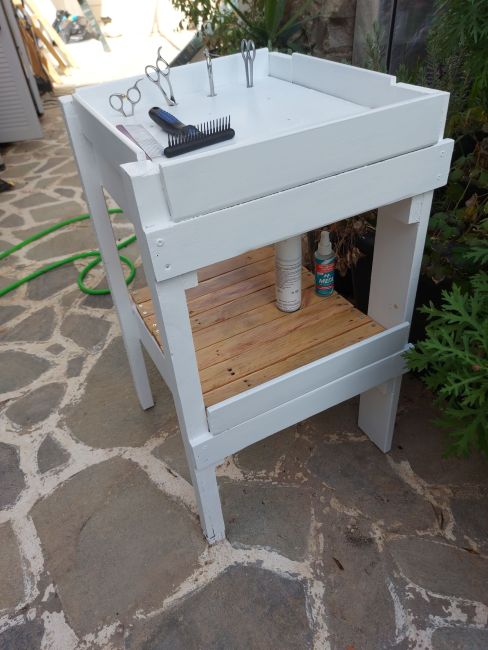
Here it is finished. Or 99.9% finished. I still need to decide how I’ll orient it when I’m working, then add some hooks to it for hanging clippers, Dremel or anything else that I might need to get out of the way of scrabbling little feet.
The lower shelf will hold my dryer and maybe even my extension cord to keep them off the ground. The bad thing about grooming outdoors in this place is that if one of the neighbours further up decides it’s a good time to hose down their yard, my yard is second last and I quickly find myself ankle deep in water.
Generally speaking, it’s not recommended you stand in water while performing activities requiring electricity.
The lower shelf is made from a skinny pallet I picked up along the side of the road and pulled apart with only minor damage to myself. I cut, sanded and varnished the pieces before pre-drilling them in order to prevent splintering when screwing them to the side pieces. It was a frustrating endeavour, but I got it done with minimal swearing.
So now its ready.
I’m ready to use it.
Unlike the dog bath while still awaits the plumber to plumb it in… He said this week.
I figured that now I have a poodle who actually plays (Lainee didn’t play…) and who actually loves toys, so I’ve been buying toys… I needed a toy box.
At first I considered buying one online. Something pretty.
Then I considered a lovely basket from a local store…
All good choices.
In the end I opted for the free (right now) option. I made a toy box out of a cardboard box I had lying around and gathering dust (and orphaned items).
I began by hot gluing the flaps down to give it strength. Then I decoupaged inside and out using old brown paper bags I’d been keeping for some unknown reason.
You can still see the logos of the shops in parts of the box… I had planned to paint it, and maybe I will one day, but I was in a rush to finish it and watch Vincent* pick his toys out.
*Yep. He is now Vincent. Calling him Vega or Vegas just didn’t feel quite right. Vincent does. It means a bit more than Vince Vega, it’s got connections to the art world as well as to hit men and the mafia. Vince, Vinnie, Vincent, Vincenzo, Vince Vega at odd angry mother times.
So, in the vein of hit men and mafia, and because Toy Box seemed too obvious and banal, I give his toy box a name:
I am easily amused.
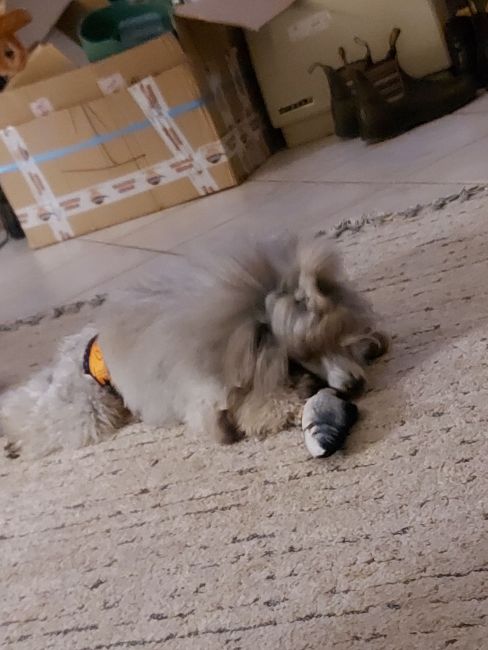
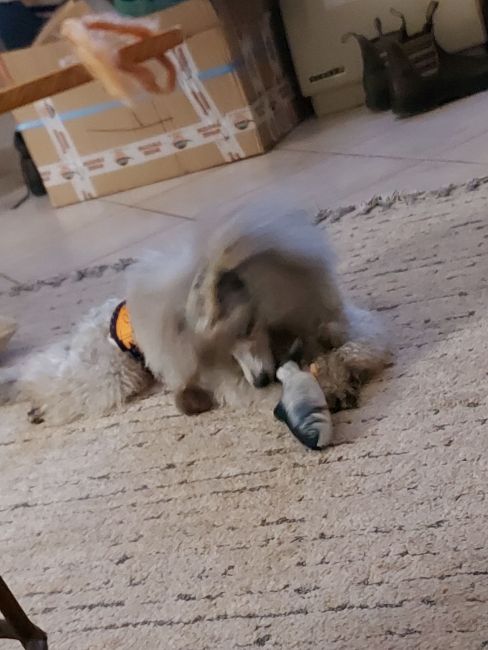
Once dry, I filled it up with some toys and then watched as he chose the fish first.
He gave that little sardine a good ol’ chewing.
Please excuse the mess behind… a big old cardboard box full of stuff to put away, my old sewing machine, a lot of sand and dust bunnies (thankfully invisible to the camera) and my favourite Blunstones.
The box is now on the porch being enjoyed by the cats till I take it to the recycling bins.
The old sewing machine, which needs a new motor cause it blew up, is waiting to be taken to storage. I might be able to get it fixed one day if I’m lucky. Apparently, I can get a new/old motor in England… But I live in Greece. Whatever.
The boots are pretty much still there, just under the bookcase and no longer in the way. Hey, it’s my house and I can keep my boots wherever I want them.
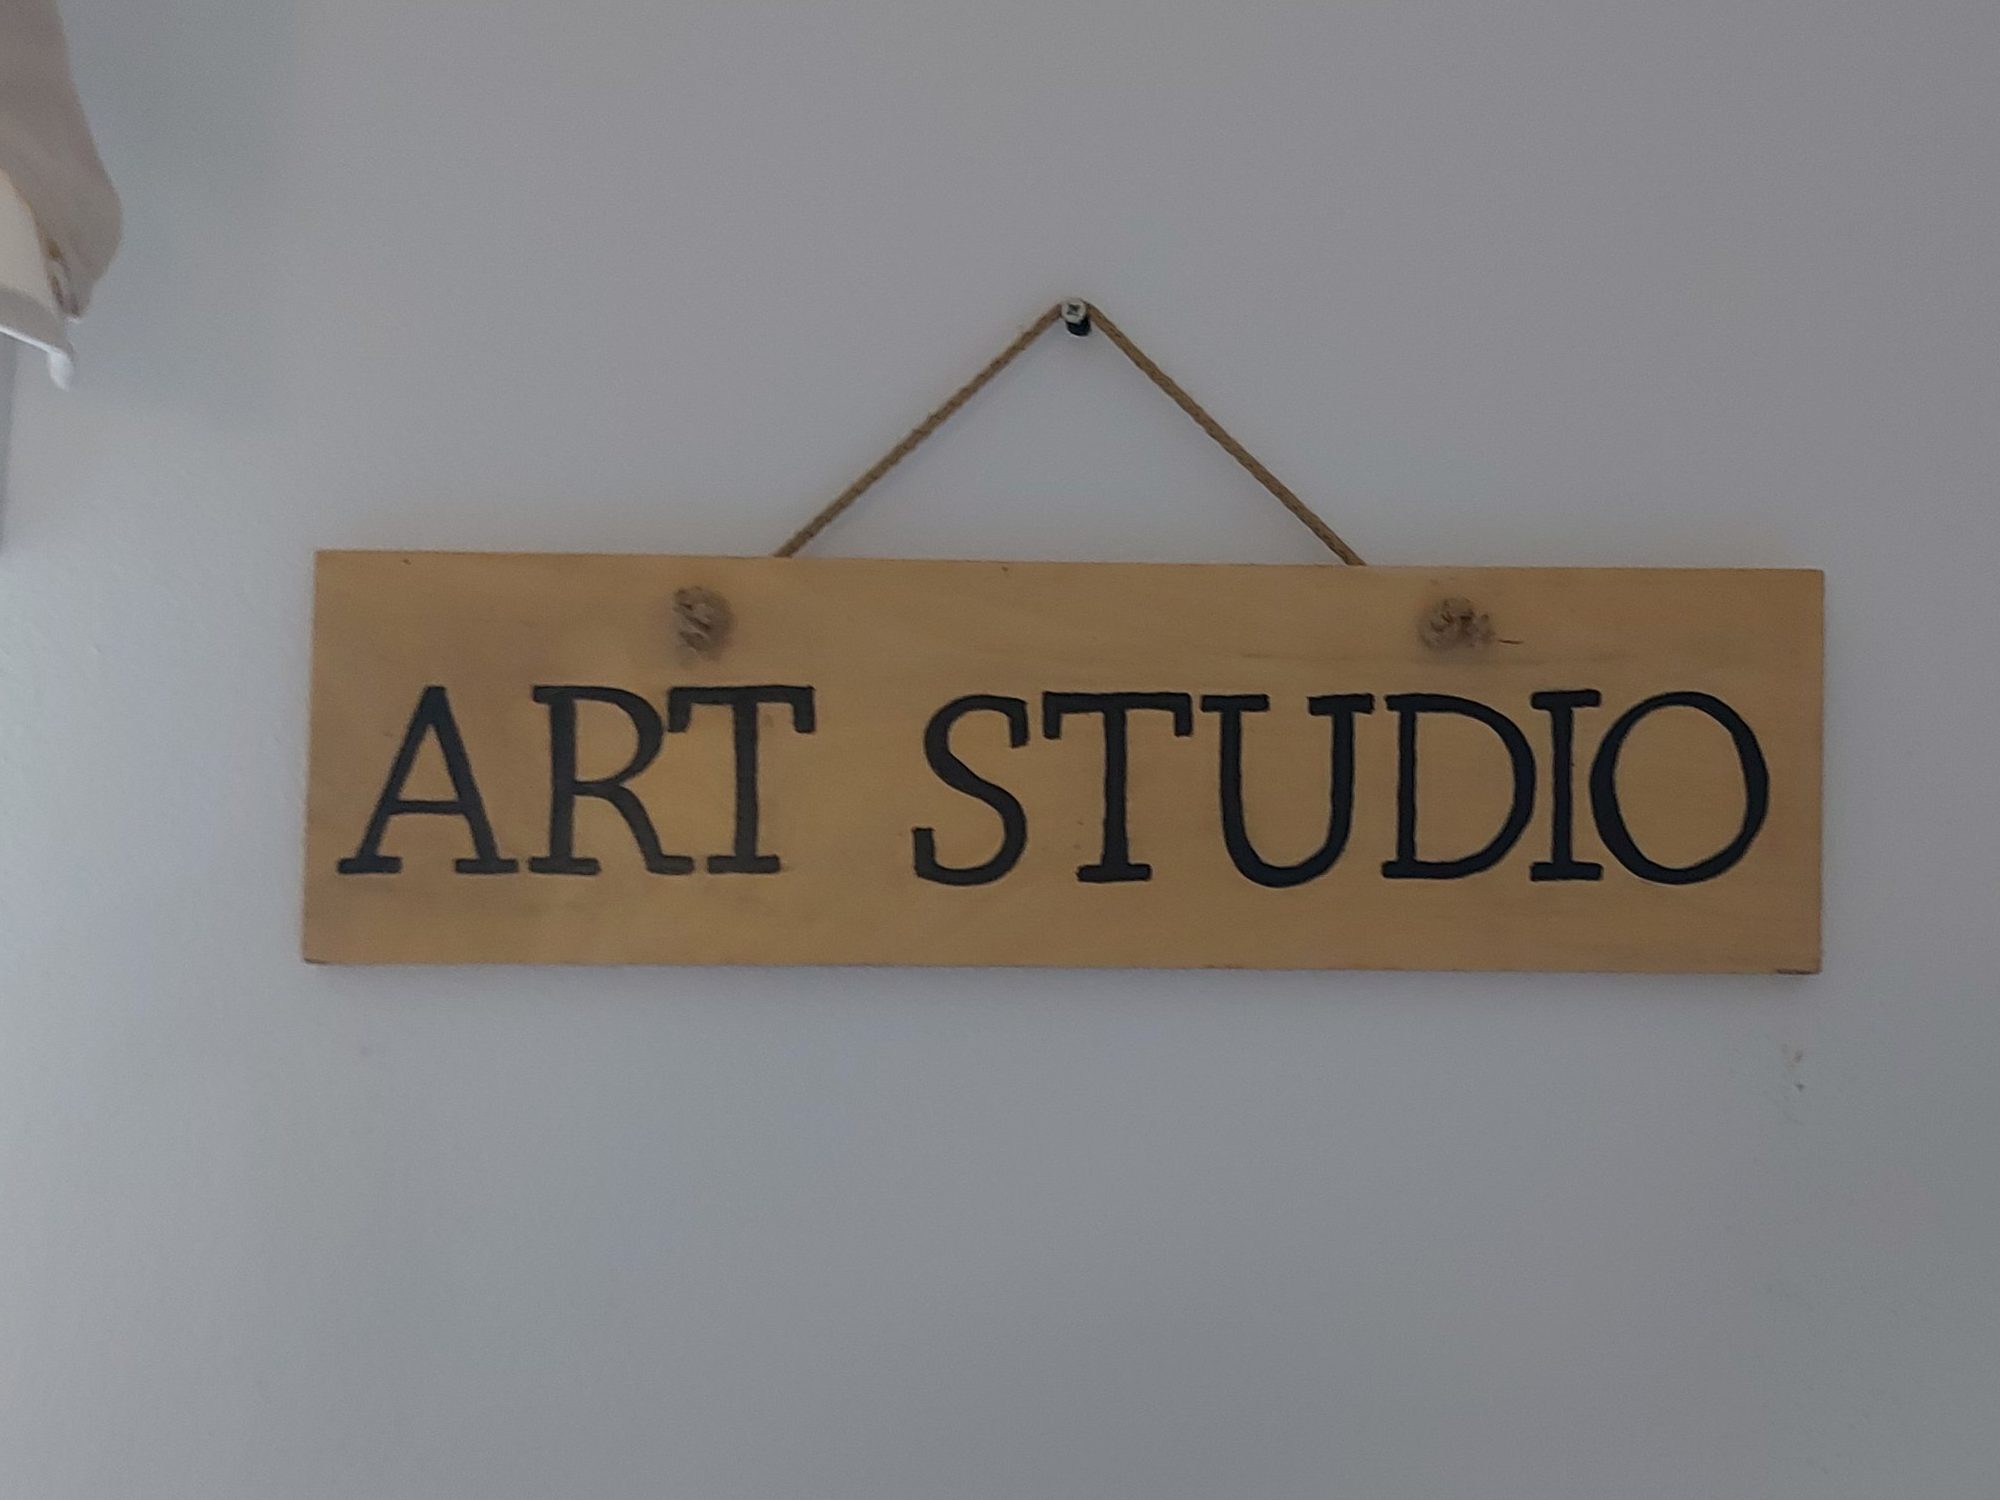
I’m not a sign writer, but this year I made two signs that I’m not sure I shared on here.
Given they turned out reasonable, I figured I’d share them with you now, just for something to do.
This is the one I made for my place, to put outside when I was running art studio open days or sculpture workshops. For now it’s just sitting in a corner of the living room.
The other one I made was a little fancier – This was for one of my cousins for her air bnb.
Both signs are small, no more than about a ruler’s length across. Both are made from bits of recycled wood I collected from somewhere. I did them by printing the writing in the size I wanted onto A4 paper, rubbing the back with charcoal and tracing the letters onto the wood.
Then it was a case of painting the letters on with a brush and acrylic paint. And as steady hands as possible.
It’s not the most efficient way to make signs.
Please don’t ask me to make a sign for you. It’s art, not professional!