the big fish

This is the big fish I made for the exhibition last month. The gallery owner had asked me to make it and I thought it was a great idea. I love making things out of paper mache and any other materials I can get my hands on. And I love experimenting. And making something this size was a challenge.

I had made a life size bulldog a few years ago, but this is a totally different animal (haha). This is a link to the bulldog – unfortunately unfinished in this post…

Anyway, back to the fish. I’ll go through the process, which was all a bit hit and miss with a lot of learning in between. It took a while… not just the working but the drying…

I began with wire I’d gotten off old paper lanterns someone was throwing away. Recycling being the main aim.
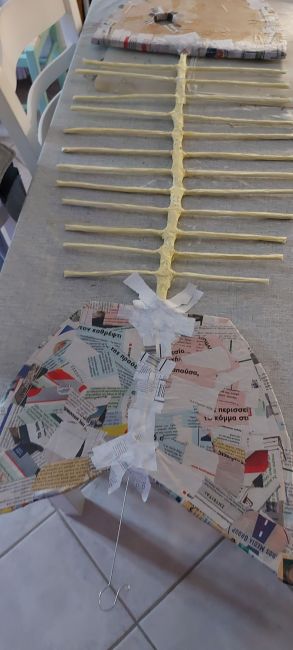
I made the spine and ribs using the very hard wire, then wrapped it all in cardboard and masking tape. Lots and lots of masking tape.

I used cardboard to make the head and tail and moved on to paper mache using strips of newspaper, which is becoming a pretty scarce resource these days.
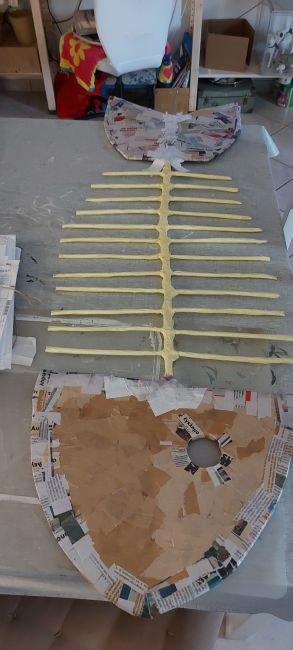
I had thought paper pulp would be the way to go so that the entire fish was recycled material, but the pulp was taking way too long to dry. And wouldn’t stick well either. Probably my own fault, I got the mix wrong… However, by the time I decided that it wasn’t going to work I’d already done the head and ribs on one side.
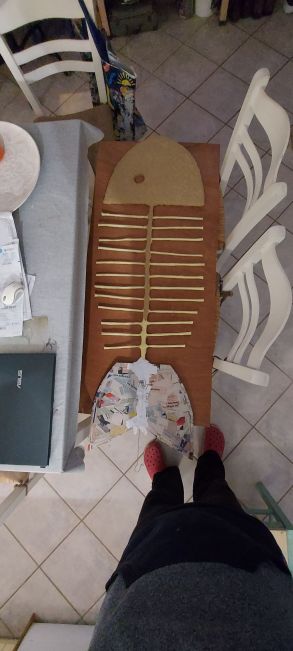
So I swapped to plaster. Using plaster bandages I coated the entire fish and that dried nice and fast and really hard, which was the most important part.
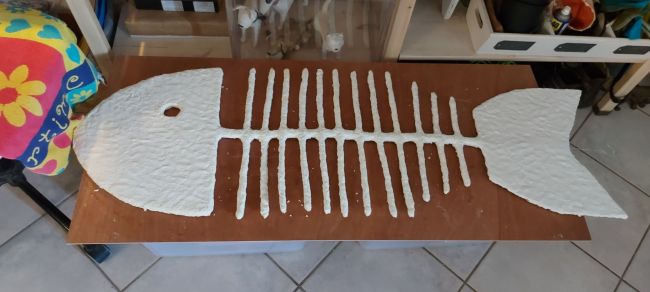
However the fish was getting really heavy and the spine was too flexible. Not good… I had to reinforce it somehow so that it would hold together well and not bend or crack.

I did what I always do: looked around me to see what I had that might work. I found an old piece of timber which was curved on one side. Perfect. I attached that to the fish going from the head all the way to the tail. I attached it using masking tape (the paper mache artists best friend!) and then plaster strips.
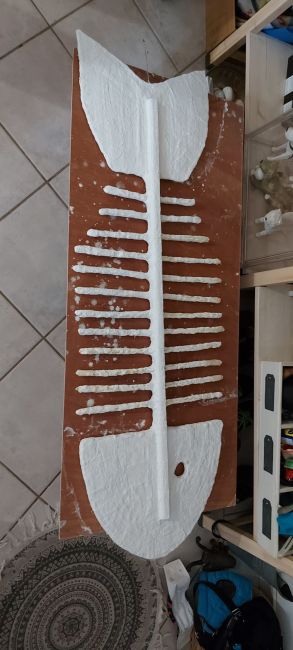
Of course I had to ‘blend’ the stick into the head and tail which I did using cardboard to create a curved look. And more tape and more plaster strips. It wasn’t totally realistic, but it did the trick.
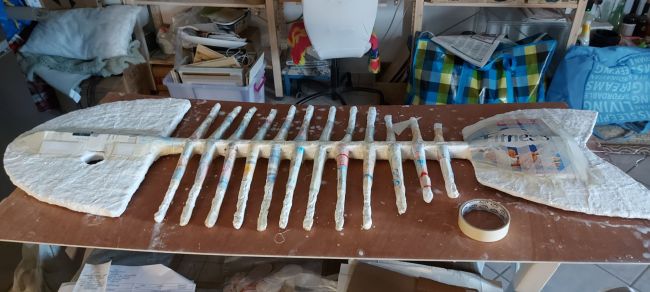
In the end I wanted to give it a smooth finish (texture isn’t a good thing when something can collect dust) so I opted to finish the fish using air dry clay. I use air dry clay a lot to make small sculptures, and I knew i could make it work.
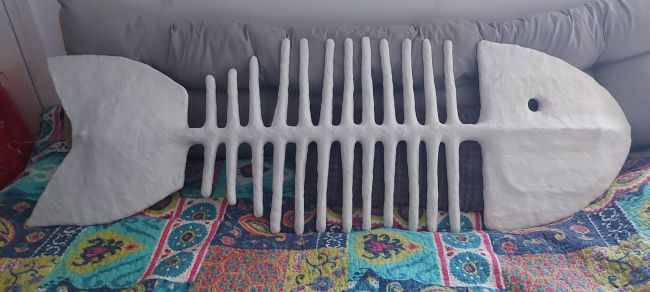
I love the way the fish turned out.

Would I do some things differently if I made one again? Yes, probably. I’d start with a stick for the spine and much harder material for the ribs… cut down bits of bamboo maybe, or dowel or whatever I can find. And attached using a drill and holes and glue… But not wire.

And yes, I will be making another. Soonish. It just takes time and I have so many other things I want to do, have to do, should do.

But I really enjoyed making it. Part of the work was done on my kitchen table when the weather was bad. Then when it got warmer I worked outdoors. The plaster work was all done outdoors. That stuff is MESSY.

Sorry about the pics that are vertical instead of landscape. Turns out WordPress won’t let me spin. I have to go back to the originals for that and I just want to get this posted. So there!

z
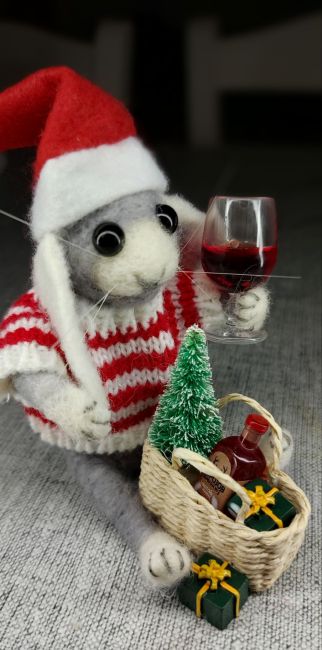
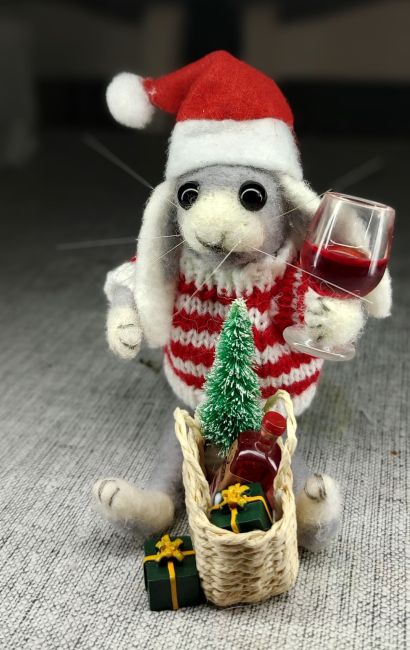
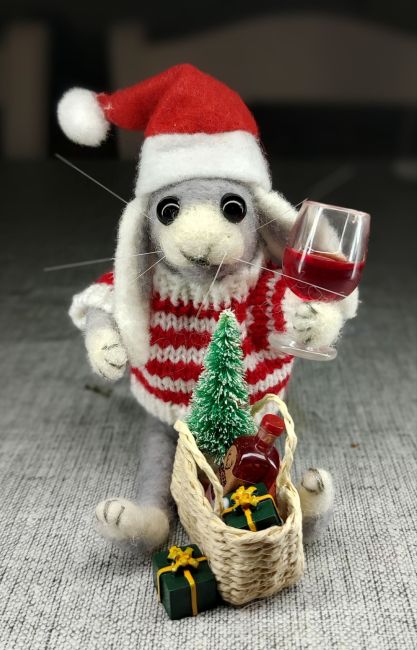
christmas is driving him to drink

I started needle felting again about a year ago, and I have to confess I’m hooked. I love it. Its such a zen feeling to sit quietly at the kitchen table stabbing wool and shaping it into anything I want. Often with the clashing sounds of an audio book on my mobile phone and mom’s tv programs… sigh…

I especially love creating little creatures with personalities, giving them more character by adding accessories to tell a story. This little bunny, for instance, started his gift wrapping full of Christmas spirit, but found he needed a big glass of red wine to get through it.

This little guy is the first in a series I planned to make for my Etsy shop this Christmas… the idea is to make little critters who represent different parts of the season. Including the snowmen in my last post, but these critters are all needle felted by hand, not made based on felted dryer balls I’d bought as an experiment.

Of course, the whole tariff thing in the USA has not done my shop any good, cause I sold quite a few of my creations to people in the US. And right now, I have a box waiting to be shipped to Canada but can’t send it due to the postal strike… Its hard enough to sell online without all this.

I’m not very good at promoting my work…

Anyway, I figured that since I’ve been absent for so long, I may as well share some of the things I’m made over the last few months.

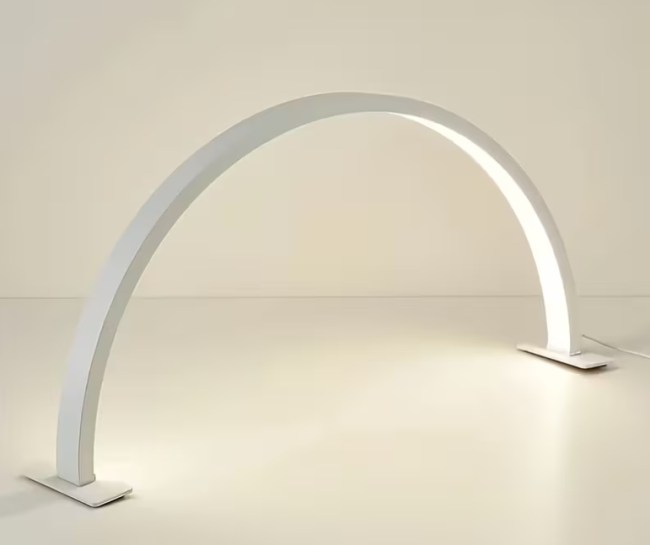
One thing that’s helped heaps in making these small creations, is the light I bought on Temu. This thing is amazing. Its made for nail professionals and has enough space under it for me to work my wool comfortably. Its USB powered, and since I don’t have easy access to a power point at the kitchen table (cords are not user friendly to old women (mom) who are unsteady on their feet) I use a fantastic strong and fast charger I also got on Temu.

Needless to say I’m addicted to Temu.

I’m not proud of myself… but I can get so many good and useful things there. And of course some totally useless things, but I won’t mention that here… Unless you’d like me to share the failures…

Anyway, later.

z

needle felting once more

Its been years since I picked up a felting needle and wool, but recently I’d been seeing a ton of posts on FB of needle felted animals created by some talented people and it brought back the memory and joy of needle felting. You can see some of my past projects here, here, here and here.

I had the supplies in the basement, so soon as I returned from my trip to Athens to visit mom I went down and brought up two boxes of wool and tools.

Unfortunately, most of my felting needles had rusted and/or broken, but I still had 5 that worked, so I began to think about what I’d create. I wanted to make something with a wire armature so it would be moveable unlike anything I’d ever done before, and I knew I didn’t want it to be realistic. I wanted to make anthropomorphic critters cause I think they’re so cute.

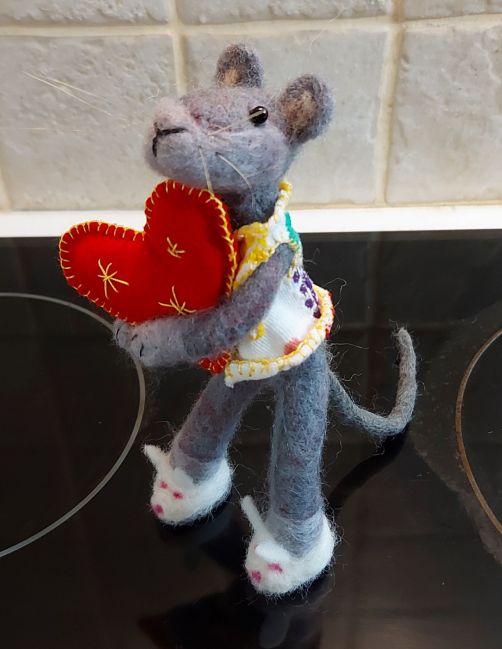
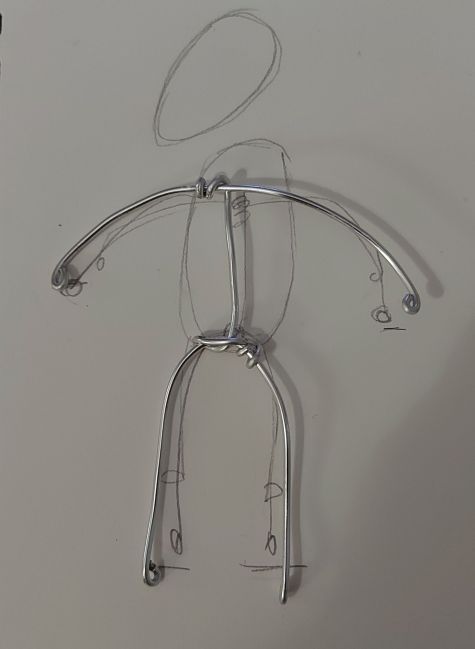
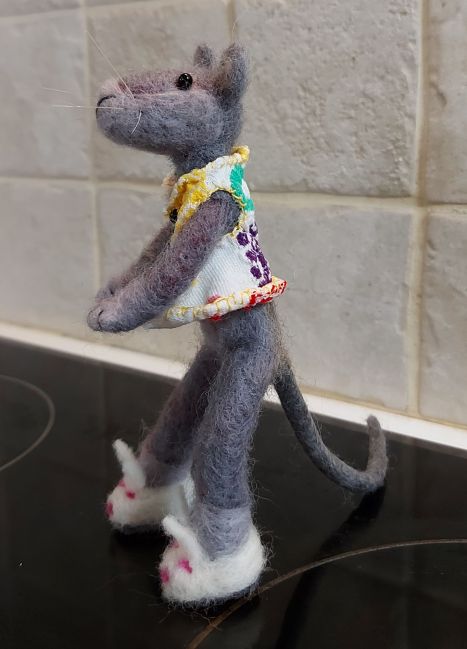
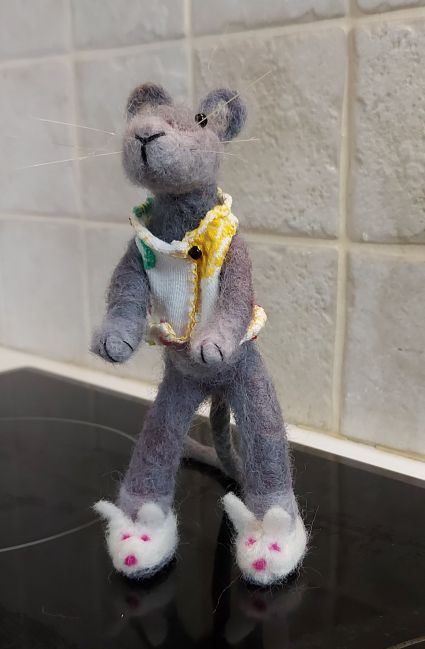
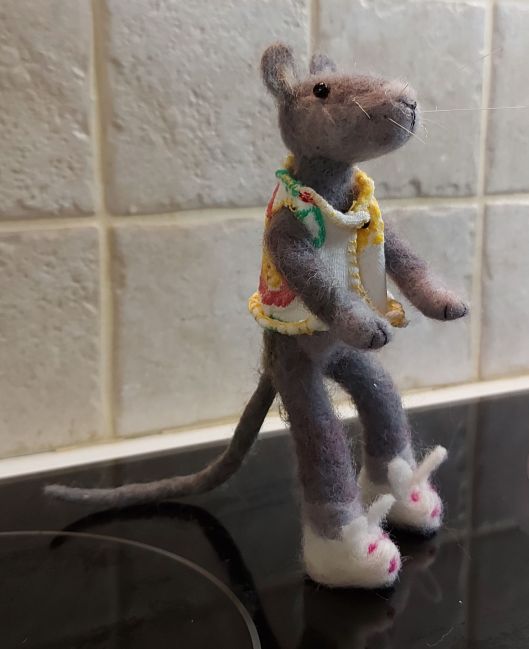
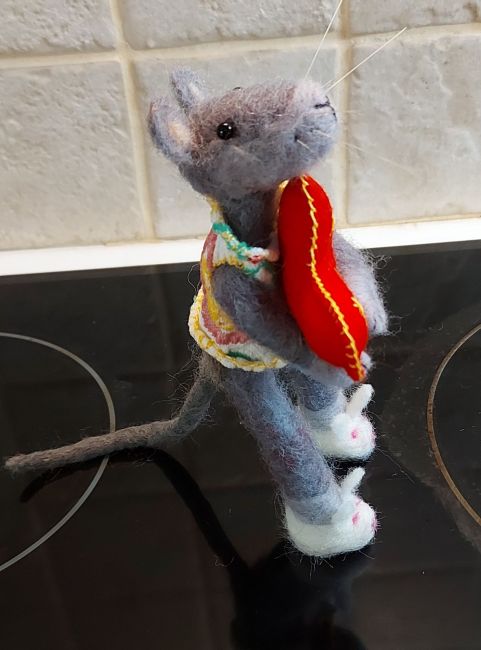
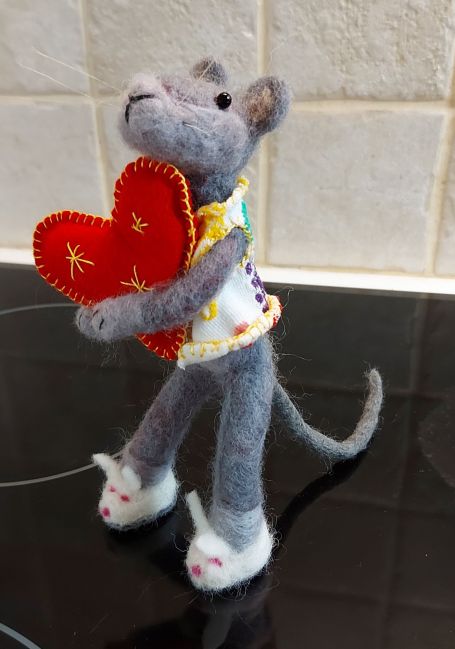
The first one I made was this little mouse. He’s about 15cm high (about 6inches). I began by sketching the shape and making an armature out of some (probably too thick) aluminium wire I had on hand, making sure to curve the ends so as to not have wires sticking out of the ends.

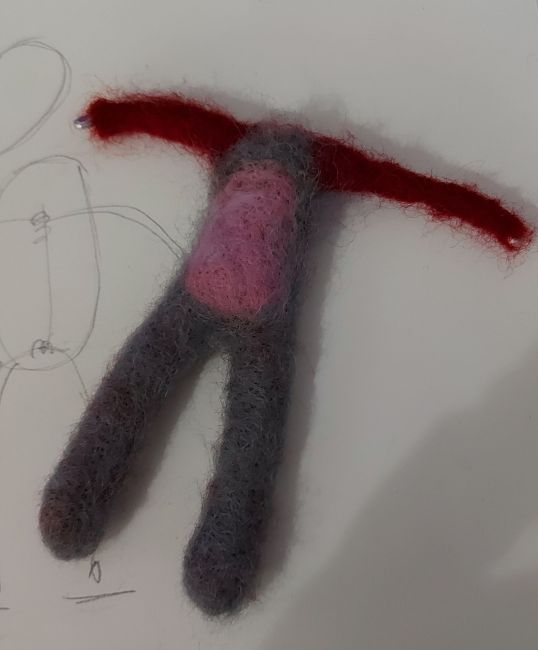
The coarsest wool I had was a dark burgundy colour (why on earth would I have bought dark burgundy???) so I began by felting the body with that, then adding the coloured layer on top.

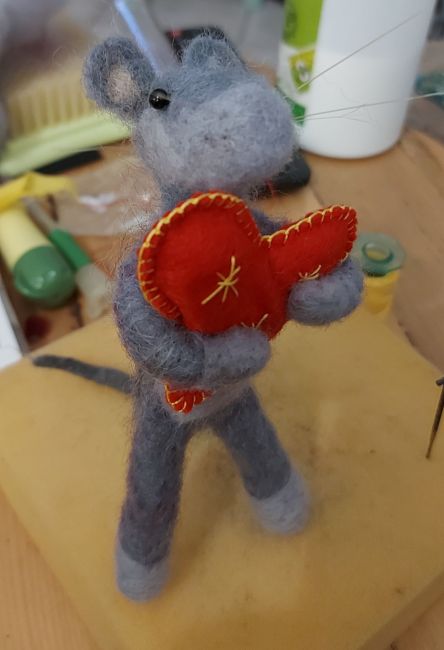
Once i made the head, I joined it to the body (sorry no pics of the process) and decided to make him a heart to hold. I added whiskers (bristles off a house painting brush) and eyes. I had some small and tiny eyes in my collection of ‘stuff I will use one day’.

Here he is before I stitched on the nose and mouth.

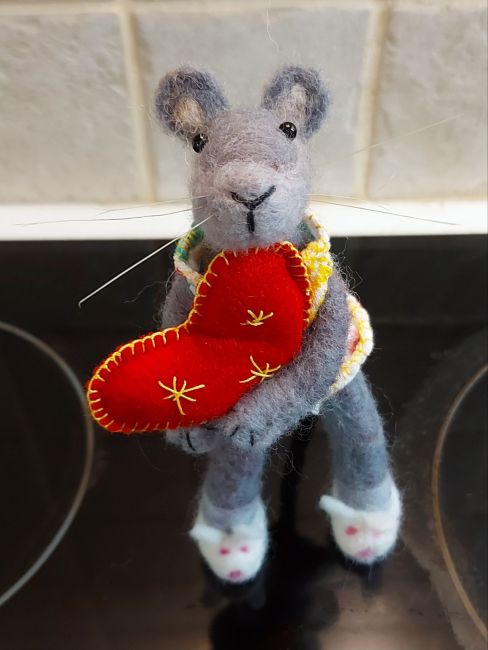
I decided his feet needed something and I was about to make him slippers when a voice suggested bunny slippers. Perfect!

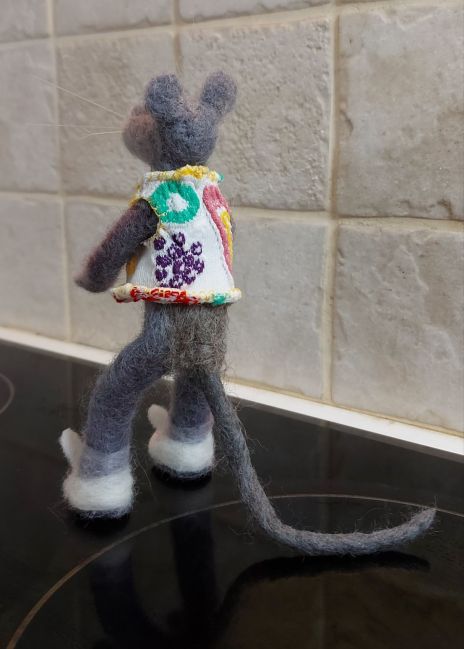
I also made him a colourful vest cause he seemed incomplete without a stitch of clothing. I made it using a pair of socks I had and never wore. It seems I’m always cutting up my clothing items when I need to make something… hm… What does that say about me?

I used a small bead as a button to keep the vest in place. I liked the curling edges so left that as it was, opting not to iron the vest.

His tail was made by wet felting – using hot water and soap to felt onto a piece of wire so he could be balanced and stand.

And here he is, finished.

For now he’s sitting on my bookcase watching me work. He’s for sale, but for now I’m not sure where I’ll put him up for sale – Facebook, Etsy, Tedooo? I just joined Tedooo and haven’t quite worked it out. I’m really not so good at all the social media stuff…

But there he is. Ready for his new home!!

In the new year I’ll be organising some needle felting workshops. I really am looking forward to that!

z

a quickie experimental work

Thought I’d share a quickie work I framed the other day. I say ‘quickie’ even though it was weeks in the making… mainly cause I had no idea what I was going to do.

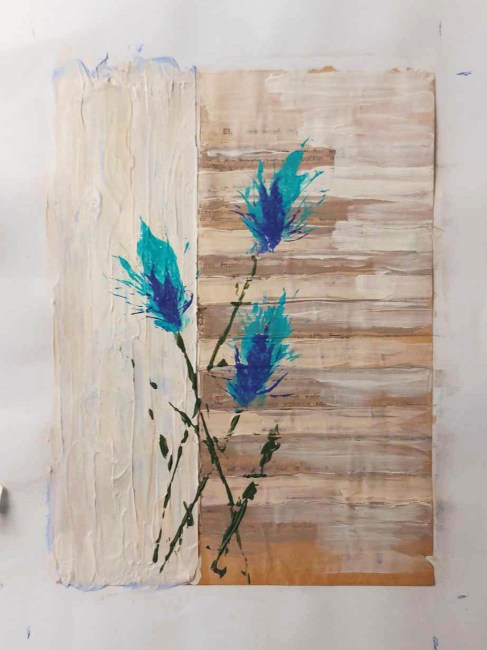
Firstly, I glued an old, yellowed book page from a stack of throw away books I’d collected to a sheet of cartridge paper to create a background to work on like I did here, then I left it for ages, sitting on the kitchen table among the hundreds of things I was going to get to ‘soon’…

While working on one of my large paintings I decided to experiment with the texture building paste I’d bought, so I mixed up some paint and applied it to the paper, thinking I would do a small painting of a wall and stairs. I let it dry and as I looked at it, I felt totally uninspired to continue, so I let it sit and think about its sins a little longer.

Thing was, the more I looked at it. the more I liked the simplicity of the colours on the background and didn’t want to make it into anything other than a background.

Sometime during that period, I saw a FB post about a guy who created art by doing backgrounds then whacking paint covered sticks and branches onto his canvases. Hm… This was only small so I couldn’t go whacking the hell out of it… but I could try pressing something onto it… that might work.

And that’s what I did. Since it was a neutral background, I wanted to do something to bring it to life. I had some of those fuzzy dried flower arrangement things from other projects, so I chose my colours, et viola!

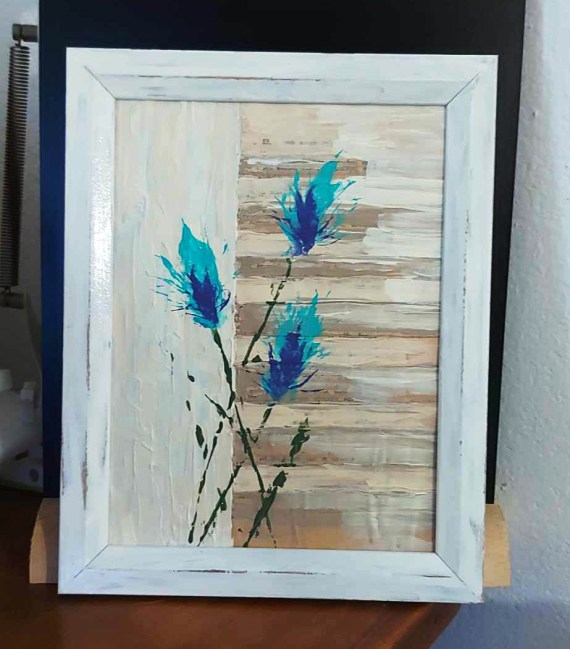
I used the same ‘flower’ to print the image in 3 different colours and I liked it. It’s like nothing I’ve ever done before, but I was pleased.

I had a small frame that fit the work, and I had flat white spray paint, so I sprayed the frame, gave it a bit of rub in spots where the paint hadn’t gone on well, and there it is.

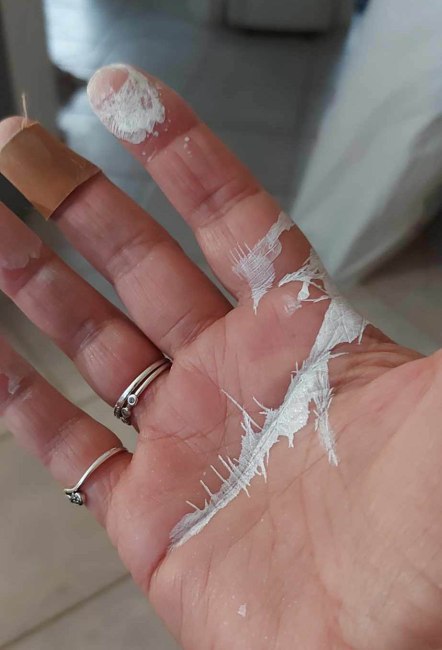
At this point comes the warning/disclaimer. When doing spray painting at home, don’t pull the cap off the spray paint with a vice grip and the determination of a fat man going after the last chip at the family dinner table. I pulled it off (they do like to make them almost impossible to pull off!) and pulled off the spray nozzle at the same time. Putting the nozzle back on caused all kinds of grief as you can see.

But hey, it’s pretty normal for me to have paint all over my hands, my clothes, my shoes… no one expects anything less.

You might notice a bandage on one finger…? I got that while rummaging through a toolbox to find a screwdriver. Instead, I found a razor paint scraper (the kind you use on glass) without its protective cover.

Let that be a lesson as well.

z