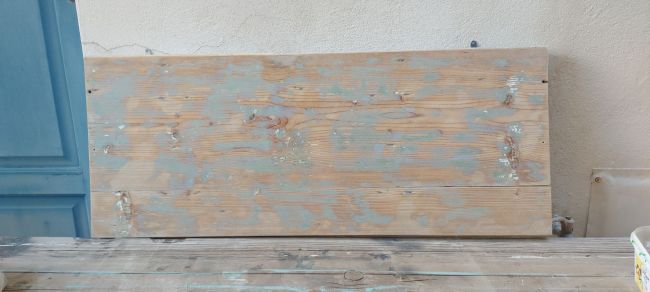
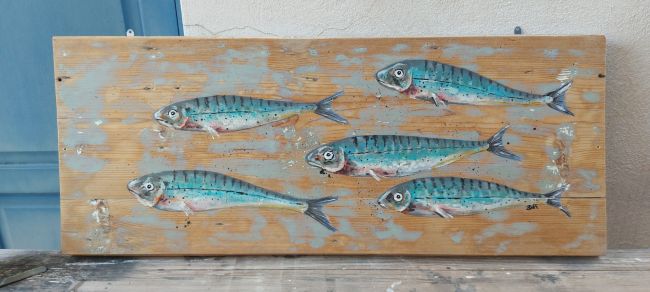
A few years ago I’d sold a painting of fish on old slabs of timber to a friend. Fast forward a few years and someone who’d seen it wanted something similar.
Of course, its not so simple just ordering a painting on old timber, an old shutter or door. FIRST you have to FIND it. Which means looking at every rubbish pile you walk or drive by anywhere you go. Sorting through stacks of old wood wherever you see one, searching for something suitable.
Remember, I no longer have sheds where I can store every potential piece of rubbish wood I find…
Once you locate the right piece, you have to carry it home, then prepare it – wash and clean off dirt or whatever might have accumulated on it, sand off the worse weathering and layers of old paint, cut off any rotted or jagged bits it might have, mend where needed, and generally prepare the surface for painting.
Then paint it. Last finish with varnish and some method for hanging it.
Don’t get me wrong. This is right up my alley. I love doing this stuff. I just wish I had the luxury of the multiple sheds I had in Tasmania to store my stash of future projects. Back then I could pick up anything I thought would ‘come in handy one day’, so that when I had a commission (or an idea) I could just walk around the sheds looking for the right piece…
Those were the days…
Do you detect a note of nostalgia in my voice typing? Yes, you do. ‘Cause lately I’ve been thinking about Australia more and more and miss it more and more.
sigh.
Anyway. Enjoy some fish.
Here is the finished piece, sitting on my workbench outside cause I have no space to hang it.
A while ago I made a couple of ‘coat racks’ for a friend’s grand daughters. I’m not sure I shared them then, so I’m sharing them now. Basically I can’t find any posts about them so if i have shared them, oh well… I mean, it would help if I remembered what I called the post… but here they are anyway. Again. Maybe.
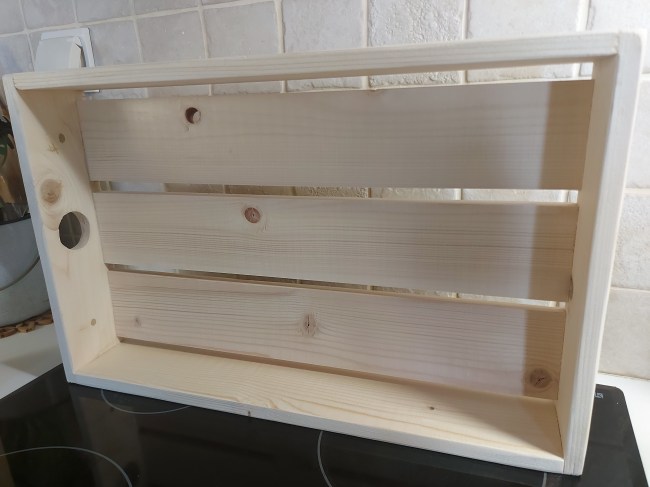
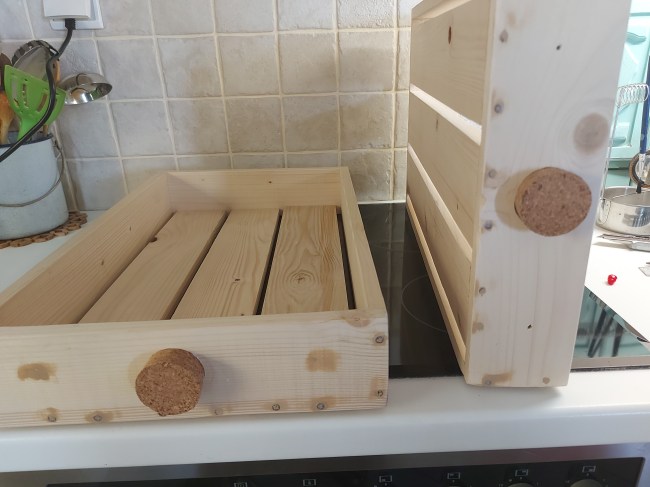
I started with 2 drawers made to fit inside pallets turned into coffee tables or couches which I found in a hardware store in Athens. They were pretty plainly finished so I sanded them and filled nail holes. They also had a large hole to be used as a drawer pull. I found a large cork to plug the hole figuring it could be used to hang something off.
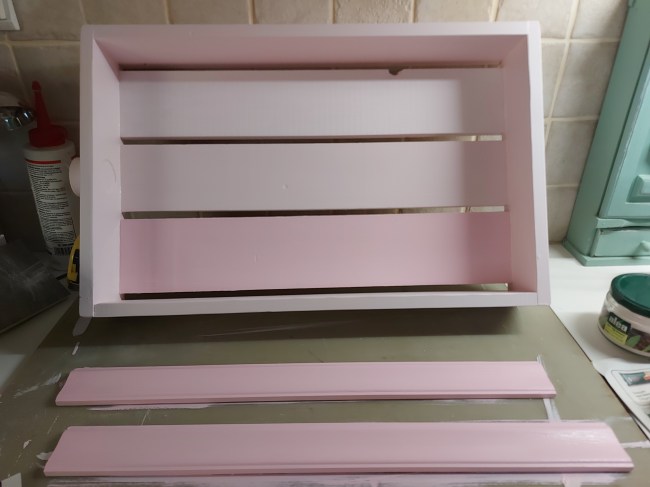
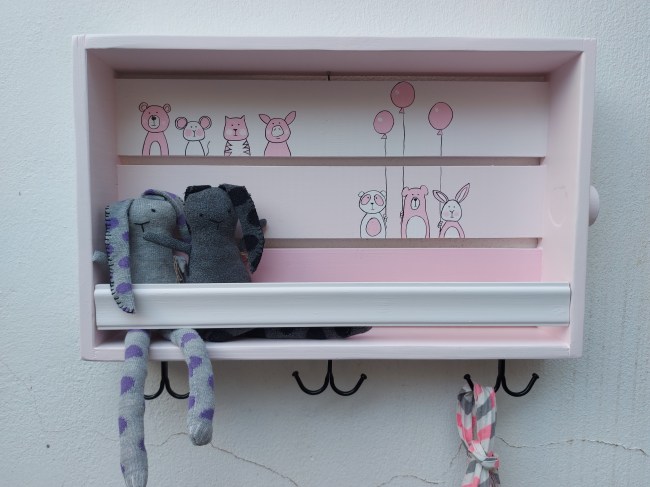
I painted them in shades of pink, and found a strip of timber to put along the front to make the box able to hold things like a tablet, a book, mittens, whatever.
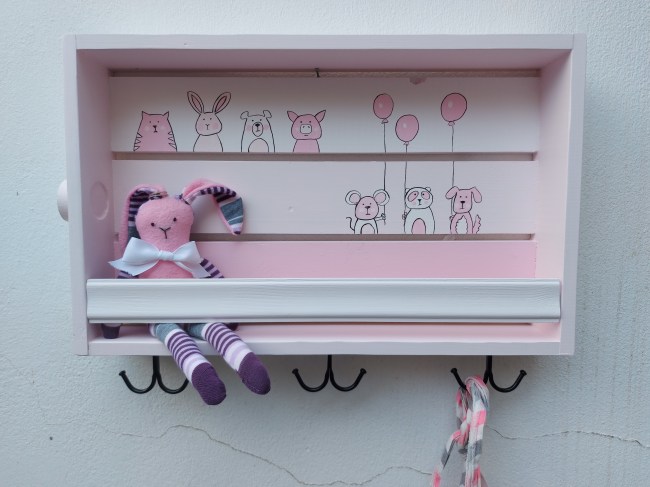
I decorated them with cartoons of cute animals holding balloons. I also added double hooks underneath for hanging coats and scarves and backpacks. Here are photos before I added the girl’s names on the ‘rail’.
Well, my friend’s daughter had a boy as well! So another coat rack wall hanging thingy was needed.
This time the place I bought the pallet drawers no longer had them, so I had to find another way to make it.
Luckily I am still a little bit of a collector of ‘things that will come in useful one day’. Not as much as I was in Australia, cause I no longer have the space, but I had managed to find and keep two boxes which fit the bill.
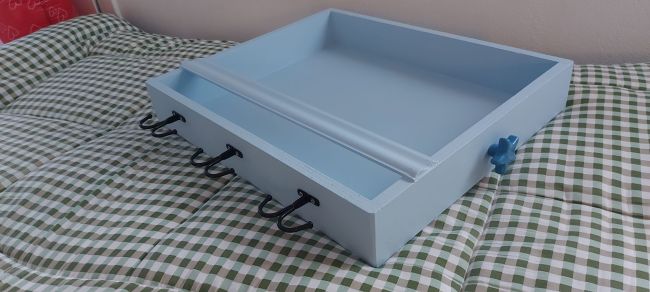
I chose one of them, sanded back the old paint, filled cracks and gaps with wood filler, and painted it light blue. Then I found a strip of timber I could use for the ‘rail’ and added that. I also found a knob to put on the side for holding a scarf or something.
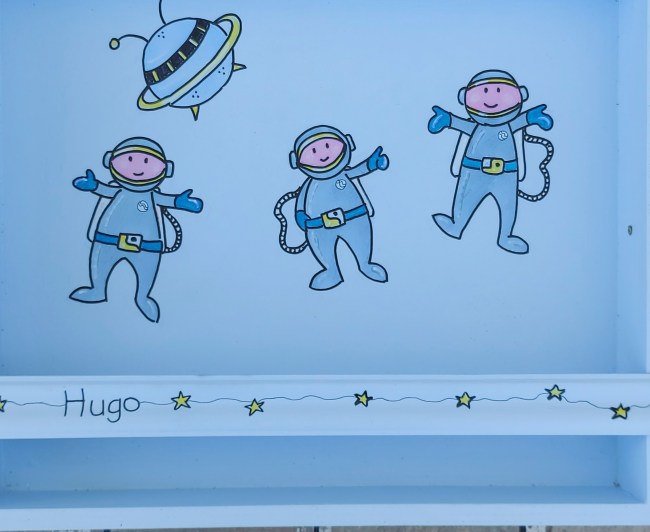
I went with an astronaut theme, thinking it might appeal to a little boy. It was that, cowboys or monsters… Anyway, the knob I’d found was a star so I went with astronauts.
Here is a close=up of the drawings on that one.
Unfortunately its been packed up to go to the Netherlands so I can’t take a better photo. This one was fine till I did something stupid and cropped it accidentally. And promptly saved over the only copy I had.
Don’t you hate it when things like that happen?
I’ve been moving files from the phone to the laptop to external drives, backing up files and generally trying to sort and organise all my photos into folders and subfolders so I never lose things again (like I did a few years ago when my old computer hard drive got corrupted). But its a never ending job and sometimes I’m sure I mistakenly toss out a folder I didn’t plan to.
Ugh.
Anyway, me and my scattered brain are going now.
Hope this might have inspired someone to do something similar for a child.
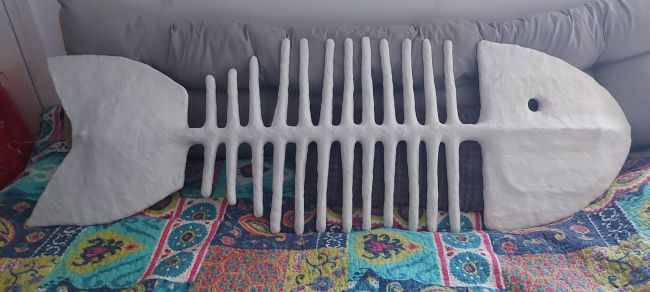
This is the big fish I made for the exhibition last month. The gallery owner had asked me to make it and I thought it was a great idea. I love making things out of paper mache and any other materials I can get my hands on. And I love experimenting. And making something this size was a challenge.
I had made a life size bulldog a few years ago, but this is a totally different animal (haha). This is a link to the bulldog – unfortunately unfinished in this post…
Anyway, back to the fish. I’ll go through the process, which was all a bit hit and miss with a lot of learning in between. It took a while… not just the working but the drying…
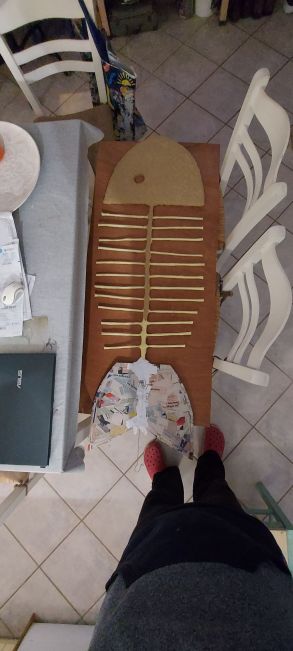
I began with wire I’d gotten off old paper lanterns someone was throwing away. Recycling being the main aim.
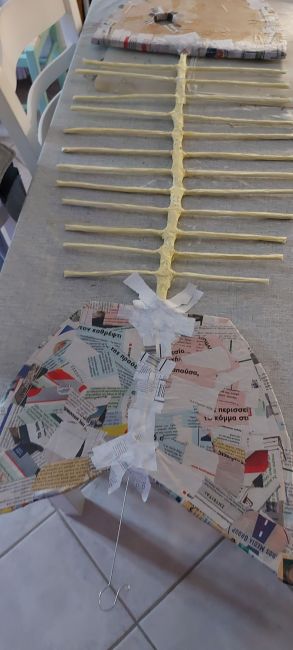
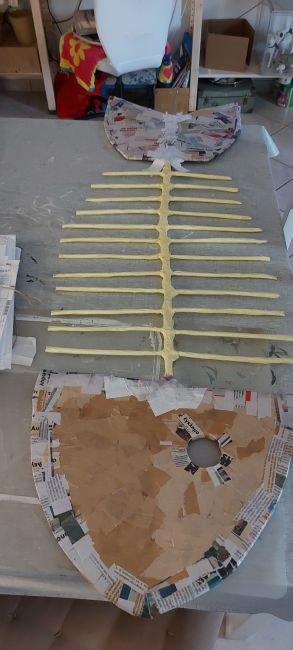
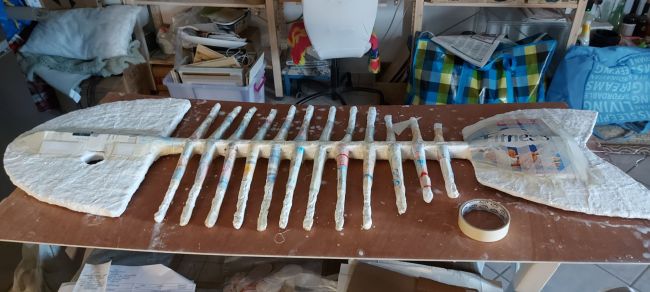
I made the spine and ribs using the very hard wire, then wrapped it all in cardboard and masking tape. Lots and lots of masking tape.
I used cardboard to make the head and tail and moved on to paper mache using strips of newspaper, which is becoming a pretty scarce resource these days.
I had thought paper pulp would be the way to go so that the entire fish was recycled material, but the pulp was taking way too long to dry. And wouldn’t stick well either. Probably my own fault, I got the mix wrong… However, by the time I decided that it wasn’t going to work I’d already done the head and ribs on one side.
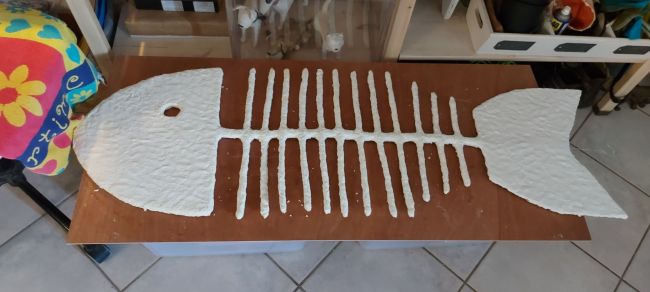
So I swapped to plaster. Using plaster bandages I coated the entire fish and that dried nice and fast and really hard, which was the most important part.
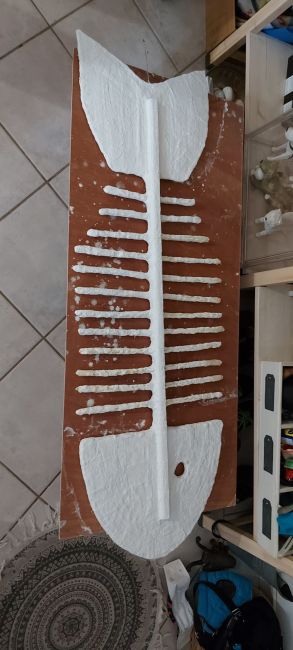
However the fish was getting really heavy and the spine was too flexible. Not good… I had to reinforce it somehow so that it would hold together well and not bend or crack.
I did what I always do: looked around me to see what I had that might work. I found an old piece of timber which was curved on one side. Perfect. I attached that to the fish going from the head all the way to the tail. I attached it using masking tape (the paper mache artists best friend!) and then plaster strips.
Of course I had to ‘blend’ the stick into the head and tail which I did using cardboard to create a curved look. And more tape and more plaster strips. It wasn’t totally realistic, but it did the trick.
In the end I wanted to give it a smooth finish (texture isn’t a good thing when something can collect dust) so I opted to finish the fish using air dry clay. I use air dry clay a lot to make small sculptures, and I knew i could make it work.
I love the way the fish turned out.
Would I do some things differently if I made one again? Yes, probably. I’d start with a stick for the spine and much harder material for the ribs… cut down bits of bamboo maybe, or dowel or whatever I can find. And attached using a drill and holes and glue… But not wire.
And yes, I will be making another. Soonish. It just takes time and I have so many other things I want to do, have to do, should do.
But I really enjoyed making it. Part of the work was done on my kitchen table when the weather was bad. Then when it got warmer I worked outdoors. The plaster work was all done outdoors. That stuff is MESSY.
Sorry about the pics that are vertical instead of landscape. Turns out WordPress won’t let me spin. I have to go back to the originals for that and I just want to get this posted. So there!
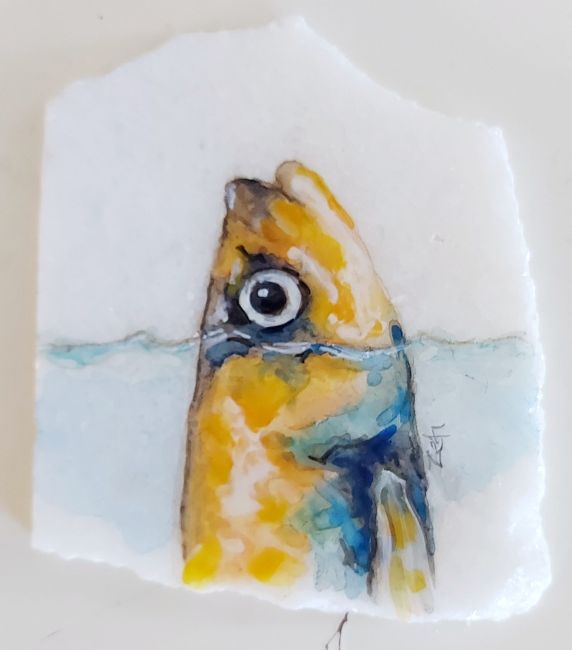
While my brother was here I didn’t have the space to work on anything larger than would fit on the corner of the kitchen table. So, when he asked me to paint him a fish on marble as a gift for a friend, I got out some broken marble pieces I had, my watercolour pencils and watercolours and made this for him. Since he’s flying, he needed the marble to be thin and light so I used a broken marble tile piece I found.
Turns out I’m really good at doing fish… must be in the blood. My grandfather on mom’s side was a fisherman, my family on dad’s side and my brother are all in the fish/seafood business… That must be it.
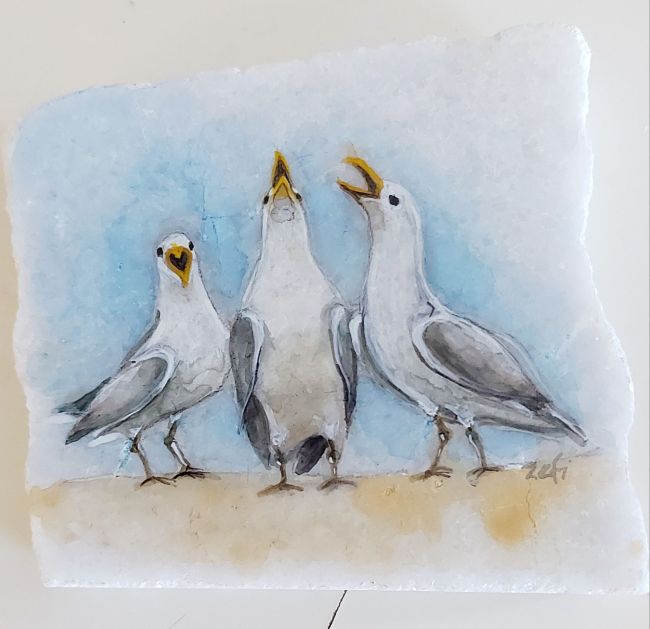
You already know I’m a magpie, constantly picking up crap stuff I find anywhere and everywhere. So, I had this spare bit of marble that I decided to paint while I had my stuff out and the table was already occupied with it all. This time I decided to do something different. I rarely paint birds, but I saw this photo and loved the way they all seem to be gossiping.
You know what I love about painting watercolours on marble? Its the way the marble doesn’t soak up the paint – it allows it to sit there till it dries. It takes longer to finish a painting as I have to wait between stages, but sometimes the pooling of watery paint gives me the effects I want and allows me to bleed colours together in a way I can’t get on paper.
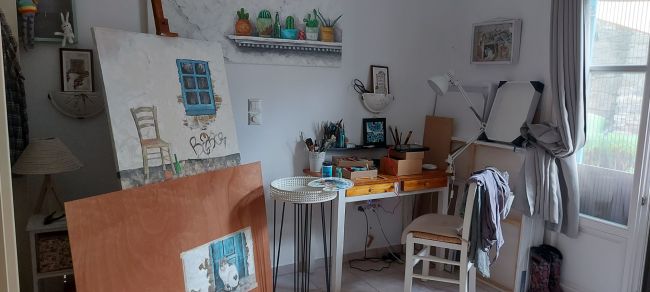
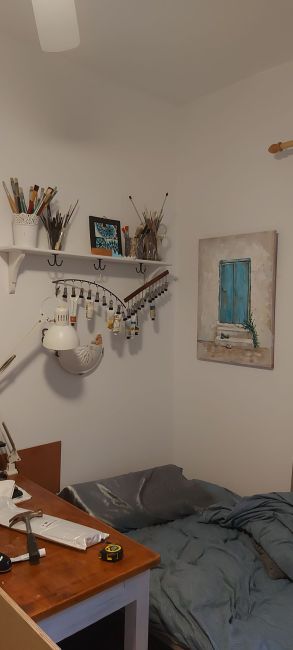
Anyway, here is a quick look at the bedroom made into a studio before mom and Peter arrived. That whole wall was my working space, with great light coming in through the window which faces east. The opposite wall is bookcases and storage.
Later on I added a shelf (I found tossed out on a scap pile) and an easy access way to store paint tubes using clip hangers I already had and didn’t really use. After mom and Peter arrived I had to shuffle things around as I needed to put up the blow up mattress to sleep on.
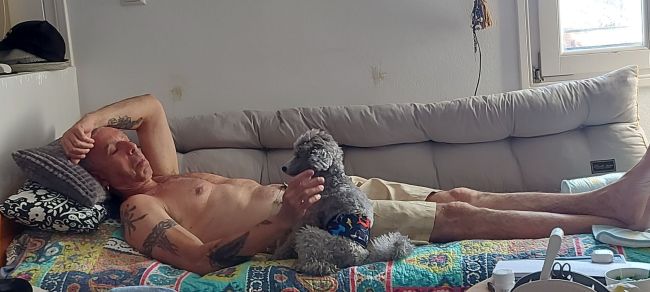
This is Peter bonding with Vincent.
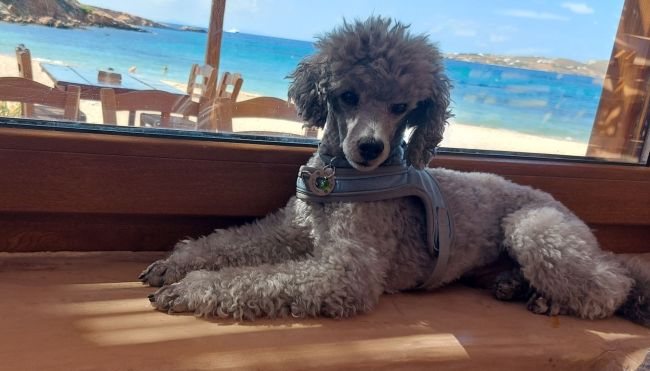
And here is Vincent, looking gorgeous as ever at a beach bar.
Well, there you have it. Two posts in two days. Who knew!
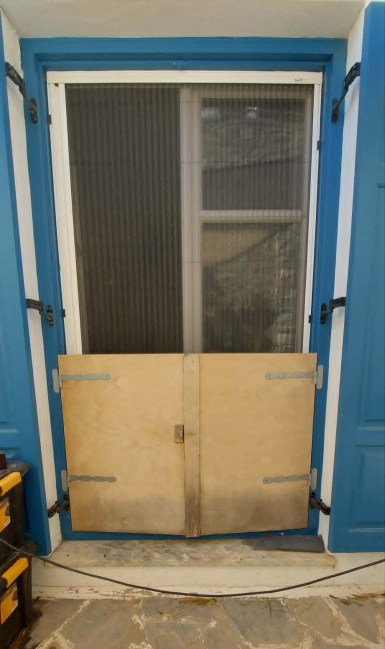
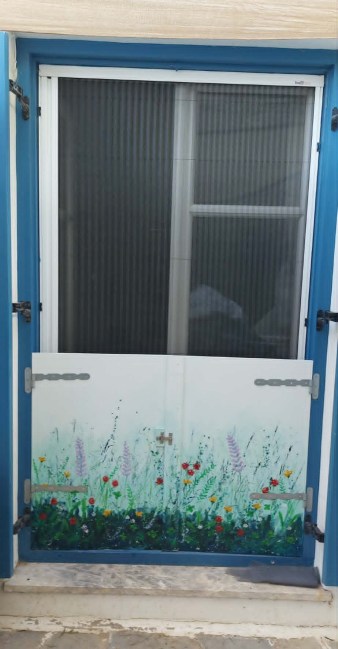
I finally got around to painting the dutch door I made for french door into the courtyard. I made this door for a couple of reasons. I groom dogs and I do them out the back there. The courtyard is very safe and enclosed, but I would always have to close the french doors to keep them from escaping into the house, and greek french doors never have handles to open from the outside. The dutch doors allow me to keep the doors open with the flyscreen closed – and protected from little monsters running straight through it.
The other reason is that I was visited by a rat twice a few years ago.
Once was enough. Twice was beyond enough.
I like to keep the back door open all the time, flyscreen closed, to get fresh air. And rats chewed through the flyscreen. UGH.
Hence, a dutch door.
Here are the before and after pics. Before, boring old marine ply which didn’t improve with exposure to sun and rain.
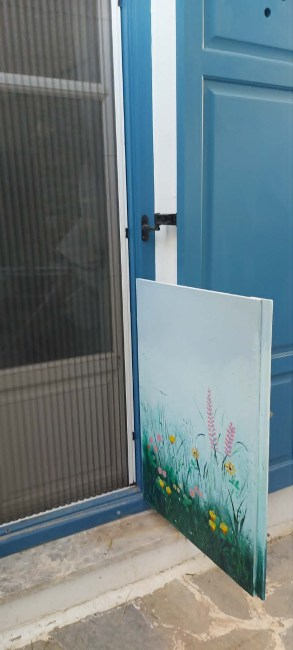
And after… I gave it an undercoat of white, then an ombre blue background, finished by painting a mess of wildflowers on it and a coat of outdoor varnish. Both sides.
Pretty, ain’t it? I love it. Of course we’ll have to see how well it holds up to the weather and dogs scratching at it to escape being groomed…
For those curious about how it was done, I used brushes and house paint for the undercoat and background. Then I used acrylic paint for the flowers and grasses. For those I was very experimental. I collected various plants on my walk with Vincent that day and I used them to create the grass by dipping them in paint of various green shades and smashing them onto the wood.
I used leaves and flowers pressed into paint to create the leaves and flowers. That didn’t always work so well, so I used brushes, cardboard and anything I could think of to add more detail and shape.
In the end I think it came out very pretty. I’m sure the visiting dogs agree.
And now for the bad news.
Turns out my Australian Business Number (ABN) was cancelled due to the fact that I haven’t used it or filed any income tax since moving to Greece – since I work and pay tax in Greece. And now my junk4joy domain will be suspended till I can reinstate my ABN and upload it to my host again. Which I’m in the process of doing.
BUT… I have none of my information so its a long deep winding tunnel of frustration!
When I left Australia I left a box of documents (old tax returns etc) with my brother who put it in storage as he’s moved a couple of times so he’s unsure where it is. Plus he’s on his way Greece and had no time to go searching for it.
My old laptop corrupted a few years ago and I lost everything on it – including all that information.
So I’m kinda stuck. I’m working on it. But not in time to stop my junk4joy domain from being suspended for 30 days from May 25. I’ll be back once I have the info I need and re-link it all, but till then no more posts.
Not that you’ll miss them as I haven’t posted for over a month even with a working blog!
I started needle felting again about a year ago, and I have to confess I’m hooked. I love it. Its such a zen feeling to sit quietly at the kitchen table stabbing wool and shaping it into anything I want. Often with the clashing sounds of an audio book on my mobile phone and mom’s tv programs… sigh…
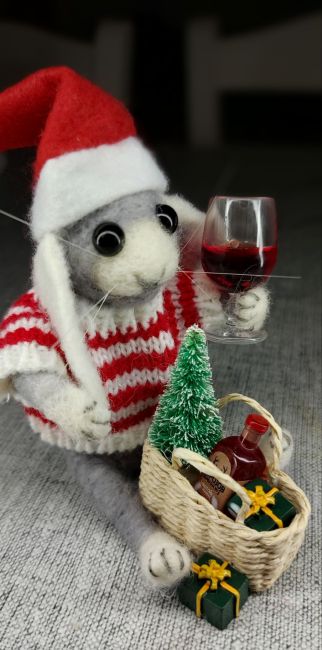
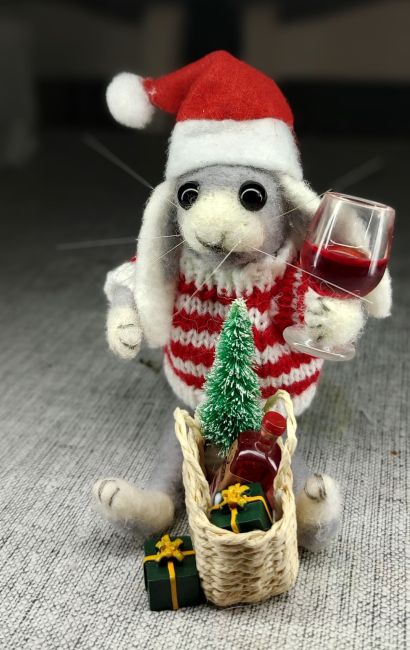
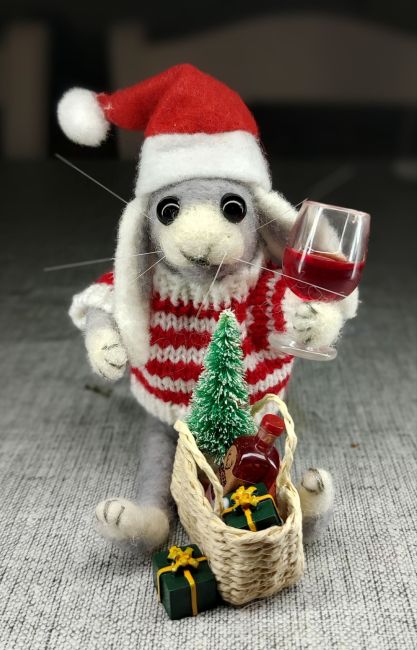
I especially love creating little creatures with personalities, giving them more character by adding accessories to tell a story. This little bunny, for instance, started his gift wrapping full of Christmas spirit, but found he needed a big glass of red wine to get through it.
This little guy is the first in a series I planned to make for my Etsy shop this Christmas… the idea is to make little critters who represent different parts of the season. Including the snowmen in my last post, but these critters are all needle felted by hand, not made based on felted dryer balls I’d bought as an experiment.
Of course, the whole tariff thing in the USA has not done my shop any good, cause I sold quite a few of my creations to people in the US. And right now, I have a box waiting to be shipped to Canada but can’t send it due to the postal strike… Its hard enough to sell online without all this.
I’m not very good at promoting my work…
Anyway, I figured that since I’ve been absent for so long, I may as well share some of the things I’m made over the last few months.
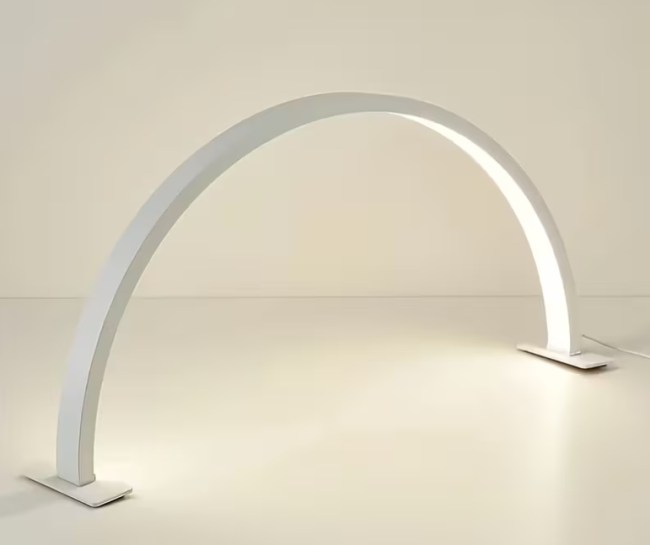
One thing that’s helped heaps in making these small creations, is the light I bought on Temu. This thing is amazing. Its made for nail professionals and has enough space under it for me to work my wool comfortably. Its USB powered, and since I don’t have easy access to a power point at the kitchen table (cords are not user friendly to old women (mom) who are unsteady on their feet) I use a fantastic strong and fast charger I also got on Temu.
Needless to say I’m addicted to Temu.
I’m not proud of myself… but I can get so many good and useful things there. And of course some totally useless things, but I won’t mention that here… Unless you’d like me to share the failures…
Lately it seems like all I want to do is curl up on the couch with my ‘work tray’ and coffee table and stab wool with sharp implements.
Maybe it’s because it’s been really cold and windy and not at all inviting out there…
Maybe its cause needle felting is a more immediate way to create sculptures – for instance, it’s so much quicker than papier mâché which needs to be done in stages with long periods of drying in between.
Plus, working with needle felting gives me the opportunity to make miniature stuff – something I’ve always had a passion for.
Whatever the reason, I’ve been working on these little figures most afternoons and evenings and listing them in my Etsy shop.
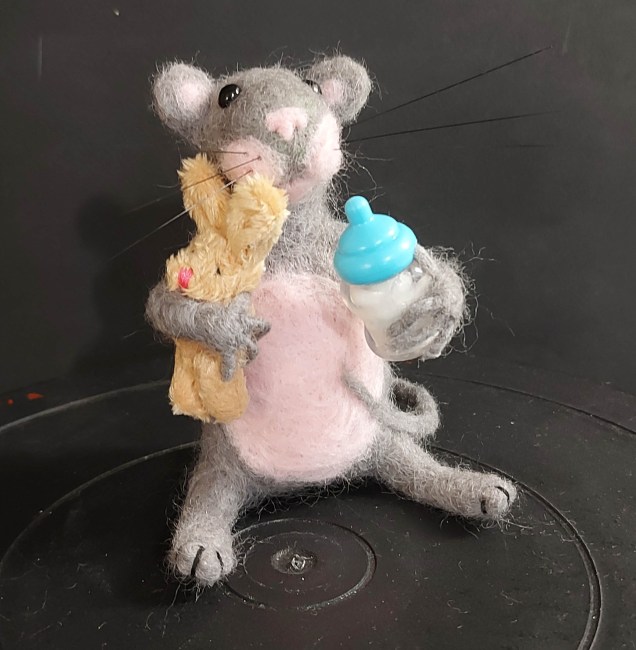
Here is baby boy mouse with his bunny and milk bottle.
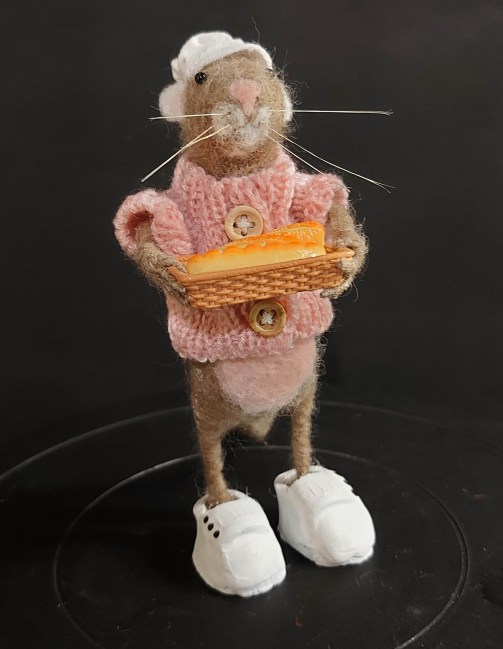
And the baker mouse with her fresh loaves of bread and her baker’s cap.
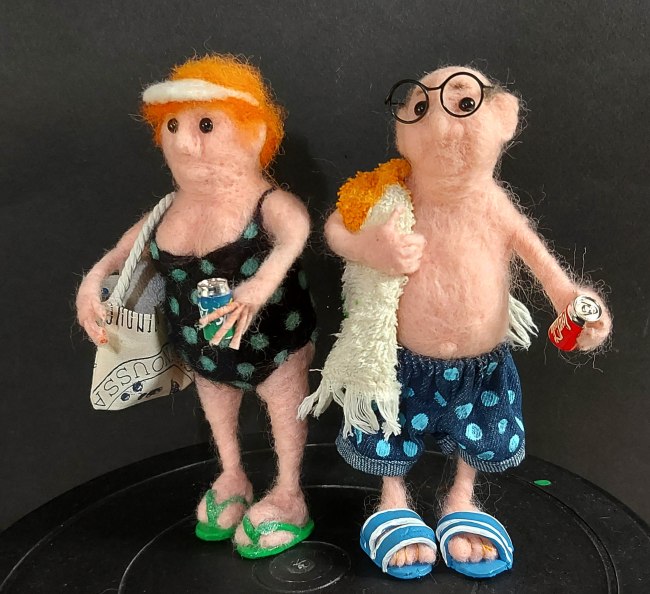
A middle aged couple on the way to the beach with towels and soft drinks in hand.
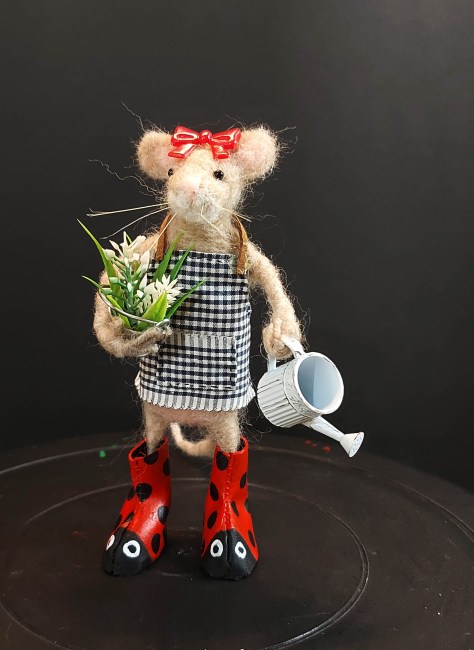
A little gardening mouse in her ladybug boots.
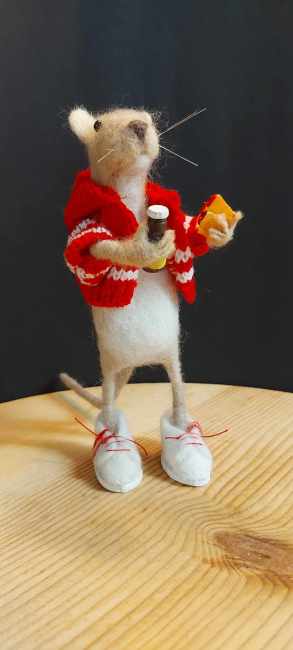
A homeboy mouse with a hoodie, untied sneakers and snacks.
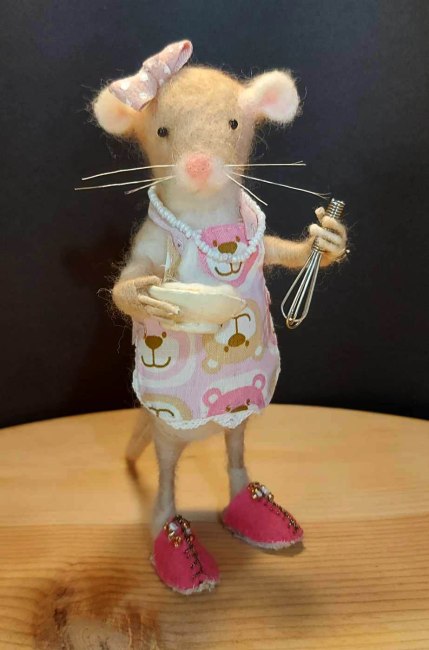
A ladylike mouse whipping up cream to top a pie.
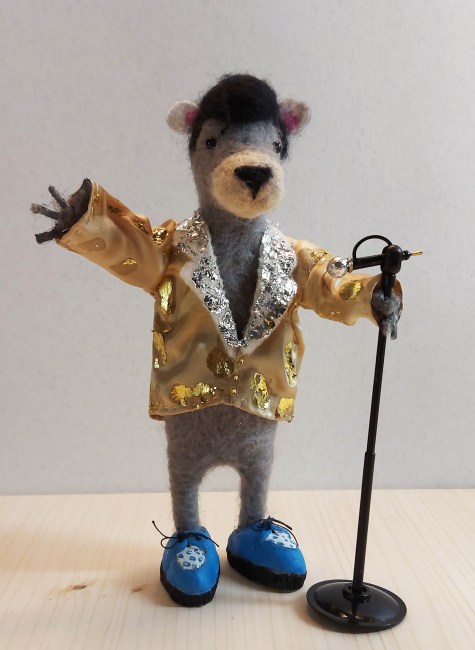
And last but not least, the best Elvis impersonator of the mouse world, Elvis Mousely.
These little guys are so much fun to make. They’re done in a couple of days mostly, depending on the time I have to spend on them and the bits I need to make – like the shoes and any props I can’t buy. Sometimes I make my own clothes (like Elvis’ jacket and the aprons on the cook and gardener), or footwear which means I have to let the air dry clay I use in most cases dry. And any painting I need to do… But they’re quicker to make than the papier mâché dogs I had been making in the past. Not to say I won’t be making more of those!
My needle felting workshops are doing ok as well. Given this is a small island and a lot of people leave over winter and are too busy to do any crafts in summer, I never expected these workshops to take off, but they are great fun for those who do join in.
But I have to get back to painting and not spending all my time stabbing wool. I have 2 commissions and the series I’m working on waiting for me!
I finished the 3rd painting yesterday finally. It had only been sitting on my easel since before Christmas and I’d barely touched it.
Feels good to have it done finally.
Now a new canvas is sitting on my easel, in the living room (ie my studio) starting at me accusingly as I sit and felt, or do nothing.
I have some ideas of what will go on it, but so far all I’ve done is prepared the canvas. Better get my paints out again as I also have a cat commission to finish by next week.
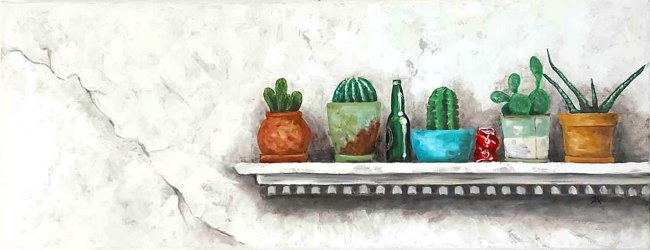
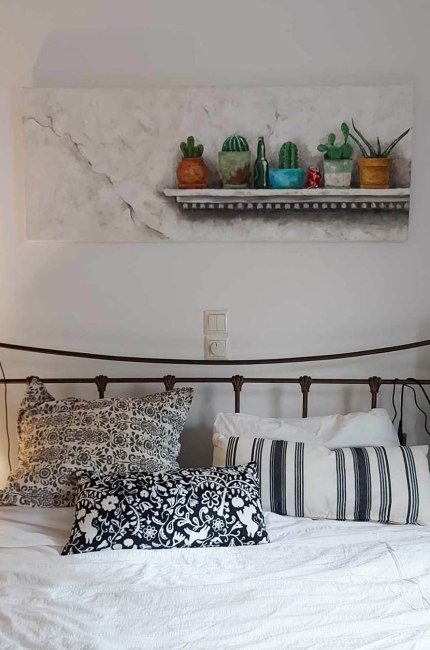
For now the newest painting is hanging in my bedroom and I love it there.
I have no idea where I’ll hang the next paintings I plan on doing will do… I am fast running out of wall space. Not that I had a lot to start with…
I’ll have to think of something.
Meanwhile I continue to work on STUFF.
The felting workshop I did this week went great. We all had fun and got something to show for it at the end. It might only be a needle felted BALL, but hey, its the start of something great! You gotta learn the basic technique first and that’s what the first beginners session was about.
Next week we’ll add colours and attach parts to make the ball into something more interesting.
Then I have to plan my second beginners workshop series and add in an advanced one for those wanting to take it further.
I have been absent but that seems to be the way I roll lately.
I roll out of bed, walk Vincent, have coffee, get online, do minimal housework, walk Vincent, do some errands, roll onto the couch…
However, despite my seemingly endless nothingness, I have been busy needle felting. The couch has become my new workstation. As you saw in my last post, I have been infected with the needle felting bug again.
I have been spending almost every single evening with a pointy weapon in hand, stabbing at innocent balls of wool with wild abandon.
And experimenting.
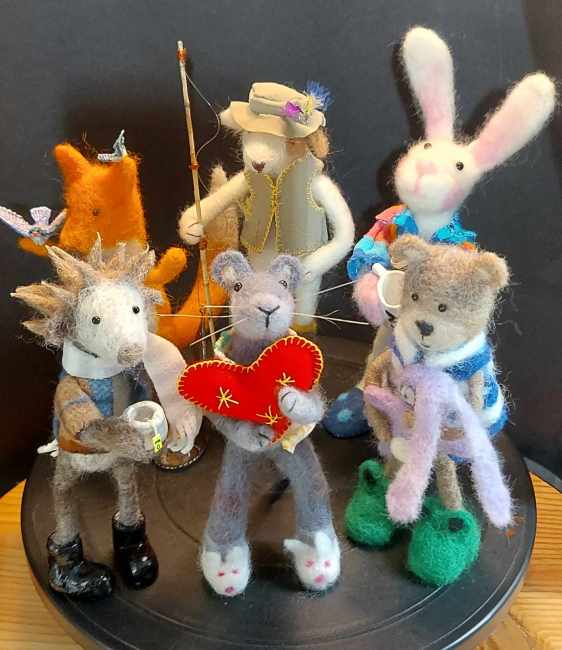
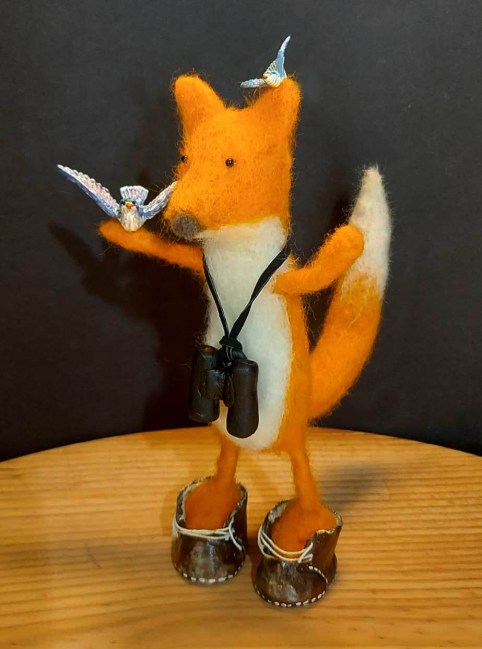
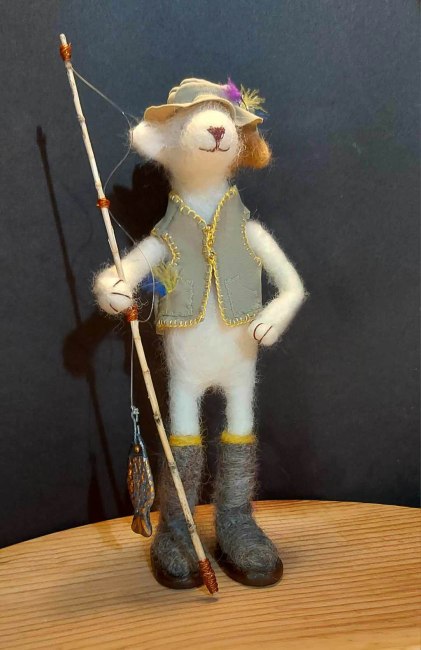
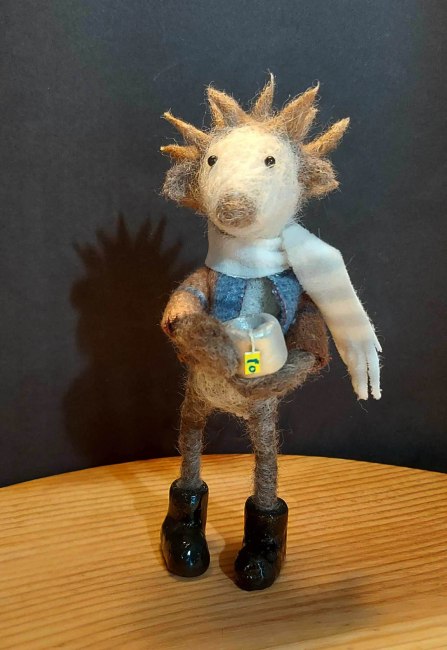
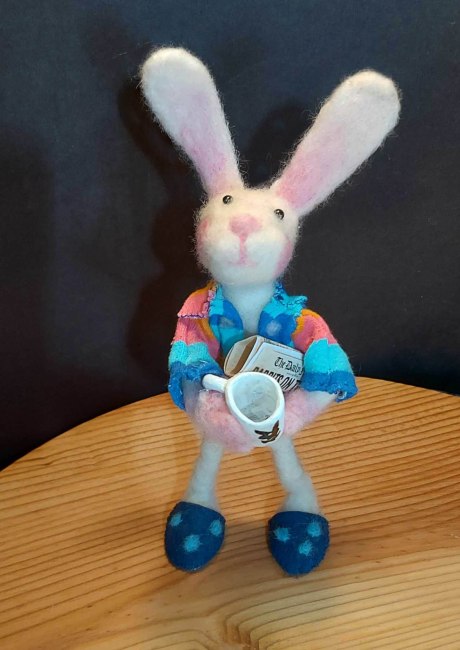
So far, here is the first lot which I have managed to put up for sale in my store:
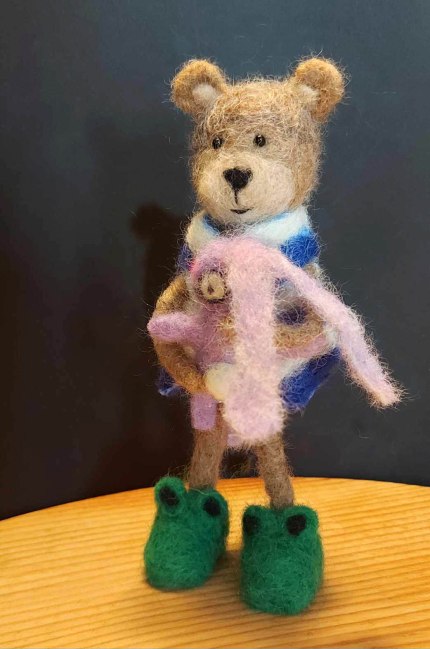
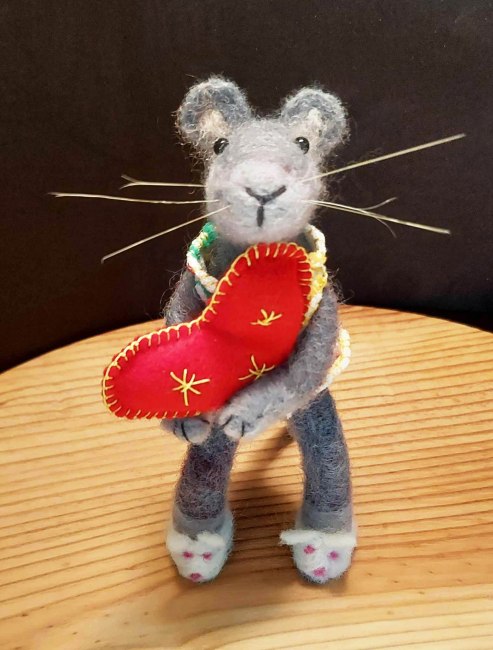
They look so cute in a group.Bird lover and bird watcher fox.A fisherman Jack Russell terrier.Shy, tea drinking hedgehog.A rabbit with his morning coffee and newspaper.Shy teddy bear with his bunny rabbit.And of course you’ve already met the little rat with his heart in his hands.
You can see more pics and details of each of these guys in my store.
My store has been very quiet lately, so it was time to put selected items on sale and promote it more, so please visit and share it with friends. I offer commissioned work – paintings, remade dolls – wall art for a nursery, felted and papier mache sculptures… all kinds of things.
This is a hard but wonderful time of year. I have the time to create, but no regular income. I’m loving the time at home and being able to experiment and play, but having to juggle bills sucks. Luckily, I have tons of art and craft materials on hand thanks to my inability to stop buying it! I think I have enough to keep me busy for MONTHS.
So, there I was, sitting at the kitchen table, a mess of art and craft stuff all around me, wondering what on earth I should do. I didn’t feel like putting the last strokes on the large painting… Afraid to finish it? Afraid to start a new one? No idea why, but there I was…
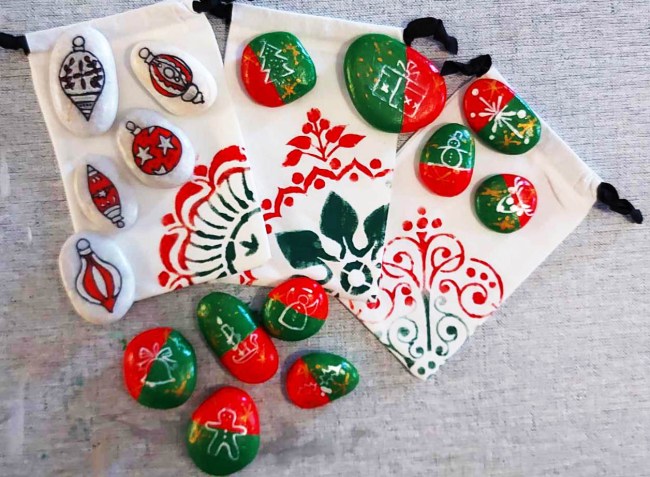
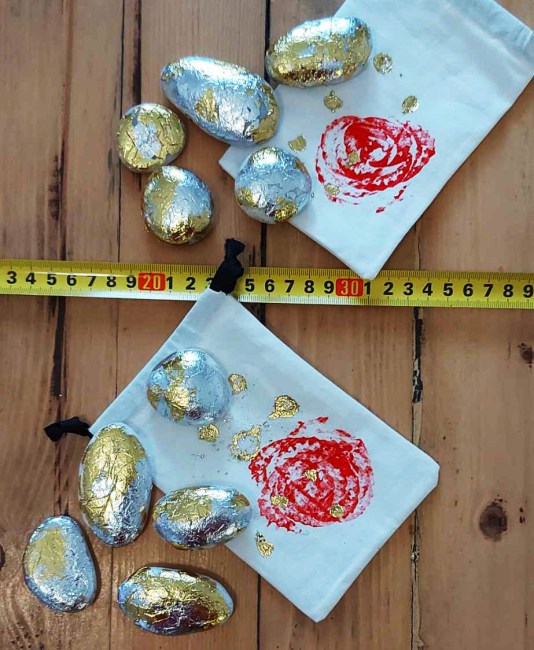
I had a pile of stones remaining from the project I made for a hotel this summer among the things I needed to sort, pack up or get rid of, and thought ‘why not make some Christmas stones?’… I had the gift bags, so why not?
I made two types – some with Christmas designs and colours, and some with silver and gold foil.
I’ve been going a little crazy with the foil lately. I’d never worked with it before so it’s been fun to experiment. Stones aren’t the ideal items to foil as they aren’t at all absorbent and the glue takes forever to dry… however, I’m really pleased with the way they look.
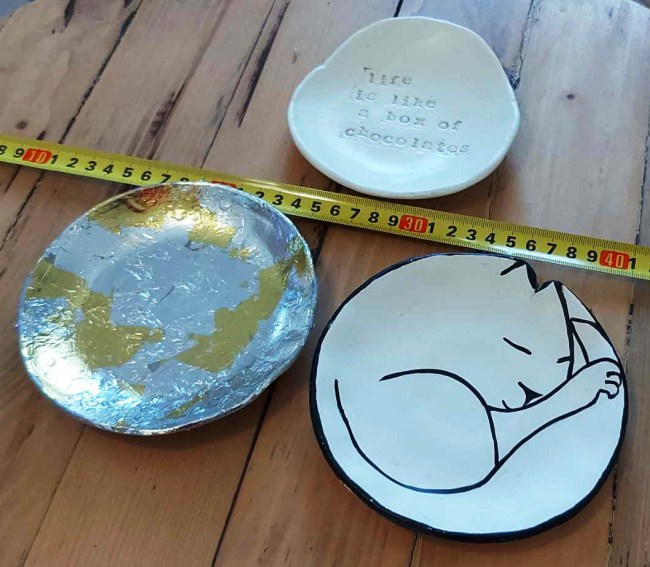
I even tried the foil on one of my little air-dry clay bowls and it came up nicely.
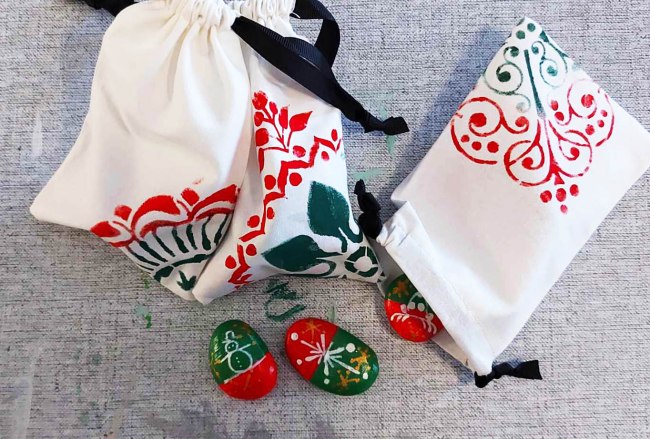
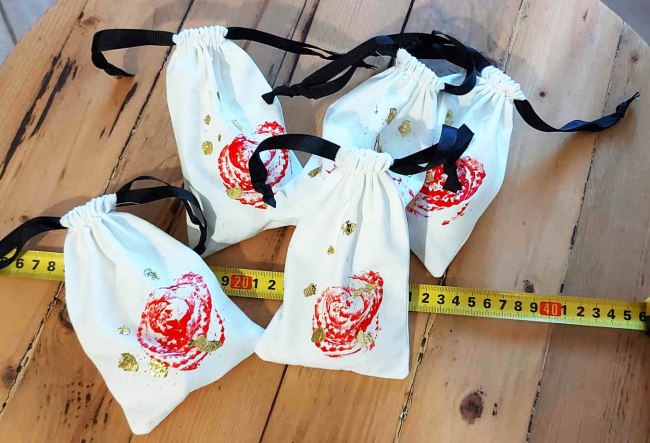
For the little bags, I created a stamp for the foil stone bags, stamped them and added a touch of gold foil which makes them really pop. For the more Christmas themed stones I used stencils to decorate the bags.
I think the presentation of these stones is really up there. I hope they sell as stocking fillers or small gifts this Christmas.