the anti-rabbit

I did take ‘before’ photos of this rabbit. 
I did.
But I can’t find them anywhere!

I got him from the ‘free to good home cause they’re too ugly to sell’ pile at the tip shop last time I visited. The poor bunny had one bead eye (as you can see on his right) and the other eye dangled from a thread halfway down his neck.
Pretty gory looking.
He had the pocket and the red striped ears you see, but no mouth and he was just plain… boring.

I thought I could pretty him up a bit… by making him a monster rabbit. The anti-rabbit of Easter, so to speak.

I gave him a zombie mouth, a mismatched eye, a spotty heart and a few darns and patches. I think he looks much better.

So does my little rat-like creature. He’s smitten. Been offering the rabbit flowers since they met.

Hope everyone has a great Easter.

z

Shared at Knick of Time Vintage Inspiration Party!

small changes in the living room I can live with

Its no secret that I dislike our living room.

Its not the size, I love the size. Its huge.

Its that nothing in there makes sense.

Like the columns in the middle of the room, holding up the ceiling cause the idiots who extended the house didn’t put in the right beam.

And they’re not even in the middle. They’re off centre, creating 2 areas of uneven size.

Mostly, what I dislike about it is the fact that its all so bitsy. We have mismatched items of furniture, nothing that makes sense and ties in together… Its too busy and messy… and I want a new couch. And the carpet is still salmon.

But I can’t remove the carpet yet (I had hoped to do that over summer, and get a new wood heater as well, but that didn’t go to plan). And I can’t afford a new couch. Which is probably for the best cause I still don’t really know what I want. I know I want leather, brown, classic… an old chesterfield would be great. Or a club lounge. And a gentlemen’s club wingback armchair would be nice. In worn leather.

Then I think a modular type with a chaise would probably fit better in our space.

I hate recliners – they’re so ugly, but they’re so comfortable…

In the end I just give up and keep moving things around to try to make the living room more bearable with what’s here now.

Among the most recent of furniture shuffles I thought I’d try a suggestion of Diane’s to stack my two small antique bookcases into one taller piece. I’d pooh-poohed her idea originally, saying the bookcases fit under the window perfectly as they were, that they don’t fit together well upside down… but she had a point. So many of my items were small/low/short. I needed taller pieces.

Then I tried it and I love this new little corner in the chaos that is our living room.

Note the painting of Dancer. I had a nail in the wall… and I had a painting to hang. There you go. 
The old/improved bookcase:

Note the books crammed in the gaps to balance it… I hope no one wants to read those books any time soon…

Its the perfect spot to sit and read or to sit with the laptop on your lap cause its the perfect height and depth of seat.

I’m wondering whether I should redo the bookshelves by colour like in this pin I saw on Pinterest. It looks so pretty, but I bet it’d be hell to locate a book. Our books are a mess right now cause I’ve been shuffling things around, but normally they’re organised by author and topic. ie art books together, dog books together, etc.

Another small but pretty move was the little bookcase I made over a few years ago into the internet corner. I call it the internet corner cause its where the cables come into the house and where, up until recently, the satellite modem and wifi router lived. Its also where the powerpoint is and where the TV lived.

You can see the satellite modem and router on top of the cabinet, and below, you can see our new NBN connection!

We are now part to the modern world, with faster internet! Not to mention a MUCH quieter internet connection! The old satellite modem was LOUD.

So this is what it looks like now – the modem on the wall and the wifi router on the bookcase. Once we’ve connected our VOIP phone the bookcase will move closer into the corner so the wires aren’t so visible.

But just in case you didn’t notice, the barbed wire heart in a base made from curved rusty roofing iron is one of Wayne’s creations.

So there you go. A couple of small parts of the living room which aren’t so bad to look at.
z

an unwanted shop rack

I’m sharing this quick project now, even though I finished it about 2 months ago… cause I wanted to share it when I had it in the office as I planned.
Of course, I had to clean and tidy the office first, and that was a job I put off and put off and put off and… you get the picture… But its finally done. Its clean and tidy (for about the next 2 days providing I stay out of it).
Who was it that said they get more cleaning done in the 30 minutes before visitors arrive than they get done in a week? That’s me. Only this time I cleaned 24 hrs in advance.
So, back to the shop rack. I found this sorry little cutie at a garage sale and was quick to grab it. It had been painted silver at some stage, not well, and the base was really wonky, but it had wheels.

Note the wonky base. Held on with string and tape.

I cleaned it up, scraped the scunge off it, disinfected it, and replaced the tape and string with screws and nuts. I gave it a fresh spray of silver, leaving the occasional old paint showing through (for character, doncha know).

Then left it sitting in the workshop for weeks, gathering dust and horse hair.

But today its in the office. Its new home.

Now stay tuned. The office cleanup miracle is coming.
z

the last chest of drawers


Among all the ups and (mainly) downs in my life of late, I thought I’d share something creative and good.

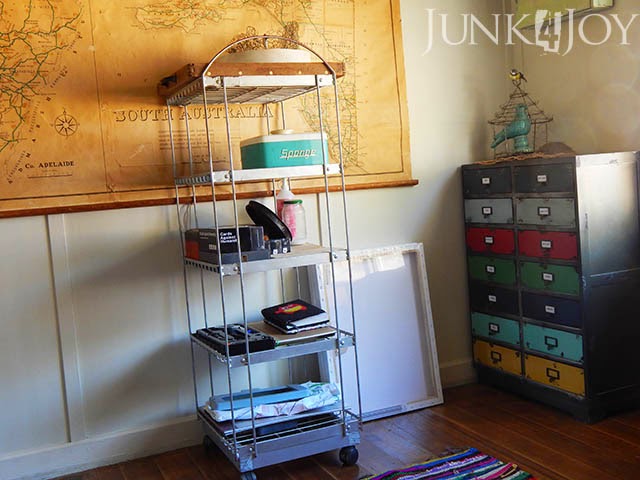
You may remember that when I overhauled the ugly pine chest of drawers a few weeks ago I mentioned wanting to fix up the smaller one to match. Here is an old photo of the two chests side by side in the bedroom as they had been since we moved here.

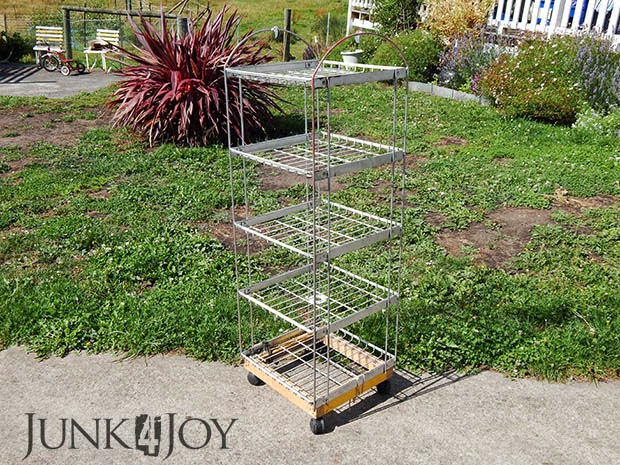
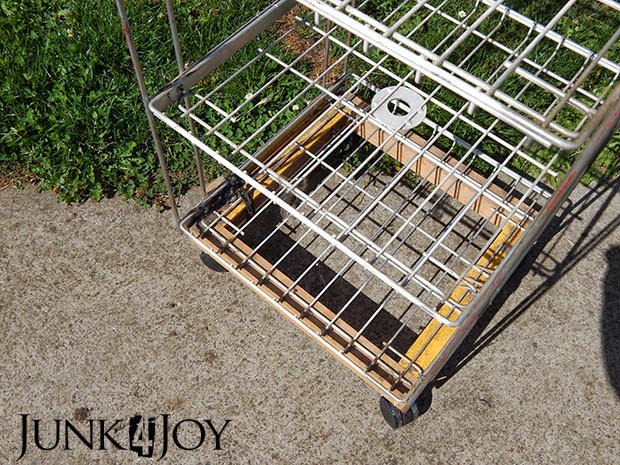
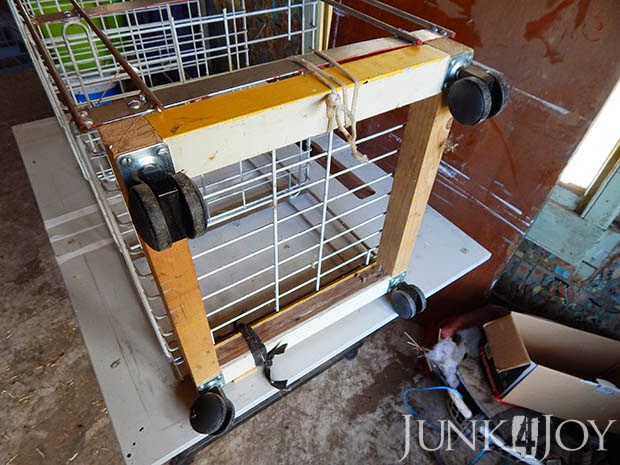
That top doesn’t actually belong there. I found it in an op shop a long time ago, unpainted and missing its ‘bottom’. I thought I’d make a shelf out of it for the mud room, a spot to drop keys and stuff. I even made a shelf to go on top of it but I never got around to putting it up where I had planned.

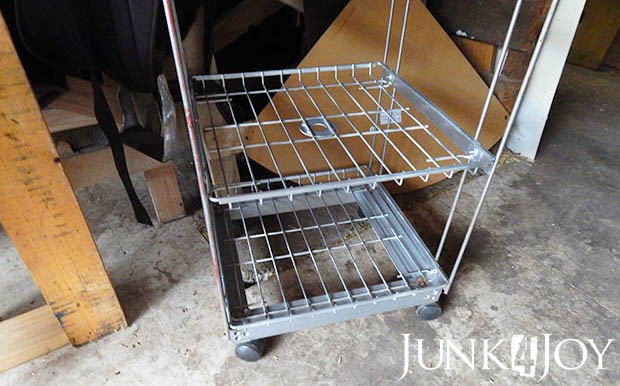
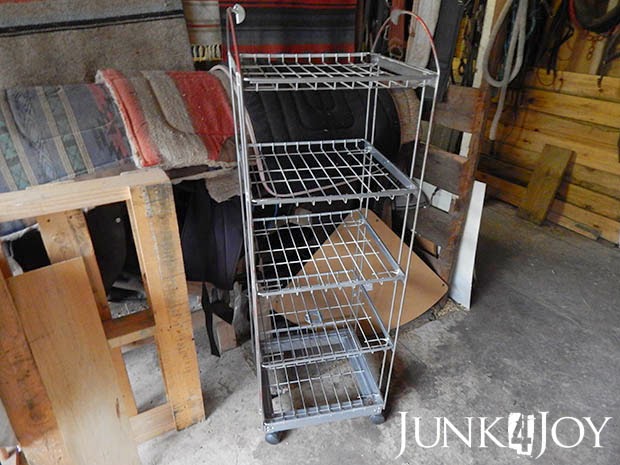
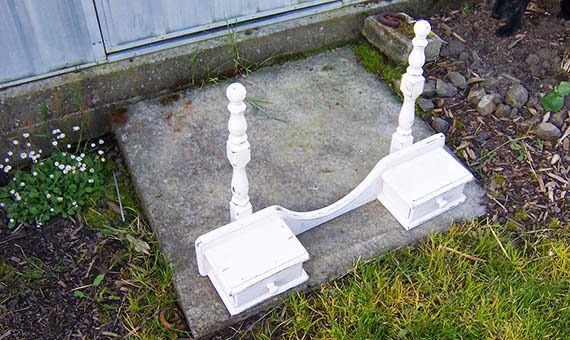
Here it is when I first got it and after I’d put some paint on it.

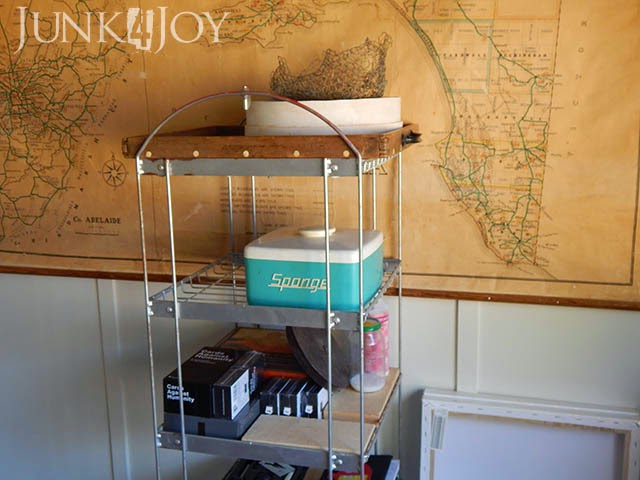
My original idea was to somehow make it into a spot for my jewellery, which is why its on top of the smaller dresser. I even made this mock-up to see how it would look.

Luckily, I decided against that. I just wasn’t sure its what I wanted to look at.

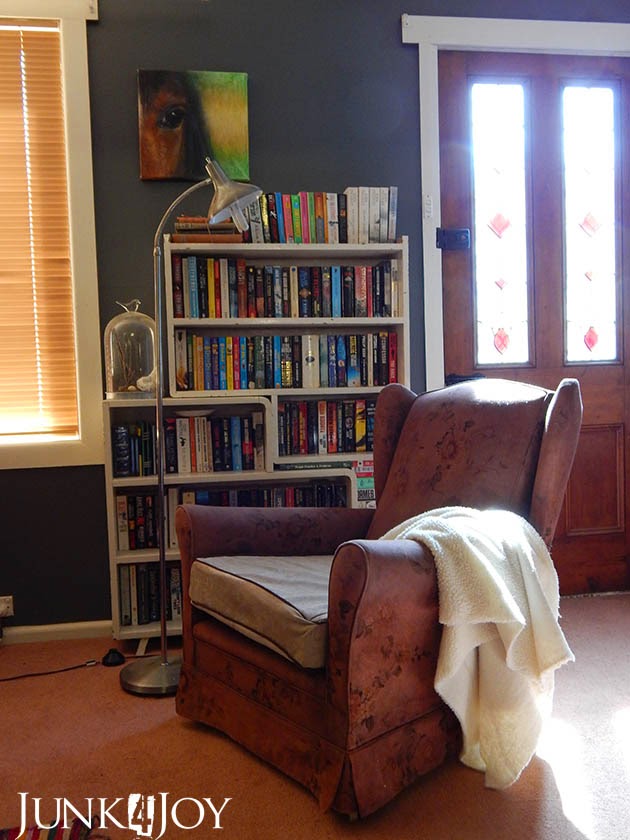
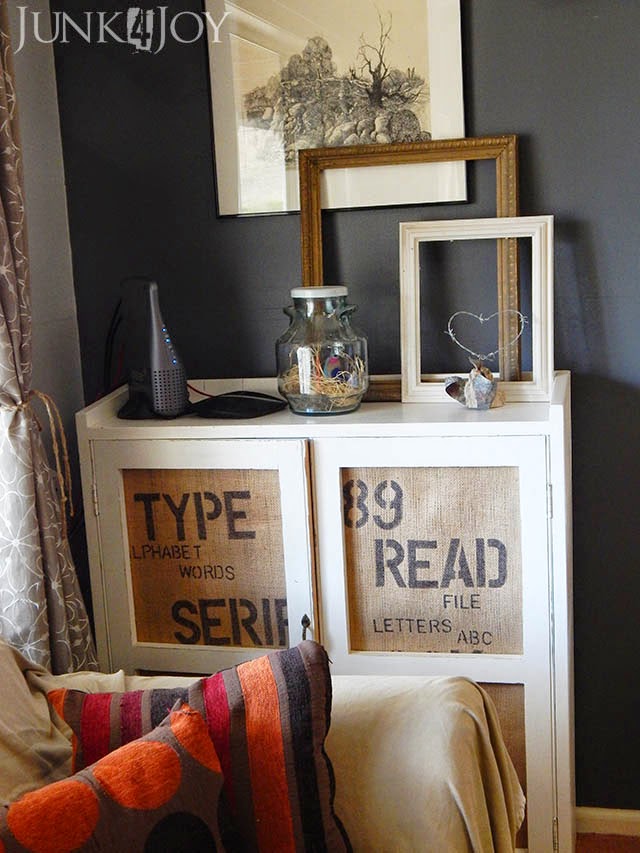
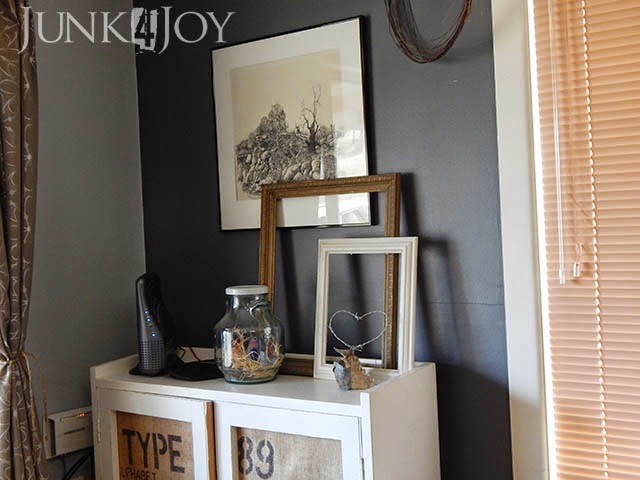
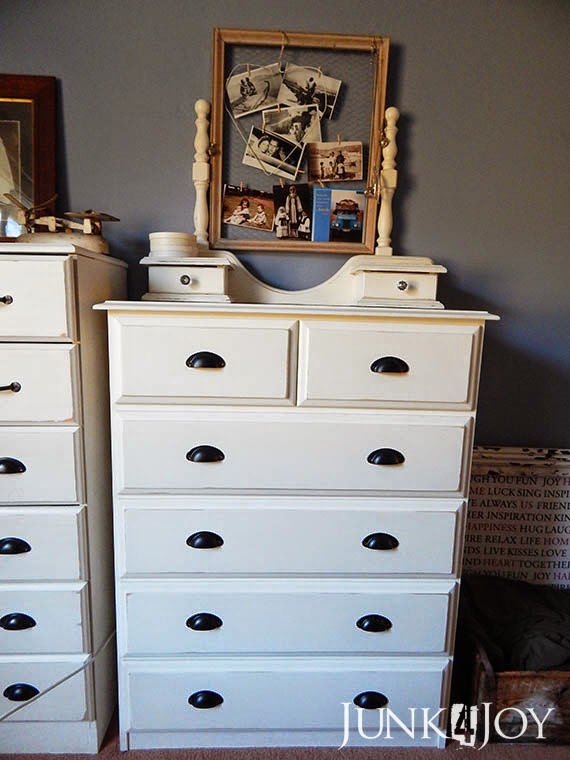
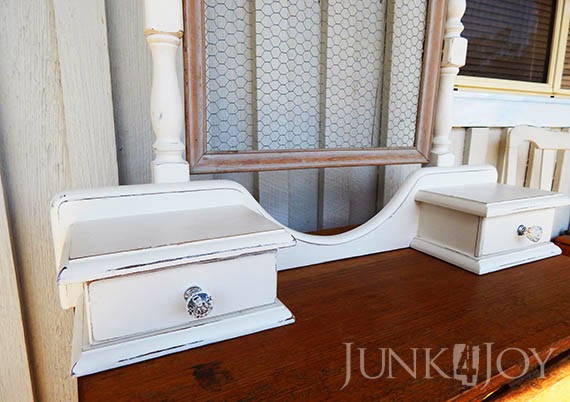
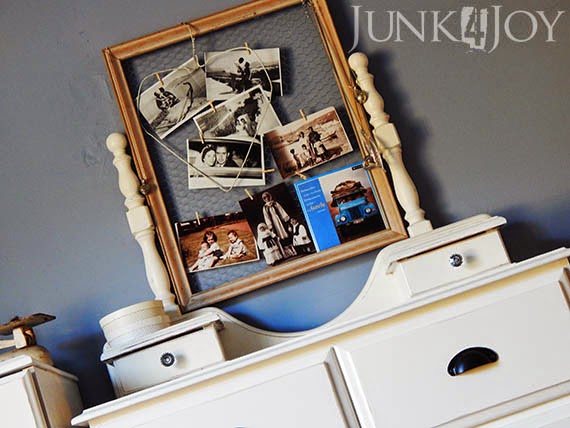
This is what it looks like now (its actually quite straight, the photo makes it look wonky… not that there’s anything wrong with that…):

I obviously don’t stage my photos. There’s a cord between the dressers for the fan. It was hot…

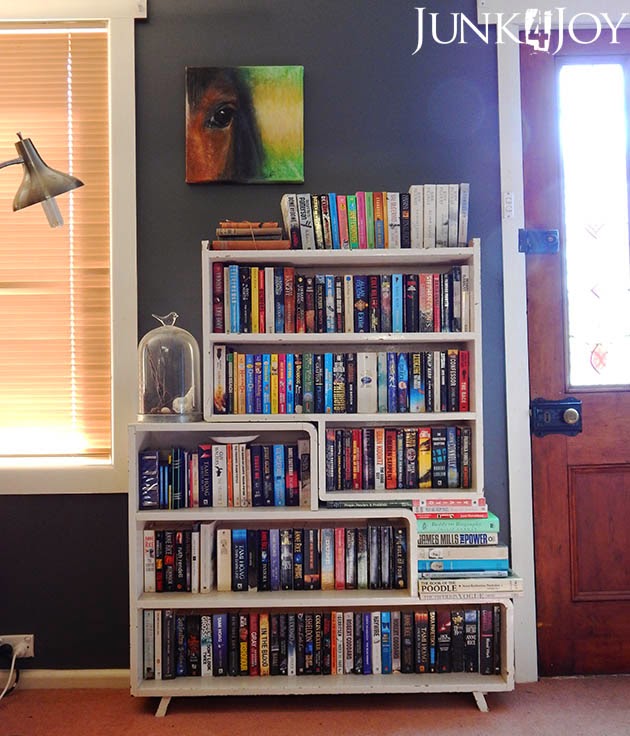
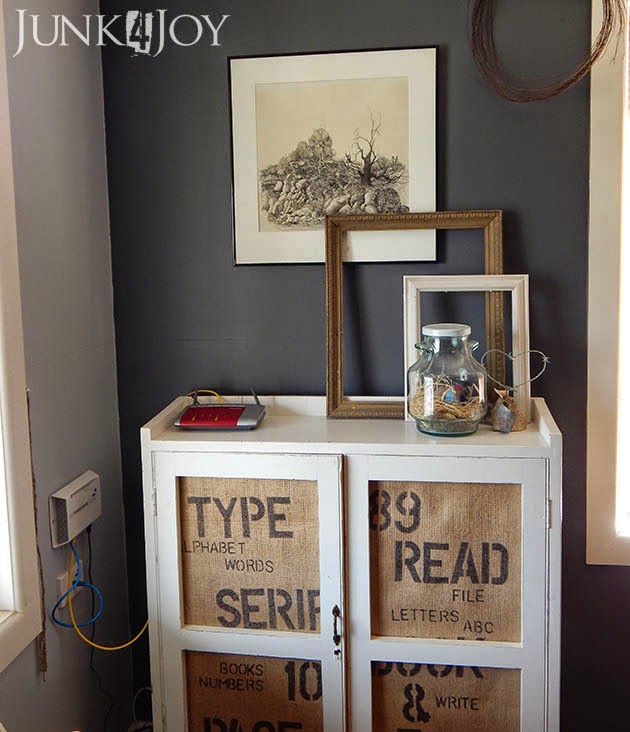
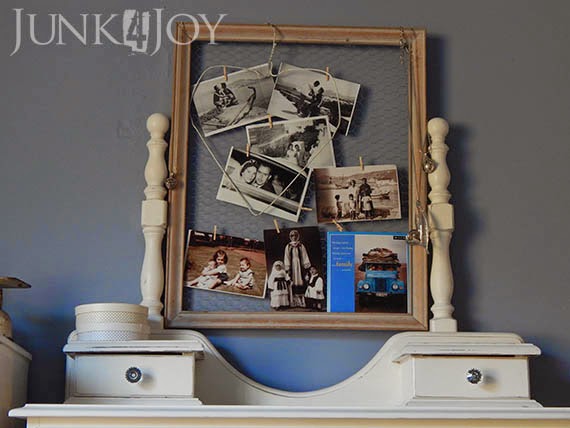
So, what I ended up doing in the end was finding a frame that fit between the posts, or whatever you call them. The one I found was perfect as it was, I liked the white washed colour so I didn’t paint it, just added birdwire.

I then used some small metal brackets to attach it to the posts.

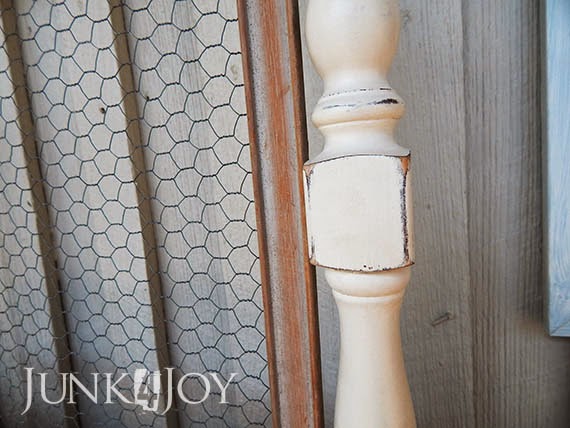
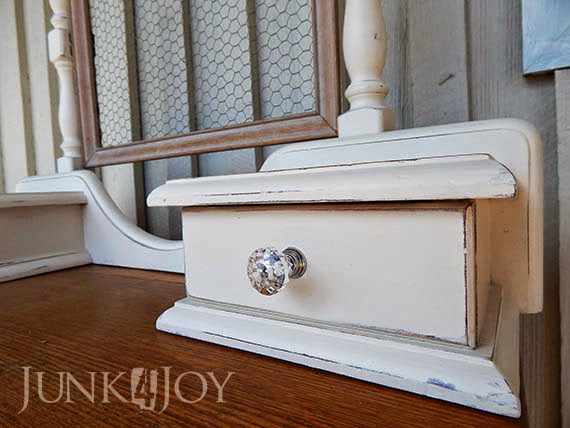
Everything was painted the same shade of off white homemade chalk paint that I used on the other chests of drawers, was distressed a little bit then waxed with clear wax.

Till I started reading DIY blogs I’d never heard of using wax over paint. I thought that’s what you did when you inherited granny’s furniture. But, being the gullible follower adventurous type I am, I bought some to give it a try… and I can tell you I love the satiny feel it gives painted pieces!

Lastly I changed the tiny wooden knobs. I didn’t try to match the black cup pulls on the drawers although I had black round knobs which would have done. I wanted something special… like these little crystal knobs.

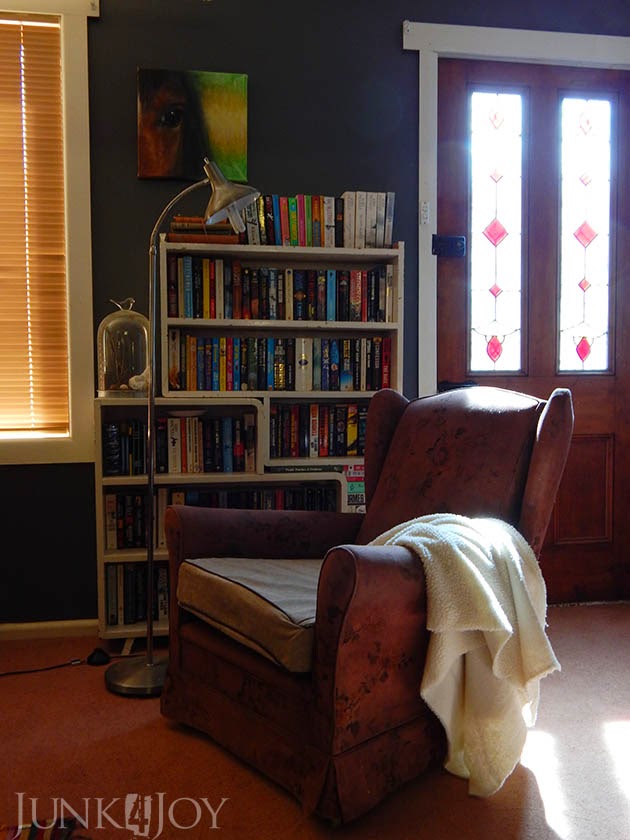
Instead of displaying jewellery, I opted for photos. That way I can look at them as I lie in bed on lazy weekend mornings. (Ok, a couple of favourite necklaces have made it to the frame, but most other stuff is out of sight.

A leftover coat hanger wire heart I made a long time ago for some of my windchimes now frames photos of my mom and dad courting and on their wedding day. I love those photos.

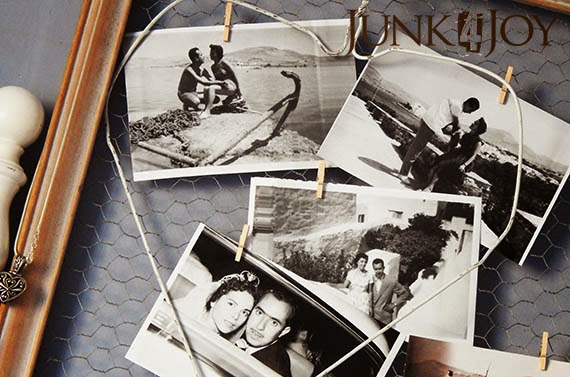
Below that I have two old photos of my dad as a toddler with his mother and sister, and one of me as a 3 year old holding my brother while my favourite cousin PG sits beside me.

I have photos of mom as a child as well but want to frame them along with other old photos I brought home on my last trip to Greece.
I also added my favourite card, given to me by my dearest cousin Zefi (aka Little Zefi), her daughter Marouso, and my Aunt Marissa. The card says ‘Having a place to go is home, having someone to love is family’ and its not just that sentiment that means so much to me but the messages inside. Its the best card ever.
Anyway, I realised I’ve said nothing about the chest I finished. Not much to say really. I painted it with the same paint as the other, larger, one. I distressed it a bit, then put the same cup pulls on it to match. Looking back now I wonder whether I should have put handles on the small top drawers to match the top drawers on the large one… but eh, its done now.

There they sit, together, opposite my side of the bed. I like the way they look now. So much neater and calmer that what I had to look at before, the yellowey pine and too neat white mismatched look.
Just a reminder. This is how it looked before:
And this is how it looks now:
I can live with that!
z

small changes make the world of difference

I really do love the way the porch is looking these days. The potato vine I planted a couple of years ago has taken off and is threatening to swallow up the whole house, but it provides a calm spot to sit and read in dappled shade during the times when the sun normally sends you scurrying inside.

My various pots and containers with succulents and one pink geranium (I may be greek but I’ve never been a really big geranium fan) are all doing well.

I bought a couple of outdoor setting cushions for the adirondack chairs a friend made for us and they’re way more comfy and inviting.

Of course, we have to bring them in when we finish our ‘front porch sitting’.

Not cause of the dogs. Its the birds that worry us most.

We don’t call it the poop deck for nothing!

My plan is that one day we’ll put a roof over the back porch as well, making it more usable in all weather and a good spot for hot summer afternoons.
When that happens we’ll still have this little corner where roofing will be a challenge. I’m not worried. I’m thinking more trellis, a pink climbing rose I’m growing from a tiny cutting, and we’ll have an ‘arbour’ area at the corner of the porch.
How pretty will that be?
Or… I could go all Greek and put in a grape vine…
I have time… The rose is too little to go in the ground till spring and it’ll be at least a year before its tall enough to need support above the rail. I have till then to find a way to convince Wayne we need a roof on that side of the porch.
z
PS I apologise to geraniums for my earlier comments. I had no idea they come in so many varieties and colours. Thanks to Google, I’m now re-evaluating my stance on geraniums and will most likely become a staunch supporter of them in the future.

a cute little airplane

Do you like my little wooden toy plane? I have no idea where it came from, but when cleaning out and organising the casita I found it among my toy collection.

(Doesn’t everyone have a toy collection?)

I have lots of collections. I basically collect anything I like the shape of, the colour of, plus anything I think I can use when doing junk art or repurposing. Behind the little airplane you can see a collection of tea pots and creamers and a collection of clothes hangers among other things.

This is one corner of the workshop which holds timber bits and pieces on the shelf, painting bits in the cupboard and tools on the pegboard.

I like this little corner. I like lots of little corners around our place. The theory is, if I like enough corners they add up liking the whole house and yard.
I pretend not to notice the bits I dislike till I can actually do something about them. Till then I focus on the pretty/cute/interesting bits that I like.
z

what happened to the drawers?

So what happened to the drawers when I decided to make over the tallboy into a linen cupboard?

They became hat and coat racks of course!

First some destruction was called for. I got out the hammer and clobbered the drawers till they came apart.
I then removed the timber knobs and filled the holes. I gave them all a light sand and went through my paint pots to find colours that were similar but not the same. I painted them all in shades of greeny blue.

Yeah, for those who’re observant, there are only four drawer fronts there. There is another one but I didn’t need it for the project I was working on. It’ll appear somewhere else later on no doubt.

I used different hooks – these hooks were sent to me by a good friend in the USA (we can’t get them here) and they’re perfect for hats.

I put the hat racks up high and the coat racks underneath. I had to stagger them in order to fit them on the mud room wall. You can see where I had to put the electrical cable over the top one. Ugh. Not pretty, but here in real life, as opposed to decorating blog-land, things like that happen.

The coat racks have mismatched hooks collected from tip shops over time.
I’d originally planned to paint the entire mudroom antique white. Now I’m not so sure. I’m starting to like the rustic timber look.
I’ll paint the pine lined ceiling white and I’ll probably repaint the two house walls to match the outside of the house. But I’d already started undercoating the left side wall (with the window and sink) back when I was sure I wanted it all white. I guess I’ll paint that wall to match the other two. That will leave one weathered timber wall. It’ll be a feature wall.
I love the way the coat and hat racks look on the old timber anyway.

I also found a home for my crystal dripping tap wall art. Its been in the casita since I made it cause it needs somewhere out of the wind. I added another hat hook to it and voila, another handy spot for a hat!

This one’s on the wall I have to paint (plus you can see the terrible paint job someone did on the toilet door!) so it’ll stand out more. But that also means it’ll have to come off one day. I hope I never have to take the other ones off. Ever.

…Am I the only one who manages to twist the top off screws?

z

Shared at Your Funky Junk Upcycled Link Party

and

the answer to everything else is pressure cleaning

Let me start at the beginning…

Years ago I bought a lounge suite at an auction for something like $25. I gave away the love seat as I didn’t like it, but kept the granny style, wing back armchairs cause they were just so comfortable.

One move, too much furniture and many years later, the armchairs had ended up in the garage as Wayne’s men shed seating. As a result they were covered in grease, dirt, horse and dog hair. They were stinky and filthy.

A week ago Patrice came over and saw them and while examining them I remembered why I bought them in the first place: comfort. Even with the granny floral. So I let Patrice have one and I decided to keep the other. She planned on reupholstering hers (good luck girl, too hard for me!) while I thought if I got the pressure cleaner on mine I could clean it up enough to dye it and bring it back into the house… after I eliminated the skirt…

Well, yesterday Patrice emailed me saying that scrubbing it with dishwashing liquid was working but that she thought my idea of the pressure cleaner was worth trying. By the time I hit send on my ‘come on over’ email she was at the gate.

We got out the second chair, put it on the path, filled the soap container on the cleaner with sugar soap and connected the hose to the hot water tap.

…Which promptly heated up and burst off the connection and flooded the laundry.

Eh. That’s ok. Our laundry is in the casita and its a horrible mess anyway.

I reconnected the hose and we gave that chair the best clean its ever had.

Its sparkling clean! I don’t think it was that clean when I bought it!

Now we know: the answer to any cleaning problem is a pressure cleaner! Need a new couch cause the one you have is filthy? Pressure clean it!

Patrice took the pressure cleaner to her house to use on her half cleaned chair, and promptly flooded her laundry.

For the second time in two days.

She has the cleanest laundry floor in the world.

Day before she forgot she had all her plant cuttings sitting in water in the laundry tub, put on a wash and flooded the laundry.

When Patrice got home she didn’t check her hose was secure enough, turned on the hot tap and it burst off just like mine did. Obviously she doesn’t learn from others’ mistakes…

The upshot is that the chairs are totally clean but they do need some drying… we had hot weather, and some wind to help dry them. Even with that though, the armchair wasn’t dry by 7pm. I put it in the grooming room and put the heater on it.

My armchair has an eaten cushion. Thanks dogs. I’ll need to make a new one for it, but since I plan to dye it I figure I can match, or mismatch, the cushion when I’m ready. New foam is needed as well, obviously.

The point is that its all doable now that the armchairs don’t smell like a dog-loving mechanic’s armpit.

This is so exciting. Patrice has been bouncing all over the place bragging that we’re the smartest people in Australia since the idea worked.

I’m content to know that I’ll soon have another comfy armchair for the house which isn’t going to cost me $$.

Wayne isn’t too impressed. He’s lost his comfy seating in the man shed. He’ll have to live with it for a while, but when I rearrange the living room (his biggest nightmare) he’ll be getting another armchair. Not sure if he’d rather do without armchairs in order to avoid the furniture re-arrangement…

z

homestead news

Summer is on its way down under and the grass is growing at lightening speed (except for all the bald patches on our ‘lawn’ where I poisoned all the weeds). The vegetable patch is starting to produce stuff.

Strawberries actually. Only strawberries. This is my first bowl from the garden. They’re the sweetest tastiest strawberries I’ve ever had!

Last weekend I lay straw around the strawberry plants to stop them growing on the ground and keep them slightly above slug dining level. And Matthew and I made a frame and put up bird netting. We used scrap wood which we cut up as stakes, then tied some thin old moulding (which had been left in the yard by the previous owner) to create a cage. We used hay bale twine to tie it all together.

Very pretty. In a redneck kind of way.

Then we put flat head nails down the side of the garden box so we can hook the net down tight.

A good job I think. Today’s strawberry crop was less chewed on than the odd strawberry I’d been picking lately.

This morning while I groomed, Matthew came around again to do a bit more work on the tyre wall and I got him to move the poor abused pussy willows to a better spot. Here they are at the side of the casita, to the left of the vegetable garden. Five of the seven I’d originally had.

Those poor trees have had the roughest time in their short lives. Firstly, they were just sticks I cut off the trees I had in Fentonbury before I moved here. Pussy willows will grow from sticks. I’d originally put them in the ground just below the dam.

Our dam is spring fed and it leaks. I wanted something to take up some of that water.
We put some electric fence up around them to keep the horses out and they grew for a while.
Then we had to move the electricity to another fence (you know, we play games with it, some days this fence is on, some days that one’s on… it amuses us), the horses got in and gave them a haircut.
We put the fence back on and they grew again.
Then we needed to dam shored up so we dug them out and moved them to a spot on the far side of the back paddock, near the creek. Plenty of moisture there too.
We put up posts and tied electric fence wire around it to keep the horses out. They looked like they died for a while, but then they came back. The trees, not the horses.
The horses realised the fence wasn’t on and they gave them another haircut.
We gave up. They were just sticks with roughly chewed ends for a long time. Then this spring they got new growth.
The other day I was thinking how I want more trees in the yard but we don’t actually have anywhere to put them, and it dawned on me that I could plant trees outside the vegetable garden, outside our yard… and that I could still enjoy them there.
Best of both worlds. The trees won’t stop the sun on the vegie patch, only in the late afternoon. They’ll give us a bit of a screen from the road and the house opposite us way down there. And once they’re grown enough they’ll also provide a bit of a wind break and give the horses a bit more shelter.
So today Matthew dug them up and planted them for the third time.
Third time lucky don’t they say?
We put up another fake electric fence with lots of wire and stakes and even angled posts to keep it strong.
Fingers crossed this time.
z

thanks for your inspiration pinterest

When I was looking for inspiration for a Christmassy project for work, I naturally looked at Pinterest. I wanted something easy the ladies could make … I knew I’d find plenty of ideas on Pinterest.

Too many ideas, in fact.

I narrowed it down to these cute little sock snowmen. For this week anyway.

I already had a few white socks at home which were either worn or had lost their sole mates, so I was part of the way there. I had to buy some pretty socks for the top/clothing layer so I got the cheapest ones I could find at Shiploads. And some rice to fill them. We already had tons bits for decoration: beads, bits of felt, buttons, yarn…

Here they are. So cute all lined up like that. Each lady picked socks and decorations, helped fill the socks with rice and dress the little guys.

Here are a couple of closeups:

Darn cute even if I do say so myself.

Now I want about 9 of them for my windowsill.

Hm. Maybe not a good idea. I think the dogs will want to play with them… rice everywhere… on second thoughts, I’ll just admire these guys…

z