kids party cake stands and other things

Since I’m on a roll blog-wise (and I don’t want to let down my fans – heheh) I thought I’d share another work project which was HUGELY successful.

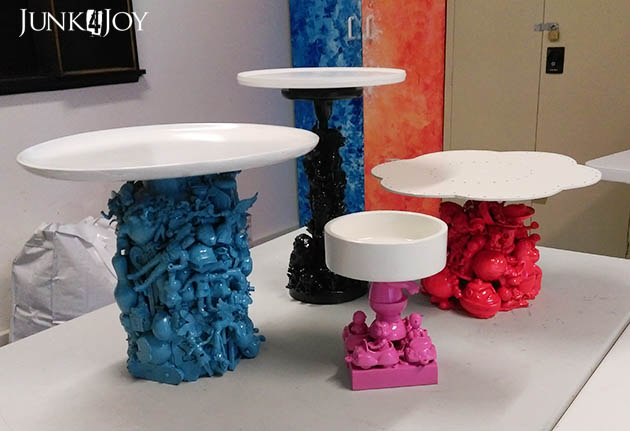
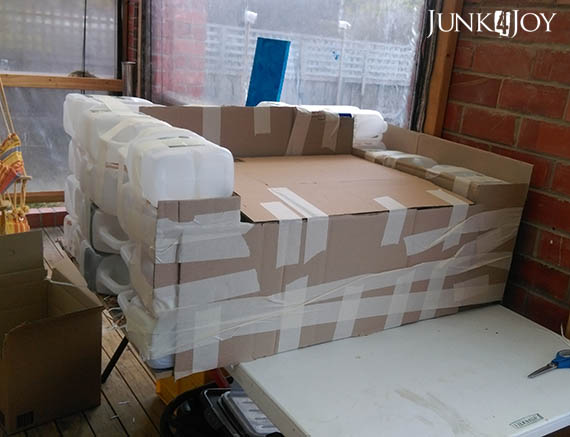
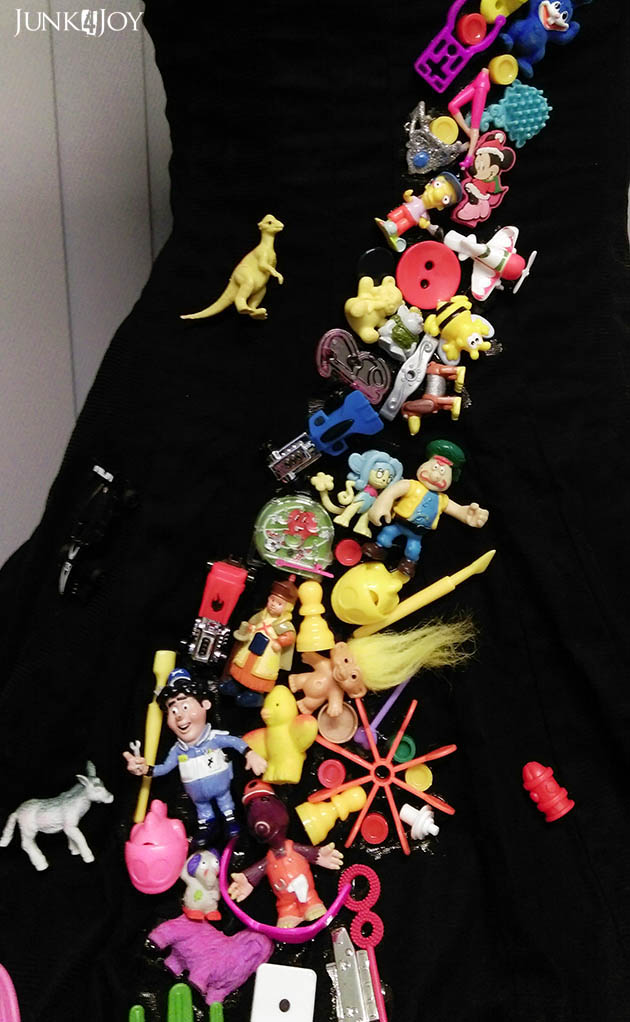
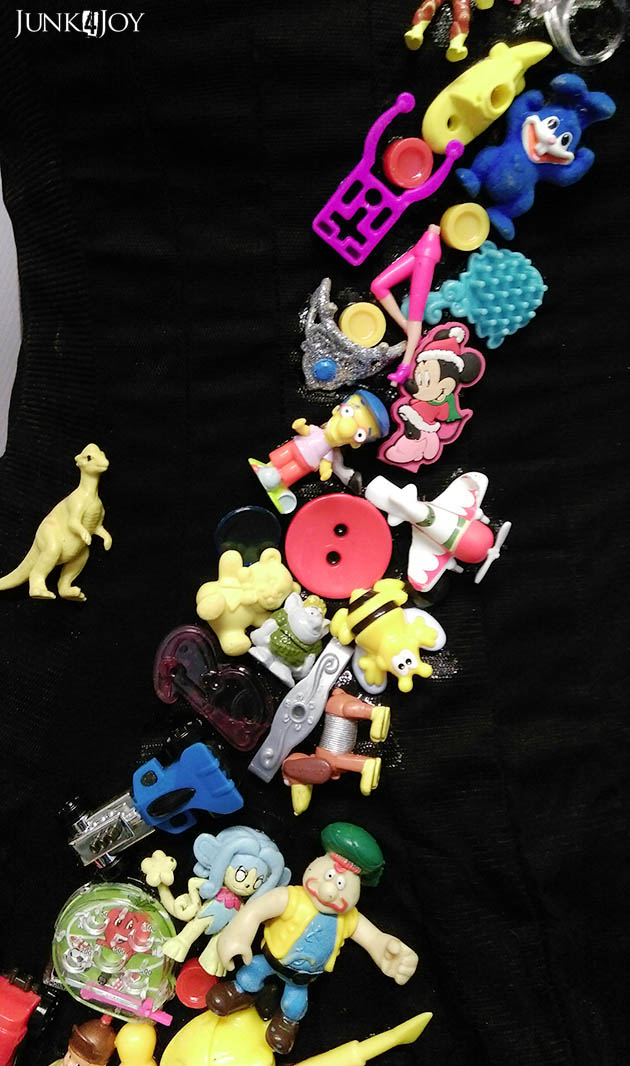
These kids party cake stands were made in my Thursday group. We spent time collecting, begging, stealing and borrowing old/broken toys from anywhere we could find them. I spent ages asking for things on FB and at work via our newsletter and noticeboards.

We also took a few trips to the tip shop to find some wooden or plastic platters and lamp bases to build them with.

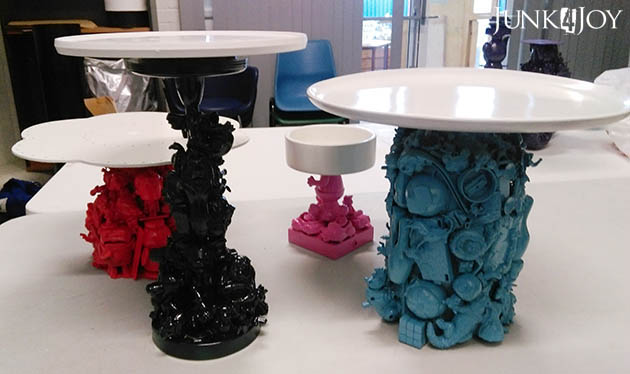
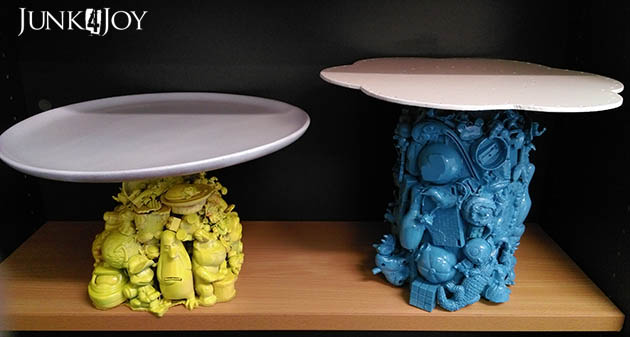
The tall one that looks black in the photos is actually a very dark blue. It began life as a tall metal lamp base which was covered in toy animals using liquid nails, then sprayed what we thought was bright orange. Unfortunately the orange sucked big time, so we tried a couple of other colours, ending up with dark blue for the best coverage.

Warning: if you plan to do this at home, beware. Not all spray paint is created equal. And not all of it matches the lid colour…

For the top we used different flat items as bases – anything from old cds to small wooden dishes. These were glued to the light globe holder on the lamp base and provided a nice big surface to glue the platters to.
The top to this cake stand is a plastic lazy susan which spins.
The light blue one was made using a large ceramic lamp base, covered in random toys and topped with a large wooden platter.
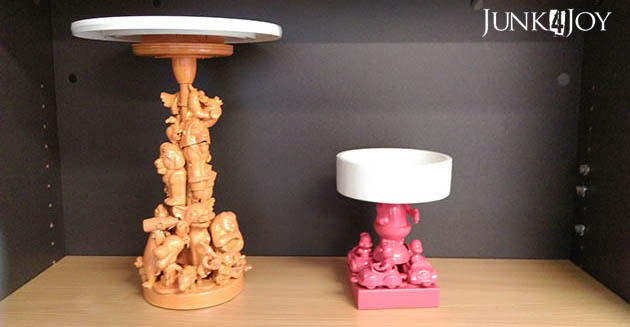
Here it is in progress. In this instance we removed the globe holder bit entirely and glued a flat surface to the ceramic base directly.
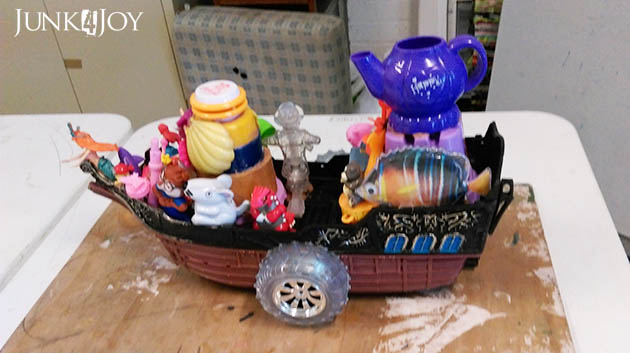
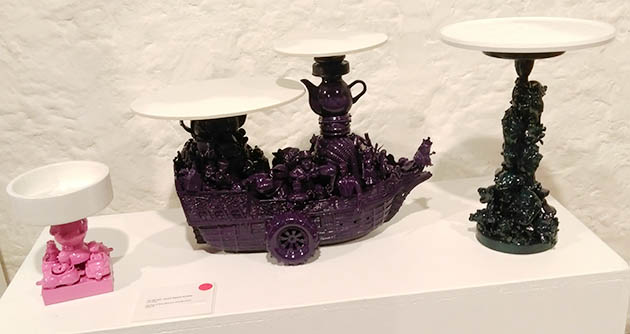
This one is my all time favourite. Its made out of a pirate ship, tea pots and all kinds of ‘human’ and animal figures plus anything ‘fishy’ we could find.. Oh and the wheels off a toy truck.
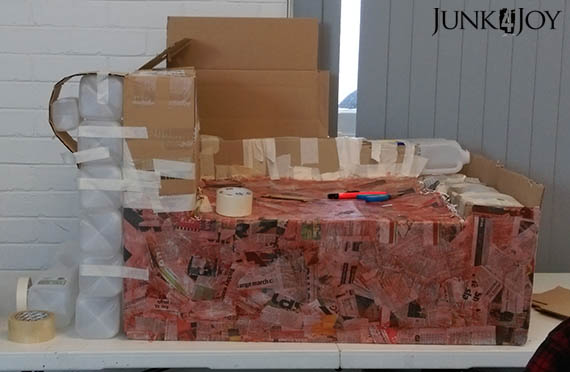
Sorry about the bad photo but its the only one I have of the pirate ship in progress.
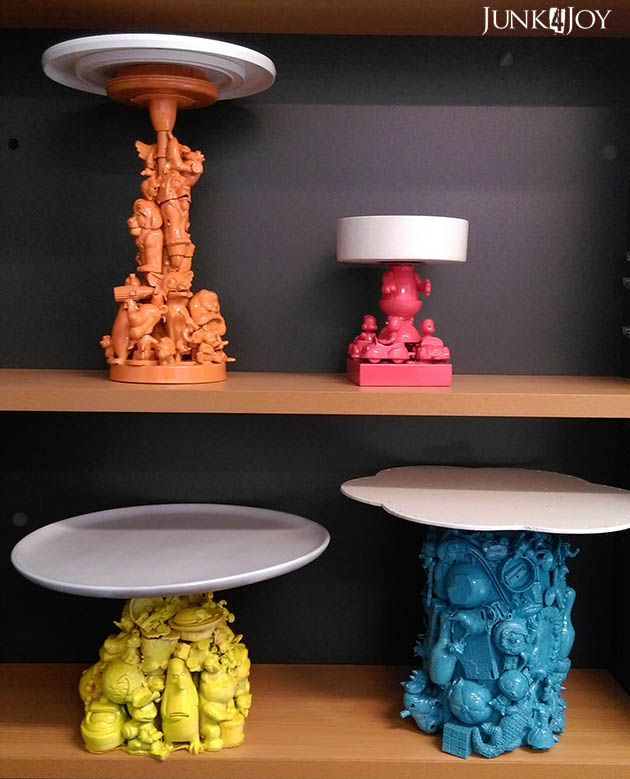
The red cake stand was made out of a small metal lamp base. The top was a flower shaped bit of wood we found which we sprayed gloss white (all the tops were sprayed gloss white to make them easy to clean). This one also went through a colour change.
You can see below how it started yellow but the yellow didn’t cover well enough. We found a brilliant red (I know it looks a bit pinky in the photos) which looked way better.
Here are the four drying in their first coats of paint. The smallest one with the bowl on top is more like a bowl for M&Ms or other lollies than a cake platter. Its made of a basically flat square base that a light globe fits onto without a shade. We used a snoopy body as the ‘stand’ and surrounded it with Peanuts characters in cars. The top is a wooden bowl I had lying around.
All five were entered as a group entitled Kids Party Collection at the Art From Trash exhibition this year. They sold instantly.
We also had a mirror decorated with toys all around it, that sold too, and we’re now working on another, larger, toy project.
Stay tuned.
z

Shared at:

updating the oval chalkboard

I’ve been really busy lately. I’m getting ready for a couple of big events. One is the Garage Sale Trail on October 22. 
I registered our garage sale on the Trail cause I have too much stuff and I really need to have a garage sale. I thought if I set a date I can’t back out of, I’ll actually do it.
Considering I was already interviewed for the local paper, I really can’t back out now.
The other big event is less public: I’m moving my grooming room into what is currently the storage room in the casita.
For the last few weeks I’ve been sorting through things every time I a few spare minutes. I began by moving things from the store room into the workshop area. This is so I have a blank canvas to work on – considering the room in question needs a ton or work… Holes in the walls patched, the timber on the ceiling needs loose paint scraped off, it needs repainting from top to bottom, a new door… You get the picture.
I’ve been stacking things in the workshop area – on top of eachother, in boxes, on top of the workbench… I started by sorting things by general use as I went and putting it in boxes: clothing, kitchen stuff, plumbing, lighting, miscellaneous… but that went by the wayside when I ran out of stacking room.
What I haven’t begun doing yet is price things. I figure I can do that later.
Later. Good word that.
Hours of work and I’ve barely scratched the surface. I plan to go through every room in the house and every shed, look at everything we have and decide whether it stays or goes. 
I’m using the method of “if you haven’t used it in a year, get rid of it” but I’m doing it my way. I’m going through all my finds and projects ‘to do’ and thinking “I bought this over a year ago and haven’t made anything with it – its time someone else made something with it”.
Among the things I’m planning to sell are coffee tables – some I’ve done something with, others I haven’t touched. A couple of cabinets I’ve remade. Some of my recycled light fittings. A collection of things I planned to make wind chimes with, Chalkboards.
Speaking of chalkboards, here is a remake of a remake. It started as an oval frame in 3 pieces a friend gave me. I first tried to fix it and used it as my shopping board for a while. 

I had to re-glue it cause I did a bad job first time round. Its still not perfect but I like it. There’s character in its imperfections.

Just one thing I’ll put in the garage sale.

Stay tuned for other great stuff I’ll be sharing here which will be for sale on the day.

October 22. Mark the day. If you live close enough, that is.

z

when a fry basket becomes a cloche

Don’t you love a quickie? Quickie project I mean!

I’ve had this base for quite a while. I originally made it for a birdwire cloche I’d made but ended up finding the perfect antique silver base for instead. So this wooden base just sat in my workshop, gathering dust.

As I prepare for the garage sale, going through everything I own and evaluating it, I found the base and thought, I wonder if the old sieve food cover I made would fit it? I know I have photos of that but I can’t find them right now so take my word for it… Anyway… Nope. It didn’t fit.

So I looked around and what did my eyes alight upon? A fry basket.

I tried and and it fit perfectly!

All I had to do was give it a wash, spray it antique white and find a knob that suits. I went with a tiny wooden knob which more or less matches.

And voila! A quick project finished.

Isn’t it nice when things just work?

And a quick project only takes 30 min and one year to complete.

z

our new old kitchen trolley

Today I thought I’d share the fun makeover of a sidewalk find.
Last year I picked up this pitiful serving trolley from the side of the road. The top was broken off, it had no lower shelf and it had at least 3 layers of bad painting… one of which was peach.

Well, that had to go!

I’d always planned to have a movable kitchen trolley in our kitchen but there’s really no room for it. Here you can see the original little side table I planned to make into a trolley for the kitchen.

I brought it in cause Wayne had bought a couple of appliances that were taking up space on our kitchen bench. I needed more space. But this little green side thingy wasn’t the right size… it was nice and narrow and had a drawer (missing in the photos for some odd reason) but it was too long, forcing the table over too far.

See that big blank wall? Watch this space…

Anyway, the little trolley is a bit better in proportions. Its not as long so the table doesn’t have to get shoved over too far, and its not too wide, allowing the dishwasher door to open when its in place! AND its taller and already has wheels!
It was meant to be! Thank you hard rubbish collection day!

This is a project I got the bug to do one afternoon and I almost finished it the same day. Basically it took me one afternoon and 4 weeks to finish.
Thanks to a broken finger.
I used the off cut of the pine slab I had left over from making the kitchen shelves. I cut it to fit on the top. Since it was a lot thicker than the previous top, it sits up above the trolley sides.

I cut the bottom shelf out of a piece of leftover plywood from the TV cabinet/room divider. (I’ll need to buy more plywood to finish that now as I keep using the bits I planned to use.)

The reason it took so long to finish was the whole circumcised finger thing. That put a damper on my creativity for a while. The main work was done though, all it needed to be finished was a couple more coats of polyurethane.

I could do those with one hand.

Once those were done I only had to lug it up to the house using one hand, one arm and one hip.
In pieces.
Then I put it in place and started using it.
Done.
Not bad for a piece of rubbish.
z

shared at:

recycled milk bottle armchair – alternative furniture

You know how sometimes there’s an idea in your head you just can’t find the time to do, yet you just can’t let go of?
Well this armchair is one one those.
I’d wanted to make usable furniture out of cardboard, papier mache and other recycled materials for a long time. I had this vision in my head …and one day I decided it was time to make it reality by building it at work in one of my creative programs.
I work in day support for people with intellectual disabilities and am lucky enough to have some creative programs.

We began by using a pallet base for strength. We used milk bottles as the main building material, using tape and glue to create the shape we wanted.

Next we cut and folded thick cardboard around the bottles to give the chair smooth surfaces.

The chair is quite big and it took weeks and weeks to build. We did many, many layers of papier mache to hold it all together.

At one stage we even began to colour the glue so we could tell how many layers we’d done!

As the chair began to take shape we found we had to add more bottles in order to get the size we wanted. We used cardboard. milk bottles and shredded paper to create the curved arms.

Once the chair was ready for its final layer we swapped out newspaper for book pages. We added detail on the arms so it looked more like a ‘real’ armchair.

The pages were stained using a mix of coffee and tea.

After all the work to put the chair together, we ripped a hole into the back so you can see the milk bottle and shredded paper construction.

I mean, what’s the point of it if you can’t see what its made of?

A little surprise on the back with this cute mouse illustration.

There’s another ‘rip’ on the other side too, as if a cat’s had a go at the chair.

Or a mouse?

Lastly we coated it all with clear polyurethane for protection.
We made a seat cushion for it, recycling an old sofa cushion with a new, reversible cover. Castor wheels on the base make it easier to move around and finish it off.

We entered our armchair in Art From Trash, of course.

Its pretty comfy for a cardboard, milk bottle, papier mache chair!

z

shared at:

the ‘don’t toy with me’ dress

I’m going stir crazy. Yesterday it took me an embarrassingly long time to butter my toast…
I’m eating oatmeal for breakfast ever day cause its easy to make one handed. I got bored of it but its back to oatmeal again. At least I make it nice. You know how you can get all those flavoured instant packs now? I make my own. I still buy the instant packs but I buy plain. I make it with water, then add milk, cinnamon, nutmeg. brown sugar and slivered almonds. yum.
I watched the entire 1-5 seasons of Game of Thrones. Wow.
I’ve gotten square eyes and a couch shaped butt. Can’t wait to get moving and working again. 
Meanwhile I called the hospital… they said they’d contact me with a followup appointment but I hadn’t heard from them. They forgot me… Now I’m waiting for them to follow up. Again.
So, meanwhile, how about I share another wearable art from trash entry made at work in one of my groups!
This one was an easy one.  We bought this tiny sized strapless little black party dress from the tip shop. I think its about a size 8…

Then we chose toys from our collection (we need more toys! please donate your old, broken, unwanted ones!) and put them on the dress using fabric glue. That way the group could do more since their sewing skills aren’t so great.

Even toys are heavy, so I found I had to add straps to keep it up. We made the straps blend in with the dress by extending the toys up on one side.
Here is the finished dress again. Not bad for a bit of discarded stuff.
It’d sure stand out as unique at any party!
z
Shared at:

steampunk faerie jacket

Today I’m sharing the work wearable art entry in the Art From Trash competition. This steampunk jacket was made by a ladies art group I work with.

It started with a jacket from the tip shop and a ton of odds and ends.

We collected anything we thought would work on the jacket and basically hand stitched it all on to get the look we were after.

We really wanted a bustle and that was added using layers of tulle from the discard bin.

We used stud earrings and other small bits of jewelry on the bustle to give to added interest.

One of the sleeves was cut short and re-finished with black velvet lace and beads.

We decided to run the decoration down one lapel and down one side of the back, bringing it together on the lace sleeve.

All the ‘junk’ we sewed onto the jacket is quite heavy so we had to make sure it was balanced. 
It turned out well and the ladies were all proud of being part of the project.
z

an orange phone table

Sharing another item I’m selling. This time a 60s phone table. Its in really good condition but I didn’t like the formica top – boring! Again, there are no ‘before’ pics cause when I decide to do something I often just start without grabbing the camera.

Montana gave me a hand with this job. She checked my work to make sure it was up to standard…

Basically what I did was use the offcuts of tassie oak planks I had, cut them to size, attached them to the formica top with glue, then sanded and planed them to create an even surface. Ok, not totally even. What’s the point of going old wood and making it perfect? You want some character!

Sanding and planing ended up taking off the weathered look so I had to bring it back. I didn’t want to stain the wood but wanted it to have some depth. I used another of my trusty artist acrylic paint washes. This time I used burnt sienna first to get the brown tones, then I used some black, especially in the joins.
The colours have brought out the beauty of the timber and its way prettier than the formica could ever be. The varnish on top just gives it a lovely finish which invites you to run your hand over the surface.

I have this for sale on gumtree and facebook for now, but I’d love to keep it if I had room for it.
z

Shared at:

industrial rustic table

Today I’m revisiting a project I did a couple of years ago. Not sure exactly when I made this table, but it was Wayne’s second desk for quite a while.
The base of the table is an old office desk from the tip shop. The top was ruined when I got it but that was ok, I got it with the plan of putting a salvaged timber top on it. That’s one plan I actually followed through on!

Up till now I’ve been quite lucky with salvaged timber – when we bought our farm there was tons of old wood just lying around the place, exposed to the weather and rotting away. We saved and reused, then stored what was left over. Wayne fixed and extended the stable using this wood. We revamped our woodshed using it. We’ve gone through a lot of it, but its not all gone yet.

I went through what’s left of the timber to find 4 pieces that matched. I didn’t. But I found some which were close enough. That’s the beauty of rustic… it doesn’t have to be perfect!

I had to brace the timber under the table to hold the slats together, and I used the holes in the metal frame to screw the top on. I then gave it a light sand to make sure there were no loose bits and to even out the worst of the wear.

Of course that ended up taking away the gorgeous grey weathered look I wanted.

Easy fixed. Using a mix of acrylic artist paints I gave the timber a wash, brushing on watery paint then rubbing it off, till I got the colour I wanted.

I used black wood putty in nail holes and filled the gaps between slats with gap filler. When that was dry I gave it a couple of coats of semi gloss polyurethane to make it easy to keep clean.

It was great as a desk. For a while. But it doesn’t have drawers. So I made Wayne a new desk (the less said about that one the better!), and this one is now for sale. If I had a large kitchen I’d keep it for an industrial rustic farmhouse look… but our kitchen is too small for such a long table. Its too cool to end up as a workbench, thus I’m trying to find it a new home.
Sometimes you just have to part with things in order to make room for new creations!
z

my first big love

You got it.
My first big love was David Cassidy.
On the way to the radio station to do our show today* we swung past the community market and I found this in one of the stalls. When I saw it I said “Oh, David Cassidy! I had the hots for him real bad when I was 13!”
To which the stall holder said “And still do!” as I oohed and ahhed at the photos and memories.
I guess he was right. You never do get over your first big love. How can you get over that smile with that one crooked tooth, those long dark eyelashes and those beautiful brown eyes?
I’m guessing never. He set the standard for the type of guy I’m a sucker for: deep brown eyes, long lashes, a mouthful of (big) teeth, with at least a couple of crooked ones in there. Dimples are a bonus but not a requirement.

But get a load of this book! Seriously. I’d have killed for this when I was 13.

“How to make David happy” is just one of the amazing articles in it. I bet the owner of this book read it like a bible and slept with it under her pillow. I know cause that’s what I’d have done….

This one takes the cake: “How David wants you to look”! 

But look at the photo of David in his corduroy trousers that end about half a mile above his ankles and his platform boots.
The seventies really were the era of fashion best forgotten.
This stuff is priceless. Did they do this sort of thing for every teen idol back then? No wonder the guy hit the skids. Who can live up to this sort of marketing!
Sheesh.
Anyway, it was a great trip down memory lane, with a bit of nostalgia for the feelings of adoration only a teen can feel for her favourite star.
*I mentioned a radio show. Its been a few weeks now that Wayne and I have been doing a 2 hour show at the local station on Sunday afternoons. Between 12 and 2pm. We play (or should I say *I* play) rockabilly, country, some hillbilly, some country swing, some rhythm and blues, some big band stuff. Pretty much the type of music you can dance to or tap your feet to. The stuff I used to dance to when I lived in Melbourne and used to go dancing 3-4 times a week.
We’re loving it!
Sunday is our day now. We sleep in, have brunch out, do the show, lots of laughs and great music, and then follow up with some coffee in town and perhaps bump into old friends. What a great way to spend a Sunday.
If you aren’t in range of the station (and lets face it, who is outside New Norfolk?) you can catch the show online at the TYGA FM website.
So there!
🙂
z