Unknown's avatar

About zefiart

Blogger, DIY-er, poodle lover, graphic designer, dog groomer, recycler, artist, wonder woman in my spare time.

kids party cake stands and other things

Since I’m on a roll blog-wise (and I don’t want to let down my fans – heheh) I thought I’d share another work project which was HUGELY successful.

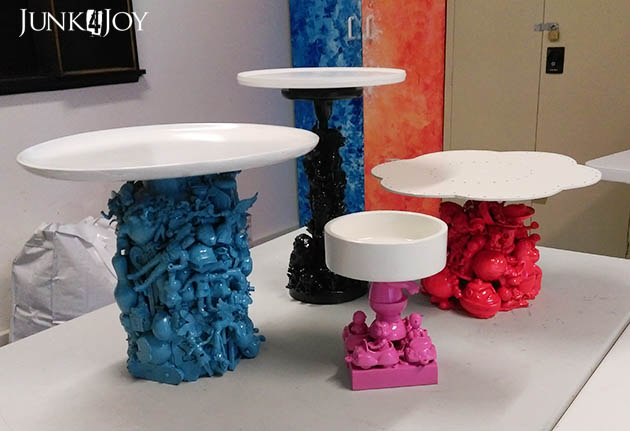
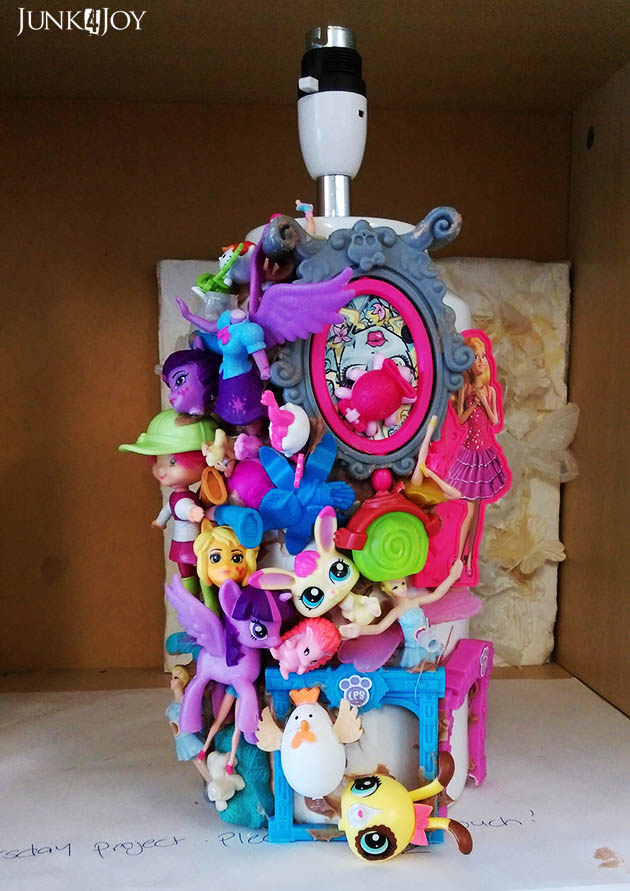
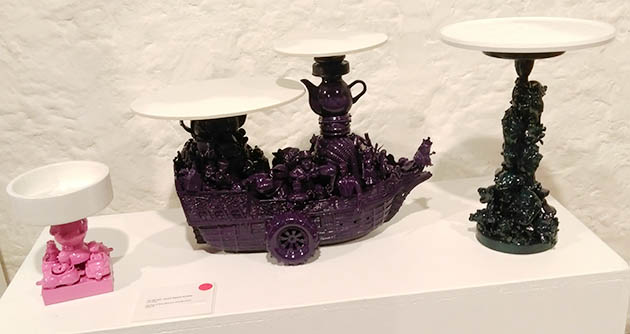
These kids party cake stands were made in my Thursday group. We spent time collecting, begging, stealing and borrowing old/broken toys from anywhere we could find them. I spent ages asking for things on FB and at work via our newsletter and noticeboards.

We also took a few trips to the tip shop to find some wooden or plastic platters and lamp bases to build them with.

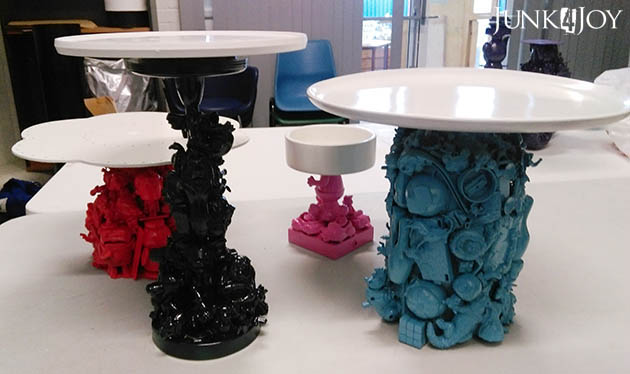
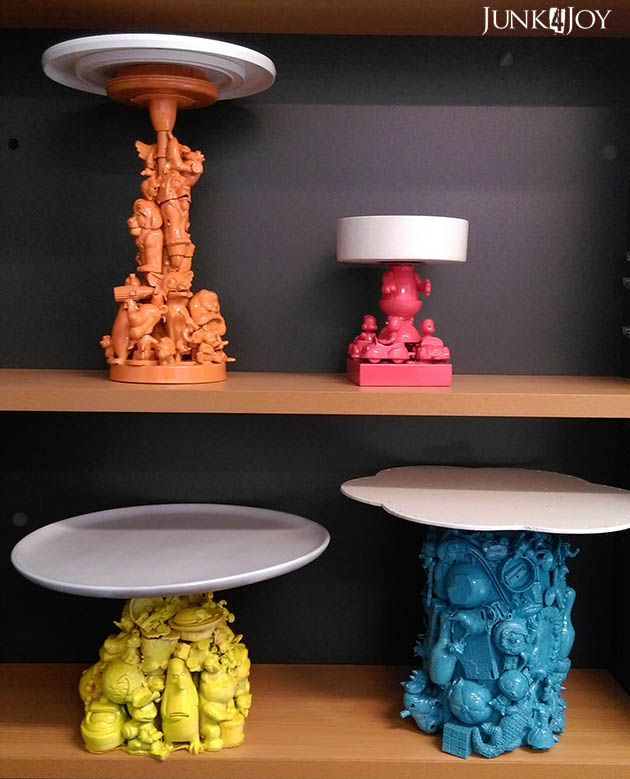
The tall one that looks black in the photos is actually a very dark blue. It began life as a tall metal lamp base which was covered in toy animals using liquid nails, then sprayed what we thought was bright orange. Unfortunately the orange sucked big time, so we tried a couple of other colours, ending up with dark blue for the best coverage.

Warning: if you plan to do this at home, beware. Not all spray paint is created equal. And not all of it matches the lid colour…

For the top we used different flat items as bases – anything from old cds to small wooden dishes. These were glued to the light globe holder on the lamp base and provided a nice big surface to glue the platters to.
The top to this cake stand is a plastic lazy susan which spins.
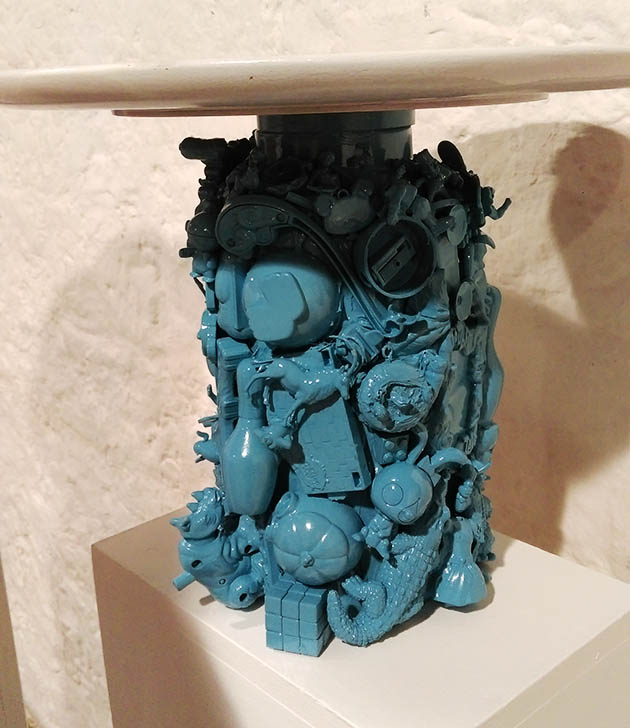
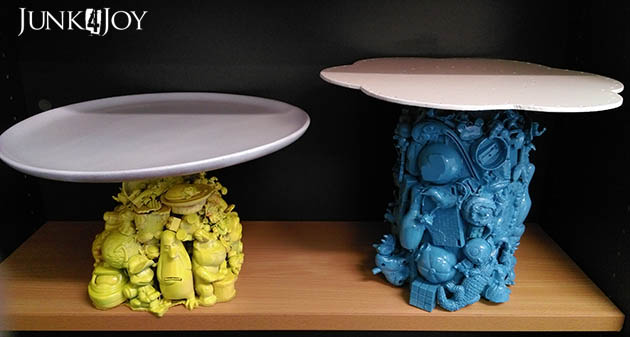
The light blue one was made using a large ceramic lamp base, covered in random toys and topped with a large wooden platter.
Here it is in progress. In this instance we removed the globe holder bit entirely and glued a flat surface to the ceramic base directly.
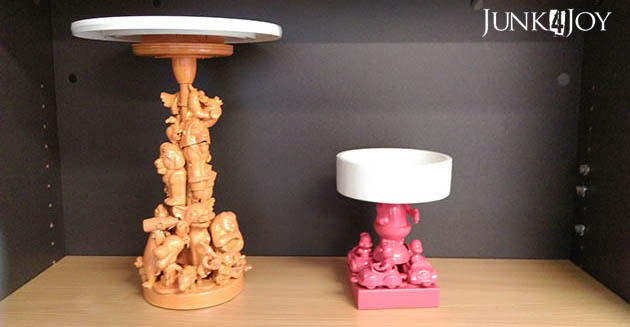
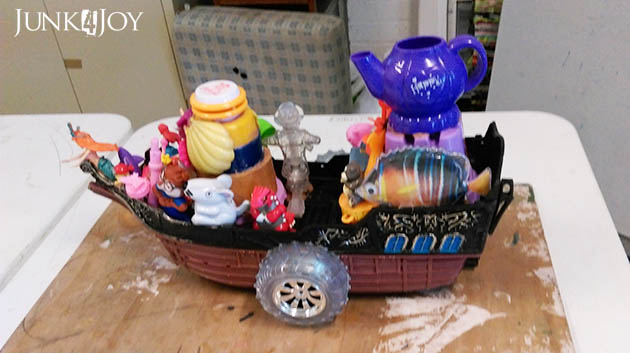
This one is my all time favourite. Its made out of a pirate ship, tea pots and all kinds of ‘human’ and animal figures plus anything ‘fishy’ we could find.. Oh and the wheels off a toy truck.
Sorry about the bad photo but its the only one I have of the pirate ship in progress.
The red cake stand was made out of a small metal lamp base. The top was a flower shaped bit of wood we found which we sprayed gloss white (all the tops were sprayed gloss white to make them easy to clean). This one also went through a colour change.
You can see below how it started yellow but the yellow didn’t cover well enough. We found a brilliant red (I know it looks a bit pinky in the photos) which looked way better.
Here are the four drying in their first coats of paint. The smallest one with the bowl on top is more like a bowl for M&Ms or other lollies than a cake platter. Its made of a basically flat square base that a light globe fits onto without a shade. We used a snoopy body as the ‘stand’ and surrounded it with Peanuts characters in cars. The top is a wooden bowl I had lying around.
All five were entered as a group entitled Kids Party Collection at the Art From Trash exhibition this year. They sold instantly.
We also had a mirror decorated with toys all around it, that sold too, and we’re now working on another, larger, toy project.
Stay tuned.
z

Shared at:

waterfront property. again.

There’s been rain, bad weather and devastation in South Australia this last week and someone on FB sent me a message saying they hoped we were well. I replied that we had perfect weather – sunny and gorgeous.
I spoke too soon.
It began raining yesterday afternoon and didn’t stop till this afternoon. Lots of water. Strong winds last night, but thankfully only for a short time.
Now, we’re used to a bit of flooding every year, but this is the second time this year and its the worst we’ve ever seen since we moved here.
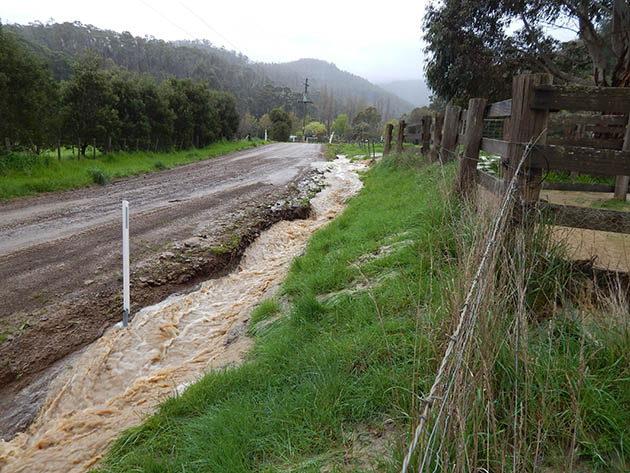
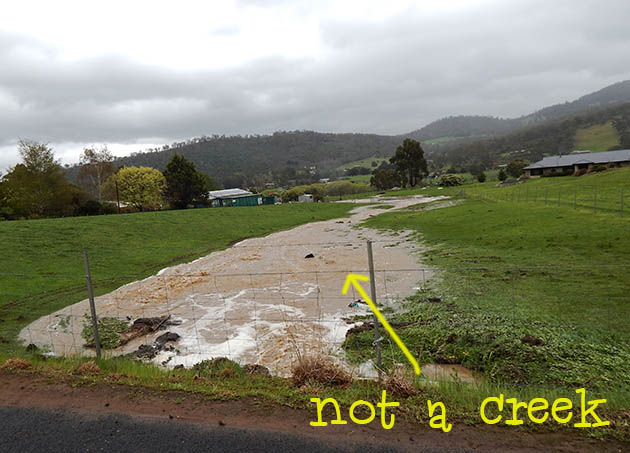
We have two creeks that run down from the hills behind our place, join together outside our top paddock, then down through both our property and the next door neighbours. These overfill with sand every year (which washes down from properties above us) and break out into our paddocks. Normally, we get a breakout in the same spot just to the right of the proper creek. Today we had a breakout in two more places, further up the creek’s path. 
We could offer white water rafting in our paddocks today!
Lucky we don’t keep any animals in our stockyards!

We’re really getting sick of fixing our driveway down at the gate. We just spent money on that at the end of summer, filling in the ruts and putting in a new culvert. That all washed away today.

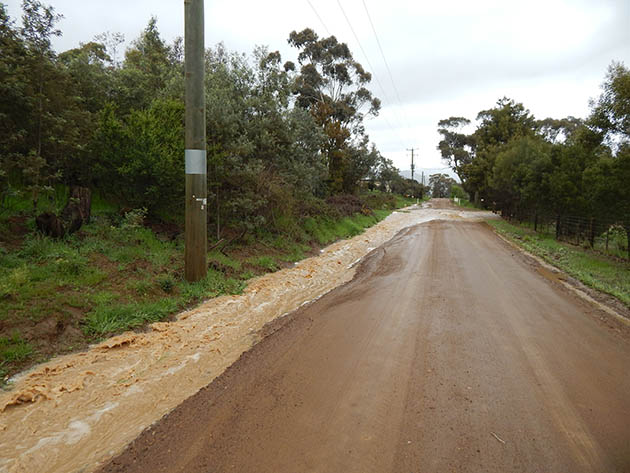
The worst of it is that the water doesn’t even go under the bridge where its meant to, it comes out onto the road, washing away huge chunks of it…

Then it rushes down to a low spot and crosses the road. I had trouble crossing that section of road this afternoon, same as at our driveway.

Lots of people had water issues today though. Tons of properties along our road had waterfalls and white water crossing their paddocks.

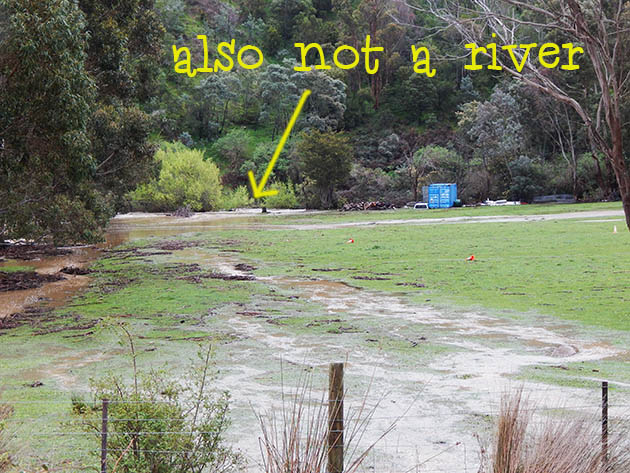
For the first time ever, however, there was a river in the valley on the lower side of our road. Entire paddocks were under water there.

I spoke to a few neighbours on the road and have decided its time to get the council to be more proactive in this. They were out today digging up blocked culverts but its not enough. They need to do more to sort this problem out. Its not just a property owners problem, its a council problem cause it affects roads and infrastructure.

Anyway. I say we have nothing to lose by getting a mob group together to speak to the council.

I’m a mover and shaker.

Wayne will say I’m a troublemaker.

z

sculpture and soul searching

I had a comment about how I’m blogging a lot lately. Unlike the huge gaps between posts most of the other time.
The fact is I know I’m a poor blogger. Good thing I’m not trying to make money from this blog!
I began blogging as a way to share news and photos of our lives with friends overseas. Then I began to share projects and got into the whole DIY/repurpose/recycle blog thing. I enjoy that stuff, I do it for myself anyway, why not share with others who like the same thing? Makes sense, right?
But… there are days I just don’t feel like blogging. I have nothing to say, I can’t be funny, or I’m flat. Its one of those vicious circles: when I feel good I’m creative, when I don’t create I feel flat. And work sometimes drains me to the point where all I want to do when I get home is curl up and zonk out in front of the TV.
On those days I think about giving up the blog. I mean, who cares what I make or do? I’m just some random person living on a small island on the bottom of the world. I have nothing important to say. 
I think the only reason I blog and share is cause I’m a showoff. I used to accuse my brother of being a showoff when we were kids but turns out I’m the one. 
Who knew…
Anyway, I’m still here, still blogging even if sporadically at times. You could say I like to be unpredictable. Like with the stuff I blog about. Its not all DIY, craft, decorating, gardening or any one thing in particular. Its a blog about me and my life – and I’m a wierd kind of jack of all trades kind of person.
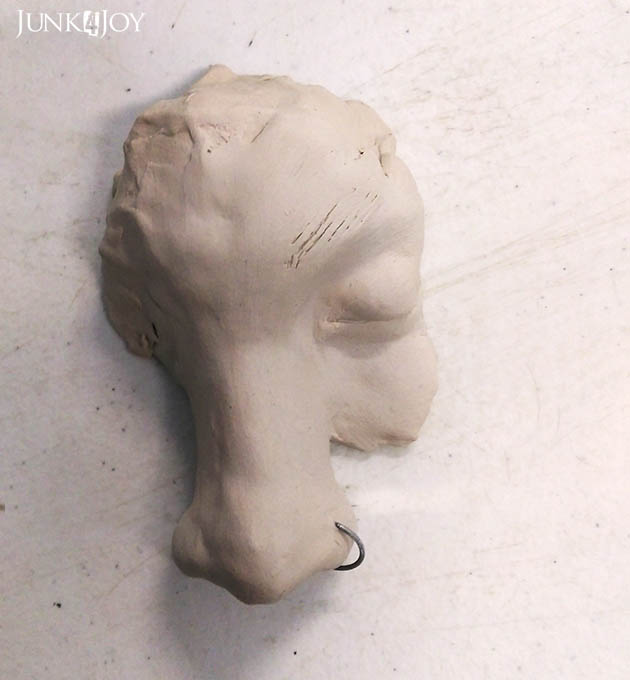
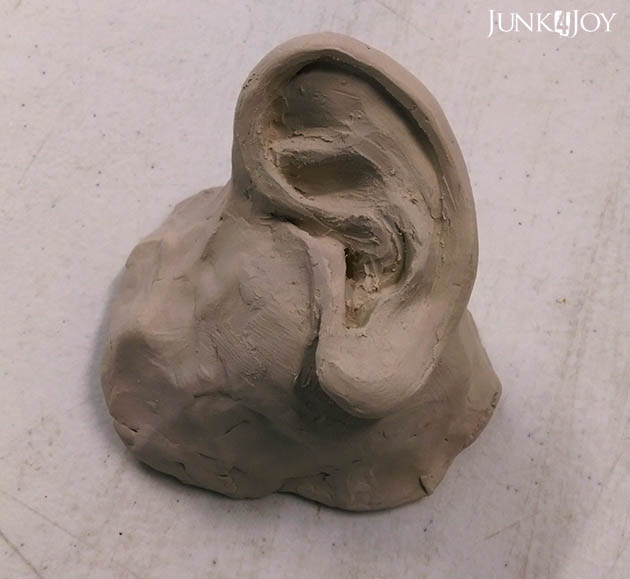
So today I’ll share some sculptures. The theme was ‘body’… so body parts it is. As I found when making the animals, I love sculpting.

These sculptures are more along the lines of ART than the animals. I wanted them to look like an unfinished work.

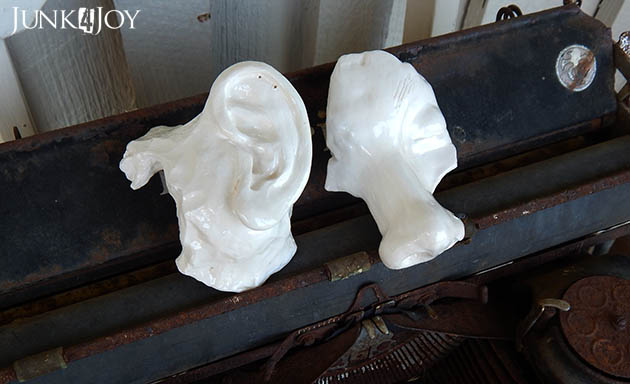
Here they are finished. Difficult to photograph cause they’re so bright white. 

Unfortunately the wire nose ring burned off in the second firing. I’ll try to replace it but the bit remaining is in really firmly. I also need to make earrings to go in the holes I made in the ear.

So there you go. Another completely different thing.

z

falling in love with barbie all over again

When I was a kid I had a Barbie. In fact, I had a Barbie and a Skipper. I loved my Barbie, but I wanted a newer Barbie with long hair cause mine had stiff short hair. I also wanted the bendable knee type, Skipper had bendable knees cause I got her years later.
I’m not sure what the story of my original Barbie was, but she was a very early 60s model, most likely 1962. Since I was too young for a Barbie at that age, I’m guessing someone bought her for me and I didn’t get her to play with till I was older.
Anyway, why am I discussing Barbies?
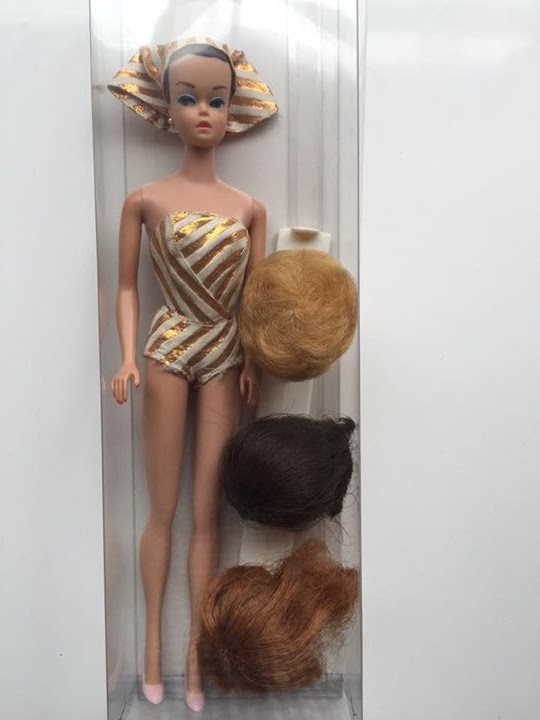
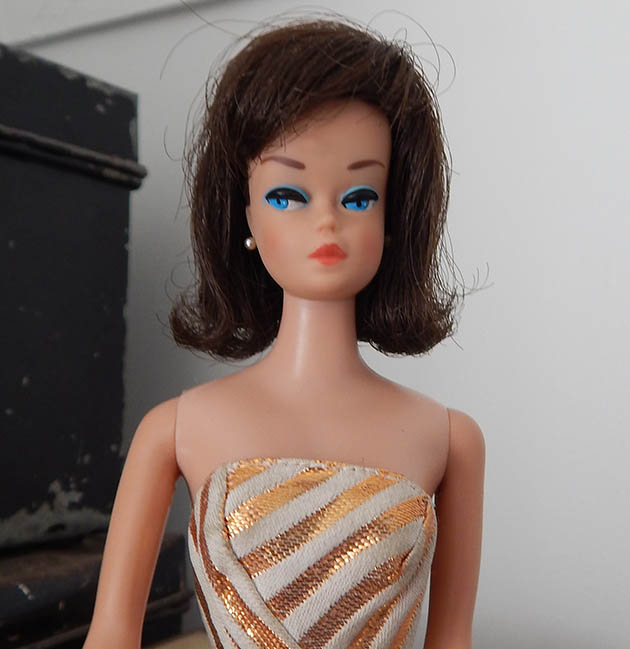
A couple of weeks ago someone posted some Barbies for sale on Facebook. I saw this one and my obsession began.

This is the Fashion Queen Barbie. Early 60s.

Needless to say I bought her!

But it got me thinking about my first (and only) Barbie. My mom gave her and all my other dolls away. No going back for me.

I began to feel nostalgic. Why is it that the older I get, the more I want stuff from my childhood?

Whatever.

I began to research Barbies. I learned about the different early models, the dates, the markings on their butts.

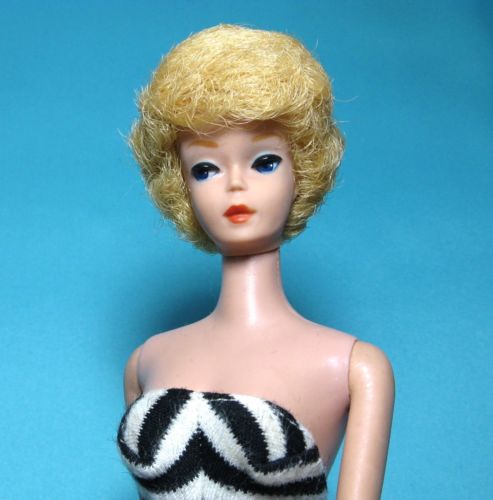
What I really wanted was to find, and buy, the same Barbie as the one I had when I was a kid. This is what I had: a blonde bubble cut Barbie.

This is more like mine looked like – stiff hair like a helmet. No fun for a young girl.
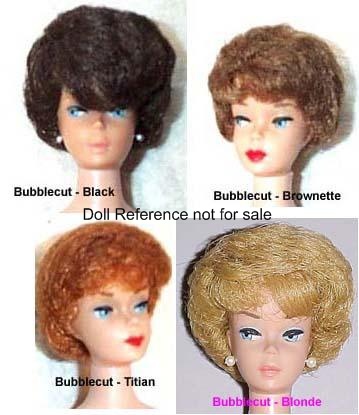
Turns out, bubble cut Barbie came in 4 colours.
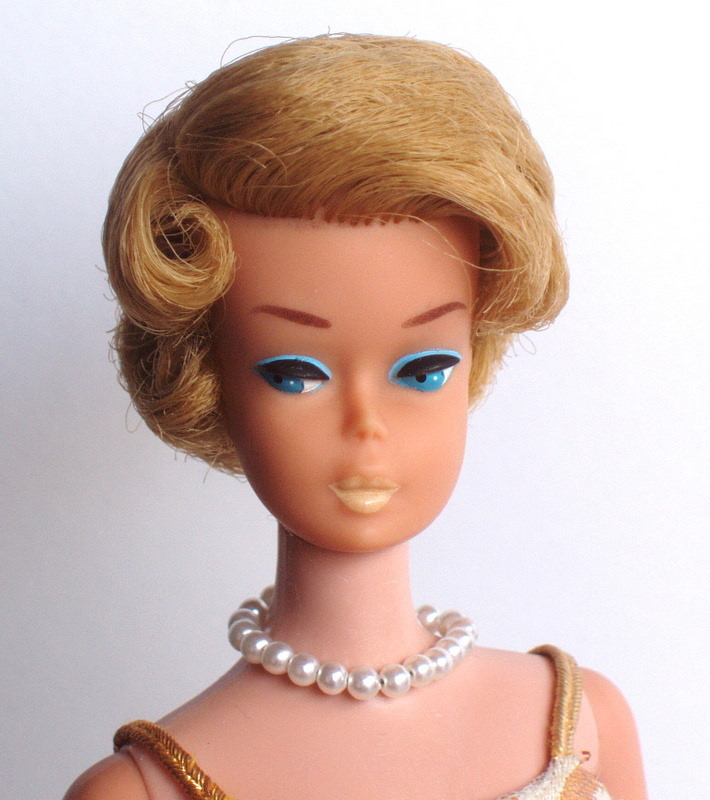
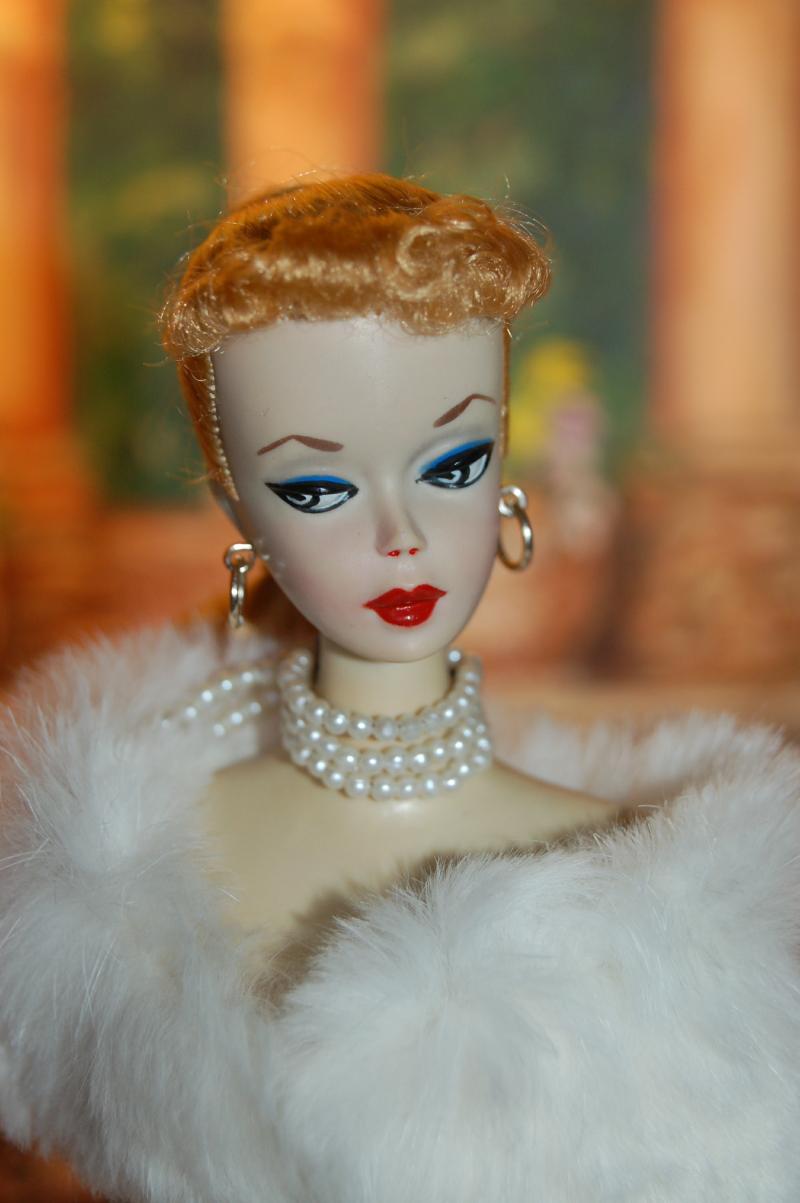
While researching I stumbled upon a couple of sites for Barbie restoration. Its amazing what these people can do with Barbie hair! I mean, look at this!
How wonderful to get a bubble cut Barbie and have her hair redone to look this glamourous!
I want more Barbies now. I’m only interested in the hard plastic ones which were the earliest Barbies made. I dislike the cheaper feeling late models. Plus I think the early Barbies are just so beautiful.
I’ve already got the Fashion Queen Barbie – this is her in the brunette wig.
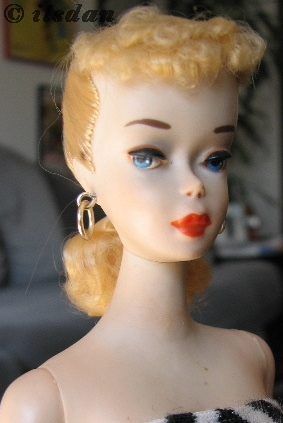
I still need to get my blonde bubble cut girl, but I also want a ponytail Barbie now! There are different versions of the ponytail model, some have longer ponytails. I think I want a brunette but the blondes are gorgeous too.
Love the curly fringe on these girls. They’re so fifties.
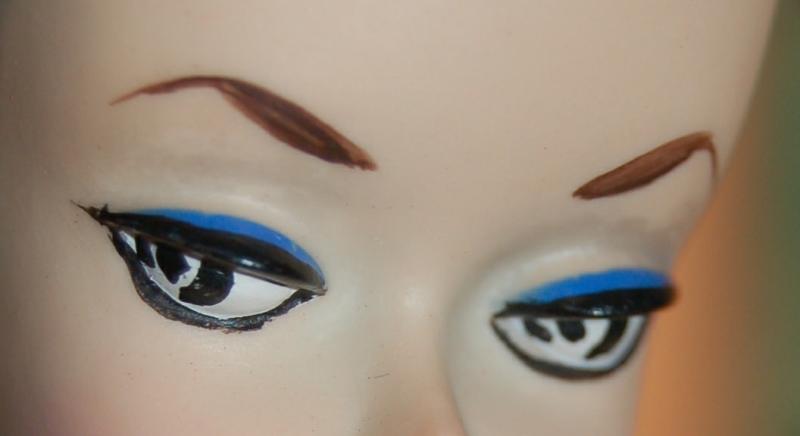
I’m no expert for sure, but I believe the earliest Barbies have the most striking eyes.
I think what I’m falling in love with all over again is the beauty of these dolls. They’re just so pretty.
Is this the beginning of a new collection? I sure hope not. I don’t think I can afford to buy a lot of these old Barbies. I want TWO more and I’m done. 
That’s my story and I”m sticking with it.
Remind me to share some photos of my other collections at some stage.
z

new grooming room stage 1

Oh man!
I feel like I’ve been hit by a bus.
I started work on the future grooming room today. I worked on it for about 6 hrs then had a shower and called it a day. It was a gorgeous day, I should have sprayed weeds and brushcut after ripping out walls, but I was more than ready to sit on the couch by then.
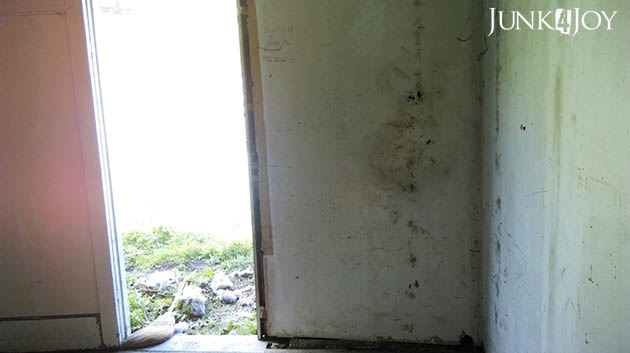
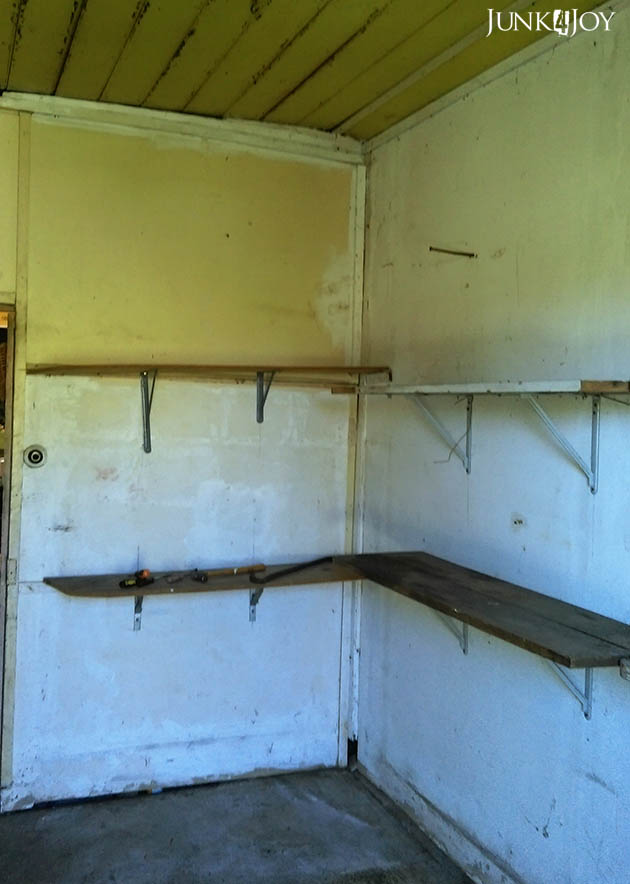
How about a glimpse of what I’ve been doing? This is what the grooming room looked like this morning. It was mostly empty but there were still quite a few things to be moved out for the ‘blank canvas’ I was after.
I managed to lug the cabinet and all the bits and pieces out of the room. Then I swept up all the rat poop. Eek.
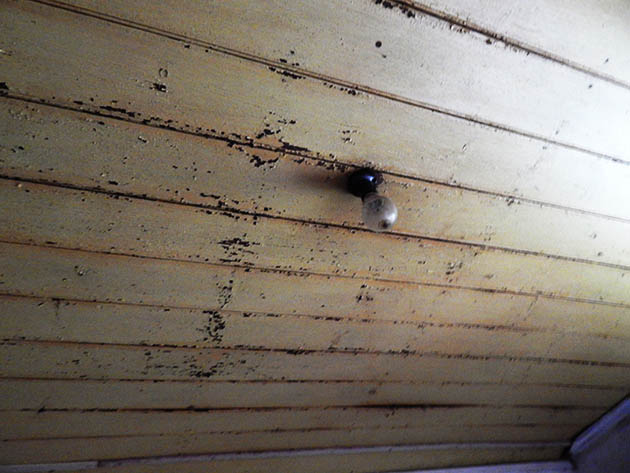
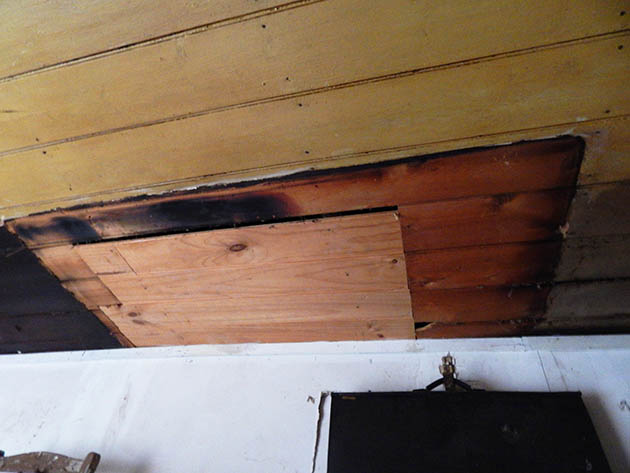
This is what the ceiling looks like in there. Badly peeling.

And badly patched.

With plenty of holes. Ugh.
No idea how I’ll deal with that yet.
The walls were filthy, lots of holes in the plaster (drywall for you americans!), old mold in places, and tons of gaps between the floor and the ceiling. Double eek.

There were quite a few shelves to take down. What I imagined would be a quick job was a monster. Some of the screws were so hard to remove I ended up breaking the plaster and prying one of the suckers off.

Since I’d already pulled out a section of plaster I thought, what the hell… I’ll pull it all off and pine line the entire room. Fresh start. All nice and clean…

Surely that won’t be so hard, right? I mean, how hard can it be? First I’ll have to dig out my drop saw which is buried under garage sale items, then move the bench (which is darn heavy) to a spot where I can actually use it… then I’ll have to measure (not my best skill), cut and nail the pine to the wall. I have a nail gun. Surely I can do that.

Right?

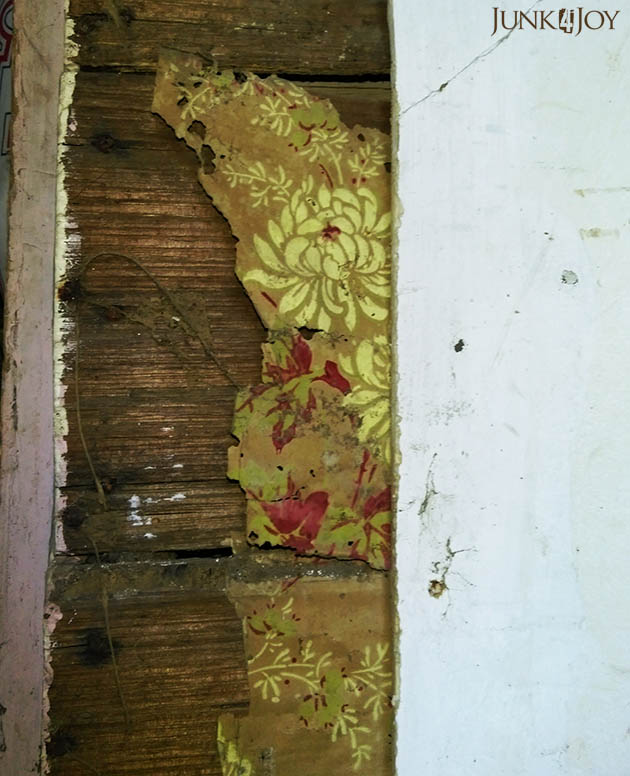
Anyway, when I pulled off the plaster on the wall leading to my workshop, which is lined in timber, I found this gorgeous moth eaten wallpaper. I wish it had been in better condition. I’d have kept it!

I found a lot of other stuff too. Bird skeletons for one thing. Oh fun. 
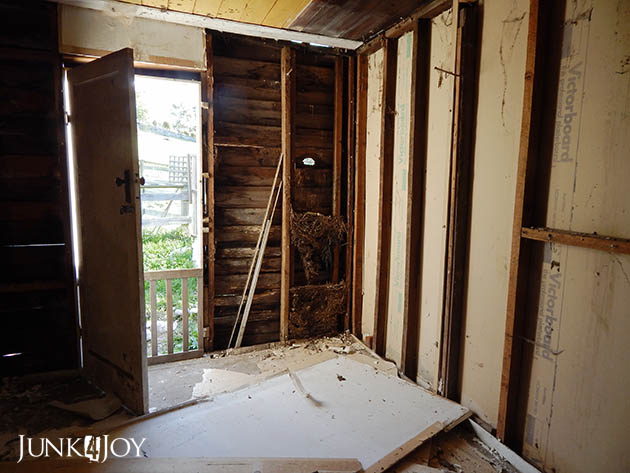
So, in the end I pulled the plaster off all the walls. This is what the room looks like now.

And yes, thats a hole in the outside wall you see there. With years of old bird nests in the wall beneath it. Triple eek.

Mouse droppings, rat droppings, dead spiders (no live ones thankfully), tons of bird dust… thankfully I was prepared for all eventualities.

I’ve organised an electrician to come give me a quote and tell me when he can rewire the room. I need more power points and I want fluoro lights. Sure hope he can do it soon.

Tomorrow I’ll go buy the timber lining I need. I’ll buy seconds quality pine so that shouldn’t be expensive…

First job is to empty the room of all the old plaster – that in itself will be a big task and will necessitate a trip to the tip.

I can’t do all the walls till the electrician has done the wiring but I can start. I can also replace the outside door. I’m considering cutting the inner door in half to create a barn door so I can keep dogs in the room but still have circulating air.

I plan to put some vinyl on the floor to make it easier to clean and better to stand on.

I now have to add “replace the rotten bits of wood on the outside wall” to the To Do List. I never planned to do that. Maybe I’ll just replace the worst ones…

I always under-estimate the time a job will take, or even how hard it will be. Hopefully once the messy stuff is done the rest will flow easier.

I can dream, can’t I?

z

love the coffee and decor

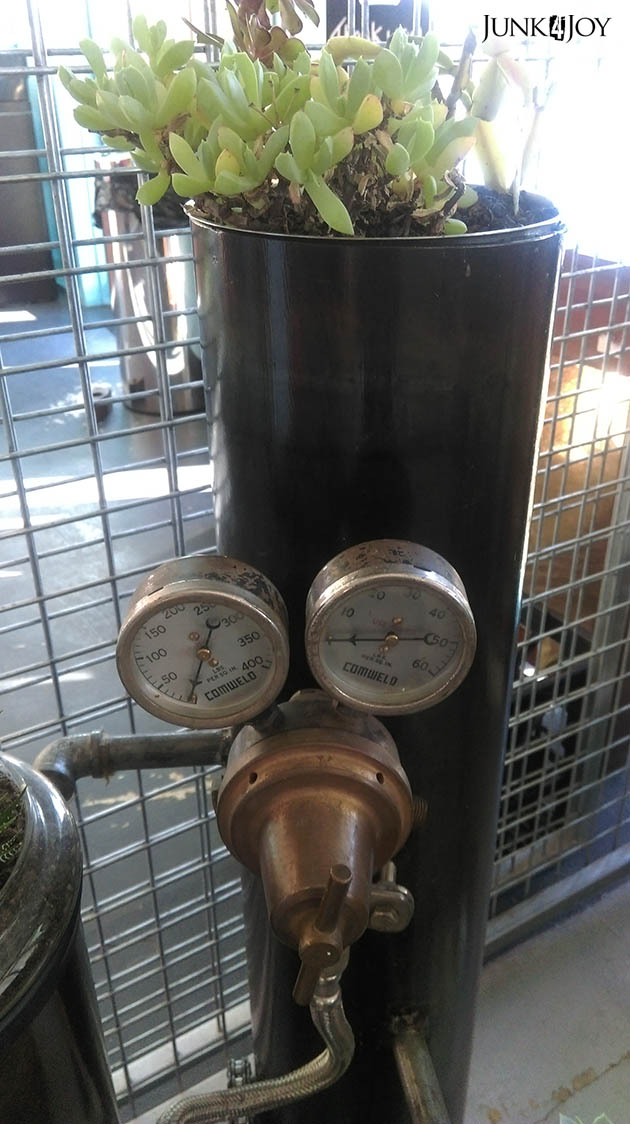
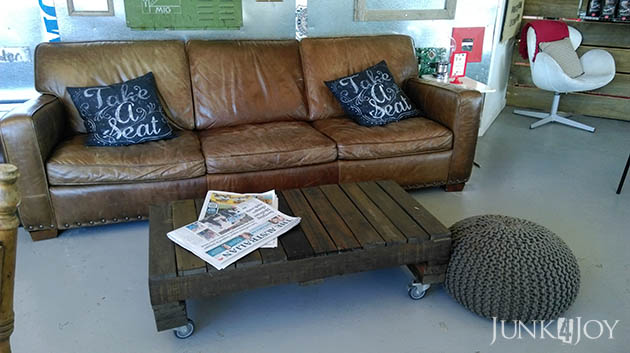
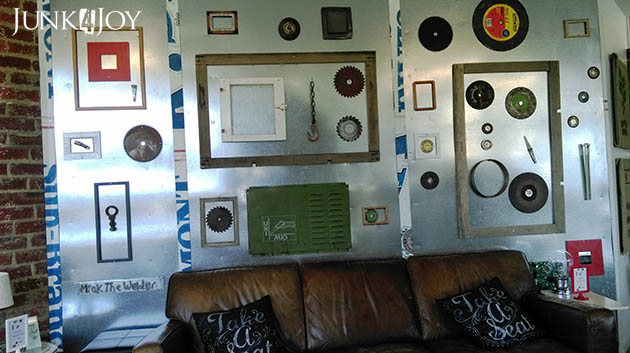
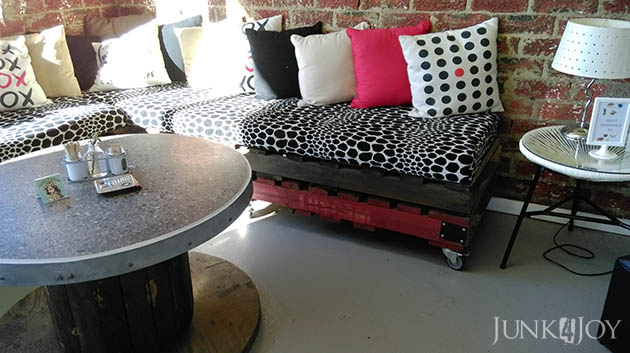
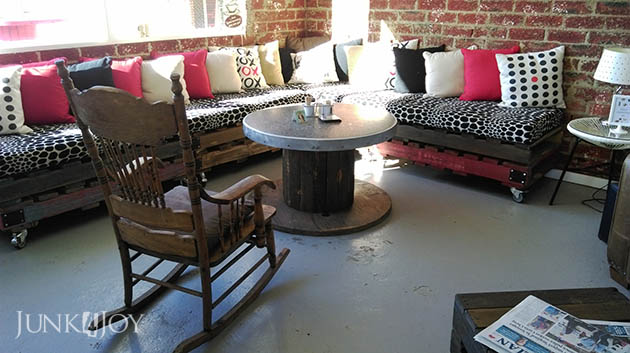
Some mornings we actually have time to grab a latte before work. This place is one of our favourites. Its a coffee shop attached to a laundromat in North Hobart called Gioconda. The coffee is great, the food is great, and the decor is fantastic!
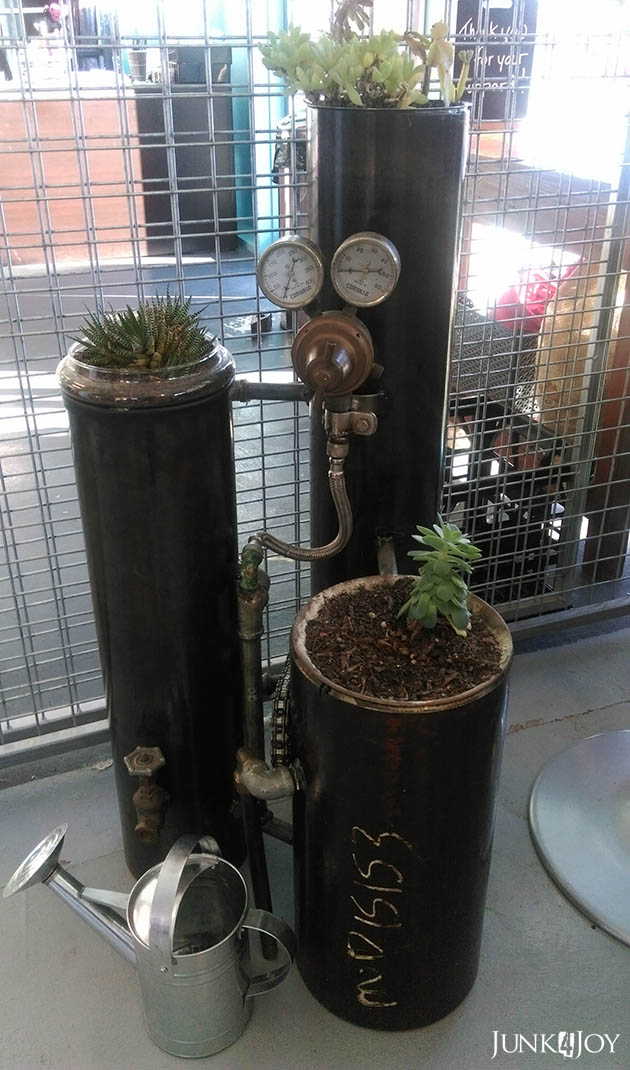
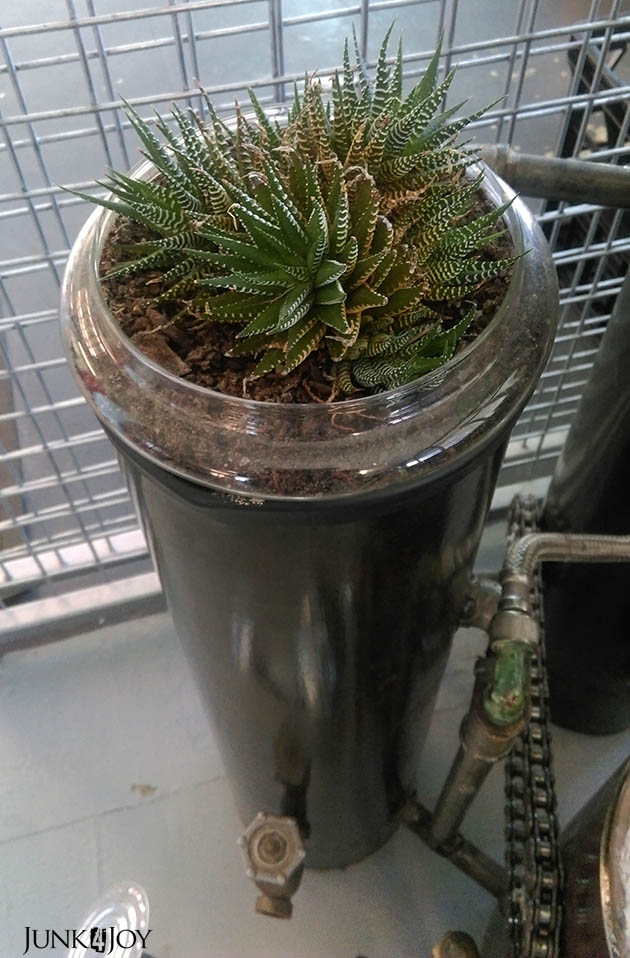
Get a load of this planter!

Pretty darn cool!

And then there’s the couch… its almost the same as the couch I almost bought. Love the industrial coffee table.

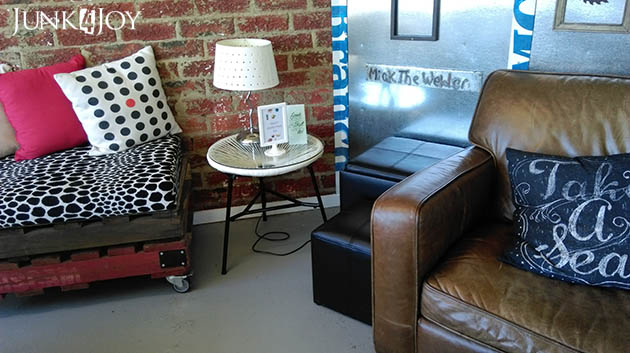
What about the pallet couch and the spool coffee table? How can you not love it?

Love the mix of styles – retro, deco, 60’s, rustic. Somehow it works.

I just had to share the pics cause I really do love this place. Next time you’re in the area why not drop in for coffee or to get some washing done.
Disclaimer: I am not being paid for this post but if I’m offered free coffee I won’t say no…. 
z

enamelware caddy

You know I have been busy lately. Not an excuse, just a fact. Somehow, among the many busy things I’ve been busy with, I’ve managed to do a few small projects.

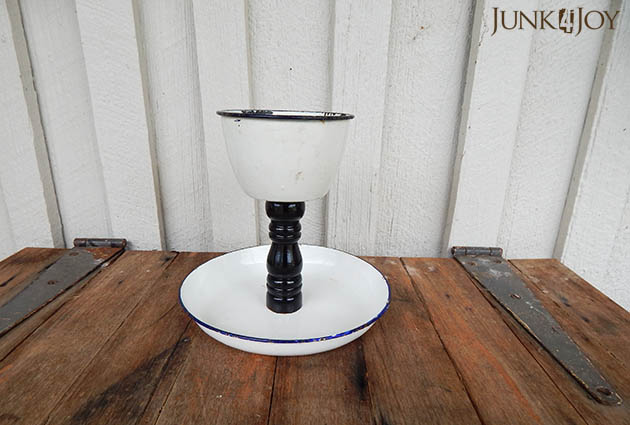
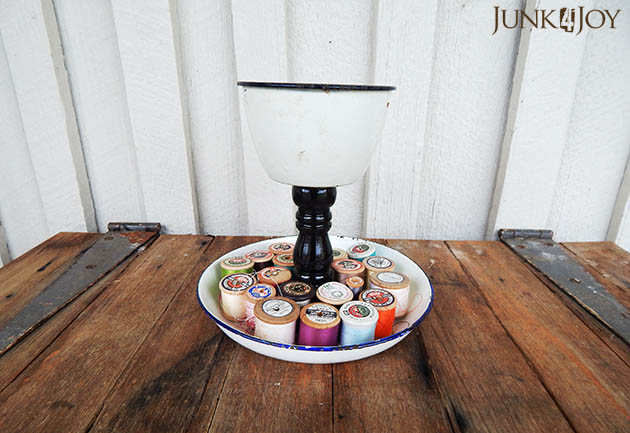
Like this cute enamelware caddy.

So, what’s it made of you ask? Well, an enamel bowl, an enamel dish and a wooden salt grinder.

Yep. A salt grinder.

I sprayed the grinder black, drilled a hole into the bowl and there was a convenient hole in the top of the grinder to join them together. The bottom was glued onto the dish.

Its now a handy spot for keeping stuff. Whatever stuff you have that you have need of a spot to keep it in. A desk tidy to hold office stuff. A bathroom tidy to hold bathroom stuff. A kitchen tidy to hold kitchen stuff.

You’re limited only by your imagination (and the size of your stuff).

This is one of the items I’ll be selling at my garage sale on the Garage Sale Trail on October 22.

z

updating the oval chalkboard

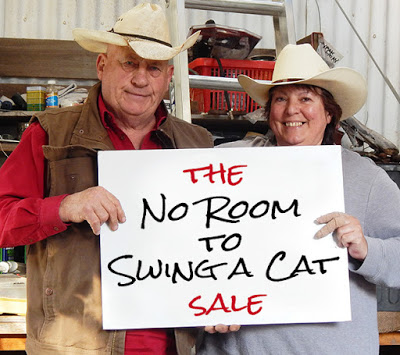
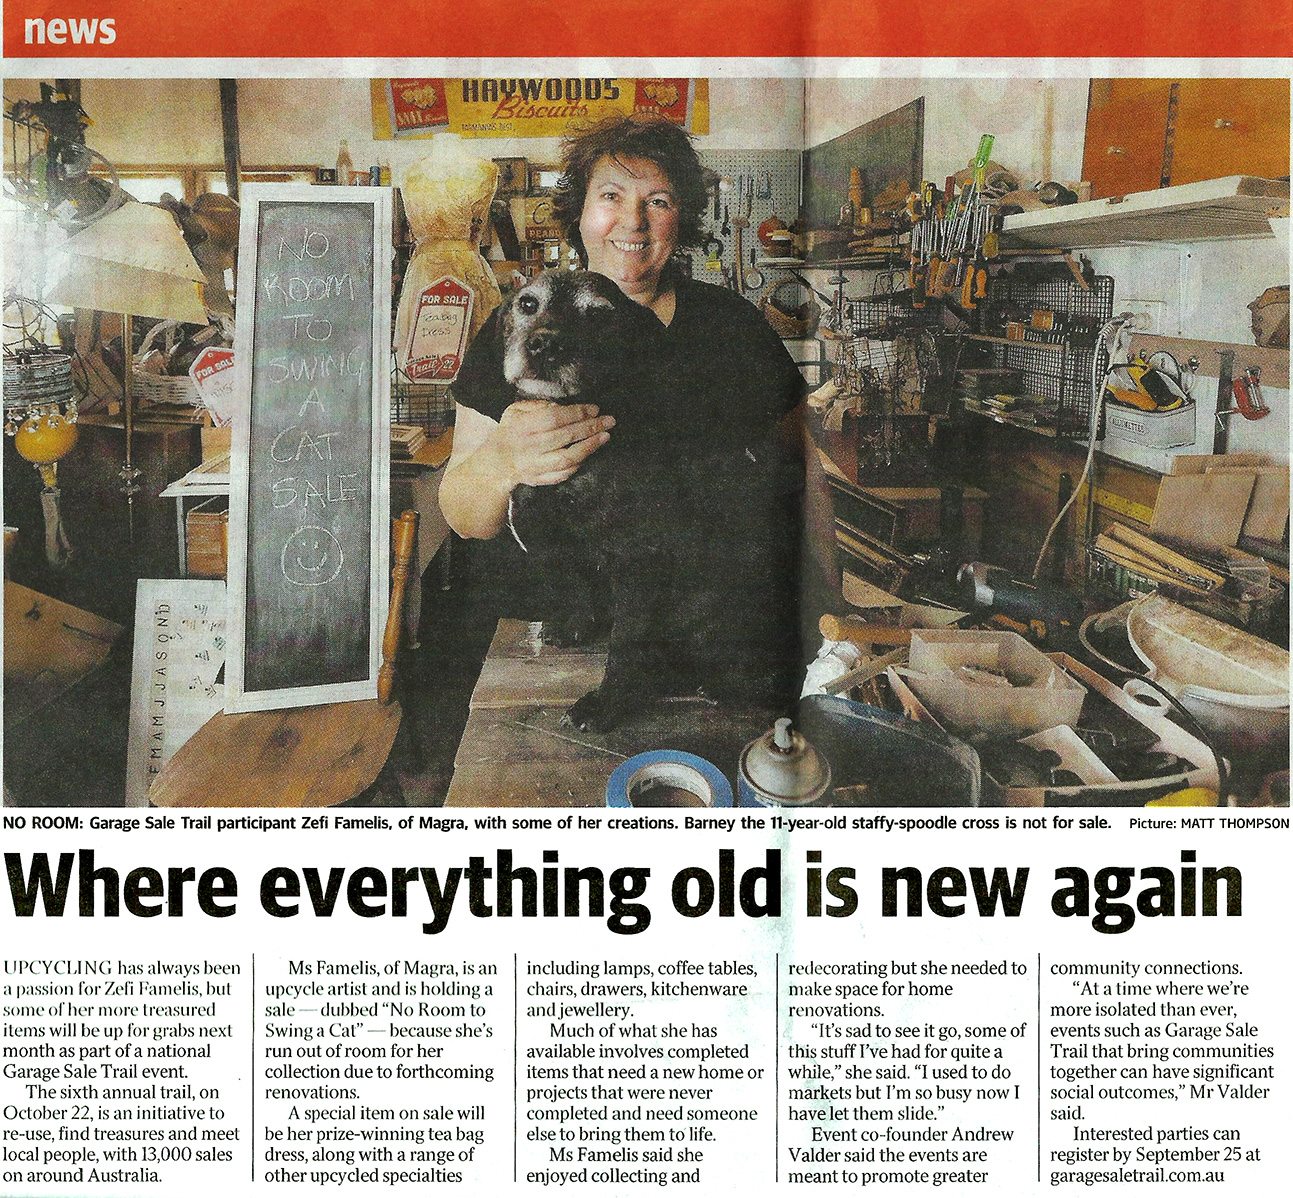
I’ve been really busy lately. I’m getting ready for a couple of big events. One is the Garage Sale Trail on October 22. 
I registered our garage sale on the Trail cause I have too much stuff and I really need to have a garage sale. I thought if I set a date I can’t back out of, I’ll actually do it.
Considering I was already interviewed for the local paper, I really can’t back out now.
The other big event is less public: I’m moving my grooming room into what is currently the storage room in the casita.
For the last few weeks I’ve been sorting through things every time I a few spare minutes. I began by moving things from the store room into the workshop area. This is so I have a blank canvas to work on – considering the room in question needs a ton or work… Holes in the walls patched, the timber on the ceiling needs loose paint scraped off, it needs repainting from top to bottom, a new door… You get the picture.
I’ve been stacking things in the workshop area – on top of eachother, in boxes, on top of the workbench… I started by sorting things by general use as I went and putting it in boxes: clothing, kitchen stuff, plumbing, lighting, miscellaneous… but that went by the wayside when I ran out of stacking room.
What I haven’t begun doing yet is price things. I figure I can do that later.
Later. Good word that.
Hours of work and I’ve barely scratched the surface. I plan to go through every room in the house and every shed, look at everything we have and decide whether it stays or goes. 
I’m using the method of “if you haven’t used it in a year, get rid of it” but I’m doing it my way. I’m going through all my finds and projects ‘to do’ and thinking “I bought this over a year ago and haven’t made anything with it – its time someone else made something with it”.
Among the things I’m planning to sell are coffee tables – some I’ve done something with, others I haven’t touched. A couple of cabinets I’ve remade. Some of my recycled light fittings. A collection of things I planned to make wind chimes with, Chalkboards.
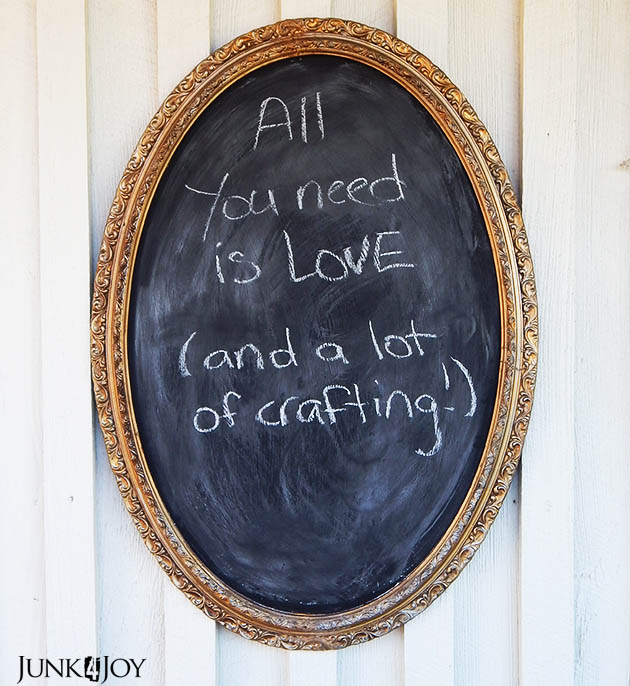
Speaking of chalkboards, here is a remake of a remake. It started as an oval frame in 3 pieces a friend gave me. I first tried to fix it and used it as my shopping board for a while. 

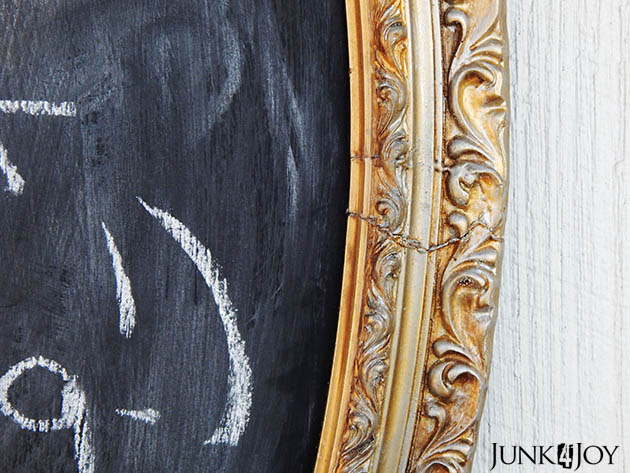
I had to re-glue it cause I did a bad job first time round. Its still not perfect but I like it. There’s character in its imperfections.

Just one thing I’ll put in the garage sale.

Stay tuned for other great stuff I’ll be sharing here which will be for sale on the day.

October 22. Mark the day. If you live close enough, that is.

z

the embankment 2 years on

Its spring. Everyone loves spring cause flowers bloom and make the world pretty.

The downside of all this thriving is the grass (ie weeds that form what we affectionately refer to as our ‘lawn’) is also growing… like… well… weeds. 

I find myself walking across the yard and see a particularly obnoxious weed staring me in the face, grab my grandpa weeder* thinking “I’ll just pull up this one, oh, and maybe that one…” and an hour or more later I’m still pulling up weeds.

This is the time of year you need daylight savings just to keep up with the garden!

However, its also the time of year when things begin to look amazing. This afternoon I mowed and was thinking how I need to get out the brushcutter (tomorrow is another day!) when I looked at the embankment and realised how my dream is finally coming true.

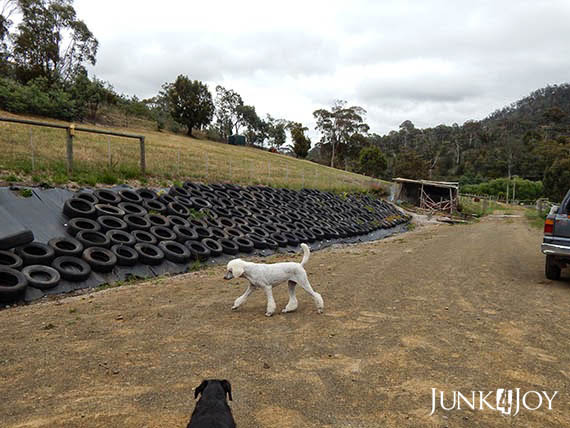
Do you remember when I first conceived of the embankment? When we moved here the driveway was just a slope, directing rain down onto the ‘lawn’ and under the house. We got the driveway levelled, put in a retaining wall alongside the house and were left with a really steep embankment which I thought would look lovely covered in flowers.

But the soil there is like cement – hard clay. So I figured I could make it work if I used old tyres, filled them with dirt to give the plants something to grow in till they could find their way into the cementlike dirt below. Its been a long, tiring project, but its finally beginning to look like I envisioned.

Take a trip down memory lane with me.

This is what the driveway looked like when we bought the farm. A gentle slope, covered in weeds.
It offered more space to park but it wasn’t pretty.
The first step was to get in an excavator to level the driveway, which meant cutting into the slope, creating a steep embankment. Excuse the photo. Most of my old photos were lost when my external drive died.
Next step was a retaining wall to shore up the driveway but basically that was it. Done. A steep, dry, ugly embankment.
But I have dreams. First I tried planting succulents on the slope thinking that nothing else would grow there – and succulents can grow in anything. Well, some grew but they were taking forever and weeds began to take over again.
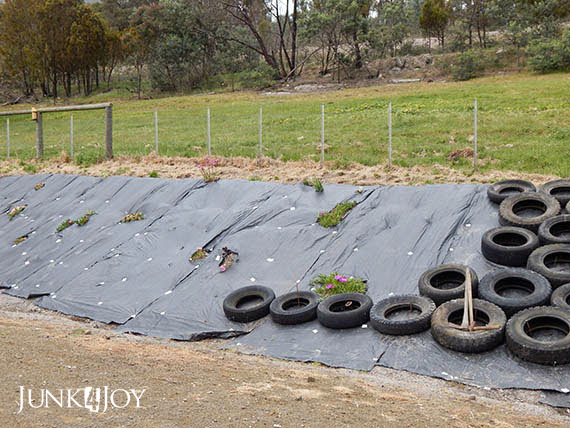
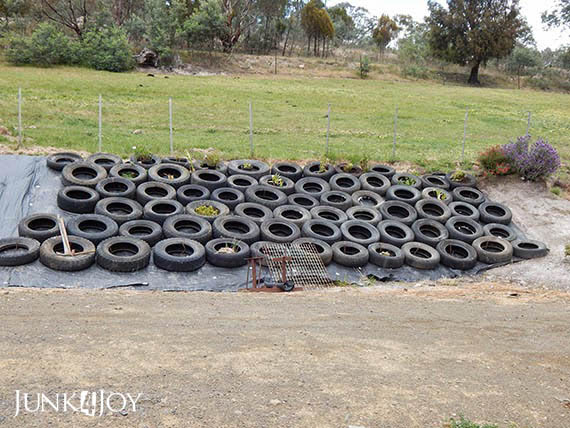
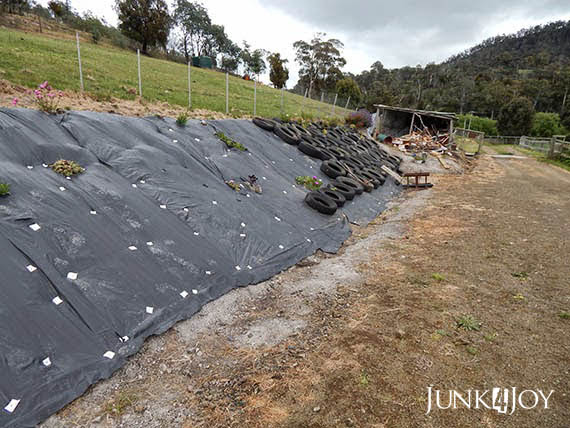
So my next idea: tyres. First we put down weed matting to stop the weeds. Then we put down tyres.

At this stage everyone said it wouldn’t work. The tyres would slide down. The weight of the tyres, filled with dirt, when wet, would create an avalanche.

I didn’t listen. I got my gardener/helper to hammer in metal stakes on the bottom row and randomly on the upper tyres in order to keep them in place. I figured they’d stay in place once the plants took root, as they’d act as anchors.

At first I kept the scattered succulents where they were, placing tyres around them. Later on they were dug up and moved. I water the embankment in summer and the hose reaches about 3/4 of it. The last quarter is where I’ve moved most of the succulents as I want the sections closer to the house and gate to be vibrant with flowers. I’m happy if the far end has green covering it.
(The ground is so hard used long nails and bits of plastic to secure the weed matting!)

Slowly I began to fill the tyres, breaking the weed matting, putting in clay breaker, filling with soil and planting all kinds of things. Most of the plants I put in were given to me by friends, dug up on the side of the road, or from cuttings. I figured that things which grew from cuttings or on the side of the road were hardy enough to grow on the embankment.
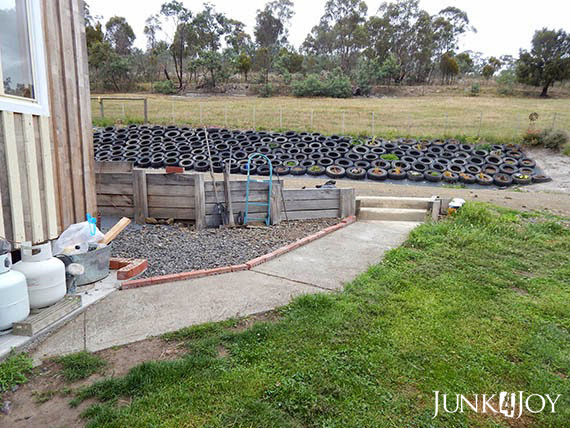
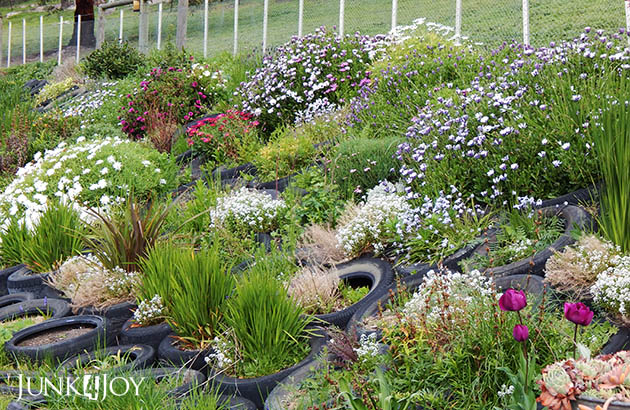
And that’s how we went from this:

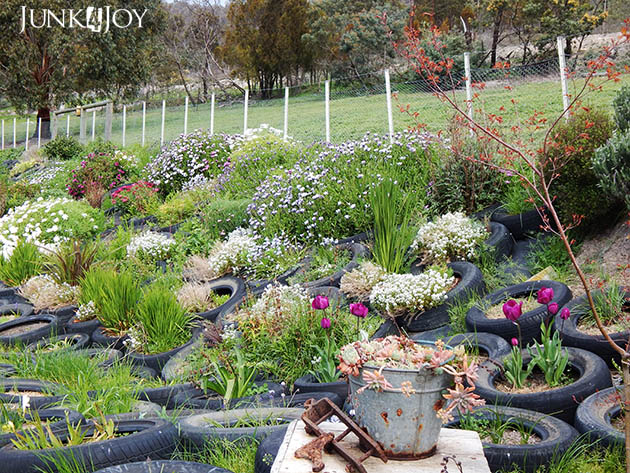
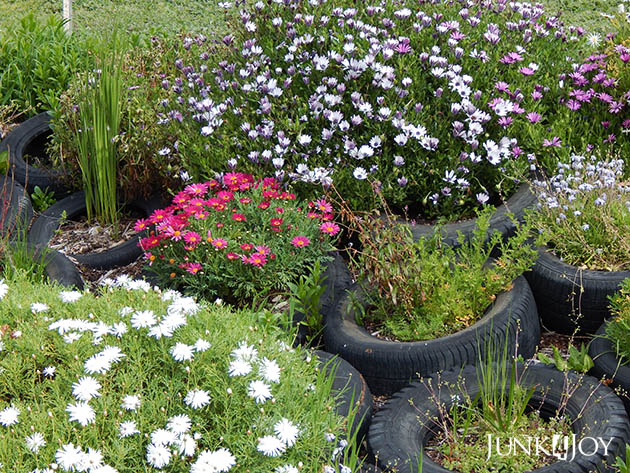
To THIS!

Amazing isn’t it?

There’s still tons of work to do. I need to weed for one thing. And trim frost bitten bits. Plus  I’m always moving plants. Some of the plants are growing over smaller ones in nearby tyres so they will need to be moved, or left to peek through gaps. Eventually I want it to be so well covered you can barely see the tyres.

I’m a lousy gardener… hit and miss is the way I work. I put things in the ground and it turns out they’re the wrong size for where I put them (it doesn’t help when I get things without labels and have no idea what they are!). For example I was given some poppy seeds. They were labelled ‘big’ ‘small’ and ‘medium’. I had them in pots on separate tiers of a plant stand, small on top, big on bottom, medium in the middle. But I had no idea how big ‘big’ was… Till a lady told me they were iceland poppies and I googled them. They’re HUGE. I had to move a couple of them….

There are still quite a few tyres to fill with dirt,  plants or both. And more succulents to move. But the embankment beginning to look like I wanted it to… a mess of plants all growing up to and around eachother.

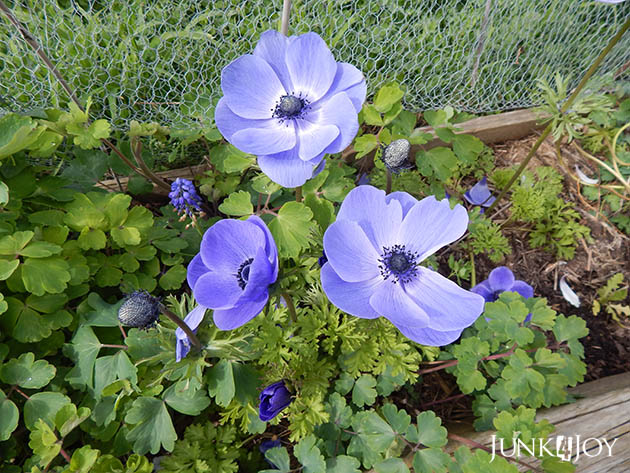
Meanwhile, the rest of the garden is blooming as well. My anemones came back this year – I have my own method: In early spring I cut off dead flowers to encourage more blooms. At the end of the summer I let them go to seed and spread seeds in the garden beds.

Works for me.

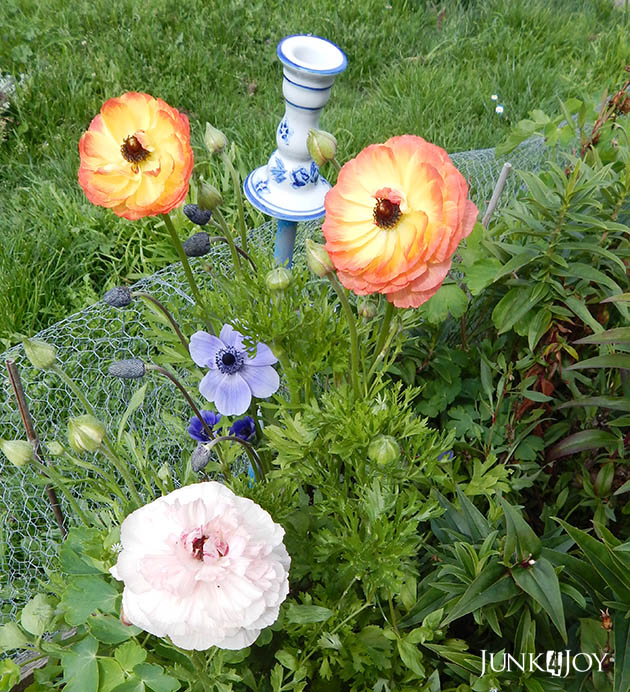
I swear I never bought these flowers. Yellow/orange ranunculus…. The packet I bought was blues, pinks and whites. Wierd. But pretty.

Between these and the poppies which could be any colour, I think my plan of a limited colour palette in my garden has flown out the window.

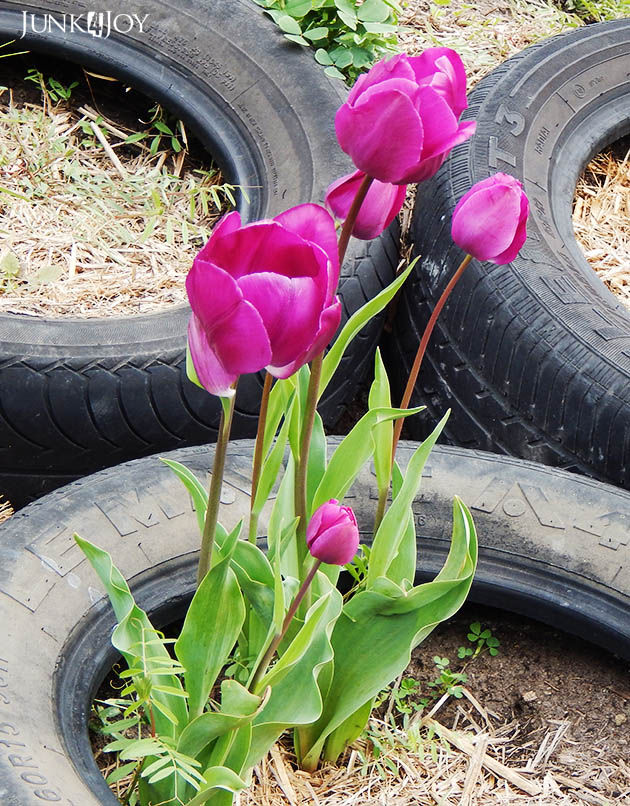
Love the tulips. These are part of a section of tyres filled with bulbs. I’m thinking I’ll sprinkle alyssum seeds in the tyres as well so there’s something in them all through summer.

So there you go.

I’ll get more photos when more things are blooming later. Its a promise.

z

* A grandpa weeder allows you to weed standing up, using your foot on a long handled tool to pull up weeds. I love it!
new kitchen shelves

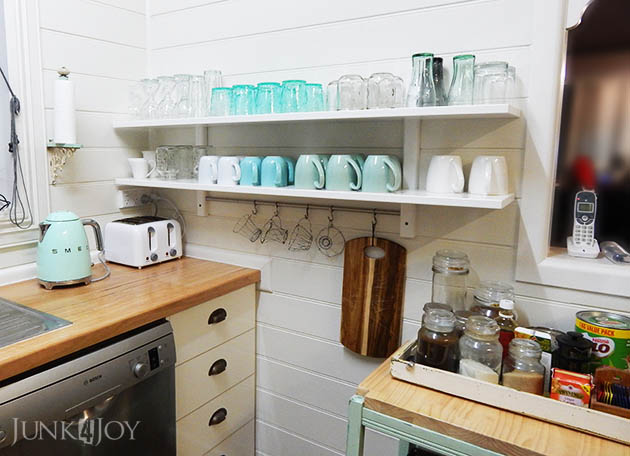
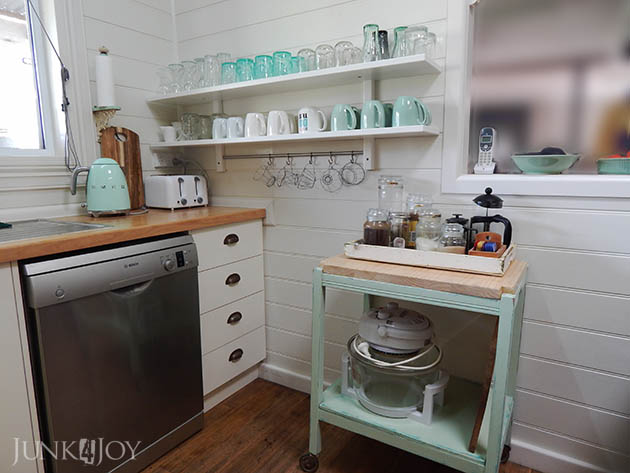
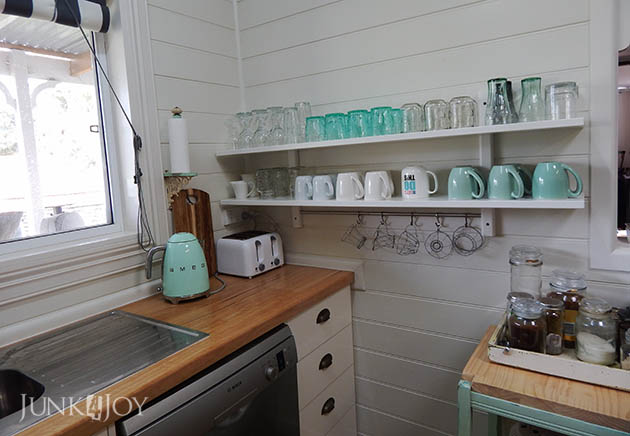
Last weekend, Saturday evening to be exact, I got a surge of energy and decided it was time to put up the IKEA shelves I bought months ago. They’re from the Varde series (with those dots over the ‘a’.)
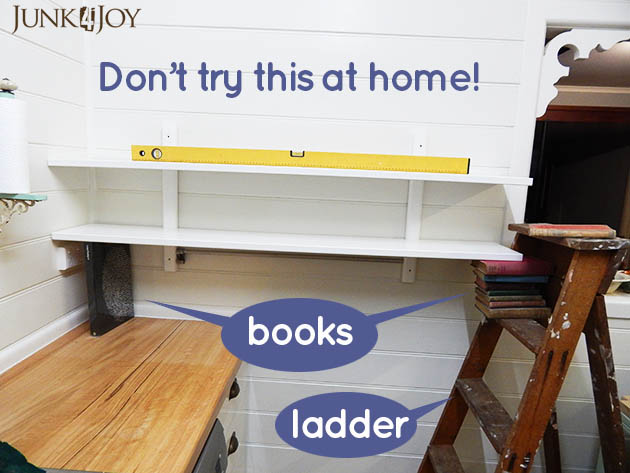
Since I was doing this on my own, and these shelves are incredibly heavy, I had to find ingenious ways to do get them up and level. I don’t advise doing it this way, but needs must…

I’m nothing if not inventive. And stubborn. I got the shelves up.

I had planned to put 2 of these units up (I bought two, making it 4 shelves) but I changed my mind. I decided one set was enough. Not so ‘cluttered’ feeling…. The space above the shelves gives you room to breathe.

For another thing there was no way I could get the other shelf up there by myself, so the decision was easy.

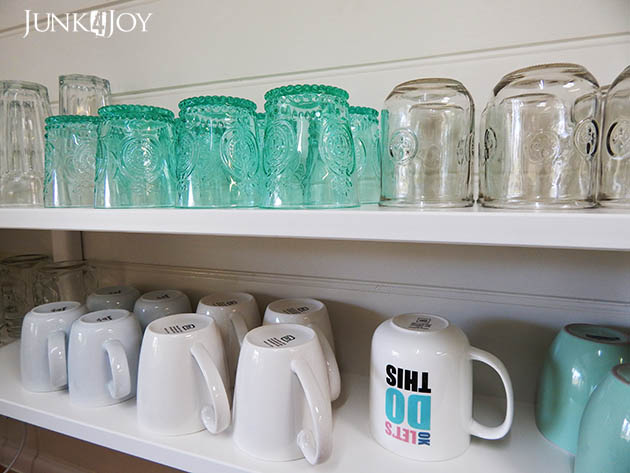
I had always planned to have my mugs and glasses on shelves, on display and easy to access. I love the look and I’ve been the right ones to suit the kitchen. I did have some pale blue mugs but they’re going. I found mint green ones at Kmart that are the perfect colour!

The green glasses are from Freedom. I’ve had those in my wardrobe since we finished the kitchen.

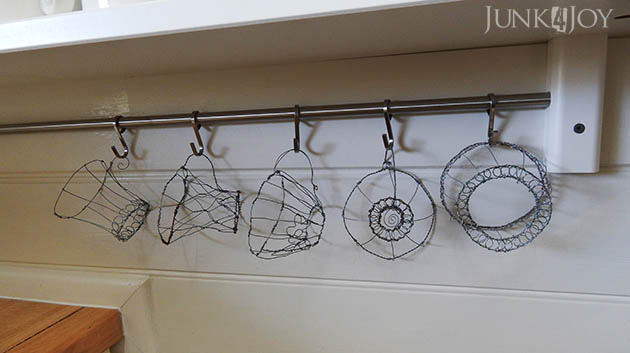
These shelves have a rail with 5 hooks underneath. Since I’d planned to have another shelf unit above this one, the wire cups I made were meant to hang higher, more at eye level. But now there is no top unit they have to hang lower. 

I love open shelves in kitchens. I know things get dusty but I’m perfectly willing to get stuff down and wash it once every now and then.
So, my shelves are up. Its only been about two years since we started the kitchen renovation!
z