Unknown's avatar

About zefiart

Blogger, DIY-er, poodle lover, graphic designer, dog groomer, recycler, artist, wonder woman in my spare time.

more fun with wire – the little wire bed

I am having so much fun lately!

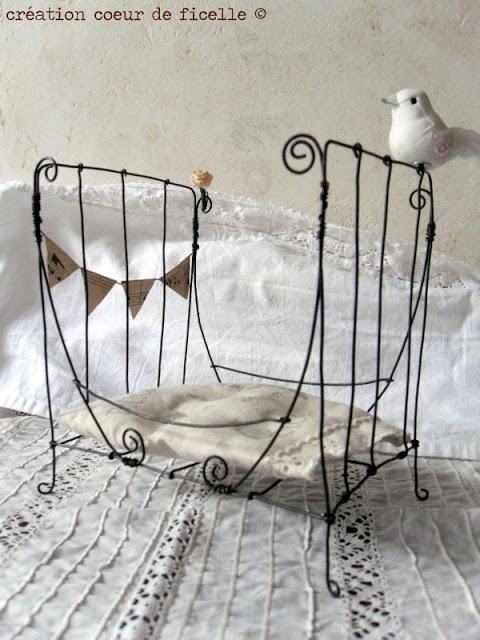
I’ve been Pinteresting like crazy, looking up all kinds of wire creations. This one here has been one of my favourites for a long time:

Really beautiful wire art on that blog.
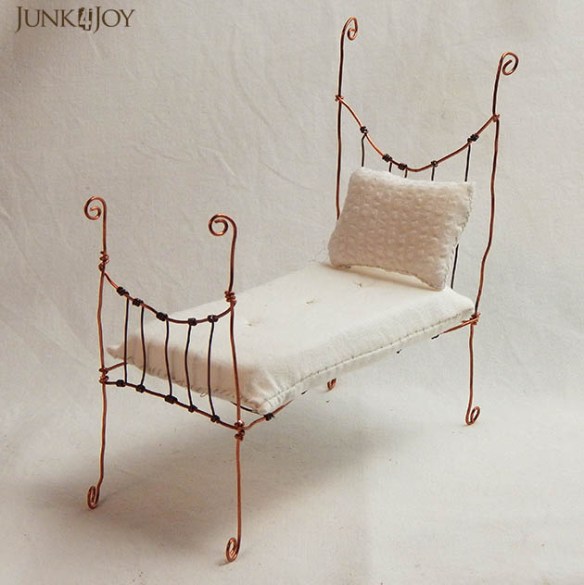
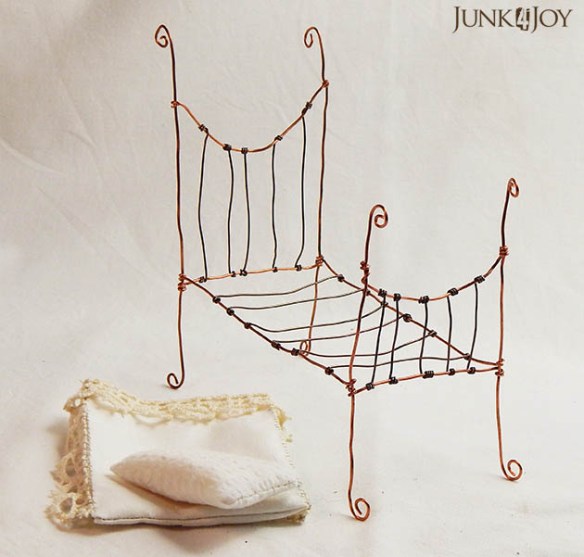
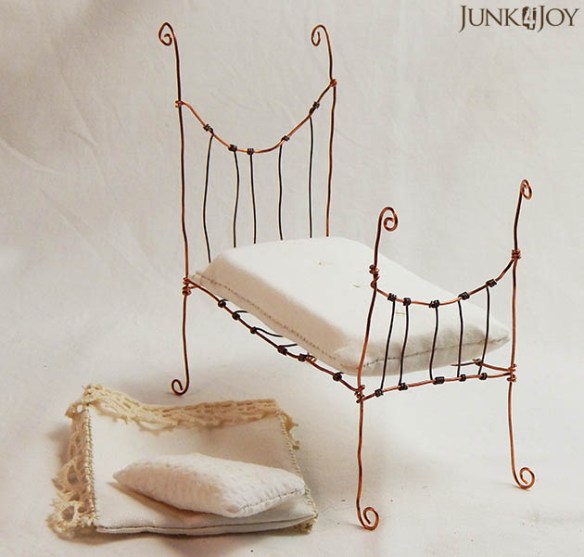
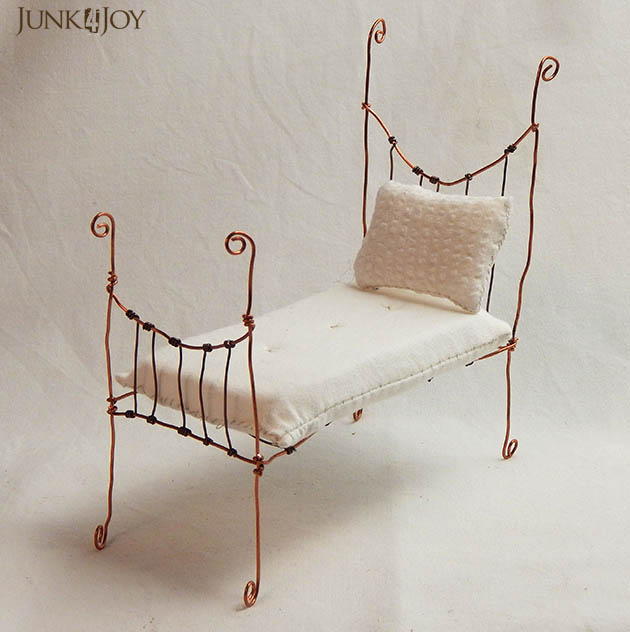
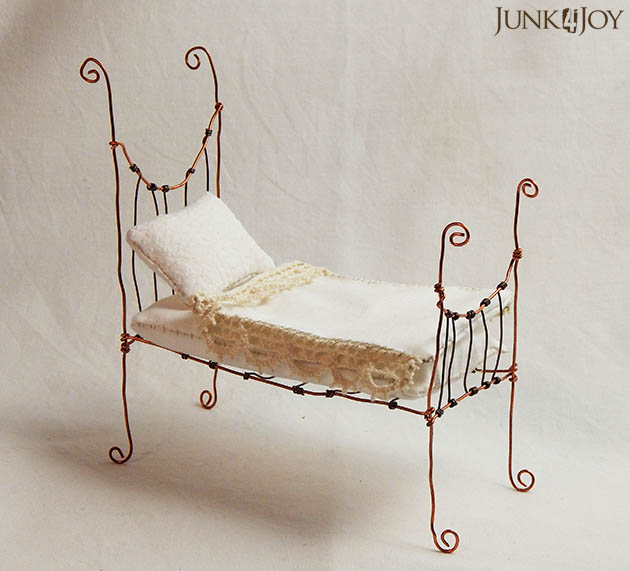
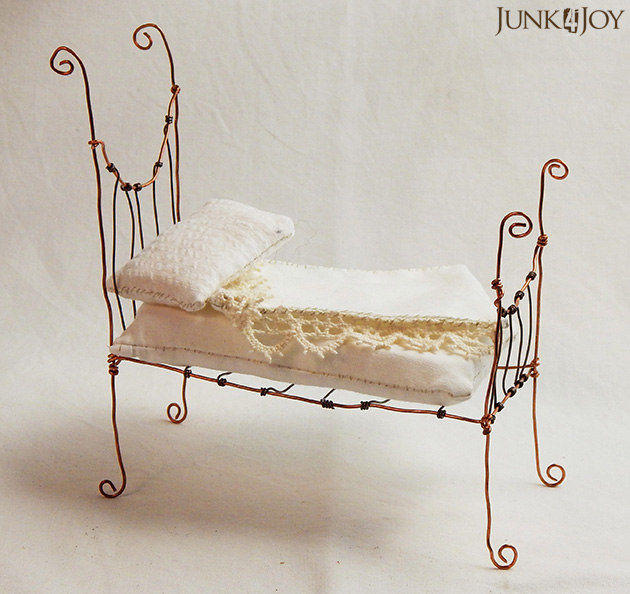
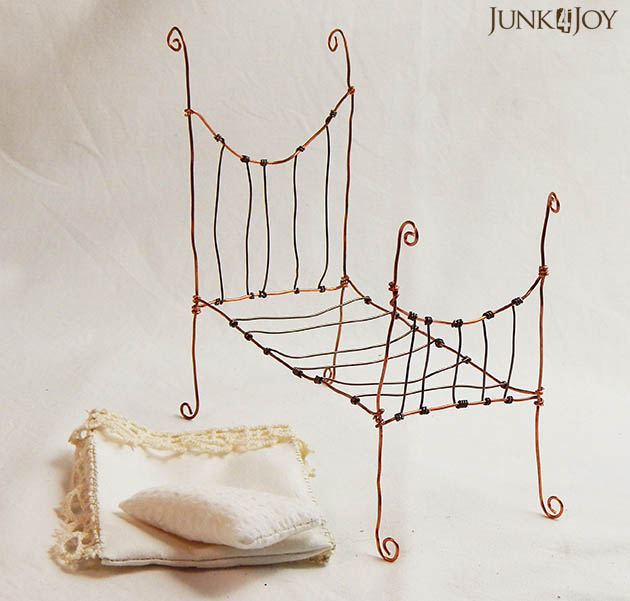
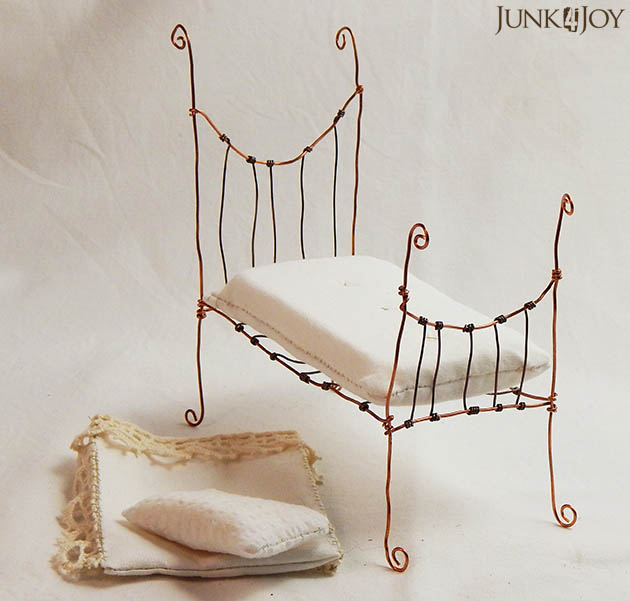
Anyway, I decided it was time to make my own wire bed… I used some of Wayne’s copper wire. One meter of it to be exact. When he asked how much I wanted that’s what I requested and I was spot on.
Go figure. I measure and cut wood the wrong size. I can’t give you a quote on how much time it’ll take me to do a job, but I could tell Wayne exactly how much wire I needed to make something I’d never made before!
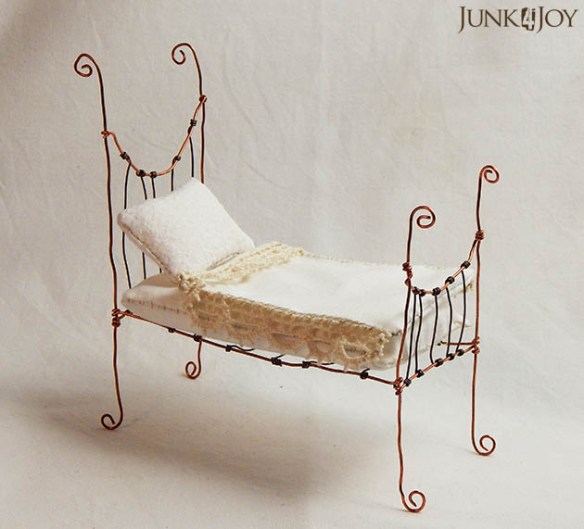
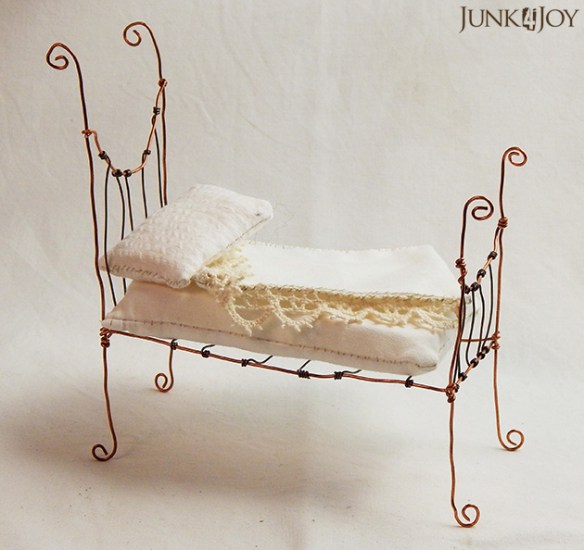
The thinner wire is also copper, but in a thinner gauge and brown. The little mattress is a thin bit of foam with a hand stitched cover. The cushion is hand stitched and filled with felting wool.

The blanket is a bit of felt I wet felted with a cotton cover to give it a quilted feel, and trimmed with a little antique lace.

This little bed was sold as soon as I showed it at the local shop I sell some of my things through. Its the perfect size for a doll’s house. Maybe its cause I’ve always loved doll’s houses and dreamed that one day I’d build my very own dream doll’s house from the ground up, but I love making this sort of thing.
I have another bed I’ll share soon as I make bedding for it.
z

wire work by him

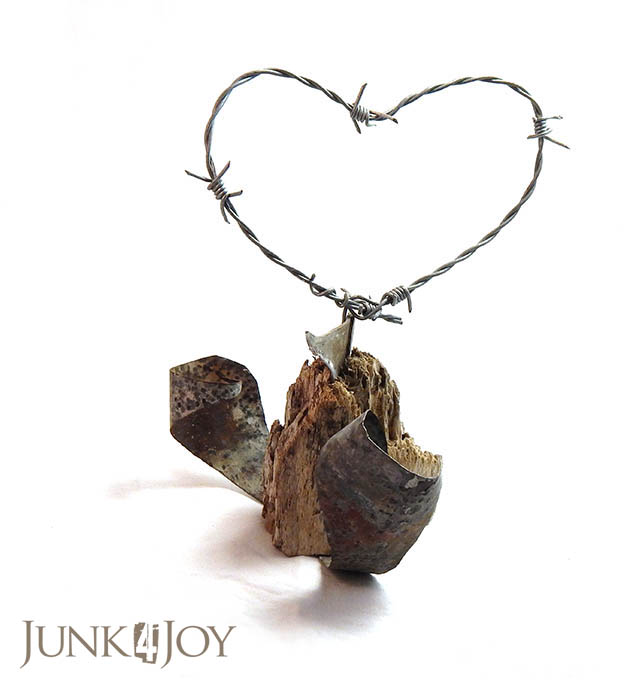
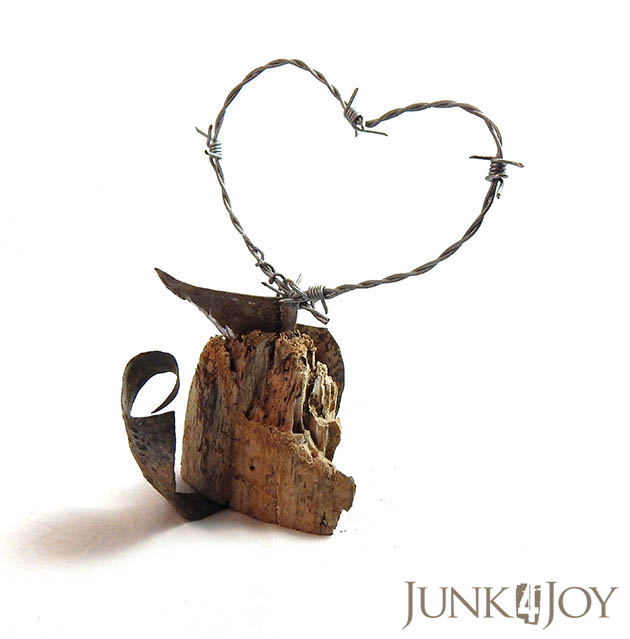
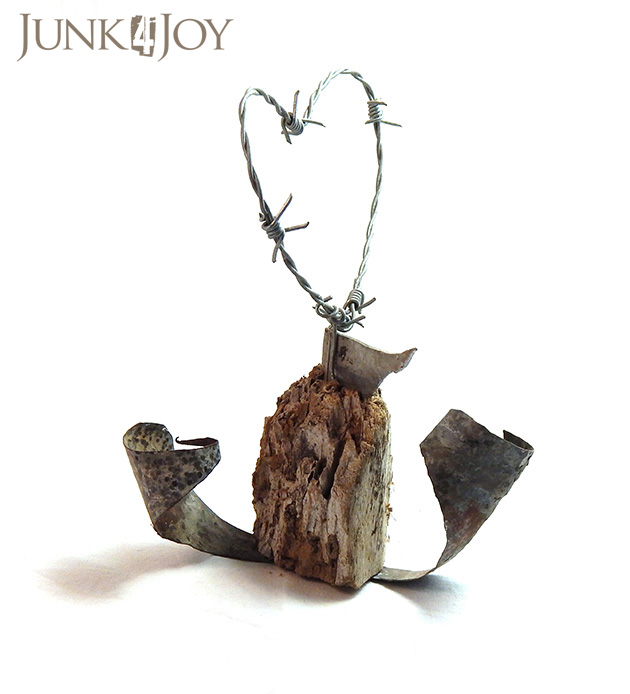
I can’t ever say Wayne doesn’t give me romantic gifts. He’s always making me hearts and flowers out of barbed wire. This is one of his creations, its about 8in tall and made of barbed wire, old roofing iron and a chunk of old wood.

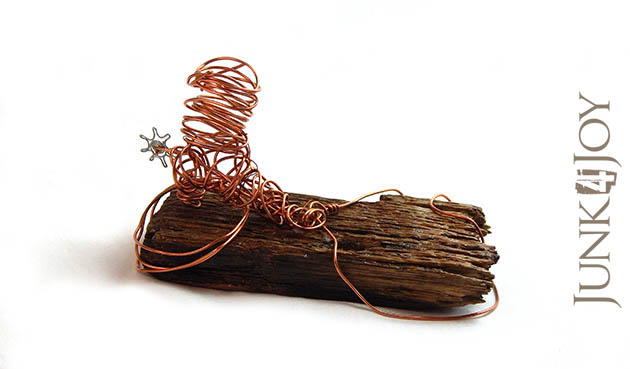
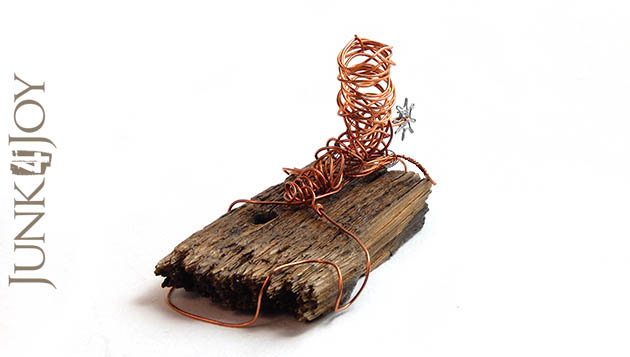
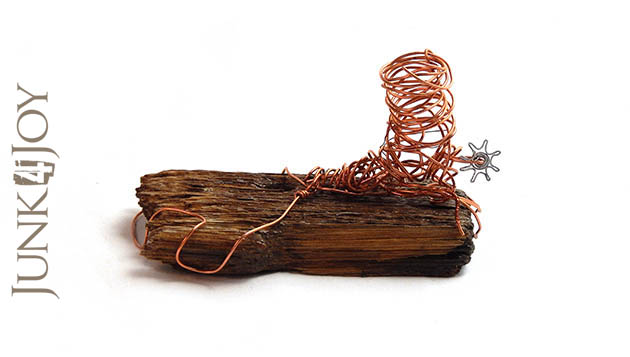
The other day he got some new copper wire and made this cute little cowboy boot. I’d been sending him all kinds of links of cowboy boots made out of wire but Wayne always does things his way. Its a boot with a spur and a lasso.

(Ok, I made the rowel – that’s the spikey bit on the spur – cause I wanted it to look cuter.)

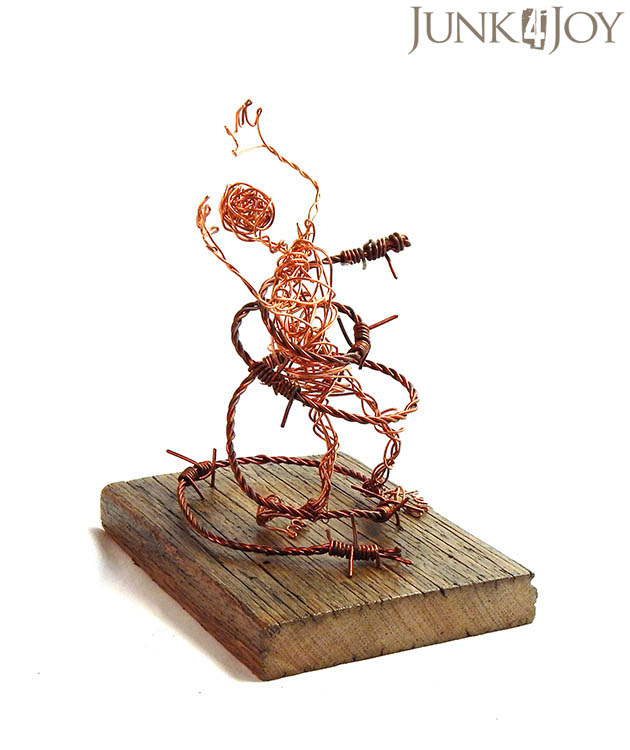
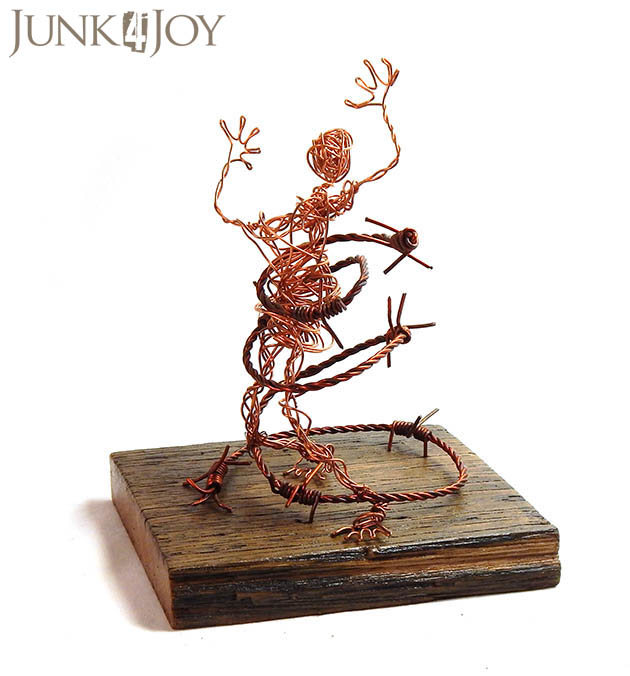
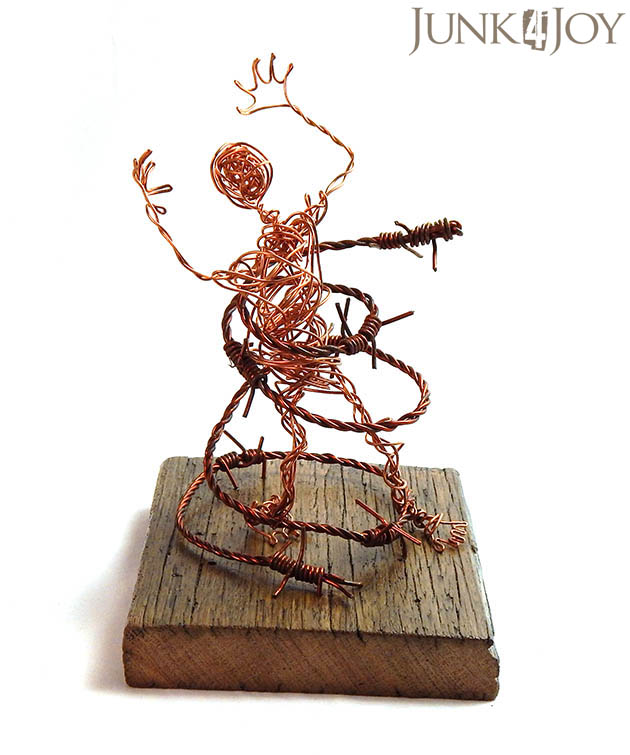
Then there’s this trapped man. Its a tortured sculpture, isn’t it?

I love his wire work. He’s so imaginative, which is why I wanted to show off some of his stuff.

z

fun with wire – a wire crown

I’ve always had a thing for wire. I love wire baskets, wire sculpture, wire anything. I love working with wire, only of course I can only work with soft wires. Lately I’ve been doing a bit more wire work cause its something I can do easily while sitting around watching TV in the evenings.
ie. I haven’t been doing any big projects but I’ve been making some smaller things.
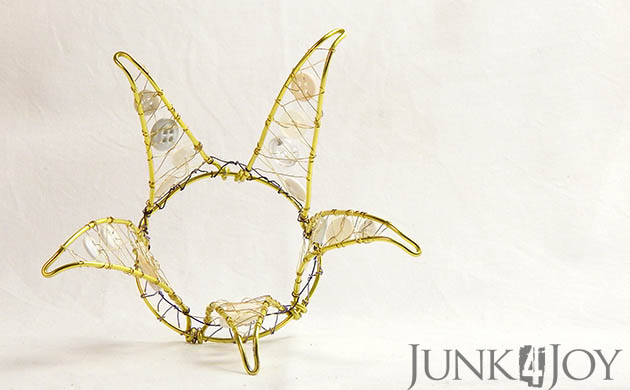
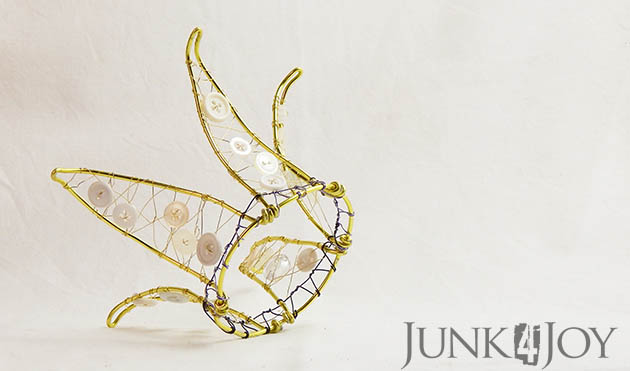
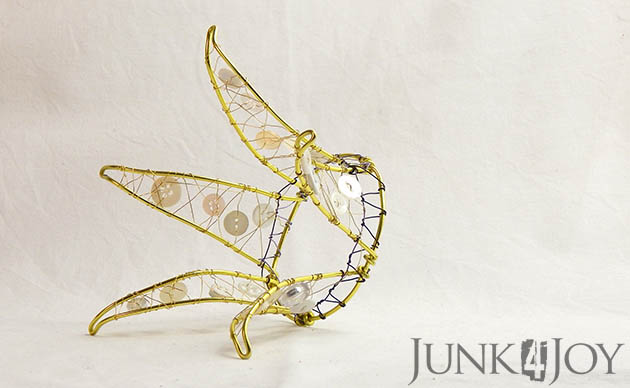
Like this little wire crown made using gold copper wire in two thicknesses, brown copper wire and buttons.

The thick wire is about 2mm thick, the brown wire is 24 gauge and the thin gold wire holding the buttons is 28 gauge.

I made this little crown as a simple decoration, to sit on a shelf or something, but I guess it can be used as as a tiny crown if you put bobby pins on it!
z

Shared at

a place for everything – even headlamps

Got home the other evening and found a stomach on the garden path.

Yep.

A stomach.

No hair. No feathers. No head. No beak. No feet.

Nothing.

Just. A. Stomach.

A ruminant’s stomach.

Seems the poodles thought it was time to up the challenge for me. Every time I find one of their kills, there’s less of it to identify it by. I was able to identify the last specimen by the feathers and some guts.

This time all I got was a stomach. With munched up grass in it. I’d guess rabbit or wallaby… and given they haven’t yet caught a rabbit (that I know of), I’d say wallaby.

At this rate I’ll soon be an expert at identifying species from the inside out.

sigh.

Ok. At this point let me just say that I don’t like my poodles killing anything, even rats or mice. Though whatever is living in our ceiling is asking for it…

I especially hate it when they kill wildlife or our ducks, chickens or geese. But they have a strong prey drive and they will kill any intruder in their yard. Its a fact of life and I’ve had to accept that my gorgeous fluffy dogs are real dogs… predators even.

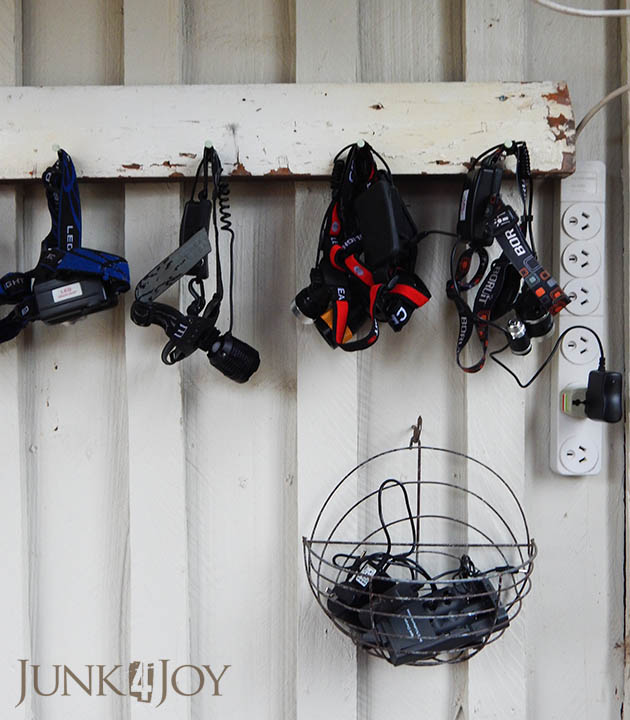
But on a cheerier note, at least a more creative one, I finally created a place for Wayne’s huge collection of headlamps.

He has a million of them. Battery operated, rechargeable, you name it, he has it. He bought one so he could go out to feed the horses in the dark. Then he bought a second as a spare. Then he got a rechargeable one. Then he found a brighter one. It goes on and on.

I don’t care how many he has. They come in handy when I’m searching the yard for clues such as hair, feathers, a head… What I have a problem with is him recharging them all over the kitchen counters.

I had to create a spot for them which met these requirements:

  1. store all the headlamps in once spot and not all over the house
  2. a spot handy to grab one on the way out 
  3. a spot handy to put it back on the way back in
  4. the ability to store and recharge in one place

I had no idea how to do this. I didn’t know what I wanted it to look like or where to put it.

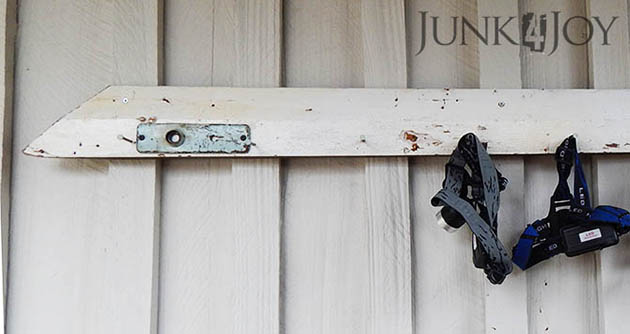
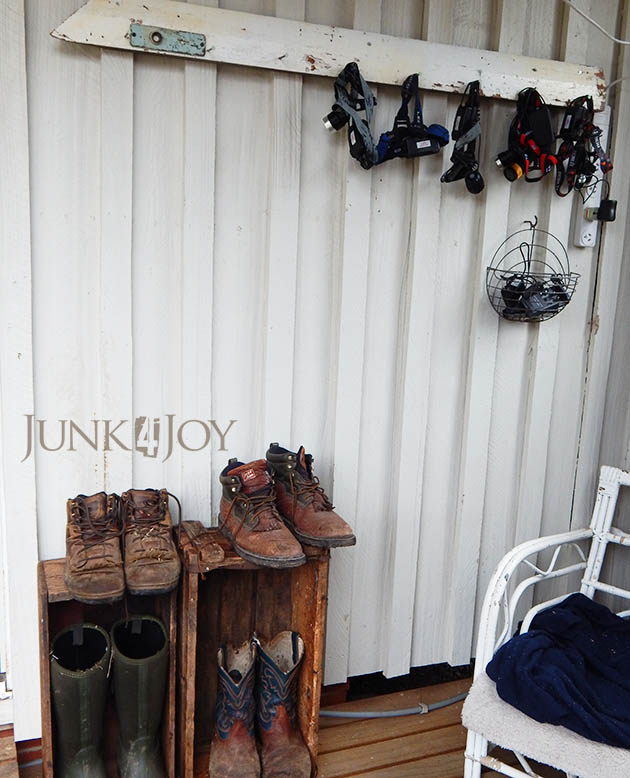
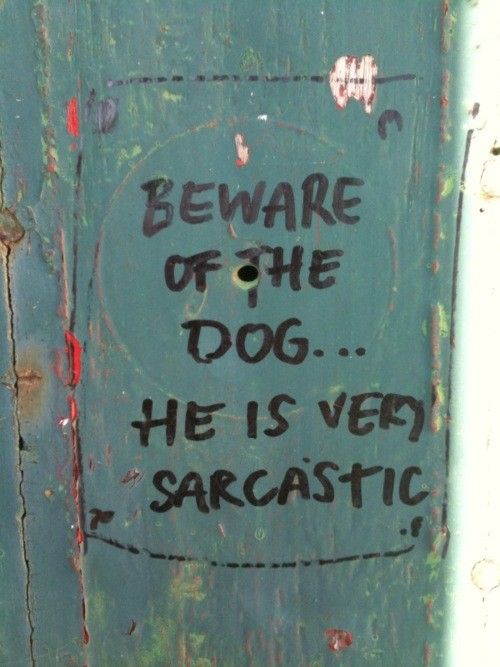
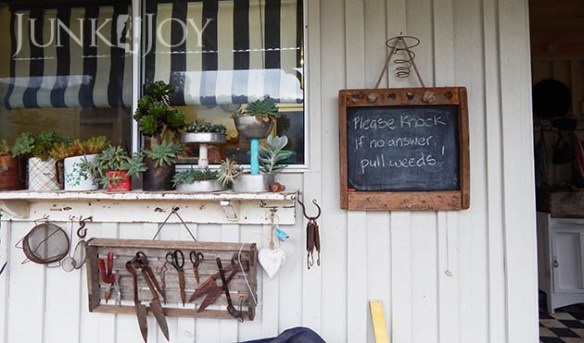
In the end I went for quick and easy. I grabbed a bit of chippy old skirting board I had in the shed, drilled holes in it and jammed in some really big nails. I added a cool chippy green-blue door thingy. Just for fun I painted the heads of the nails pale green-blue to match.

I chose to put this new headlamp hanger on the front porch, in the enclosed area. Unfortunately there’s no power there so I had to use a long extension cord going from the outdoor power point in the middle of the porch and a power-board mounted on the wall. I’ll be managing the cords better once I find my box of cable clips…

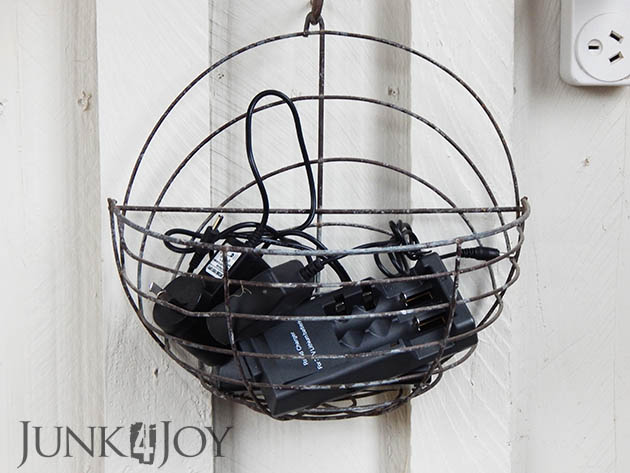
I added this cute half planter basket to hold the chargers.

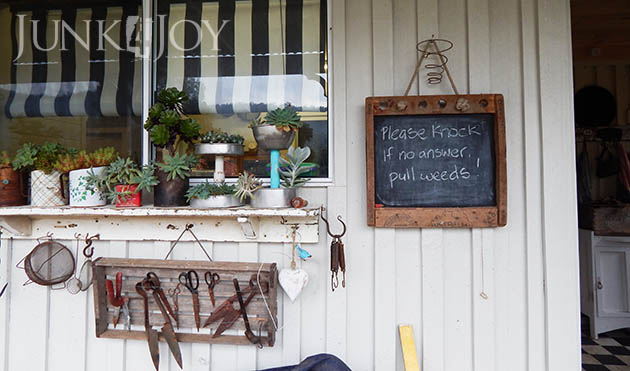
In order to do all this I had to move a few things over to the other side, so the kitchen window ledge is looking a lot busier.
I’m happy. The headlamps are off the kitchen counter. Wayne is happy cause he no longer has to search for headlamps I’ve moved.
Win win.
z
wardrobe makeover

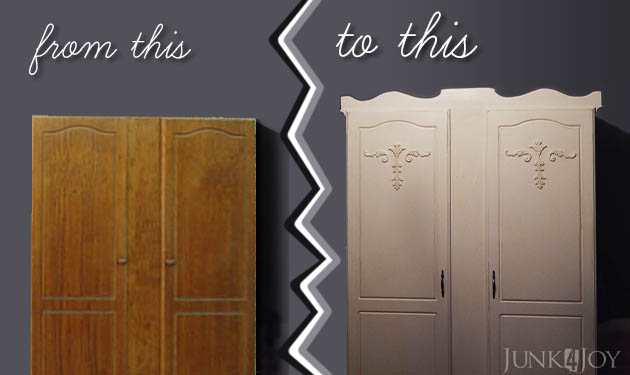
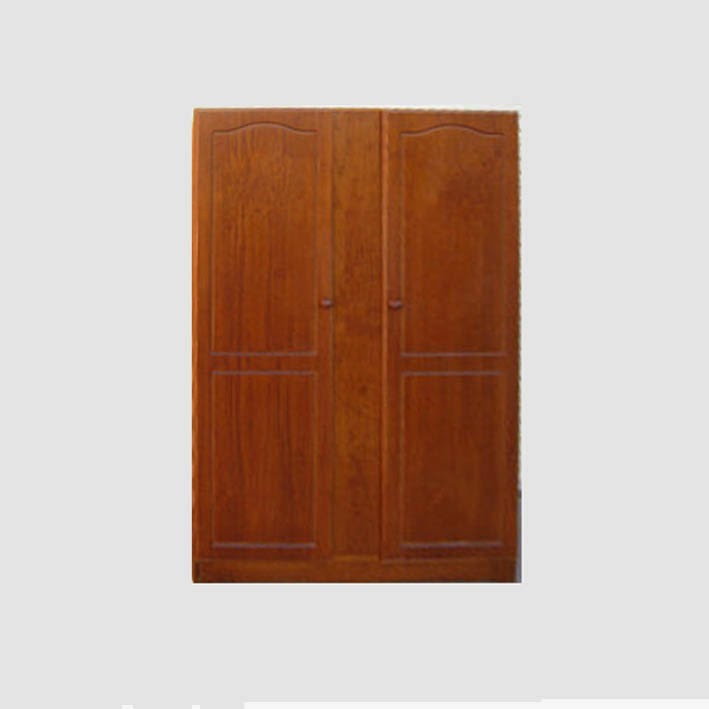
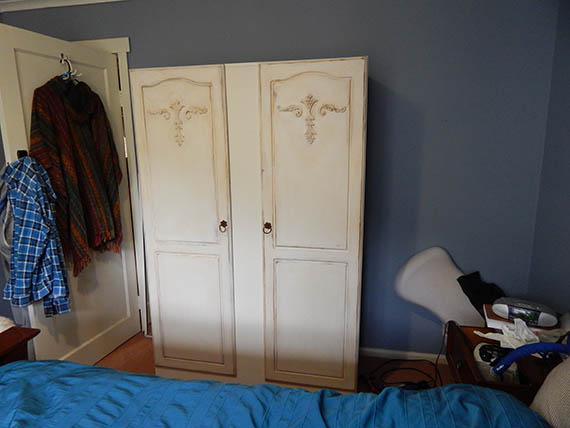
I had mentioned in a previous post somewhere that our bedroom has a split personality. Today I’ll share how I’ve frenchified a plain (ugly) pine wardrobe to contribute to the french provincial/white/shabby half of the bedroom’s personality.
This is what the ugly wardrobe looked like before.

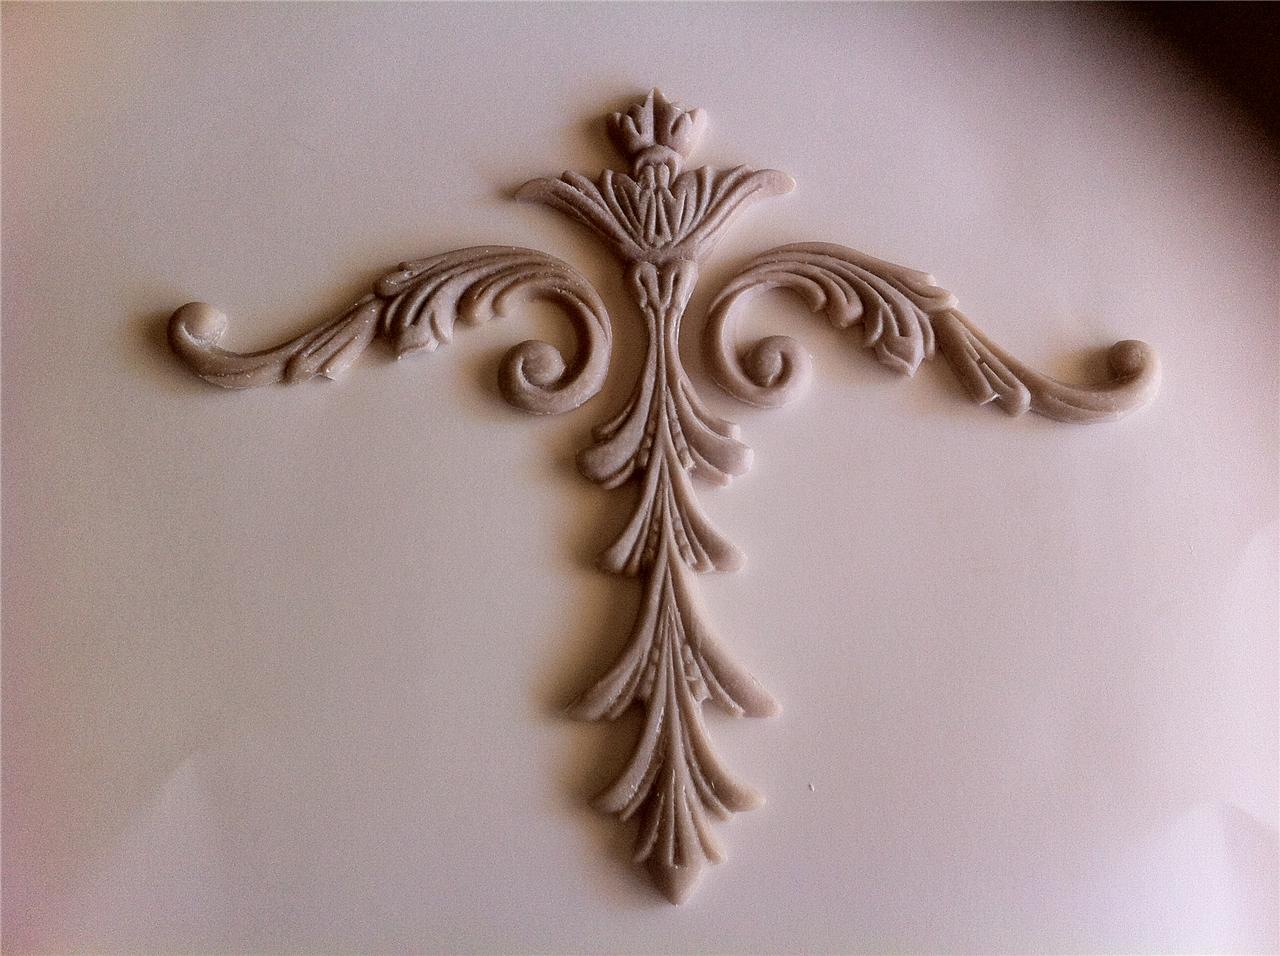
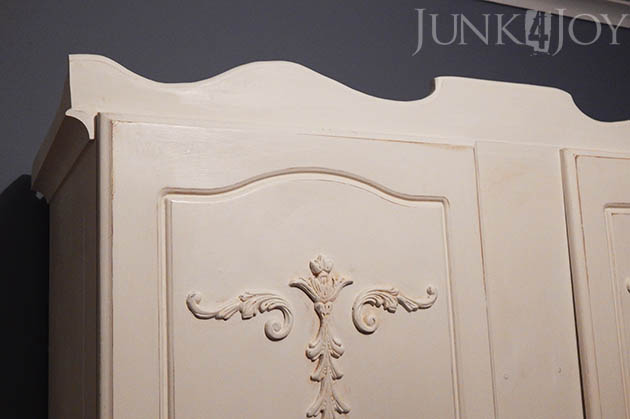
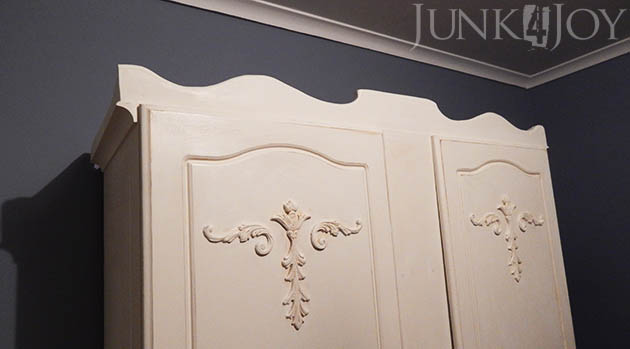
So, I found these fancy appliques on ebay.

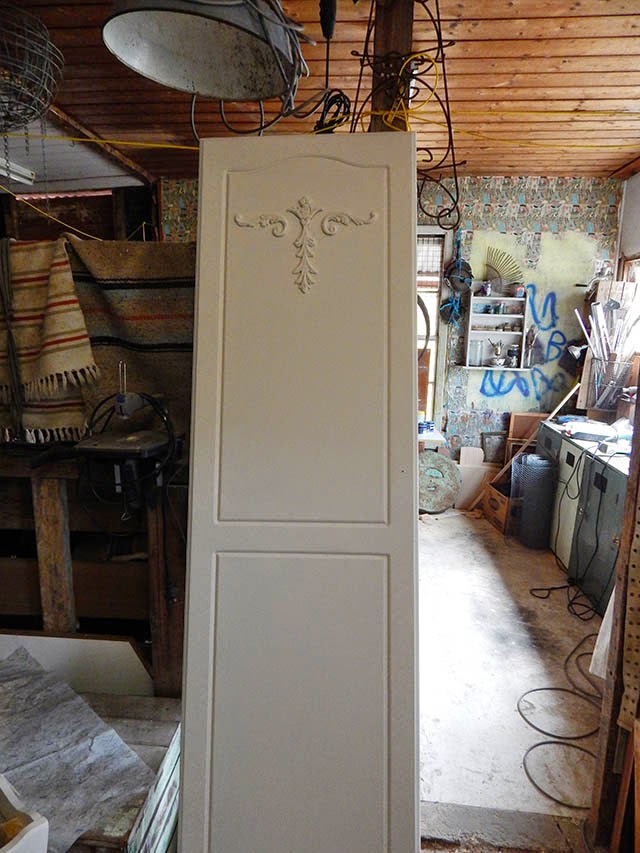
I did the usual:  removed the doors, sanded back them back a bit, glued the appliques on the doors and undercoated them.

I painted the entire wardrobe a creamy white (same colour I used on the dressers I updated here and here). I scrounged through my collection of knobs and handles and found some cute little rusty ring pulls…
That’s when things started going downhill.
Did I mention I started this makeover before Christmas?

So… after putting the doors back on the wardrobe, and the handles on the doors, I did a little extra sanding and then rubbed spots of the wardrobe with watered down burnt sienna paint to give it that old patina.
I hated it.
So I repainted it.
And re-sanded it, just enough to show a tiny bit of the grimy-ness left by the burnt sienna. 
Then I waxed it with clear wax, just cause I like the satiny feel.
But there was more to do. It still looked plain and ugly, like someone had just stuck a couple of decorative bits on an ugly old pine wardrobe and painted it white.
Which is pretty much what it was, really.
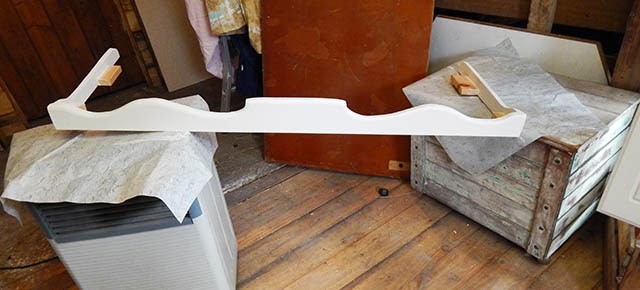
I wanted a more “armoire” look, so I designed a top for it. I did this by measuring the top of the wardrobe, re-measuring it, then drawing half of my design on a folded piece of paper, cutting it out, unfolding it and tracing it on a piece of pine.
I used my new, more controlled skills on the jigsaw, to cut it out. I only stuffed up a little bit on the top middle bit… the most important bit… but hey, I won’t point it out and maybe you won’t notice it…

I used my mini router to give the edges a bit of curve. I had to brace the corners to join it together, and I had to provide extra little bits (you can see those on the sides) to screw onto the wardrobe top.
Hey, I make this stuff up as I go along! If you’re after professional how-to’s you’re on the wrong blog!
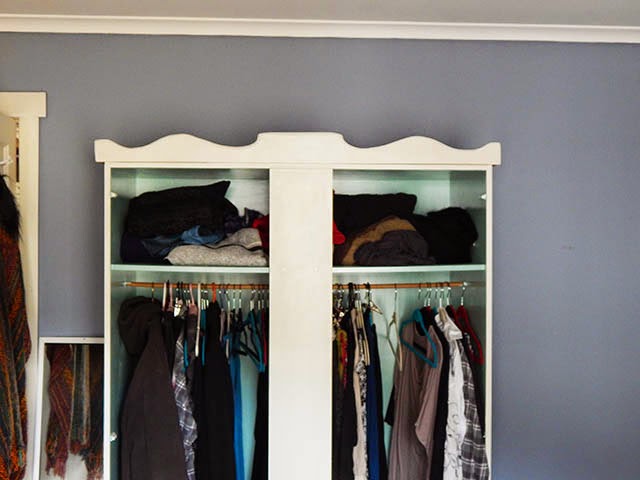
Here it is on top of the wardrobe (minus the doors. Again.).

Yup. You noticed.
I sure did. 
After I put it on the wardrobe.
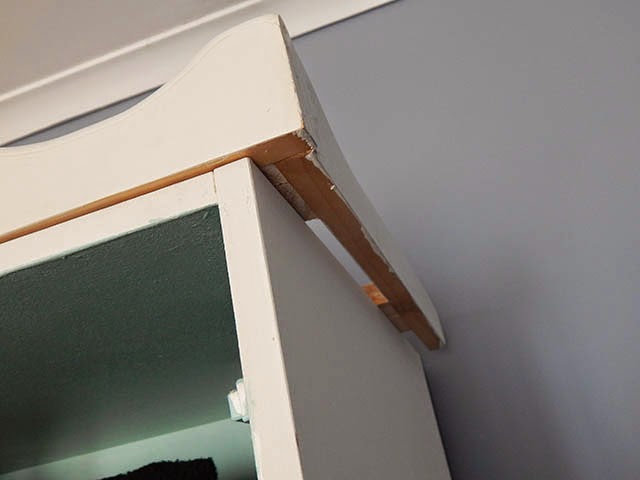
The top was too long.
Not by a smidge… by a whole lotta smidges.
And I measured it more than once!
This is why I’m not a carpenter. And why I make wierd things, cause I have to. I have to find ways to fix my mistakes!

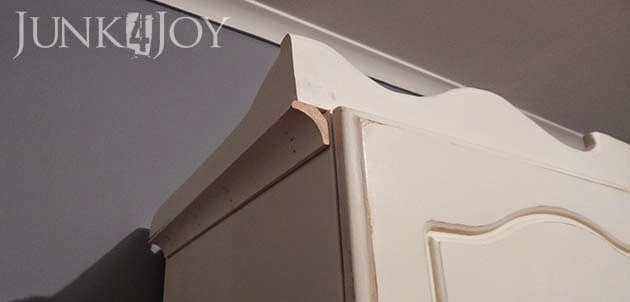
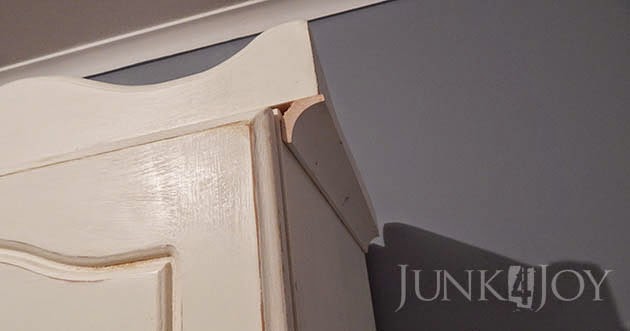
I bought some concave trim. Naturally, my overhang was too big for the smaller trim, too small for the next one up.
I opted for the bigger one, cut to length (almost length… I cut them a bit short… it never ends).

I was left with gaps. No problem. I know how to fill gaps!

Ok, so its not perfect, but its still a lot prettier to look at than what I’d been looking at for the last 4.5 years.

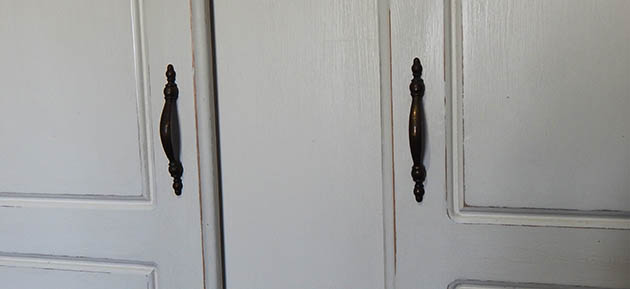
I also changed the handles. The rusty rings weren’t working for me. I found these old bronze handles in my collection and they’re perfect.

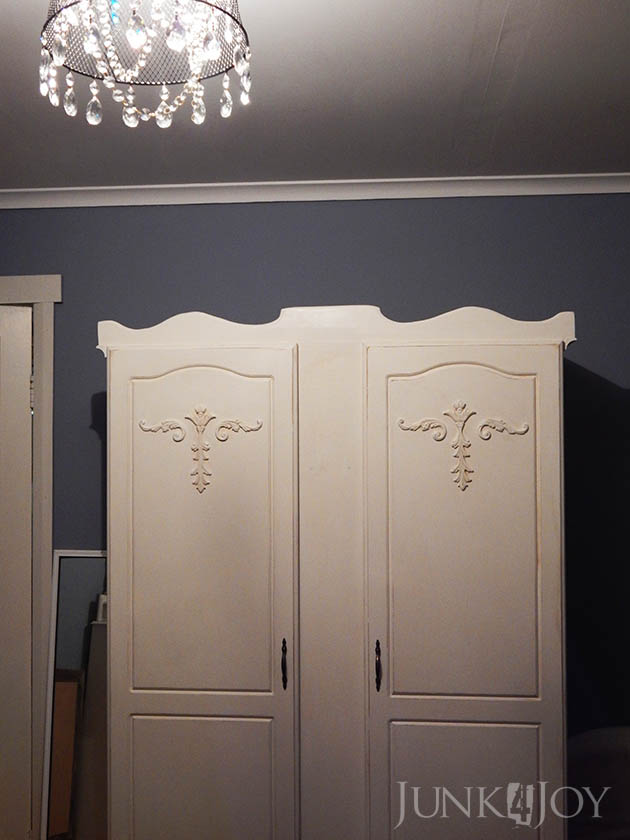
So here is that side of the bedroom, with the bin chandelier and the wardrobe. The mirror sits on the floor behind the door cause its just too heavy and I don’t want to put it inside a wardrobe door and stuff up the hinges. I think I may have done that already with all the doors on and off so many times…

At least I can now cross ‘finish the wardrobe’ off my To Do List. It was becoming a permanent fixture there.
z
scarf organisation

Everything in our home is multipurpose. I mean, it can (and often has) been used previously in many places and for many different uses.
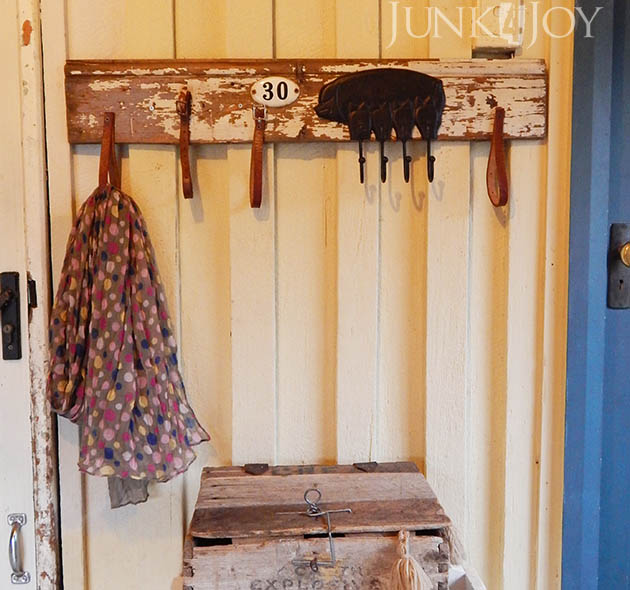
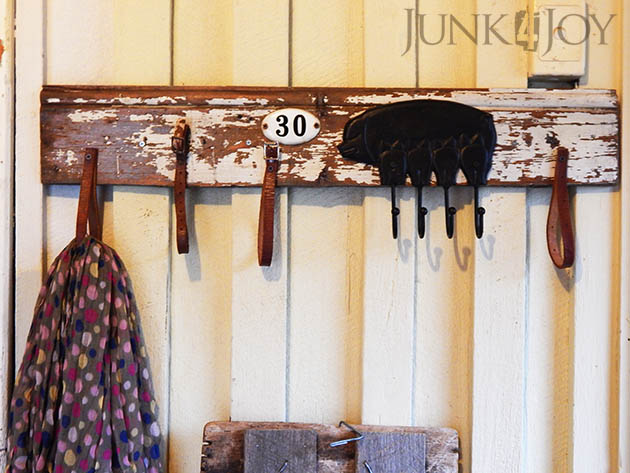
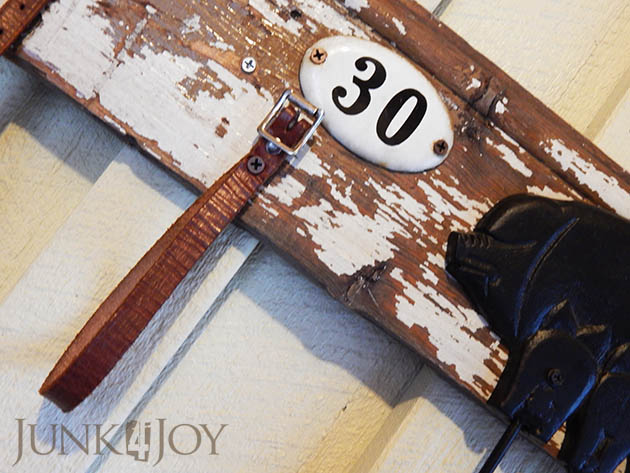
Take this little pig with her piglets. She once lived in the kitchen to hold keys. The old enamel house number is from Wayne’s childhood home, it also lived in the kitchen at one stage.

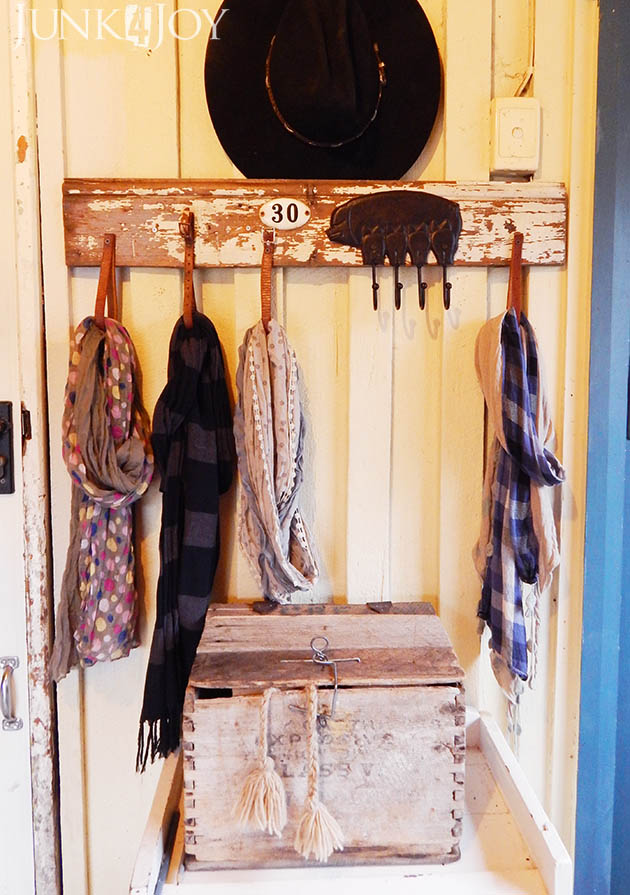
Now, they’re together again as part of my new scarf hanger.

This was a quick and easy project that took me weeks to photograph and share. Between us, we have a zillion coats, jackets, beanies, hats and scarves. I made a whole lot of coat racks to hold the hats and coats, I put up an antique coat rack which I got from my grandmother’s house in Greece for our scarves and beanies… but I wanted to keep my prettier scarves separate from the practical warm ones.

I looked around at what I had and found this chippy bit of timber lining. All I did to this was wash it and scrape off the loose bits of paint.

I found a thin leather belt I’d collected from a tip shop, and a small bit of leather which was probably some kind of collar, maybe… also from a tip shop. I cut these to the right length to make loops to hold scarves. Mainly cause I didn’t have anything I liked to act as hooks for this project.

I left the buckles on a couple of the leather straps just for something different.

I added the pig for other odds and ends and added the number just because.

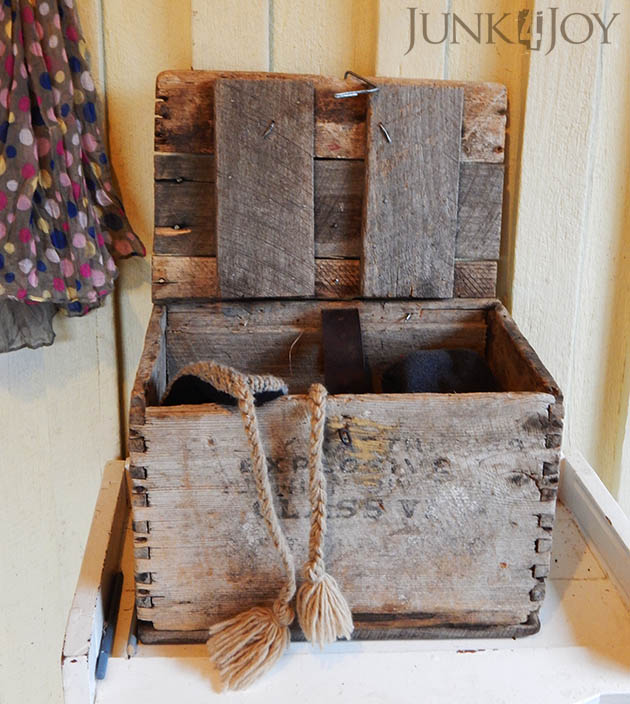
Its the first thing you see when you walk into the mudroom, hanging between the door to the house and the door to the toilet. Below it, on a small cabinet, is a rustic box Wayne revived, now holding gloves. That box used to be my ‘in house’ toolbox in a previous life.

So there you go. A little something new for the house to make life a little more organised.
I hope.
z
Shared at: 

new sewing & craft box

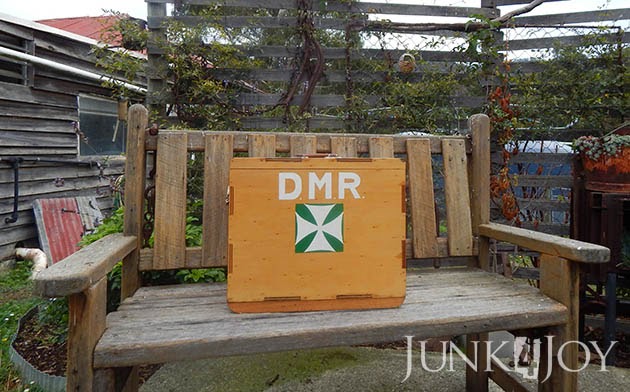
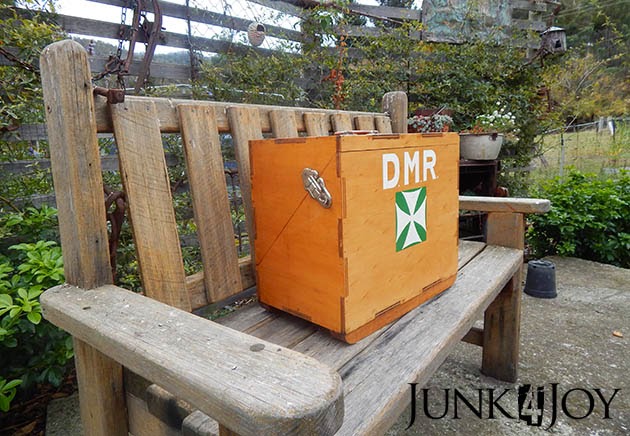
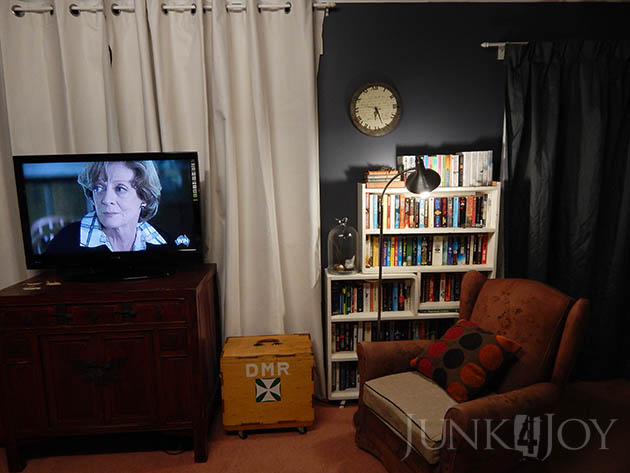
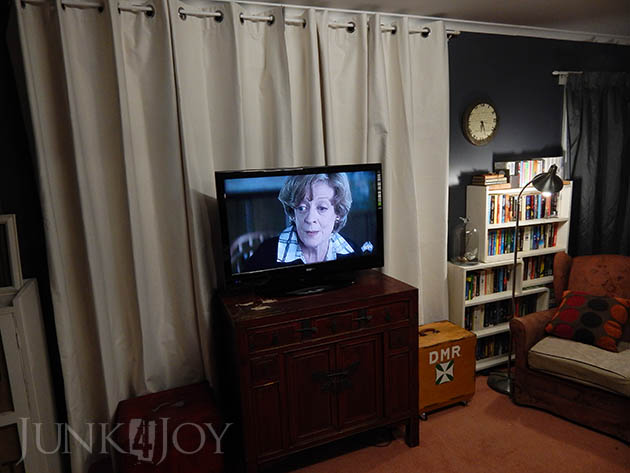
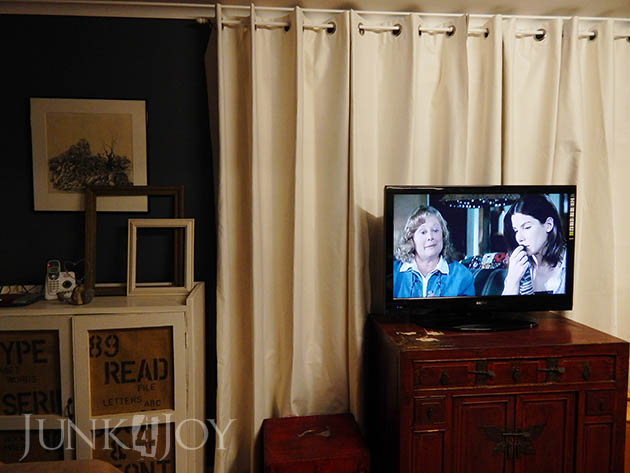
Did you notice the pretty first aid box beside the TV in my eyelet curtain post? Its my new sewing/craft box!

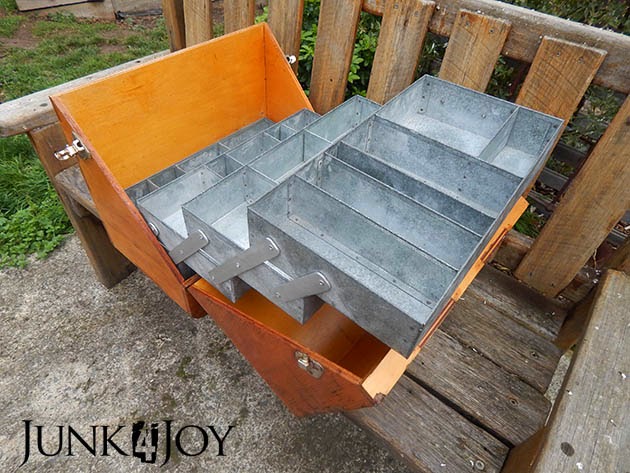
This was a gift from a couple of good friends. It was among some work things which were going to be thrown out. They took it home, cleaned it up and had planned to use it as a tool box or something, but lucky for me it really wasn’t suitable. Take a look at what’s inside:

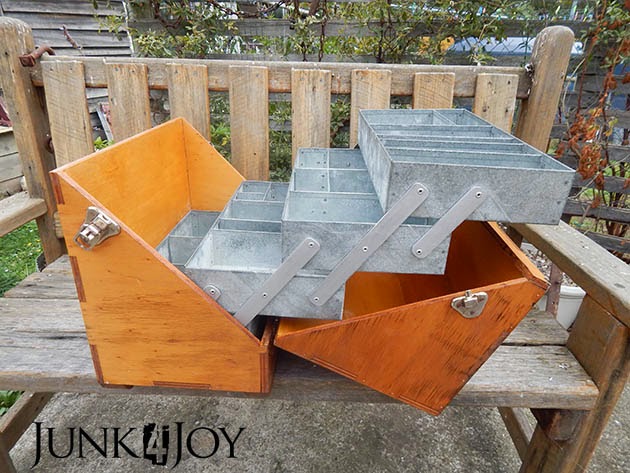
It opens like a concertina, metal shelves sliding out at an angle. Problem is, the box itself plus the weight of the shelves means that if you put anything heavy on the shelves the whole thing tips over.
Obviously first aid supplies are light. How much can gauze dressings and band aids weigh?
I had planned to put beading and craft things in it, but they can be heavy too, so I went with sewing bits and pieces. You know, threads, needles, bobbins, buttons, pins, elastic, small things you have no use for, bits of ribbon and lace…

Since its heavy, and I mean HEAVY, the first thing I did was put small wheels on the bottom. I figured that once it was in the house I could just roll it from here to there and never have to lift it again.

And cause I tend to craft and sew in the living room while watching TV (no wonder the house is always a mess!) its close at hand with anything I need.

Pretty cool huh?

This is all part of my trying to organise myself and our home in such a way that I can make things without having to lug things around and spread them all over the living room all the time. When I started doing up the office I took all my crap stuff out and put it in plastic containers in the casita till I could sort it and organise the right storage for it. Its mostly still out there, but over the last couple of weeks I’ve been bringing in a box at a time and going through it. Some things are staying, a lot are going to work for art and craft programs there.

The stuff that’s staying now has some cubby storage to keep it organised.

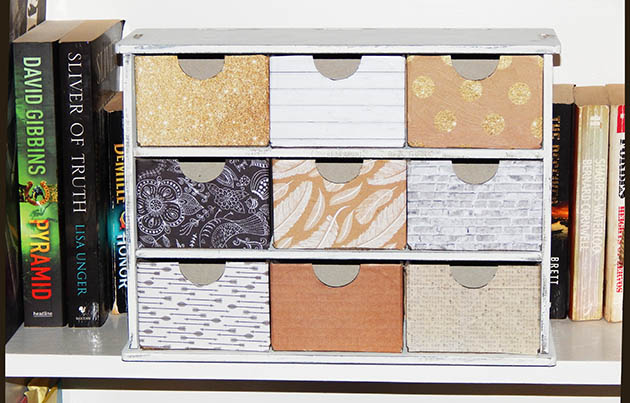
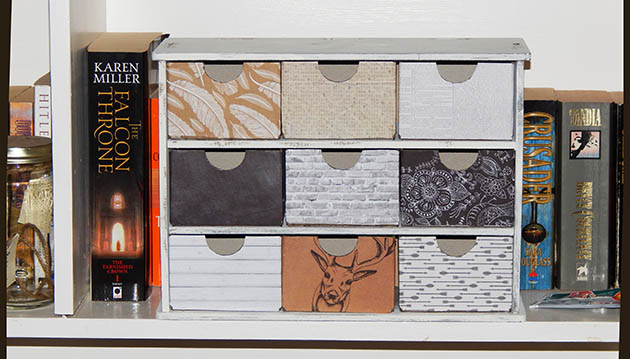
These are just the cheap little MDF and cardboard cubbies that they sell at Kmart. I used scrapbook paper to decorate them so they’re quite cute (not the best job…) I figure I need at least one more of these, but they make it so easy to find things – everything in its own drawer.

I also have a tip shop small wardrobe which is waiting for a makeover in the casita. Its going to have some shelves put in it and get a facelift, then it’ll move into the office to hold my neatly organised and sorted craft bits and pieces.

I’m getting there.

z
white eyelet curtains

A friend of mine at work once asked if I accepted charity. I said sure, I’m not too proud. Anything you don’t want, give it to me. Old things, broken things, whatever. I’ll most likely want them.

After all, I’ve worked hard to earn a reputation as a junk-addicted crazy poodle lady.

So, when my equally crazy friend Patrice asked if I’d like the old curtains from her living room, I said yes. Of course.

I’d admired those curtains before. I love eyelet curtains and I love white curtains (says the woman who bought metres and metres of grey and silver curtain fabric to make curtains for the living room). Anyway, they’re not old. She’s only had them for about a year.

Worst thing wrong with them was the bit of cat hair on the bottom, but hey, whats a few cat hairs between friends?

She also gave me a few plastic curtain rings and a couple of brackets to re-hang the dark grey curtain over the door … that’s our front door, the one we never use to walk in or out of the house, and it lets in so much cold wind in winter that I always hang a curtain over it. This year I couldn’t find the curtain I’d used last year with its rings and brackets so I improvised. Not always a good thing. I had to take it off and put it up again, but it works better now.

But back to the white curtains Patrice gave me. They’re nice and long so I did what I’ve never done before and hung them up as high as I could. We have a  pretty low ceiling in our living room so that’s not really high, but turns out its the right height for the curtains. No hemming needed.

Patrice, bless her little cotton socks, also gave me some plasterboard toggle thingies for mounting the brackets. Well, after mucking around for ages, searching for the right brackets for the curtain, compromising on ones that ‘will do’ and fiddling with toggles and screws, I got them up.

All while listening to The Secrets of the Ya Ya Sisterhood. Great movie.

I really like them.

Now I think I need to buy enough to do the other window which looks to the front of the house. They come ready-made as continuous curtains at Spotlight.

Next time I’ll make sure I have the right brackets… and the right plasterboard fittings.

That’ll make life easier.

Oh, I have a new drill. Its a cheapie that Wayne got me a couple of months ago. Its much lighter than my trusty old one which was probably my first power tool ever. And its got a chuck which is probably better for me as I can’t really hand tighten enough.

So there you go.

I finally did something.

z

something to smile about

We’ve just had a week off. A whole week, sandwiched by a weekend on either end and a public holiday on Monday… That’s a whole lotta time to ourselves!

You’d think I’d have tons to share right?

Well, you’d be wrong.

It all started last week when I had to use my day off to drive a whole lotta stuff into the city and to the gallery where Wayne had organised work take part in an exhibition. Then I drove into the city both Saturday and Sunday cause Wayne was the only person who put his hand up to man our part of the exhibition. That meant I spent two days in Hobart… not bad in itself. I watched a couple of movies and had coffee out and did some shopping… But they were days not spent at home, working on… oh… I dunno… anything!

Then, on Monday we had to go back into Hobart to take down the exhibition… more driving in to the city, a whole day pretty much gone.

We live about 30min or so out of the city, more in traffic. But going into the city always blows out. You try to do as much as you can “while you’re in there” and one hour turns to two and so on.

Tuesday grooming and a great playdate with a friend and her poodle. Fun. We all enjoyed that. Wednesday grooming again, all day. Thursday (yesterday) another drive into the city to pick up the Art From Trash entries this time, ours and work ones.

And today… we had an appointment at the tax man.

All bad news I’m afraid. And that’s for last year. In about a month it’ll be more bad news.

sigh.

So, you’d think that having spent only half a day out today, I’d be champing at the bit to get out into the workshop to make something. Anything.

But no. I’m sitting here, near the heater, trying to keep warm. Tasmania turned the cold on for the first day of winter and hasn’t let up since. Big frosts every morning, pea soup fog all day… Lovely.

I’m just too weary to go out there and work in these conditions. Maybe tomorrow. Maybe the next day.

Eh. Who knows.

Meanwhile I’ll entertain you for a bit. Will that do?

I love words, language, etc. So its no surprise I love these:

The Washington Post’s Mensa Invitational once again invited readers to take any word from the dictionary, alter it by adding, subtracting, or changing one letter, and supplying a new definition.

Here are the winners:

1Cashtration(n.): The act of buying a house, which renders the subject financially impotent for an indefinite period of time.

2. Ignoranus: A person who’s both stupid and an asshole.

3. Intaxicaton: Euphoria at getting a tax refund, which lasts until you realize it was your money to start with.

4.Reintarnation: Coming back to life as a hillbilly.

5. Bozone (n.): The substance surrounding stupid people that stops bright ideas from penetrating. The bozone layer, unfortunately, shows little sign of breaking down in the near future. 6. Foreploy: Any misrepresentation about yourself for the purpose of getting laid.

7. Giraffiti: Vandalism spray-painted very, very high .

8. Sarchasm: The gulf between the author of sarcastic wit and the person who doesn’t get it.

9. Inoculatte: To take coffee intravenously when you are running late.

10.Osteopornosis: A degenerate disease. (This one got extra credit.)

11.Karmageddon: It’s like, when everybody is sending off all these really bad vibes, right? And then, like, the Earth explodes and it’s like, a serious bummer.

12. Decafalon(n.): The gruelling event of getting through the day consuming only things that are
 good for you.

13. Glibido: All talk and no action.

14. Dopeler Effect: The tendency of stupid ideas to seem smarter when they come at you rapidly.

15.Arachnoleptic Fit (n.): The frantic dance performed just after you’ve accidentally walked through a spider web.

16. Beelzebug(n.): Satan in the form of a mosquito, that gets into your bedroom at three in the morning and cannot be cast out.

17. Caterpallor  ( n.): The colour you turn after finding half a worm in the fruit you’re eating.

And how about an absolutely amazing website:

Or the funniest ad ever:

Or maybe this is:

This is funny but also hits cute and sweet:

How about some funny images:

Hope you had a chuckle or two.

z

art from trash – some photos

I really wanted to share some photos of work at the Art From Trash exhibition which ends next week. Some of these photos were taken by myself but most were taken by the official photographer and I got them off the Art From Trash facebook page. Please visit their page to see more work.
I mostly just wanted to share the works that Wayne and I entered or have connection with through our jobs.
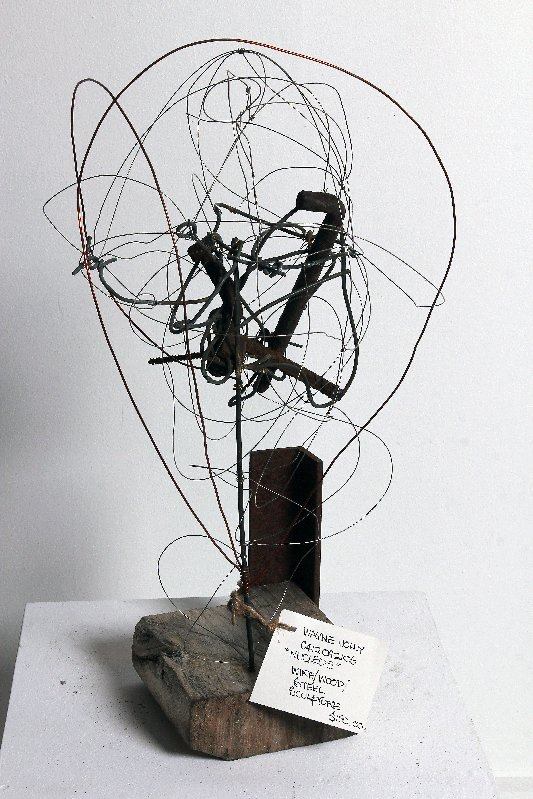
Firstly, here are Wayne’s entries. This one is called Nucleus and is made of old metal, wire and wood. It looks best in the sunlight with the sun glinting off the silver and copper wires, contrasting with the rust and old wood. Its approximately 45cm tall.
This one is called Big Bang and is over a metre tall. Its free standing and is also made of different wires and metals. You can’t tell in the photo, but there are silver and copper wires all mixed in together with rusty metal. Photos don’t do it justice.
You’ve seen this one before. Its my Travelling Sidetable.
And of course, my Rooster In Print.
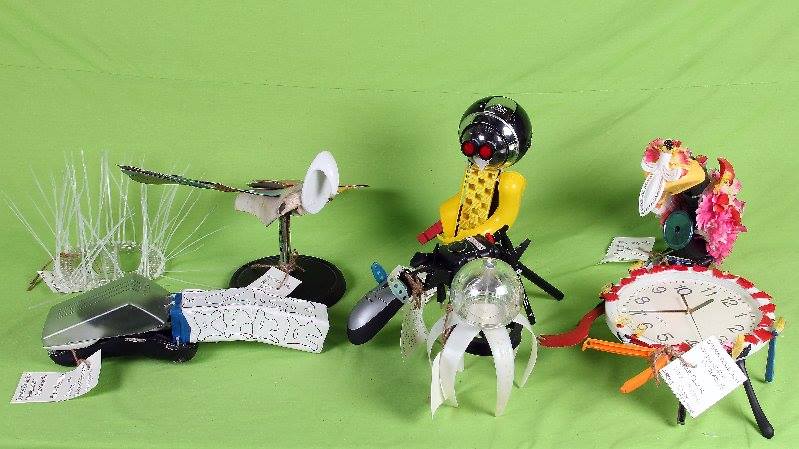
This is the Cosmos Collection, a collection of animals made from plastic and other ‘junk’. These were made as part of ‘making art from trash’ workshops run at Cosmos (where Wayne and I work) in association with the Tasmanian Art Gallery.
Another Cosmos entry in the AFT is this Rock’n’Table, made by participants in our art programs. Obviously made of rocks and a slab of old wood.
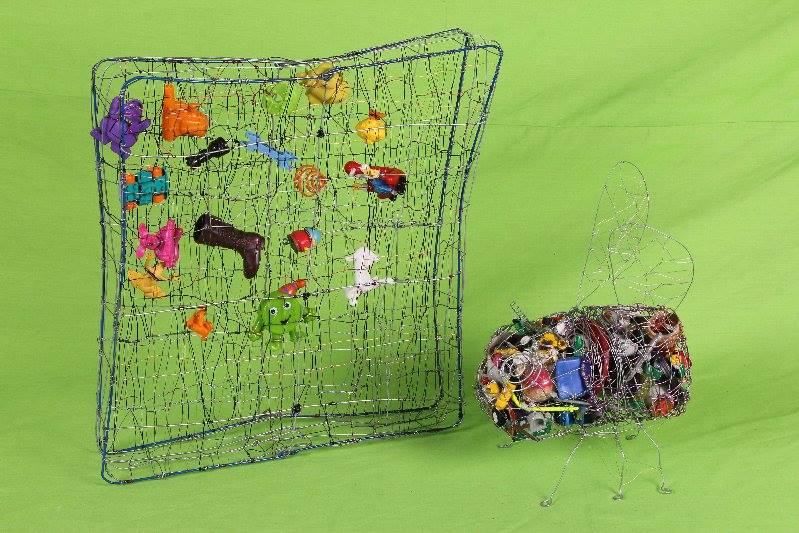
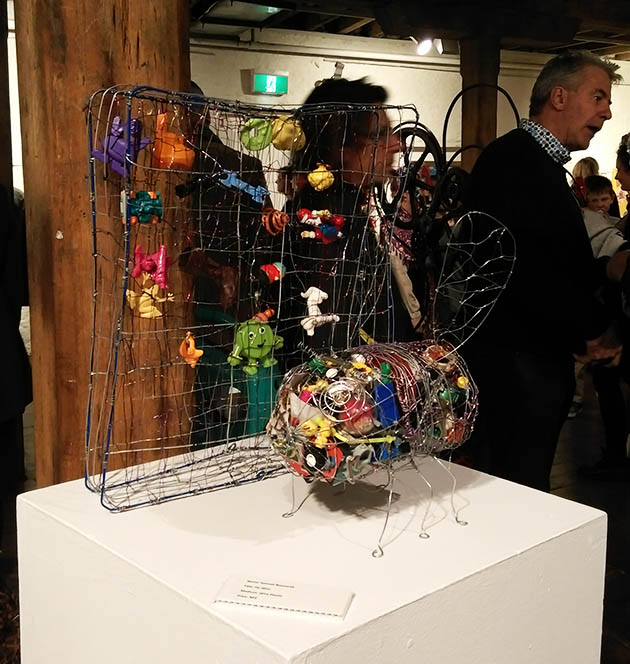
Below is the work of a guy I tutor in art privately. Sam Bosworth is a very talented young man with autism and I love working with him and watching him develop his wiring skills. This entry is called Fly Wire and is made of old coat hangers, old plastic toys and wire. 
You can’t really see the many different coloured wire in the pieces.

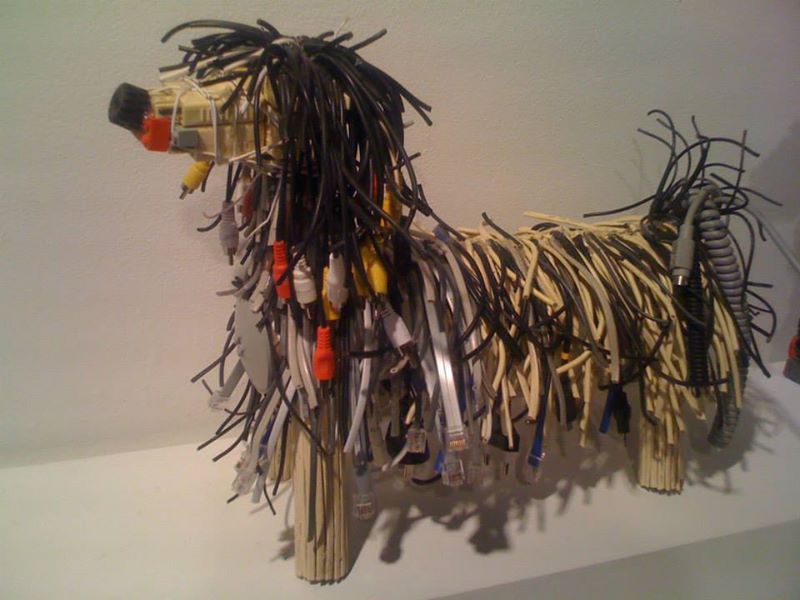
And in case you missed last year’s AFT, these were my entries – the Junkyard Dogs.

This little guy is made of wire, plastic toys, dog hair and electric cables.

This guy is plastic toys and wire.

This one is old cables and cardboard.

Lastly, the smallest in the bunch, wire, dog hair and a dash of possum hair and dryer lint.

I’ll leave you with a fun one – this is one of last year’s Cosmos entries. The Tin Man was something I assisted one of our participants to make.

So much fun! That’s the best part of my job: working with people with disabilities to create art.
z