Unknown's avatar

About zefiart

Blogger, DIY-er, poodle lover, graphic designer, dog groomer, recycler, artist, wonder woman in my spare time.

cleaning and sorting update

Just a quick update before I disappear back into the casita.

I think I’m getting somewhere. I can see the floor now. In the workshop area at least.

I decided I can’t get all three rooms organised at once like I’d planned. I thought I could go in there and sort and clean and organise and have 3 tidy rooms in one go. Instead, I’m going to tackle it a bit at a time.

See, here’s the problem – I have a ton of stuff taking up space, and even with putting things in the sell, donate and throw away boxes, I’ve still got lots left.

There are things I’m just not willing to let go of yet. Not till I’ve made something with them. I got a lot of stuff to redo and make over for myself or to sell, so the only way to move those things out is to redo and make them over and sell them.

So, what I’ve decided is the way to tackle cleaning up the casita is to work in stages. Stage 1 is to get all the boxes out of the pile of death in the store room, the items in them sorted and distributed to their new homes (here or elsewhere). That way I can find just the right bit to finish something.

The store room is not yet empty and won’t be for a while. The grooming room still has stuff in it that don’t belong there. For a while. But the workshop is beginning to look like a person can work in there again.

I’m going back to continue on that in a minute, and then I can start on Stage 2. Making stuff and moving it out.

Hi-ho, hi-ho, its back to work I go.

z

cleaning up or messing up?

You know how I started cleaning out the casita?
Well, the job has defeated me.
Or at least, its giving my confidence a good thrashing…
I started out with a mess and I thought I was making some progress. Instead I now have a bigger mess in more rooms than I had to start with.
Sigh.
I know that its always darkest before the dawn (or messier before its organised) but man… this is seriously harder than I thought. 
I thought I’d have it finished this weekend. Now I’m thinking it might be the middle of 2016 before I’m done.
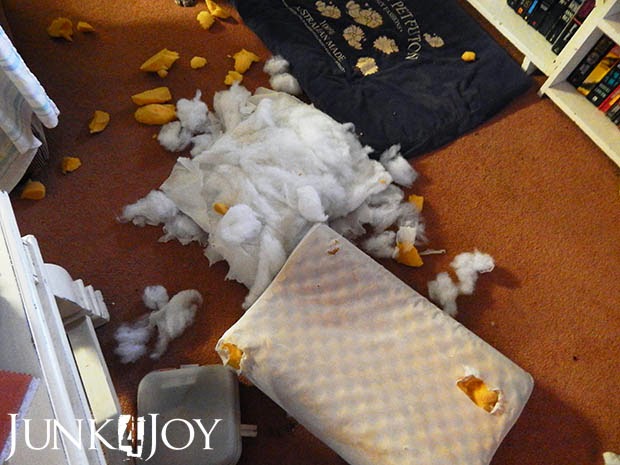
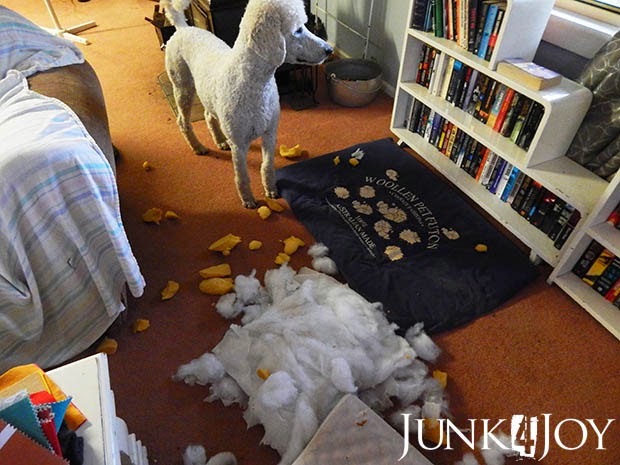
Meanwhile, Romeo decided to do some of his own organising. He decided it was time to remodel the dog pillows.

And here is the proud Romeo with his handiwork.

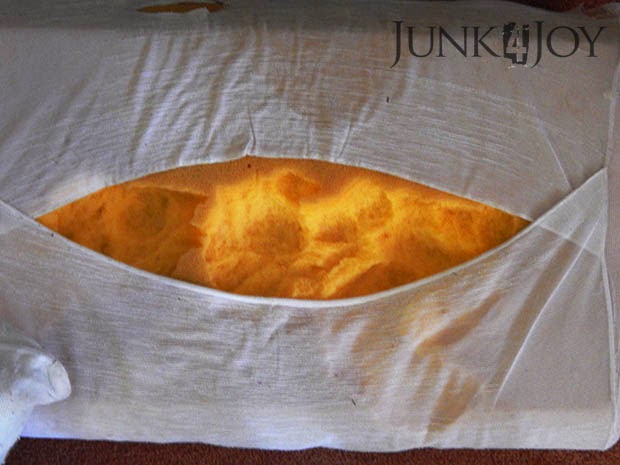
He even decided to just take bites out of the foam on this  pillow. Just picturing him doing this makes me laugh.

I think he was just trying to lift my spirits. Cause of course, coming inside after digging myself out from under 107 cardboard boxes to find foam and stuffing all over the floor in the living room is just what I needed to lift my spirits!

At least he was determined, he had a goal and he worked hard to achieve it.

I should take a leaf out of his book (or stuffing out of his pillow) and keep going on my clean up and organising.

It will get better.

One day I’ll finish.

Then I can start messing it up again.

z

cleaning and organising – heap of change challenge

You know how most people do spring cleaning? Well, turns out that most of the world (the DIY, decor blogging world) do their spring cleaning at the start of a new year no matter what season it is in their hemisphere.

Kinda like “new year, clean house”.

Whatever.

It made sense in my head…

Anyway, Donna at Funky Junk challenged everyone who wanted to participate in a clean up challenge. The Heap of Change Challenge. (For details, and to join in, click image below.)

Join in! You can never have enough cleaning/organising/tidying in your life.

Its one of those jobs you can do every day for the rest of your life.

Its depressing when you think about it.

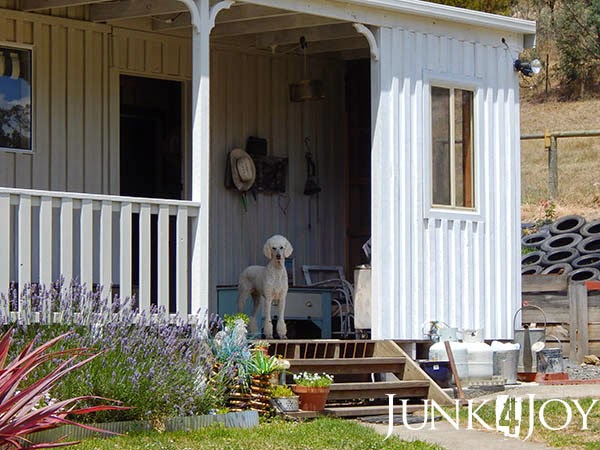
Anyway… one job I’ve been putting off for ages is organising the casita. For the uninitiated, the casita is the original old house on the farm which we use as a shed. It was used as a shearing shed by previous owners. For us its a horse feed room, storage room, tack room, laundry, workshop, grooming room and I-have-something-and-nowhere-to-put-it room.

The large main room is my workshop basically so I have a ton of stuff my own stuff in there. Then about a year ago when I organised my office, I moved everything from the office to the storage room in the casita.

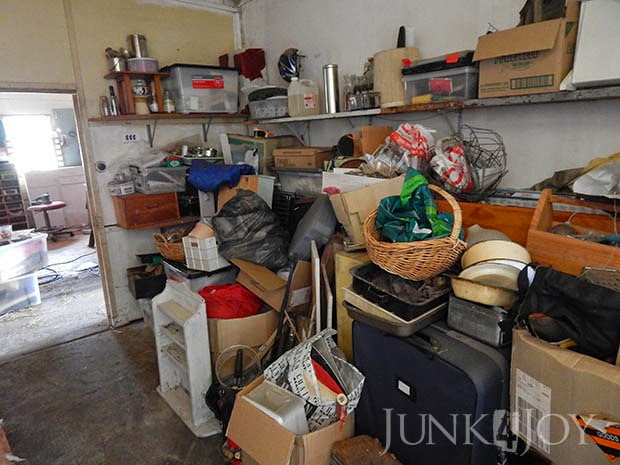
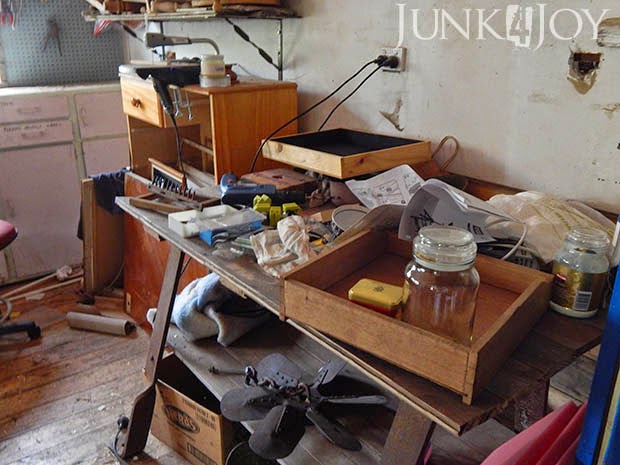
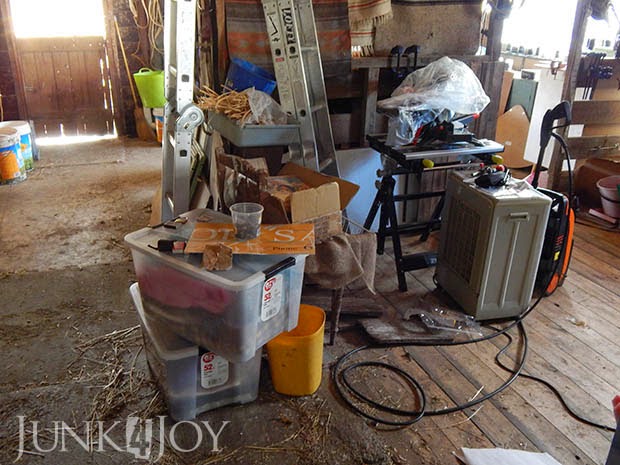
My office looked great (for a while, but more on that disaster area later) however, this is what the casita looked like.

Really.

Hope you have a high tolerance for chaos.

I am not a hoarder. I am not a hoarder. I am not a hoarder…

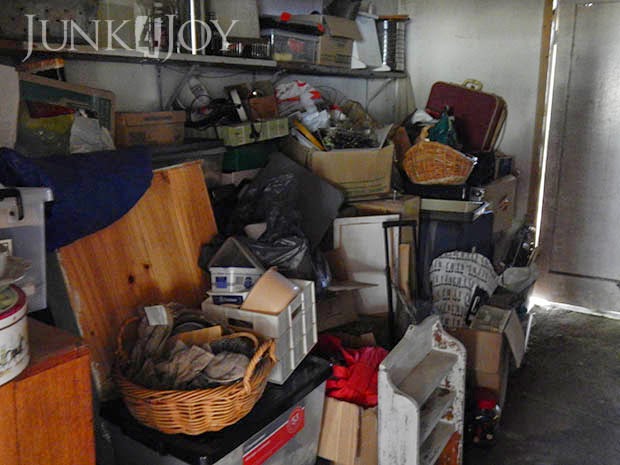
There was an upper cupboard in the store room on this wall but we removed it so I could use it in the workshop. Obviously all the stuff in the cupboard had to go somewhere!

Finding anything was a nightmare.

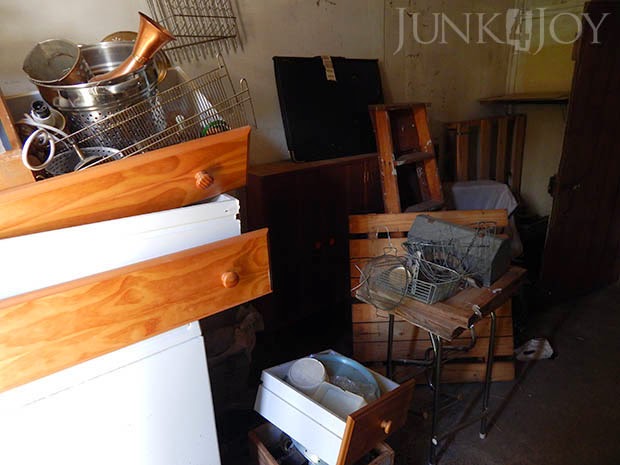
This is what my workbench looked like. The new/old workbench that Wayne had in his shed and wanted to get rid of. I love it cause of its heavy, industrial iron legs.

Basically, when I want to actually do any work in the casita I have to shove things over, step over electrical cords, trip over boxes, etc. The fact that I’m able to do anything in there at all is testament to my incredible talents.

Ha.

Ready for the afters? Well, I’ll disappoint you. I spent all weekend working on that sucker and I’m still not even halfway there. I’m taking everything out of the store room and finding a place for it.

I have boxes for things to donate, I have rubbish bags I’m filling ruthlessly, I have boxes for things I plan to sell or give away. I’m trying to recycle and use anything I have on hand for storage and I’m sorting things into areas of related items. Maybe one day I’ll actually be able to start a project and know exactly where everything I need is.

I’ll share some pics for now, kinda like teasers of organisation to come.

However… there will never be any great reveal labelled organised clean and tidy perfection within an inch of its life photos in this workshop makeover. Its just not that kind of area. Its messy and dusty and not photogenic.

It has broken windows mended with bits of wire mesh, lots of cobwebs, hay from the feed room, hair from the grooming room, mouse droppings, sometimes possum droppings, unlined walls, groovy old wallpaper, severe drafts and half finished or half demolished areas.

So, put away your expectations of pretty, control your OCD and just enjoy the bits that don’t look too bad.

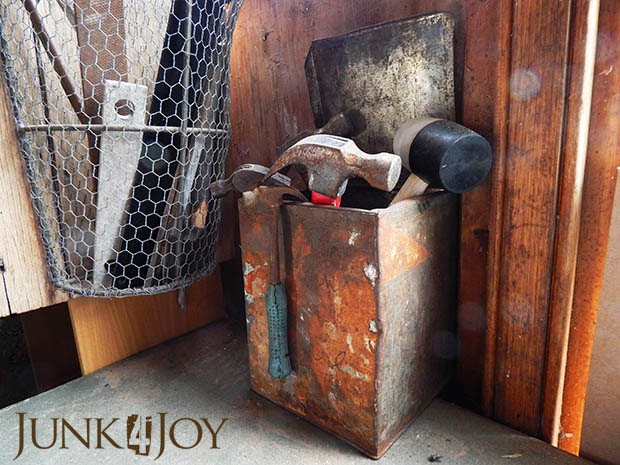
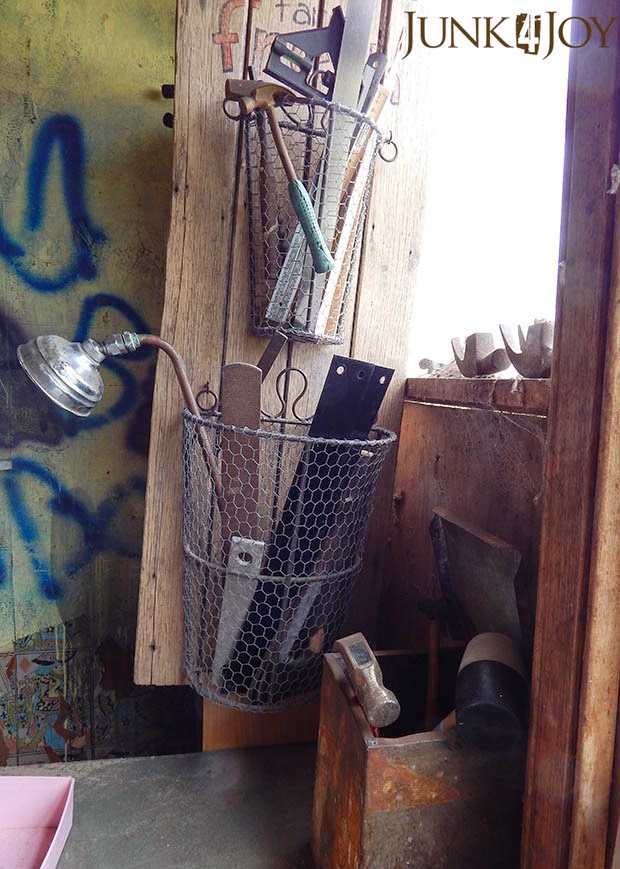
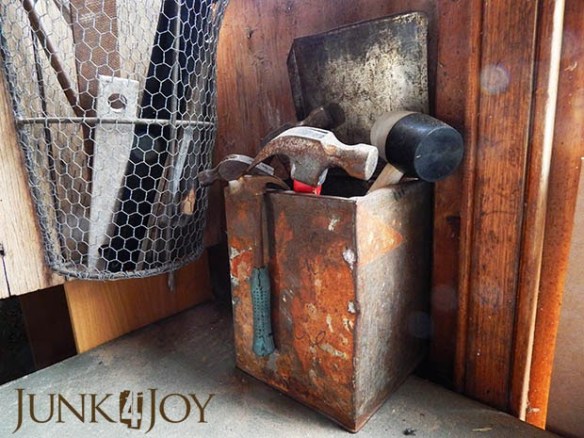
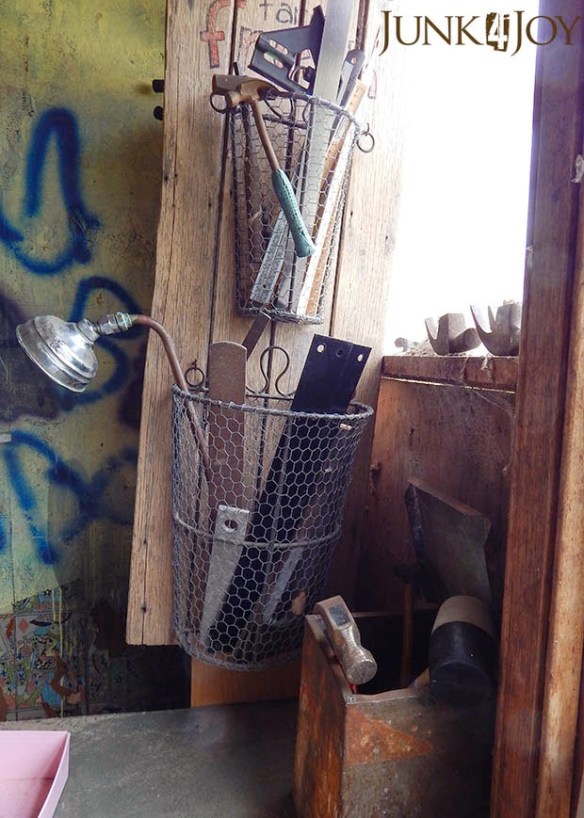
Like this beautifully rusty old biscuit tin holding my hammers.

On the right of the hammer box is the farm fresh sign with baskets I had in the kitchen for a while. I something better for the kitchen, so now my baskets are holding bits and pieces in the casita. Rulers, straight edges, whatever is long and straight.
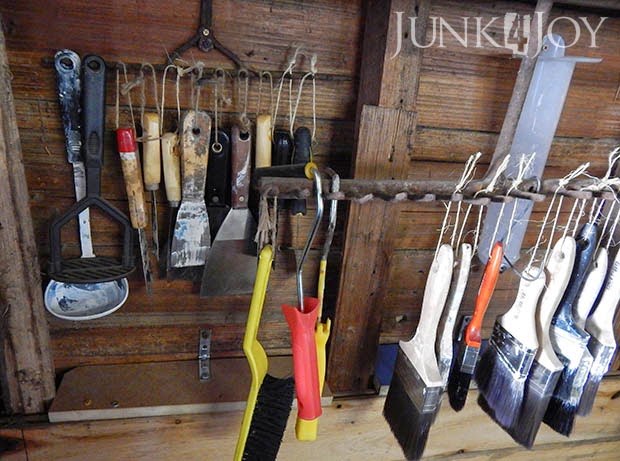
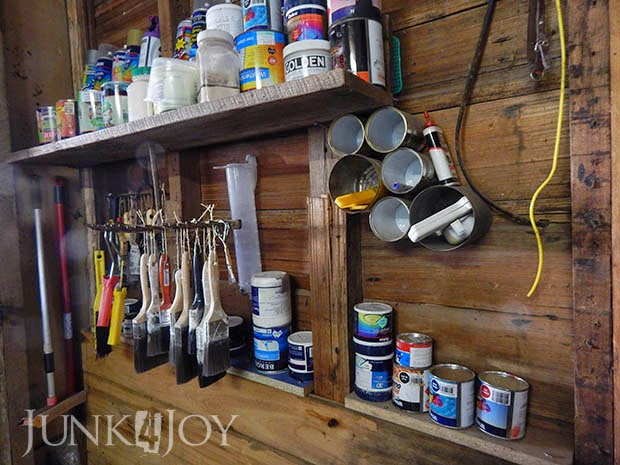
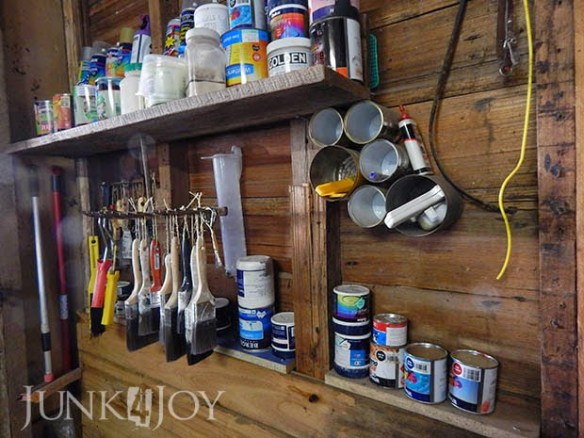
My used paint brushes, scrapers and other paint related implements are now hanging off rake heads. Not only are they all in one place, but they can drip dry there and the bristles don’t get smooshed.

Below the rake head hanging system I put narrow shelves where the wall lining ended abruptly. Someone either stopped putting timber lining on the wall when they got to that spot, or they stopped ripping it off. Either way, there was a huge gap down there where things would disappear, never to be seen again. With the little shelves I kill two birds with one stone. While I don’t condone killing any birds, this stops things from falling into the gap and doubles my small paint tin space.
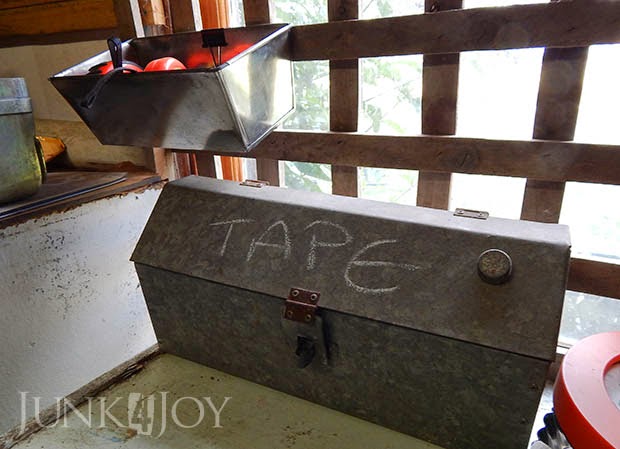
A cute galvanised box holds all tapes and my tape measures are all now in a cake tin.

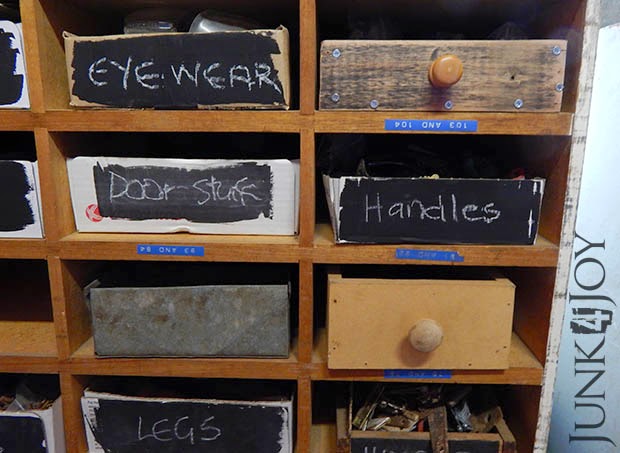
The cubby shelf unit needs more drawers and I’m using anything I have for now. Mostly cardboard boxes cut to fit and labelled. Ignore the blue tape labels. They’re the ones I couldn’t remove. Yet.

See the timber box with knob top right? That is the worst-made box in the universe.

I made it.

Eh.

Its not labelled but it holds knobs. I figured that was self explanatory.

And yeah, second one down holds more knobs, in case you’re wondering.

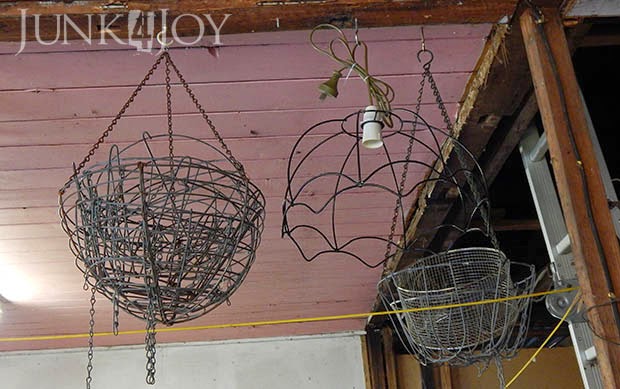
I decided that the roof was storage space just waiting to be pressed into service. I’ve started hanging baskets and light fittings up there. As well as light-fittings-to-be.

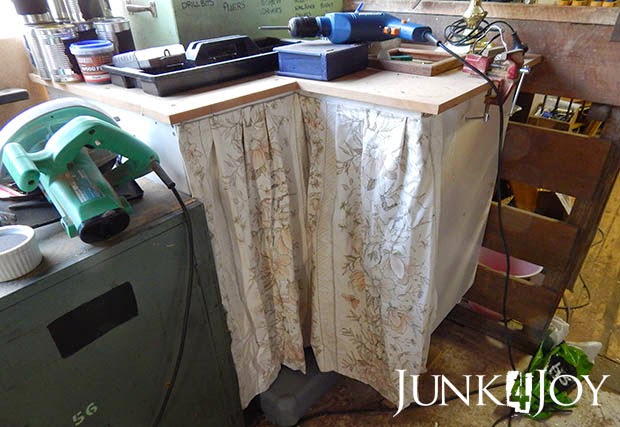
This is a corner cupboard from my old kitchen. I put an MDF top on it and some furniture legs and it now holds my power tools. I added a pretty curtain to keep the worst of the dust off them. Who said you can’t have pretty in a workshop?
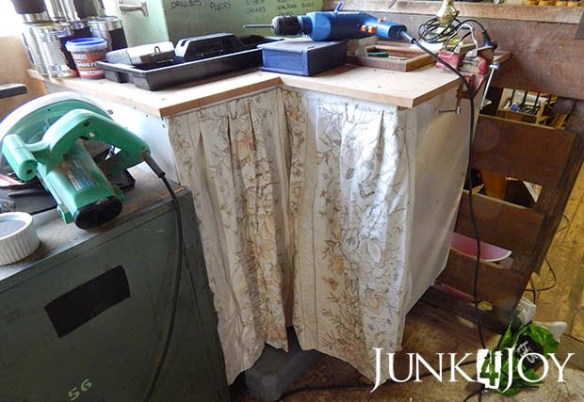
 I even nailed pleats into it!

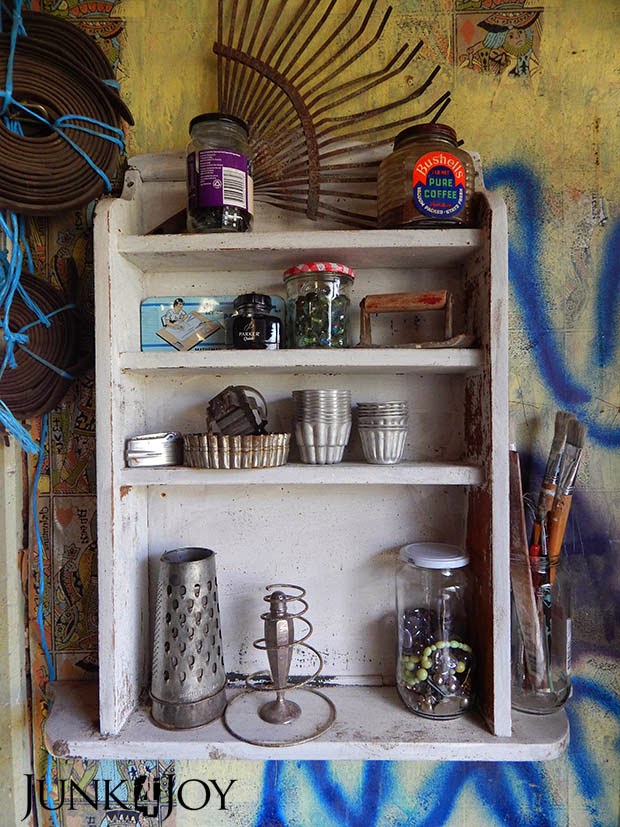
This cute little shelf is something I picked up at a tip shop. I used milk paint and almost all of it flaked off one side …I couldn’t be bothered sanding and painting it again. Its now part of the workshop.

Notice the graffiti and the old playing card wallpaper? Cool, huh?

I hope to do more sorting and organising this weekend and hopefully one day soon I’ll have some more finished pics of imperfection to share.

z
my new toy

I did it. I broke down and bought myself a router.

A mini router. What they call a ‘trimmer’.

I’ve wanted a router for ages. Firstly I wanted one so I could make my own frames. Then I wanted one so I could do fancy edges on things.

Mainly I wanted one just cause I wanted one.

You know. To round out my tool collection.

“And here is my workshop, there’s the drill, the circular saw, the contra saw, the jigsaw, the drop saw, the scroll saw (a build-up of saws), the belt sander, the orbital sander, the corner sander, the hand tools … and the router!”

One thing I have to share though, is that I’ve always been more than a bit afraid of routers. Probably cause someone once told me that they’re very dangerous cause they spin faster than any other tool.

Like, just cause a circular saw doesn’t spin as fast it can’t do as much damage. Like cutting off your foot is way less intense than edging your hand…

I have no idea why I was so scared of routers. But I was.

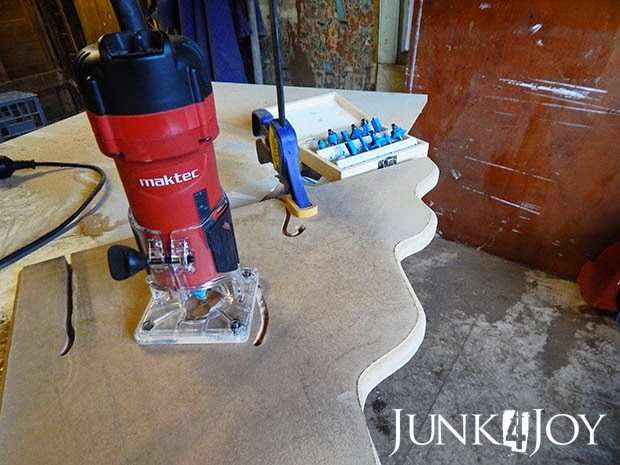
So, when I got this baby (pun intended), I took it home, read about how to put the bit in and got set up to try it out. Safety goggles, a piece of scrap MDF (soft stuff to experiement on) and clamps.

I tried the bit it came with first and did a few freehand curly bits on the MDF. Ok. A bit wobbly. The thing kinda tried to get away from me.

That was boring though, so I tried an edge with a curved bit. That was easier and more fun!

So I took out my jigsaw, drew a wavy line and cut it out slowly and carefully*, then did that edge.

I’m so proud of my edge. I could never quite get how you could edge something freehand without guides, but I did it. Its not perfect but I did it!

*The jigsaw and I have never been good friends. I’ve never been able to get it to work as well as most of the DIY-bloggers I follow seem to. Maybe its a crappy jigsaw (its over 10 years old and was a cheapie)… Most likely its the crappy user.

I think I figured out what I do wrong. For some reason I’ve been a bit scared of my jigsaw and never seem to press the button to full throttle.

Funny as I play free and easy with my circular saw all the time, waving it in one hand, not a care in the world. I use that tool so much its almost like an extension of my own body.

I think I never used the jigsaw properly. It was something Kristi (at Addicted 2 Decorating) said that made me realise I was doing it wrong. She said that I drive the jigsaw, it doesn’t drive me.

Up till now I’ve never been able to cut along my lines. I’d put the jigsaw to my wood and just let it lead the way. My jigsaw has always had a mind of its own, veering off here and there till I give up in disgust. But last night I kept Kristi’s advice and took it really slow, going full throttle on the blade so it cut smoother, and cut carefully and followed my lines almost perfectly.

With that and the edge I managed to do first time, I feel very proud of myself!

Though, I brought myself back down to earth with a crash when I made the worst box known to mankind. I’ll share that with you when I share the workshop tidy up at some later date.

I’ll leave this post on a positive note of achievement.

z

good start to the year?

Ain’t life fun? Just when you think things can’t get any worse, something else happens.
First it was Wayne, with his sore back, then me with the wacked ribs, now its Cass with a gash on her side big enough to drive a truck through.
That’s three now. Lets hope that’s all there is now!
I went out this morning to put her mask on (for the sun) and saw a huge gash on her side with blood dripping from it.
Not nice.
I yelled for Wayne and we went up the top of the paddock to get her and brought her into the house yard. We washed the wound and yeah, it was beyond our capabilities to fix. Too deep and too big.
I called the horse vet clinic and they sent out one of their vets this afternoon. He did a great job stitching it up. I was unsure how he’d be able to hold such a gaping wound closed, but he did a double layer job – first stitching muscle and then skin.
I made myself as useful as possible. First I brought out my small grooming table so he could set up his tools. Then I lent him my clippers with a #40 blade to clip around the wound. And after he finished I cleaned her up.
Wayne says I’m a frustrated vet nurse. I’ve assisted with surgeries before, on my own animals when they were injured after hours (which is when every self respecting animal injures itself). There was a time when I considered being a vet … I opted to go to Art School instead. 
Looking back now, being a vet would probably have been a much better career choice…
At the very least I’d have been able to support my animal habit. Oh well. Hindsight is 20-20 right?
My poor Cass. She’s a bit accident prone, but this is rather bigger and badder than the usual cuts and scrapes horses tend to get. She’ll be in isolation for a while till we know the stitches have done their job and she wont rip them open.
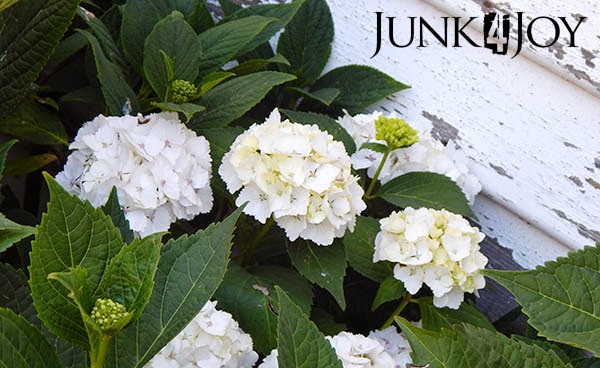
For those who are squeamish, I’m putting the before and after pics below. You just enjoy the pretty photo of my hydrangeas. 
I put them at the top of this post just for you.
If you have a weak stomach close the window now.
This is what the poor girl looked like after we washed out the wound.

And this is this afternoon after the vet closed her up.

Poor Cass…
z

blog facelift

Did you notice I’ve made some changes to the blog?

I’ve started to try to be more ‘professional’ with my blog. Firstly I started making my photos bigger (I thought they were big enough, but apparently bigger is better – sorry guys). Then I started watermarking my pics so that if by any chance, someone might want to actually PIN one of my photos on Pinterest, then someone else might see my photo and look at my blog…

Or wonder what the hell a ‘Junk4Joy’ is.

The other change I made is to the layout. Firstly I changed the colour of links. I thought I may have been a bit too subtle before.

That’s me.

Subtle.

Just like my grandmother who could blow out your eardrums when she used her ‘inside voice’ in a car.

Lastly, I made the blog wider all over, so that the text part would fit the newer/bigger photo format.

So, what do you think? Do the longer lines make it harder to read? Or is it ok? Can you even see a difference?

I do like the bigger photos. I notice how much I dislike small photos on other blogs now.

Other than that, all is well. Back at work and back to coming home tired and not doing as much as I would like. Basically I just watch, get online and blob.

Yes, I do mean blob.

Except for tonight, when I’m blogging not blobbing.

That is till I hit Publish. Then its back to blobbing and watching tv for a while.

z

rusty rustic lamp – take two

What do you do when you have a desk lamp without a base? I bought an old desk lamp from a garage sale, you know, the kind you’d see everywhere in the 80s which clamped onto the side of the desk.
I saw it, thought “hey, I can fix that” and took it home. Wayne made a base for me and I did use it for a while, but really, that base was overkill. I got a hernia moving it.
So, when cleaning out the office for its makeover (see it here and here) oh-so-long ago, I took the lamp apart and started on the road to remaking it. 
The idea was to make it industrial looking to go with the industrial/rustic desk I had planned for Wayne.
I did finish the desk, he’s been using it since before Christmas and I promise I WILL take photos as soon as he leaves the house long enough for me to clean up his office area…
Anyway, I was saying, I had the desk finished but the lamp was still in bits in the casita.
I went out there this afternoon on a whim and finished it.
Five minutes. That’s all it took. Eight months and five minutes.
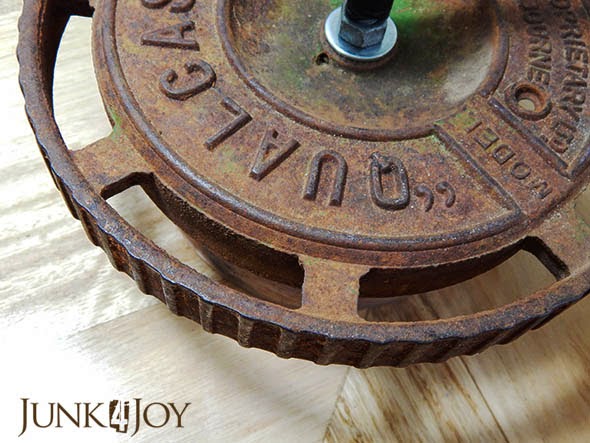
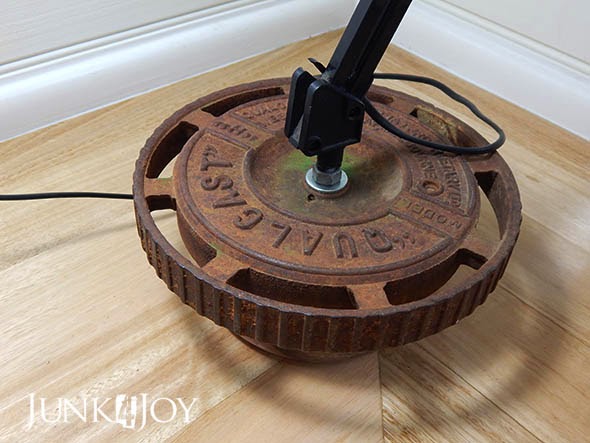
See, I’d run into a problem. I had this round rusty metal wheel thingy I’d picked up at a tip shop ages ago and I knew I wanted to make that the base. However, it had a pokey outey bit on the bottom so it wouldn’t sit flat. And the other side of the wheel thingy was boring so I had to find a way to have the whole thing sit flat with the good side up.
I thought a block of wood was the way to go when I started working on it. I drilled a hole in the wood to poke through the long screw on the lamp. The screw thing was too long for the wood block so I cut it shorter using the angle grinder. I found that I’d stuffed up the block of wood cause I drilled it one width all the way through so there was nowhere for the nuts to hold on…
That’s when I sat it in a corner and proceeded to ignore it.
Until today.
Today I went into the casita and thought “I must have something I can use as a base which will be easier to screw the lamp onto”.
In fact there were a few things…
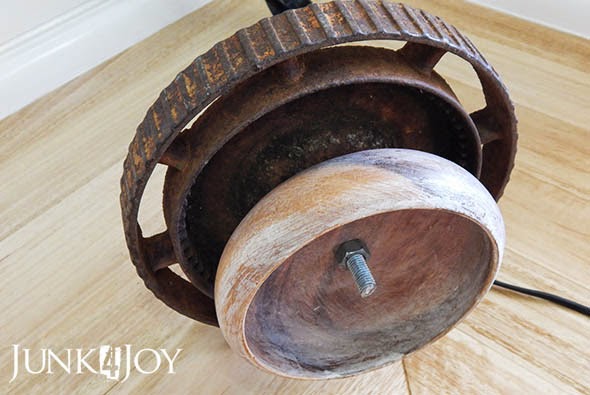
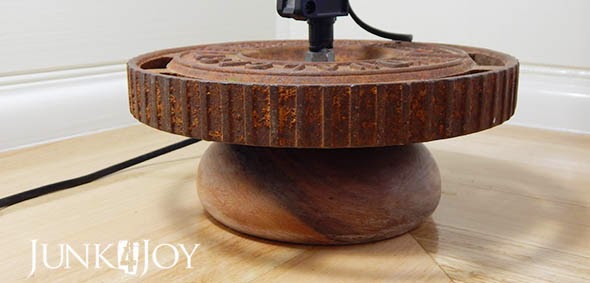
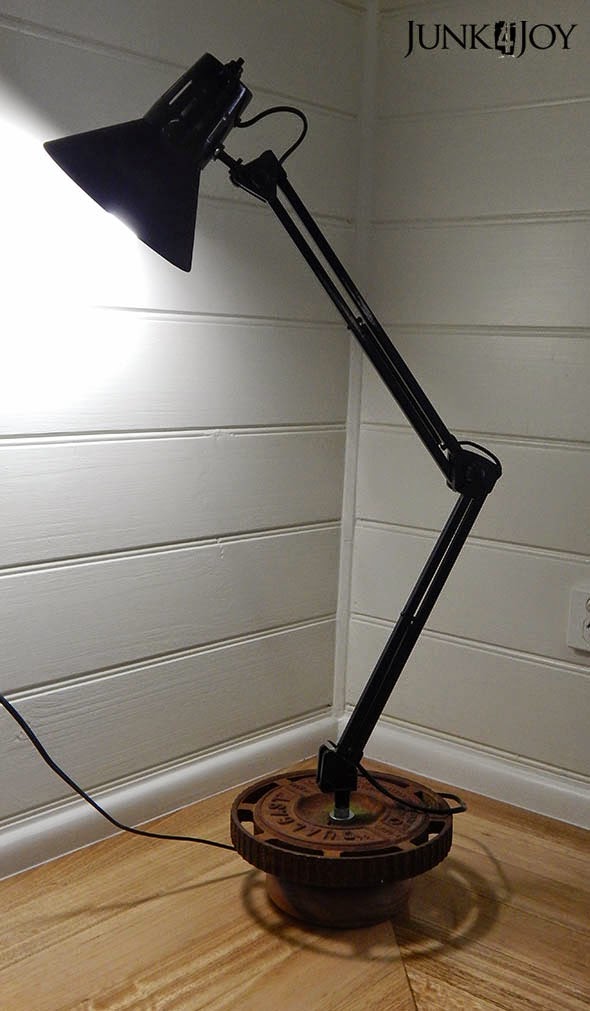
In the end I selected a small wooden bowl from my collection of wooden bowls (cause you never know when you’ll need one). I drilled a hole in it where I guessed the middle was, just wide enough for the screw, then piled the lamp, the wheel thingy and the wooden bowl on top of one another and screwed them together using a couple of nuts.

Its pretty stable. The wheel thingy (yes, that is the technical term) is really heavy so won’t overbalance.

Gotta love the green mossy patina… I didn’t clean it. I just blew the worst of the dust off it. I also didn’t seal it as the rust doesn’t come off on your hands.

There was only one more thing I did to the lamp… It had a couple of scratches on the rim of the lamp so I painted it with black chalkboard paint. Now I can leave notes to Wayne on his lamp!
This is how it looks in the corner of the kitchen. One day I promise I’ll take a photo of it in its new home on Wayne’s new/old/industrial/rustic desk.

Not bad for an eight month five minute job, huh?

z

Shared at:

oil painting the cheat way – photoshop filter

I’ve always been good at using Photoshop to manipulate images – notice my new banner? I created that using a photo I took of the old typewriter on the porch, type and 2 vintage poodle images.

I’ve always been able to play with pictures to create all kinds of things, from simple alterations like removing or adding a person, taking liberties with colours, or creating something entirely fictional. I enjoy doing it and, if I was to be completely honest, I also enjoyed the knowledge that not everyone can do that kind of stuff.

Then I found picmonkey and it was so easy to adjust colours and add effects, I kind of forgot about Photoshop for a while. All I did was resize, crop and add the occasional effect to images for a long time.

That is, till recently when I got Adobe CS6 on my laptop. Now I’ve started doing stuff with PS again and remembering why I loved it. Like the Christmas and New Year’s cards. Those were quick and easy, removing type and creating backgrounds where I needed them… but doing something like the banner, that’s way more fun.

I used to do a lot of that type of thing for websites, but I don’t design websites for people any more. Here’s one I designed for my poodle website years ago, using 4 separate images: a photograph of a drawing I’d done of my first standard poodle (Pagan), some pastels, a background and a photo I took of Pagan at a show.

But I digress. I was posting to share an amazing effect I found in Photoshop that I’d never known before. Its called Oil Paint and its under Filters.

Here are some pics I played with – the mist in the hills opposite our place on a hot rainy day. Before:

After:

I really love the way it interprets the trees. I want to paint like that!
Here’s another one, a portrait of Montana, before:

After:

Ok, pretty good but definitely not its strong point.

It really comes into its own when you do something like this – the trellis in the yard with rusty chains, the birdhouse I made and an old lantern. Before:

After:

I love this one especially. Amazing isn’t it? Like professional illustrations.
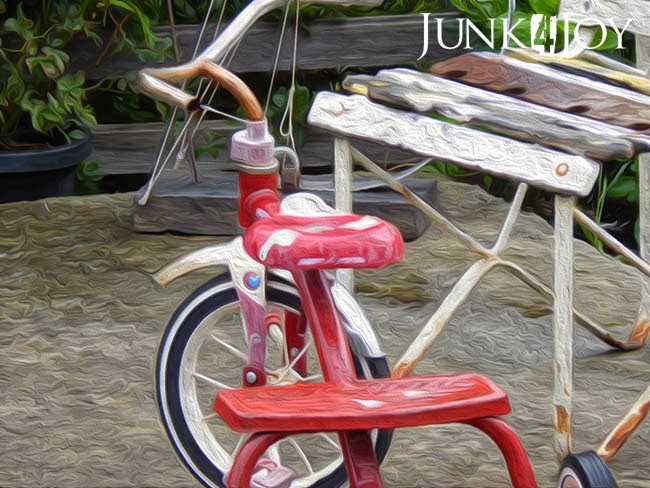
This one’s great too – the old kid’s bike near the trellis. Before:

And after:

I don’t know whether to be thrilled or depressed about this discovery. I LOVE the effect. I love the pop arty colours and the swirliness of it. I love the curly leaves and way everything looks spot on perfect.

But I’m depressed too. Cause why would anyone need to paint any more when you can do this type of thing to your photos with a filter?

Sigh.

z

felt phone pouches

Well, looks like my ribs aren’t smashed after all. They feel so much better today, they must have just been bruised.
Mind you, the painkillers the doc gave me helped some…
Still, its so good to be able to breath normally again!
I finally got around to taking pics of some phone pouches I’d made. Most of these were made before Christmas as gifts and the last one I made this week for myself.
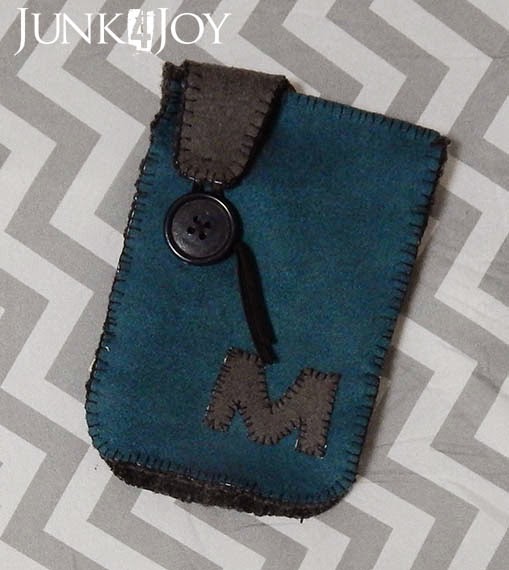
This one was for a friend named Matthew (hence the M) its my first attempt at making something ‘masculine’… I used a felted grey jumper and some suede fabric to make this one. I used some of the elastic bottom of the jumper for the side of the pouch.

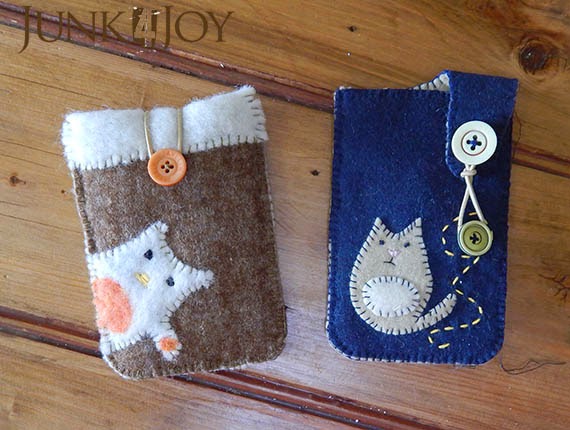
I made this one for my friend Patrice. She’s a cat person. As in, she owns a cat. Well, so does Matthew, but I couldn’t really give a guy a pouch with a cat on it… just didn’t seem right…

The pics aren’t great… I apologise. Somewhere in the mess of the casita is my lightbox. I’ll get it out again one day.
Patrice’s pouch is made from felt squares, tan inside and dark blue outside. I use hair elastics for the ties on most of these.

The one on the left below is made of a piece of felt square on the outside and a bit of felt I wet felted on the inside. Its much thicker than the blue one as my wet felted bits are thicker than bought squares.

FYI The little critter on the outside is meant to be a monster, not a cat. Just so you know.

I rolled the inner lining over at the top and made a simple close with buttons on both sides. I decided to keep that one for myself cause I love the little critter, but my mobile was too long for it. I had to do some surgery and re-make it.

What I did was undo the fold over top, add another piece of the wet felted stuff, back it with some leftover tan, and add the buttons and elastic to the front. I think its much cuter this way.

Then this week I got bored sitting around doing nothing so I made another pouch just ’cause I could.
And cause I never put away all the felting stuff.
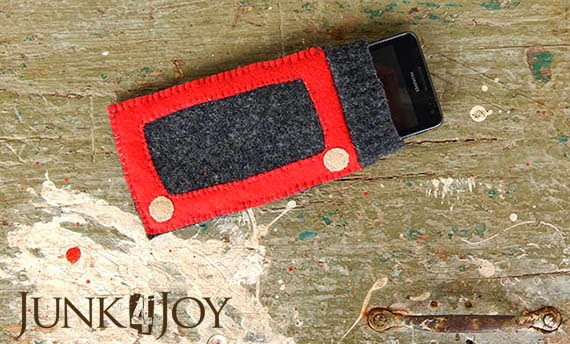
I’ve always loved the etch-a-sketch ipad covers and stuff I’ve seen on Pinterest so I made my own.
I used the same felted grey sweater I used for Matthew’s pouch for the body, I even used some of the elasticated knit from the sleeves to make a kind of neck opening.
They may not be the most practical cause you actually have to take the phone out to use it, but they’re fun and they offer a certain amount of protection from rough handling. They also keep the phone safe from scratches when inside a handbag. 
The only thing that concerns me a little is that my poodles have shown a taste for felt and I’m worried that one day one of them might grab the phone in its pouch and think “Yummm, this is nice. Soft on the outside, crunchy on the inside.”
z

the big questions

Seeing as the this whole busted rib episode has slowed me down, I’ve had a lot of time to think.

Most of the time I try to drown out that voice in the back of my head that asks the hard questions. Like:

Is this all there is to life?
Am I on the right path?
Is this job what I want to do forever?
Should I aggressively try to build up my own grooming business and work for myself?
Should I try to be a serious blogger?
What alternatives are available to me?
Why was I born?
Where is the chocolate?

Most of the time I succeed in silencing the voice.

Its easy enough to do.

I put on a dvd. I read a book. I make things.

Just looking at my To Do list is enough to befuddle my brain into numbness.

But the questions remain. Lurking. Waiting for that moment I let my guard down and don’t have a power tool or clippers in my hand to fend them off.

Really. What do I want to be when I grow up? I’m still asking myself that question. My body is slowly falling apart but my brain is still that of a lost 13 year old.

I’ve said this before and I stand by it: the more choices you have in life, the harder it is to make a decision.

I’m so lucky. I’m creative and there are so many things I love/like/want/enjoy doing. Its hard to pick just one and concentrate on it.

It irks me to see people with little talent and creativity make a success of their lives, but its cause they pick something and work at it. I take my creativity for granted… I can do almost anything I put my mind to, so I do something, master it, then move on.

Story of my life. Jack of all trades, master of none.

I do a little bit of everything and in the end, I get nowhere.

I can figure out how to do things and I can actually follow through with them. I even finish things occasionally 99% of the time. But how can I pick something and concentrate on that and become successful at that – in a way that translates into an income?

Ah.

Now there’s a hard question.

z