a new/old labrador tray

A while ago a friend asked me to make her a tray featuring labradors. I considered her request and came up with the idea of doing a silhouette of a lab, super-imposed on a star in red, yellow and black. Something that would look like an old fuel sign.

I started by choosing a frame I thought would make a nice tray. I then cut a piece of plywood to fit into the frame I’d painted bright red.

I printed out my design on 2 sheets of A4 paper and (using the charcoal on the back method) traced it onto the plywood.

I painted the dog and background using my acrylic artist paints. I loved the natural colour of the plywood so I decided to leave the star unpainted rather than do it in yellow.

When the paint was dry I gave it a sand to make it look old and worn. I tried it in the red frame and didn’t really like it. There is such as thing as too much red.

So back to the drawing board. I cut some pieces of tassie oak I’d gotten for free from the hardware store – they were packers in pallets of products they were tossing out.

I did the steel wool in vinegar trick – I planned to age them with the vinegar solution then paint them and scuff them up to expose the aged timber.

Well… something went wrong. I have no idea what or why, but the wood turned black as soon as i painted the vinegar on it!

You can still see the grain, but its like I used black stain instead of vinegar. Wierd.

However, in my “go with the flow, all accidents are happy little adventures” frame of mind I decided to go with it and make it work.

I painted the bottom of the plywood grey and painted a bit of the vinegar solution over the sanded areas to age it. It went black too. But it works for me. It looks old and abused.

Then I made my first mistake.

I painted some of the vinegar on the sanded red areas. It left distinct stains.

Oops.

Go with the flow. Its all part of the adventure, right?

I stained the entire red area with vinegar to try to smooth it out. The blackness bled into the star.

Ooops again.

I sanded it out, did a bit more sanding, then decided it was good to go. Its just a bit more ‘abused’ than it was before.

Since this is a tray, and trays are used to carry drinks and food, I gave it a coat of estapol for protection. That’s causing the shine in the photos. Please look beyond that. I’m sure some use will take care of that.

I found a couple of old bent handles I had in my collection – they’d been removed from a couple of drawers I’d used in another project.

I used some pre-rusted washers under the handles when screwing them in place, cause the smallest black screws I had were a tad too long. Didn’t want the pointy end of the screws sticking out on the inside of the tray!

It worked. I actually love the little rusty outline around the handles.

The photos are giving the black a rather blue tinge which isn’t there in real life. Its come up quite good. I hope my friend likes it… Do you friend?
z

Shared at:

an unwanted shop rack

I’m sharing this quick project now, even though I finished it about 2 months ago… cause I wanted to share it when I had it in the office as I planned.
Of course, I had to clean and tidy the office first, and that was a job I put off and put off and put off and… you get the picture… But its finally done. Its clean and tidy (for about the next 2 days providing I stay out of it).
Who was it that said they get more cleaning done in the 30 minutes before visitors arrive than they get done in a week? That’s me. Only this time I cleaned 24 hrs in advance.
So, back to the shop rack. I found this sorry little cutie at a garage sale and was quick to grab it. It had been painted silver at some stage, not well, and the base was really wonky, but it had wheels.

Note the wonky base. Held on with string and tape.

I cleaned it up, scraped the scunge off it, disinfected it, and replaced the tape and string with screws and nuts. I gave it a fresh spray of silver, leaving the occasional old paint showing through (for character, doncha know).

Then left it sitting in the workshop for weeks, gathering dust and horse hair.

But today its in the office. Its new home.

Now stay tuned. The office cleanup miracle is coming.
z

the last chest of drawers


Among all the ups and (mainly) downs in my life of late, I thought I’d share something creative and good.

You may remember that when I overhauled the ugly pine chest of drawers a few weeks ago I mentioned wanting to fix up the smaller one to match. Here is an old photo of the two chests side by side in the bedroom as they had been since we moved here.

That top doesn’t actually belong there. I found it in an op shop a long time ago, unpainted and missing its ‘bottom’. I thought I’d make a shelf out of it for the mud room, a spot to drop keys and stuff. I even made a shelf to go on top of it but I never got around to putting it up where I had planned.

Here it is when I first got it and after I’d put some paint on it.

My original idea was to somehow make it into a spot for my jewellery, which is why its on top of the smaller dresser. I even made this mock-up to see how it would look.

Luckily, I decided against that. I just wasn’t sure its what I wanted to look at.

This is what it looks like now (its actually quite straight, the photo makes it look wonky… not that there’s anything wrong with that…):

I obviously don’t stage my photos. There’s a cord between the dressers for the fan. It was hot…

So, what I ended up doing in the end was finding a frame that fit between the posts, or whatever you call them. The one I found was perfect as it was, I liked the white washed colour so I didn’t paint it, just added birdwire.

I then used some small metal brackets to attach it to the posts.

Everything was painted the same shade of off white homemade chalk paint that I used on the other chests of drawers, was distressed a little bit then waxed with clear wax.

Till I started reading DIY blogs I’d never heard of using wax over paint. I thought that’s what you did when you inherited granny’s furniture. But, being the gullible follower adventurous type I am, I bought some to give it a try… and I can tell you I love the satiny feel it gives painted pieces!

Lastly I changed the tiny wooden knobs. I didn’t try to match the black cup pulls on the drawers although I had black round knobs which would have done. I wanted something special… like these little crystal knobs.

Instead of displaying jewellery, I opted for photos. That way I can look at them as I lie in bed on lazy weekend mornings. (Ok, a couple of favourite necklaces have made it to the frame, but most other stuff is out of sight.

A leftover coat hanger wire heart I made a long time ago for some of my windchimes now frames photos of my mom and dad courting and on their wedding day. I love those photos.

Below that I have two old photos of my dad as a toddler with his mother and sister, and one of me as a 3 year old holding my brother while my favourite cousin PG sits beside me.

I have photos of mom as a child as well but want to frame them along with other old photos I brought home on my last trip to Greece.
I also added my favourite card, given to me by my dearest cousin Zefi (aka Little Zefi), her daughter Marouso, and my Aunt Marissa. The card says ‘Having a place to go is home, having someone to love is family’ and its not just that sentiment that means so much to me but the messages inside. Its the best card ever.
Anyway, I realised I’ve said nothing about the chest I finished. Not much to say really. I painted it with the same paint as the other, larger, one. I distressed it a bit, then put the same cup pulls on it to match. Looking back now I wonder whether I should have put handles on the small top drawers to match the top drawers on the large one… but eh, its done now.

There they sit, together, opposite my side of the bed. I like the way they look now. So much neater and calmer that what I had to look at before, the yellowey pine and too neat white mismatched look.
Just a reminder. This is how it looked before:
And this is how it looks now:
I can live with that!
z

a wonky barn door

It seems doors are all the rage lately on blogs.

Last week Donna at Funky Junk Interiors shared this wacky door, and I love it!

And today I saw Angie at Knick of Time had made a mini barn door which is absolutely gorgeous:

Before I knew doors were going to be the trend I made my own shed door in the casita. Up till now we’d had a half door, bottom only obviously (top only would have been plain stupid!) between the casita entry and workshop. Since I sometimes put the poodles in there when grooming customers arrive and leave, I needed to close them in better.

I used to leave them in the house, but with open windows in summer I’m afraid they’ll knock out a flyscreen or three. I won’t let them meet and greet cause they’re very protective and won’t let people into the yard unless I’m there to let them in.

So I decided to keep them in my workshop. The theory behind the top door was less vision = less barking. Turns out it doesn’t work quite that way, but hey, we now have a more gap filling door than we had before!

You’ll notice the crooked gap between the two doors (I blame the door frame, it must be crooked)… the way the timber runs in different directions… the holes in the plaster where the poodles tried their paws at remodelling… Its all part of the charm.

Disclaimer:

I didn’t actually MAKE this door from scratch. I used a door from an old chicken coop I’d demolished when I bought my house in Fentonbury. Since then I’d used this door and its matching partner as ‘keep the dog out of the bedroom’ gates in Fentonbury and here.

So, I basically adapted what I had to create the top part of a door for the casita.

Since the door is heavy, I needed some T hinges which I had to buy. I didn’t have any the right size. I then had to cut a couple of pieces of timber so that the hinges had something to actually attach to. The door timber isn’t that thick.

I kinda like my added bits. They’re sort of like the patchwork of Donna’s door, just not as neat or charmingly random as hers.

I used a hook latch to secure the upper door to the chalkboard dog lead organiser. Since the top door has to swing opposite to the lower door (long story having to do with light switches around corners), I have to keep it open unless its in use to keep poodle eyes from seeing too much.

Since the only time I need to access the lead organiser is when I’m grooming, and since the poodles are usually locked up at that time, its not a problem.

To keep it closed I used a tiny bolt I had in one of my collections and simply put a hole in the door jam.

Easy.

A bit wonky but I don’t mind. I can make a better door if I want. Just look at the door I made for the phone station. I just didn’t want to this time!

In fact, my next door project will be more like Donna’s or Angie’s if I can get the right balance between wacky and neat.

z

what happened to the drawers?

So what happened to the drawers when I decided to make over the tallboy into a linen cupboard?

They became hat and coat racks of course!

First some destruction was called for. I got out the hammer and clobbered the drawers till they came apart.
I then removed the timber knobs and filled the holes. I gave them all a light sand and went through my paint pots to find colours that were similar but not the same. I painted them all in shades of greeny blue.

Yeah, for those who’re observant, there are only four drawer fronts there. There is another one but I didn’t need it for the project I was working on. It’ll appear somewhere else later on no doubt.

I used different hooks – these hooks were sent to me by a good friend in the USA (we can’t get them here) and they’re perfect for hats.

I put the hat racks up high and the coat racks underneath. I had to stagger them in order to fit them on the mud room wall. You can see where I had to put the electrical cable over the top one. Ugh. Not pretty, but here in real life, as opposed to decorating blog-land, things like that happen.

The coat racks have mismatched hooks collected from tip shops over time.
I’d originally planned to paint the entire mudroom antique white. Now I’m not so sure. I’m starting to like the rustic timber look.
I’ll paint the pine lined ceiling white and I’ll probably repaint the two house walls to match the outside of the house. But I’d already started undercoating the left side wall (with the window and sink) back when I was sure I wanted it all white. I guess I’ll paint that wall to match the other two. That will leave one weathered timber wall. It’ll be a feature wall.
I love the way the coat and hat racks look on the old timber anyway.

I also found a home for my crystal dripping tap wall art. Its been in the casita since I made it cause it needs somewhere out of the wind. I added another hat hook to it and voila, another handy spot for a hat!

This one’s on the wall I have to paint (plus you can see the terrible paint job someone did on the toilet door!) so it’ll stand out more. But that also means it’ll have to come off one day. I hope I never have to take the other ones off. Ever.

…Am I the only one who manages to twist the top off screws?

z

Shared at Your Funky Junk Upcycled Link Party

and

tallboy makeover

Long time in coming, but its finally done! The second chest of drawers makeover.

Again, I’m sharing a before pic that isn’t the exact tallboy I made over, mine was 5 large drawers and two small top ones… but you get the idea. It was almost exactly the same as the before pic. Pine, boring, plain. After has some class to it with its fancy base and pretty colours.

It was a pretty major job for me as this was the first time I’d attempted something so big in terms of modifying an existing piece. I’ve done tons of modifying before but most of the time my modifications are the type you can knock up with a few nails in a few hours. This one took a few weeks to complete, and a couple of new toys to play with.

This old chest of drawers came to Wind Dancer Farm with Wayne when we moved in. It used to be part of his bedroom furniture which included two matching plain chests of drawers (see the first one made over here) and a wardrobe (started but not finished). Since I made Wayne his own walk-in robe (here and here) I’ve been using his items for my own clothes.

Yes. He needs a room. I make do with a wardrobe and 2 chests of drawers.

What’s wrong with this picture?

Anyway, I hated their pine plain-ness and the way this particular chest of drawers had the propensity to drop drawers off sliders everytime you wanted to get a T-shirt out. Hence the makeovers.

Firstly I had to put a bottom on the chest, thus the next few photos are of it upside down, so don’t get confused. There was no need for a bottom when it was just drawers. I used an old piece of bamboo flooring a friend gave me and attached that to the frame first.

I drew the fancy front design on a piece of paper, drawing only half, folded it in half and cut it out. I traced it onto the piece of pine and cut it using my jigsaw. I then got to play with my new router and do the edge.

I used glue and a couple of nails to fit the fancy front onto the base.

I had to create a frame for it to sit on, to lift it off the ground enough for the fancy front. A normal person might have made the frame first, then cut out the front to match the raised frame, but I’m no normal person.

Its very makeshift. I used a combination of pine pieces and particleboard pieces to get the right height on my frame.

Note: this blog is all about making do and making up. Do not try this at home. Google how to do things properly!

You can see where the old base board of the chest had two cutouts. I had planned to cover those with trim but ended up keeping them visible. They kind of add a design element to the base.

Turned it right way up… It was looking good!

Those little cut outs I mentioned earlier created little gaps for dust (and mice*) to get in, so I glued a couple of scraps of thin plywood to the back of them.

*Not that mice will have a hard time getting in as there are no doors!

You can never over-do clamps!

Next I added some trim to the back edge of the melamine bottom brace and some dado trim to the front to create finish the edges. I added some leftover bits of skirting board to the sides to cover the hodge podge of the frame. I also added a piece of pine under the drawer space at the front to serve as an added precaution to the drawers falling out!
I gap-filled my heart out.
Then came the easy part: painting.

I’d thought yellow would be a nice colour, cheerful, clean… I bought a small pot of a colour I picked in the paint store.

Too pale.

I played artist and darkened it up using warm yellow and some warm red. Hmmmm…

It actually looks nice in the photos but trust me, in person it was gag-worthy. Kinda like the colour of raw fat…

Out came the trusty, tried and true aqua/green I used on the kitchen doors. Maybe not original, but hey, if all else fails, go back to what worked before.

I added a couple of the leftover knobs from the kitchen makeover as well while Romeo oversaw progress.


The makeover wasn’t without its failures. You can see where I ripped off paint when I ripped off masking tape on the melamine bottom brace. But nice trim!

Eh. No one will ever see it… Once its full of stuff, which it will be forever more.

Here it is in the guest room. Ignore the blurred background of all the crap stuff I removed from the old cupboard (the one that now lives on the front porch). Some of this stuff will be finding a new home soon as part of the cleaning up and organising regime.

We don’t have pretty matching sheet sets and doona covers… and I can’t fold fitted sheets.

Now you know my shameful secret.

My grandmother would roll over in her grave.

I’m now thinking it needs doors as I’m not liking it all on display… so in-your-face. Fly wire or bird wire in the doors to soften the un-colour-co-ordinated linen…

One day.
For now I kinda like the way it looks and the old cupboard on the porch. I’m happy.
z
Shared at Your Funky Junk Upcycled Link Party
and

old flan tin clock

Among the multitudes of things I’ve had to relocate and find homes for in the last couple of weeks as I cleaned out and organised the casita, were a few flan tins. I’d collected them with the aim of making them into clocks one day.

Well, I’m pleased to say that one day finally came.

On Friday afternoon, while working on a chest of drawers makeover in the workshop, I found myself shoving a few items over to make space on the workbench. Among which was this old flan tin.

I remembered a bit of Donna’s (Funky Junk) advice to only handle something once, so I thought it was time to take heed.

Up till now I’ve not followed that particular piece of advice even though I wanted to. I’d pick up an item, go put it down a little further over, then remember the ‘no double handling’ rule and wander around with it in my hand for 15 minutes or so looking for its forever home.

It just didn’t work.

It would be ok if I had taken everything out of the room first (which was another bit of Donna’s advice) and got all my storage spaces sorted and allocated before picking up items to rehome, but I didn’t work that way.

No, I decided to empty the storage room, the grooming room and the workshop all at the same time.

Nothing like making a challenge really challenging!

So, there I was, chest deep in boxes, buckets, tools and dust, holding a jar of screws, unable to move cause there were things in the way, ready to burst into tears.

That’s about when I gave up and took a week off, till I realised that the way to finish was to do one room at a time.

Once I decided to do that I cleaned out the laundry, the grooming room and the workshop. The store room is messier than it was before, but hey, you can’t have it all at once.

But back to that clock.

When I found myself shoving over the old clocks and the flan tin I realised there was no better time than the present to make that clock. Or try to make that clock.

Firstly I had to bend the squished tin back into shape. Then I found that it had a broken bit on the side so I made that the top, drilling two holes on either side of the broken bit to put wire through. The thought behind that being that the broken bit wouldn’t be visible if it was on top.

What I didn’t notice till I took the photos was that the Willow logo in the middle is crooked.

Moving right along…

I then pulled apart a cheapie clock with broken glass I’d had in the grooming room a while back. I took out the clock parts and drilled a hole in the middle of the flan tin to fit the mechanism dooby.

Of course, I stuffed that up. I made the hole too small and the hour hand wouldn’t move and I broke the mechanism pulling it out.

Lucky I had another cheap clock. I think I bought 3 at the time cause they were like $1 each.

I used superglue to fix the clock mechanism to the back of the tin, put the hands on and put in a new battery. Then waited to see if it would work. 
It works! Its still telling the correct time 2 days later in its new home on the grooming room wall. I call that a win despite the crooked logo in the middle.
Oh well, if you wanted perfection you’d be reading another blog. On this one you’ll only see slap dash seat of my pants quality work. ‘Cause that’s how I roll!
z
Shared at:

the cleanup goes on

Ok, I’ve been busy, continuing the cleanup in the bomb site casita using the divide and conquer method that was necessitated by the amount of stuff I had to sort and organise.
Progress has been great. This is what the store room looked like before I started:

This is what it looks like now:

Amazing huh?

I’m so impressed with myself.

Well, the stuff that doesn’t yet have a home had to go SOMEWHERE… Most of the stuff in there is empty boxes and some larger items I need to makeover. I’ll eventually sort them into some semblance of order.

My theory is that I’ll work on, finish, and move things out thus creating space!

The workshop areas are workable now at least. I’ve mostly organised things by type and use and found a place for almost everything.

I’ve even been making an effort to put things back when I finish using them.

That won’t last.

At least I can now work on a few things. I’ve already started two projects, like this chest of drawers makeover…

One thing that wasn’t planned in the cleanup was a new workbench, but while cleaning I moved this badly made, rickety bench from the laundry area into the workshop. I added cross pieces and a shelf to stabilize it then fixed the drop saw onto it. Its still the ugliest, badliest made bench ever cause I just kept adding bits till it stopped wobbling, but I now have a permanent home for the saw and don’t have to move tools all the time. Always a good thing.

Another area I managed to clean up and out is the grooming room. This is what it looked like before:

And here is is now. Not perfect, but way better.

Here’s a closeup of the old sign I have on the grooming room door. This is a sign I made for my house in Fentonbury. I had it on my gate for the 8 years I lived there. Pantone being the prefix I bred and showed poodles under.

I’m happy with my progress. Even though there is still much to do. At least I’ve been able to actually do something creative cause I now have the space.
That makes me happy.
z

cleaning and sorting update

Just a quick update before I disappear back into the casita.

I think I’m getting somewhere. I can see the floor now. In the workshop area at least.

I decided I can’t get all three rooms organised at once like I’d planned. I thought I could go in there and sort and clean and organise and have 3 tidy rooms in one go. Instead, I’m going to tackle it a bit at a time.

See, here’s the problem – I have a ton of stuff taking up space, and even with putting things in the sell, donate and throw away boxes, I’ve still got lots left.

There are things I’m just not willing to let go of yet. Not till I’ve made something with them. I got a lot of stuff to redo and make over for myself or to sell, so the only way to move those things out is to redo and make them over and sell them.

So, what I’ve decided is the way to tackle cleaning up the casita is to work in stages. Stage 1 is to get all the boxes out of the pile of death in the store room, the items in them sorted and distributed to their new homes (here or elsewhere). That way I can find just the right bit to finish something.

The store room is not yet empty and won’t be for a while. The grooming room still has stuff in it that don’t belong there. For a while. But the workshop is beginning to look like a person can work in there again.

I’m going back to continue on that in a minute, and then I can start on Stage 2. Making stuff and moving it out.

Hi-ho, hi-ho, its back to work I go.

z

cleaning and organising – heap of change challenge

You know how most people do spring cleaning? Well, turns out that most of the world (the DIY, decor blogging world) do their spring cleaning at the start of a new year no matter what season it is in their hemisphere.

Kinda like “new year, clean house”.

Whatever.

It made sense in my head…

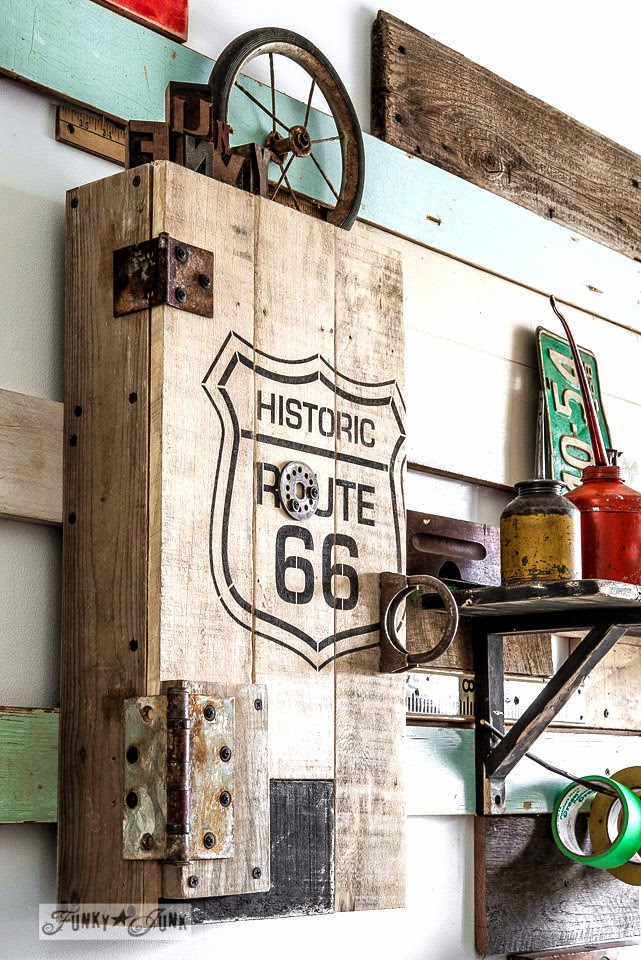
Anyway, Donna at Funky Junk challenged everyone who wanted to participate in a clean up challenge. The Heap of Change Challenge. (For details, and to join in, click image below.)

Join in! You can never have enough cleaning/organising/tidying in your life.

Its one of those jobs you can do every day for the rest of your life.

Its depressing when you think about it.

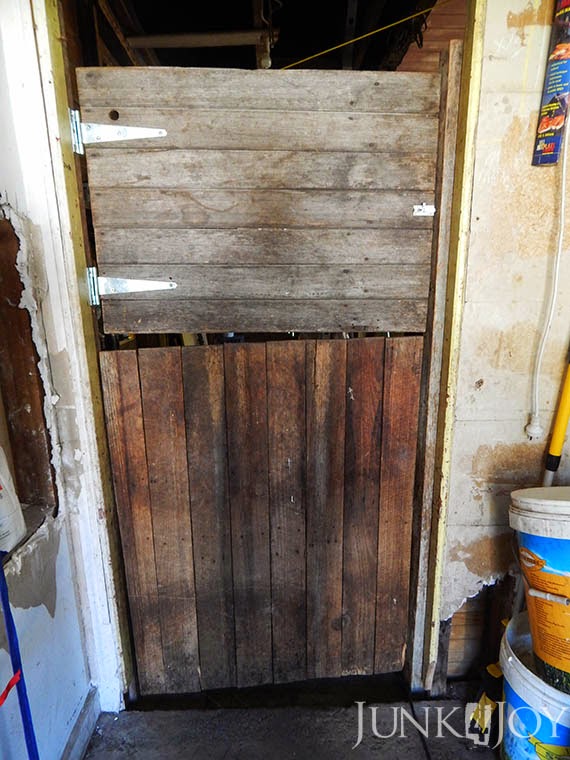
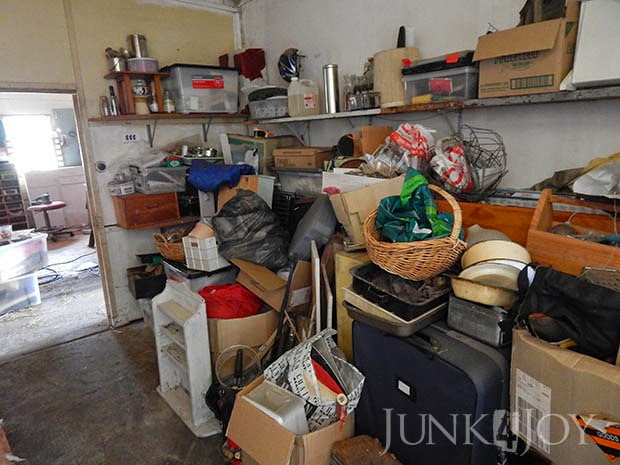
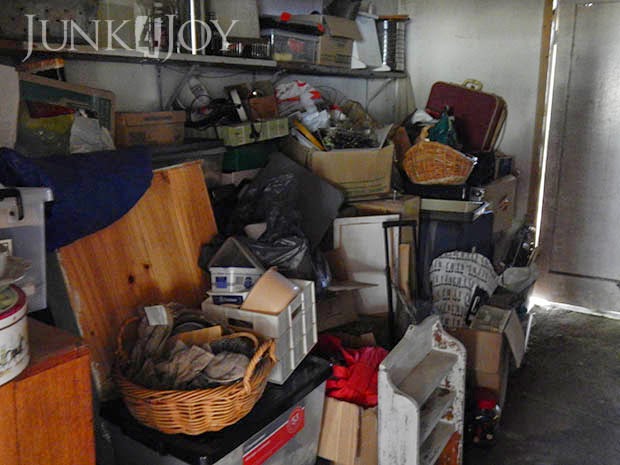
Anyway… one job I’ve been putting off for ages is organising the casita. For the uninitiated, the casita is the original old house on the farm which we use as a shed. It was used as a shearing shed by previous owners. For us its a horse feed room, storage room, tack room, laundry, workshop, grooming room and I-have-something-and-nowhere-to-put-it room.

The large main room is my workshop basically so I have a ton of stuff my own stuff in there. Then about a year ago when I organised my office, I moved everything from the office to the storage room in the casita.

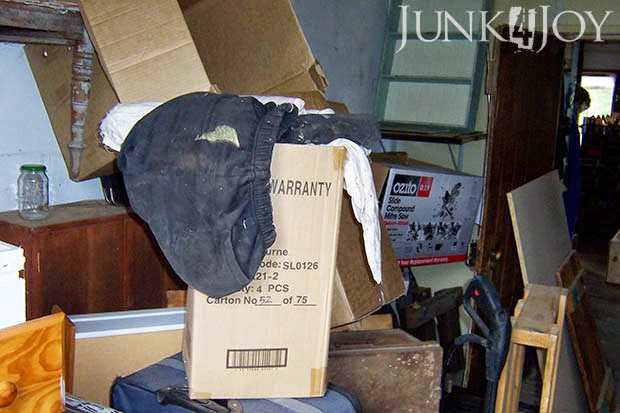
My office looked great (for a while, but more on that disaster area later) however, this is what the casita looked like.

Really.

Hope you have a high tolerance for chaos.

I am not a hoarder. I am not a hoarder. I am not a hoarder…

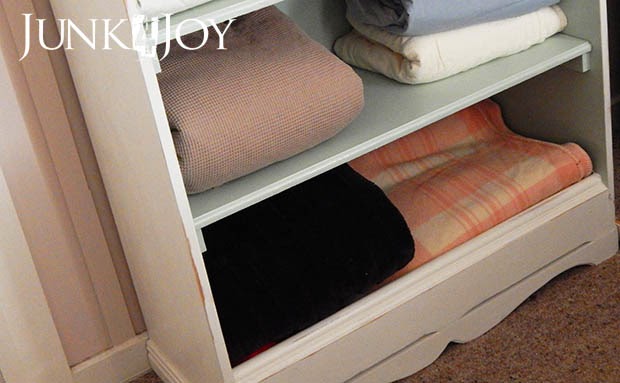
There was an upper cupboard in the store room on this wall but we removed it so I could use it in the workshop. Obviously all the stuff in the cupboard had to go somewhere!

Finding anything was a nightmare.

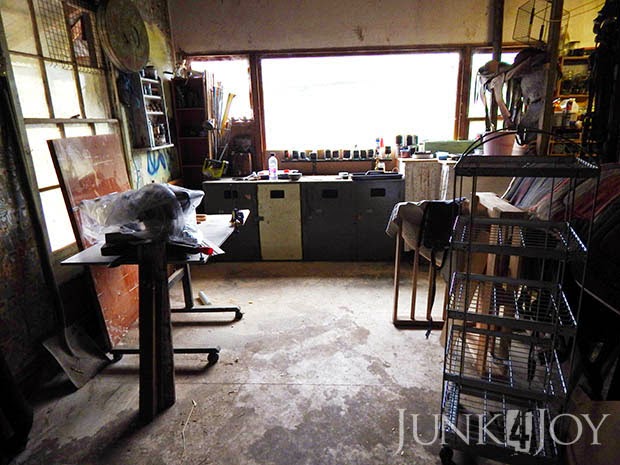
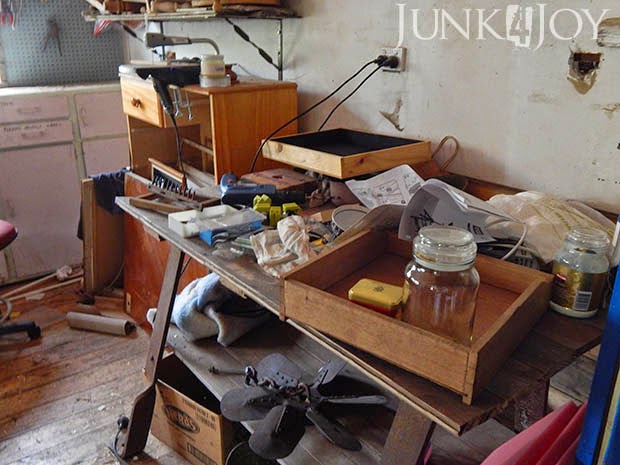
This is what my workbench looked like. The new/old workbench that Wayne had in his shed and wanted to get rid of. I love it cause of its heavy, industrial iron legs.

Basically, when I want to actually do any work in the casita I have to shove things over, step over electrical cords, trip over boxes, etc. The fact that I’m able to do anything in there at all is testament to my incredible talents.

Ha.

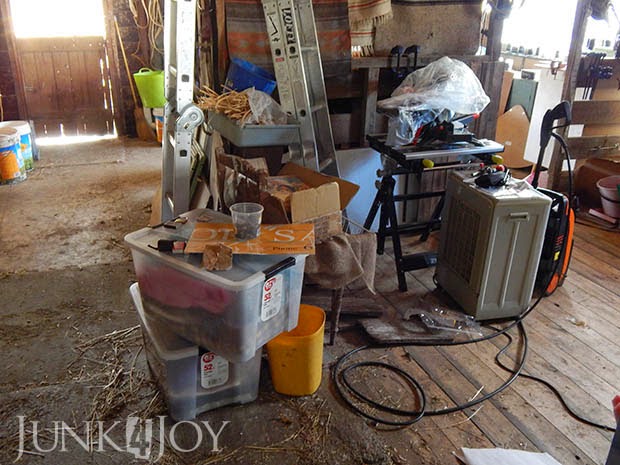
Ready for the afters? Well, I’ll disappoint you. I spent all weekend working on that sucker and I’m still not even halfway there. I’m taking everything out of the store room and finding a place for it.

I have boxes for things to donate, I have rubbish bags I’m filling ruthlessly, I have boxes for things I plan to sell or give away. I’m trying to recycle and use anything I have on hand for storage and I’m sorting things into areas of related items. Maybe one day I’ll actually be able to start a project and know exactly where everything I need is.

I’ll share some pics for now, kinda like teasers of organisation to come.

However… there will never be any great reveal labelled organised clean and tidy perfection within an inch of its life photos in this workshop makeover. Its just not that kind of area. Its messy and dusty and not photogenic.

It has broken windows mended with bits of wire mesh, lots of cobwebs, hay from the feed room, hair from the grooming room, mouse droppings, sometimes possum droppings, unlined walls, groovy old wallpaper, severe drafts and half finished or half demolished areas.

So, put away your expectations of pretty, control your OCD and just enjoy the bits that don’t look too bad.

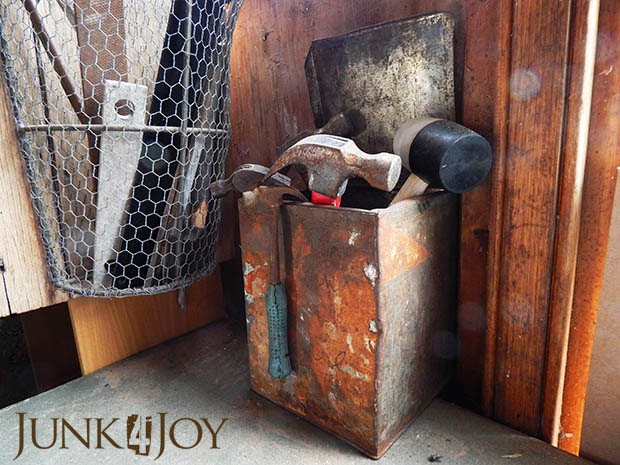
Like this beautifully rusty old biscuit tin holding my hammers.

On the right of the hammer box is the farm fresh sign with baskets I had in the kitchen for a while. I something better for the kitchen, so now my baskets are holding bits and pieces in the casita. Rulers, straight edges, whatever is long and straight.

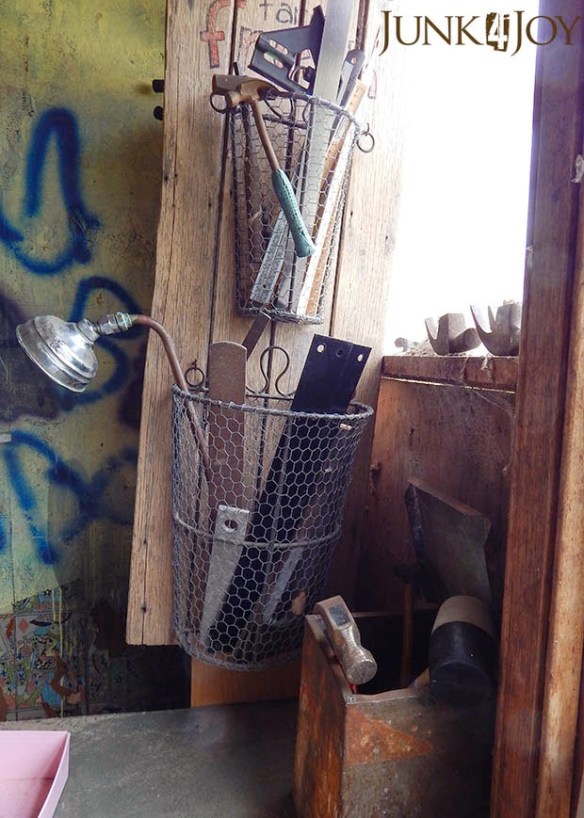
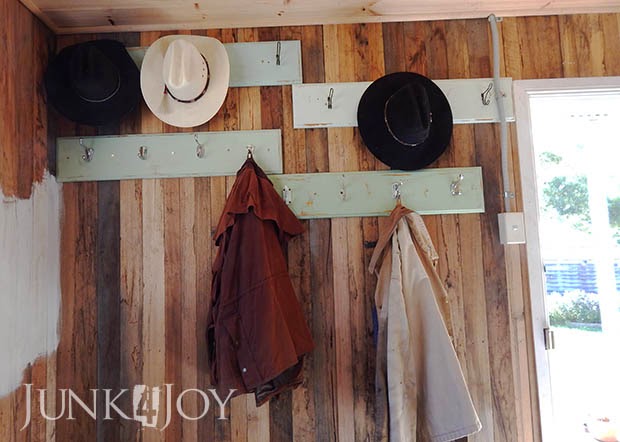
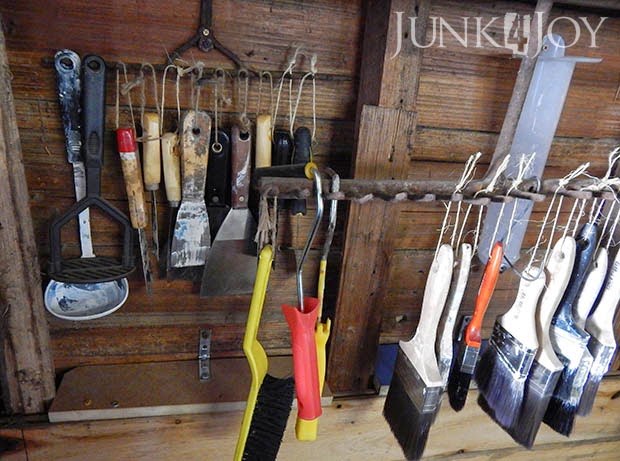
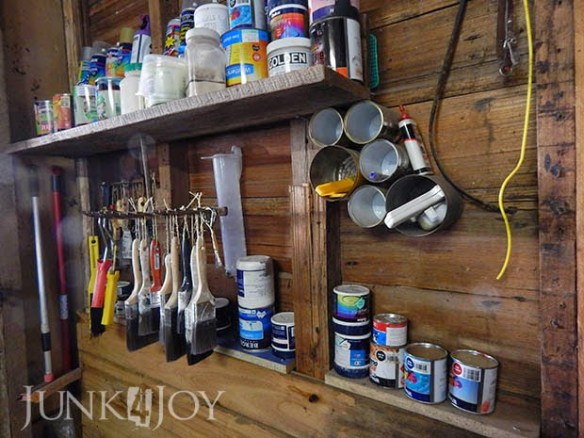
My used paint brushes, scrapers and other paint related implements are now hanging off rake heads. Not only are they all in one place, but they can drip dry there and the bristles don’t get smooshed.

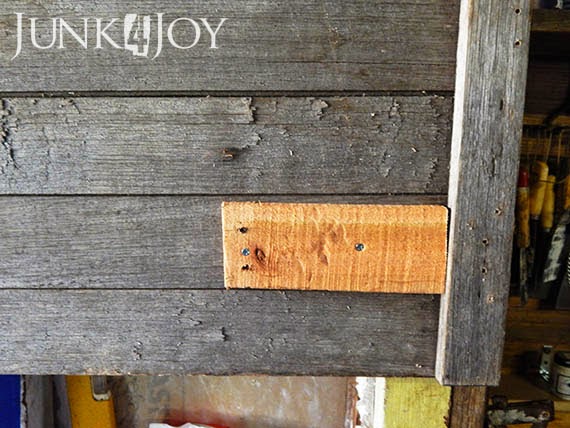
Below the rake head hanging system I put narrow shelves where the wall lining ended abruptly. Someone either stopped putting timber lining on the wall when they got to that spot, or they stopped ripping it off. Either way, there was a huge gap down there where things would disappear, never to be seen again. With the little shelves I kill two birds with one stone. While I don’t condone killing any birds, this stops things from falling into the gap and doubles my small paint tin space.

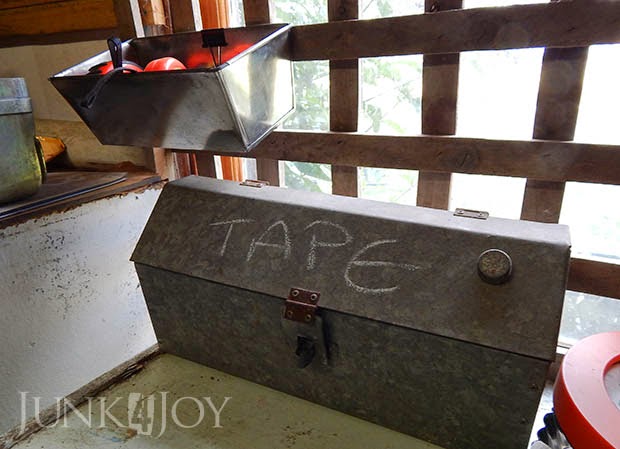
A cute galvanised box holds all tapes and my tape measures are all now in a cake tin.

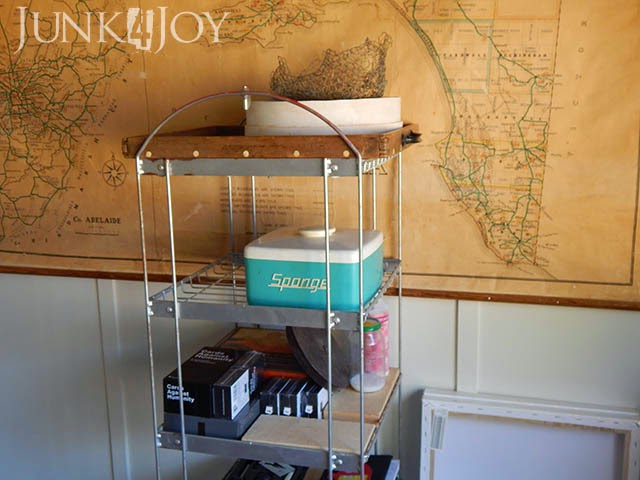
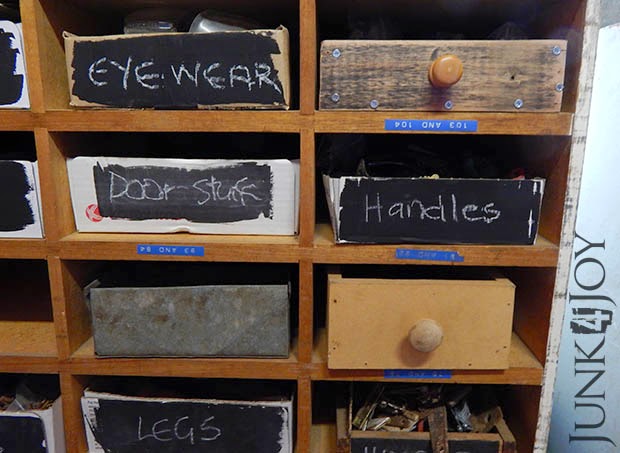
The cubby shelf unit needs more drawers and I’m using anything I have for now. Mostly cardboard boxes cut to fit and labelled. Ignore the blue tape labels. They’re the ones I couldn’t remove. Yet.

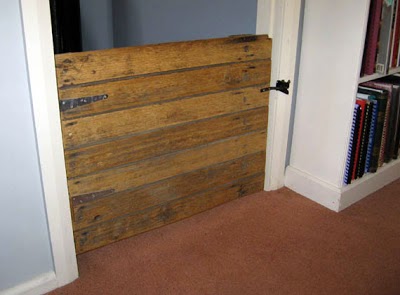
See the timber box with knob top right? That is the worst-made box in the universe.

I made it.

Eh.

Its not labelled but it holds knobs. I figured that was self explanatory.

And yeah, second one down holds more knobs, in case you’re wondering.

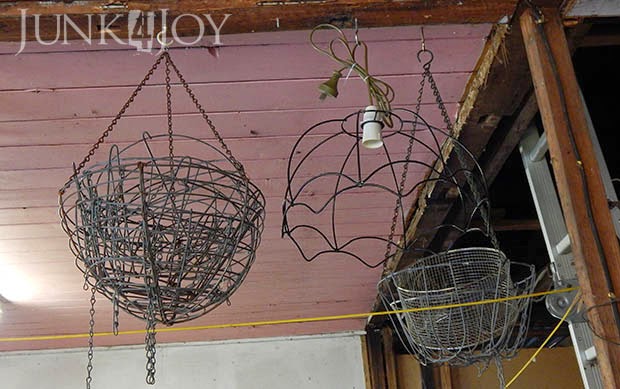
I decided that the roof was storage space just waiting to be pressed into service. I’ve started hanging baskets and light fittings up there. As well as light-fittings-to-be.

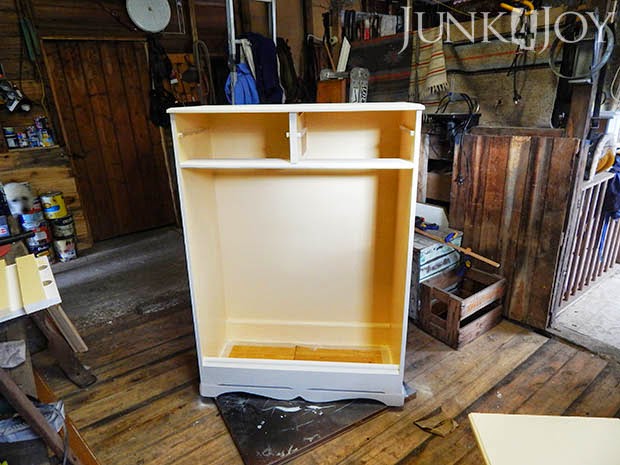
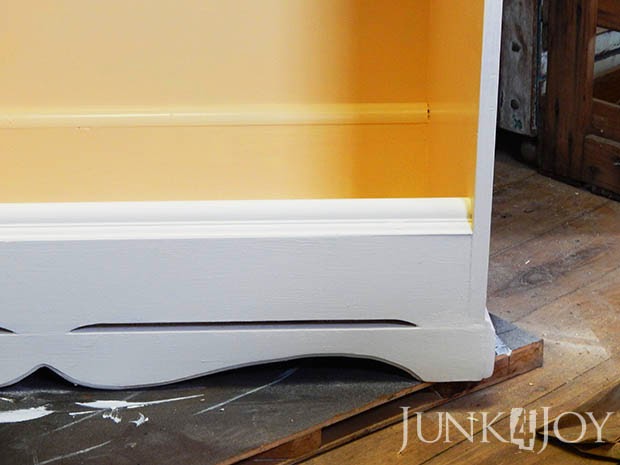
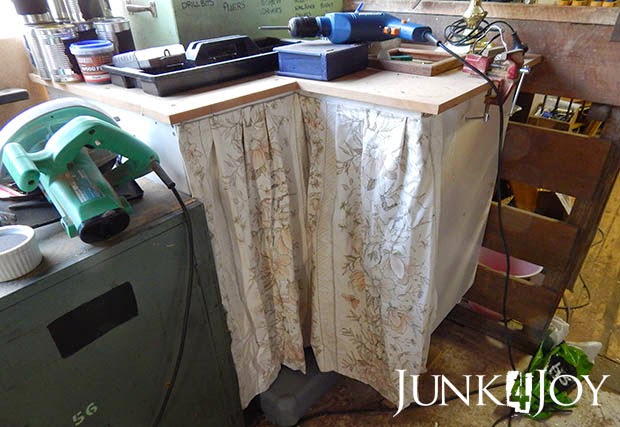
This is a corner cupboard from my old kitchen. I put an MDF top on it and some furniture legs and it now holds my power tools. I added a pretty curtain to keep the worst of the dust off them. Who said you can’t have pretty in a workshop?

 I even nailed pleats into it!

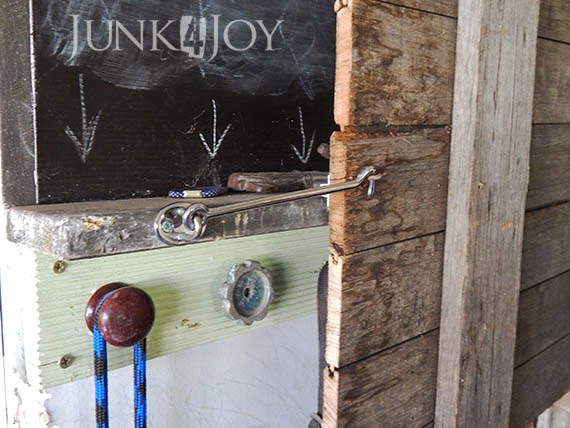
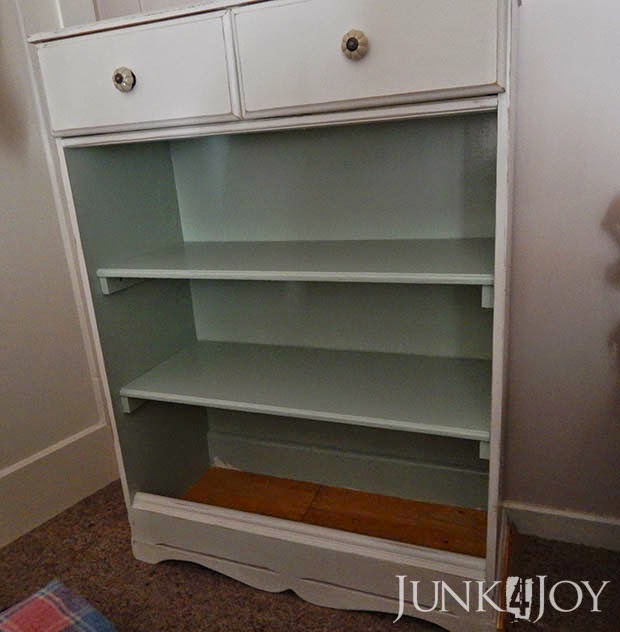
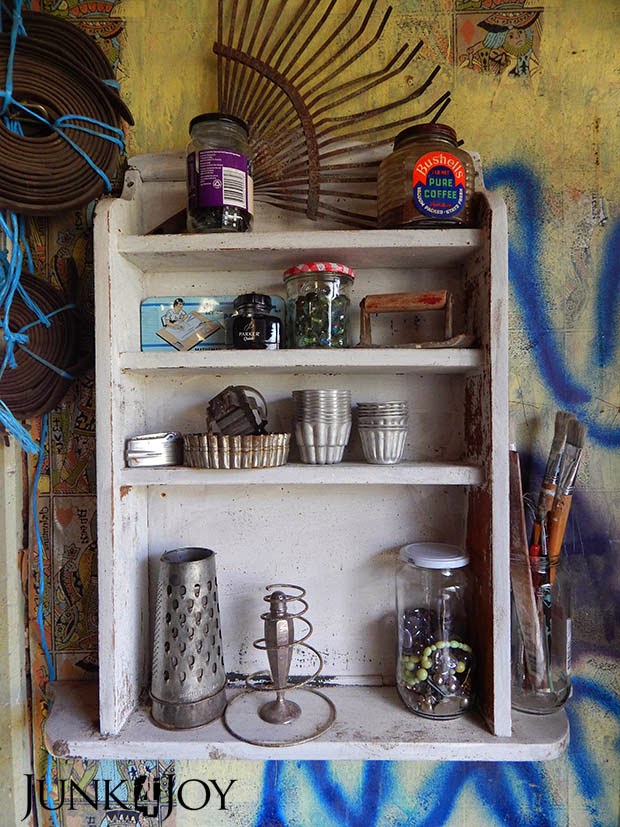
This cute little shelf is something I picked up at a tip shop. I used milk paint and almost all of it flaked off one side …I couldn’t be bothered sanding and painting it again. Its now part of the workshop.

Notice the graffiti and the old playing card wallpaper? Cool, huh?

I hope to do more sorting and organising this weekend and hopefully one day soon I’ll have some more finished pics of imperfection to share.

z