
I used to love writing (and receiving!) letters. Back when I was a teenager I used to write letters regularly. I had a pen-pal in Germany for quite a few years, and later I always stayed in touch with people I met by mail.
I’ve always been a social person and love to meet new people. I make friends everywhere I go and love sharing even a few simple words with people in passing in the supermarket or the post office.
Summers on Paros were the best back then. There were always so many people on holidays and I was there, waiting to befriend them and show them the best beaches. Among the many friends I made over the many years I lived in Greece and summered on Paros, a few stand out:
Mark, an english guy who came back to visit a few times and with whom I exchanged many fun, imaginative letters. One memorable letter he wrote to me was on toilet paper. I wrote him a letter and glued all the pages together. We had that kind of relationship.
Another was Inge, a lifelong friend. We met on Paros one year and then spent the next few years catching up on Paros or in Holland, exchanging letters in between.
Believe it or not, while we wrote real letters we were in touch way more than we are now, with email at our fingertips. sigh.
Going to the letterbox was a very exciting time. Nothing compares to finding a letter in the mailbox, ripping it open eagerly on the spot, or taking it to a quiet corner to savour every moment of it…
Back then I would make and send Christmas cards every single year. Now I still make them. but I email them. I post the bare minimum of cards. If you’re not on the computer, sorry. Too hard.
Now, email has taken over letters, but somehow, getting an email doesn’t have the same thrill as find an envelope with a stamp from foreign regions had. Email is quicker, faster, more efficient… but its soul-less compared to real letters….
I spent many days sitting at a table at home, in a cafe or library, pen in hand… picking favourite pens, different papers which would inspire me to write… the smell of new stationery… folding and placing a finished letter in an envelope, addressing it and sending it on its way.
I miss those days.
Back to reality and the era of the word on a monitor!
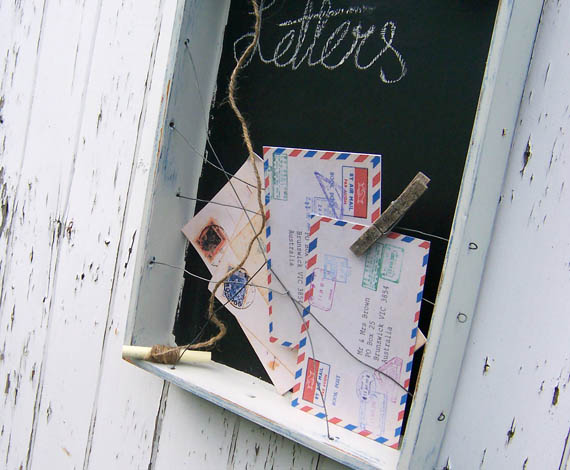
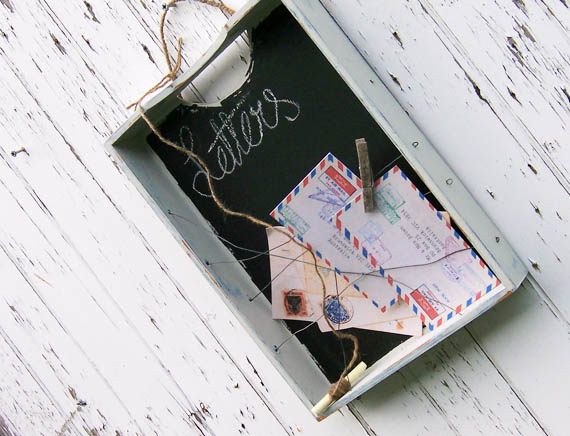
This is the story of an old in-tray.
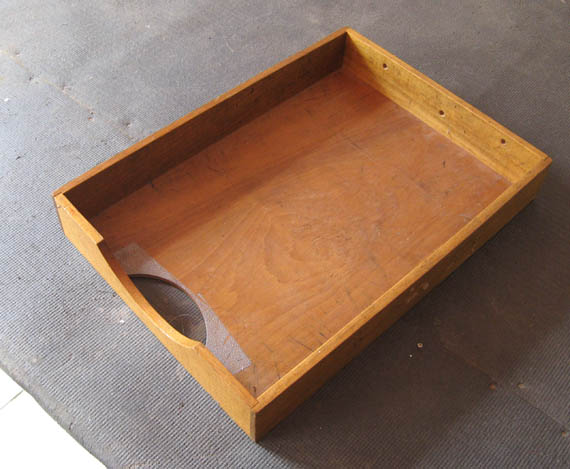
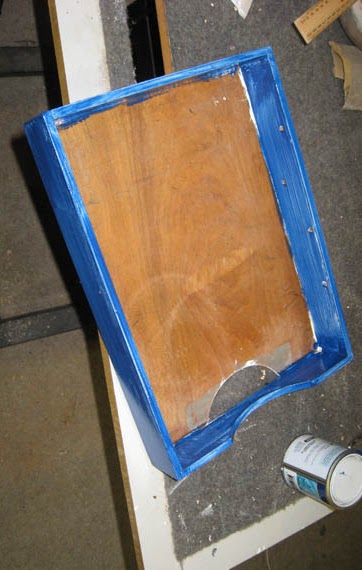
I found this little beauty in an op shop somewhere along the line. It was plain and boring. I thought it would make a really pretty wall-hung letter holder.
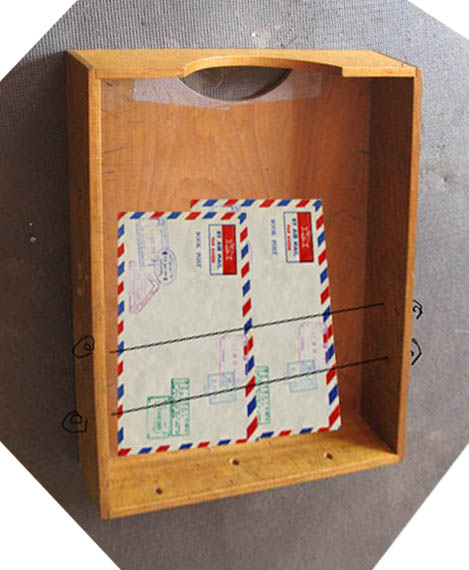
I did a mock-up in Photoshop to see if it would work. I liked the idea.
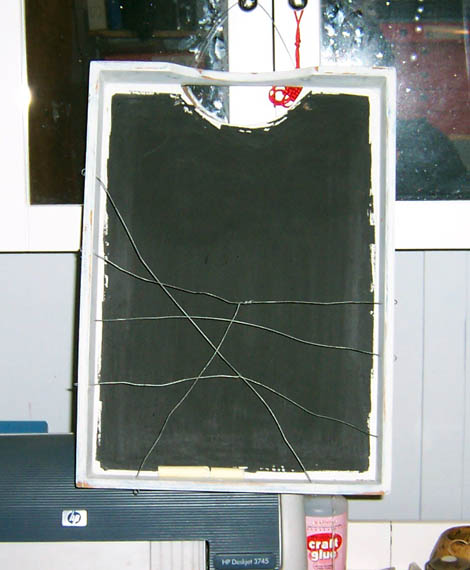
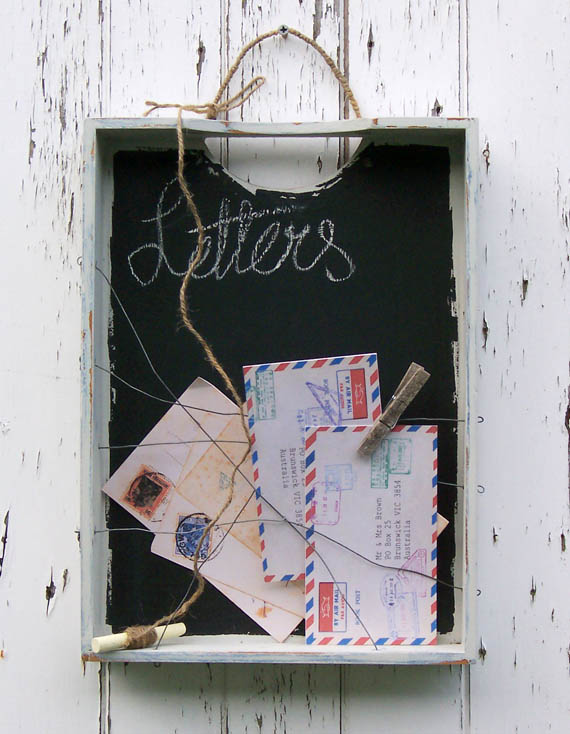
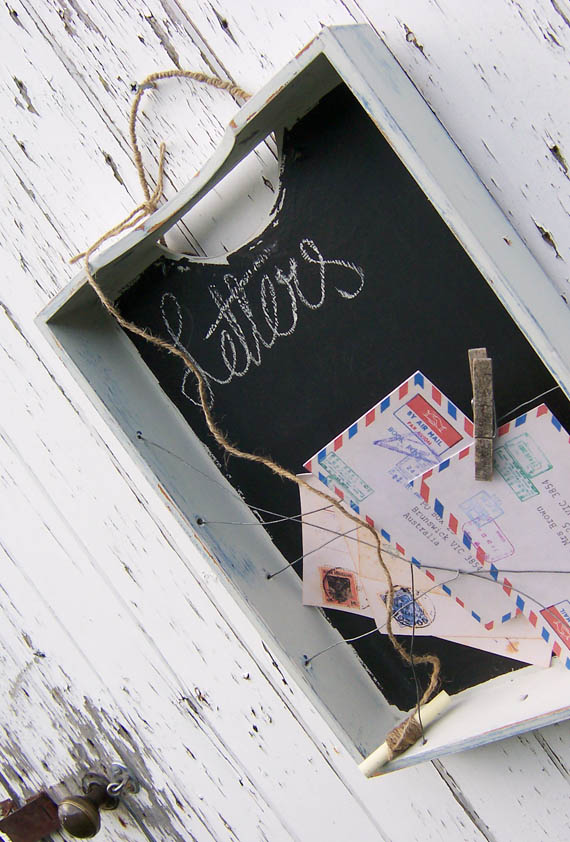
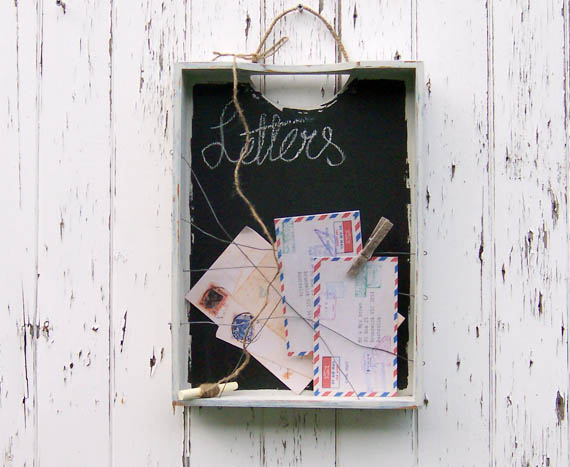
So I got to work. I painted it blue. Hated it. Painted it pale green. Hated that. Ended up a pale grey. Liked that. Distressed it a bit on the corners. Then I painted the inside of the tray with black chalkboard paint. I did it in a way that the edges were rough cause I liked that more casual look.
I then used some old wire, threading it through some holes that were already there and adding a few more. Originally I was going to just put the wire across in a kind of zig zag pattern, using the unevenly placed holes. Then I spontaneously crossed wires to create a rather more unexpected effect.
Like a letter holder on drugs.
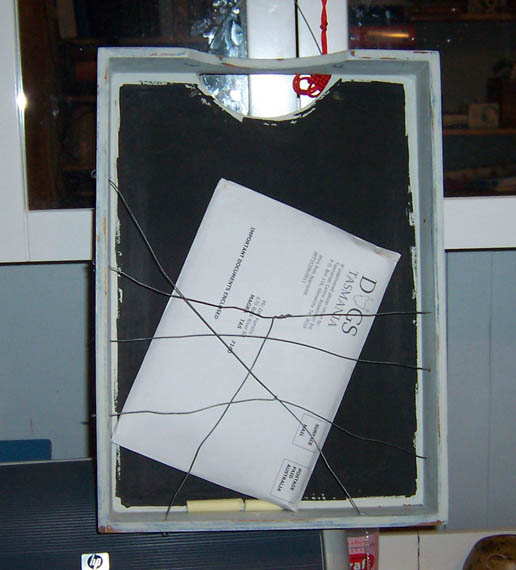
I liked it! I did a trial run with a letter I just got in the post. It worked. Good!
To finish it off, I added a wire hanger, then wrapped it with jute string to match the string I tied the chalk with. I wrote “letters” in my bad handwriting. Dressed it up with some old postcards and letters and its done!
So, do you like it as much as I do?
z
PS: You’ll find this item for sale in my etsy shop (in links above). I’ve also added it to the Knick of Time Tuesday Vintage Style Link Party. Go check it out.


