office makeover – part 2

The office is almost finished. Sure, things around here are never actually really finished, but its now as finished as it will be for a while.

Warning: these photos were taken ‘in progess’ so they’re not all neat and tidy!

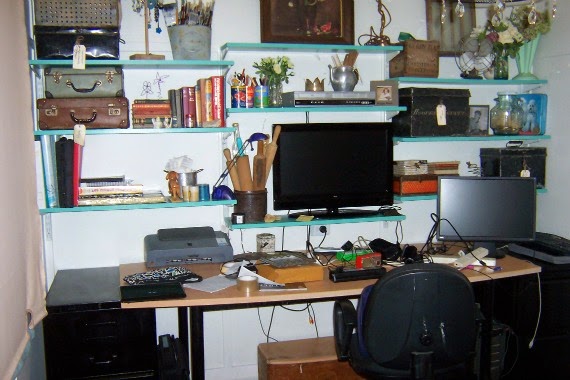
The one thing thats glaringly obviously not finished is the blind on the window. Still the old salmon coloured one. Its a colour that haunts me. Since the window isn’t a standard size I can’t just go buy a cheap blind to replace it so I’m considering my options. Till then, I can live with it.

As you can see above, there will always be boxes of stuff for the various projects I have on the go at any given time lined up in the office. But if I keep my promise to myself and work on one (or two, okay, maybe three) projects at a time, I can keep the mess down. Especially if I put away things I’m finished with.

I bought these two colourful rag rugs online. I had planned to sew them together to make one large rug for the office but they’re very obviously different lengths. Well, the guy did say they’re handmade so they do differ! Doesn’t really matter. I’ll be putting my non-slip rug underneath them and they’ll do the job of keeping the office a bit warmer in winter. Plus, they’re easier to wash when they’re smaller.

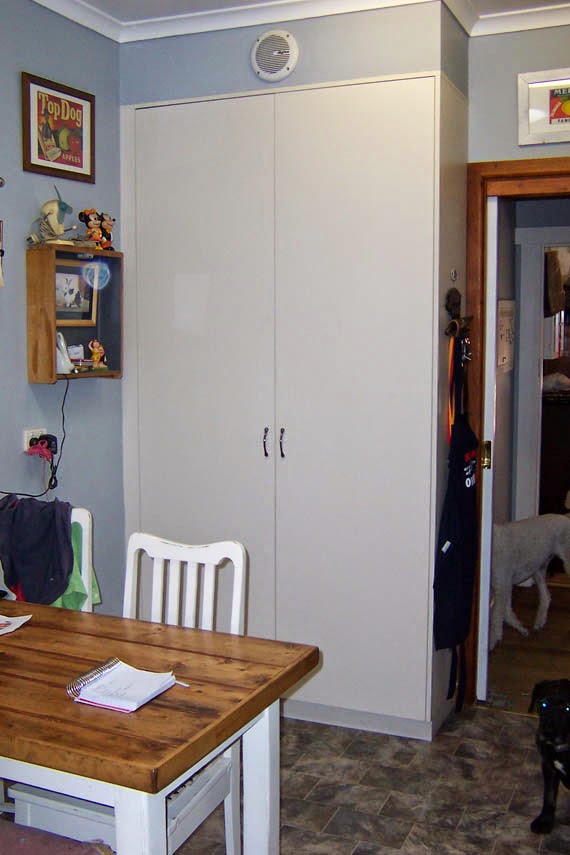
I spray painted our filing cabinets gloss black so they’d match. Mine was a purpley colour and Wayne’s was a more original beige. Now they’re both black and they don’t stand out like sore thumbs.

The light fitting is a waste paper basket I hurriedly put up and that needs finishing too. I have the crystals. I just need to get it down and fix it up.
I’ve painted the shelves a deep shade of aqua to match the cute little coat hanger near the map which holds some of my scarves.
The wooden box under the desk holds my power board and once I hinge the top on it it’ll act as a footstool when I’m working at the desk.

My sewing machine will live on its little school desk on castors so its always handy when I need it. My paper storage stool had to find a temporary spot too.

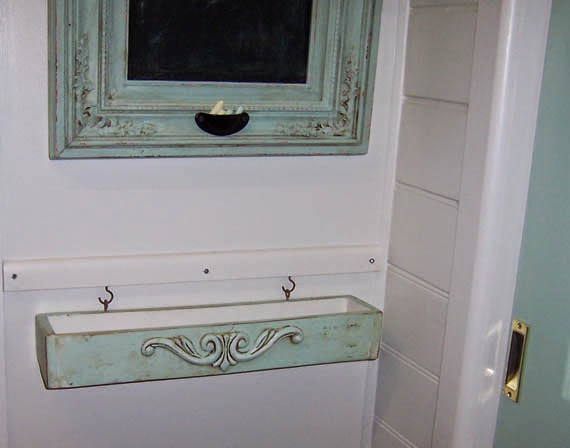
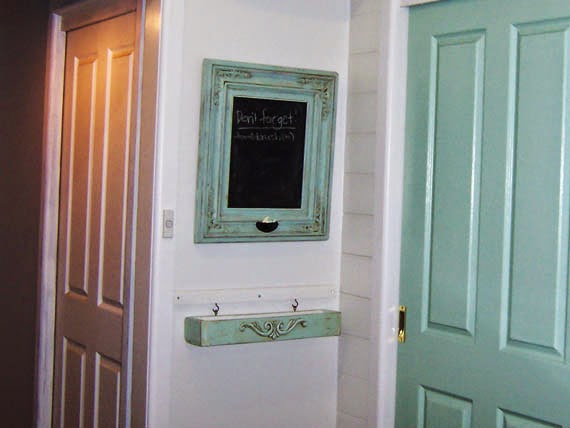
I have plans to make that wall above the sewing machine a wall of memories with photos and shadow boxes.

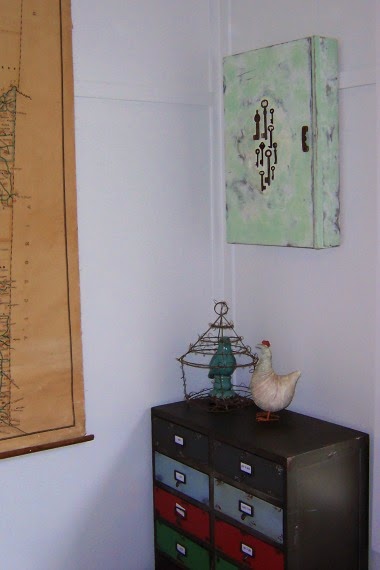
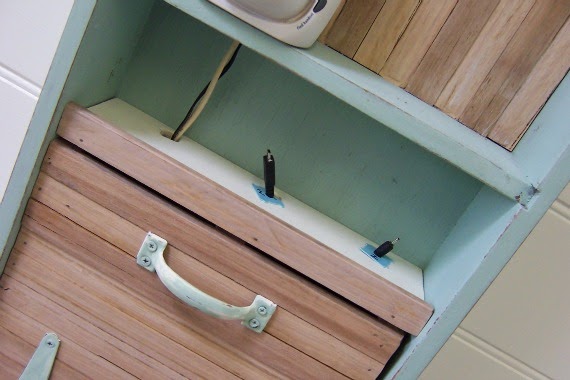
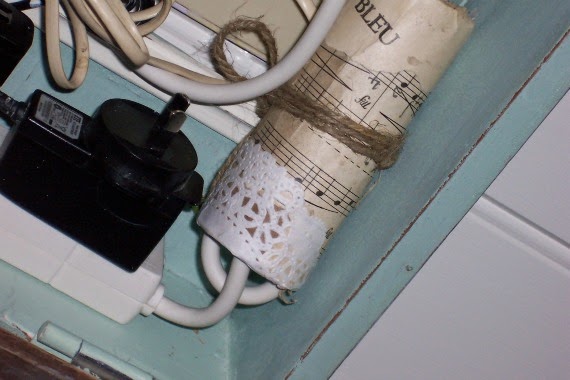
The map is a feature on the wall near the door. Right now its still a blank wall where I pile boxes of materials. I hope to one day, maybe, possibly, put a nice armchair in that corner near the small cupboard with drawers. I have a reading lamp I’m working on for that corner too.

Maybe.

Its not a big room.

This is my new paperweight. An antique iron. Love it.

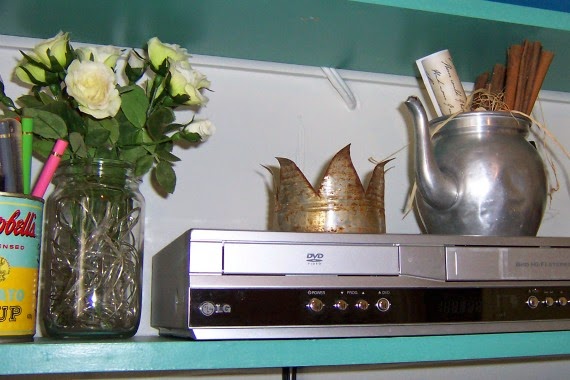
My tin rusty tin crown sits on top of the dvd player cause I have no idea where else to put it and it always makes me smile when I see it.

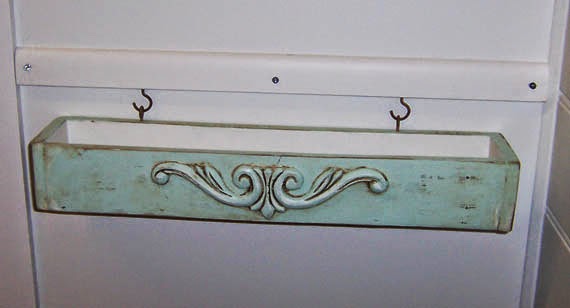
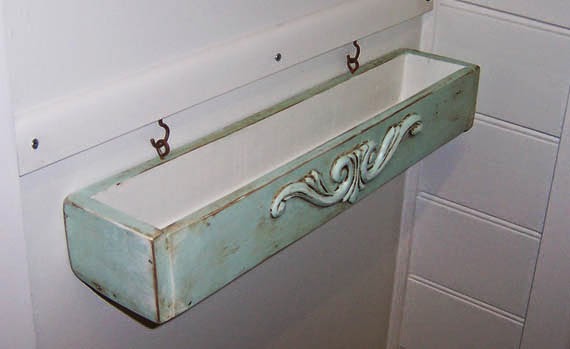
A shabby letter holder now holds my paint brushes and the pottery measure Merrill gave me still holds my necklaces.

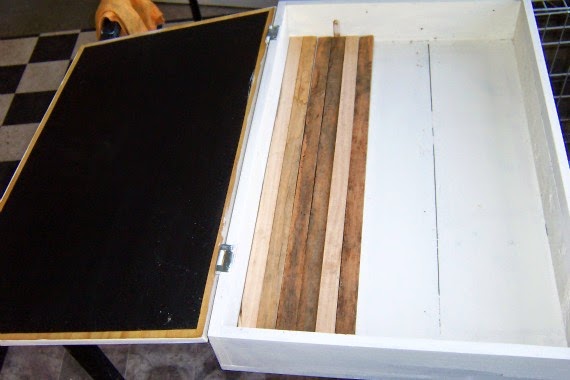
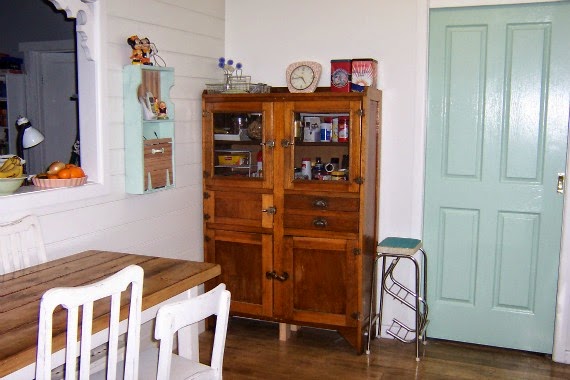
I’m still using my old suitcases, metal boxes and baskets for storage as much as possible cause I love the look of them. I have less storage space in the office now I moved the dresser into the kitchen so I really do need them.

The shelves are still a bit of a mess of things I like and want to keep around me, plus things I need in order to work. I figure they’ll sort themselves out eventually.

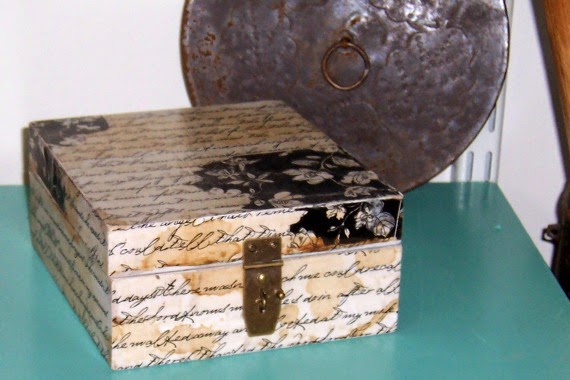
A small timber box I decoupaged holds my usb sticks and other small but necessary gadgets. The shelf wall and desk are now home to a desktop computer with its own monitor, a TV monitor I connect my laptop to when I’m doing film editing and a dvd/video player so I can watch movies in the office if and when I get an armchair in there.

Eventually I’ll be getting rid of the desktop computer so I’ll have a bit less clutter on the desk, but knowing me, unless I’m very careful I’ll soon lose the desk under tons of paperwork to be filed or acted upon. The theory is that when I love a room I make an effort.

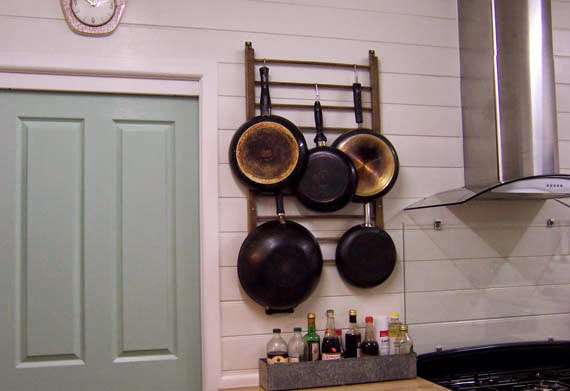
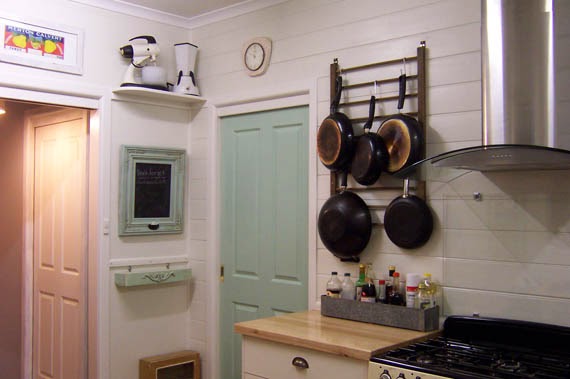
The kitchen is still clean and tidy so there may be hope for me yet.

z

a place for our keys

Once upon a time Wayne had this box in his garage. I think he once told me it was meant to hold a dartboard…

I remember now (hard not to with all the yelling…),

…but I’d forgotten it before I pulled it apart…

Anyway, from the moment I spied it just sitting idly against a wall, I had plans for it. I found it was made of 2 boxes joined together so that their doors opened outwards like a wardrobe.

One day I got inspired and pulled it apart. That’s when he reminded me what it was for.

oops.

Anyway. What was done was done by then. I may as well do something with it to make the destruction worth it, right?
What I saw when I looked at it was a key storage box… a place to keep our keys organised and labelled. (Sorry, no before photos.)

Making into what it is now wasn’t an easy job. When i pulled it apart it had chipboard glued to the inside. REALLY well glued. I ended up taking chunks of timber out when I tried to pry it out using a chisel and scraper. Then I put the sides back so it was a single box with a door even though the inside was awful with all the gauges.

That meant I had to find a backing for it. That’s when inspiration struck.

Ages ago when we visited the guy who we bought timber from for the mud room, I saw all these strips of hardwood he was throwing out. They were the edges of timber he’d trimmed to size. They were the same width but the thicknesses varied. I collected some and they’d been sitting in the carport since I brought them home. I got some out, sanded them, cut them to size, gave them a wash of different colours, then used them to line the box. It gave the box a beachy kind of feel.

Ok… I don’t do beachy… so I had to figure out how to finish the outside of the box so it suited my style but didn’t look out of place with the inside!
The door to the box has a fancy design on it with a name in the middle. Sort of like a wine crate would have… I wanted to keep that somehow, but had no idea as to what I wanted to do with it. I considered painting keys on it, stenciling words… 

I wanted to use keys for the obvious reason. And I remembered the antique keys I brought home from Greece. I wanted to use them on something I’d keep, so why not this?

I experimented with some expendable keys and different glues to see which would work best and then glued the keys on the door. The 3 bigger keys are from Greece, the rest are from my ‘antiqued’ key collection.

I had started painting the box creamy yellow, then brown in a way to make the fancy border stand out, but I just didn’t like it.

I went ahead and painted it in layers of different coloured paints in the sloppiest way I could, till in the end I topped it off in the minty green I’ve been using everywhere else.

Then I distressed it.

Naturally.

The colours in the photos vary a lot, sorry about that. Its cause I took them in different places inside and not outside on an overcast day.

They key box is now hanging in the corner of the office between the window and the wall with the antique map.

It doesn’t have many keys in it yet. I have to sort them out and label them properly so we know what’s what.

One day I plan to be organised.

In this lifetime even.

z

Shared at:

Beyond The Picket Fence

repurposed playpen pot holder

You never expected that the kitchen makeover would be done, finito, finished, so easily – right?

No!

Last weekend I put up my new pot holder. Its not really a pot rack since it sits against the wall.

In fact its not even a pot rack… more like a frying pan and wok rack…

Basically, the layout and size of the kitchen doesn’t really allow for a pot rack hanging from the ceiling. It would feel like a cave in there, Wayne would always bang his head against the pots… a total disaster.

So I considered the playpen side I picked up from a tip shop once and I’ve kept it in my shed (that magical place of mystery and treasures), gathering dust like everything else, forever.

I’ve left it original. That means I didn’t do anything to it. All I did was give it a clean and a light sand (mostly to get off some unidentifiable muck). Its got hinges on either end which I used to attach it to the wall, and a hinge in the middle so it could fold in half back in its playpen sides. Its pretty cool.

I think it works pretty well as a frying pan and wok rack actually. Though not big enough… How many frying pans can one home have? Six apparently. That’s how many we have. Or, technically, five frying pans and one wok.

z

Featured at:

Beyond The Picket Fence

Shared at:

a pallet wood box

You know what its like – you come into the house with an armload of stuff: some shopping, a bag over your shoulder, your keys, phone and sunglasses, maybe an armload of firewood… you just dump it all as soon as you can, on the most convenient surface usually.

Well, I’m over using the end of our kitchen bench as a hold all for everything we bring into the house or dig out of our pockets.

And I’m even more over Wayne running around the house at the last minute every time we’re on our way out going “Where’s my phone? Have you seen my keys? What was I wearing yesterday? I can’t find my wallet!”

I’m hopeful this little addition to our kitchen will help.

When I made the cabinet/bench I had some pallet wood left over. I used it to make this box. It was much easier than the bread box I’m making (more on that later…)

I had this fancy scrolley thingy I bought off ebay to tizzy up the wardrobe in the bedroom (one day). Given it was still lying around in a drawer when I moved the kitchen dresser from the office to the kitchen (yup) I figured I may as well use it before it got all bent from being stuck in a box and put somewhere safe where I’d never find it again.
In other words, I had this thing so I put it on the box to make it look fancy.
Why couldn’t I have just said that first time? 

I painted it in the same blue/green I used on the doors and frame, and, of course, covered it in my favourite ‘grime’ – burnt umber. That way it matches the chalkboard straight away and I don’t have to wait for someone’s grimey fingers to make it look old.
I put it on the wall between the doors so that its one of the first things you bump into as you come into the house. The wall in that spot is just plasterboard and as such wouldn’t be strong enough, so I put a bit of timber on the wall in order to attach the box securely to the wall. I used some old rusted up hooks and eyes for hanging the box.
I just want to dab a bit of white on the screws to hide them a bit and it’ll be finished.
So far its working fine. Its already being used. I’d call that a success.
z

Shared at:

Beyond The Picket Fence

storage bench with pallet top


A long time ago, in a land far far away on one of my visits to the tip shop, I found this little cabinet. Like the one I posted about previously, this little guy was made as a base to a wardrobe. A small wardrobe. This is the only ‘before’ pic I can find (not one of my best, I confess).

It didn’t have a top at all, had a couple of big cracks on the sides and the drawer was broken. In fact it was a real mess. But I liked the shape and handles, and was already thinking bench and shoe storage.

My vision was that one day I’d put a new top on it, give it some new paint and make the drawer into a door.

It sat in the casita for about a year. Maybe more. It held all kinds of junk for a while. It stood on its side a fair bit trying to look inconspicuous… It hung around gathering dust and possum poop (thanks to the resident possum, Mr Ponsonby who has since been relocated, and turned out to be a Mrs anyway).

Eventually I noticed it again and decided it was about time to do something with it and regain some space in my workshop. Especially given I’d pulled apart and repurposed the old shoe cabinet/bench.

I started off by giving it a coat of paint. At the time I was experimenting with greens so I painted the body green, but the handles were painted in a creamy yellow so I stuck with that for the door. I put a shelf inside the cabinet and painted the inside a slightly brighter yellow.


I pulled apart the broken drawer keeping the front. I had to fill the dovetail joints with bits of timber and gap filler to make it into a door rather than the front of a drawer. (Sorry, no pics of that.) I attached a clip closer and hinges so it now opens downward.

I’d always been itching to make something out of pallet wood (I’ve used pallets for many things but never made anything out of the wood) so I went and collected a couple of pallets from the ‘free’ pile outside a hardware store.

To be honest, I’m not sure they’re totally free, I was told they were by a friend and I chose to believe her, but whenever I’ve taken any I’ve always felt rather sneaky about it. Whatever… most of the ‘free’ pallets are broken or made of really cheap wood. Obviously. They’d never throw out good pallets.

Anyway, I got my pallets home and started pulling apart the only one long enough to make a top out of. I split most of the bits of wood I got off. In the end I got enough better pieces to create the top.

It wasn’t easy. I see so many pallet wood projects and I wonder how people do what they do… either they’re getting much better quality pallets than I got, or they’re just plain better than me!

I finally pieced together a top with as few gaps as possible, matching warped boards together like a jigsaw puzzle. I joined the wood together using 2 slats of wood underneath to hold them together and to give them added strength. (Did I mention this was crappy timber?)

Once that was done I sanded it back really well. It looked great.


Only problem was I wanted a weathered timber look, not a brand new look.

So I looked around for some steel wool to put in vinegar and resigned myself to waiting for the requisite rust to age the timber with.

I couldn’t find steel wool. I think I used all I had patching up holes around pipes in the wall in the kitchen! (Apparently mice won’t chew through steel wool. At least I hope they don’t!)

Well, that was the end of that idea. What else could I do?

I got out my artist acrylics and mixed up a watery solution of burnt umber (a colour you hear about a lot on my blog), grey and black. Grey cause weathered wood is always grey and black cause nails holes always go black.

I slopped the watery solution over the wood and let it soak in a bit, then wiped the excess off with a clean rag.

Not quite right yet.

I got out undiluted colours and painted them on and wiped them off, leaving darker areas. I dabbed black over areas of the wood, especially around holes.


I love the way it turned out.

When it was dry I put 3 coats of satin polyurethane on it to finish it.

Finally, I distressed the cabinet a bit in areas where it would normally get wear and rubbed in some burnt umber to give it an old appearance. Not that it wasn’t old, but the paint was new and burnt umber is like the accumulation of years of dirt.

Funny how I refresh something, make it nice and clean, then make it look grimy before putting it in my house… I wonder what that says about my personality…?

I’m still not entirely sure about the colours. I didn’t want just another white or cream cabinet and I had this colour mixed up and thought it would go well with the creamy yellow. An antique colour mix I thought. Do you think I achieved it?

z


Featured at:

Shared at:

Beyond The Picket Fence

cabinet door chalkboards

Once upon a time I had an old footlocker/wardrobe base which went with the wardrobe Wayne brought with him when we moved in together. Our ceilings in the bedrooms are too low for us to use this as intended (as a base for the wardrobe) so it sat on the front porch for a couple of years as a kind of ‘hold all’ for anything we weren’t sure what to do with.

Since it didn’t have a proper top, I did a mosaic on it so it would look pretty on the porch while it held Wayne’s boots. I had five old, crazed, oblong tiles and a ton of plain white ones. I used the green tiles (funny, guess I was always attracted to that colour!) in a staggered pattern with the white around them. I colour matched the green tiles and did one coat in that, then topped it with white which I distressed to show the green through.


Wayne made spoon handles and a wire closer for the doors (not pictured, sorry).

When I had to move back to my old house in Fentonbury for a while, it made an appearance there…

but it spent the majority of its life on our porch outside the mud room. Here it is in its prime, before the accumulation of crap useful items seeking a permanent home began to accumulate.

Then Wayne started using the cabinet as a bench and sat on the corner while pulling on boots, breaking the chipboard top… pieces of tile everywhere… It wasn’t worth salvaging so I did what any reasonable person would do, I kept the doors and chucked the rest out.

In fact, its still in the junk pile waiting to be taken to the tip…

The doors became my first experiment with milk paint.

I bent the spoons a little more to make them into chalk holders.

I do like the textured effect of the milk paint, but I can’t say I’m a convert…

All in all, I’d say the latest incarnation of the (leftover bits of) cabinet have turned out ok.

z


Shared at:

a new chalkboard for the new kitchen

One of my friends said this corner of the kitchen looked wierd, with the little shelf and the mixers. Well, this corner is still the same as its always been since we bought the house. Only difference is its now a different colour.

And this narrow strip of wall always held a calendar.

Not even a really nice calendar most of the time.

When planning the new kitchen in my mind, I always thought a new chalkboard would look nice there… for our shopping list.

We already have a long narrow shopping list chalkboard near the fridge, but I have something else planned for that spot. Plus, I wanted a much more elaborate frame for the kitchen and this one fit the bill.

It had been painted a bright red before I got it and I thought that would make a nice contrast to the greeny/aqua colour I painted it. I used milk paint for the first coat and acrylic for the second. No idea why. It just seemed like a good idea at the time. It gave it a roughed up look which is fine by me. I added a little ‘age’ (or grime) with some burnt umber artist acrylic to make the details stand out a bit more.

Compared to our long shopping list chalkboard, this is pretty small. Maybe we’ll save money with smaller shopping lists… More likely we’ll just write smaller.

I used a drawer pull as a chalk holder. Old trick, yeah. But I had 10 of these pulls. I bought them for the kitchen drawers and when they arrived they were too small. Alright for my delicate girlie fingers, but not for Wayne’s manly ones.

In other words, I had spare drawer pulls, I may as well use them, right?

This is the only creative, house-related thing I managed to do all this weekend.

Though I did bake again! I made a pasta flora. Its a greek jam tart.

I also made another spanakopita cause I’m addicted. Sorry, no photos of that, but here’s a photo of the baclava I made last weekend.

Yum.

z

Shared at:

Beyond The Picket Fence

pom pom suite – more art from trash

This is another entry in the Art From Trash Exhibition. This time its a collaborative piece (or pieces) made at work.
I work on different programs at work, and we try to enter interesting things in competitions when we can. This suite is something that took us almost a year to pull together.
The concept was inspired by an image I saw on Pinterest of a chair covered in coloured pom poms. I found two old plastic fabric covered chairs at the tip shop which were perfect for our project. I had the broken stool legs at home, as well as a shallow tray/box from previous tip shop explorations. 
With the help of a couple of ladies at work, we sanded off rust and spray painted all the metal work glossy black. And cleaned up the chairs.
A whole lot of ladies helped make the billions of pom poms needed to cover the chairs. These were stitched into the chair upholstery to create very comfy padded seats.
We made heaps of tiny pom poms using the fork method I saw at Eclectically Vintage. These we put into the table top box, which we attached to the stool legs. I had a thick piece of perspex cut to size for the top, which is held on by screws.
We created a fun little sitting arrangement.
To finish off the ‘suite’ I made this chandelier at home using an old lamp shade stripped off its original covering, some fancy wool and more pom poms.

I love how it worked out. So soft and feminine. Here’s Montana keeping an eye on things. She agrees, though I think she wanted to eat the pom poms.

In the spirit of entries being made of ‘trash’, we made the whole suite out of things people had mostly discarded. The chairs, table and lamp shade all came from the tip shop. The light fitting in the chandelier came from a 2nd hand lamp I bought to revamp. The wool was mostly from op shops or donated (I ran an ad on gumtree.com asking for white wool and a really nice guy actually sent some!).
I just love making things out of ‘nothing’ and the guys at work love seeing what they helped create being exhibited and admired.
Who doesn’t?
z

junkyard dogs – art from trash

Every year the City of Hobart Council has an exhibition called Art From Trash. Its one of my favourite events of the year. This year I entered my Junkyard Dogs – partly inspired by the little dog I made during my art course last year. Remember Hair of the Dog
Well, here he is again, with one of his new mates:

Let me introduce you to them properly.
First there was Tiny Terrier, the first art from trash dog. He’s made of a wire frame and felted dog hair… plus some dryer lint and possum fur I found in the woodshed.
Then there’s Wire Terrier:

He’s made of electrical, phone and computer cables. See, while cleaning up the house a while ago I found all these cables which belonged to printers, phones, computers and stereos I haven’t had in years. A whole box of them. I actually put them on the porch to take to the rubbish. Then I had second thoughts. I could make something from them!
So I made another dog. He’s made of a cardboard frame with all kinds of cables and a few legos.

Then there’s Toy Terrier.

He’s made of toys and a bit of wire on a cardboard frame. A whole lot of small toys and toy parts a friend collected from her daughter’s bedroom floor. She was going to throw them away but of course, I could do something with them!

Lastly there’s Bubble and Squeak (the name kinda says it all). He’s a mix and match of all the materials I used on the other three dogs. Befitting a junkyard dog.
He’s made of a wire frame, a hollow bowl shape which holds all kinds of thing… toys, a broken mobile phone, chargers, old ink cartridges, electric plugs. His tail is made of cables and an old metal spring. His legs are all hollow wire frames, but front legs end in felted dog hair paws. His head is full of felted poodle hair and dryer lint, which flows down to cover half his back.
These guys will be in the Long Gallery in the Salamanca Art Centre till June 4th. I already know Tiny Terrier won’t be coming home and I must admit I felt a bit sad saying goodbye to him. I believe Toy Terrier is also going to a new home. 
Seriously, I don’t have space to keep everything I create, but sometimes its hard to say goodbye!
z

roadside salvage drawer to phone station

One of the problems in our kitchen is that the telephone jack and a power point (where we plug in the phone and one phone charger) were kind of ‘in your face’ in that they were to the right of the ‘servery’ into the living room, but not lined up vertically or horizontally. Hard to hide in other words.

Here’s a photo of the ‘pre’ kitchen and you can see how I dealt with it before. An old drawer, with a hole cut out to expose the phone jack, held the phone, a framed print of a rabbit (cause why not?) and some of my 50’s collectibles.

Of course the powerpoint was lower and to the left, so that remained exposed along with the accompanying ugly cords.

When we were doing the kitchen and Handyman was lining walls with pine, I asked him to move the power point and phone jack so that they were closer and neater.

I wanted to create a ‘charging station’. A place to keep and charge our mobile phones and landline. And hide the mess of cords and plugs.

I have a ton of stuff in my workshop and the shed, including a stack of drawers I picked up off the roadside one day. I evaluated them and thought one of the drawers would be perfect. It had an unusual shape – it was long, one section had 4 holes, and a dip in the sides. No idea what a drawer like that would be for.

Here it is after a coat of milk paint.

I took off the handle on top, filled the holes. then did a few coats Lichen milk paint to stop the paint flaking off too much in some spots.

I had to somehow hide the holes in the back… We buy our timber from a local guy who mills his own wood and cuts his own boards. Last time I was at his place I picked up a few of the trimmings he’d cut off the ends of his boards when dressing them. They were the same width but irregular thicknesses so I sorted through and picked the bits which were more of less closest in thickness.

I cut them to size, sanded the weathered layer off and glued them to the back of the drawer.

I really need to go back and get more of them. They’re great!

This was the plan: the top shelf would hold the landline phone station. The bottom section would have a shelf added up the top to hold our mobiles. Below would be a door to hide the power points, cables and chargers.

I made the shelf out of an offcut of pine since I planned to paint it and it didn’t have to match. I put a ‘lip’ on the shelf in tassie oak, matching it to lining and so mobiles won’t fall off. I drilled 3 holes in the bottom shelf (one for the landline cables, one for each of our mobiles) and one hole in the original shelf for the landline cables.

Now I needed a powerboard, giving us enough power points for 2 mobiles and a cordless phone.

Since the idea was to hide the mess behind a door, I cut a hole in the drawer… badly. Necessitating the addition of trim to neaten it up. eh. That part will be hidden most of the time. 

The worse problem was that when it was finished, I screwed it to wal, plugged everything in, then discovered that the mobile chargers were too fat for the door to close properly!

Sigh…

I had to cut out the entire bottom back of the drawer to give them a bit more room.

Goodbye trim.

I’m such a professional!

Anyway… next came the exciting part. The door.

A barn door with Zs at the back.

I always wanted to make a door with Zs at the back.

I bought the smallest T hinges I could find and a silver handle I kinda liked. But I didn’t want them looking new, so I painted them. Tons. So they’d look like they’d been used for years on many different cabinets.

I also got a magnetic catch as a closer since I planned to swing the door downwards, like an oven door.

Here’s what it looked like when it was finished.

And here it is in the kitchen, ugly cords hidden, Mickey, Mini, Wilma and Barney back in their spots. Plus a rusty wire flower Wayne made me.

Here are some details…

(Btw, I used bread bag clips to keep the charger cables from falling down behind the door.)

Lastly, inside I decided to try one of the cord organising tips from Pinterest… I got a hand paper towel roll, decorated it and discovered the plug wouldn’t go through the middle. I had to slice it open to slot the cord into it, hence the jute string holding it together.

The only things I had to buy were the hinges and power board. Overall its a success I think!

z

Featured at:

Beyond The Picket Fence

Shared at: