fun day at the market and another baking tin caddy


Its been a long week day. Today a friend and I had a market stall in the Shabby Chic Market. I enjoy meeting people, selling stuff and spending some of my hard earned cash at other seller’s tables!
 Its always fun to do a market but getting ready for them is a killer. 
I don’t do them very often. I have more than enough on my plate as it is. A market means more time spent making things to sell and less time spent on cleaning the house, washing dishes or doing laundry.
Come to think of it, I should do more markets…

I’m sleep deprived.
I’ve been up late every night in order to get a few things finished and guess what? I haven’t finished them all.
And guess what else?
I’m doing another market next weekend!
What’s that saying? “No rest for the wicked”… or is it “Glutton for punishment”?
On the positive side, I came home to a cooked dinner, washed dishes and clean washing. Wayne is a gem!

Anyway, thought I’d share another baking tin storage caddy. I made 3 but only photographed two. I shared one last week but this is my favourite. It didn’t sell today and I think it might be a sign.
I’m seriously considering using it at the sink to hold dish washing liquid, hand soap and sponges in the kitchen.

I’ve taken photos of some of my projects which I’ll be sharing soon but I apologise in advance for the quality of some of the photos… The weather was ‘ordinary’ yesterday so I had to take most of the photos indoors with lousy lighting. Not even Photoshop can fix some of those photos….

z

Shared at:

tiered tin caddy

I’ve always loved those cute desk caddys I’ve seen made out of old baking tins.

I have tons of baking tins. I’ve been collecting them for ages. I have them in all shapes and sizes. Same with ice trays. And colanders.

I collect them to put plants in, and I will be doing that too. I have plans…

Meanwhile I decided I’d make myself a tierd baking tray caddy. I went with 2 tiers. Its just the right size for holding all kinds of goodies. On my desk, the top holding tins with pens and other drawing stuff, the bottom holding the other bits and pieces we all collect on our desks.

I think one at the kitchen sink would be good, holding dishwashing liquid and sponges. Maybe in the bathroom to hold the moisturizer, watches, whatever.

When I have a nicer kitchen with room to put one of them… I have plans for that kitchen too.

Right now the plan is to bring in a tarp to throw over all the dirty dishes in the sink so I don’t have to look at them…

z

Shared at:

DIY Show Off

the new toothbrush holder

You know I hate our bathroom, right?
Its small. Its cramped. It has an unforgivably common vanity. A gold rimmed mirror. White and gold taps. (gag). A gold rimmed standard shower cubicle. A square edged clawfoot tub*. Ugly white and gold plastic towel ‘knobs’. No storage space, and less space to move.
Oh, and not to mention laminate tile sheeting.
Lovely.
One of the worse culprits was the hideous toothbrush holder in mouldy gold and white plastic.
Gorgeous.
I can’t afford to redo the bathroom right now. Though I’d dearly love to. In fact I was planning to, at the very least, remove the clawfoot tub* so there’s room to put in a cute cabinet or two and turn around when you’re drying your hair… but you can’t even get the clawfoot tub out of there without ripping out the shower and vanity!
sigh…
Meanwhile I do the tiny things which make it easier for me to go in there without throwing up.
Like getting rid of the ugly toothbrush holder and replacing it with something kinda nifty.

Like this spiritless spirit level I found at a tip shop. You can’t really see it in the photos but the test tubes and the beaker are painted in cream and white – the bottom cream, the top a white stripe.
I had wanted to do a more dramatic ombre type of thing but in the end I didn’t think I could get a nice effect on the plastic test tubes if I didn’t use spray paint. As it was, I discovered that ‘low tack’ orange masking tape ain’t low tack enough. You can just see the bits of orange pigment/glue left behind.
I figure once the paint has ‘cured’ long enough I can try wiping the residue off with some eucalyptus oil.


Can you guess why I wanted to paint the bottom of the jar and tubes? Yup. You got it. To hide the gunge that always accumulates at the bottom of a toothbrush holder.
And the reason I didn’t paint up as high on the beaker? Cause I liked the numbers showing.
I also whitewashed the spirit level so it wasn’t brown. Nothing I could do about the gold fitting though. I have to live with those. At least I painted the silver clamps white so it wouldn’t clash too much.
One day, when I have a bathroom I actually like, I might change the colours on the test tubes. Till then, this is way better than the ugly thing I tossed unceremoniously in the bin.
z
* I am thinking the clawfoot tub might work nicely as a cooling outdoor bath in summer. Somewhere. Maybe… I’ve always thought it would be great but never had the guts to actually do it.

NOTE: This project turned out to be a fail. The test tubes gather water which becomes mucky and stagnant and stinks. I replaced them with large gauge syringes and it works much better!

Featured at:

DIY Show Off

Shared at:

The DIY'ers 

DIY Show Off

paper storage

 Its been a while since I last made something for the house.
Well… I made the LP side table, but I made that a couple of weeks ago. I’ve just been so busy with other stuff. But yesterday I got a bee in my bonnet and started 4 projects. I’ve finished two of them but can only share one today as I don’t have photos of the other one yet.
This is my new paper storage solution! I was inspired by this on Pinterest. I had an old stool with its top broken off and I’ve been meaning to make this little beauty for quite a while.
All I did was clean it up, I liked the chippy paint look. Then I got some burlap, some of the small cotton bags which came in the lot of flour bags I bought a while ago which I made cushions and kitchen curtains out of, my staple gun and got to work.
That’s the manual staple gun… not the air powered one. Love that sucker, but really for a job this small ‘Zefi powered’ was enough.
Now, of course, I’ve got my left thumb all wrapped up again. In vet wrap. Yep. Love the stuff. Turns out its just as good for humans as for pets! I really was sick of the physio wrapping my thumb in sticky stuff that took the first five layers of skin with it when it came off.
I love this vet wrap stuff so much I’ve just bought 3 more rolls of it on ebay. I always used to have vet wrap for the dogs and for wrapping poodle ears on show days, but I’m down to the dregs of my last roll. A 10cm dark blue roll. Since I have to cut it in half to strap up my thumb I’ve ordered the 5cm rolls in pink, purple and red.
Cool!

Meanwhile, back to the matter at hand….
I turned the stool upside down cause I liked the feet being on top. I sewed the cotton bags to the burlap, then stapled the burlap to the sides of the stool.
Lastly I put a bit of masonite underneath, fitted some small castors and voila.
I now have somewhere to put my rolls of paper instead of shoving them willy-nilly into a crate under the desk and scramble to catch them every time I knock the crate and they spill out, unravelling all over the floor.
And I didn’t just make stuff. I did some tidying and sorting as well. I don’t know if I mentioned this, but when the poodles went possum hunting while I was away, they did some major redecorating in the small shed I use for garden storage, the ride on mower, brushcutter and the overflow of stuff I will ‘get to one day’ and can’t fit in my workshop.
Today I tackled that and cleaned it out. Threw out a couple of mouse infested suitcases. Sorted boxes and crates from wire baskets and metal boxes. Stacked my old frames neatly. Found things I’d forgotten I had. Re-acquainted myself with the amount of projects I have, waiting to be tackled.
I actually love having piles of stuff everywhere. When I’m looking for that ‘something’ for a particular project, I just go looking through the sheds. Its like going tip shopping but free!
I started looking for more chickens (since one hen ain’t gonna provide the eggs we need) and geese for Wayne. I can find chickens on gumtree… but very few geese! Who knew they’d be so hard to find!
I’ve also started getting my gear ready for my first attempt at running a workshop on making stuff from found objects. My office looks, once again, like a herd of wildebeest lived in here for a week. Not harmoniously either.
However, I’m not feeling too bad about it. I heard on TV a week or so ago that the more creative a person is, the messier their desk is.
I am INCREDIBLY creative. My mess flows over my desk, pools on the floor and spreads out onto the coffee table in the living room. With splashes in the kitchen, on bookcases and even the deck.
In my ‘bee in bonnet’ mood today, I also got a haircut (short short short!), bought some embroidery thread and picked up my cow painting from the gallery. I love it but I seriously don’t have enough room for that much work in this house. Not enough walls. I need to sell it… or…
I’m gonna need a bigger house!
Anyway, I feel great having actually done a few new things around here! I really am happiest when I’m doing stuff for the house.
Wayne is already dreading my upcoming living room makeover… first the living room… then the whole house!
z
shared at:

The DIY'ers 

DIY Show Off

its a record!

I figured it was about time to share another project I made for the house instead of all the arty farty stuff I’ve been doing lately.
When Merrill moved to Victoria, she left behind a ton of vinyl LPs which belonged to her mother. As usual my reply to “Do you want these?” was “Yeah. I can do something with those.”
I had no idea what, though I did have visions of melting LPs in the oven to make bowls, cutting them to make LP mosaic’s… and tons of other things.
One thing I never considered was making a side table out of one! Then I saw this photo and I knew I had to do it!
 
I had the LPs, after all. (Thanks Merrill’s mom).
I had the perfect little base. I think it was originally intented to hold a pot or something. When I found it it was just metal legs.
Whatever.
A bit lot of Liquid Nails and couple of wedges to level it later, here is my LP side table!
Ok. These photos are uninspiring, I just plonked it in front of the little bookcase I put burlap on and snapped away. I could have dressed it up, moved furniture to create a cosy corner, staged the shot… but hey. I was busy! Give me a break!
At least I vacuumed our disgusting carpet.
Which is going this summer!!! See, we need a new wood heater. That means we’ll be needing a new (bigger) hearth so there’ll be carpet lifting involved anyway. May as well go the whole hog and lift carpet from the entire room!
What we’ll find is that about 1/3rd of the living room has old floorboards like the ones in the photos below (yeah, I was shamed into trying to take prettier photos) and that 2/3rds is chipboard flooring.
So, come summer holidays I have a huge job ahead of me. Not only do I have to find the right wood heater for us, but I have to remove a huge living room full of carpet (which will be recycled around the sheds and garden!), I also have to find a new flooring solution.
Ideas are welcome.
Naturally the best alternative is to put down proper floorboards where the chipboard is, remove the vinyl from the bathroom and kitchen and finish the lot.
That’d be nice but expensive.
I could put down more vinyl, good for a house with dogs, easy to clean, yada yada. There are some excellent designs around these days.
Or I could just go the cheap and labour intensive route and paint/stain the floors myself…
I guess I’ll decide once I get the carpet lifted and the new heater in.
 Meanwhile my new LP side table’s been holding paint brushes while I was working on my latest paintings. The plan is to move it next to my armchair so it can hold my coffee cup or my scissors while I work on sewing projects in front of the tv.
‘Cause, doesn’t everyone need a handy little side table to hold scissors?
z

Shared at:

The DIY'ers 

DIY Show Off

art from trash – the plastic fantastic chandelier

I’ve been trying to post a bit more often, like I used to, but you know how things go. You work, you get home tired, you work more at home, you make stuff to sell, you groom dogs, you clean house, wash clothes, think about mowing the lawn…
Then you have to attend functions and exhibitions where you win 1st prize…
Yeah! You heard me!
I won first prize at the Kingborough Council Salvaged Art Competition!!!!!!!!
This is the winning entry as it was when I was putting the finishing touches on it at home in the living room. I’d put a hook in a beam on the ceiling and one of us or one of the dogs would brush by and it would make hollow plastic clunking noises like a badly tuned windchime every time we walked past it.
The thought behind it was that I wanted to make a chandelier. Something large and pretty but out of ‘rubbish’… Plastic cups and old tuperware lids which I found at tip shops and in the bottom of my cupboard.
The ‘base’ for the chandelier is a large plastic clock I found at the tip shop. It was perfect!
I used wire, odd beads and crystals to give it a bid of bling and sparkle. Then I got 2 four meter strings of battery operated fairy lights so it would light up. The idea was to make it possible to light it when it was hung for exhibition without needing to wire it in.
Here it is in the competition. Hard to see the lights in the bright gallery.
There was one downside… somehow the lights would not set to ‘ON’ but stayed on ‘Blinking’. Not the effect I was after. If truth be told I wanted it to be full of fairy lights… a tangle of them above the clock base and going up towards the ceiling. 
Still, I can’t complain. 
I WON!
To make the night even more special, the Roadmap Bookcase I had worked so hard to pull together with the guys I work with on the Revamp program won 1st prize in the Amateur Artist category!
These are the same guys I made the footstool repurposed to shelf with. Here is the shelf at the gallery as well.
I was feeling pretty darn good last night!!!!
Wayne and I had other entries. I’d entered my recycled bag (above) and Wayne entered his wire eagle and nest sculpture.
And this cute little bird made of wire is another of Wayne’s creations which was entered.
Well, enough bragging for one post I guess…
Better go deflate my head.
z
Shared at:
DIY Show Off

revamped footstool

Yes, yes. I know its been a long time between posts. To be honest I’ve just been too wrapped up in my own little world to want to get online, much less blog.
But here I am… sharing a project from work.
Some of you already know I work as a disability support worker as my ‘real job’ to support my art habit. I’m lucky enough to be able to do some creative work in that role with some of the guys I work with.
For instance, this repurposed footstool is a project I’ve been working on with some young men in one of those programs.
The aim of the program is to find, fix up and revamp items found in tip shops in order to develop the guy’s skills and produce something which can be sold to buy materials for the next project.
This footstool had been hanging around in the store room for a long time. It was just crying out to be reborn into something pretty…
We went looking for bits of dowel, finials and knobs. We drilled holes, attached knobs and stained dowel. We painted it a nice light blue colour, then sanded, repainted and re-sanded…
The lowly footstool was reborn into a cute, handy little kitchen shelf. 
Or bathroom shelf.
Or craftroom shelf.
I took it home to dress it up and photograph it cause the guys really do want to sell it. They’re proud of it and rightly so. I think it looks terrific!
The rods come out so you can put rolls of paper on them instead of hanging tea towels or pots and pans. Its both useful and pretty.
We’ve entered it in the Kingborough Salvaged Art competition and I’m posting it on Facebook. It is definitely for sale. We’ll be selling it through a silent auction.
If you’re interested in buying this one-of-a-kind piece of recycled art, please contact me on zefiart@gmail.com and put in your bid. I’ll be keeping track of all bids and at the end of the competition, on October 6th, I’ll announce the winner on Facebook and by private email.
The money raised through the sale of this masterpiece will be used to create MORE masterpieces in the future!
Go on! Make a bid!

z

Featured at:


Shared at:

DIY Show Off

art from trash – my new bag

I am never happy with bags.
Handbags are just too small.
Or they hold too much and become too heavy.
I used to use backpacks. They make sense… After all its better to carry the weight of your life on your back than on one shoulder. With the amount of crap I carry in my bag its amazing I don’t lean to one side permanently.
But somewhere along the line I decided I needed to start using handbags. Or rather, shoulder bags.
Then I got my big diary
It wouldn’t fit into any of my handbags/shoulder bags so I started using canvas shopping bags as my work bags.
They’re ok, but they have no pockets, no inner dividers, nothing to hold things in place… I was constantly losing pens, car keys and my mobile phone.
I was sick and tired of it.

So I made my own shoulder bag.
I got this bee in my bonnet about it one night last week. I looked through the cupboard in my office, found some upholstery fabric samples which might work then started thinking of ways I could use the fabric to make a bag.
I was limited by the size of the samples. I didn’t want to make a patchwork carpetbag looking thing so I didn’t want to mix and match too many fabrics.
In the end I only used one sample for the body of the bag, though I turned the fabric inside out on the sides just for contrast.
I’d never done this before but it wasn’t that hard. I just had to work out the size and design, then cut.
Or cut and then make it work.
The living room was back to normal again.
Normal means a coffee table full of crafting stuff. That’s more normal than clean and tidy round here.
One thing I wanted was a pocket to hold things securely. I wanted a divider inside the bag so that I could put the diary in that part and it wouldn’t fall and lean..
I cut one piece of fabric which I stitched in when I put the bag together, it forms a divider ‘pocket’ at the back of the bag for the diary. I added a couple of fabric loops to hold pens inside that pocket too!
I re-used one of my canvas bags for the strap, flap and inner pocket. I just cut or picked off the bits I wanted from the old bag. I put the small zipped pocket inside on the divider, and put the straps on the sides of the bag.
I reinforced the sides where the straps join and I put in some stiff fabric under the bottom of the bag to help it hold its shape.
Lastly I needed to pretty up the flap/front of the bag…
I was inspired by this image on Pinterest:
I used scaps of burlap and another fabric (using both sides) and some blue cotton yarn for the stitches. I opted to leave out the beads. Knowing me they’d be flying off left, right and center.
Ok, it looks nothing like my inspiration, but I still think its pretty ok. And it’ll hold my diary and TWO pens!
I’ve decided to enter it into the Salvaged Art Competition being held in Kingston next month. Why not? Its all recycled!

z

Shared at:

DIY Show Off

The Girl Creative

one last paros project – shabby photo frame

This is one of the smaller projects I worked on while on holiday in Greece. I had a huge collection of old buttons (I really wish I had them here!), a large collection of old doilies, ribbons, lace…
Then there were the other odds and ends my aunt Marisa found for me. One of which was this little heart shaped basket. 
She said “Do you want this? Can you do something with it?”
I said, “Sure, I can do something with it.”
My standard reply. 
Never say no to ‘stuff’… it will always come in handy one day.
In order to prevent becoming a hoarder featured on one of those awful reality tv shows “Buried Under A Ton Of Crap” however, you have to actually USE the stuff you’re given/collect to make more stuff which you can either sell, give away or display prominently in places like your kitchen, toilet or garage.
I decided the little basket would make the best photo frame for Marouso’s bedroom… she has a little alcove in there which is bare and desperately needed something pretty. So between working on the light fitting for Zefi and some small hearts like these for my aunt, I started putting together this little baby.
I used some old buttons, some still on the card, some old curtain lace, a bit of rusty wire and a bead… plus a little bow and icon pin from a christening. You can’t see it well, but at greek christenings they hand these little pins out as a memorial. My aunt had (of course) a collection of them.
Zefi, I’m sure you’re reading this… you promised you’ll collect me some!
Next step was a photo… Marouso had a few really nice ones she’d taken with her kitten, and I had a great one I’d taken of her and her ‘titini’… a bodyless stuffed toy cat which she’s had since she was a baby. Its sort of like Linus’ security blanket. No one knows what ‘titini’ actually means, its what she called it back when she couldn’t talk. For all we know it means “Get that stupid cat toy out of my cot right now!”
Marouso and her ‘titini’.
I had a play with the photos on picmonkey.com – I don’t have Photoshop on the netbook so I had no other way of altering the images. I wanted to go with an old fashioned black and white look but when I got them printed I decided to go with the photo above.
Great photos though. I love the one above where the kitty is all eyes.
I slotted the photo in behind the buttons where I’d left a ‘photo tucking’ gap, tied a ribbon to it for hanging and voila. Done.
z

Shared at:

DIY Show Off

lace doily light fitting for a cousin

Well, I’m back home. Back to Wind Dancer Farm, back in Tasmania, back to my own little family. Its good to be home despite the fact that it means no more lying around on a beach, no more Paros, no more mom and cousins around me.
The trip was good, considering it was LONG and the seats on airplanes these days are made for height challenged individuals with eating disorders.
Seriously.
Have you ever tried sitting in one of those seats for 14 hours straight?
If you’re of ‘average’ height and you try to slouch in your seat you end up kneeing the seat in front of you. They used to have foot rests under the seat in front but they’re gone, ensuring that if you stretch out your legs, the seat has a sort of tourniquet effect, cutting off circulation to your lower legs. The new, improved individual monitors are a great idea… till you realize that you don’t actually enjoy having a screen 12in from your face. And that if the person in front of you leans his seat back, the monitor barely misses scraping your nose. You used to be able to say “excuse me” and sort of squeeze past the people sitting beside you if you needed to get up, all they had to do was sit up and pull their legs back. Now you have to get everyone to get up and pile into the aisle, or what passes as an aisle, so you can get out. Heck, even getting in and out of your own seat required contortions reminiscent of a pretzel if the person in front of you has the seat laid back. I remember being able to get up and walk the aisles during a long trip and loiter near the back of the plane doing stretches. This trip four of us were standing in line near the toilets and had to dodge stewardesses and serving carts… Bet they were pleased to have us in their tiny work area.
Hey. I know I’m older. I know I’m no longer as flexible as I was, but even if I still had the figure of my 20s, I still wouldn’t be able to squeeze past my co-sardines’ legs or lean back without touching the seat in front of me.
On the positive side, the food is a whole lot better than I remember.
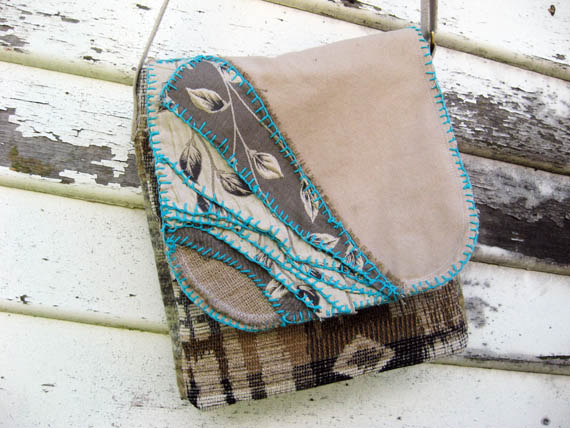
So, I’m back home. The tan is fading fast and jet lag is keeping me up when I should be asleep… thought I’d share my last big project on Paros before life goes back to normal and the blog goes back to being about living on a farm with poodles and other critters. (I don’t mean Wayne.)
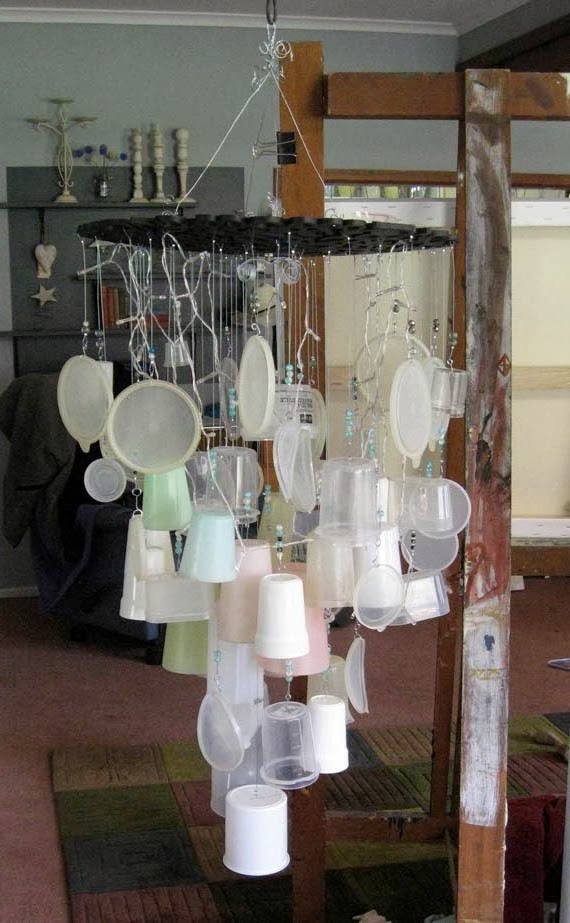
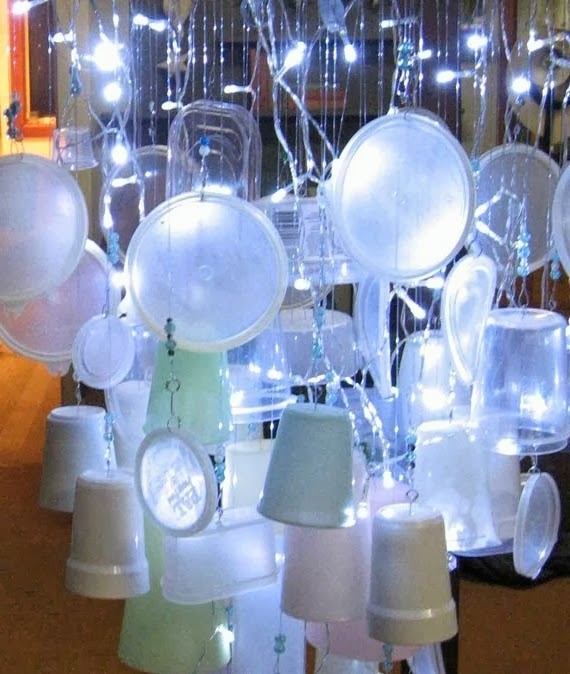
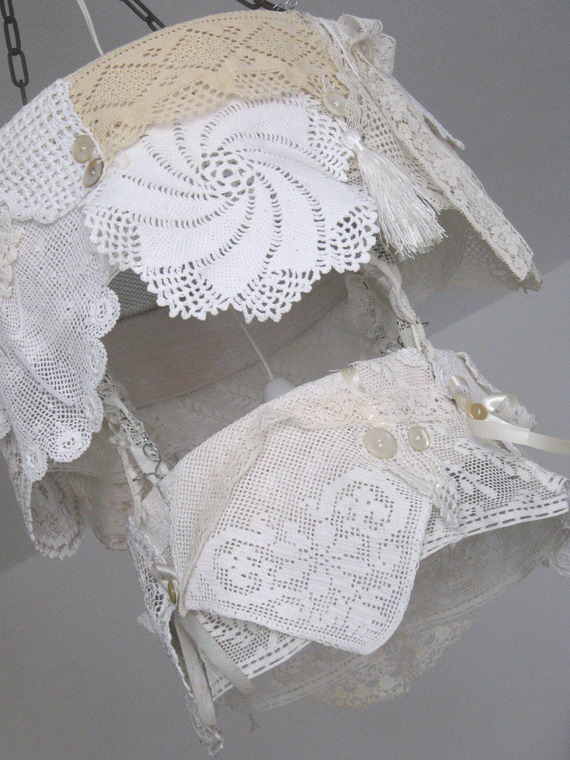
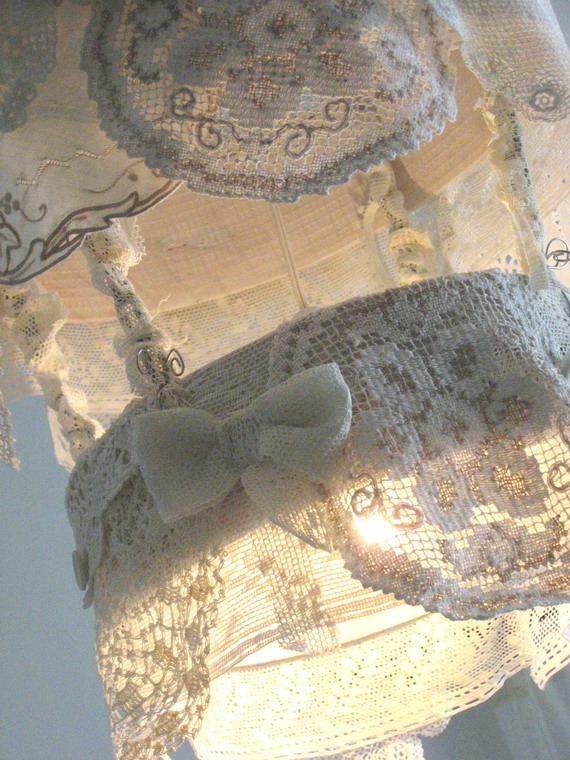
The lace doily light fitting in little Zef’s bedroom.
When I first got to Paros my aunt Marisa was all set on getting me to make a lace doily lightshade for Zefi’s bedroom. She had seen one of these in a shop and wanted one badly. Only difference was, the one my aunt loved had a wire frame inside.
Great idea if you have a wire frame. A very round balloon and tons of glue could also make this but it wouldn’t hold well in damp conditions I was betting. I started looking for alternatives.
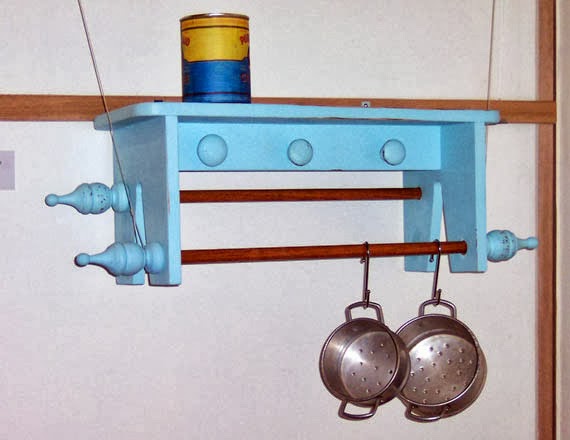
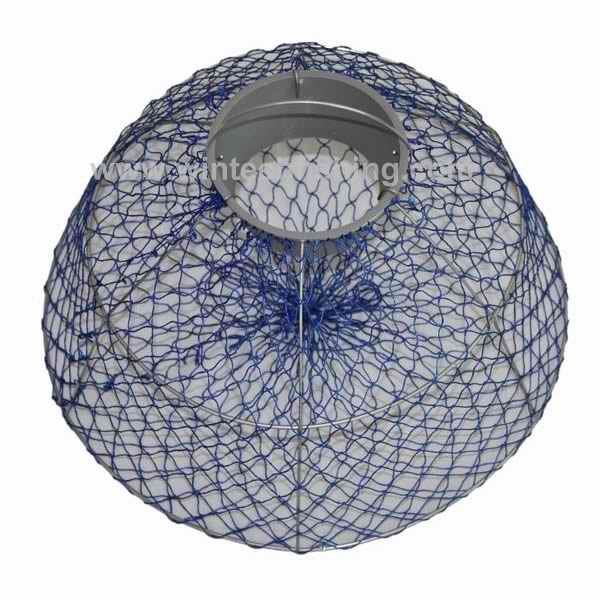
I saw a rusty trap similar to this at Souvlia but it was bent beyond repair. I did find a new one for sale eventually (in a fishing shop, go figure!) but by then I’d moved on…
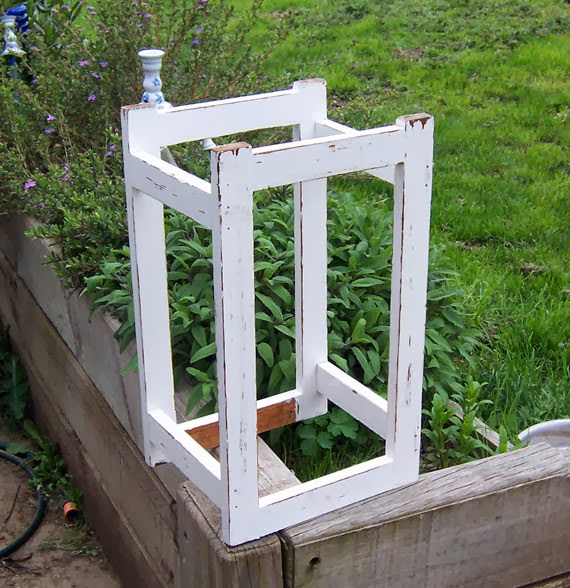
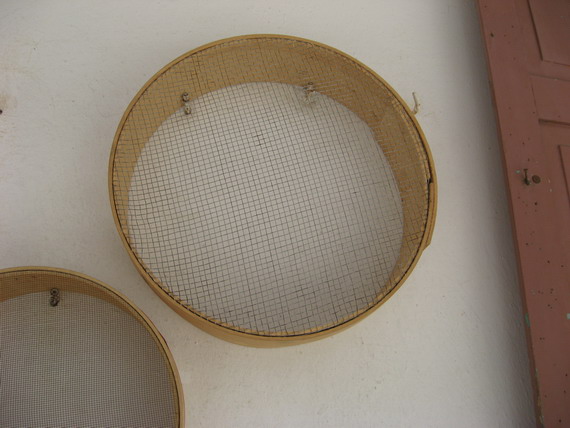
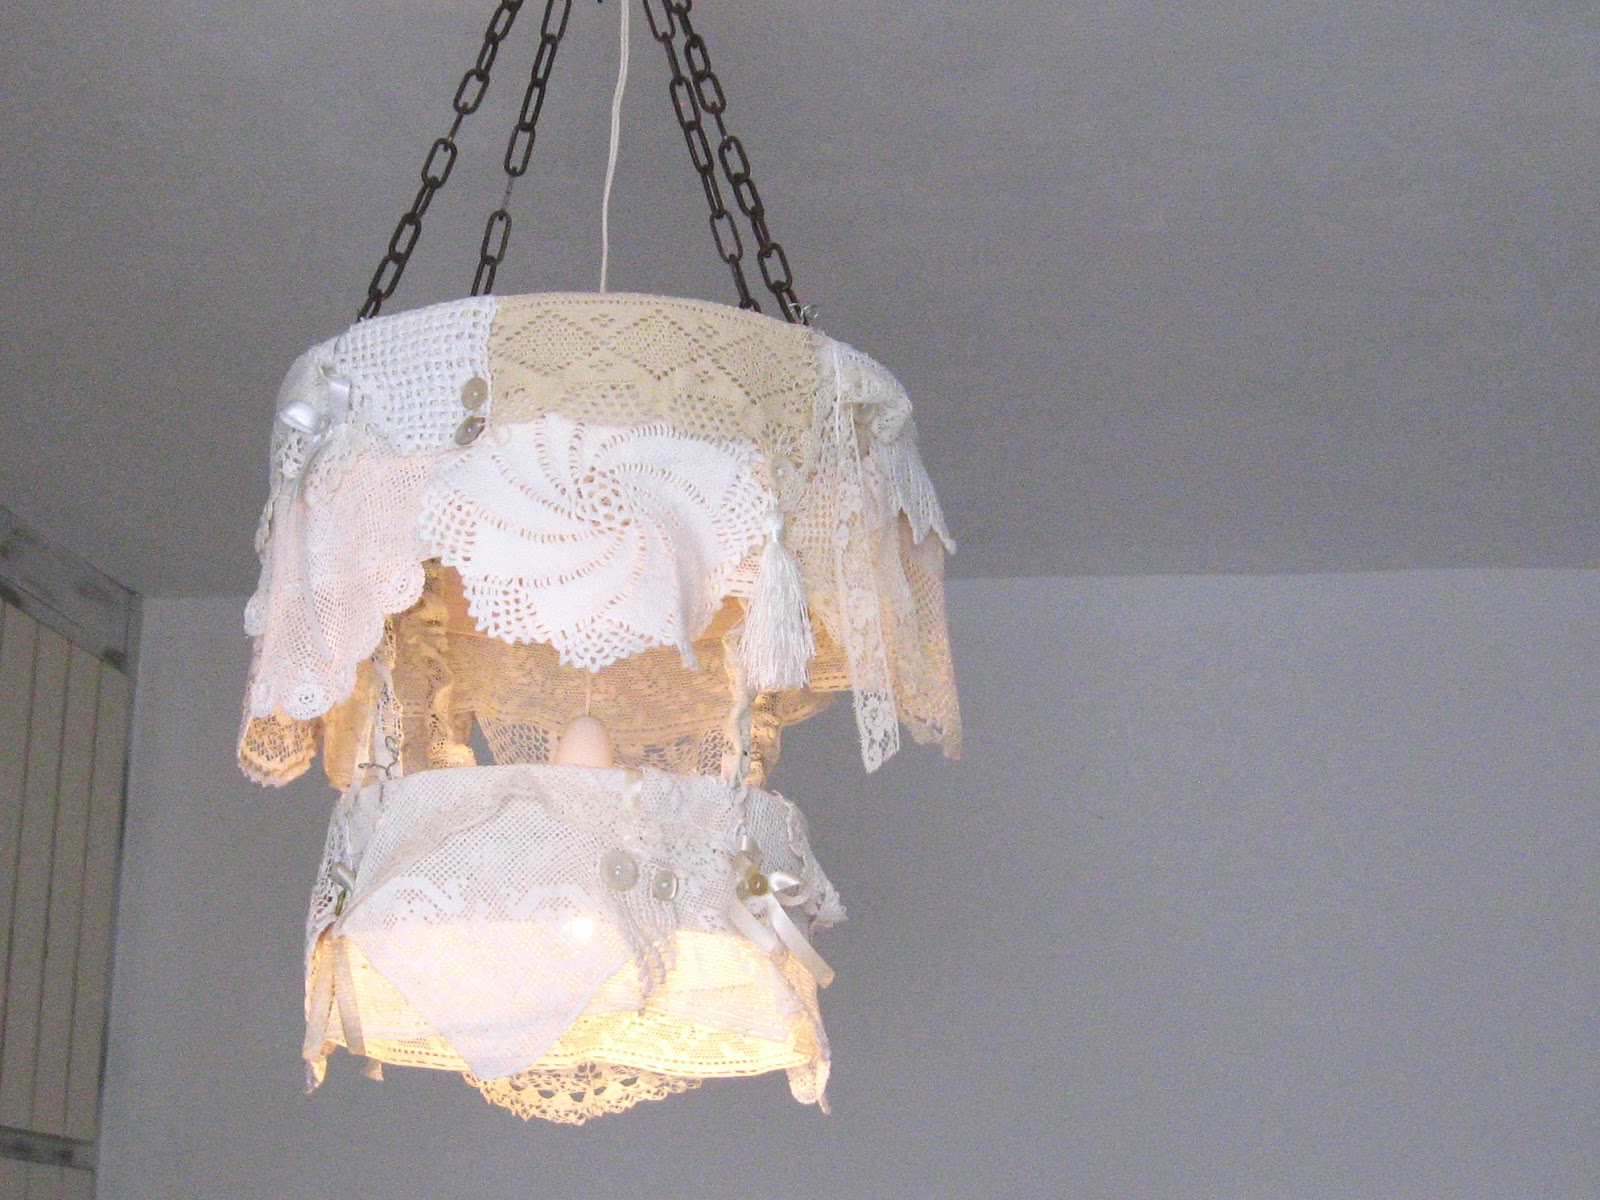
What I decided to do was build a kind of chandelier doily and lace light using 2 of the sieves I’d seen previously at a grocery store.
I went and bought a couple of these little beauties, limed them white and got a friendly uncle with a drill to make holes for chains.
I then started planning how to place and sew on the doilies and lace without cutting or ruining them, as per aunt Marisa’s instructions, and without aunt Marisa watching my every move and making suggestions as to how to do it better…

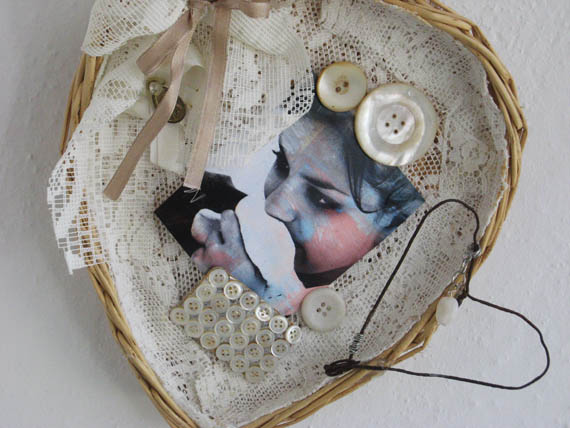
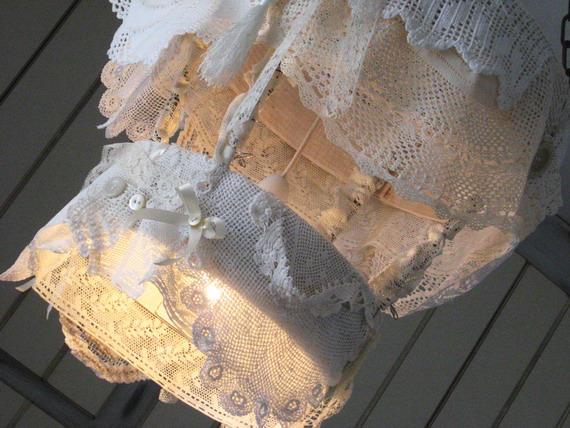
I ended up using quite a bit of old curtain (since I was allowed to cut that) as an under-layer, then layered and joined the doilies over that. I embellished it with ribbons and buttons and pieces of lace.
Only one doily was hurt in the making of this light shade… it was just too big and I really wanted to use it.
I was working in Zefi’s place, hiding from aunt Marisa… when she walked past and saw me. First words out of her mouth were “Oh, you cut that doily” before Zefi hustled her off with threats to her life if she said another word.
Zefi and I searched every hardware store on Paros to find the right chain. She was the one who found the perfect one – large links in bronze.
We’d also asked Andreas (Zef’s husband) to see what he could find in Athens and he’d brought us some silver chain. In the vein of waste not want not, I thought we should use the silver chain as well. I secured the chains to the sieves with wire and hid the silver chain with lace ‘sleeves’ made from the old curtain hems.
That way I didn’t have to sew any more than necessary!
I had to buy a pair of wire cutters to cut the sieve for the light fitting to go through, but that was easy enough.
Lastly, while Zefi was at the beach I climbed on her bed, and with her daughter Marouso’s help, put the light up on the hook already in the ceiling, fed the light through and replaced the globe.
Let there be light!
It came up pretty good even if it does look like an upside down wedding cake!
Payment for this: some very old doilies and a gorgeous old cut lace curtain.
Thanks guys! My next trip will be longer so I can plan on working for part of it! 🙂

z

Shared at:
The Girl Creative

Keeping It Simple