upcycled pringles container

The other night my hands got bored as I watched TV so I got this old pringles tin and made it unrecognisable.

First I cut it into 3 uneven slices. Put bottoms on the ones that ended up bottomless. I did a couple of layers of papier mache to strengthen them.

I wanted it to say something, so I found synonyms for the word ‘write’ and printed them out in different sizes.

By way of aging the paper, I used a candle and slightly browned it.

Note: Browning paper is a tricky business… there’s a fine line between browning and flaming.

After dancing about the kitchen with a piece of paper rapidly turning to ash in my hands, I kinda liked the burned edges.

Note (again): After a certain point, blowing on a flame doesn’t put it out. It encourages it.

z


good things come to those who fossick

I really scored today!
On the way home from work I had to stop for something at a $2 shop (ok… I lie… I didn’t have to!) and well, once I was in there I just had to look around, right? I mean, I was there!
I went through all my favourite aisles (art & craft, homewares, stationery) and just as I was leaving I spotted this little fellow.
I just had to have him! Of course he’s not porcelain, what do you expect from a $2 store? (Things which cost more than $2, that’s what). He cost me $8 but I think he’s worth every cent. I’m working on a few little projects and I think he’ll find himself in amongst them soon enough.
My other, even more exciting news, is this!
You know I can’t resist an op shop, right? And if there’s no one there to stop me, I just have to go in.
Well, this time I’m so glad I did!
This is an op shop I generally visit once every 2 weeks or so as they tend to have good prices. When I walked in today I spotted a basket full of what looked like old cotton pillowcases.
On closer inspection it turned out they were all cotton sacks. Flour, bread, coin sacks even. As I started pulling them out and looking at them I knew I had to have some.
The basket had 30c each on the side so I started unfolding, sorting, looking.
Then I thought stuff this. I want the entire basket!
So I took it up to the ladies behind the counter and asked how much for the lot?
$5 they said.
DONE, I said.
I’m so excited! Not all of them are old, but a few at least are before the metric system! (I haven’t yet sorted and counted them, just flipped through them.)
Oh boy!
I can barely contain myself.
They wanted to know what I was going to use them for.
I have no idea. When I saw them I just knew I had to have them.
Kitchen curtains comes to mind.
Office curtains even, if there’s enough of them.
Some of the bigger ones would make nice cushion covers. Some would probably look fantastic framed…
I just love the idea of a curtain though, sacks sewn together, without cutting them up and ruining them… so the curtain is double thickness. Or do I cut them up and sew them together so the curtain is more flimsy?
Oh, the dilema!
I may have to sleep on it. Give them a wash and good iron. Sort them out by size. Just look at them and admire then and thank my lucky stars I decided to stop in at the op shop today! 
z

the woodshed finished!

Its finished! Mission accomplished. This September break, we made over the woodshed!
The last finishing touches went on on Monday, the last day of our break.
I made a couple of signs for the shed (what is it with me and signs lately? I have this unhealthy obsession…)
I made a small ‘Woodshed’ sign which I put into the center of the barbed wire wreath.
I also made a special sign –
When we moved here, we named the farm Wind Dancer after Wayne’s special horse. I always wanted to make a sign for the gate and never got around to it. Then while we were making over the woodshed I found this old round piece of plywood. I’d seen it many times before – its been there since we bought the farm after all. Its old, weathered and broken in spots. 
It was perfect.
I wanted it to look like a very old sign. Like you’d see in an old garage or something.
I had to print out the words on lots of bits of paper and I cut them out like a stencil. Using charcoal, I drew the letters and horse in, and then painted it.
Unfortunately, when I coated the sign with polyurethane to protect it from the weather (cause now its a sign I don’t want it rotting or washing away in the rain) it darkened. Varnish always darkens the colour of timber.
This is how it looks when you come up our drive now. The fence ruins the look a bit, but we can’t do much about that. (You can see where Wally has been gnawing on the fence posts!)
Wayne has finished the last wall – on the right. Its a half wall. He won that arguement. Actually, it made more sense than leaving it open on that side. Now we can toss wood in and it won’t just bounce back out.
 The front and left side of the shed now has plants and rusty objects adorning it.
The ammo boxes are one of my favourite things. I found them at op shops over the years and have held onto them.
We’re both very proud of our ‘new’ woodshed.
z

Shared at: 

Knick of Time
DIY Show Off
 
Homespun Happenings

pasta flora

This is my mom’s pasta flora recipe. Its really easy to make and really delicious. Of course, when mom made it, it was a bit prettier than this.

Disclaimer: Mom’s a great cook, but her recipes have evolved over the years. She cooks from memory and things aren’t scientific. This is my interpretation of her instructions.

Pasta Flora

4-5 cups self raising flour
1 cup butter
1 cup sugar (or less)
3 eggs
jam of your choice

Make a crumbly dough using the above ingredients (minus the jam of course!), then set it aside for 15min or so. Butter (or line) a large baking tray (or two smaller ones like I did above). Divide the dough in half roughly and using your fingers (palms, fists) flatten the dough to line the bottom of the tray. Spread jam over dough. Cut the rest of the dough into pieces and roll into ‘ropes’. Use these to create a lattice over the jam. If you have enough dough left over create a border as well. Bake in a moderate oven till golden brown.

I don’t know what ‘crumbly’ dough is really, but I add flour till the dough feels right.

Maybe I am turning into my mother after all… whenever I queried her on the precise amount of an ingredient, she would say ‘you use your eye’.

z

a woman’s work is never done

Today I was inspired. I put on a 40’s style kerchief and got to work to whip this house back into shape. If I could fit into one of my original 50s dresses, pointy toed heels and a frilly apron, I’d have gone the whole 50’s housewife look.
As it was, flannel shirt and paint splattered track pants had to do. 
The plan was to finish a few started projects (or at least move them along a step or two), clean the house (which is a disgrace – glad my mom lives thousands of miles away and isn’t likely to drop in unannounced!), and cook.
Well, I didn’t clean the house.
What I did do was remove the horizontal blinds from the kitchen window that now looks into the mud room and put a rail up to hang pans. I put a hook on the other window so that when I lift the blinds I can tie them up and they won’t come crashing down again. I folded washing. I took a couple more suncatcher/chimes down to the local cafe to replace 2 which have sold.
And I cooked. I don’t often feel like cooking but when I do, I cook tons. This morning over breakfast I flipped through my old recipe book, the one where I started writing mom’s recipes when I was a teenager. It got me all nostalgic for mom’s cooking.
I chose 3 things to make – pastitsio (a lasagne-type of dish with rigatoni), peas with tomato and dill and spring onions, and pasta flora for dessert (and snacks for work this week). 
I just wish I was as good a cook as my mom is.
z

live laugh love in 8 easy steps


I really love signs on timber. After reading links on Pinterest on how to transfer letters or images to timber, and experimenting with a few suggested methods, this is what I found:

The best and easiest way to make signs is to use a method which I learned in grade school.

Tracing!

So, here’s the Zefi sign-making method.

1. Print out the words you want on plain printer paper. I used different fonts for each word. (Ok, this bit I didn’t do in grade school!)

2. Then, using charcoal, cover the entire back of the printed image. If you’re transferring onto a dark background you can use chalk or light coloured soft pastels.


 3. Lay the paper onto the timber, charcoal side down. At this point its handy if you made sure the words/image are the right size for the timber you’re using.

I used weathered timber I’d prepared earlier, using a dry brush technique to create an aged sign look.

4. Using a pen, ‘colour in’ the letters, pressing the charcoal onto the timber surface. If you want to make sure the image doesn’t move, use some masking tape to tape down both paper and timber.

I’m extremely lazy confident so I didn’t tape it down.

5. Remove masking tape (if you used it), lift up paper, and voila! This is what you have if you’ve done it right.

If, unlike me, you’re not ‘confident’ and taped everything down, you can check your transferred image before you commit yourself by removing the paper.

6. Using a fine brush and paint, you then fill in the letters. I used watered down artists acrylic paint cause I wanted a softer look. By watering the paint down I achieved an uneven saturation of colour which is what I wanted.

If you plan to sand and distress the timber sign after you paint the letters, you can use undiluted paint at this step.

7. When I had the pieces all painted, I added screw eyes and asked Wayne to make some S hooks to joining them together.

That step took 5 weeks.

8. Technically, the sign is finished at step 7, but I added some jute flowers to my sign cause I like adding these little touches.


So there you have it. Something I learned in grade school has come in real handy.

I’m still waiting to see if algebra will come in handy.

Find this on

DIY Show Off

z

Shared at:

Knick of Time

another tip trip

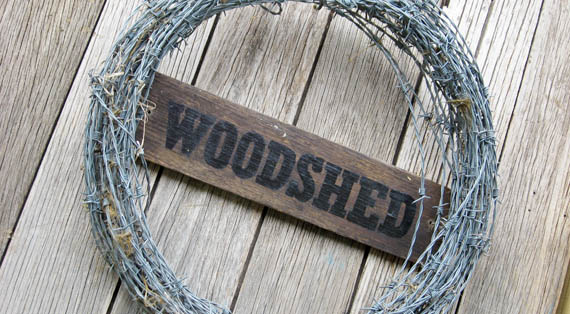
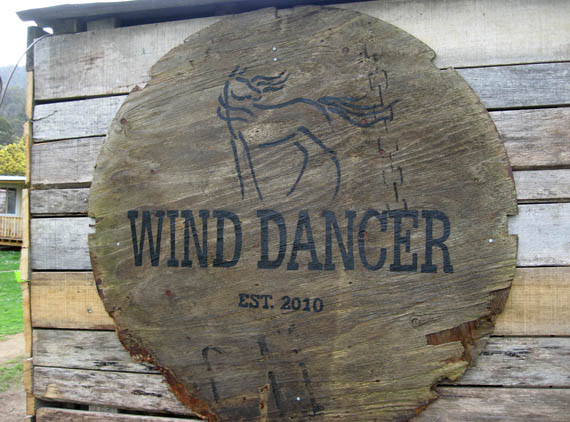
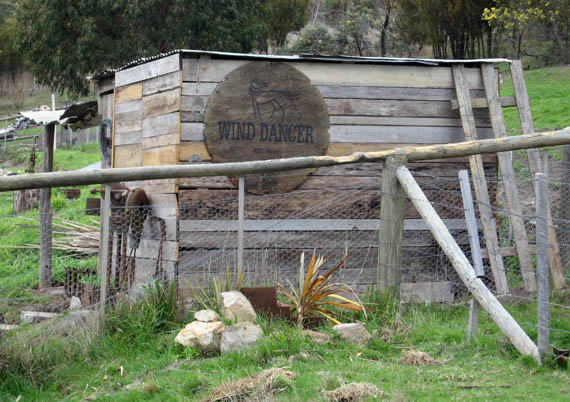
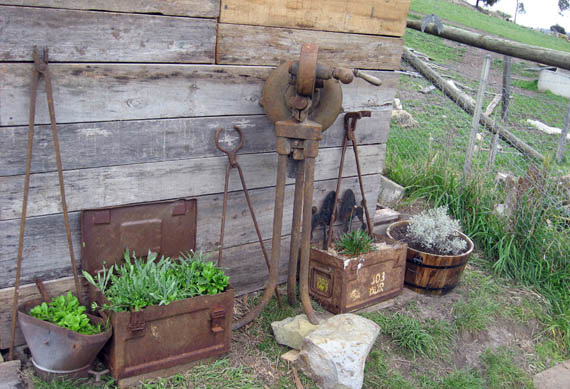
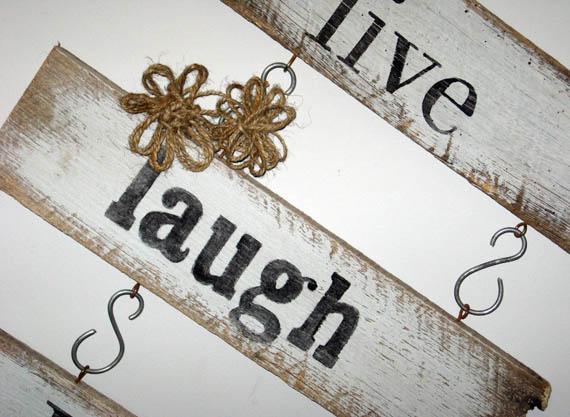
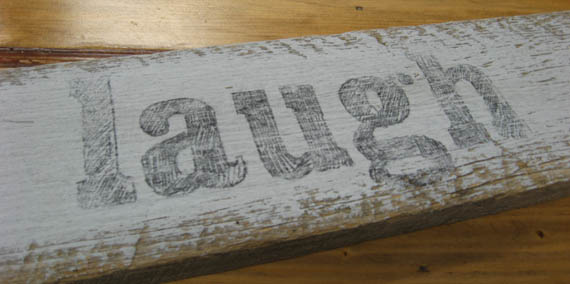
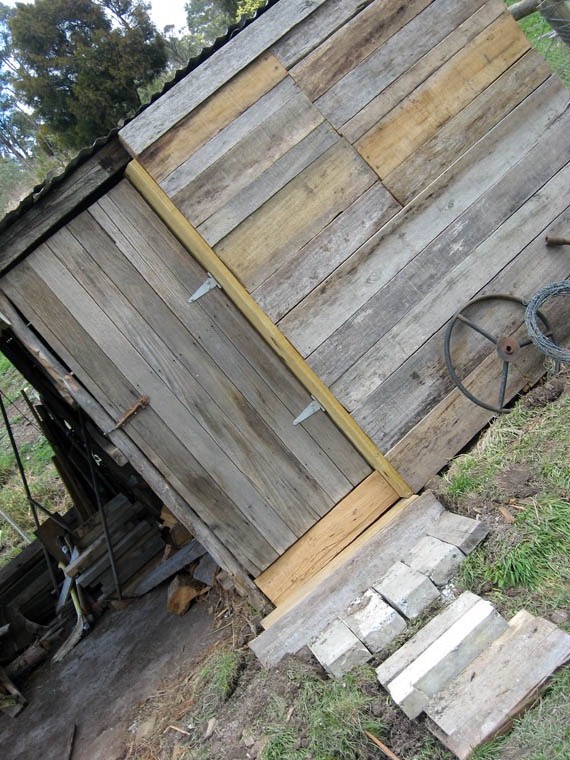
Yesterday, and again today, both Wayne and I spent a bit of time doing bits and pieces around the new look woodshed. It seems our plan to ‘do up the woodshed’ over this break has been achieved. This is a preview. I’ll have more photos soon… Let me just say it involves a pretty cool sign.

I really wanted to put in a climbing rose, but when I tried to dig a hole I almost dislocated my shoulder. It was like hitting granite. I’m not a good gardener. I’m a wimp, so I decided to do the easy thing.

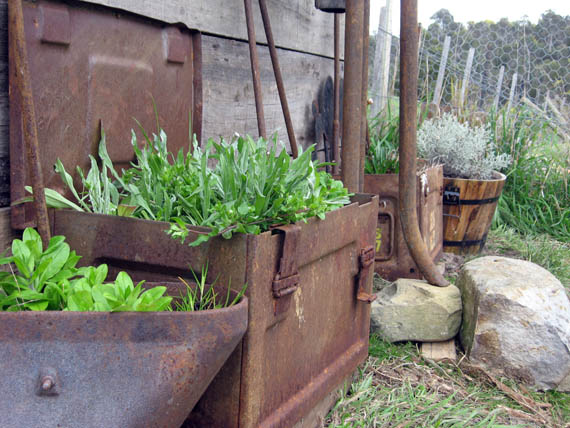
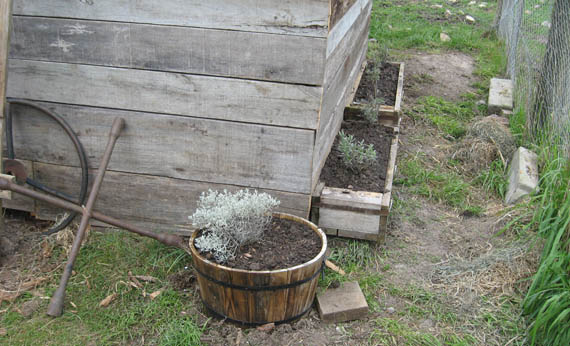
I went and got a couple of the boxes I’d gotten (for free) and put them along the side, dug 5 tons a wheelbarrow full of dirt from a mound we mysteriously have behind the garage, filled the boxes, and chucked some lavender plants in them.

I then put an almost entirely but not quite dead climber into the ground (figuring if it lives, bonus, if it doesn’t well, nothing lost since it was mostly dead anyway) and took the fake half barrel it used to live in (or tried to die in) over to the woodshed and put another plant in it there.

Let me explain.

As I said, I’m no gardener. Every spring I get this crazy gardening mania. I have visions of pretty flowers and a gorgeous garden with little surprise nooks and whimsical decorations… I buy plants, put them in the ground and watch most of them die. Wayne thinks I should buy them pre-dead and save the time. I’ve taken to buying them and keeping them in pots in an attempt to trick them into staying alive.

Last year I bought a ton of plants really cheap from an old guy who grows them from cuttings, including 21 lavenders I intended to plant along the driveway. That never happened. I put in 3 then Wayne said not to put in any more since he had plans to do some digging there.

That never happened either.

So, I still had 18 lavender plants growing more and more pot-bound. A few weeks ago I put most of the lavenders along the front of the house, just at the foot of the new deck.

Yep.

I stuffed up again.

Sure, they’re still alive so far (despite me) but I didn’t put in a proper bed, and I didn’t weed or anything, so now I play spot the lavender plant between the weeds.

Sigh.

Well, another 4 went into the boxes. Now I have a few more to find homes for and I can’t, for the life of me, think of where to put them. We may have 90 acres, but the house yard is not big.

I have a hydrangea I need to move. Long story involving sump oil and a ton of river pebbles.

And today I put in some pussy willow cuttings, on the paddock side of the fence. I put in about 10 of them last year, near the dam, to soak up the bog created around there every winter – but the horses ate them. We had to put an electric fence around that area so they’d have a chance, and to protect the silver birches I planted.

I checked them today. The silver birches have leaves, the pussy willows are just sticks. Hence this second attempt to plant cuttings.

I got the cuttings from Fentonbury where we’d gone to do an inspection. While there, we got a load of stuff to take to the tip.

This time I made sure I didn’t shut my fingers in the car door.

I also helped Wayne unload the rubbish. He took one thing out of the trailer, I put one in the back of the ute.

Ok, that’s an exaggeration. I only kept back a few things. Things I knew would come in handy one day. Wayne was not impressed.

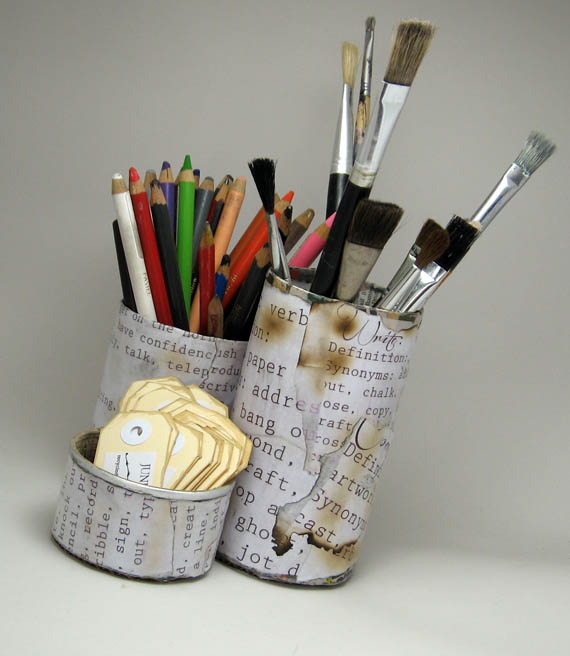
At least I’ve been making things lately, using what I have and being creative! And it feels great!

z

the make-do philosophy

I’ve been thinking…
Don’t roll your eyes.
I’ve been thinking about a few things ever since I read about the Nesting Place’s 31 Dayers. This is the link to last year’s challenge to blog on one subject for 31 days in a row, during October.
At least that’s how I understood it.
My first thought was “How exciting! I want to do it (if its on again this year).”
My second thought was “Oh, no, what would I write about?”
My third thought was “Could I do it?”

Its a huge commitment. 31 Days? Can I keep at something for that long?

Last time I said I’d do something every day was when I decided to walk every afternoon. I think the last walk I took was about a year and a half ago, precisely 3 days after making the decision.

If I did do it…I’d have to pick a topic relevant to me, my life, my blog. It would have to be something I’m interested in. It would have to be something which challenges me … and which ideally will take me a few steps outside my comfort zone, otherwise what’s the point?
So, what would my topic be?
Then I had the answer.
I could do a series on using what I have. On not spending money for everything I think I need, even if it is from an op shop.
Cause, between you and me, I have a shopping problem.
This could be my 10 step program, in 31 steps if you will. 
First admit you have a problem…
I think that I have enough stuff around here that I can tackle most of the projects I have waiting in the wings. I have things I can use to make, mend, fix, change, most of the projects on my list.
Ok. Not all of them. Some of them will need special bits purchased for them. But quite a few of them can be done using what I have on hand and my imagination.
I could make a list of the projects I can work on during the month and tackle them using only what I already have. Of course there’s its virtually impossible to do 31 projects in 31 days when you work… but surely there’s other related stuff I can post about …
So what do you think?
Should I do it?
z

the woodshed gets a door

 
Hey! I’m back to typing with all fingers! Gently, but all fingers nonetheless!
So here, I am with the promised photos of the woodshed with its new door.
There’s a small drainage ditch in front of the woodshed, so Wayne made temporary steps up to the door as well! He’s a gem.
The door came from an old shed I pulled down at my house in Fentonbury. Its seen a few incarnations…
I used it as a divider in my bathroom in Fentonbury for a while…
I also used it as a ramp when I had puppies who needed a bit of help getting up and down steep stairs.
Now its back to being a shed door. Full circle.
In the spirit of using what we have, the hinges have come off a door somewhere, so has the lovely old rusty bolt. And being that Wayne is clever with wire, he made the bolt work with wire to latch it onto.
Looks great doesn’t it? Even Wayne thinks so. This morning he said ‘I hate to admit it, but the woodshed does look better.’
Score 1 for Zefi.
Though he did roll his eyes when he saw me hang the barbed wire on the door…
You may have noticed the roll of barbed wire lying against the shed along with an old tractor steering wheel and a huge wheel brace. After taking the photos I thought the barbed wire would make a great wreath for the door (hence the top photo).
I’ve got plans for that wreath.
Since when do I not have plans for everything?
Stay tuned.
z

happy birthday to me

Well. Its my birthday. I got tons of birthday wishes on Facebook. Thank you, I feel so popular! A couple of my cousins got my age almost right. One wished me a happy 28th, another wished me a happy 25th. Again.

(You know who you are, and I love you!)

Wayne gave me my birthday present this morning – a multi-function power tool!

I love that we can buy eachother power tools as gifts and are as equally thrilled to get them as to give them! Its the perfect arrangement really… I want a router, so I’ll buy one for Wayne at Christmas.

This morning the weather was glorious so I took the dogs to the bottom paddock for a run in the daffodils and snowdrops. Its gorgeous at this time of the year.

Other than that, I just took it easy. I did do a few things, though not nearly as much as I hoped I’d do. Then again, I’m a slave driver…

I washed a huge pile of dishes (an achievement in itself with 2 fingers taped together and needing to be kept dry), made a spanakopita (greek spinach pie) and then worked on some crafty projects. I should have some photos to share soon.

Wayne put a door on the woodshed and did a great job. Photos coming.

Our friend Chris dropped in to visit and we had pizza and ice cream. No cooking on my birthday. Wayne did offer to take me out for dinner, but I am in my comfy ‘don’t wanna leave home’ zone. If I’d thought of it earlier, I’d be wearing pjs already.

Tomorrow I’ve got a follow-up doctor’s appointment – he wanted to get the xray results and see how I was going. I had planned to cancel the appointment but forgot, so now I have to go in and see him at 9.15am. Ugh. I’ll be taking the tape off tomorrow either way. I don’t need it any more. My fingers are ok to use providing I’m gentle with them!

z