Unknown's avatar

About zefiart

Blogger, DIY-er, poodle lover, graphic designer, dog groomer, recycler, artist, wonder woman in my spare time.

progress on the mud room

The guys have almost finished the mud room. The reason its not finished yet is that there are still a few minor bits and pieces we need to finish it, plus it still needs a ceiling. I’m not overly worried about the ceiling at this stage – it has a roof and its not leaking. That’s a bonus whichever way I look at it.
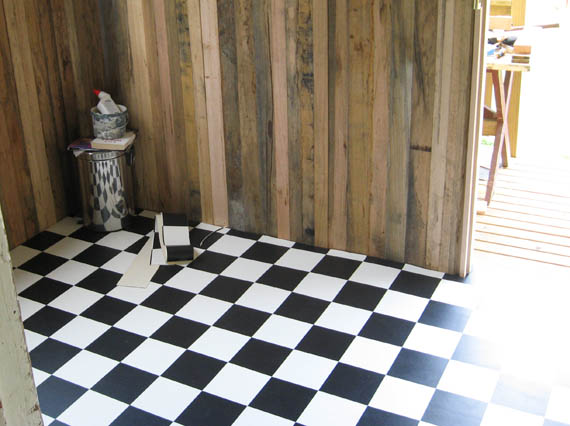
First, the mud room used to be a small porch. Chris and Wayne put up stud walls, we bought a window to go in one wall and they clad the external walls. Last time Chris was here they started on the interior walls. I wanted the walls lined with timber and we had a pile of tassie oak flooring so we used that. Its not all one size but I’m easy (in some things) so what I got the guys to do was randomly alternate the thin boards with the wider ones to create interest.
Over Easter the guys put some plywood down over the decking to create a level surface and I went and collected the roll of vinyl I’d found in a shop way on the other side of Hobart. This morning they put down the vinyl… I love it. Love the 50s black and white tile look. Their laying of it isn’t perfect, but it’ll do!
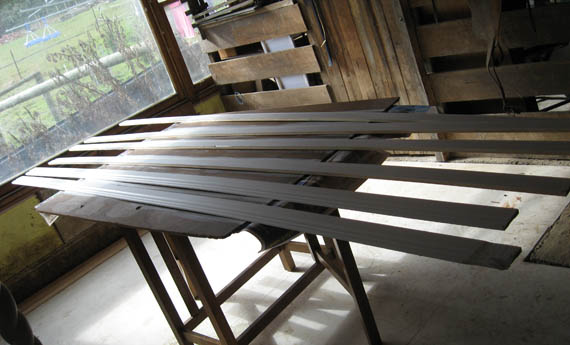
I had also bought some skirting boards on the way from collecting the vinyl and I had time to paint it before it was put in place. I’d never had the time to do that before. Sure makes life easier.
As I said, its far from actually finished yet, but the main stuff has been done. The mud room and toilet both have vinyl on the floors and skirting boards. Only the house ‘exterior walls’ needs a bit of skirting board to finish them and that’s my job to buy, paint and put in place. I also need to buy some trim to go around the window.
Once thats done I’ll fill gaps and paint… and then the best bit: decorating! I have such ideas for this small room. The main idea is to get all the coats and jackets and shoes (oh so many shoes) into one place in an organised fashion… well, I can dream.
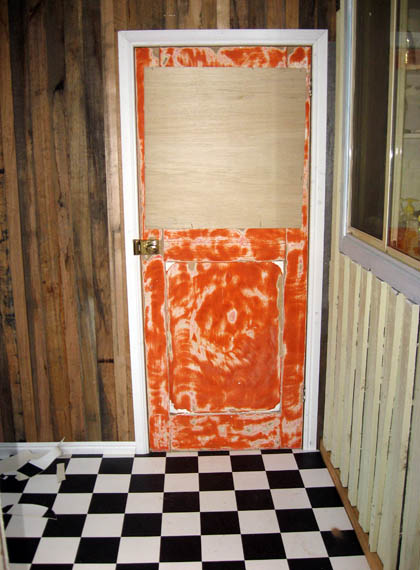
The new/old front door is in place with a deadlock on it. It still needs a handle but I’ll find one I like in my travels somewhere… The door needs 2 panes of glass in it but till we get the glazier in to do that, Wayne’s put in a bit of plywood to stop the howling wind. 
Going to the toilet is so much warmer than it used to be! 
Better go and tizzy up the gourmet pizzas we bought for dinner tonight and feed the monsters. The dogs too.  
hahah.
z

DIY – kitchen chairs make over


This is the story of a couple of chairs found at tip shops looking very sad and very ugly. I got this first chair for $1! I couldn’t believe it! When I saw it I thought for sure they’d want something like $15 for it. At least. I’d seen similar chairs in much wobblier condition for $25 each at one of the other tip shops. This one was nice and sturdy. When I got the sales person’s attention I asked about a couple of other items I was interested in, then offhandedly asked about the chair, sure I wouldn’t want to pay their price for it. When she said $1.00 I had it in my car before she could change her mind.
It was painted in layers of oil paint which I found where almost impossible to get off using the sander.
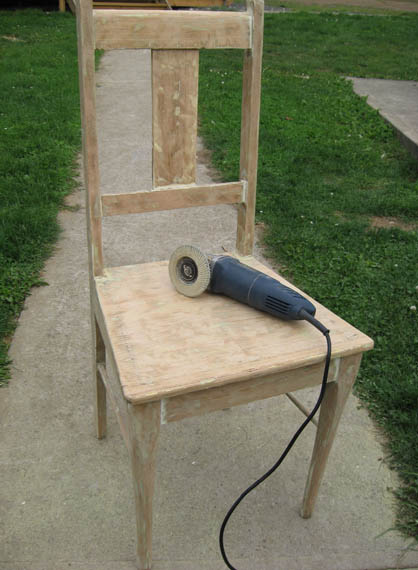
So, I got out my trusty angle grinder with the sanding attachment and made short work of all those layers of paint.
I then decided to stick with the two toned theme on the chair and painted it Limed White, with a pale blue seat… And hated it.
I quickly repainted it. This time I used a mix of my own making. I never used to do this, but I have a good friend who is forever taking liberties with paints and mixing up her own tints. My biggest fear is that I’ll find a colour I love and run out mid-job with no way to recreate it.
I soon got over my fears though and was happily mixing up colours for all I was worth. Almost everything in my way got a coat of paint on it over the last 2 weeks.
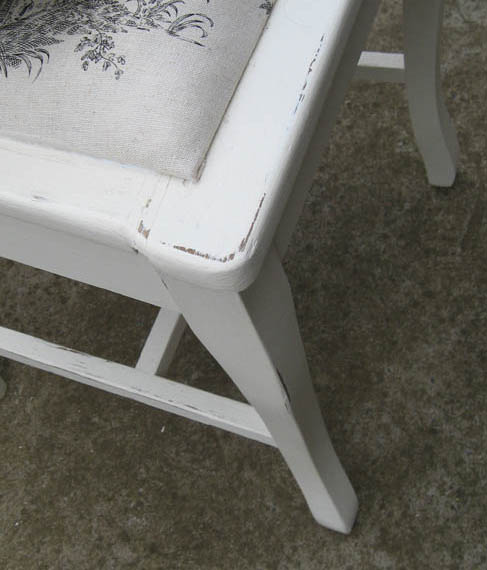
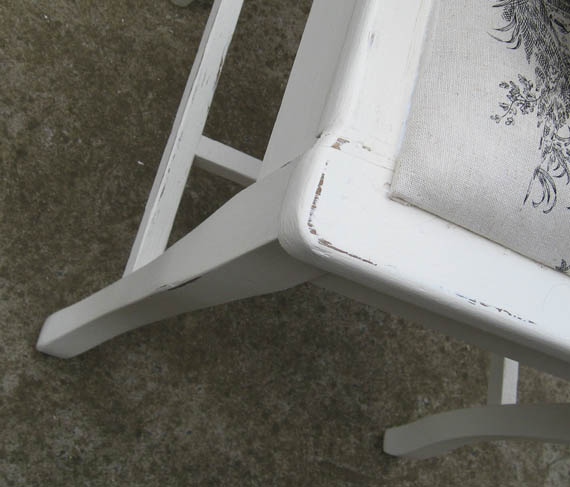
I finished up with a chair in a pale rich creamy white which I love. Its similar to the colour of the kitchen table. Once the chair was finished I gave it a quick sand, exposing a few spots on ‘wear’ areas, then I gave it a wax with some clear beeswax. I love the smell of that stuff and the soft gloss it gives to things. I’m totally new to furniture wax and this is the first time I’ve tried it. I read about it on the DIY blogs I’ve been reading lately and thought I’d give it a try.
After all, try everything in life once, and the good things twice.
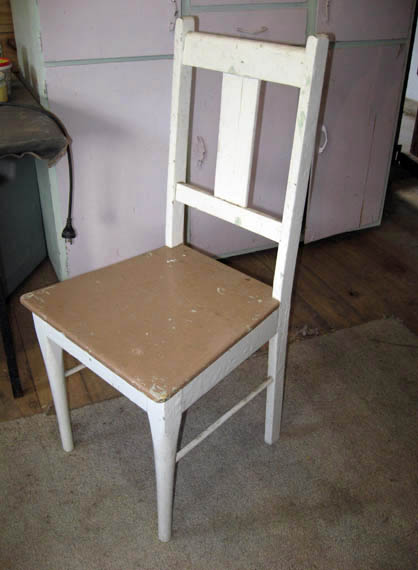
The other chair in this little story is a dining chair from a set of 3 I got at a different tip shop for $5 each. These poor little chairs were sitting in the rain on the day I saw them. One had a broken back so I knew I had to rescue them. The pic below is of one of the chairs, the one with a missing slat, not the broken backed one or the horribly upholstered one. They had the best 50s style vinyl on them, marred by paint splatters, but gorgeous.
 
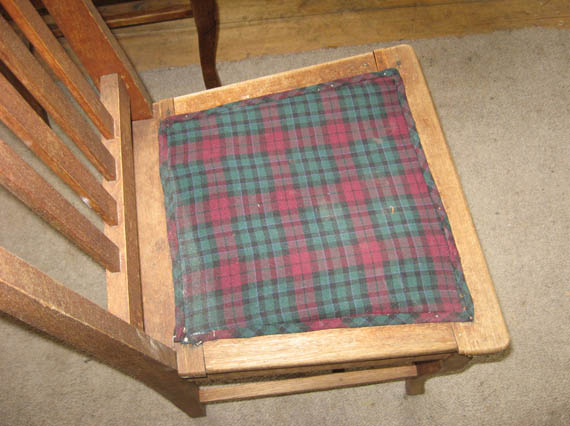
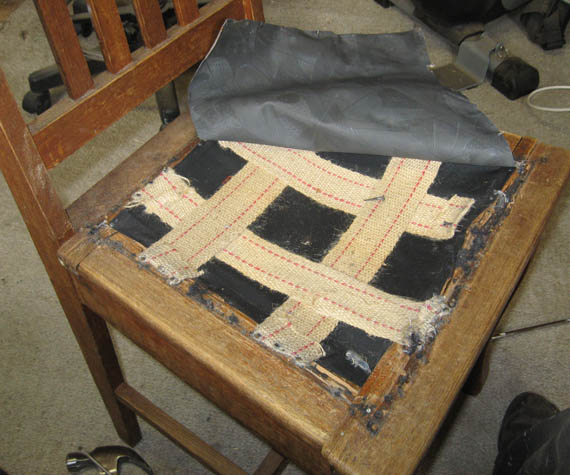
This is the horribly uphostered one. With a broken and splintered seat due to having nails pulled and hammered in quite a few times over the decades.
I thought I’d tackle the upholstered one first, thinking it might be the easiest one to start with – plus I needed to find a way to repair the broken back and fill the other chairs where timber was missing… 
I ripped off the check fabric and nails, found wadding and the original vinyl being used as a kind of backing. Plus lots of nails and splintered wood.
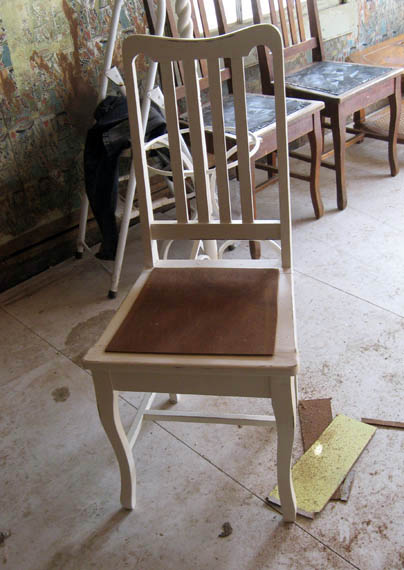
So, first things first, I painted it – white of course. This time I used my favourite stand-by Antique White USA. Once the painting was finished I gave it a quick sand and wax. I cut a bit of masonite to cover the hole and nails I couldn’t remove or hammer in below ‘ouch’ stage.
Then I upholstered it. 
I’ll spare you the gory details. It wasn’t pretty.
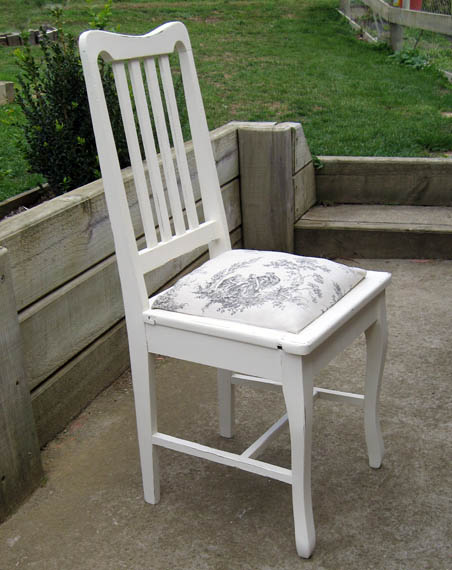
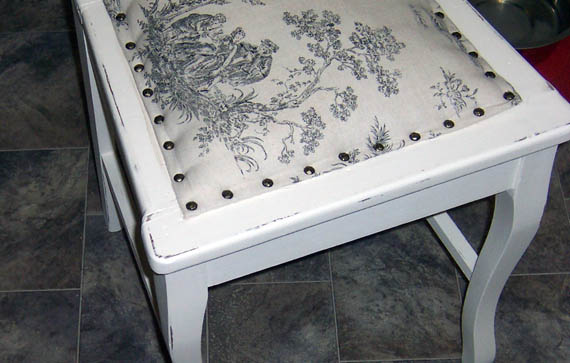
I’ve only tried upholstering something once before in my life – using a staple gun. This time I tried my hot glue gun. That made it easier, but my corners leave a lot to be desired. Here’s a photo far enough away as to hide the imperfections.
In the spirit of not spending any money if I can avoid it, I used things I had on hand. Paint I had on hand, offcuts of masonite I found in the casita, some toille fabric remnants I’d found a couple of months ago in the clearance bin at Spotlight, and some wadding I also found among my collection of ‘stuff that’ll come in handy one day’.
(I’ll come clean: the wadding came out of stuffed toys the dogs ripped apart. I knew I kept it for a reason!)
All in all, I love my new kitchen chairs!

 They now sit proudly in the kitchen, awaiting the arrival of their not-quite-matching mates.
I have more of the black and white fabric and a complimentary fabric in cream and burgundy which I plan to use to make a cushion for the hard chair, maybe for all the chairs…
I just love doing this stuff!
z

ps. I just added upholstery tacks to the padded chair and its really finished it off nicely.


Shared at:

DIY Show Off

i need a holiday

Just a quick post to let you know I’m still alive… but barely kicking. I’m exhausted and my arm has been sore since I woke up this morning. Usually it has the good grace not to hurt till I’ve been working for half the day. I’m not impressed.
I know I’m always saying I’m tired cause I’m doing too much, but I’m really working my butt off. Pity its still as big as ever… its just not fair.
So, photos of projects will be coming soon, as each is finished, but I’m still working on the kitchen chairs, a coffee table, a coat rack and some smaller projects. 
Meanwhile, the sign outside the door has changed – this one inspired by a sign on Pinterest. Love it.
Montana is fine, but still not her usual self. She’s sooky and isn’t eating much at all. Yesterday when I started packing the car with stuff to take to Fentonbury she got in and stayed there all day. That’s not unusual, she loves the car. Sweet girlie. I hope the results are all good.
Meanwhile, Chris has been here since Friday and the guys have been working on stuff. In 3 days they lined 2 walls in the mudroom (they do look great) hung our new/old front door, bought and installed a deadlock on it, and I think they connected a downpipe to our new guttering – a good thing too cause its been pouring.
In the same 3 days I made a chalkboard and painted an old frame for it, sanded and undercoated and did 2 topcoats on a coffee table, 2 chairs, a louvre door and a coat rack. Groomed 3 dogs, 2 of which were standard poodles, did the washing and folding of  laundry, loaded the car with things to take to Fentonbury, entertained visitors, went to Fentonbury and cleaned the house and started getting it together, washed dishes countless times and avoided cooking.

Why is it that when men work they take so many breaks? Maybe if I adopted their more relaxed attitude to working I wouldn’t be wearing my wrist brace during the day and moaning about the pain…

z

if there’s no rest for the wicked, what does that make me?

Even when I’m supposed to be taking it easy, I’m doing something. I just can’t stop. I’ll stop for a cup of coffee but I’ll read a book or check mail while I do it. I watch TV but half the time I also work on a craft project, brush or caress a poodle. Before I got a PVR I used to read a book during the ads.

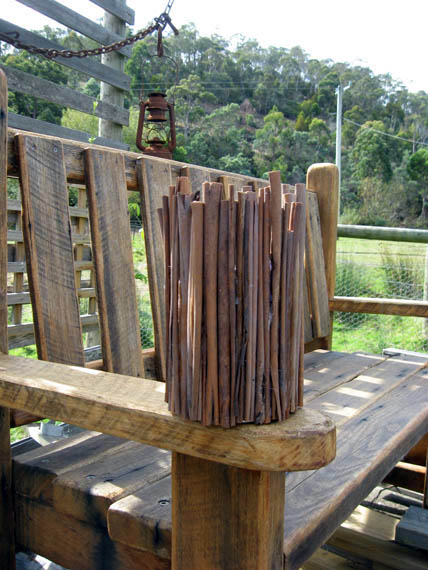
Point in case, the vase above. This used to be an empty coffee can. I collected some old gum tree bark and used the hot glue gun (I love my hot glue gun) to glue the curls of bark to the tin. They look amazing…. just like cinnamon sticks. This is only a preview. I have plans for this vase… stay tuned.

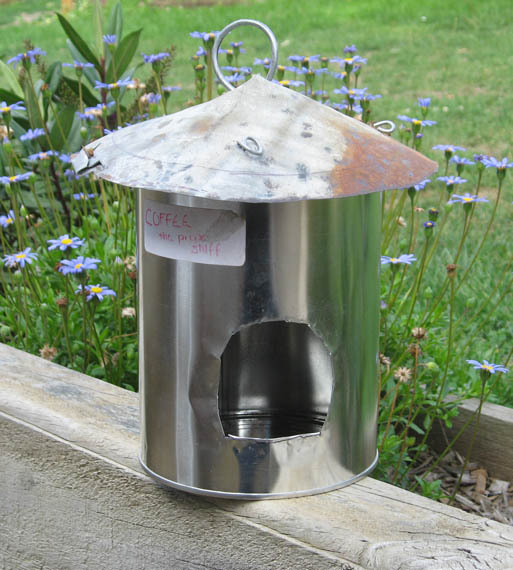
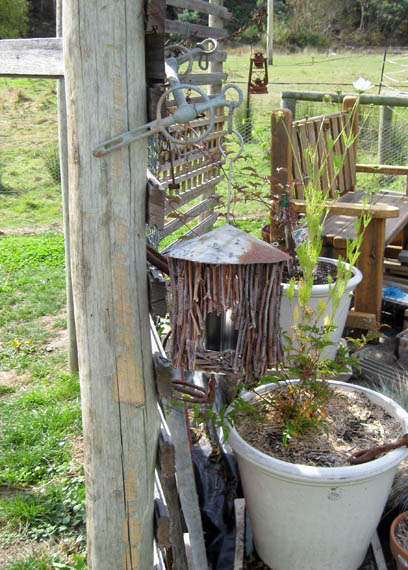
Another thing I worked on while watching TV over the last week was a birdhouse. We now have two birdhouses hanging off the trellis in the yard. I promise I’ll take better photos one of these days but I was so eager to hang it up and see what it looked like in its ‘natural environment’.

This too was made from an old coffee can. Wayne helped by cutting out the door for me and making a roof out of some old rusty tin. Great isn’t it? I love the little twisted wire ‘hooks’ he made to hold the roof on.

All I did to improve this birdhouse was to glue sticks to it to cover the tin. I’ve temporarily hung it off an old horse bit we have on the trellis. Kinda cool.

So, besides all that, now that the kitchen table is done, what have I been doing? Well. On Monday I found out that the tenants had vacated my house in Fentonbury. I had given them notice as I discovered that its very stressful and not at all easy to sell a house while its rented out. The only thing to do was to take the house back and move myself back in so I can have the house looking the way I like to have it: neat, tidy, clean, maintained… and gorgeous.

Not that the tenants were bad… they were fine to start with and to be honest I never had an problems with them till I decided to sell the house. From the minute I notified them of my intent to sell they became the tentants from hell. I wont go into details, all I can say is that it could have been way worse. I’ve seen the horror stories. We lost a sale because of them, but the house is ok… Nothing some cleaning and TLC can’t fix.

I’m so glad to have my house back. Its been a really hard thing for me to let go of this house. I think its because I didn’t sell it but decided to rent it. I confess I’m a control freak… I like things done my way. And seeing my house not being maintained the way I would myself… well… it was hard to deal with. If I’d sold it it would have been someone else’s house, no longer mine to worry about.

When I sold my house in Melbourne I moved away so I didn’t see what the new owners did or didn’t do. When I did visit Melbourne and drove by one day a couple of years later I was disappointed that the new owners didn’t seem as house proud as I was… but it was no longer my house, so it wasn’t my problem.

My advice is this (and I really wish I’d given myself this advice a year ago): don’t rent your house. Not if you’re attached to it… if you want to move on, sell it. Being a landlord sucks.

But enough of that. I had been talking about my week. It started with learning the house was vacant on Monday, then having to take a day off on Tuesday to go and inspect it with the agent to be sure all was ok. From there things just got busier and busier. Tomorrow is Good Friday, so with having Monday and Tuesday off its been a short week for me… short but not quiet! My week included finding the vinyl I want in the mud room, taking chainsaws in for a service, grooming 2 new dogs, working, picking Merrill up from the airport, visiting the tax man, shopping and taking Montana to the vet to be spayed.

Yes… My baby girlie is in the living room right now, sore and miserable. She won’t eat even though I chopped up some leftover sausages and a chicken schnitzel and tried hand feeding her. That’s ok. She’ll eat it in the morning I’m sure.

Thing is… I knew I didn’t want to breed Montana again. She only had the one litter but she had bad diarhea for weeks afterwards so I didn’t want to risk her health by having another litter. Plus, if I did  have another litter I’d have to keep a puppy and then I’d have to show it… and who has the time? and who has the money? Breeding Montana would mean airfares to the mainland for both of us, stud fees, and the cost of raising a litter. I sure don’t have money to spare right now.

So, even though I knew I wasn’t going to breed her again, I couldn’t bring myself to put a full stop on that part of my life. You know… just knowing that I could breed another litter if I wanted to, that my own line didn’t end there, well… it was reassuring.

But I finally decided it was time. Montana is 7.5 yrs old. I wouldn’t breed her again even if I wanted to at this age. So this morning I dropped her off and asked that the vet who spayed her also look at a small hard lump on her tummy near her last teats.

$565 later (yeah, you heard me!) Montana is spayed, all went well and the lump was removed and is being sent to be biopsied.

I was fully expecting the vet to tell me it was nothing. But here I am now… not even wanting to think anything other than positive stuff.

He said its a mammary tumour – of those 50% are benign and 50% not. Of the not, 50% are the type that spread, 50% aren’t. So, there’s a 75% chance this is nothing at all to worry about.

Fingers crossed. I try not to think that Pagan (her mother) died at age 9 of cancer. She was fine till one day she had diarhea and didn’t eat, the second day when things didn’t pick up they took her to the vet and the ultrasound showed she was full of growths in her abdomen. There’d been no indication.

Hopefully this is nothing at all. I couldn’t bare her being sick. I adore my baby girl. She is the most beautiful dog in the world.

Ok. Enough of that. It will all be fine. I’m going to go cuddle her for a while.

So, tomorrow I had planned to go up to Fentonbury to start the clean up of my house and yard. But I wont be… Wayne suggested that a day off wouldn’t kill me. Little does he know huh? I’ll stay here and look after my girlie, clean my car, do some work on my dining chairs, sort out stuff to take to Fentonbury, catch up on emails and computer work… that’s taking it easy!

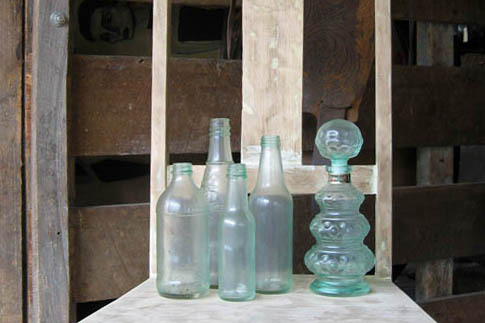
I’ll leave you with some tip shop bottles I gave a ‘sea glass’ effect to using PVA glue and food colour (yep, you go it! another Pinterest idea). These will be going to the bathroom in Fentonbury as decor.

z

DIY – the kitchen table

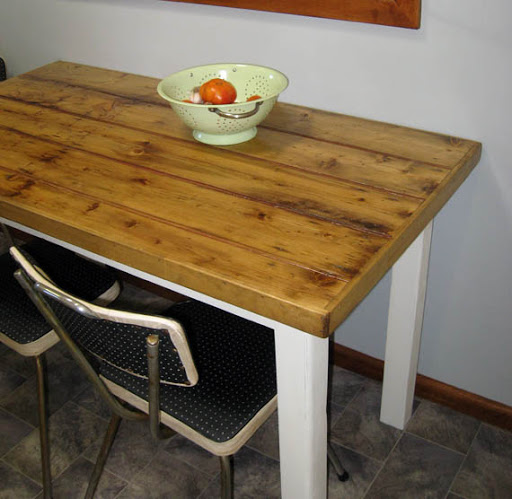
Well, its finally done!!! The new/old table that I’ve been making over is finished! It only took about five weeks from the day I got it. Really. It would have been done sooner if I could have worked on it more solidly. As it was, it went from this:


to this:

Not bad eh?

Ok. So here’s the story. I’ve always dreamed of having a country kitchen. Our kitchen here is melamine heaven (ugh) and not really big enough for the big pine table I dreamed of. So I make do till I can afford to do the kitchen up. Up till now I’ve had my 60s kitchen table (and chairs as you can see above) in the kitchen and that worked fine. But I still wanted that timber table. I figure the rest of the kitchen will catch up one day soon…

As you know, I’m a tip shop/op shop addict. And on one of my trips I saw this table and thought ‘hey… I can do something with that!’

It had a horrible, broken top, a wonky leg and nails all over the sides.

All I saw was that it was solid tassie oak and I was going to replace the top anyway. I had plans to use the offcuts from enclosing the mud room to create a new top, but then I looked around me and found this:

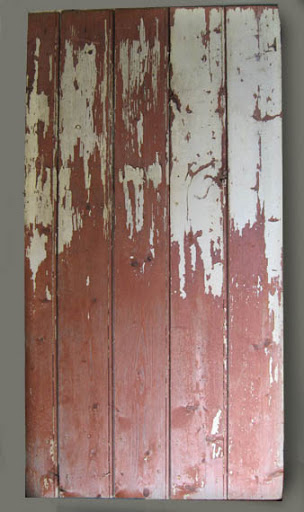
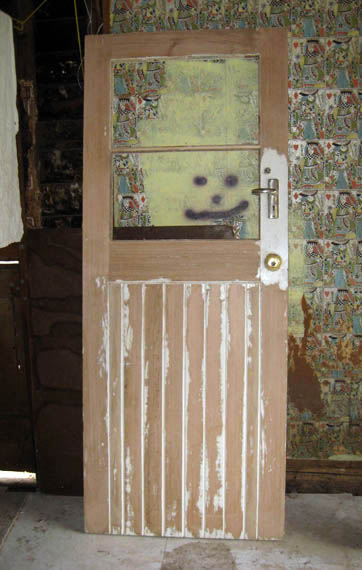
And old shed door. Too small to use as a front door but still… I thought it’d come in useful one day. 🙂

I put it on top of the table and thought ‘eureka!’. I had my new table top.

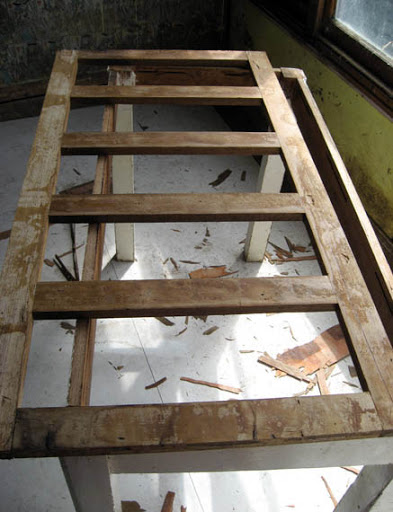
I started by removing the bracing at the back of the door and the very old, very rusty hinges. I quickly found out that the slats were in pretty bad shape. I had to pull them apart, clean them up and re-glue them together. They still weren’t all that solid.

I sanded off the paint. I wanted to use the front of the door with the grooves between the slats. The slats were bent and uneven due to years of exposure to the elements. I had to sand a LOT to get the door more or less smooth and even.

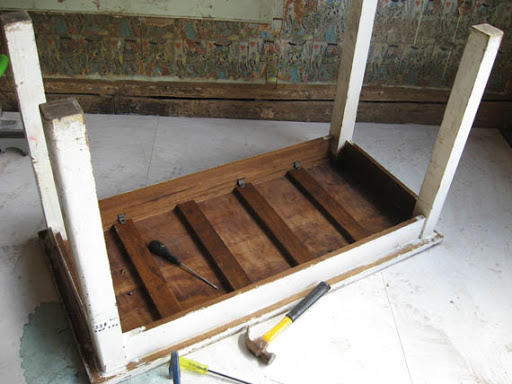
Then I started work on the table. I turned it upside down and found it had a clever little ‘hold the top on’ system which I saved and re-used when I finished.

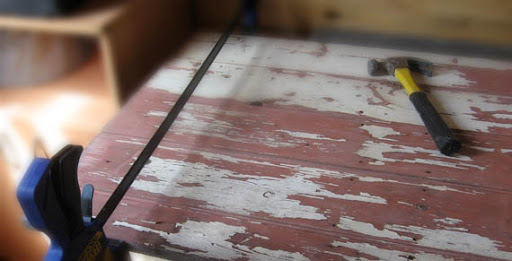
It had a nice solid oak frame which had originally held plywood covered with some kind of laminate which was long gone, only the glue remaining. I had to beat that out with a crowbar.

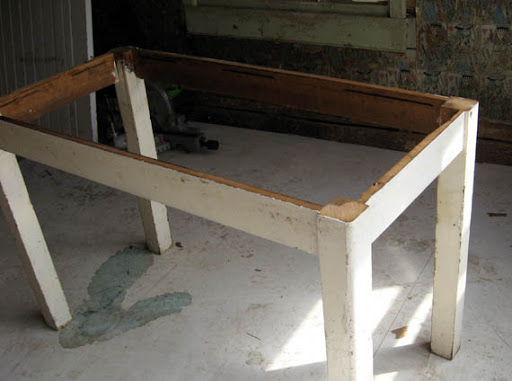
In the end I was left with the solid table top frame and the table legs.

I worked on straightening up the wonky leg and sanding back the peeling paint off the legs. I wasn’t too fussy about getting it perfect. I’m after a country look after all. Worn and loved, not pristine.

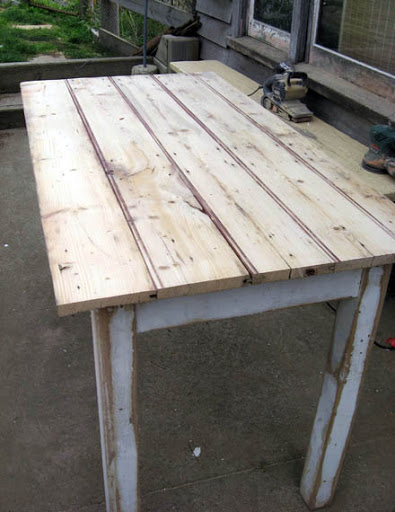
Next came attaching the top frame to the legs with glue and nails, then the new top onto that.

And sanding.

Lots of sanding.

I got to use the new belt sander for the first time. That sucker sure can pull. Almost pulled me over the table top first time I turned it on.

 Eventually, I got to where I thought I was finished. Then I sanded some more.

The table was only about 19-20mm wide with ragged edges. Even after I cut the worst of them off with my circular saw I still needed to edge it to make it look neat. Plus make it look thicker. Nothing like a nice thick table, right?

I got some pine strips as edging. They were 40mm wide. Great, but too much overhang underneath. I didn’t want to risk anything catching onto the edge and pulling it off. So I had to cut down some strips of timber to put behind as extra support for the edging.

Sorry, no photos of that. It was dodgey looking.

Once the edging was on I had to sand it again cause my joins left a bit to be desired.

I learned to work with furniture from a guy who makes rustic pieces. I basically learned to sand using a grinder … need I say more?

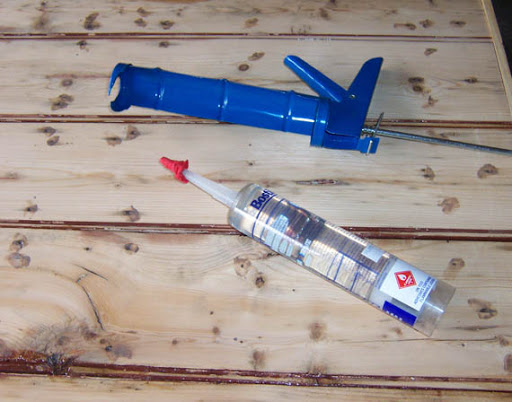
I used some clear silicone stuff to fill the big holes. Big mistake. Sure, it worked on the holes, but that stuff was horrible. I tried to fill the gaps with it (cause who wants to lose crumbs in cracks in the table?) and I got it all over the surface of the table. I got my fingers covered in it for one thing, but I couldn’t remove it. And when I went to sand it off it only made a kind of greasy smear. Yuck.

Note the clever trick I picked up from a friend: use a balloon stretched over the tip to keep the silicone from drying out.

I had to find a way to get the smeared silicone off, or at least minimise the mess… so I rubbed some burnt umber artists acrylic onto the table around the cracks where the smears were. I like it. I love burnt umber. I use it to give my ‘distressed’ items a more distressed look.

Then I looked at the table top, before applying polyurethane, and thought ‘Hmmm. It needs something.’

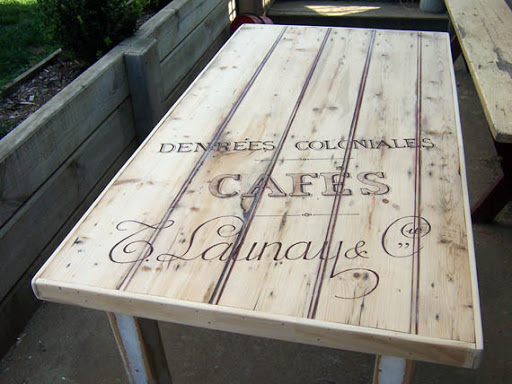
I found a graphic I liked on the Graphics Fairy website, printed it out but couldn’t blow it up to the size I wanted to tranfer it onto the table. I had to do it freehand.

I ruled up lines, then drew the letters on with a pencil. I then used a brown marker to draw on the type. I ain’t a signwriter. It came out ok, but not quite as authentic as I would have liked.

 
So I attacked it with the sander, rubbing it down, making it look like it had worn off. I probably went overboard with the rubbing, and perhaps the black marker would have looked better, but when I tested it on a scrap bit of timber the brown sanded better than the black.

Finally it was time to paint and lacquer the table. I sat the table up on some tap bits (like the skirts you put under tap fittings) so that I could paint the legs all the way to the bottom without having to worry about then sticking to newspaper (a tip off Pinterest)

I tried another tip I got off Pinterest: the elastic band to stop drips. Have  I mentioned how much I love that site?

I had to do three coats of polyurethane, sanding lightly with 240 grit paper between coats (cause thats what the instructions said). I gave the legs 2 coats of a creamy white paint I mixed up using some leftover cream and a bit of Antique White USA. Once it was dry I gave the legs a light sand to show a bit of wear, then moved it into the kitchen!!!

Next project… the chairs!

z

Shared at:

Knick of Time
DIY Show Off

I’m on fire!

Yep! I’m SuperWoman! This weekend I managed to get to a ton of my current projects. And it feels good!

Since I plan to blog about each project in more detail when they’re finished, I thought I’d share a sneak peak just cause I’m so pleased with myself.

Above is our new/old front door. This is stage 3 of the door. Its now had the hardware removed and have been sanded on both sides (the other side being mostly orange).

I also got started on the three dining chairs I got for $5 each. Above is one of them, with a 50s vinyl seat and a missing back slat. One other has the same seat and all its slats. And the third had a fabric badly replaced seat which I have removed and have started the process of restoring.

I also started on another chair. This one cost me $1 from the tip shop. I know! I couldn’t believe it! You never see these old chairs (in sitting safe order!) for that much. I had to grab it. I had some trouble getting the 104 layers of paint off it, but I managed and now its ready for a fine sand and paint.

Then there’s the new/old kitchen table. The one where I replaced the stuffed up top with an old shed door. That needs more work but the basics are done. I’m so excited.

But don’t think I was slack and stopped there! I worked on a birdhouse, a vase, our firewood box, made muffins, entertained, worked on horses, did the requisite multiple loads of washing and groomed a dog. (Not my own fuzzy faced beasts unfortunately. I had to draw the line somewhere!).

So, I feel good as I go into another week of work.

z

e.t. phone home

Today, finally, was a productive day. We’ve been so busy lately with work and visitors that it seems my life has become anything but productive.

After a run to the hardware store for some plywood for the mudroom floor and a good start to 5 loads of washing (where on earth do that many clothes come from?) I got to do some real work!

As opposed to work for someone else, or computer work.

Firstly we got to do some work with Dancer. She’s been very wary of lifting her back feet – she leans onto Wayne and snatches them away in fear of losing her balance. Today we tied her up and, using a rope and some cuffs (technical horse training gear), worked on lifting her legs – Wayne in the danger zone and me on the other side of a post hanging onto the rope.

We were both thrilled with how she went. After a few minutes of panic at being cornered and having rope around her legs she started giving her legs and letting Wayne lift them forward and back. Excellent work! Not a single kick. When we first got her she’d let fly every spook she got. Tomorrow we hope the farrier is able to trim her back feet for the first time.

After giving her an apple and lots of pats, I got to work sanding an old feed box Wayne had which we’ve decided to use as our firewood box. Its going to live on the front porch which is exposed to the weather (no roof on that part yet!) so the box needed a new coat of paint to protect it from the elements. I gave it a quick sand and put on the first of 2 coats of paint. What colour you ask? Antique White USA of course. Mainly cause I have tons of the stuff in exterior (and interior) paint. I’ll finish that off tomorrow and I’ll get my trusty man to fill it with firewood. 

I got the new/old front door out onto the little porch of the casita and sanded the inner side. I’d already removed the hardware so I was able to sand it pretty well and remove all the old flaking white paint. I then chipped away at all the glue and broken glass on the panel bits so we can put in new glass.

Once I decide on a lockset and handle for the door I can bog up the unwanted holes and paint it! Oh… and then get the glazier to put in new glass of course.

Still, I was very excited by my work.

While I was out there sanding for what seemed like hours, using my left hand as the main sander hand to spare my right (which is a problem hand with its constant aches and pains) I wondered where Wayne had got to. I knew he was around somewhere but I couldn’t see him and I couldnt hear him. When he’s working in the shed I can usually hear him hammering away and swearing. Today there was a strange silence.

Ok. I’ll go with the flow. I did my work on the door, brought in the washing, got onto the computer to check mail. And then I heard Wayne calling me.

You know how you can always tell by the sound of a dog’s bark what they’re barking at? For instance, you can always tell if its a stranger at the gate, someone on the road, the horses at the fence, or a chicken in the yard – and you respond accordingly.

This afternoon when I heard Wayne calling for me I knew he had something to show me.

When I went outside this is what I saw:

Wayne’s obviously been playing with his welder. Isn’t it gorgeous? So cute in its aggressive little way.

I love it when Wayne gets to be creative.

I better go have a shower and rest up my arm. Tomorrow is another big day. Hopefully I can move my other projects along a bit further, or, dare I even dream it… finish one of them!

z

I blame my brother

A long long time ago, I shared a bedroom with my younger brother Peter. Obviously, like most young siblings, there came a time when my younger brother became my worst enemy instead of my closest friend. At that time, sharing a bedroom with a BOY, much less a younger brother, was something I definitely did NOT enjoy.

During that time my brother also learned how to do things to annoy me.

For one thing he loved raw onions. I hated them. (Still do in fact, probably due to childhood trauma). He used raw onions to his advantage as much as he could, eating them then breathing in my general direction. Yeech.

He also learned to burp. Loud. And long. He could burp the alphabet and say ‘Hello, how are you?’ in a burp.

Charming huh?

He’d burp at the table after mom and dad left us to clean up, resulting in me calling him ‘sewer breath’ among other affectionate nicknames.

Unfortunately, he also learned to combine his two hobbies: eating raw onion and burping, thus making my life totally miserable.

He’d eat a plateful of raw onion with dinner, then he’d go into the bedroom before bedtime and burp over my bed, leaving a lingering aroma of onion burp to settle over my bed.

I was not pleased.

See… Peter, like most men, can burp on cue. I never learned how to do that. I’d drink a coke, swallow air for all I was worth, only to bring it back up in a pitiful little ‘bfp’ instead of his roaring ‘BURRRRRRRRRRRP’.

Then, one day, I have no idea how it happened, but we were sitting there at the table when suddenly I felt an erruption coming. I let it gather momentum, growing like a snowball as it rose from my very depths…and let it fly.

My brother almost fell off his chair. His eyes about popped out of their sockets. Not only was it big and loud with admirable reverb, but it came out of his prissy sister!

Over the next few weeks, and years really, I’ve had the fortune to overhear my brother in conversations with friends – you know, the boys will be at a party or in a pub and one of them will burp and the others will make admiring comments… then Peter will inevitably say ‘Man, that was nothing! You should hear my sister burp! She can rattle the plates in the cabinets!’

I’m so proud.

I’d finally earned my brother’s admiration.

However… I do blame my brother. Cause since then, burping became a kind of secret pleasure of mine. In company I’ve always held back, playing at being ladylike. But in private I’m sure I’ve managed to break a few records. Only my dogs had been witness to my growing talent in that area till recently. They generally take it in their stride, but sometimes “The Burp” will cause one of them to start and fall off a chair.

I’ve always felt I could share who I truly am with Wayne. He, being a man, has never been shy about burping in my presence and admiring the decibels he can achieve. I felt that I had finally found someone who, loving me as I am, would appreciate my full range of talents, so…

I came out of the closet!

I no longer hide my satisfaction of a well formed burp. I share it with Wayne who I can rely on to appreciate it fully.

“Well brought up. Pity you weren’t.”

I’m proud to say that in a contest of who can burp loudest or longest, I’m the hands down winner. However, I still can’t not burp on cue, so I lose points there.

Sometimes I think Wayne wishes I had kept some mystery about me, particularly about that part of me. The other day when I burped in the car he clutched his ear screaming “You busted my eardrum! I’m deaf!”

He wishes.

Still. I blame my brother. He’s the one who planted the seed that burping can be a pleasurable hobby. And pushing it underground for so long only allowed it to gain strength and momentum.

Peter, you’d be proud. (And slightly ashamed).

z

DIY – paint it white

Since this last week has been flat out work-wise and I don’t have anything new to share, I thought I’d share my kitchen make-over in my house in Fentonbury.

It wasn’t the first house I rennovated, that prize goes to my house in Melbourne. But unless I can find the photos for that rennovation it will forever remain a mystery.

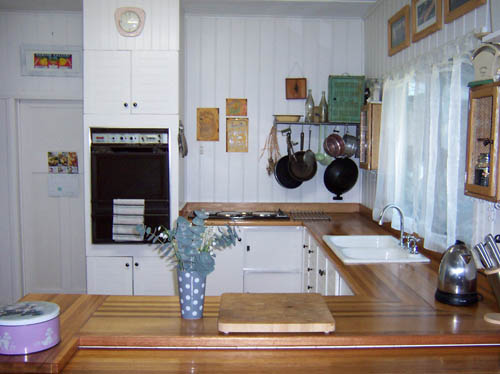
The house in Fentonbury however, was recent enough that I have all the photos on cd so I get to bore you with how I managed to take my kitchen from this

to this

When I bought the house I fell in love with it despite the fact that I hate pine. I loved the space of the kitchen. And I loved the white old country style sink.

Ok… so it didn’t have a drainboard, and, when you don’t have a dishwasher, you kinda need a drainboard. But I solved that problem by buying a plastic drainboard from Howard Storage World. Problem solved.

To be honest, I’d much rather have that sink here, now, instead of the single tub double drainboard sink we have in our current kitchen. I hate that.

Anyway, first thing I did when I moved into Fentonbury was to change the tap in the kitchen. I hate those low taps which you can’t get the kettle or a big pot under unless the sink is empty (who’s sink is always empty? Not mine…)

I put in a nice, high gooseneck tap. I have no memory of how I actually did it so I can do it again here, but I did do it myself.

So… here are some photos of what it looked like when I first moved in. Full of packing boxes to start with…

Then tidier, but oh so dark with all the pine…. From the living room, which was all white back then, the kitchen looked like a gloomy cave even though it had a skylight.

The breakfast bar was really wierd. It was low so that you had to use normal chairs to sit at it, not stools… which meant you were really low compared to the bench.

(The ‘rail’ to the right of the photo isn’t built-in… it was my cot side solution to keeping dogs out of the living room at the time.)

Among other things, there were 3 cupboards that didn’t have doors. On the plus side, my microwave fit perfectly into one of them!

Luckily, the floor was perfect.Polished tassie oak floorboards. I didn’t need to do anything to that.

Another plus – the bench top was gorgeous. Also tassie oak. Beautiful.

I did a few little things to make the room look better till I got the courage to take the plunge and really change things. I removed the little shelves from one side of the sink and moved them to the large blank wall on the breakfast bar side. I added a few more shelves to display my collectables and to hold the coffee and sugar.

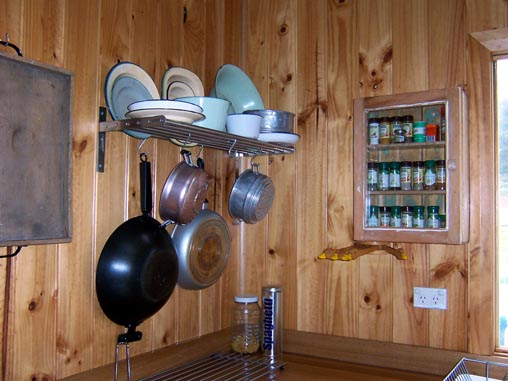
I put an Ikea bathroom/towel metal shelf above the corner near the stove to hang pots from. And I put an old bathroom cabinet I’d re-done and repurposed on the wall to hold spices.

The cabinet is solid tassie oak with a king billy pine door that I found at a tip shop for about $5. That’s before they started charging like bulls. I removed the old mirror from the door, sanded back all the old paint to expose the timber. I put a solid tongue and groove back onto it. Added clear glass to the front door and a hand made handle, and voila! Gorgeous spice cabinet!

I’ve always loved the look of painted timber on walls. The only thing which was holding me back from painting the kitchen walls and cabinets was the thought of all that sanding!

Then I thought about ESP (I had used this stuff in Melbourne to paint an old laminated kitchen dresser and I loved the finished product).

So, instead of sanding, I simply wiped on and wiped off the ESP, then painted.

I used Antique White USA for both walls and cabinets. I changed the ugly plastic white handles with some simple black knobs cause they were cheap enough and weren’t brass. I don’t like brass.

I removed the small shelves (relocated them, a couple of them went next to the pantry to hold cook books) and added one large shelf to hold display items. I put another of my bathroom cabinet makeovers (this one with a bird wire door and a metal back) on the large blank wall to hold coffee, tea, sugar etc.
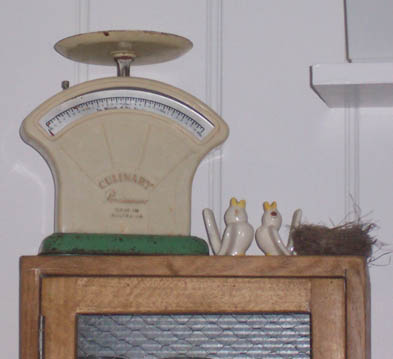
I also raised the breakfast bar. Since the bench overhung on both sides, I couldn’t put the breakfast bar at the same level as the benchtop. I considered leaving it off completely, but then had second thoughts. I just moved up the brackets holding it in place and so there was a small step down to it. I never got around to getting proper matching stools for there…

I made a large frame from old dado rail to hold an old poster I’d bought off ebay many years ago. Below I was testing out how it would look by putting it on a box on the breakfast bar… Very technical.

I added some tin signs over the stove (no rangehood, so many old Australian houses don’t have rangehoods).

Still no doors on those cabinets. The problem was working out how to make doors cause of the position of these cabinets… considering I was making them without professional help. I just didn’t think I could make doors to match the existing ones. No wonder the previous owners had left those cupboards door-less.

I tried curtains but I hated them. Yuck. I lived without doors for a long time till I found the solution.

What I did was make a simple flat door for the microwave cupboard and swing it so it opened toward the oven. I decided flat doors would work fine, flat doors being way better than no doors, right?

I then made sliding doors for the corner cupboard under the stove and the cupboard on the other corner where position made it impossible to hang outwards opening doors. I bought some MDF, cut it to size, got some metal ‘tracks’ and made myself some sliding doors.

Ok… I know I’m not exactly making sense here, but one day while browsing in a hardware store (I do that a lot) I saw these square U shaped metal things. They came in long lengths and looked just the right size to hold a 6mm MDF sheet. I tested them and sure enough, they did. I have no idea what they’re meant for, but I bought a few pieces of the metal, cut them and glued them onto the shelves inside the cupboard.

On the corner cupboard above, where the doors could slide back into the corner I only needed one track top and bottom for each door. On the other side, where the doors had to overlap so you could only open one side at a time, I had to make the tracks double, one for each door so they could slide past eachother.

I painted the new doors the same colour, added the same knob to the flat door but I used sash window openers to the sliding doors.


I considered using the fabric I bought on Paros while over there on holiday a couple of years ago to make curtains for the kitchen. But I realised this fabric would be too thick for the amount of light coming in through that window. I’m glad I didn’t use them there now as I have put them in the bedroom here and they’are perfect for there! They add a touch of Greek island to our room and make me smile.

I needed something thinner. A friend gave me some old tab topped organza curtains which I cut and hemmed and they worked perfectly. They let in all the light and blurred the view just enough.

I can’t give you an idea of cost for the kitchen update but it was cheap. I didn’t need to replace appliances or move anything. I just gave it a facelift the only way I could – with paint and imagination.

Lots of fresh white paint, some new doors, new knobs, a new tap, some personal touches and I had a kitchen I loved.

z
a little bit of washing

Its been a very productive weekend. Although I didn’t manage to cross much off my ever growing To Do list, I feel like I actually accomplished a lot of things.

We started off today with breakfast on the deck – the weather was perfect today. Warm and sunny but not hot or muggy. A bit of a breeze, but not windy. Gorgeous. I made french toast with bacon, banana and maple syrup. Yum.

Its funny, but years ago I was reading a book by Michael Connelly where the main character, a detective named Harry Bosch, went into a truck stop for breakfast and ordered a short stack with bacon and maple syrup.

I’d never had bacon and maple syrup together before. I’d never had bacon with pancakes before for that matter. I thought ‘OMG! Bacon and maple syrup, together! What a wonderful idea!’

I couldn’t wait to try it. A couple of years ago I went to a cafe for breakfast (something I lurve doing but rarely get to do) and guess what they had on the menu? French toast with banana, bacon and maple syrup!

I became addicted. For a while I made it every weekend. In fact I made it so often I got sick of it. Today was the first time in months I’d made it and it was like meeting an old friend.

With such a great start to the day, its not surprising things went well. I put on some washing, removed the glass from the new old front door. Hung out the washing. Put on more washing. Cleaned up the broken glass. Knocked the top off the old table I’m doing up for the kitchen. Hung up washing. Put on more washing. Cleaned up broken bits of plywood. Pulled apart the table frame from the top frame. Hung out more washing. Put on more washing. Sanded the table legs. Straightened the crooked table leg. Glued and nailed the table frame back on. Hung out the washing. Put on another load of washing. Went to the supermarket to buy ingredients for borscht, picked up chaff for the horses. Brought in all the washing and tossed it onto an armchair in the living room. Chopped up the vegies and put them on to boil for the borscht.

You get the picture.

I had a productive day. Among all the washing I managed to make chocolate muffins and borscht (which I’d never made before and only tasted once before in my life) out of the excess beetroots we had.

I would have vacuumed the living room and tidied it up as I did the kitchen and office, but I couldn’t open it to change bags. Its a sign. No more cleaning for today!

I think I deserve a break. An ice cream and some TV is in order.

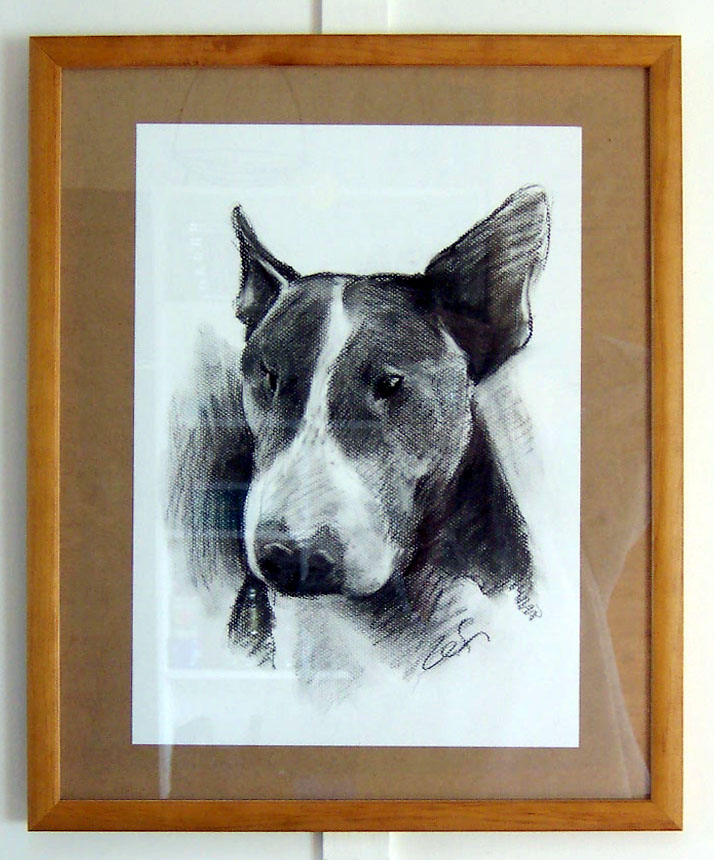
However, before I go I’ll share these photos of a couple of my old drawings. I found these while looking for something else yesterday.

z