Unknown's avatar

About zefiart

Blogger, DIY-er, poodle lover, graphic designer, dog groomer, recycler, artist, wonder woman in my spare time.

an outdoor firebox

This last weekend I did a little work in the garden.

Actually, I’ve been doing a little work in the garden for a couple of weeks now. The emphasis is on little… I’ve had a friend helping me and he’s been doing the heavy lifting. I’ve had him help me move some plants, put in new plants and prepare the vegetable patch for planting.

We have a cement slab in our yard which used to hold a water tank many years before we bought the place. Its just a useless concrete slab in between the house and the Hill Hoist (Australian icon, aka clothes line) which tends to collect ‘stuff’. You know the stuff I mean, the kind of stuff you think “I can’t be bothered taking that back to the right shed now, I’ll just leave it here…”

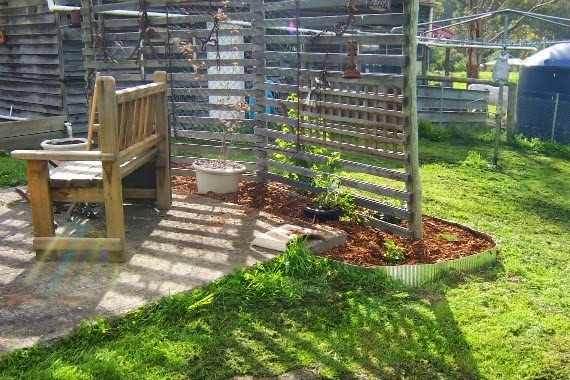
When we first moved here I asked Wayne to build a trellis there to block the view of the clothes line and water tanks. I had visions that the clematis and banksia roses I planted in front of it covering the trellis and providing a gorgeous screen.

Here are a couple of photos of the trellis from two years ago. First a view of from the clothes line towards the house.

Looking towards the corner of the casita – you can see the clothes line and one of the water tanks.

And looking back towards the house from the other side. The plants are more than double in size since then, but still nowhere near the gorgeous screen I envisaged.

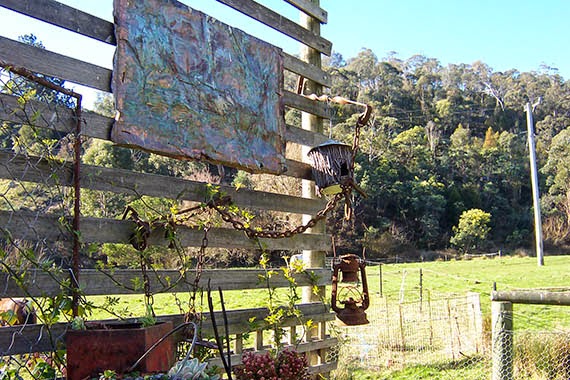
Here are some pics taken on the weekend of the same area. In this one you can see the clothesline behind the trellis. You’ll also see the copper artwork I distressed to get the green patina. Its now garden art.

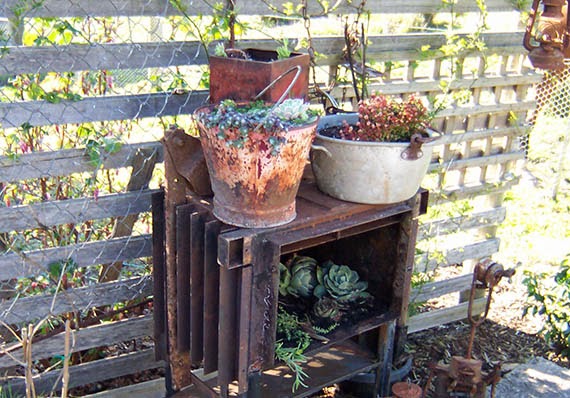
This spot is great for sitting and relaxing in the afternoons, once the sun heads down behind the trellis. You look over the middle paddock towards the hill, the dam and stable, back up the valley behind the house, and all the front yard. So, when Wayne decided to get rid of the big wood stove he had in the garage and asked if I wanted it as a garden ornament, I jumped at it.  Its perfect for my little outdoor relaxing area.

What would an outdoor post from me be without horses and a gratuitous poodle in the shot?

The wood stove is heavy and very rusty. Just gorgeous. Wayne removed the door and side panels so you can see the rusty metal sides in all their glory. I put some potting mix in the box itself and put in some succulents. They’ll get full morning sun there but shade in the afternoon. I added some of my favourite pots: a once red bucket, a once red biscuit tin and an old jam pan. They’re filled with succulents as well. Only succulents will survive that position in pots in summer as it gets full sun almost all day long.

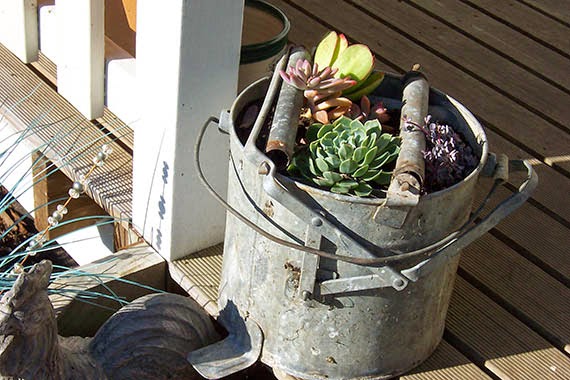
While I was at potting up succulents, I did a few more. Here’s another favourite of mine. The old mop bucket!

Oh boy, I used to hate those things when I was growing up.

I love spring. I love looking at the garden and seeing the flowers bloom and what new flowers pop up that I don’t remember putting in.

z

Shared at:

the tooth fairy isn’t happy

Update on the tooth saga.

I still have it.

Ok – here’s the story.

Since I last posted I’ve continued to pop pills on a regular basis. Sometimes I’d not take them for a while cause I’d be thinking ‘Hey, I feel ok. I’m just imagining it. I don’t have a problem with my tooth’. Then the pain would hit and I’d be popping pills like Ben Johnson popping steroids.

I made an appointment with the dentist on Thursday at 2.15pm. I don’t think I really wanted to go… I’ve been working up a pretty good dentist phobia. I wrote 2.45pm in my diary and as a result, I missed my appointment.

Luckily (or unluckily?) they managed to squeeze me in today.

Lucky I guess, cause it woke me up again last night. Ouch.

The dentist took another xray. All looked fine. Still.

The dentist discussed options… pull out the tooth. Its right at the back, not really necessary for eating as its not meeting the top tooth or something like that, do a root canal, but then maybe its not worth it, the tooth seems a bit loose… maybe its unstable… maybe we could try removing the filling, packing it with antibiotic & sedative and see how it goes. If it works, great. I go back in and have a real filling put in. If it doesn’t work, I go in and either have the tooth pulled or extend the problem by having a root canal.

Uhmmm. One quick procedure, one (smaller) bill. One long procedure, one (huge) bill, followed up with another procedure and another (huger) bill.

Tough decision.

If I’m going to crown (and bridge) anything, I think I’ll go for the upper, further forward gap in my mouth.

The dentist gave me an injection, waited a while, then started drilling. He successfully ducked my punch. Good reflexes. I guess dentist’s need those.

He gave me another injection and waited some more. Filling removed and replaced by balm for angry teeth.

All was going well. The numbness wore off. I felt fine… for about four hours. Then the pain came back, like a long lost friend.

I now have a pain killer problem. I’m running out of them.

Dentures are looking pretty good right now. If they hurt you just take them out and plunk them in a glass of water on the bedside table.

z

so, what’s up doc?

I need some of these.

See, I had a loose filling. It had been loose for a long time and it was bothering no one. But I got a reminder in the mail that it was time to visit the dentist, and, being a good little girl, I made an appointment.

Only about 2 months later.

I got a clean (youch. hate that!) and had the loose filling, which wasn’t hurting, replaced with a new one.

Soon as the numbness wore off I began to have a headache… you know the type? Its all on one side of your head, in the temple and in the jaw… you don’t even realise you have a headache really, till you realise you’ve been rubbing your temple with your thumb and using your knuckle to pound your jaw joint. That’s when you realise that not only do you have a headache, but its really a toothache pretending to be a headache.

Well, I’ve had that headache for almost 2 weeks now.

I got the filling replaced on Tuesday, then on Friday I finally called the dentist to say all was not well. I saw the owner of the practice on Saturday. He took an xray and said the filling wasn’t too close to the nerve, he showed me the enlarged xray and it looked damn close to me. Still, he didn’t think we should be ripping out the filling just yet. He did a little drilling to lower the height of the new filling in case I was causing pain by clenching (which I do, I have a splint I wear at night for that). He also cleaned around the gum which was sore cause of the clamps the first dentist put around the tooth while filling it.

I was hit by a wave of unbearable pain.

I think the dentist realised how bad it was when I sat there holding my jaw with tears running down my face.

I got antibiotics and painkillers.

The good stuff.

I took two of them and then stuck to over the counter stuff the rest of the time.

The following Tuesday I was back again. The pain was persisting even though I’d just finished the antibiotics. I was still taking pain killers.

The dentist said “Give it another 3-4 days. It shouldn’t be a problem. It just needs to settle down.” Uhuh.

Sometimes I think its settling down. It doesn’t seem so bad. Then I get another headache/toothache… I’ve been woken up twice in the last few days by the pain.

That doesn’t sound like its settling down to me.

Still, I’ll give it a few more days. I’m not too keen to have the tooth touched again any time soon.

I am becoming very scared of dentists…

I know I’m old, but our family dentist in Athens used to fill teeth the ‘old fashioned’ way. Firstly he never used anaesthetic (yikes) so he’d always drill one day, then fill the tooth up with an antibiotic paste/temporary filling. A week later we’d go back and he’d take that out and fill the tooth.

There were never any problems at all with fillings his way.

I’m told that was done very long ago cause anaesthetic was expensive and they couldn’t drill too close to the nerve. That meant there was always some bacteria left in the cavity. In order to get rid of that they’d use the temporary filling with antibiotic in it.

Nowadays its so much easier. We have the numbing stuff so we use it liberally, we drill down and play chicken with the nerve, slap a filling in there and say “She’ll be right mate!”

I’ve lost two teeth due to this method. First time my tooth abscessed before I got home from the dentist. Second time the pain started when I got home. I really don’t want to loose another but I also don’t want another root canal…

I think I might ask for the dual visit method of tooth filling from now on.

z

this one’s serious

I got home just before 4pm on Friday afternoon to find the dogs barking at something at the back fence. It was a tasmanian devil.

I couldn’t believe my eyes.

Firstly it was daylight, secondly I’d never seen or heard a devil in this area, and third, the dogs weren’t really carrying on… the devil had obviously been here for a long time.

It was only small, a female, and she was growling at the dogs but she was sick. She had a huge tumour on one side of her face which was bleeding in one spot and had a huge hole leaking disgustingly green pus. The eye on that side was squeezed almost shut. She was thin and her back and rear legs were motheaten with mange.

I started calling anyone and everyone I could think of to come catch and help her. I called a neighbour who does wildlife rescue, no reply. I called the vet. They gave me the number for Bonorong Wildlife Sanctuary. They sent out a guy from Hobart to catch her. He works for Save the Devil and volunteers for Bonorong.

My job was to make sure the devil was safe and to keep track of her so we didn’t lose her.

I sat on the porch and waited. Once I locked the dogs inside she moved away from the fence and found a sheltered spot among the reeds near the dam. She then just sat there quietly.

When the guy arrived he went out and managed to catch her without too much trouble.

The horrible news is that not only was she really sick with the tumour, she was also a pregnant female whose babies had died inside her. She was septic. She had to be put down. He was taking her straight to their vet but he said both the tumour and the sepsis meant she had no chance.

I have been heartbroken since. I’m glad we found her and that her pain was ended humanely. It would have been a very slow painful death otherwise.

I’m so sad for the devils. I love all animals, natives in particular. And the tassie devils are really special to me. Them and ringtail possums, quolls and bandicoots. All the ones who are threatened.

What’s happening with the devils, with this disease, is just horrific. I’m considering becoming a wildlife rescuer (seeing as I have so much free time) because I become involved anyway.

Read some of the happy rescue stories here.

I pick up injured animals off the side of the road. I’ve now begun to overcome my fear and actually check fresh roadkill for babies in pouches. I’ve never had the stomach for it before cause I couldn’t face the tragedy of it. So far I’ve found two babies in pouches, unfortunately, both already dead. Even if I manage to save one I’ll feel better.

I just hate it when I see animals dead on the side of the road. Its bad enough if its rabbits or a cat, a possum or a wallaby, but when its the endangered species like the devils or quolls I get really upset. Or echidnas or wombats… its not like they dash out in front of cars fast! People have to literally TRY to hit them!

I wish people would slow down and avoid hitting things.

Anyway… it was capped off this afternoon when the dogs sent up an alert.

Yep.

Another animal in distress. This time it was a young male wallaby with toxoplasmosis. A disease spread by domestic (and feral) cats which native australian animals have no immunity to. It attacks their central nervous system making them blind and wobby and they slowly starve to death or get hit by cars.

I went out, caught him easily and called my neighbour. Her son (who’s also a wildlife volunteer) came down to pick him up. They’ll have to put him down too.

Ahhh, the fun of living in the country!

z

time is(n’t) on my side

 I look forward to the day when I have time.

I figure I need about another 10 hours in every day just so I can do all the things I want to do, let alone the things I have to do.

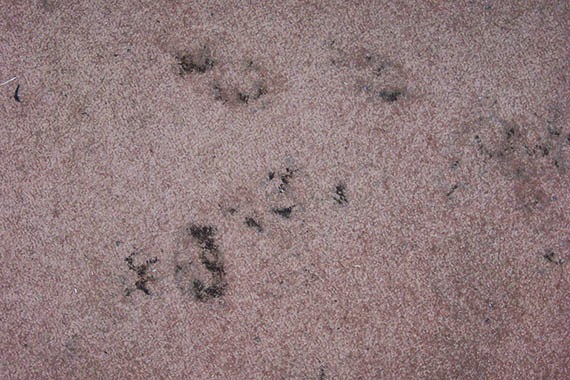
For instance… this is our carpet near the front door.

Our front door is a door we rarely use as its on the back side of the house from the front gate. It opens directly into the hideously salmon carpeted living room. I made the mistake of letting the dogs in through that door a couple of weeks ago when it rained for about 2 weeks straight.

I had steam cleaned the carpet a couple of months ago (to impress visitors) and if I had a steam cleaner I might do it more often. I was actually tempted to buy one… but who am I kidding? I hate vacuuming and avoid it like the plague, how often would I steam clean a carpet I hate?

I yearn for the time I’ll have off over Christmas: three whole weeks! I have an intimidating list of WANT TO DOs including ripping up the carpet in the living room, and I can’t wait! Other things on the list include doing something with the floor after removing the carpet, putting in a new/refurbished wood heater, finish painting the exterior of the house, painting the mud room, organising coat hangers and other necessities in the mud room and enclosed porch space, making stuff for another market, working in the garden and trying to fix up the casita.*

Basically I think I need another year of time just to keep up.

Of course, like everything else, a ‘simple job’ like removing carpet will turn into 3 solid weeks of work, effectively bumping everything else on the list to ‘another lifetime’.

I mean, it sounds simple, right? Rip up carpet. Paint floor (cause we can’t afford to put in new flooring right now and only 1/4 of the room has floorboards, the rest is chipboard, and I promised Wayne this won’t cost a lot).

But the job isn’t simple. You have to break it down into steps to understand the enormity of it:

– remove all furniture from the living room (or more likely, push it from one side to the other and listen to Wayne complain)
– remove carpet
– remove underlay
– move furniture
– crawl around on hands and knees (and butt) pulling up tacks and staples
– move furniture
– encourage Wayne to wear shoes the entire time to avoid hearing him swear when he punches holes in his feet)
– clean floor
– move furniture
– sand floor
– move furniture
– find someone to fix problems under the floor which cause the floor to be uneven
– move furniture
– wait for things to be done
– find more things that need to be fixed, replaced, removed
– move furniture
– find hidden treasure (I wish)
– pick floor colour and paint the floor, 2 or 3 coats
– move furniture
– seal the floor, 2 or 3 coats
– move furniture

EASY.

Meanwhile I’ll use my spare time to paint the exterior of the house cause I’ll already have finished painting the hallway, entry way and mud room in all the spare time I have between now and then.

Not to mention getting back in the saddle! I need to commit to working with Dancer soon as the ground dries out enough, otherwise why do we keep horses?

As I said, I dream of a world where I have time.

Its not all bad. I’ve had lots of good times lately, where nothing has been done but I’ve socialized and relaxed. Wayne and I have had breakfast out a few times over the last couple of months, we’ve had visitors, and we’ve spent a lot of rainy days inside complaining that the rain stopped us from working outside (but secretly kind of glad to be inside and not working outside).

One thing I look forward to is visits from Zephyr and his mom. They come over every 2nd weekend for a play and groom. I adore little Zeph and having him around is my puppy fix. My kids like him too and love getting out for a romp.

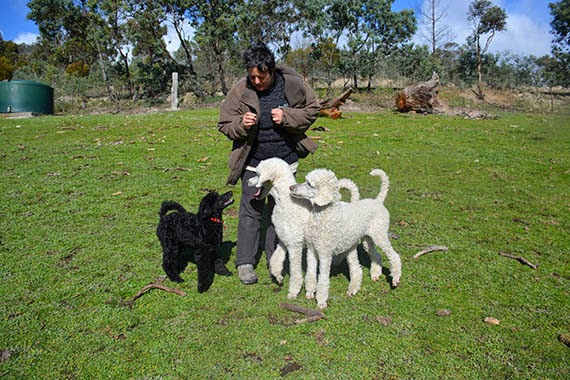
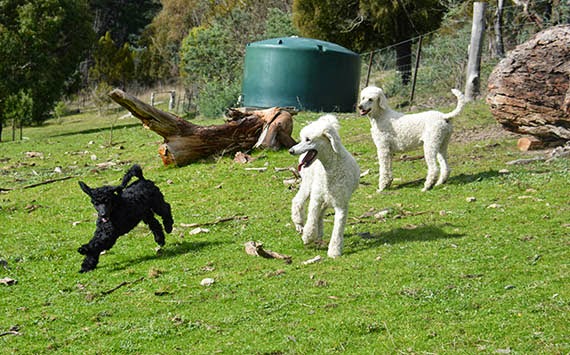
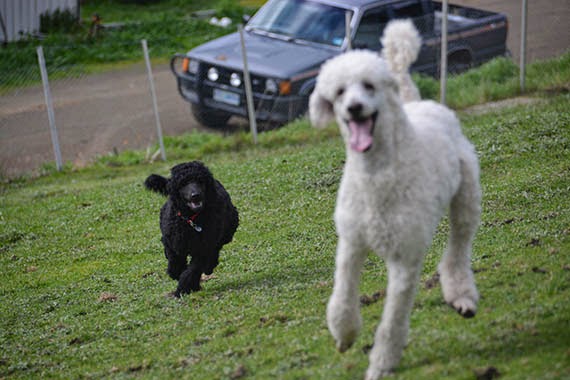
Here are some pics of them running around last time he was here. It was a gorgeous day (though pretty cold) and our top paddock is the driest spot to play.

Lining up for treats.

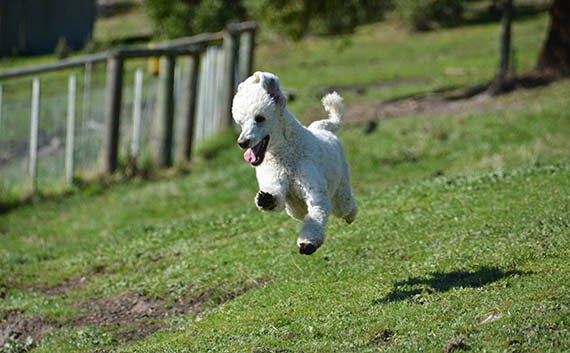
Romeo can fly.

Zephyr trying to keep up with the big guys.

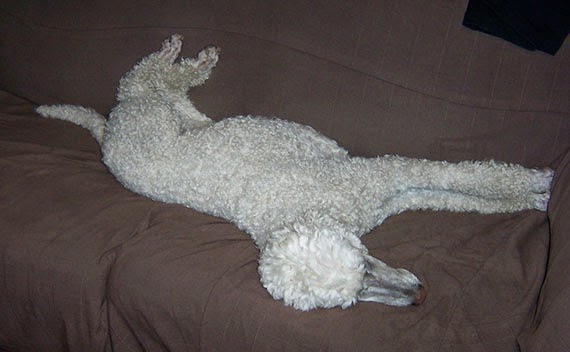
You gotta love the awkward poses dogs sleep in.

*The casita… sigh… We have another possum living in the ceiling in there. Only he’s not living in the attic of the original part where Mr Ponsonby lived, he’s living over the laundry. He’s created 2 large holes in the ceiling from where he occasionally peers down at me, his little pink nose twitching. The plasterboard is mouldy in places and stained. Its disgusting.

In fact, the entire addition part of the casita (the flat roofed part) is disgusting. The floor is a concrete slab sitting on the ground, probably without proper lining to stop the damp. The walls in the laundry and toilet have mould growing on the plasterboard. YEECH.

The ceiling fell down in the dog wash room.

The grooming room floor flooded with water coming in through the wall/floor join when we had all that rain a couple of weeks ago. I removed all the vinyl to let it dry out and don’t plan on replacing it. The ceiling is sagging too and there are holes made by the millions of birds nesting in it.

I want to remove all the ceilings, but I’m afraid that if I remove it from the grooming room I’ll never be able to work in there in summer – it’ll get way too hot.

I will definitely be removing the ceiling from the laundry and toilet though, to encourage Mr Possum to move on.

We have birds dancing around in our house ceiling too. There must be a village above our bedroom and another above the living room. The only way to fix that problem is to hire someone to come put gutter guards on all our guttering, then go around and plug all holes around the house using wire – NOT in the same way as my failed fix of last year.

… Anyone feeling bored and want to do something useful? I sure could use a hand or three.

z

the costumes are finished. finally.

The good news is that the costumes and props are almost entirely sorted. I managed to finish the costumes this week and will have all the props ready by the end of next week. We won’t start filming till the end of August due to program staffing changes, but here’s hoping!
So here are the costumes. I put them together for each character so that everything a person needs is on one hanger.
Before looking, please remember I’m not a great sewer, not very neat and I make tons of mistakes. Plus I shortcut where I can. I made all costumes using fabrics, clothes, beads etc from op shops and donations from friends (and my own stash). Ditto for trims, lace and props.
Having warned you, this is the cook’s costume. This comprises a plain white apron, a frilly white cap, a beige tunic and skirt. The tunic is one I made myself. The skirt is a tiered skirt I bought at an op shop. It was white so I dyed it using coffee so it matches the colour of the tunic. The point was to make the clothing darker than the apron and cap so they would stand out.

No cook would be complete without a rolling pin so I’m lending one from my collection for the film. The cook is only in one brief scene at the beginning of the movie.

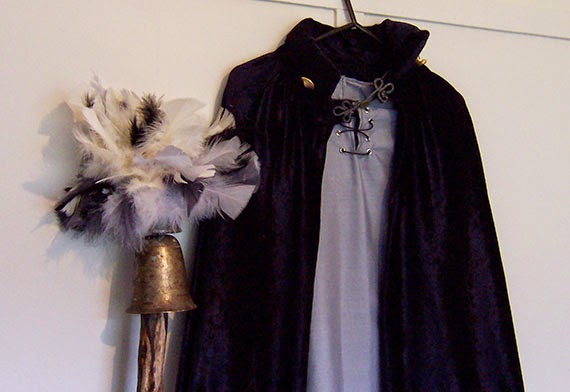
Another small part is that of the guard. He’ll be wearing the grey tunic, black leggings, puffy pants, ‘boots’ and a blue cape we already had in wardrobe.

The guard will also be holding a staff when he guards the King’s chambers.

Note: the kingdom where our story is set is a peaceful one (till evil makes an appearance) so there’s no need for weapons. Therefore the guard holds a glorified feather duster instead of a sword.

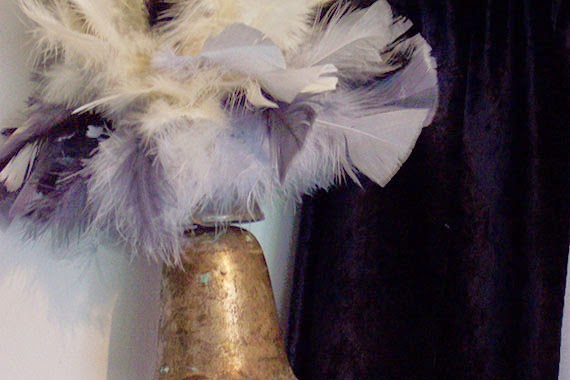
Wayne made the staff for another production and I repurposed it for ours. I created the feather puff ball using a styrofoam ball and used hot glue to stick feathers into it. I then glued it to the brass bell Wayne had attached to the large stick.

All self respecting guards need a helmet, so our guard has one I made using a very thin foam sheet I found in the bottom of a shopping bag. I was about to throw it away when I realized it was the perfect material to make the helmet out of.

I used some metal beads used for hanging multiple strands together – they look like military insignia, and finished it off with a gold button on the top.

There are 3 kings in our movie so I gave them each a colour to keep things easy to sort. The first king is King George. His main colour is brown. For his tunic I used a black top with gold strands through it and added a fur collar and a couple of gold buttons with a chain.

The shawl (a table runner!) adds a dash of ‘je sais quoi’… although when he’s being more formal he’ll wear his cloak made of a shiny heavy brown fabric with a wide dalmation collar.

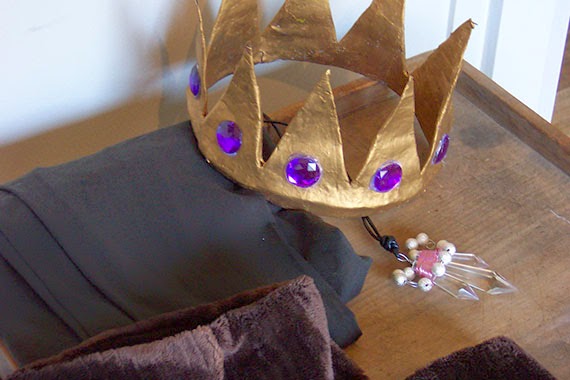
The costume is completed with brown leggings, brown ‘boots’, a crown and the ‘good magic crystal’.

The crown is papier mache and rhinestones. The ‘good magic crystal’ is 3 chandelier crystals wired together with silver beads on a leather thong.

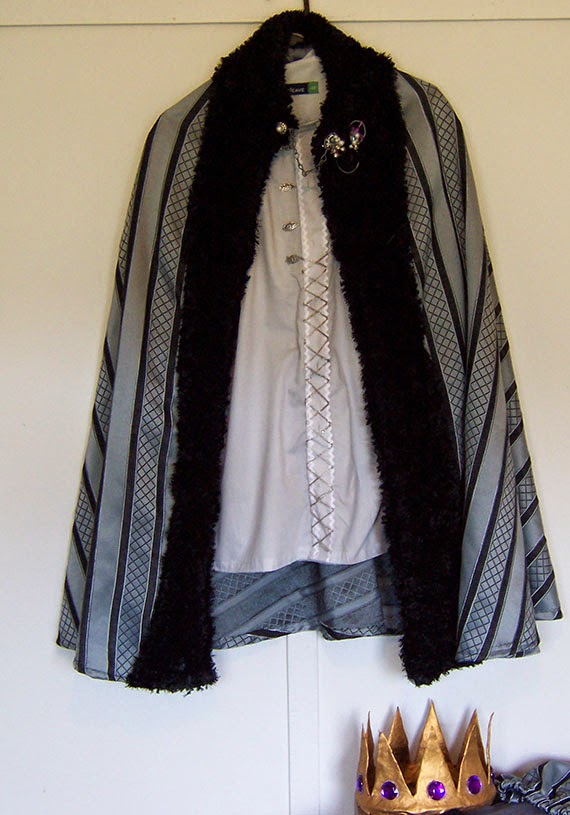
Next we have Prince Oscar… before he becomes a king, Prince Oscar wears a puffy sleeve tunic in 2 tones of grey. I used an old shirt and puffed the sleeves by adding in slices of extra fabric. I made some changes to the trim on the front of the shirt since I first posted about it. I removed the black laces and added silver decorations. It looks much better.
Prince Oscar wears a silver cap with black and purple feathers, matching puffy pants, grey tights and black ‘boots’.

When Prince Oscar becomes king he replaces the cap for the crown and wears his fur lined cape.

Plus the ‘good magic crystal’. Of course.
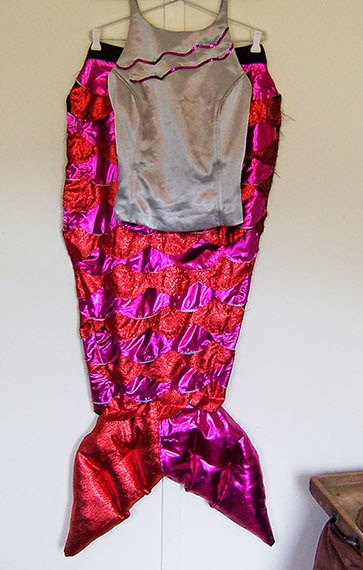
Lucy is a mermaid. Her costume couldn’t be blues and greens cause we’re using a green screen so I had to be imaginative. The top is something I found in an op shop. I added pink sequins to make it match the tail a bit. Since its too small I’ve added lacing at the back so we can adjust it to fit. The mermaid will only be seen from the front in our film.
I’m the director. I decide how to film it!
The tail was a bit of a challenge. I had to make something which was easy to make, easy to put on, easy to move around in, yet still look like a mermaid tail.

What I ended up doing is cutting red and pink fabric into scalloped strips to give them the look of fish scales. I then attached these to a black ‘apron’ of fabric. The apron tapers in towards the feet where it joins onto a tail which is stuffed with filling to give it body. The tail ties on at the waist and has 2 large elastic loops which hold it in place against the legs. There is no back to the tail and will be worn with black leggings.

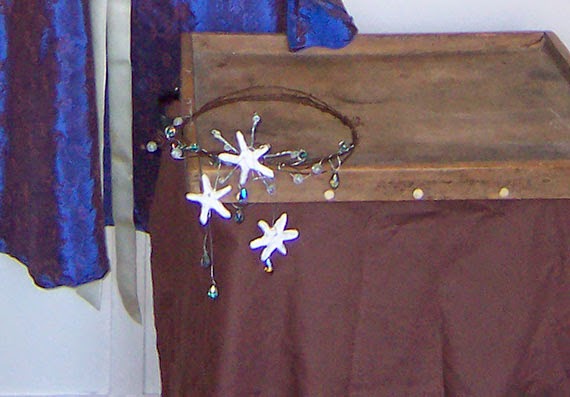
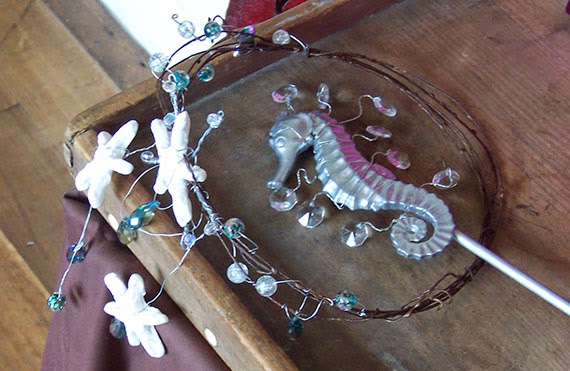
The mermaid has a great crown I made with brown florist wire, crystals, silver wire and starfish I made using a porcelain clay recipe I found on Pinterest.

Sorry about the blurry photos.

She’ll also have a magic wand (cause mermaids are magical creatures, at least in our story!). I made the want using a plastic seahorse, a bamboo stick, some wire and crystals.

When Lucy the mermaid becomes human she’ll be wearing a gorgeous blue dress. I made this dress using the easy pattern I found on Pinterest, with the smoother armpit cuts. I absolutely love this dress, the colour is just beautiful and the lace and pearls on the sleeve are so pretty.

When she’s human Lucy will still wear her mermaid crown, though she’ll add some pearl necklaces to her outfit.

Another character who only appears briefly in the film is the peasant who leaves a baby at the castle gates. The peasant will be sharing the cook’s costume but, instead of an apron and cap, will be wearing a scarf I brought back from Greece wrapped around her head and partly covering her face and will carry a baby in a basket.
 
There are two queens in the movie. The first is Queen Mary who’ll be wearing a burgundy and gold dress trimmed with gold braid and gold beads. Made from an old doona cover.

This dress wasn’t made the easy way. I didn’t have enough fabric to make this dress using the simple fold over and cut pattern. I had to make it the normal way which involves cutting a bodice, sleeves and skirt all separately and joining them together.

It turned out quite well considering.

Queen Mary will be wearing a gold necklace given to me by my friend Merrill. Only borrowing Merrill!

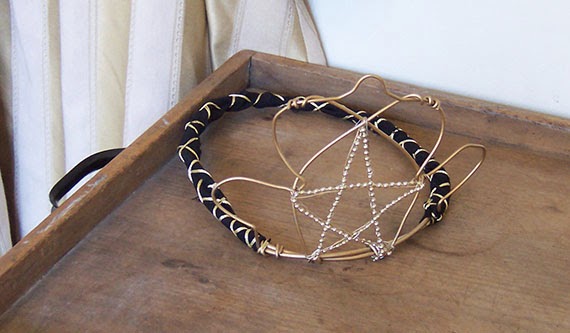
And of course she’ll be wearing a crown. The wiring for the crown was done by Wayne. I finished it with the black and gold band and the gold beads.

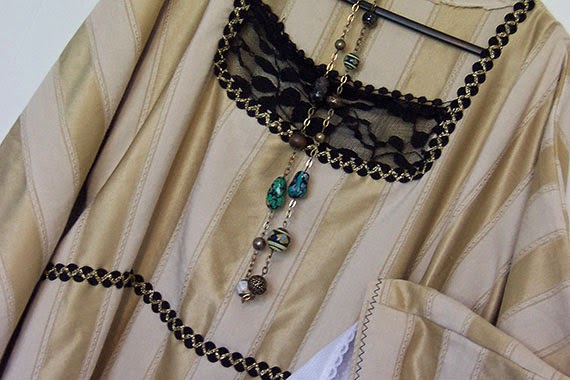
Queen Sophie will be wearing this gold dress with black and gold trim, also made from a doona cover. Since Queen Sophie is being played by a guy this dress has a lace bit in front to hide chest hair…

Queen Sophie’s dress was the first one I made so its made with the same easy dress pattern which involves cutting two pieces and sewing them together. None of the dresses have zips or buttons… Given that the waist measurements are wide enough to go over the shoulders there’s no need for them.

Queen Sophie spends a lot of time crying so I made her a fine lacey hanky out of a scrap of white cotton and some lace.

Then there’s the bad guy… He doesn’t start out bad. At first he’s just a normal guy. When he’s normal he wears an off-white gathered sleeve tunic with a red velvet vest.

The tunic is made in the same simple way as the dresses but I didn’t have enough fabric to make the sleeves long so I added bits to it, hence the gathered sleeves. I made the vest without a pattern. I used a singlet to figure out the size and where to cut the arm holes and then just winged it. It actually looks great on.
He’ll be wearing black leggings and black ‘boots’ both as a good guy and then as a bad guy. When he turns bad though he’ll wear a black tunic made from a black pin stripe shirt and a black cape.

And he’ll have the ‘bad magic crystal’. Of course.

Since the ‘bad magic crystal’ and the ‘good magic crystal’ are related they’re made in the same way using chandelier crystals, wire and beads, but whereas the good crystal is pink and silver, the bad crystal is black and silver.

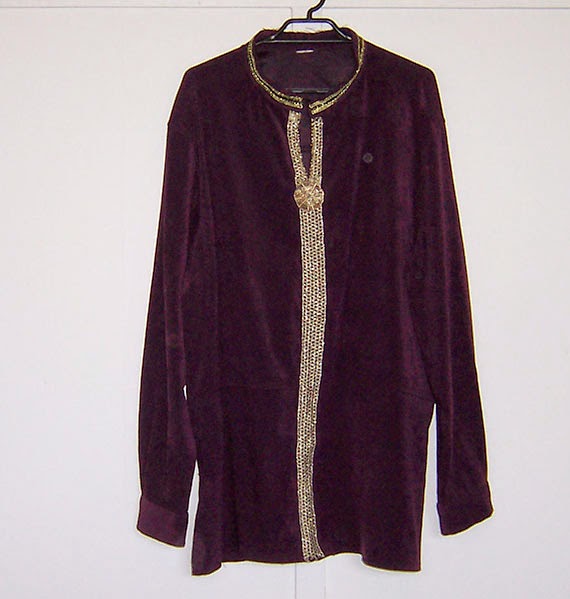
Then there’s Wallace. He starts out as a prince and wears a burgundy tunic trimmed with gold braid made from a velvet-look shirt.

With this he wears burgundy leggings and black and purple ‘boots’.

In case you’re wondering, the ‘boots’ I keep referring to in quotation marks are obviously not real boots. I’ve made these to be worn over the leggings and sit over the top of the shoes. The guys will wear black shoes and the boot tops should make it look like they’re wearing proper boots.

I made the first pair by cutting out fabric and folding it over at the top and adding velcro for attaching it.

Too hard. For me. I kept attaching things to the wrong side and having to unpick them…

Instead, I bought stretchy pants from the op shop clearance rack, cut the legs off around knee high, added tops to them and voila… boots!

Back to Wallace though. When he becomes king he’ll wear a shorter burgundy tunic (another velvet look shirt) and puffy pants.

Only they’re not puffy pants… its a puffy skirt I found at the op shop which makes perfect puffy pants!
King Wallace will also wear the crown and have the ‘good magic crystal’.

Lastly there’s the rabbit, Robert. When Robert is a human he’ll be wearing a white tunic, white pants and white shoes. He’s the cook’s son after all, a commoner, so nothing fancy for him.

I made the tunic out of an old flat sheet and added a bit of lace and a black shoe lace to tie it at the neck. There wasn’t enough width to the fabric using the simplest pattern, so I had to add extra bits to the sleeves.

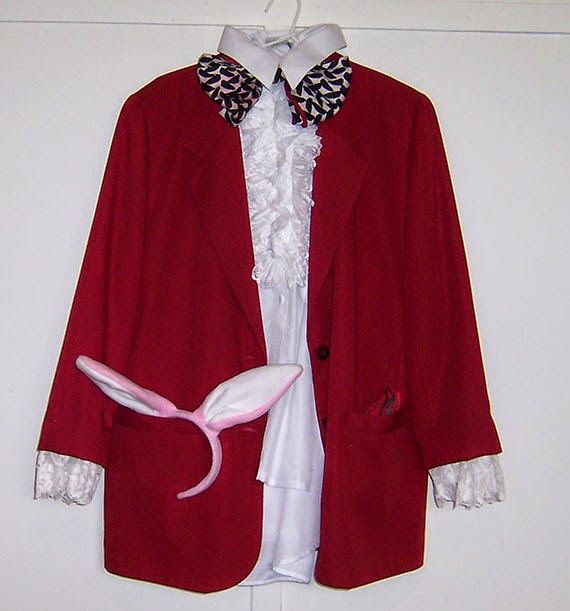
When Robert becomes The Wonder Rabbit he’ll be wearing the white pants and shoes, a frilly white shirt, a red jacket with lace at the sleeves, a large bow tie and rabbit ears.

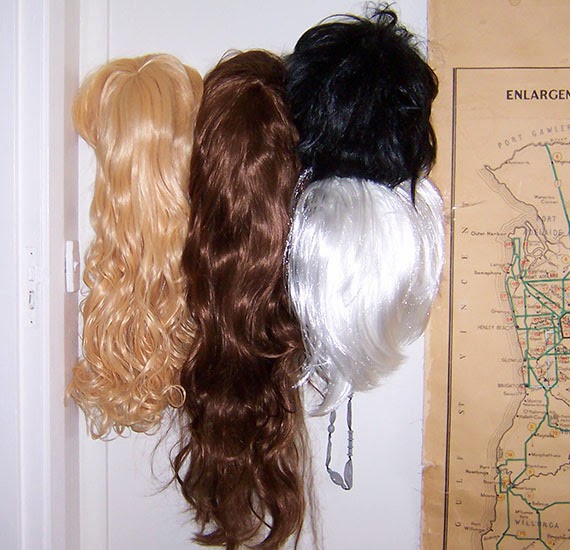
I have the wigs organised. Robert will be wearing the red wig. The short brown one will be shared by Prince Oscar and Prince Wallace as they’re not in any scenes together.
King George and Oscar, when he’s older, will be sharing the white wig. The blonde wig will be worn by Lucy and the long brown wig will be worn by Queen Mary. The short black wig will be the bad guy’s wig.
We have a couple more wigs which will be worn by Queen Sophie, the cook and the peasant.
I’d say we’re ready!
z
the kitty cat project

Thought I’d share a project made at work by one of our participants, with help from staff and myself. Who is also staff…
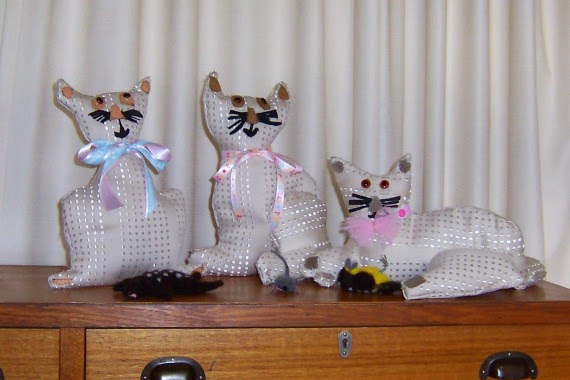
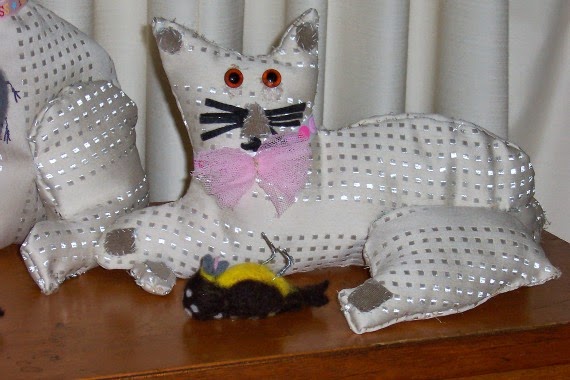
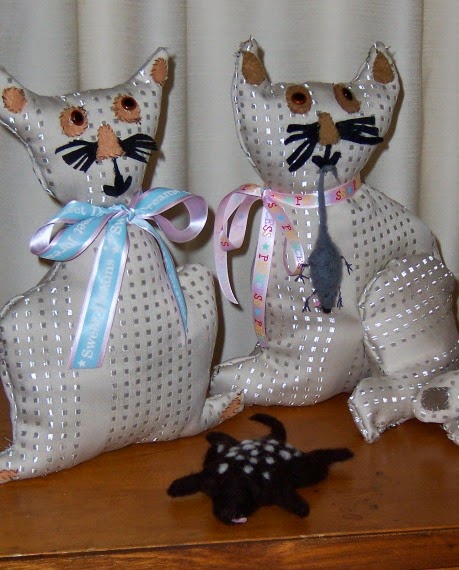
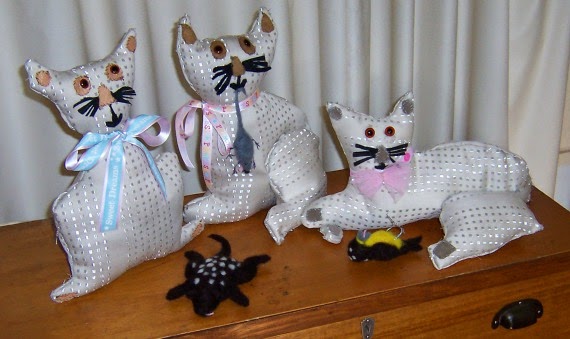
Meet The Great Hunters.

These cats were out from patterns made by myself and another staff member, then stitched together by one of our participants who loves sewing projects using recycled curtain fabric.

On their own, each cat is just a cat. But as a group they’re more interesting. Especially when they each have a dead animal they hunted in front of them. Especially when two of the three dead animals are endangered… cause then you have artwork with a message and a twisted sense of humour.

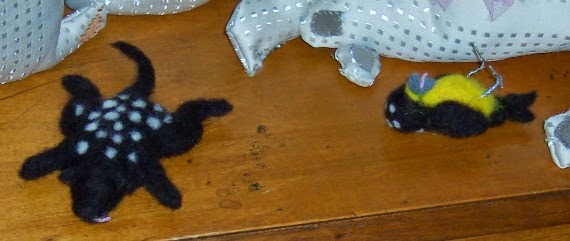
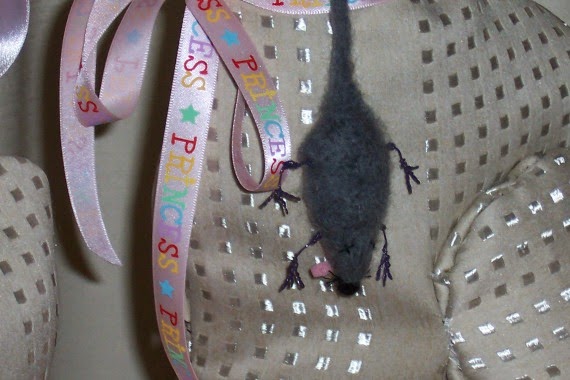
I made the dead animals to go with the cats. They’re needle felted wool and the bird and mouse have wire legs.

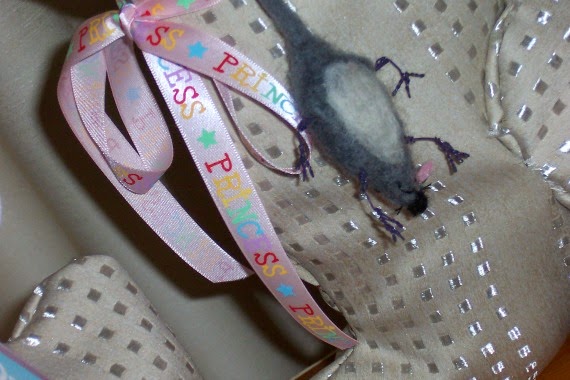
Here’s the mouse. I love him. In fact I wore him as a broach when I first made him. He makes a great broach. How often do you see a dead mouse broach really? Not enough I say.

Gotta love that sticky-out tongue!

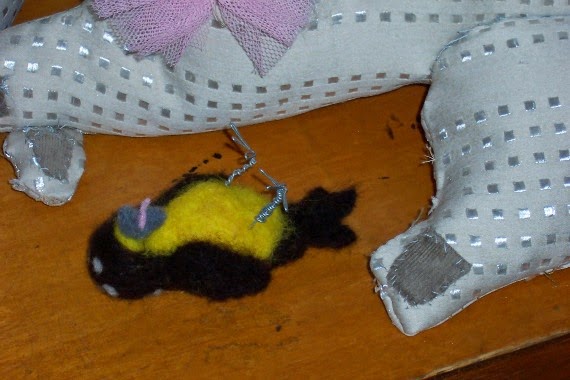
The bird is a many spotted pardalotte. We have a few of them around here and they’re not nearly as chunky as the one I made…

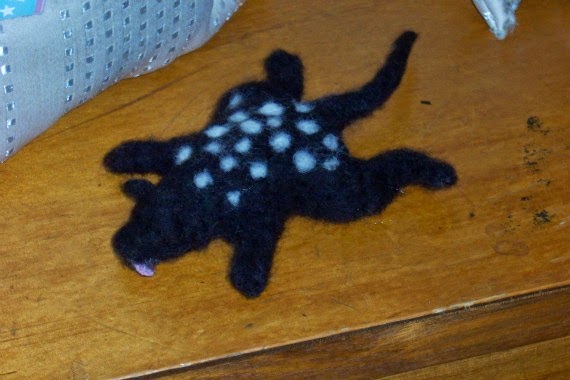
Lastly there’s the eastern quoll. Complete with its own sticky-out tongue.

Here they all are, looking pretty pleased with themselves.

Sometimes I really love my job. The participant who made the cats is thrilled with her work and its great to assist with something like this.

z

we’re gonna need a (bigger) boat

Its only rained twice this week.

Once for 3 days and once for 4 days.

Ok. Its been raining a lot.

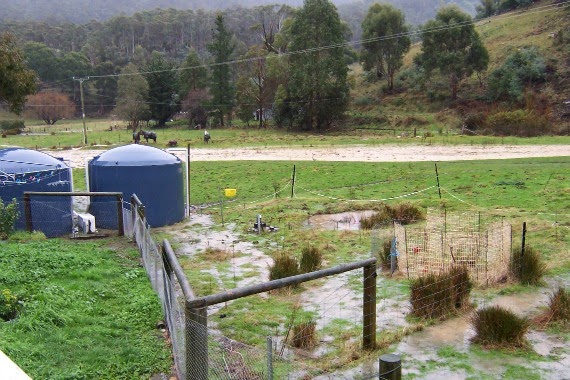
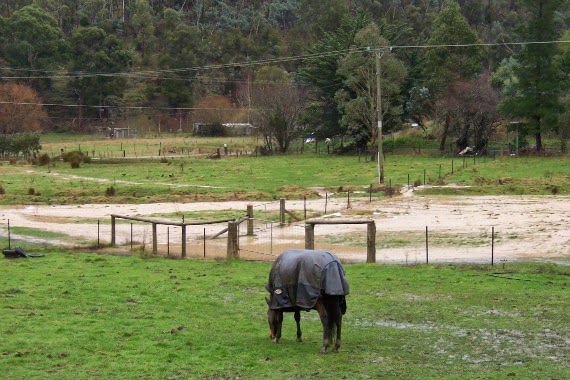
This morning we had pools of water all over the paddocks. At lunchtime we had a lake.

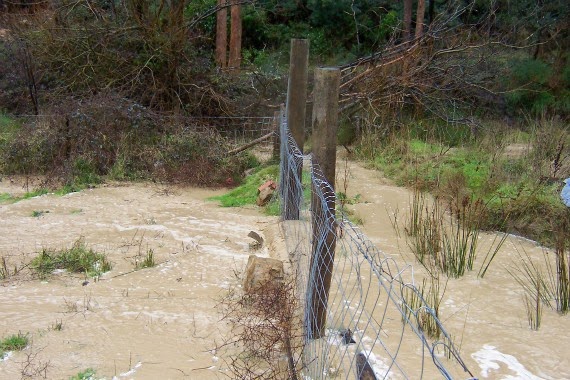
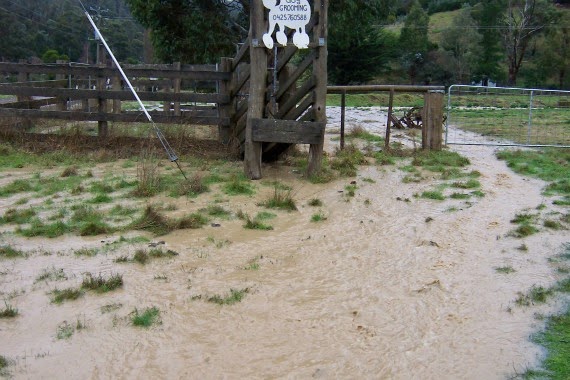
It all starts up here, where the creek overflows near the ford.

The problem is ongoing and we’ve been trying to fix things since we bought the farm. First thing we did was hire someone with an excavator who swore he knew exactly what needed to be done, then went ahead and did what he wanted even when we and the neighbour behind us jumped up and down and told him not to.
See, it all began way before our time here with a combination of things.
First the landowner up the hill sold off blocks but kept the road/driveway as a private road. And didn’t put in culverts. 
And the council allowed that to happen.
Next, the creek that runs down from the hills behind us was redirected by the guy who owned our property before us. The creek used to run through the middle of the top paddock and he moved it to where the ford is now.
This resulted in an unnatural sharp bend on the creek which overflows every time we get more than a light rain. Add to that the fact that there are no culverts on the road above, so we also get sand washing down in the stream. The sand fills up the creek bed and, when it rains heavily, the water overflows the creek sides and floods our paddocks.
For the first two years we lived here we couldn’t get up to the top of our property in winter cause we couldn’t get over the ford. It was under water.
Enter our amazing excavator man who decided we needed a ‘secondary creek’ for overflow and this is what we have now:
See where the water runs into the creek at the top of the pic? Now notice where the sand filled ‘overflow’ has overflowed into the paddock.
This is the result:

The creek is on the other side of the fence on our next door neighbour’s land at this point… the lake is ours. It follows the line of the creek, not IN it, all the way down our property.

In case you’re wondering, the water at the bottom of the pic is dam overflow…  that joins the creek overflow at the bottom of the middle paddock and forms a bigger lake in the bottom paddock.

 
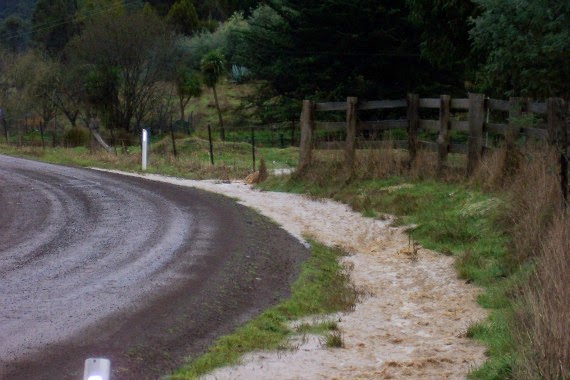
Then it breaks out and flows onto the road…

Both at the side of the creek in a small waterfall:

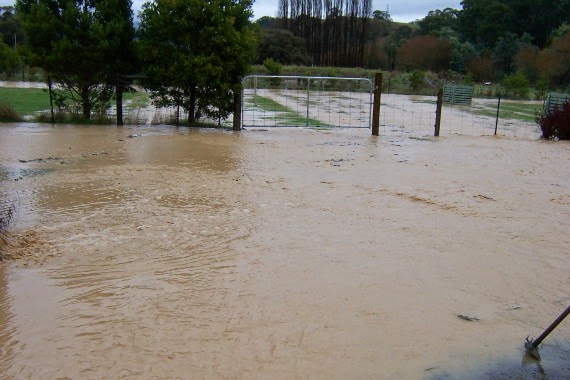
And over our driveway:

Down past our gate:

Where the two rivers happily join together:

Rushing down the road and eventually crossing it in a couple of places:

Straight down into our neighbour’s property opposite:

Almost to his doorstep. This is his driveway outside his house and shed.

It then runs off over his paddock, joins another river coming down from the road and runs down to the river beyond.

Needless to say, our neighbours love us.
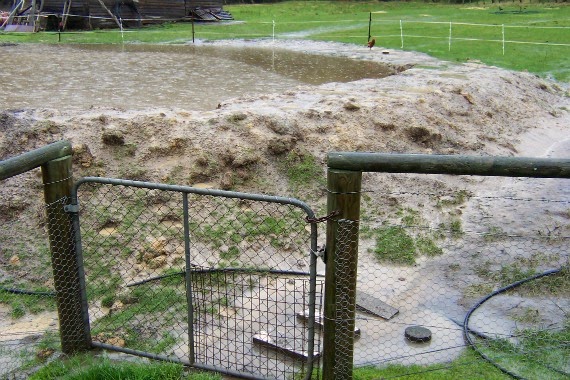
This is our dam. Its pretty full. Note the overflow spot our newest excavator man put in? (near the top middle of the dam about where the geese are.) He did a better job than ‘amazing excavator man’. Only one problem… the overflow doesn’t go down into the paddock as planned (where it would just add itself to our lake and the river flowing into the road)… it just follows the side of the dam and floods the areas just below our house.
 
 
Meanwhile, this the side of the shed… my poor plants. That’s a very sickly mexican orange blossom near the corregated iron. Not looking happy at all. Lucky I put the hardenbergia in a pot!

The good news is the hardenbergia is flowering!

The bad news is the grooming room is flooded. And at this stage I’m not sure if its come in from the slightly opened window or through the floor!
If its from the window, how come there’s no water near the other window??? 
If its from the floor, how come this has never happened before? Sure its damp in there when it rains, but never so damp you could swim in it!
Then again, the casita in that section has concrete floors… I bet they weren’t built to withstand this much water. 
I’m seriously considering making some major alterations to the casita – namely removing the flat roofed sections of the building, leaving only the older/original part. It would mean some knocking down and a lot of rearranging the spaces that are left. Doable… but I think Wayne will kill me if I mention it…
Maybe I’ll get him drunk, then tell him…
z

costumes, stepping up the hardness factor – part 3

When I first started this project I thought ‘easy, just alter and adjust clothing to create the look I want’.

Yeah. Right.

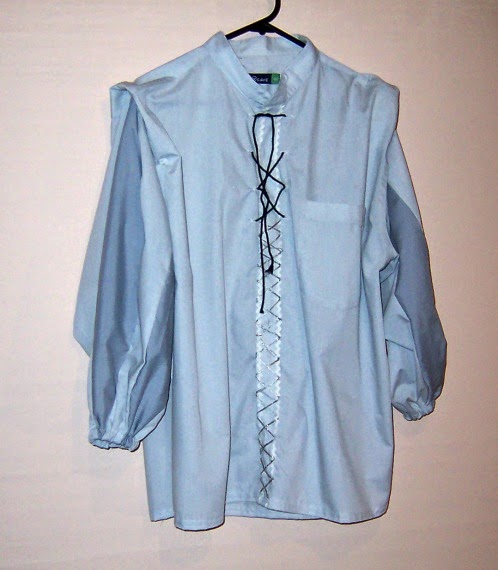
As I said before, shirts might sound like a good way to make tunics but they’re not. They have buttons down the front and pockets and the sleeves aren’t nearly wide enough for a full puffy effect. My first attempt at making a puffy sleeve shirt was to add slices of fabric to shirt sleeves.

This was the result:

First I removed the buttons and collar. Then I sewed the front shut and added braid to fancy it up. It wasn’t enough, so I added criss cross in silver thread. Better, but not great. I tried buttonholes for the laces.

Monumental fail.

Turns out I’ve completely forgotten how to do nice neat button holes. And you really need more than one layer of thin cotton to do them properly anyway.

That’s my story and I’m sticking with it.

I removed the cuffs and added elastic to the sleeves (the shirts are way too big for some of the guys I’m making costumes for).

Last, as I explained, I wanted puffier sleeves. So I cut out some long ‘slices’ of grey cotton fabric and inserted them into the sleeves. Two on each sleeve. They work okay.

Tried the shirt on the king and the shoulders are like, halfway down his arm. Sigh. I’m putting in a kind of capped look which I’ll fill with padding.

It’ll do.

Next came the dresses for the two queens and the mermaid-made human. Three dresses needed.

I’d found this design on Pinterest, sorry, no website attached to this one:

How perfect is that? So easy! Just a couple of cuts and viola, a dress!

I found a fabulous old doona cover at the tip shop which was perfect for the first dress and made it up using an average measurement of the two actors playing the roles (one is a girl, the other a guy). Basically, I made the dresses to fit me cause it ends up they’re more or less the same size as me in the bust area (though obviously distributed differently).

The dress turned out great though I did shorten the sleeves. The doona was the same on both sides so all I had to do was follow the pattern and cut out the shape. Easy.

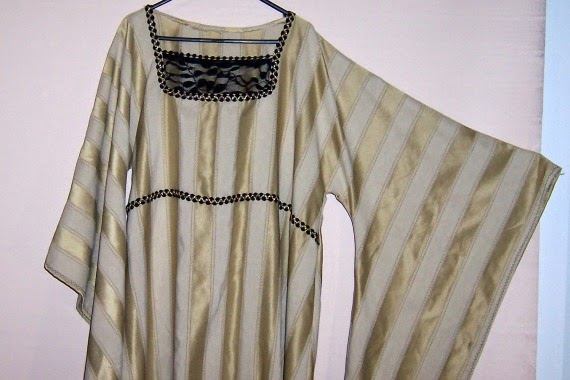
I added a bit of black and gold braid at the neck and under the bust, then added a bit of lace to hide chest hair (cause this is the dress a guy will be wearing – a comedic touch as he’s so much taller than the small statured king).

However, one catch. That pointy armpit thing doesn’t work in real life.

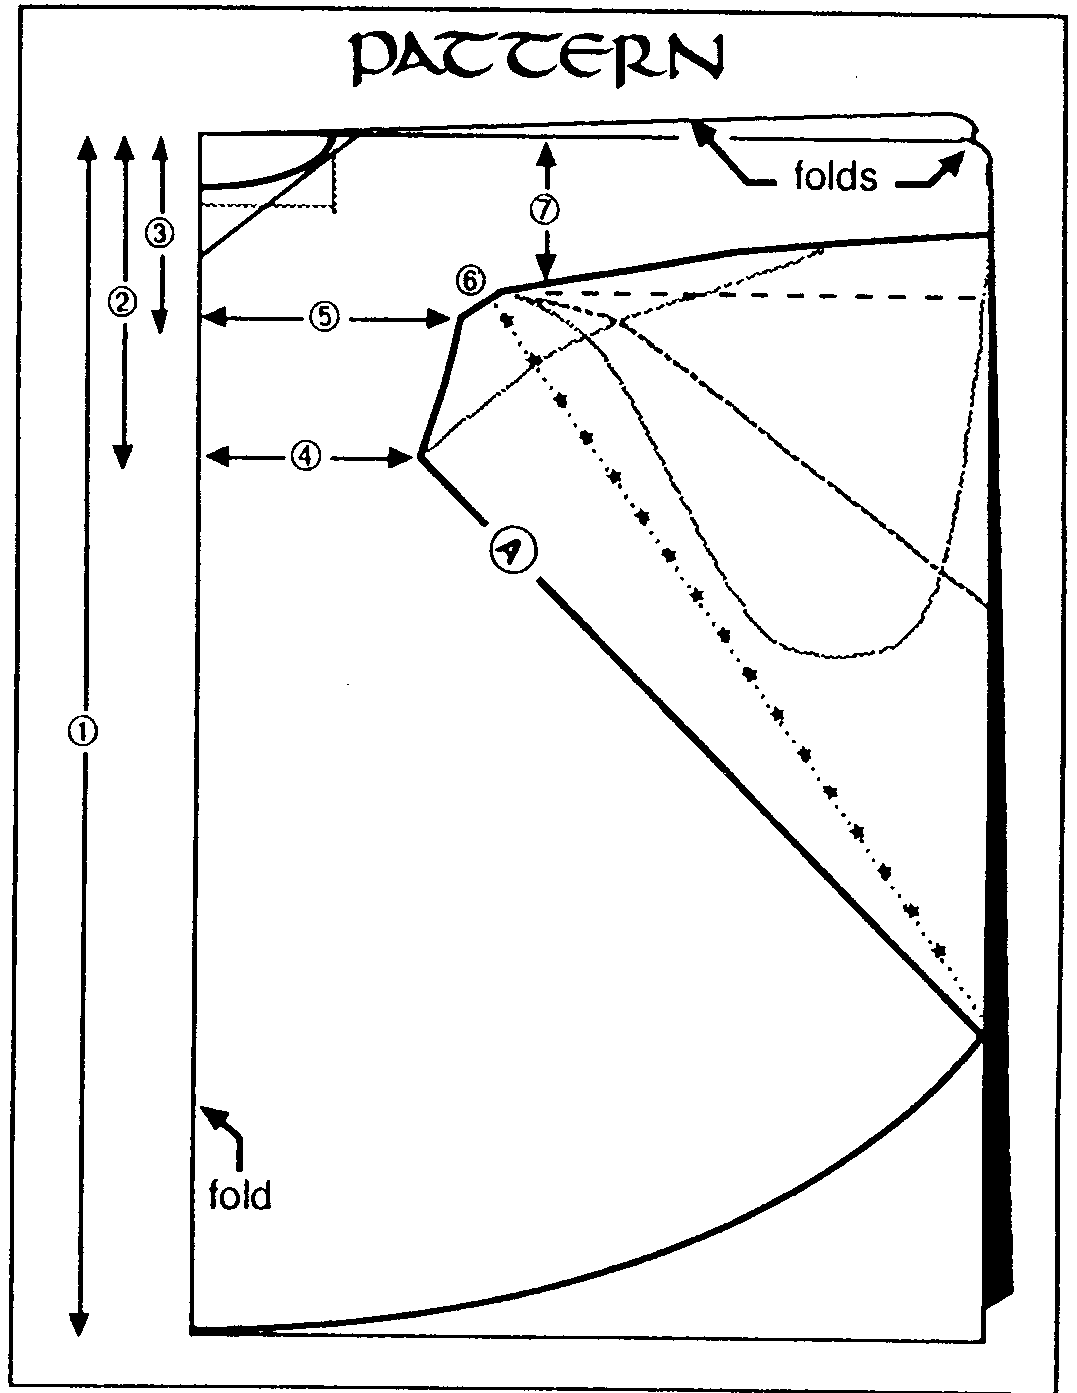
So I amended the pattern. Later I found these patterns which are more or less what I did to fix my dress.

This pattern is great, however I didn’t need any waistlines… Which is good cause by making the dresses kind of square at bust and waist there’s no need for zips.

On to the next dress. This fabric was donated by a colleague. Another creative, collector of ‘things that will come in handy one day’. Its a beautiful blue shimmery satiny type fabric and there was enough to make the dress using the first pattern. With the rounded armpit of the second.

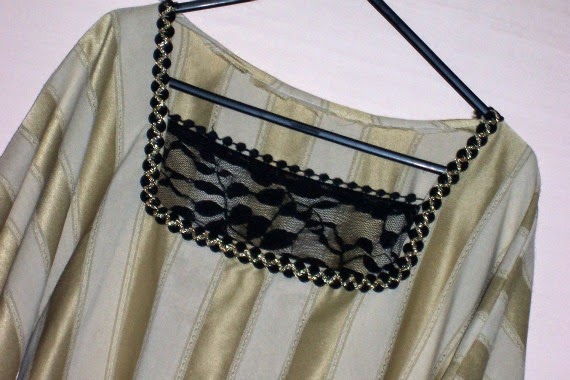
This time I added lace to the neckline, facing inwards in a medieval fashion. I then added a ribbon which is stitched in place at the back, then goes through loops at the side and ties up under the bust.

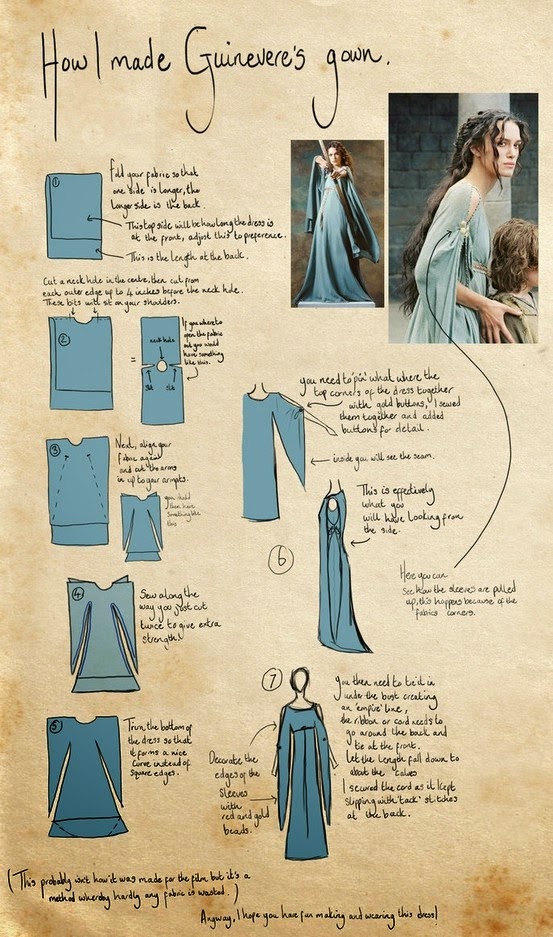
I also kept the sleeves open a la Guinevere’s gown above and sewed on a string of tiny pearls to decorate the sleeves. It looks amazing.

The sleeves are a little long, but turns out the actor can put her hands through the last gap in the sleeve and it looks fantastic. And intentional!

Happy accidents are my friend. I create in such a slap dash manner that I really rely on these windfalls!

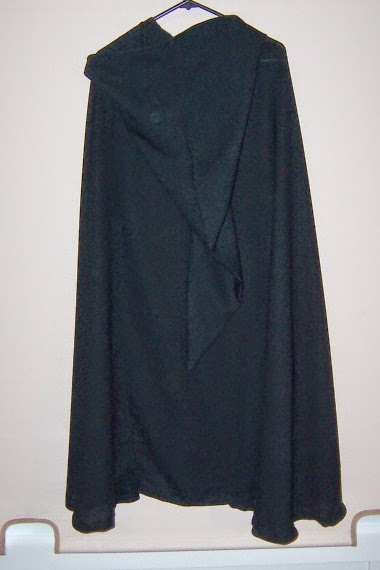
For the evil character’s cloak I used a pattern I found on YouTube by a guy who makes his own medieval costumes the easy way. Pretty cool dude.

The basic pattern is the same folded over, half circle pattern as the capes I made before, but this time I had to do some patchwork to get enough fabric to create the length of cape needed… I didn’t have any single piece of fabric big enough. The only black fabric I had was a slippery type I have no name for, but it has some weight to it so it will swish well on film.

At the neck I put a simple black button, nothing flashy about this bad guy’s cloak. On the hood though, I went with a more evil/ku klux clan type of hood, long and pointy.

Disclaimer: All these photos have been taken in the office against my awful peach blind with indoor lighting. The pics aren’t the best but I had nowhere else to take them in better conditions. You’ll get to see the costumes on humans later.
I have an old 60s-70s Singer sewing machine my father bought me at a trash and treasure market about 25 years ago for $10, and I don’t own an overlocker. I either pink fabric edges or zig zag them. And I’m no seamstress. My grandmother (who was) would turn in her grave if she saw my butchered finishes.
z

costumes not so easy – part 2

More badly cheaply made costumes for our film. 
When dressing in a fairy tale/medieval style you need tunics. Loads and loads of tunics. And shirts just don’t make good tunics. At least not for the ‘common folk’ costumes, which can’t have fancy braid to cover the button down the front look of shirts.
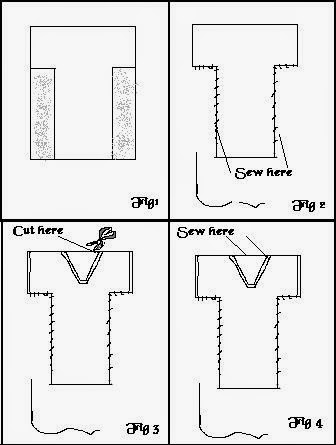
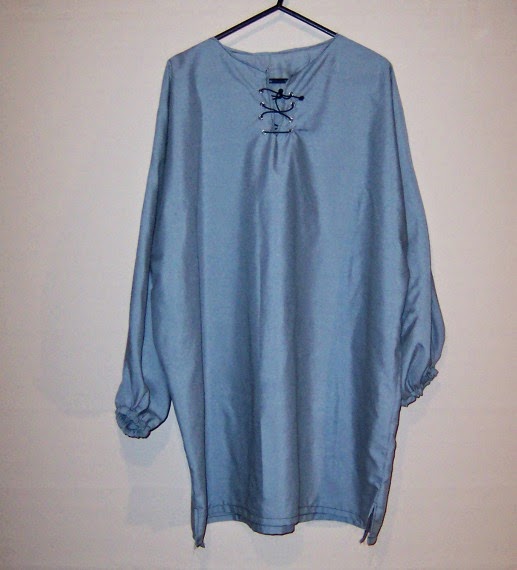
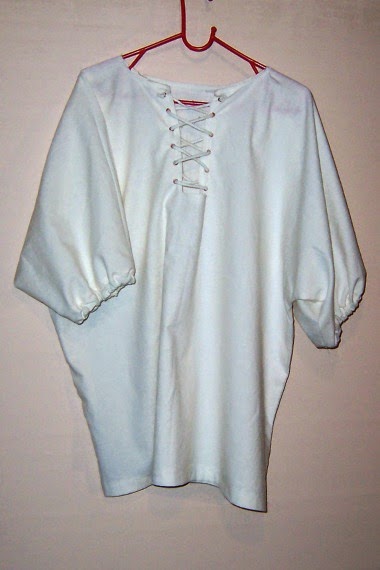
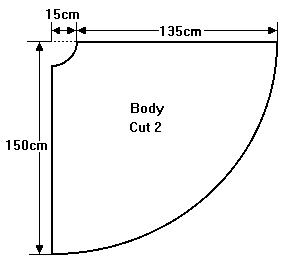
So, using some plain grey cotton fabric from my stash, I made the simplest tunics I could. Basically I laid the fabric out in half and cut out a T, along the lines of this pattern:
I added elastic to the sleeves to give them a puffy look.

This is where my bad sewing and laziness becomes obvious. I used black thread cause it was on the bobbin and I didn’t have grey, and what the hey, its for a film. You can get away with a lot of fake in movies. 
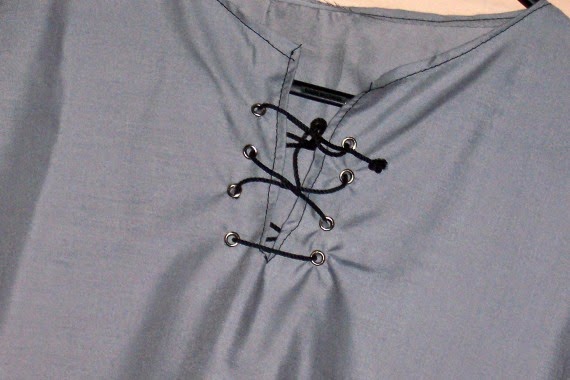
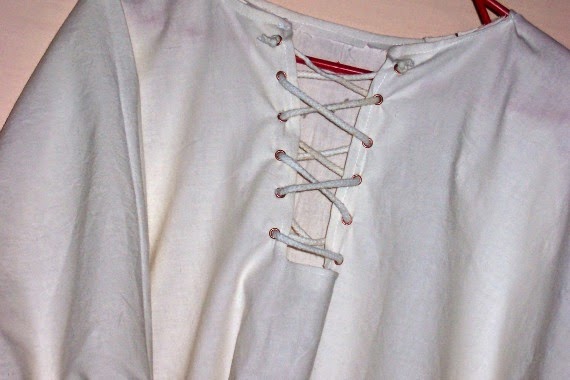
I bought myself one of those eyelet tools and a pack of eyelets in different colours for the lace up front which is a requisite for tunics. Took a few monumental fails putting on the eyelets but eventually I managed to figure out how to use the tool which came without instructions (not even those translated from Chinese to Russian to Swedish and then to English). Not the neatest eyelet/lace up setup I’ve ever seen, but hey… I blame the thin cotton fabric, the fact that I have no patience and no hand strength.
I finished it off with some thin black string I found in my odds and ends.

But hey… its for a film. And you can hide a lot of fake in movies.
The second plain tunic was better. This one is for the cook and is made of cream fabric with white string. I put more eyelets on this one so it worked better. The sleeves are short cause I didn’t have enough fabric to make the T sides long enough. But its the cooks costume and I figure the cook can have her sleeves pushed up.

The costume is finished off with a cap and an apron. The cap has no pattern. I simply cut a circle cut out of fabric, put elastic around the edge and lace trim. The apron is pretty plain, just a simple apron out of plain white cotton.
Another costume, for one of the kings, is a cape and puffy pants in a heavy silver fabric. I got lucky with this fabric which I found at an op shop. I think its unlined curtain fabric, but its rich and very royal looking.
This cape will be worn with a pair of gray leggings (on loan from my wardrobe) and some fake boots (more on those in a later post). I also have a cap for this costume cause when this character is young he won’t need to wear his crown (also in a later post).
I made the cape using the simplest template, basically the same one I used to make full circle skirts in my rock’n’roll dance days:

Once the cape was hemmed I got a fluffy knitted scarf and sewed it on to give the impression of fur. Cause kings wore fur of course.
To finish it off I used beads, wire and a bit of chain to create a fancy way to hold the cape closed.

Lastly, the cap was made the same way the cook’s cap was, only this time I had to made it in 4 sections to allow for the stripes in the fabric. I trimmed the edge of the cap with a finer line of scarf/fur, made a scarf/fur pom pom for the top and added a couple of feathers.

One thing that guys used to wear back then were tights and puffy pants. The skirt I found which I shared in Costumes Part 1 gave me the inspiration to base my ‘puffy pants’ on a more skirtlike design. Instead of trying to make actual baggy shorts, I just made a skirt with elastic around the thighs which will bunch it up, creating a puffy look.
I don’t have a photo of the king’s pants, but here are another character’s pants, they’re basically the same… 
Ok, I could have made shorts. I actually did make shorts. Huge fail. 
I’ve made trousers before, I know how to make a pattern for them… but for some strange reason the shorts I cut out in the silver fabric just did not work. I did what any imaginative fake seamstress would do… I converted them to a skirt which would look like shorts.
Hey. It works.
And you can hide a lot of fake in movies!
z