wire work by him

I can’t ever say Wayne doesn’t give me romantic gifts. He’s always making me hearts and flowers out of barbed wire. This is one of his creations, its about 8in tall and made of barbed wire, old roofing iron and a chunk of old wood.

The other day he got some new copper wire and made this cute little cowboy boot. I’d been sending him all kinds of links of cowboy boots made out of wire but Wayne always does things his way. Its a boot with a spur and a lasso.

(Ok, I made the rowel – that’s the spikey bit on the spur – cause I wanted it to look cuter.)

Then there’s this trapped man. Its a tortured sculpture, isn’t it?

I love his wire work. He’s so imaginative, which is why I wanted to show off some of his stuff.

z

fun with wire – a wire crown

I’ve always had a thing for wire. I love wire baskets, wire sculpture, wire anything. I love working with wire, only of course I can only work with soft wires. Lately I’ve been doing a bit more wire work cause its something I can do easily while sitting around watching TV in the evenings.
ie. I haven’t been doing any big projects but I’ve been making some smaller things.
Like this little wire crown made using gold copper wire in two thicknesses, brown copper wire and buttons.

The thick wire is about 2mm thick, the brown wire is 24 gauge and the thin gold wire holding the buttons is 28 gauge.

I made this little crown as a simple decoration, to sit on a shelf or something, but I guess it can be used as as a tiny crown if you put bobby pins on it!
z

Shared at

thanks for your inspiration pinterest

When I was looking for inspiration for a Christmassy project for work, I naturally looked at Pinterest. I wanted something easy the ladies could make … I knew I’d find plenty of ideas on Pinterest.

Too many ideas, in fact.

I narrowed it down to these cute little sock snowmen. For this week anyway.

I already had a few white socks at home which were either worn or had lost their sole mates, so I was part of the way there. I had to buy some pretty socks for the top/clothing layer so I got the cheapest ones I could find at Shiploads. And some rice to fill them. We already had tons bits for decoration: beads, bits of felt, buttons, yarn…

Here they are. So cute all lined up like that. Each lady picked socks and decorations, helped fill the socks with rice and dress the little guys.

Here are a couple of closeups:

Darn cute even if I do say so myself.

Now I want about 9 of them for my windowsill.

Hm. Maybe not a good idea. I think the dogs will want to play with them… rice everywhere… on second thoughts, I’ll just admire these guys…

z

the kitty cat project

Thought I’d share a project made at work by one of our participants, with help from staff and myself. Who is also staff…
Meet The Great Hunters.

These cats were out from patterns made by myself and another staff member, then stitched together by one of our participants who loves sewing projects using recycled curtain fabric.

On their own, each cat is just a cat. But as a group they’re more interesting. Especially when they each have a dead animal they hunted in front of them. Especially when two of the three dead animals are endangered… cause then you have artwork with a message and a twisted sense of humour.

I made the dead animals to go with the cats. They’re needle felted wool and the bird and mouse have wire legs.

Here’s the mouse. I love him. In fact I wore him as a broach when I first made him. He makes a great broach. How often do you see a dead mouse broach really? Not enough I say.

Gotta love that sticky-out tongue!

The bird is a many spotted pardalotte. We have a few of them around here and they’re not nearly as chunky as the one I made…

Lastly there’s the eastern quoll. Complete with its own sticky-out tongue.

Here they all are, looking pretty pleased with themselves.

Sometimes I really love my job. The participant who made the cats is thrilled with her work and its great to assist with something like this.

z

costume making the easy way – part 1

In case you’ve wondered where I got to over the last few days… weeks…

I’ve been buried in the chaos that is my life. I’ve had no time to post and nothing much to post about. I’m overworked and over-committed. The house hasn’t yet been tidied up since I started making over the office about a month ago. I still have things stacked in the corner of the living room from the kitchen remodel. Instead of finishing things and putting things in their place (or getting rid of them), I’ve just kept adding to the mess.

We haven’t been able to see the living room floor, much less the coffee table surface, for over three weeks now. It looks like my brain exploded in here.

Why you may ask? Well… its because I offered to make the costumes for a movie we’re making in one of my programs at work.

Obviously!

See, I take pride in what I do… and since I have nothing to do in my 1 minute of free time a week, I thought I’d offer to take on yet another TO DO for my list cause I want our movie to look as good as possible.

As good as possible means costumes that look right for the story and aren’t just a mishmash of cobbled together bits and pieces we could scrounge from wherever. That means making costumes that look right from bits and pieces I could scrounge from wherever… tip shops, op shops, my fabric collection, my wardrobe, my friend’s wardrobes, wherever.

And all those boxes and bags have been placed in the living room in an orderly fashion.

haha.

Ok, firstly, what’s the movie about? Its a fairy tale of good vs evil, kings and queens, a prince, a mermaid, love, friendship and a magic rabbit. The story was written by the group I work with so it pretty much had to cover everything.

Its set in a land far far away, a long long time ago, therefore the costumes are more or less renaissance in style.

So I started the easy way.

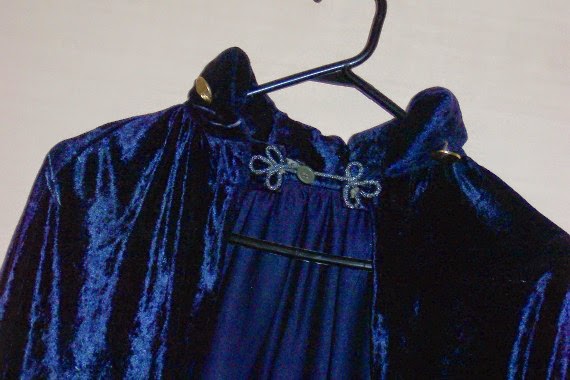
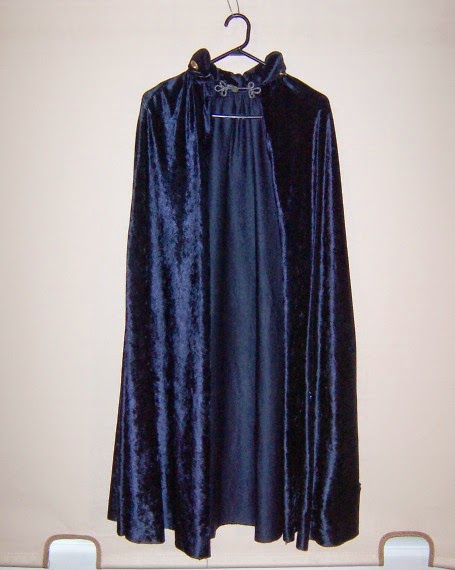
First I looked through the wardrobe shared by the drama programs. This blue cape is one piece we’ll use but I’m not sure which character will wear it yet. 
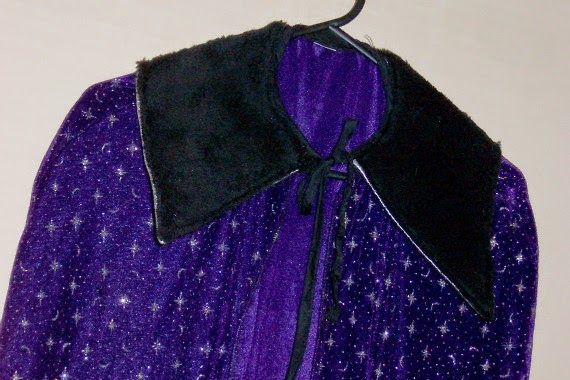
I also found this purple cape which had a silver collar that made it look very ‘magician’-like. I put some fake black fur on the collar to make it a bit more regal.
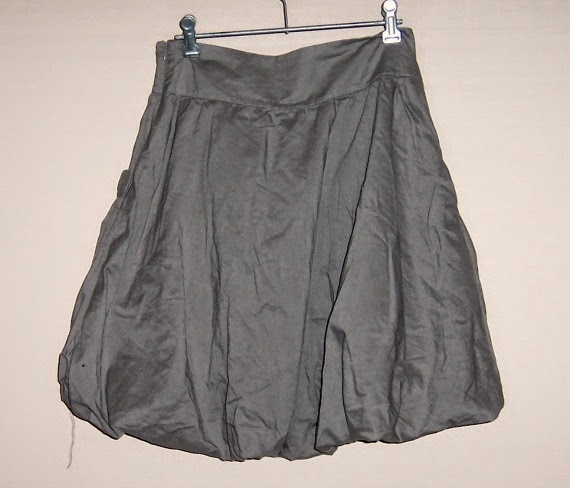
I found this funny skirt in an op shop. Its perfect as puffy pants. You know those puffy pants guys used to wear over their tights? 
Ok. I’ll get photos of the full costumes so you’ll be able to picture it then.
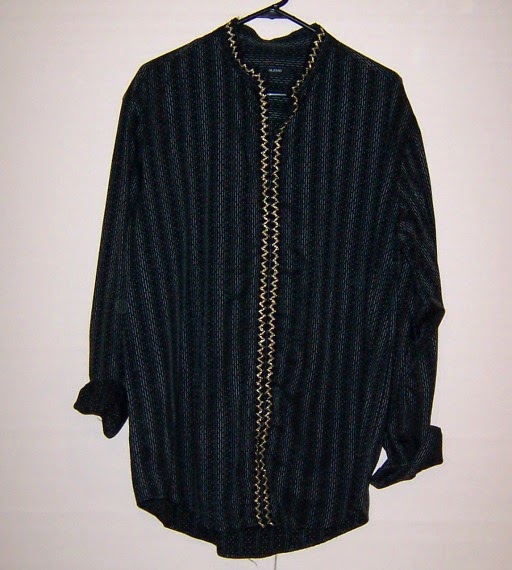
Next I moved on to adjusting clothing. These shirts were donated or found at op shops and were in my program’s wardrobe. I cut off the buttons and collar, stitched the front closed, added fancy braiding and voila: tunic.
A black one for the bad guy.

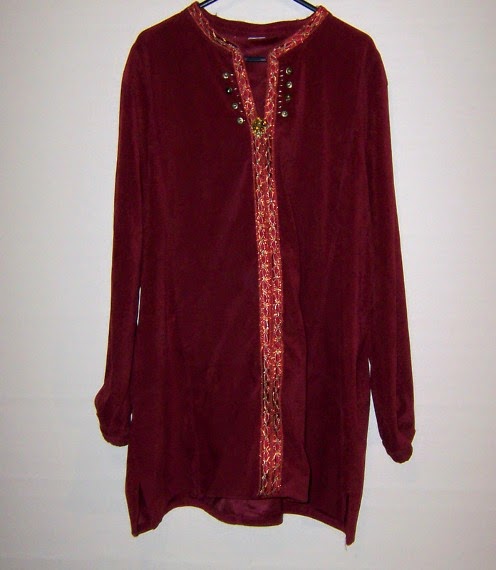
A regal looking burgundy one.
Embellished with gold buttons, gold stitching (bad stitching) and a vintage earring.
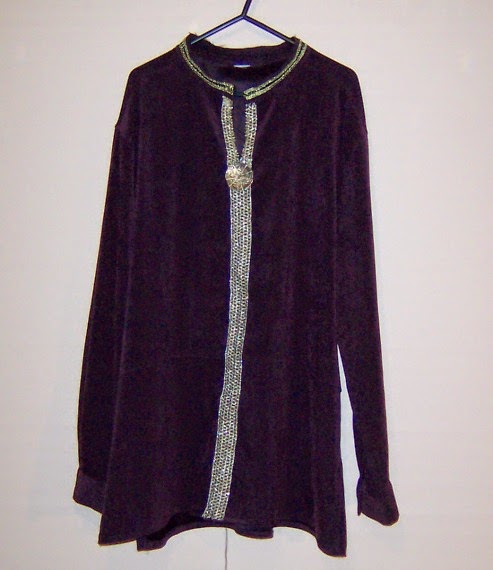
A regal purple one with gold braid trim and an oversized gold button embellishment.
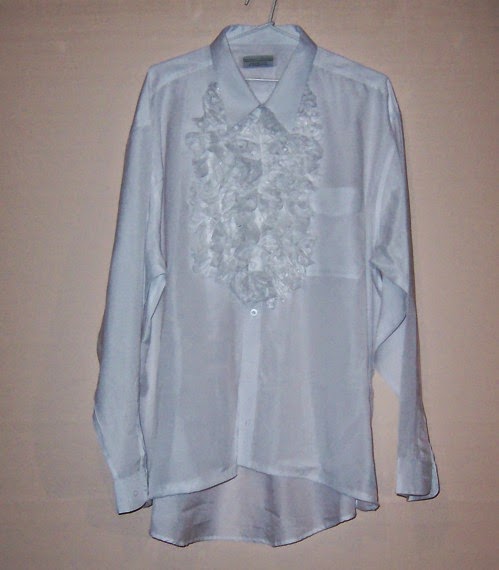
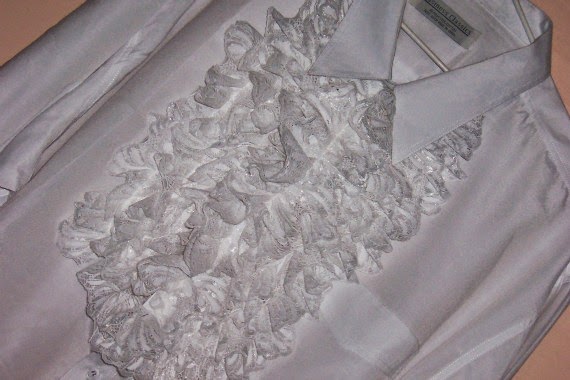
I adapted a white shirt for the magic rabbit costume. All I did for this one was add ruffles of wide lace ribbon.
Since the jacket worn over this shirt won’t close (its not big enough) I made the lace bib nice and big to make it a feature. 
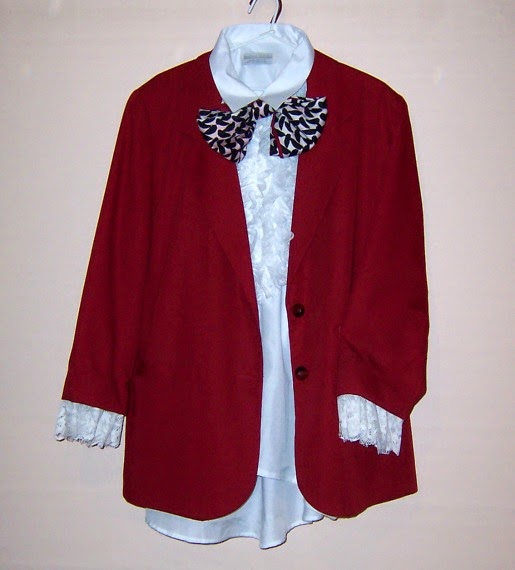
The rabbit costume is based on Tim Burton’s Alice in Wonderland white rabbit but I couldn’t find a blue blazer. I opted to use my old dog show red jacket. I shortened the sleeves temporarily by hand stitching them, then added lace to the cuffs. The lace was cut off a ripped table cloth.
The bow tie was an op shop silk scarf which I tied into a bow and added elastic to go around the collar. Of course this costume comes with a set of pink and white bunny ears and a pair of white trousers.
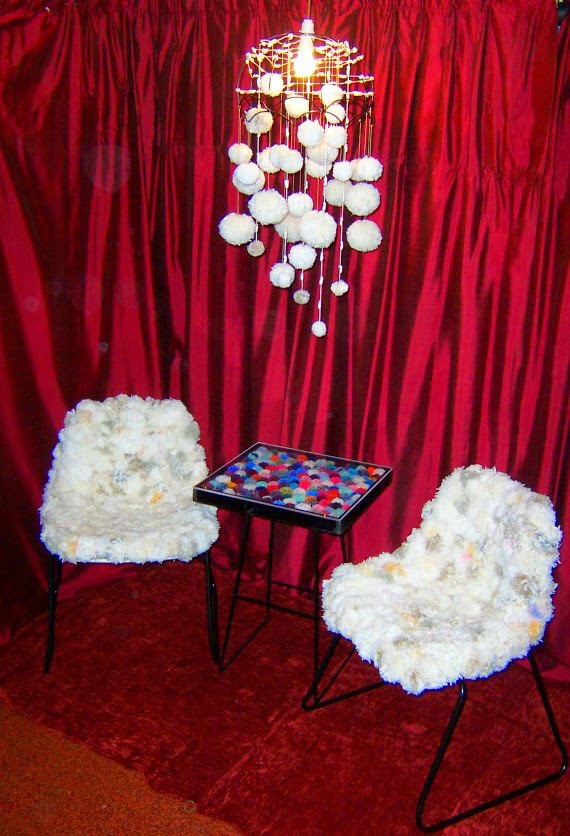
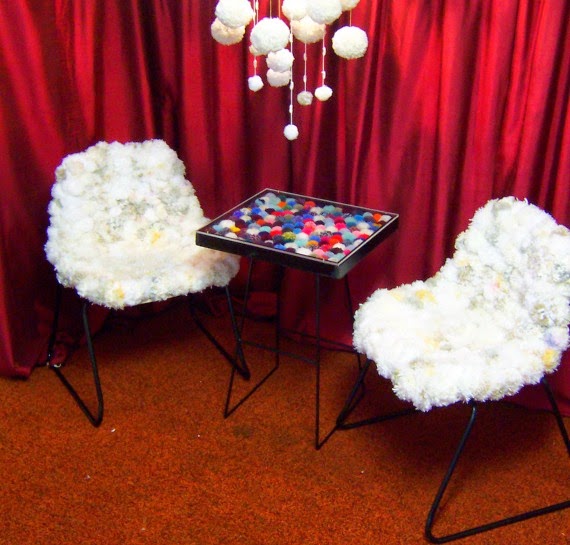
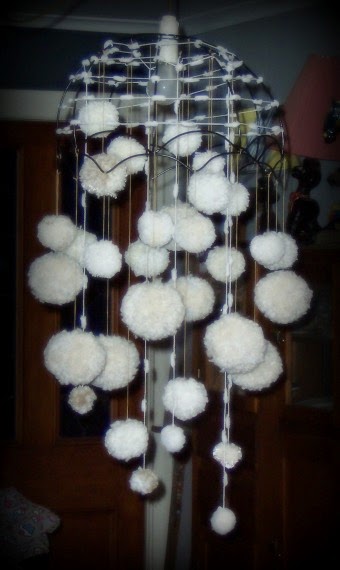
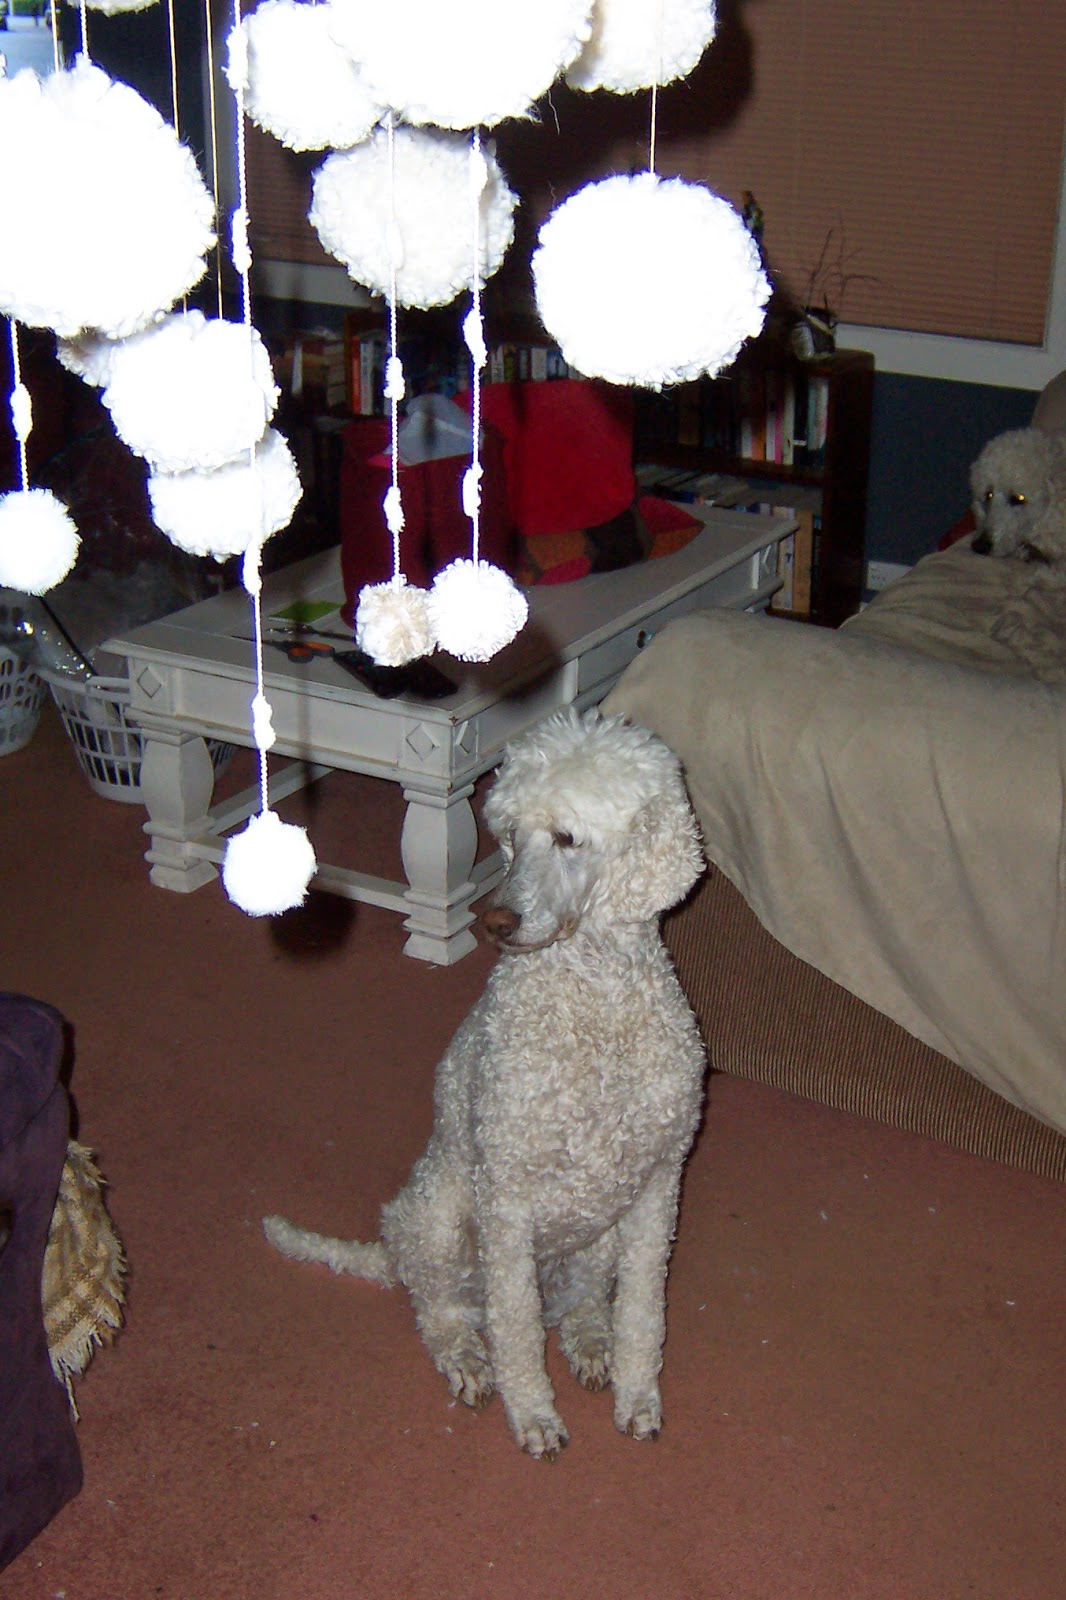
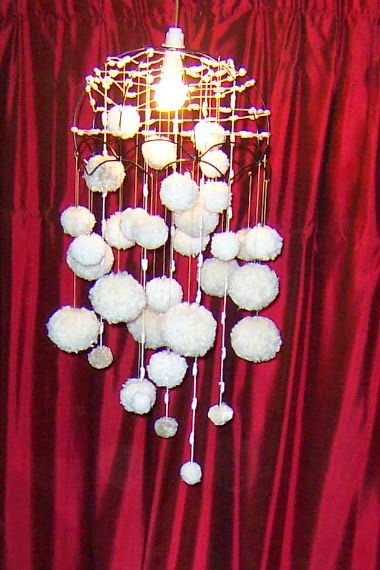
No rabbit costume is complete without a tail. For this I used a leftover white pom pom from the pom pom chair suite
The rabbit costume has optional spats made from a red tartan napkin. I thought they might add a bit more ‘spiff’ to the rabbit but it’ll depend on how the costume looks when its all together. I have a small gold clockface and some gold chain which I hope to make into a fob watch too.
Stay tuned for more costumes.
z
Shared at:
Beyond The Picket Fence

pom pom suite – more art from trash

This is another entry in the Art From Trash Exhibition. This time its a collaborative piece (or pieces) made at work.
I work on different programs at work, and we try to enter interesting things in competitions when we can. This suite is something that took us almost a year to pull together.
The concept was inspired by an image I saw on Pinterest of a chair covered in coloured pom poms. I found two old plastic fabric covered chairs at the tip shop which were perfect for our project. I had the broken stool legs at home, as well as a shallow tray/box from previous tip shop explorations. 
With the help of a couple of ladies at work, we sanded off rust and spray painted all the metal work glossy black. And cleaned up the chairs.
A whole lot of ladies helped make the billions of pom poms needed to cover the chairs. These were stitched into the chair upholstery to create very comfy padded seats.
We made heaps of tiny pom poms using the fork method I saw at Eclectically Vintage. These we put into the table top box, which we attached to the stool legs. I had a thick piece of perspex cut to size for the top, which is held on by screws.
We created a fun little sitting arrangement.
To finish off the ‘suite’ I made this chandelier at home using an old lamp shade stripped off its original covering, some fancy wool and more pom poms.

I love how it worked out. So soft and feminine. Here’s Montana keeping an eye on things. She agrees, though I think she wanted to eat the pom poms.

In the spirit of entries being made of ‘trash’, we made the whole suite out of things people had mostly discarded. The chairs, table and lamp shade all came from the tip shop. The light fitting in the chandelier came from a 2nd hand lamp I bought to revamp. The wool was mostly from op shops or donated (I ran an ad on gumtree.com asking for white wool and a really nice guy actually sent some!).
I just love making things out of ‘nothing’ and the guys at work love seeing what they helped create being exhibited and admired.
Who doesn’t?
z

junkyard dogs – art from trash

Every year the City of Hobart Council has an exhibition called Art From Trash. Its one of my favourite events of the year. This year I entered my Junkyard Dogs – partly inspired by the little dog I made during my art course last year. Remember Hair of the Dog
Well, here he is again, with one of his new mates:

Let me introduce you to them properly.
First there was Tiny Terrier, the first art from trash dog. He’s made of a wire frame and felted dog hair… plus some dryer lint and possum fur I found in the woodshed.
Then there’s Wire Terrier:

He’s made of electrical, phone and computer cables. See, while cleaning up the house a while ago I found all these cables which belonged to printers, phones, computers and stereos I haven’t had in years. A whole box of them. I actually put them on the porch to take to the rubbish. Then I had second thoughts. I could make something from them!
So I made another dog. He’s made of a cardboard frame with all kinds of cables and a few legos.

Then there’s Toy Terrier.

He’s made of toys and a bit of wire on a cardboard frame. A whole lot of small toys and toy parts a friend collected from her daughter’s bedroom floor. She was going to throw them away but of course, I could do something with them!

Lastly there’s Bubble and Squeak (the name kinda says it all). He’s a mix and match of all the materials I used on the other three dogs. Befitting a junkyard dog.
He’s made of a wire frame, a hollow bowl shape which holds all kinds of thing… toys, a broken mobile phone, chargers, old ink cartridges, electric plugs. His tail is made of cables and an old metal spring. His legs are all hollow wire frames, but front legs end in felted dog hair paws. His head is full of felted poodle hair and dryer lint, which flows down to cover half his back.
These guys will be in the Long Gallery in the Salamanca Art Centre till June 4th. I already know Tiny Terrier won’t be coming home and I must admit I felt a bit sad saying goodbye to him. I believe Toy Terrier is also going to a new home. 
Seriously, I don’t have space to keep everything I create, but sometimes its hard to say goodbye!
z

barbed wire hearts

Its been a long time since I shared any creative projects.
I’ve been busy OK?
Anyway, here are a few (bad) pics I took of some barbed wire hearts I made not too long ago.
I found some barbed wire at one of the tip shops and collected it to make some hearts. Once the basic heart shapes were made (thanks Wayne, you’re a wire genius and not afraid of barbs), I used finer wire to decorate the hearts.
First I made a spider web. I used some craft glue blobs to create a dew-drop look on the web.

Another is a bit more random in curls and webs.

Last is an extra curly one with pink wire highlights.

One of these days I’ll get creative again. Meanwhile I’ll be better off diverting my creative energy to clean out the guest room. And the office. And paint the railing on the porch.

Strangely enough I’m actually looking forward to actually doing all that. I just can’t seem to find the time!

z

the tshirts which almost ended us

I forgot to mention another thing I did do over the last month or so while I’ve been feeling unproductive…

I did the T-shirts for the work camp.

I’ll go to my grave insisting that Wayne asked me if I wanted to design the T-shirts.

He’ll insist to his grave that he asked me to make the T-shirts.

I would never have agreed to hand draw 38 T-shirts! Even if I had agreed to hand-draw 38 images there’s no way on earth I’d have agreed to hand write anything. My hand-lettering sucks.

Big time.

That’s why I use a computer!

The idea was that there’d be 6 teams (which soon became 7), each team would have a different colour T and a different native animal as their name. The animals had already been chosen. I designed 7 different logos for the teams. (Excuse the pics, the colours are all off.)

The camp staff needed their own Ts representing all the teams. That was another 5 T-shirts. (This is supposed to be a white T!)

Anyway, the fronts were done easily enough. Despite a lot of hard work and a lot of swearing. I suggested we use iron-on transfers for the backs since there was no way I’d get the type done otherwise.

Took me 3 solid days of drawing and ironing but the Ts came out great.

I did mess up one… or three… Ok, only one drawing was really stuffed up (though a few of the goannas looked like they’d been run over by a truck) cause I started really big and found that there was no way I could make the images that large and hope to use the fabric pens to do it.

I stuffed up a couple of the iron-ons as well. Some didn’t peel off properly cause the iron wasn’t hot enough, others got cooked a bit cause the iron was too hot.

Ugh.

Apparently the T-shirts were a hit on the camp.

z

fancy bleach jeans

In between posts about kitchens and navel gazing, I thought I’d continue to post the odd crafty DIY project.

I have this old pair of jeans that I wear when I’m having a bloated tummy day. They aren’t ‘good’ jeans, just a very cheap pair I picked up a few years ago. Strangely enough, they’ve outlived my ‘good’ jeans.

Anyway, they had a light spot on one leg where I’d probably splashed a bit of bleach somehow. Like when I decided stuff the natural shower cleaners, I’m going with the big guns.

Since I’m not ready to totally throw them out, I figured I’d use them to experiment with.

I got out a small watercolour paintbrush, a bit of bleach and started painting.

I did it in two stages as I was winging it. Typical Zefi. I decide to do something then just go off and do it without real preparation or planning.

The fabric absorbed the bleach really quickly so I had to keep charging up the brush, then it would  ‘leach’ into the fabric and spread. Thus the variations in line thickness.

It turned out ok though.

I’d wear them in public.

z