when the cats away

As usual, I had big plans for this weekend. 
Its Grand Final weekend so Wayne has gone to his friend’s house to watch the game and do the male bonding thing.
It was my big chance to do something I’ve been thinking of doing for a while now. We have (had!) a big cupboard in the corner of the living room which I used as my linen cupboard.
In the living room.
Who thought that would be a good place for a linen cupboard?
To make matters worse, it was brown, varnished MDF. Not exactly pretty enough to make me want to keep it!
A few weeks ago when I opened the door to take out clean sheets, the front piece of cornice fell off and broke in half. It was like a sign – the cupboard had to go!
So, with Wayne and his rolling eyes away for the weekend I thought I’d tackle it.
I didn’t get any before photos cause I didn’t think of it, but I started last night (Friday to those of us in the Southern hemisphere).
I started by pulling the doors off the cupboard (man those suckers are heavy!), then removing the last strip of cornice still clinging on. I was able to get the cornice off without breaking it, and the doors off without crushing any toes.
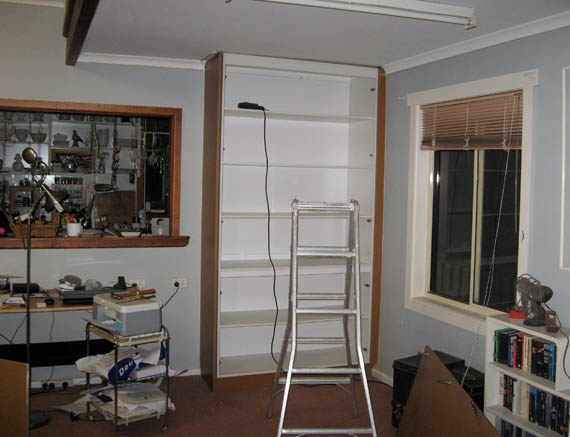
I removed all the screws from the inside of the cupboard which fixed it to the bottom frame, the wall and the outer side, totally planning to dismantle it and just move it out. I discovered that the cupboard itself was one complete piece, with a ‘veneer’ of MDF on the side which matched the doors, a frame which it sat on, and a bit of a strip where it met the wall.
The ‘veneer’ side was stuck to the wall with silicone gap filler. I had to get rid of that, then use a hammer to loosen it, again managing to get it off without crushing any toes.
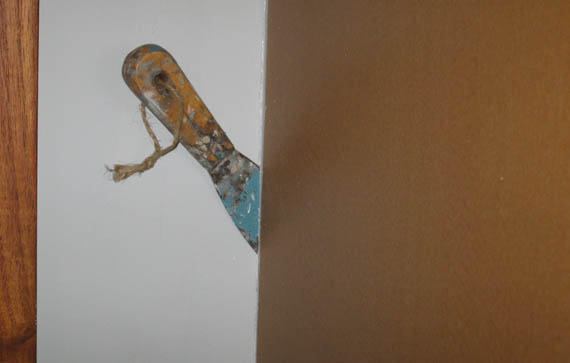
 I got the whole cupboard off the wall with immense difficulty. Not only was it heavy, it was also very tight. I had to inch it forward on the bottom frame, then try to work it off and onto the ground without totally damaging the ceiling. You can see the scrape marks where I didn’t quite succeed.
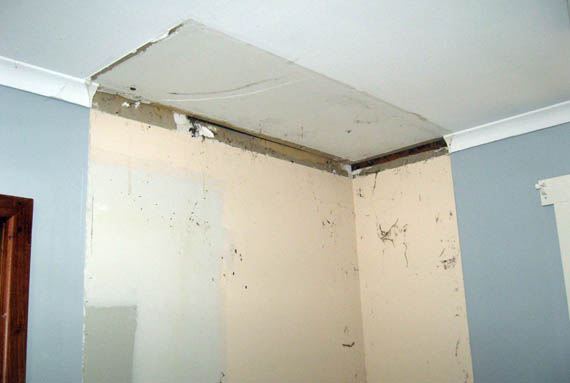
What I was left with was an expanse of unpainted wall and ceiling, with plaster bits stuck where the cornice used to be, and gaps that would need sealing up. And mouse droppings. Lots of mouse droppings.
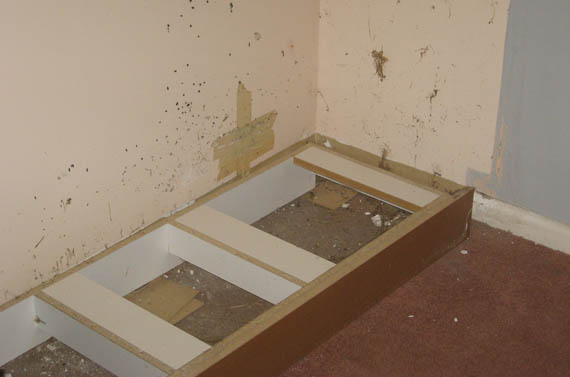
This is the frame the cupboard sat on. No carpet underneath of course. And a hole in the wall behind the packing tape.
About halfway through the removal progress I began to have second thoughts. I wondered if I could/should leave the cupboard there, open it up to shelves maybe. It didnt look too bad all white and much brighter than the brown it was with the doors. But I decided to go ahead and remove it, however instead of pulling it apart, I’d keep it intact and move it to the tiny back entry as my pantry.
So I had to put half the screws back in.
My plan is to put my corner office desk in that corner so Wayne has a much bigger space to work. He never used the office so I’ve claimed it as my space and he has a desk in the living room. For now, I’ll put in my desk and later I hope to make him a much nicer desk, something with character.
Anyway, once I got the cupboard off the frame I had to figure out how to get it out of there. The ceiling in that part of the living room is really low.
Actually, we have 3 ceiling heights in the living room. Originally it was 2 separate rooms, with a later extension. Why they didn’t redo the ceilings to match I have no idea. But there you have it. A low ceiling plus a lower beam meant I couldn’t get the cupboard out unless I lay it down on its back, then onto its side to push it to the entry.
Good plan.
I started to lie it down when it broke in half, almost crushing me underneath it.
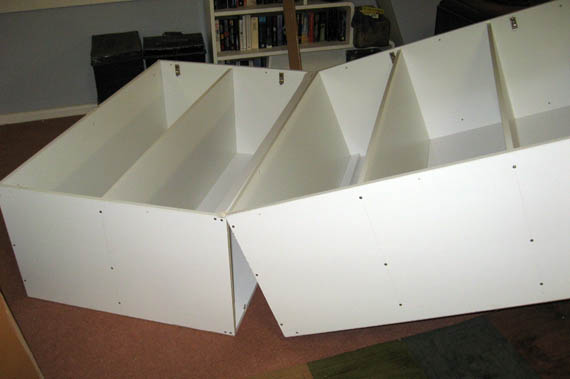
Ok, it didn’t BREAK in half. It was 2 pieces, joined together. It just came apart at the weakest spot.
On the bright side, it was now 2 pieces making it easier to move!
I lay each piece on its side, then slowly pushed them from the living room, across the tiny hall, around the corner in the kitchen and into the tiny dark entry.
I put the frame down first, then wriggled the biggest piece of the cupboard onto it. Then, using a ladder and my body as a counterweight, I managed to slide the top piece up and sit it on top. Again, using a push, slide and counterbalance technique, I got the smaller piece into place.
So high school physics wasn’t a total waste of time!
I then screwed the bits together and to the bottom frame. I even managed to put a few screws into the wall behind to keep it stable.
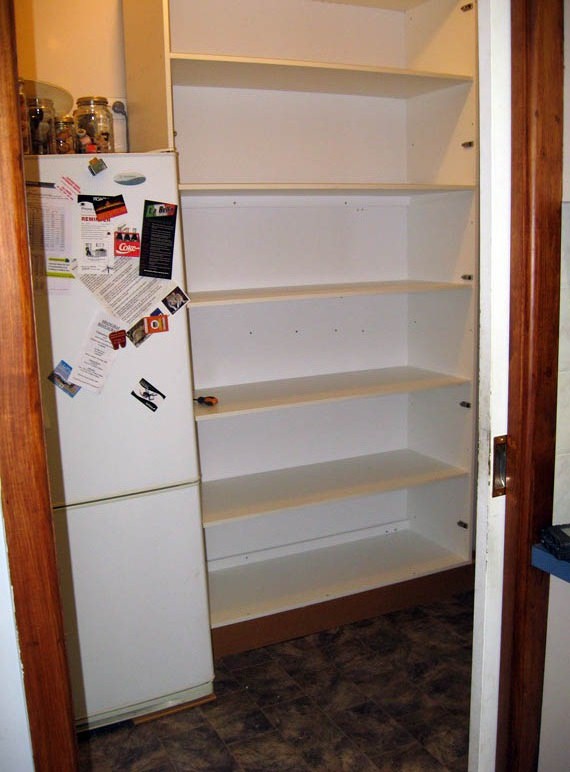
It makes the fridge look tiny now, doesn’t it? ONE DAY I plan to knock out half the wall from that tiny entry into the kitchen, making the kitchen an L shape and making that pantry area part of the kitchen. It’ll remove the rabbit warren feel of the back of the house and bring the fridge into the kitchen.
Most country houses here in Tasmania use the back door as the front door. Our front door is on the other side of the house. Sort of silly really, but thats how it is. To enter our house you have to come into the mudroom (which we added on), go through the tiny dark entry/pantry, then into the kitchen.
For now,  I’ve just made the tiny entry into a real pantry.
The house is a mess, stuff piled everywhere. I grabbed a few things I’d taken out of the old wardrobe I was using as a pantry and put them on the shelves. I’m planning to leave the shelves open, not adding doors. I’ll see if Wayne can remove the hardware. My arm is already killing me and I dont really want to be trying to remove them using a screwdriver.
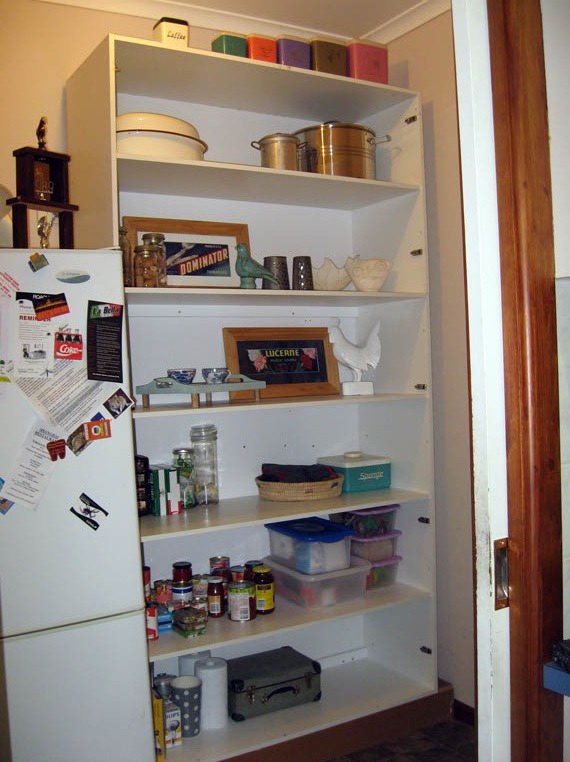
 
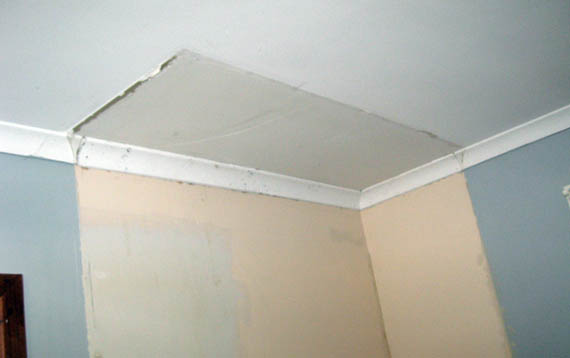
 But I wasn’t done. I couldn’t leave the holes in the ceiling or the floor. Firstly its cold today and there was a lot of cold air coming in. Secondly, it was like a mouse superhighway judging by the droppings.
I’ve never done anything like this before and its a really bad job. However, it doesn’t really matter. One of these days, when we win lotto, I’ll get the whole living room ceiling redone. Till then, I just needed to get the holes patched up.
I used the cornice which had come off (or fallen off). I only had to trim down one piece and it turns out, cornice is easy to cut. The problem was with putting it up. I know you’re not supposed to use nails, but seriously, after trying to get it up using liquid nails* and failing, I decided what the hell. I can paint over nails.
*I broke my caulking gun. Then I couldn’t find the new one I’d gotten as a spare. I had to go borrow one from Wayne’s garage!
I couldn’t get the plaster blobs off the ceiling. They’ll need sanding off. Ugh.
I got lucky with the skirting board. I was going to use anything at all, just to cover the holes, but I found some matching stuff in the casita. I even managed to cut it to fit into the corner!
After everything was glued and nailed in place, I used gap filler to fill in any gaps. I’ve left it all to dry overnight and tomorrow I’ll sand back and re-fill any spots that need re-filling. Like the hole I patched.
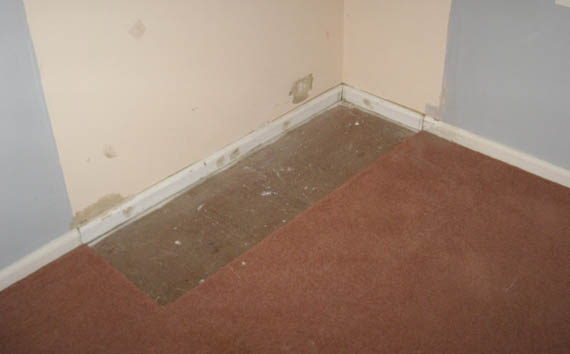
Now, I know its not the prettiest job I’ve ever done. Its messy and ugly. There are plaster globs on the ceiling, missing carpet in the corner, the skirting is uneven where it goes from carpet to timber. But I don’t mind. It will do for now. I can’t paint the walls cause I don’t have paint for it, besides I want to repaint the entire living room. And I plan to remove the carpet when I can too.
So, I’m tired. Its been a huge day.
Tomorrow is another day with more work!
z
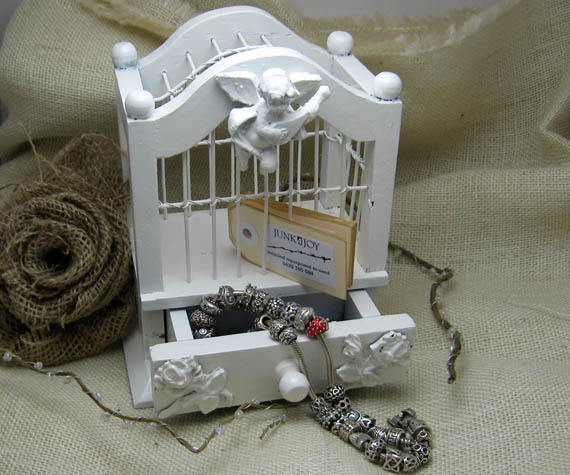
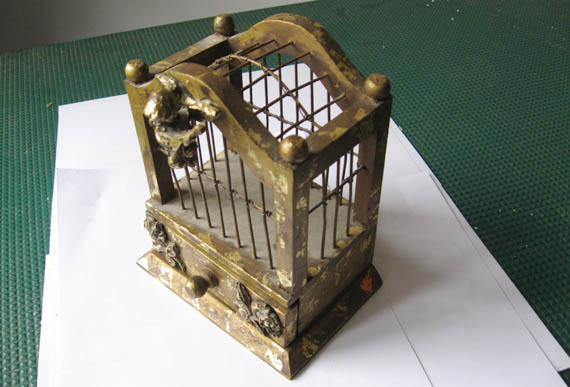
cupid cage?

What on earth would you do with a small drawer thingy with a cage that you can’t even open?
I mean, really.
I saw this thing in a 2nd hand shop.
It was ugly.ย 
Painted gold and aged in a really tasteless mass produced authentic made in china antique kind of way.
Yet I bought it anyway. Says a lot about me, doesn’t it?
To be fair, it was part of a ‘how much would you take for the lot’ kind of deal.ย 
There was something about it. Something I couldn’t put my finger on… maybe the dust, or the faux finish…
Anyway, got it home, brushed it off, gave it a wash, then proved the well known saying in DIY-blogland: everything looks better painted white.
So, it does look better. Doesn’t it?ย 
Pretty.
Still quite as useless though.ย 
Unless you only have 2 rings you need to store.
Which I don’t.
…. I have no idea what I’ll use it for… then again, give it a few months of sitting on a shelf and I’ll find something.
z
Shared at

quick & easy photo display

Here’s a quick and easy little project. It only took 4 months to finish.
3 months, 30 days, 23 hours and 40 minutes were spent in the planning stage. The most important stage, as you know.
20 minutes were spent putting it together.
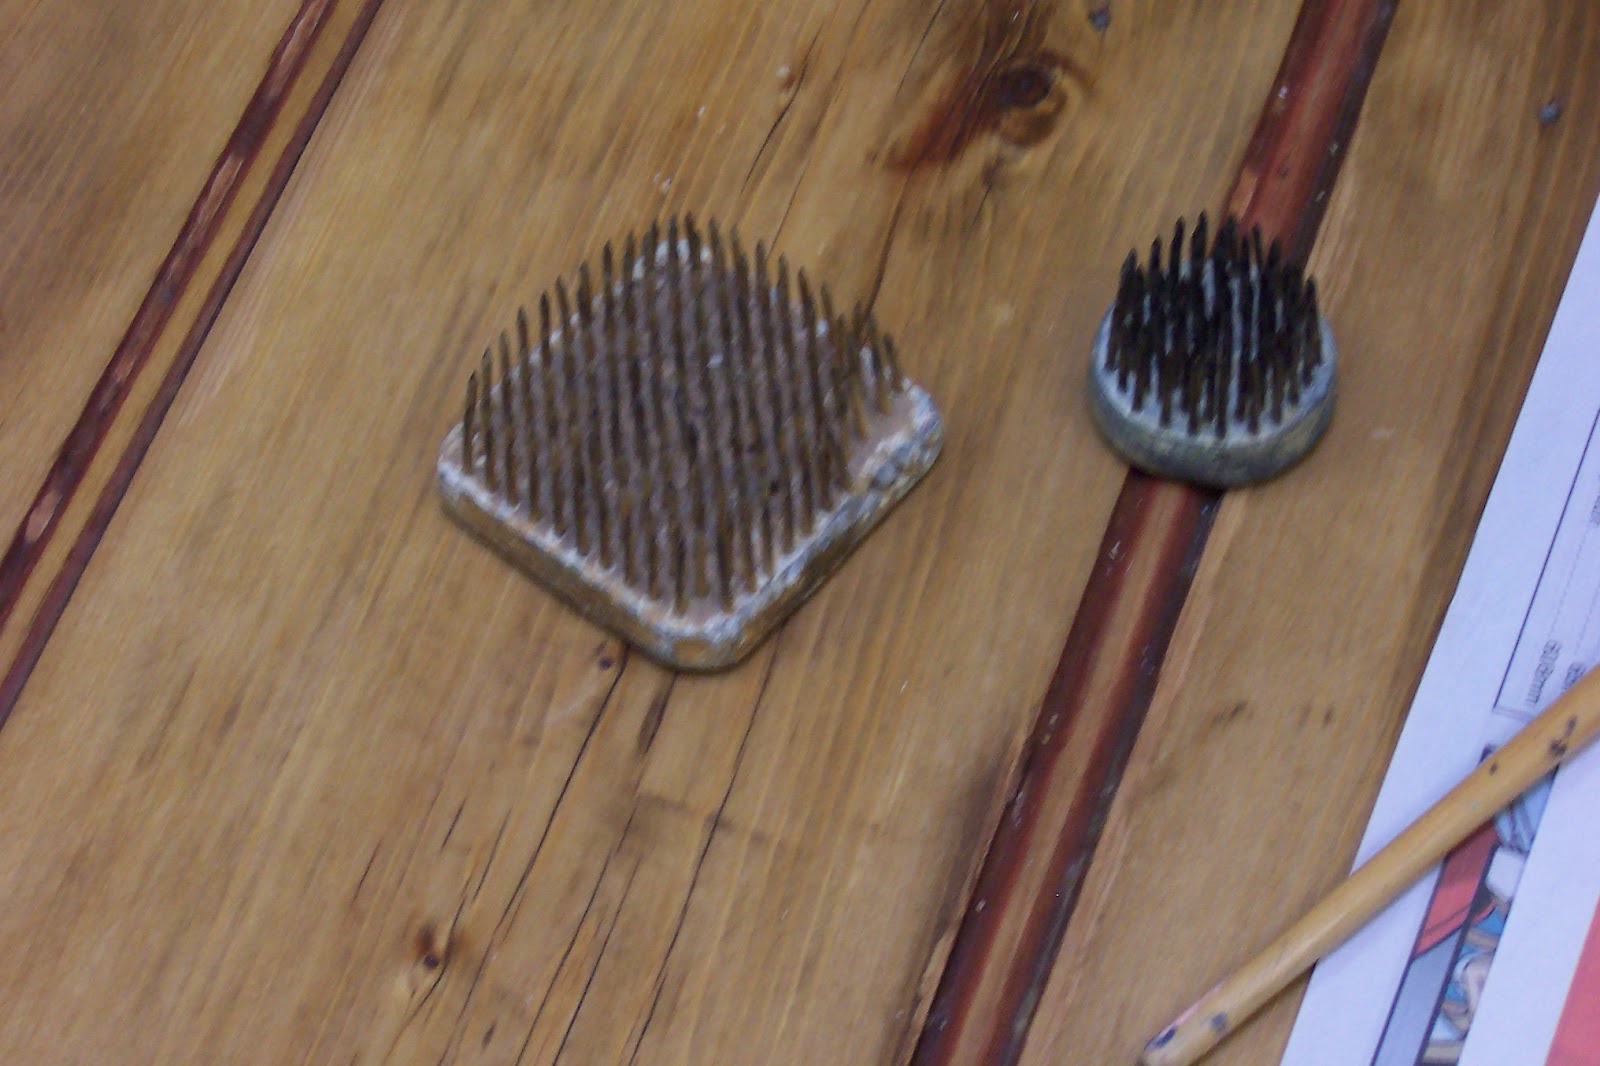
First step, spot these cute little flower frogs in an op shop.
(I was told that’s what they’re called. I had no idea what they were, much less what they were called, when I saw them. I just liked the shape. And the rust didn’t hurt either.)
ย 
Next step, pay your $2 and take them home where you put them on a shelf and let them gather dust while you consider options.
Then, when you’ve got a spare 20 minutes, search your computer for photos you like. Resize them, adjust the saturation in Photoshop and add frames to ‘age’ them. Put new ink cartridges in the printer, print them out, laminate them and trim them down.
ย 
Once that’s done, stick the photos in the frogs and photograph.
See? Easy.
Have I ever lied to you?
z
Shared at

DIY Show Off

upcycled pringles container

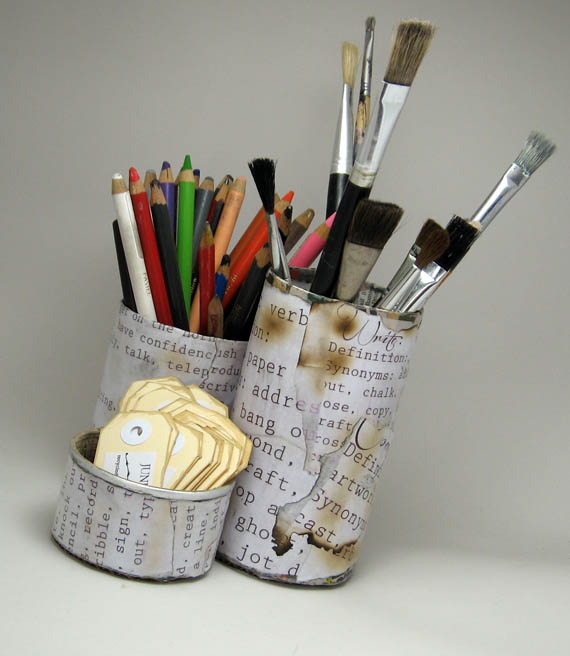
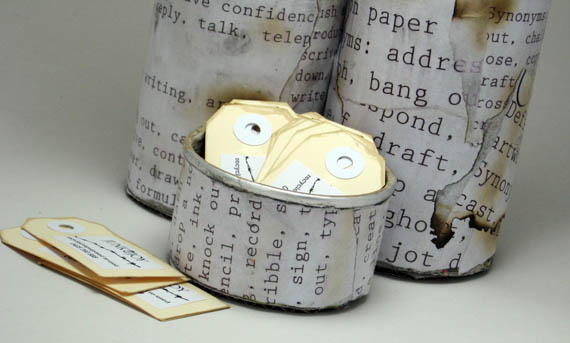
The other night my hands got bored as I watched TV so I got this old pringles tin and made it unrecognisable.

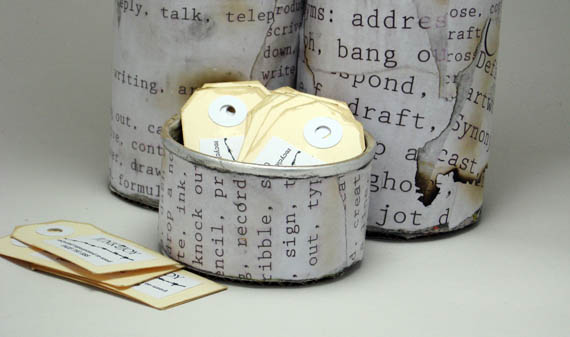
First I cut it into 3 uneven slices. Put bottoms on the ones that ended up bottomless. I did a couple of layers of papier mache to strengthen them.

I wanted it to say something, so I found synonyms for the word ‘write’ and printed them out in different sizes.

By way of aging the paper, I used a candle and slightly browned it.

Note: Browning paper is a tricky business… there’s a fine line between browning and flaming.

After dancing about the kitchen with a piece of paper rapidly turning to ash in my hands, I kinda liked the burned edges.

Note (again): After a certain point, blowing on a flame doesn’t put it out. It encourages it.

z


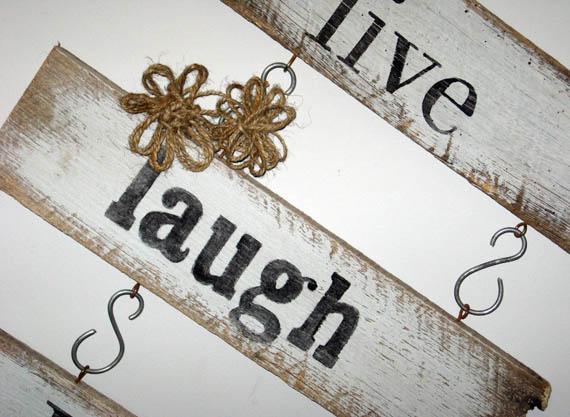
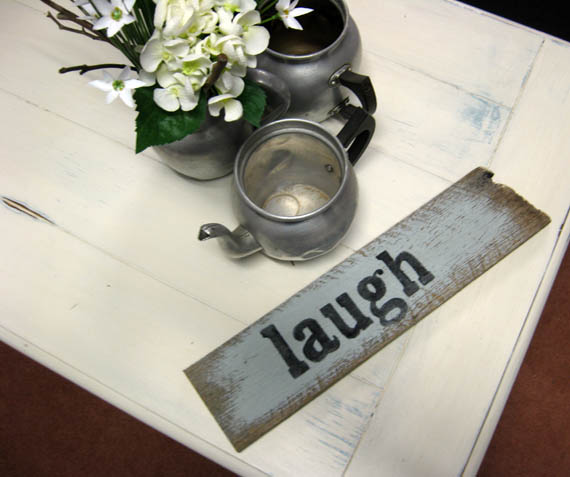
live laugh love in 8 easy steps


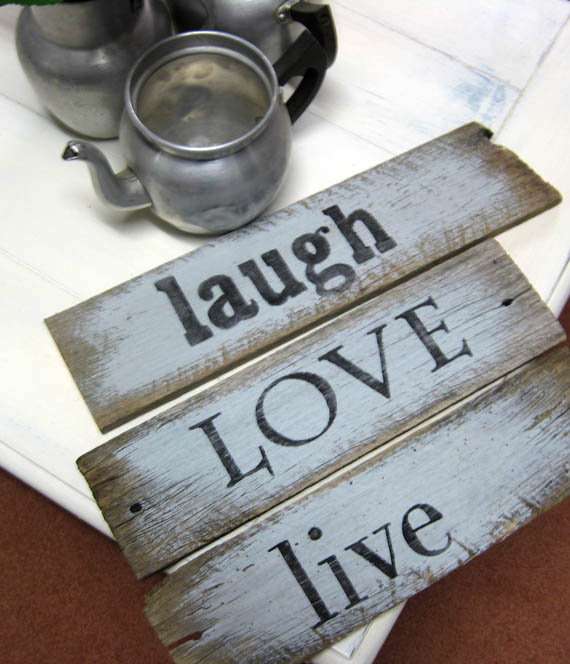
I really love signs on timber. After reading links on Pinterest on how to transfer letters or images to timber, and experimenting with a few suggested methods, this is what I found:

The best and easiest way to make signs is to use a method which I learned in grade school.

Tracing!

So, here’s the Zefi sign-making method.

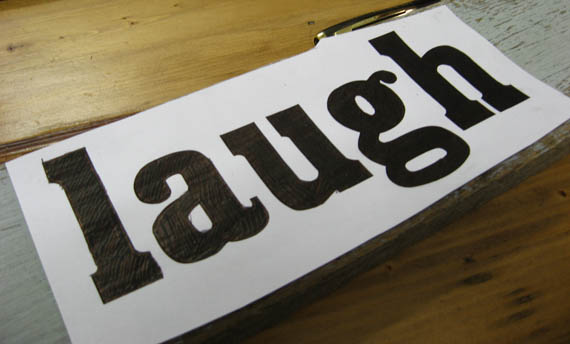
1. Print out the words you want on plain printer paper. I used different fonts for each word. (Ok, this bit I didn’t do in grade school!)

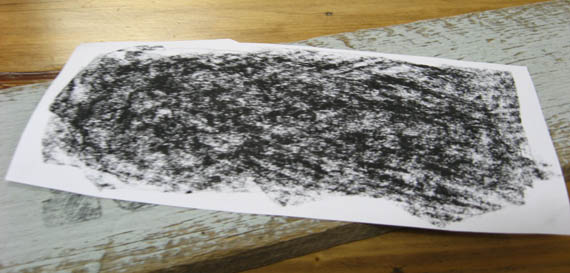
2. Then, using charcoal, cover the entire back of the printed image. If you’re transferring onto a dark background you can use chalk or light coloured soft pastels.

ย 

ย 3. Lay the paper onto the timber, charcoal side down. At this point its handy if you made sure the words/image are the right size for the timber you’re using.

I used weathered timber I’d prepared earlier, using a dry brush technique to create an aged sign look.

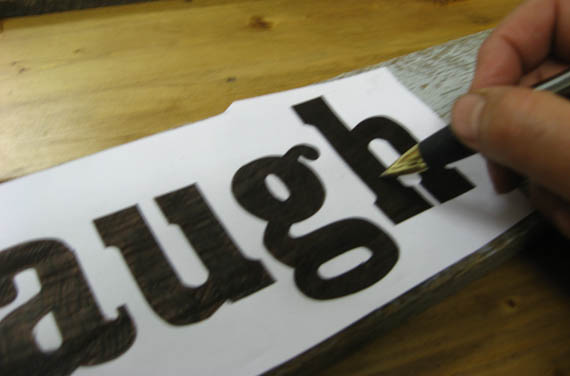
4. Using a pen, ‘colour in’ the letters, pressing the charcoal onto the timber surface. If you want to make sure the image doesn’t move, use some masking tape to tape down both paper and timber.

I’m extremely lazy confident so I didn’t tape it down.

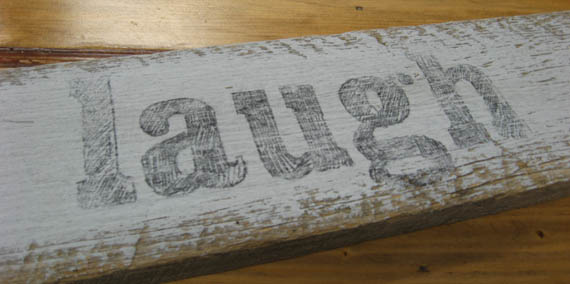
5. Remove masking tape (if you used it), lift up paper, and voila! This is what you have if you’ve done it right.

If, unlike me, you’re not ‘confident’ and taped everything down, you can check your transferred image before you commit yourself by removing the paper.

6. Using a fine brush and paint, you then fill in the letters. I used watered down artists acrylic paint cause I wanted a softer look. By watering the paint down I achieved an uneven saturation of colour which is what I wanted.

If you plan to sand and distress the timber sign after you paint the letters, you can use undiluted paint at this step.

7. When I had the pieces all painted, I added screw eyes and asked Wayne to make some S hooks to joining them together.

That step took 5 weeks.

8. Technically, the sign is finished at step 7, but I added some jute flowers to my sign cause I like adding these little touches.


So there you have it. Something I learned in grade school has come in real handy.

I’m still waiting to see if algebra will come in handy.

Find this on

DIY Show Off

z

Shared at:

Knick of Time

the woodshed gets a door

 
Hey! I’m back to typing with all fingers! Gently, but all fingers nonetheless!
So here, I am with the promised photos of the woodshed with its new door.
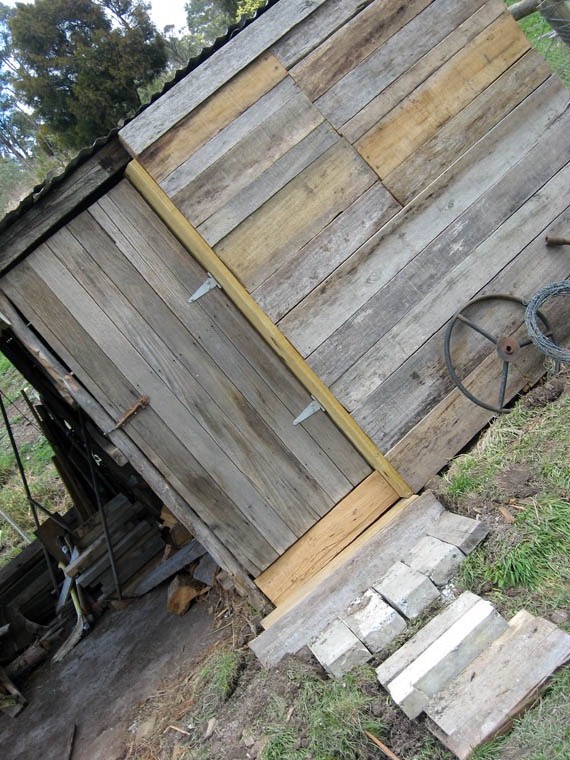
There’s a small drainage ditch in front of the woodshed, so Wayne made temporary steps up to the door as well! He’s a gem.
The door came from an old shed I pulled down at my house in Fentonbury. Its seen a few incarnations…
I used it as a divider in my bathroom in Fentonbury for a while…
I also used it as a ramp when I had puppies who needed a bit of help getting up and down steep stairs.
Now its back to being a shed door. Full circle.
In the spirit of using what we have, the hinges have come off a door somewhere, so has the lovely old rusty bolt. And being that Wayne is clever with wire, he made the bolt work with wire to latch it onto.
Looks great doesn’t it? Even Wayne thinks so. This morning he said ‘I hate to admit it, but the woodshed does look better.’
Score 1 for Zefi.
Though he did roll his eyes when he saw me hang the barbed wire on the door…
You may have noticed the roll of barbed wire lying against the shed along with an old tractor steering wheel and a huge wheel brace. After taking the photos I thought the barbed wire would make a great wreath for the door (hence the top photo).
I’ve got plans for that wreath.
Since when do I not have plans for everything?
Stay tuned.
z

the woodshed gets a makeover

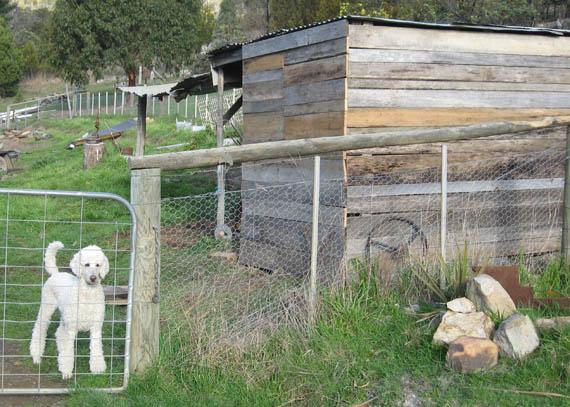
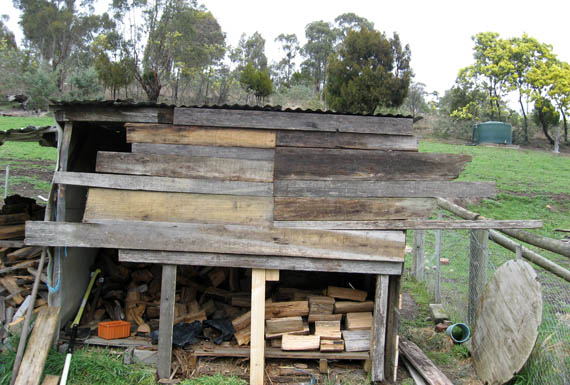
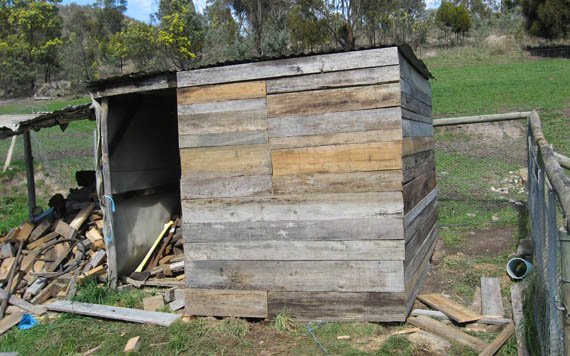
Ever since we moved into Wind Dancer Farm, I’ve itched to do something about the eyesore which was our woodshed.

Note the lovely heavy duty shadecloth gift wrapping… Very pretty. Not.

Ok. Its just a woodshed.

But I had a dream.

I dreamed of a pretty woodshed.

Something rustic, made from old weathered timber, with signs hanging on it and a yellow climbing rose growing up it.

Ok. The rose will have to wait. That will take a few years to grow up up the woodshed.

If indeed climbing roses are frost and strong wind tolerant.

Anyway, back to the point…

I’ve been itching to give the shed a makeover. It was clad in that dreary shadecloth. And we had piles of old timber lying in the back paddock, rotting away.

Wayne pointed out that we had to use that timber soon or it would be beyond using. At which point I jumped at the chance to bring up my plans to redo the woodshed. Again.

Note: Previously, every time I brought up the ‘woodshed makeover’ plan I got eye rolling.

Bring up using old timber which needs to be used or burned to clean up the paddock, and suddenly Wayne is making plans… Turns out I was just going about it the wrong way all this time!

Over our break (this week we’re on holidays from work) we were going to make over the woodshed!

Yeah!

It seemed like an easy plan.

It would have been if we agreed on the basics of how to go about doing it.

My idea: rip off the shadecloth (so we can see what’s under it), put in extra support bits to nail the timber cladding to, and go from there.

His idea: lay the timber straight over the top of the shadecloth cause he didn’t want to go to the trouble of removing it and cause it would involve moving firewood.

Of course I won.

Mainly cause I said I’d do the removing on my own, as well as moving any firewood needed to do the job.

We started on Sunday morning. Or should I say, I started on Sunday morning.

I spent what seemed like 52 hours (and was probably only 2) removing the shadecloth. I still have scratches, scrapes and a slice just above one of my nails thanks to the shadecloth…**

The heavy duty,  metal infused shadecloth which medieval armour was make of.

Then I put on gloves.

By the end I could only reach 3 sides of the shed as there was firewood piled high against the 3rd side.

In the afternoon we drove the ute out to the paddock and loaded it up with timber. Brought it close the woodshed. Brought out the power tools and got to work.

We did a bit of arguing about what would go where and in the end we compromised.

i.e. I won.

We discovered my circular saw is stuffed. It works fine for a while, then jams and kicks back. No idea what’s going on. We decided it wasn’t worth the risk, so brought out the drop saw. Sensible.

We worked till late on Sunday afternoon and got the supports in and finished one side.

We had sore muscles where we didn’t know we had muscles afterwards. Ouch.

Monday, after a few errands in New Norfolk, we got back to work. This time Wayne cut the timber to size in the paddock using his chainsaw.

Easier.

Sometimes he has good ideas.

It was quick and easy. All we needed to do was nail up the boards. That meant me carrying them over and Wayne nailing them on.

We got one more side finished and the 3rd wall almost finished till the rain chased us indoors.

Of course, it wasn’t without some stuff-ups. This wall below for instance. This was the result of the following conversation:

“Should I get the level?”

“No. We don’t need a level.”

“Yeah, you’re right. Its just s shed. I want it rustic.”

OOPS.

Tuesday we both looked at it and agreed. We had to rip those boards off and redo that section.

After we fixed the crooked bits, I tackled the shadecloth again. Wayne was really worried that the wood would get wet if it rained, cause the slats don’t fit perfectly.

Hmph.

So, in order to not hear “I told you so” next winter, I said I’d take care of it. I measured and cut the shadecloth, then clambered over the ever shifting pile of wood, legs spread-eagled, slipping and sliding, to nail it all up.

(Note: nail tacks in the back pocket isn’t a good idea if you end up on your butt.)

Then came the fun part. Moving the pile of wood from the outside of the shed to the inside. See it there? under the sagging roofline?

 I cut a hole in the remaining shadecloth and picked up and tossed every single piece of wood into the shed.

My back!

But in the end I had a clean and tidy outside, under cover (more or less) area.

The plan is this: we’ll need to redo the roof on that outside area. Then new wood that needs chopping will be staked there. Wayne does the chopping in our driveway right now, but with this area cleaned out now, he can chop on the grassy bit to the left of the shed where there’s room to swing an axe. He wanted to keep the door (I was all for closing in that whole side), so he’ll be putting an old shed door I brought from my old home on there tomorrow. The side that opens to the undercover area will get made into a large door so chopped wood can get tossed in.

All in all, its going well. I plan to do some more work to the exterior, make a sign for it… stay tuned.

Unfortunately,  I’ve managed to mangle my middle and ring fingers on my left hand. Typing is Really hard with one hand and 1 finger… Its like type, type, backspace, backspace…

How? Well, we took a load of trash to the tip this morning and somehow I managed to jam my fingers in the ute door. YOUCH!

There I was, fingers jammed, swearing up a storm (a couple of men nearby blushed) and trying to pull them free. Took me a few seconds to realise I could open the door with my other hand. I swear, if I’d been in water, I’d have drowned.

**The shadecloth cut is now gone. Sliced off with a bit of my nail bed. Nice.

Nothing broken at least, I had an xray and had a tetanus shot (ouchies). I opted to get the shot in the same arm. Why spread the pain?

So here I am. feeling sorry for myself.

At least I can’t do dishes!

z

rusty coathanger heart

While digging around for scrap barnwood in the pile in the back paddock, I found 3 rusty old coat hangers.
I loved them so much I’ve planted a few new ones out there for next year.
ย I bent the coat hangers into hearts (cause what else would you do with them?) and hung them off the curtain rod in the living room for a while. Let them mature, you know…
I made my heart welcome wreath out of one of them.
Which left 2 hearts waiting for their purpose and forever home.
One of the hearts is a bit too rusty (and weak) to hang things from… that will go somewhere later, when I find the right spot for it.
This heart has become a suncatcher, with different coloured prisms and other misc objects for a bit of sparkle and shine.
Just whimsical enough I think.
z

dragonflies & crystal

ย I saw some wire and bead dragonflies on Pinterest a few weeks ago and since then I’ve gone dragonfly crazy. I’ve been making them at work for clients, and at home, well… just because I can.

There’s something so cute about them.

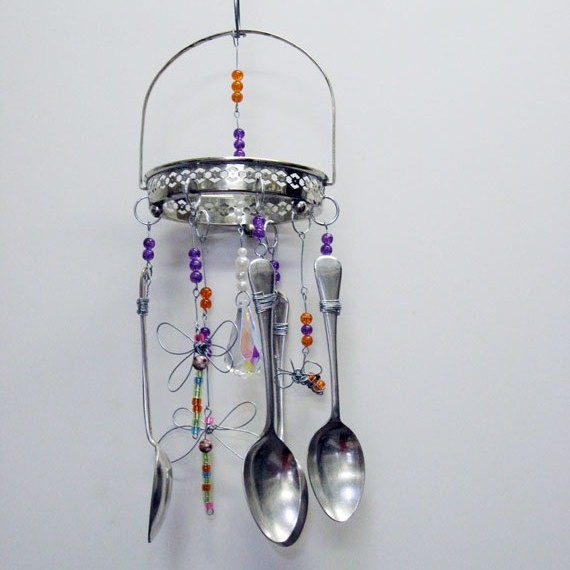
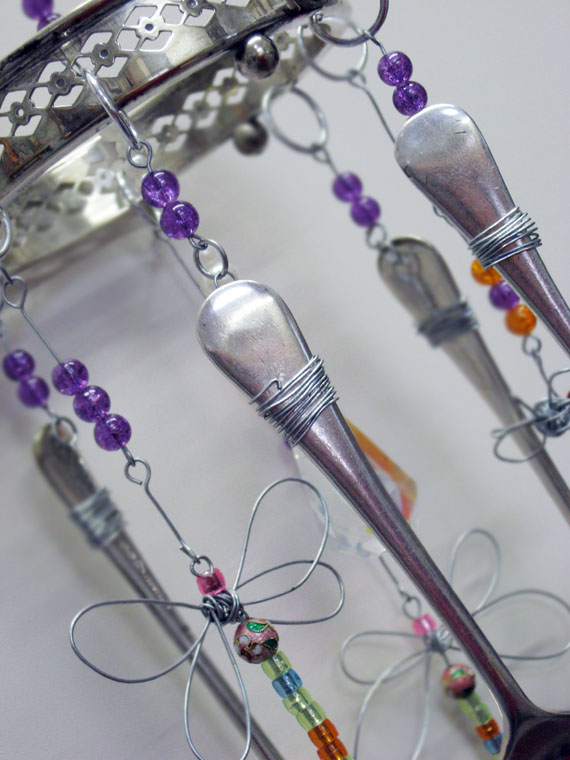
A few weeks ago I found this silver dish thingy at an op shop. I have no idea what the technical name might be, but originally this thing held a small glass or crystal bowl. Without the bowl, this poor little silver thingy just looked sad.

Till I added dangly things to it and made it into something special!

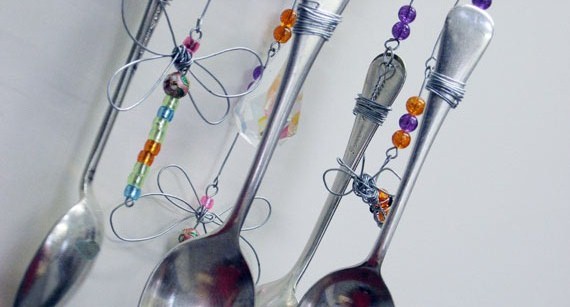
I used some more of the antique cutlery (I got a load of the stuff so it will feature in a few projects). They make a great musical sound when they clink together.

I added 2 dragonflies and a small bumble bee (you can see him peeking out between the spoon handles).

I used crackle glass beads and the large crystal in the middle for a bit of sparkle and light reflection.

So the sad little silver thingy is sad no more!

z

what to do with old horse shoes

Ok, so its not a problem most people have. But when you have horses (and have friends with horses) there’s no shortage of old, rusty, horse shoes.
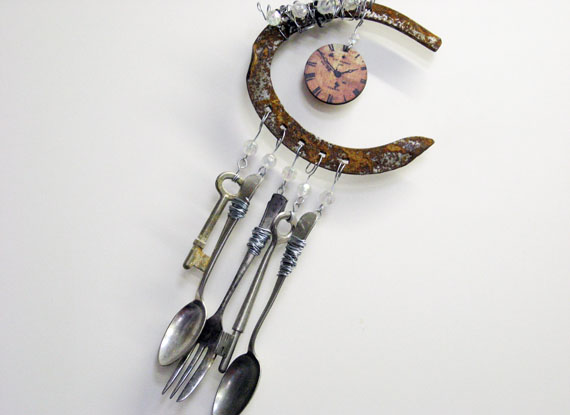
This small training shoe found its way into my ‘miscellaneous’ box and was just sitting there, staring at me, asking to be used for something.

Last week I went into the little local cafe where I’ve been placing items to sell and found that all my suncatchers, chimes, dangles had sold!ย 
I had to make more.
Since I make these things out of materials on hand, each one is different. I’ll post each of the last ones I made in separate posts to keep things simple.
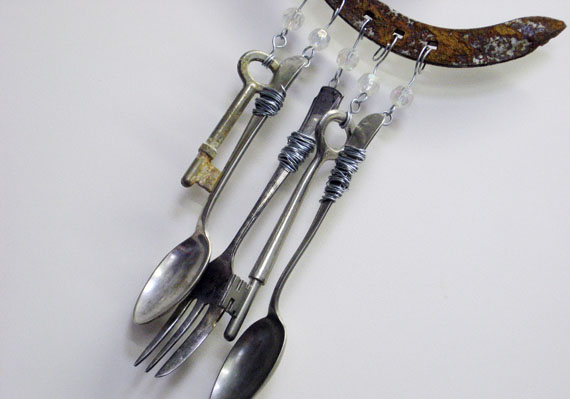
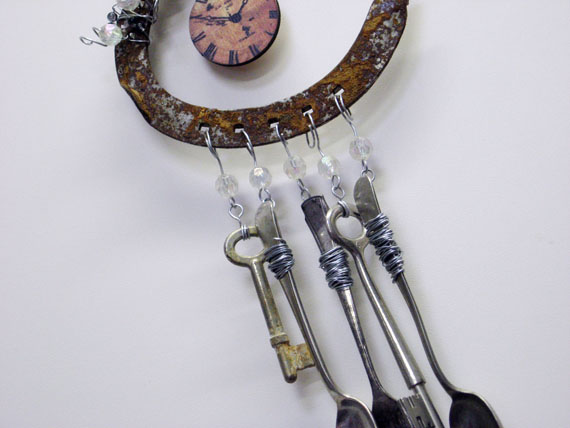
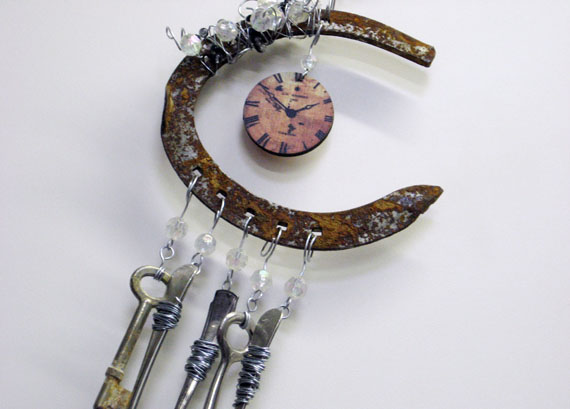
This particular one is made out of an old horse shoe (obviously), antique cutlery, old keys and aurora borealis beads. Plus an old clockface decoration. That was a last minute addition which just worked.
I just love the colours of rust on the horse shoe. I know where I can get a ton of these. Might need to find more things to make with them.
Suggestions welcome! ๐Ÿ™‚

z

Linking up to Homespun Happenings’ Rustic Restoration Weekend.
Homespun Happenings