my new farm gate

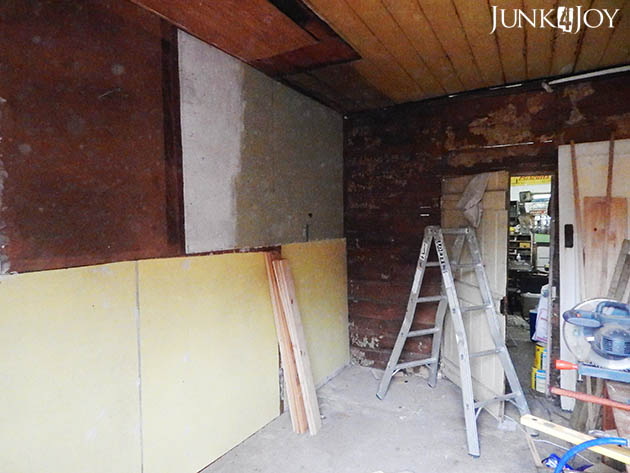
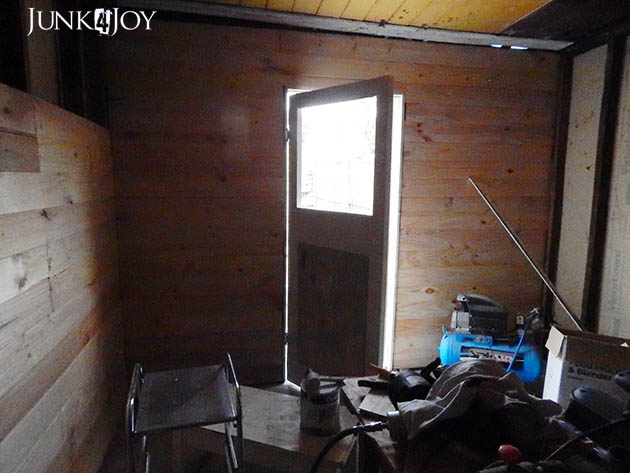
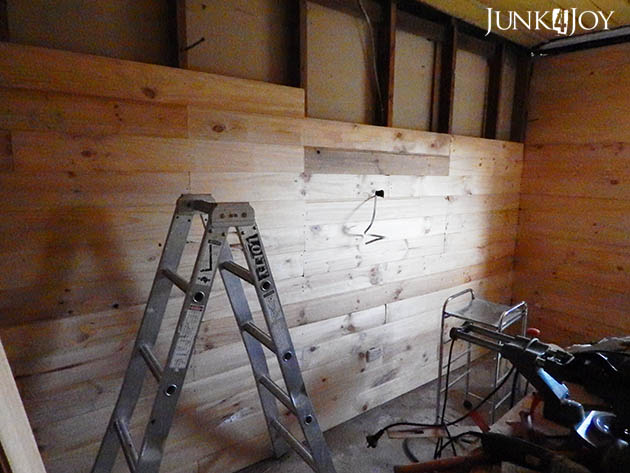
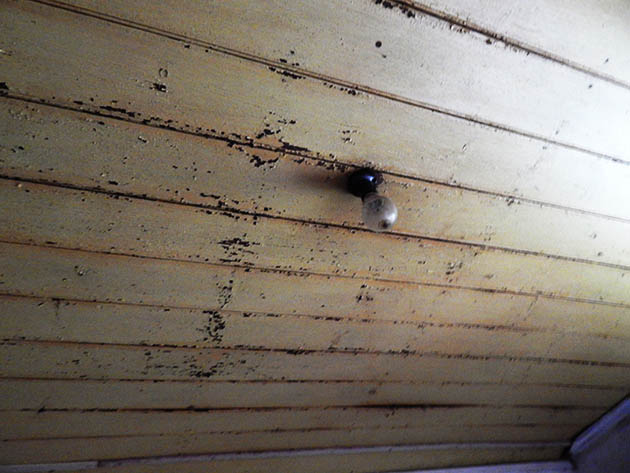
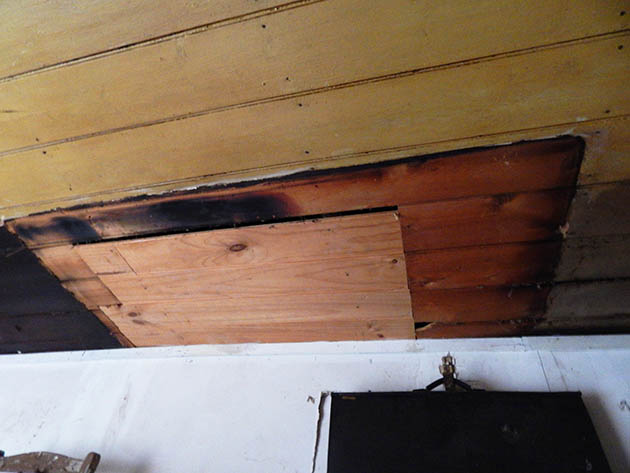
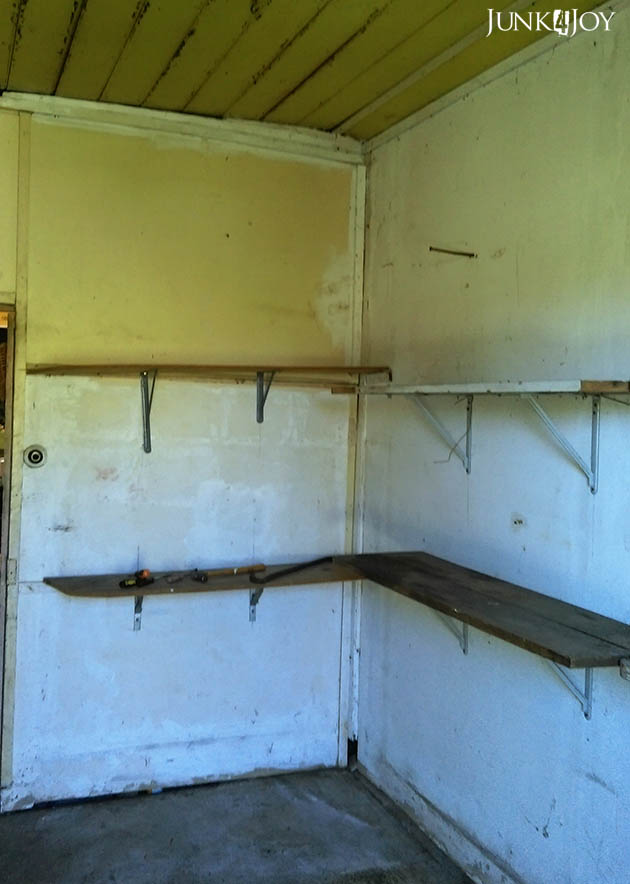
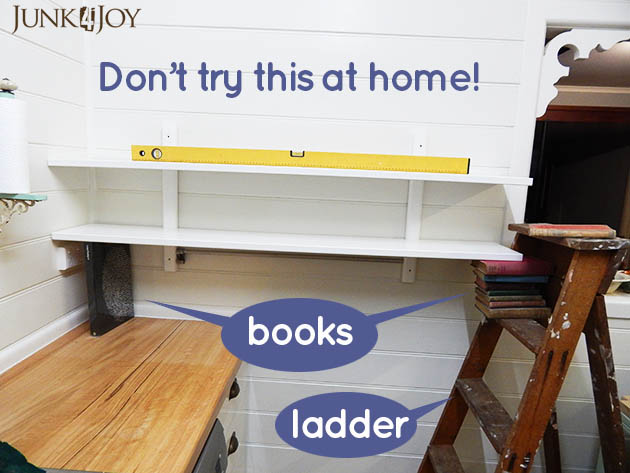
Progress on the new grooming room is slow. I had one day where things kinda just flowed and things got done. I was up on ladders, using my arms and head to hold up sheets of MDF to the ceiling and using the nail gun to secure them there.
Then I ran out of MDF.
Turns out I’d measured correctly but remembered wrong. I needed 6 sheets (of the biggest size I could handle on my own) but remembered to buy 4.
Live and learn my friends.
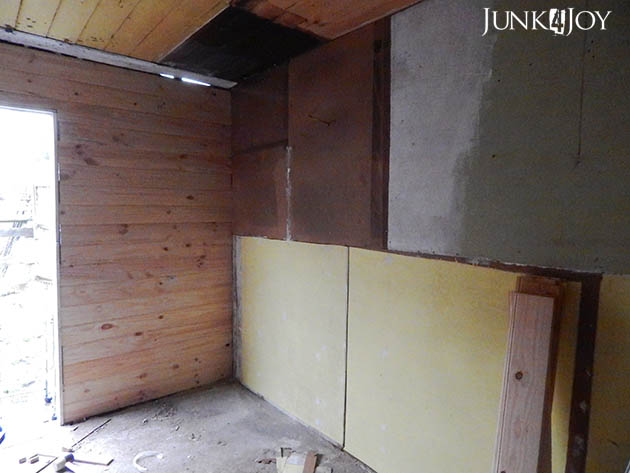
So, having NOT finished the ceiling I couldn’t very well finish everything else. I had one and a half walls I could put ‘skirting boards’ and ‘cornices’ on.
I placed those words in quotation marks cause I’m not using either cornice or skirting boards for the job. I got plain pine boards cause it was the cheapest way to go. The end result is the same: I’m covering gaps where walls meet ceiling or walls.
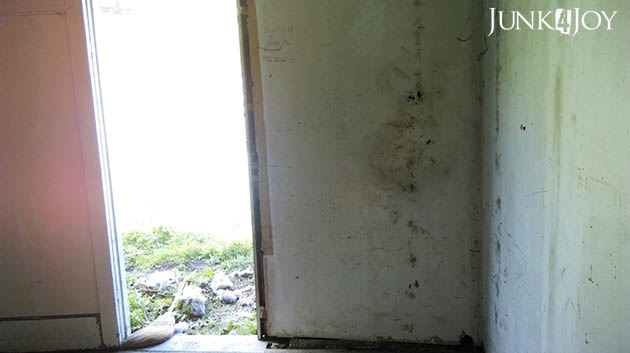
Having done the bits I could do without finishing the ceiling, I looked around at what I could do next…
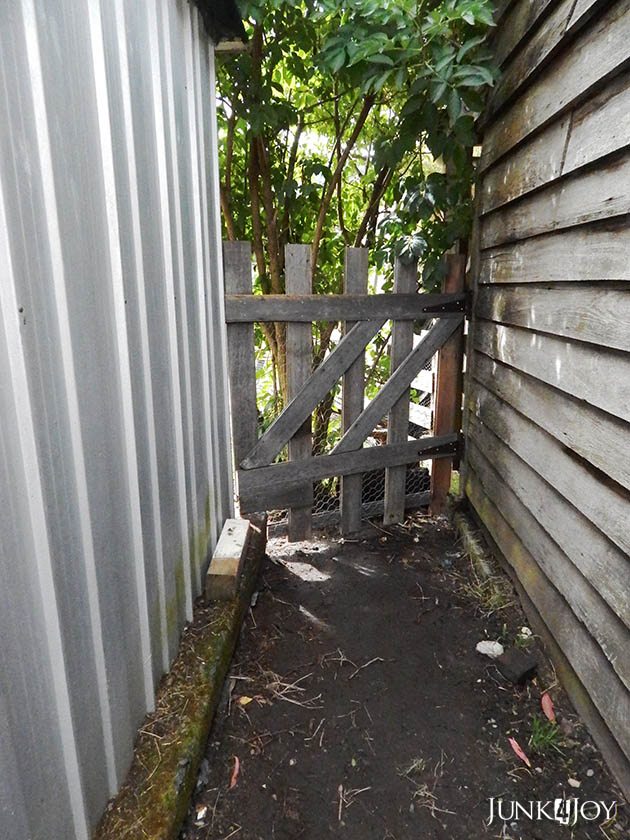
…and found the gate.
Ok. I didn’t find the gate. I found the gate was a job I could do which wasn’t affected by the unfinishedness of the ceiling.

I had planned to use pallet wood to make the gate, but I had 2 long pieces of old tassie oak flooring outside the grooming room, in the tiny yard, just waiting for a use. So I used them.
Firstly I had to measure the distance between the cement slabs the casita and the tiny shed (its an aviary) are sitting on, then the distance between the walls. I’d already attached an extra post to the one on the side of the casita which holds up the porch roof so I could swing the gate off it.
I cut my timber pieces the height I wanted – tall enough to stop a dog jumping over them. 
Then I did what any sane, mathematically challenged person would do: I marked the measurments out on the floor and lay the timber down, spacing the boards by eye and laying the cross pieces over the top. Good enough for me.
I joined all the boards together using screws then reinforced those with nails. 
I cut my Z pieces. I did two cause I couldn’t work out the angle to cut a single one on… I did say I was mathematically challenged! In order to save wastage I went with 45 degree angles and 2 Z pieces. It should work fine.
I hope.
Last I used some nice strong chicken wire over the back of the gate cause the gaps are big enough to allow dogs through. I had wanted a picket style gate with small gaps but I didn’t want to spend money on treated pine or fence pickets.
This is one heavy gate cause tassie oak is heavy stuff. I had to get some pretty strong hinges from Wayne’s collection of rusty items to hang them with.
I love my new rustic gate. It fits between the wall of the casita and the aviary and will stop dogs from escaping into the paddocks.

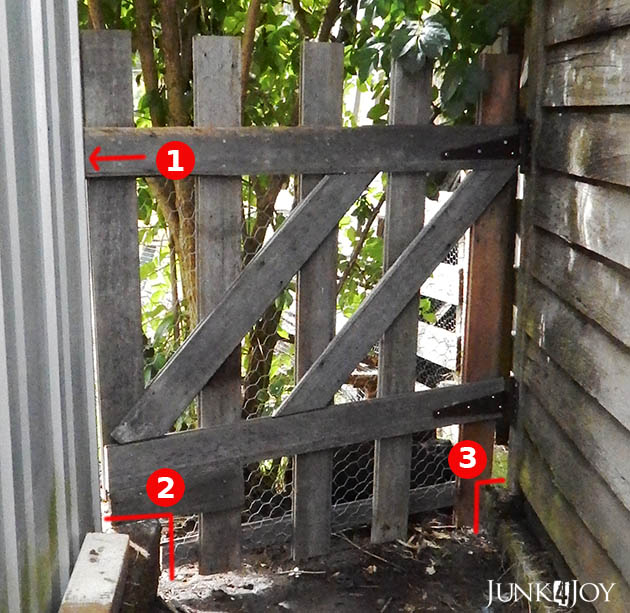
I’ll be putting a bolt onto the gate at #1, put a hole into the aviary wall for the bolt to slide into.

#2 shows where the end board is cut short to accommodate the height of the concrete slab. I found I had to reinforce that spot as the wire could have been bent by a particularly insistent dog bent on escape. (haha)

#3 is where a sliver of wood was removed to allow the gate to swing without hitting the concrete on the casita side.

All in all, a job well done.

I’ll finish this post with a gratuitous photo of a poodle: Romeo was overseeing my gate-building efforts. He approves.
z

update on the grooming room

Well the grooming room is still far from finished.
You can’t rush these things. It takes time to think, measure, plan, get your materials together, find the energy, the time. Have you ever noticed how much STUFF needs to be done when you plan to spend a day working on a project?
… Then one day the planets align and things start happening.
Yesterday was that day. 
I’d already drawn a ‘map’ of the last wall, drew in the posts and noggins (that’s the brace type of horizontal studs, yeah, I didn’t know that either), numbered and measured the drawers I’m going to use, and, using Illustrator, did a jigsaw puzzle to figure out how to fit it all together. The map helped me figure out where I needed noggins to secure the drawers to the wall.
I went down to the casita, turned on the air compressor and began putting noggins between the posts where the map told me to.
I then pulled out all the sheets of masonite I had stacked against the wall in the workshop area. I knew I had used sheets but had no idea how many and what sizes.
Turns out I had 1 large sheet of 6mm, 3 smaller sheets of 6mm and 3 medium sized sheets of 3mm.
Naturally I began with the largest sheet, starting in one top corner. I measured, cut out a nick to make it fit properly, trimmed it down so I could join the sheets on a post, then measured it again and cut it again as I got it wrong first time. Thankfully I cut it too long, not too short. Phew.

The biggest sheet at the top far end is painted green with a bit of white over one section. That obviously came off a wall somewhere. The darker, smaller pieces came off the floor when we ripped up the vinyl in the kitchen. I was sure I had more of that stuff, but I don’t. Must have thrown it out cause most sheets cracked when pulling them up.

Whatever.

I used the 6mm stuff for the top of the wall since that’s where I’m going to put my drawers.

The bottom area won’t have things hung on it so I used the 3mm masonite there. That’s all painted yellow, also obviously second hand. I have no idea where these sheets came from as I didn’t remove them from anywhere. Another of the bonuses we got when we bought the farm. Like lots of old bricks, old timber and loads of rubbish.

I had to overlap the thinner sheets a bit cause I didn’t work that out well (ie the joins aren’t on posts. ooops.) so I used liquid nails and nailed them as best as I could. This wall will hold crates and dog beds so it should be fine. Unless a rhino head butts the wall we’ll be good.

It looks funny with all the patches of colour. When its all painted one colour it’ll look much better. I’m sure.
Next step is the ceiling. I’m going to cheat there. I do not want to sand back all the flaking paint and I definitely don’t want to try to fix the saggy or gappy bits. I’m going to get some thin MDF and just cover it.
Easy.
Famous last works.
Anyway, we’ll see.
Of course there’s still one more wall. The interior wall. I can finish the room and leave that wall as it is and still groom, with the old timber showing. In fact, that’s what I planned to do. But now I’m having second thoughts. I’m wondering whether I should do some kind of patchwork on it…. use old shutters… that’d be interesting!

Like this:

Or this (swoon):

But with all the hair flying around in a grooming room, I’m not sure that would be a good idea. Maybe I should use cupboard doors… less gaps.

Like this:

Or this (swoon):

I’ll have to see what bits I have and how much wall I can cover before I go buy anything new.
Oh, I also fixed the interior door. It wouldn’t close. Its got an exterior lockset and the latch wasn’t catching. Well, I fixed the sucker. I got the hammer and wacked it a few times till it worked. Ha.
I also learned how to fit a handle on a door so I can do the exterior door. Thank you YouTube.
So, basically, what I’m saying is that the room is coming along, but there’s still a lot to do:
1. line the ceiling
2. put in powerpoints and lights that work (electrician job)
3. paint all walls and exterior door
4. paint ceiling (once its done)
5. paint the floor
6. put a lock/handle on the exterior door
7. make a window for the top of the exterior door
8. make gates for both doors (to keep dogs from escaping)
9. put shelves in the drawers, paint the drawers, put poodle figurines in drawers, put glass or perspex on drawers, put drawers on the wall
10. make a canopy for over the door
11. make a gate for the little yard
12. sort out the ‘landscaping’ in the little yard
13. run screaming into the hills
Sheesh.
Whose idea was it to start this?
Its going to be great! I’ll keep telling myself that.
z

recycling christmas

This year I really didn’t feel like doing much for Christmas. I wasn’t going to decorate at all. 
But then, while cleaning the office, I found the Christmas tree I made last year from the sides of an old cot. I’d wrapped it in plastic and left it as it was – with the wire and stars, ready to go. So… well, it was ready to go… I figured I way as well use it.

With one small difference. This year I put fairy lights on it! (’cause I found them while cleaning the pantry!)

I also put it in a different spot this year. Last year it was on the wall over the air conditioning unit where I now have my industrial stencil artwork.

Since I needed it close to a power outlet for the lights, it made sense to put it on top of my pretty antique cabinet.

This spot means you can see it from the kitchen as well which is an added bonus. I love fairy lights and this just makes me smile. I think I might leave it up for a long time… at least till the end of January.
z

slow progress in the new grooming room

Its been slow going in the new grooming room.

Mainly cause I haven’t been working on it. I’ve been either too busy or too lazy. After all the knocking out of old walls and emptying the place out I kind of lost steam for a while.

I had to buy pine lining for the walls and even though I bought the cheapest stuff around it was still a lot of money. That put a damper on things for a while. Then I didn’t know how to use the air compressor. Then I realised I needed the right nails for the nail gun.

Then I chickened out a while cause I was like “What on earth was I thinking? I’ve never done anything this big in my life before!”

But its just a shed, right. Who cares if its not perfect. It’s not like its the kitchen, right?

I already had the door, a lovely old door with a missing glass panel on top. I sanded it back, plugged all the holes and clamped it with some glue to make it stronger. But it needed a bit off on one side. I was too chicken to tackle that with a circular saw…

Well, a good friend came out and gave me a hand to get started. She’s done this sort of thing before. She knew how to use the compressor and how to change bits on the nail gun and she’s tackled way bigger jobs than this. As a result, the door was trimmed down with her saw (one that’s made especially for cutting long straight lines) and hung. And the wall around the door (the smallest wall) was done.

Yes, I can see light too. The ceiling in there is really crap so there’ll be a lot of fiddling to get the wall to join the ceiling properly. Maybe I can just put up a board and cover the holes?

Whatever.

IT’S A SHED.

Today, before it got too hot, I tackled the other wall. I stopped when I had to climb up and down for each board. Plus I had to stop birds from getting into the wall before I got to the top. I chose to staple bird wire into the gap between the flat roof part of the casita and the wall cause there were a LOT of bird skeletons in that wall. I don’t want that happening any more. I mean its awful hearing them in the wall and it smells when they die.

I also gave the door its first coat of paint, an oil based 3 in 1 undercoat. It’s an exterior door. It needs to be protected from the elements, hence the oil paint. I normally prefer water based paint cause it doesn’t smell as much and dries quicker.

Last week I got a tin of aqua enamel deep base on sale and had it tinted a bright blue. I’m thinking that’ll be the colour on the outside of the door. I was planning on white for the inside and I’ve left the inner bottom panel unpainted cause I love the chippy look (though I sanded it back so there’s no loose paint any more). I could change my mind and do the whole door blue, but we’ll see. I like the chippy paint and don’t think that’d go with the blue.

Of course, the door still needs a window. I have to see what timber I’ve got and make that. I’ve made doors before successfully (see my new linen cupboard) so how hard can it be? I think the only time I’ll run into problems is when I have to use the router to make a groove for the glass to sit in… never attempted that before. It’ll be fun for sure!

Actually, I think you’re supposed to do that BEFORE you make the door. Yeah. I’m sure of it…

YouTube to the rescue!

That will leave me with two more walls to do. I don’t have enough pine lining for all the 3rd wall so I’m having to get creative. I have quite a few large masonite pieces which I kept from when I removed the lino in the kitchen. I’m thinking I should have enough to cover that wall. Once its painted who will know? Especially when I cover it with old drawers! (Wait and see!)
Its getting to the good bits now. And I checked. That room is way cooler than the current grooming room, even on a really hot day like today. With both doors open there’ll be enough of a cool breeze to keep me sane.
Oh, see that play pen side? That will be fitted to one or other door to keep dogs in. There’s a tiny yard outside the room which, once I fit a gate to the back part, will be totally secure. Its been cleared out and I’ll be putting down newspaper, weed mat and pine bark to keep it dry and clean for visiting dogs.
Its all happening here.
If it wasn’t so hot.
I think I’m only good for a few hours work when it’s hot. Then I need to do quieter stuff. Not like I haven’t got tons of that to do either.
z

taps and coat rack

What’s on tap for today you ask?
Well, I tapped into my creative mind and came up with this recycled tap coat rack. You could say I tapped this old pine board into a coat rack.
Luckily I had all these things on tap in the workshop.
groan.
Ok, I’ll stop now. 

I love these old garden taps with their patina showing and all. Some are our own old garden taps and some I picked up from here or there, as I do.

I painted the board with chalkboard black paint so you can label the taps for each member of the family if you should so desire. 

Other than showing off my tap coat rack, I don’t have much else to say. You could say I’m all tapped out.
Turns out I had one more left.
z
Shared at:

make an easy lightbox

I’d like to share my dodgey easy lightbox. You know, for when you need to photograph something small and need to be able to do it without glare or shadows.

Well, I failed in that. But I think its the lighting rather than the box that’s to blame.

But first, lets explain the term ‘dodgey’ for those who don’t speak Australian. The Urban Dictionary defines it as:

Australian term.
1. Something or someone that is a bit suspicious, doesn’t seem quite right. Doesn’t seem the real deal.
2. Slack, broken, worthless or useless.
3. Not very appealing.
1. That car salesman seemed a bit dodgey.
2. This old car is pretty dodgey.
3. That band last night were pretty dodgey.
As you can see, dodgey is my middle name.
So, how to make your own lightbox?
Get a largish cardboard box. Cut out 3 squares – one on top and one on either side, but not the back or the bottom. Well, you could, but it’d be a waste of time.
Now the first time I did this I threw an old white sheet over the box as my light diffuser (yeah, I know technical terms!)
This time I got more professional. I cut out squares of white fabric and taped them onto the box. Real professional. I was going to use hot glue but tape was easier – ie it was there on the table next to me.
Note the overabundance of bits of tape in the picture. I used the box flaps to reinforce the sides and top, using tape to attach them. Classy.
Almost there. Get a large sheet of white paper. Glue or tape that to the top of the back, curl it where the back meets the bottom to create that no horizon look, then lay it down flat at the bottom.
Voila.
Now all you need is light. 
I collected all the spare lamps I had in the house. One tall reading lamp. Two smaller lamps. Ideally you want bendable lamps you can angle at the windows, and you need them to kind of match light-wise. Strength I mean. I didn’t have matching ones. Hence the uneven lighting in my images.
Whatever. It was better than taking photos with a flash.
That’s it. Your lightbox is ready for masterpiece photos.
Mind you, you really do need a tripod for taking photos, so if you have one get it out and set it up in front of the lightbox.
Surely you can do a better job than mine, but hey, I now have a lightbox, dodgey as it is, set up in my office for every time I want to take photos.
I’d say I’ve done well,
z
Shared at:

kids party cake stands and other things

Since I’m on a roll blog-wise (and I don’t want to let down my fans – heheh) I thought I’d share another work project which was HUGELY successful.

These kids party cake stands were made in my Thursday group. We spent time collecting, begging, stealing and borrowing old/broken toys from anywhere we could find them. I spent ages asking for things on FB and at work via our newsletter and noticeboards.

We also took a few trips to the tip shop to find some wooden or plastic platters and lamp bases to build them with.

The tall one that looks black in the photos is actually a very dark blue. It began life as a tall metal lamp base which was covered in toy animals using liquid nails, then sprayed what we thought was bright orange. Unfortunately the orange sucked big time, so we tried a couple of other colours, ending up with dark blue for the best coverage.

Warning: if you plan to do this at home, beware. Not all spray paint is created equal. And not all of it matches the lid colour…

For the top we used different flat items as bases – anything from old cds to small wooden dishes. These were glued to the light globe holder on the lamp base and provided a nice big surface to glue the platters to.
The top to this cake stand is a plastic lazy susan which spins.
The light blue one was made using a large ceramic lamp base, covered in random toys and topped with a large wooden platter.
Here it is in progress. In this instance we removed the globe holder bit entirely and glued a flat surface to the ceramic base directly.
This one is my all time favourite. Its made out of a pirate ship, tea pots and all kinds of ‘human’ and animal figures plus anything ‘fishy’ we could find.. Oh and the wheels off a toy truck.
Sorry about the bad photo but its the only one I have of the pirate ship in progress.
The red cake stand was made out of a small metal lamp base. The top was a flower shaped bit of wood we found which we sprayed gloss white (all the tops were sprayed gloss white to make them easy to clean). This one also went through a colour change.
You can see below how it started yellow but the yellow didn’t cover well enough. We found a brilliant red (I know it looks a bit pinky in the photos) which looked way better.
Here are the four drying in their first coats of paint. The smallest one with the bowl on top is more like a bowl for M&Ms or other lollies than a cake platter. Its made of a basically flat square base that a light globe fits onto without a shade. We used a snoopy body as the ‘stand’ and surrounded it with Peanuts characters in cars. The top is a wooden bowl I had lying around.
All five were entered as a group entitled Kids Party Collection at the Art From Trash exhibition this year. They sold instantly.
We also had a mirror decorated with toys all around it, that sold too, and we’re now working on another, larger, toy project.
Stay tuned.
z

Shared at:

new grooming room stage 1

Oh man!
I feel like I’ve been hit by a bus.
I started work on the future grooming room today. I worked on it for about 6 hrs then had a shower and called it a day. It was a gorgeous day, I should have sprayed weeds and brushcut after ripping out walls, but I was more than ready to sit on the couch by then.
How about a glimpse of what I’ve been doing? This is what the grooming room looked like this morning. It was mostly empty but there were still quite a few things to be moved out for the ‘blank canvas’ I was after.
I managed to lug the cabinet and all the bits and pieces out of the room. Then I swept up all the rat poop. Eek.
This is what the ceiling looks like in there. Badly peeling.

And badly patched.

With plenty of holes. Ugh.
No idea how I’ll deal with that yet.
The walls were filthy, lots of holes in the plaster (drywall for you americans!), old mold in places, and tons of gaps between the floor and the ceiling. Double eek.

There were quite a few shelves to take down. What I imagined would be a quick job was a monster. Some of the screws were so hard to remove I ended up breaking the plaster and prying one of the suckers off.

Since I’d already pulled out a section of plaster I thought, what the hell… I’ll pull it all off and pine line the entire room. Fresh start. All nice and clean…

Surely that won’t be so hard, right? I mean, how hard can it be? First I’ll have to dig out my drop saw which is buried under garage sale items, then move the bench (which is darn heavy) to a spot where I can actually use it… then I’ll have to measure (not my best skill), cut and nail the pine to the wall. I have a nail gun. Surely I can do that.

Right?

Anyway, when I pulled off the plaster on the wall leading to my workshop, which is lined in timber, I found this gorgeous moth eaten wallpaper. I wish it had been in better condition. I’d have kept it!

I found a lot of other stuff too. Bird skeletons for one thing. Oh fun. 
So, in the end I pulled the plaster off all the walls. This is what the room looks like now.

And yes, thats a hole in the outside wall you see there. With years of old bird nests in the wall beneath it. Triple eek.

Mouse droppings, rat droppings, dead spiders (no live ones thankfully), tons of bird dust… thankfully I was prepared for all eventualities.

I’ve organised an electrician to come give me a quote and tell me when he can rewire the room. I need more power points and I want fluoro lights. Sure hope he can do it soon.

Tomorrow I’ll go buy the timber lining I need. I’ll buy seconds quality pine so that shouldn’t be expensive…

First job is to empty the room of all the old plaster – that in itself will be a big task and will necessitate a trip to the tip.

I can’t do all the walls till the electrician has done the wiring but I can start. I can also replace the outside door. I’m considering cutting the inner door in half to create a barn door so I can keep dogs in the room but still have circulating air.

I plan to put some vinyl on the floor to make it easier to clean and better to stand on.

I now have to add “replace the rotten bits of wood on the outside wall” to the To Do List. I never planned to do that. Maybe I’ll just replace the worst ones…

I always under-estimate the time a job will take, or even how hard it will be. Hopefully once the messy stuff is done the rest will flow easier.

I can dream, can’t I?

z

enamelware caddy

You know I have been busy lately. Not an excuse, just a fact. Somehow, among the many busy things I’ve been busy with, I’ve managed to do a few small projects.

Like this cute enamelware caddy.

So, what’s it made of you ask? Well, an enamel bowl, an enamel dish and a wooden salt grinder.

Yep. A salt grinder.

I sprayed the grinder black, drilled a hole into the bowl and there was a convenient hole in the top of the grinder to join them together. The bottom was glued onto the dish.

Its now a handy spot for keeping stuff. Whatever stuff you have that you have need of a spot to keep it in. A desk tidy to hold office stuff. A bathroom tidy to hold bathroom stuff. A kitchen tidy to hold kitchen stuff.

You’re limited only by your imagination (and the size of your stuff).

This is one of the items I’ll be selling at my garage sale on the Garage Sale Trail on October 22.

z

new kitchen shelves

Last weekend, Saturday evening to be exact, I got a surge of energy and decided it was time to put up the IKEA shelves I bought months ago. They’re from the Varde series (with those dots over the ‘a’.)
Since I was doing this on my own, and these shelves are incredibly heavy, I had to find ingenious ways to do get them up and level. I don’t advise doing it this way, but needs must…

I’m nothing if not inventive. And stubborn. I got the shelves up.

I had planned to put 2 of these units up (I bought two, making it 4 shelves) but I changed my mind. I decided one set was enough. Not so ‘cluttered’ feeling…. The space above the shelves gives you room to breathe.

For another thing there was no way I could get the other shelf up there by myself, so the decision was easy.

I had always planned to have my mugs and glasses on shelves, on display and easy to access. I love the look and I’ve been the right ones to suit the kitchen. I did have some pale blue mugs but they’re going. I found mint green ones at Kmart that are the perfect colour!

The green glasses are from Freedom. I’ve had those in my wardrobe since we finished the kitchen.

These shelves have a rail with 5 hooks underneath. Since I’d planned to have another shelf unit above this one, the wire cups I made were meant to hang higher, more at eye level. But now there is no top unit they have to hang lower. 

I love open shelves in kitchens. I know things get dusty but I’m perfectly willing to get stuff down and wash it once every now and then.
So, my shelves are up. Its only been about two years since we started the kitchen renovation!
z