making do and interesting things

 My cousin Zefi’s house in the commune that’s known as ‘Souvlia’ used to be the boat shed and garage. It was built on a slope so the front is a couple of steps down. As a result its darker than most of the houses on Souvlia, but no cooler. In fact, being at the back of the block, with other buildings as windbreaks, it doesn’t get the full force of the wind – great when you want to sit on the porch for a drink, terrible if you want a cool breeze to cool down.

Despite that, Zefi has made it into a gorgeous place. Thanks to her mom’s fossicking, her husband’s good taste and Zefi’s practical mind, the place is pretty, traditional and totally user friendly.

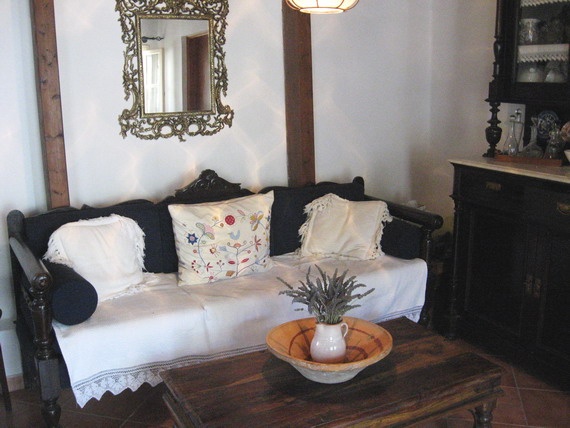
I love her old island couches. I’ve tried to find this type of couch in Australia as its the ideal outdoor couch. Its not so comfy as a living room couch, but so pretty.

I love the big dresser as well, in the traditional dark timber. Zefi’s grandfather on her mom’s side used to be a carpenter and he made some beautiful pieces.


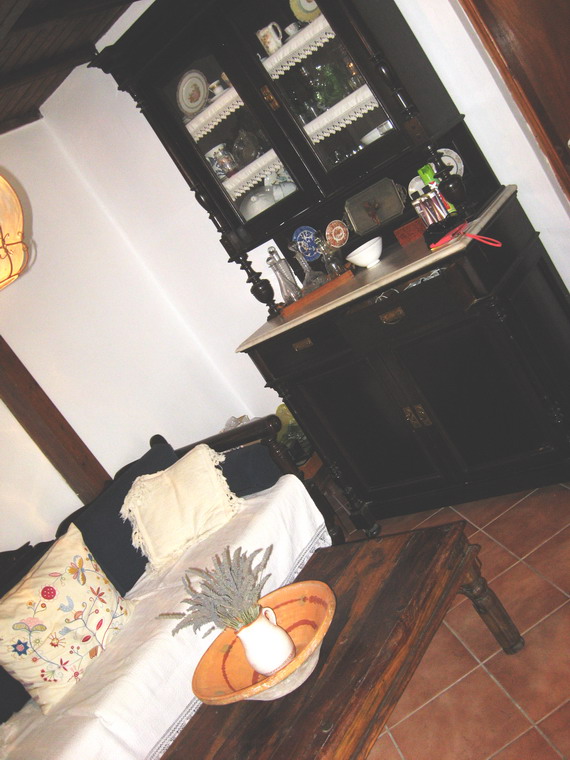
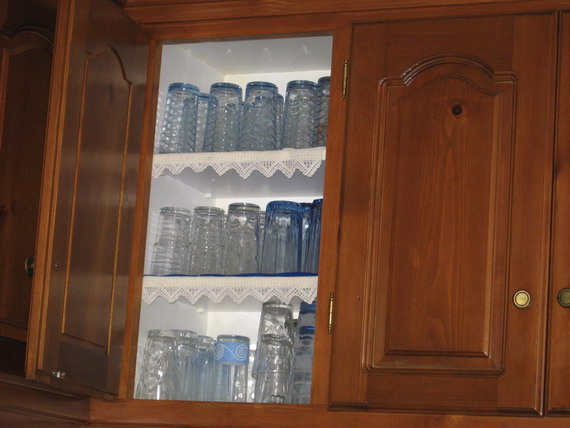
 I love the lace on the shelves inside the glass cabinets.  My aunt Dora has it in her kitchen in her house as well.

 One thing I love to do when I’m here (or anywhere for that matter) is look at shops. I love looking at shops. Sometimes I see things I want to buy, something I see things which inspire me. Whatever. I love to look at shops.

In the market street in Parikia there’s a traditional old homeware/grocery store. Its been there as long as I can remember. They now sell more stuff to tourists than to locals I’m sure, but its the only place I saw one of these:

 Its apparently a dough bowl of some sort. You put the bread dough in it to rise. I find myself needing one of these… I never make bread, but I’m sure I’ll find a good use for it.

I also love these things:

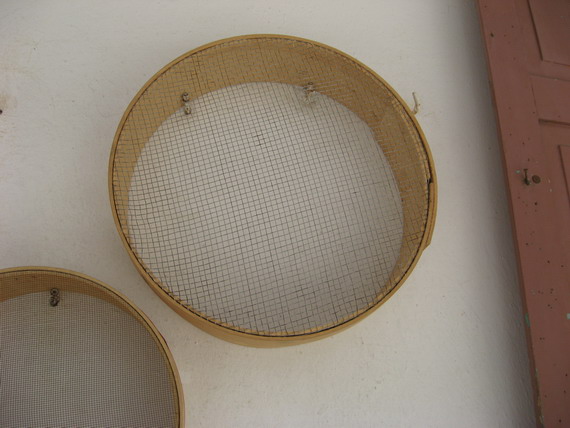
Sieves of all sizes with all different wire thicknesses… from flour sieves to lentil and bean sieves. Pretty cute.

At the other end of the shopping scale are the home decorator stores… not very different to the type of stuff I see in Australia. Still pretty displays and colours though.

Colourful outdoor cushions with jute and bling tassels and fish, naturally.

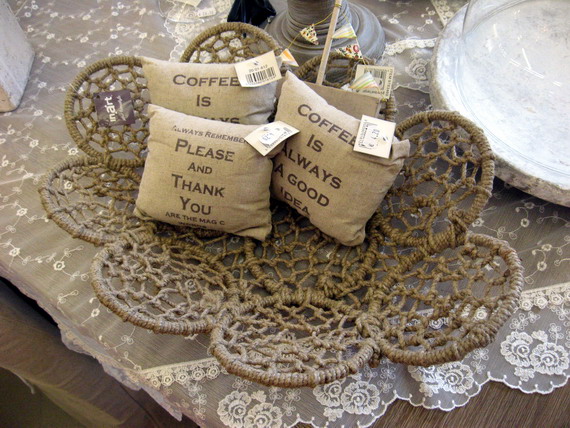
Burlap mini cushions and a jute string bowl on a lace table runner.

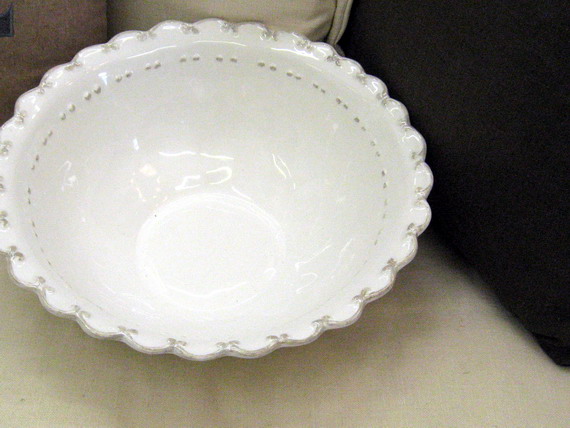
A beautiful simple white bowl.

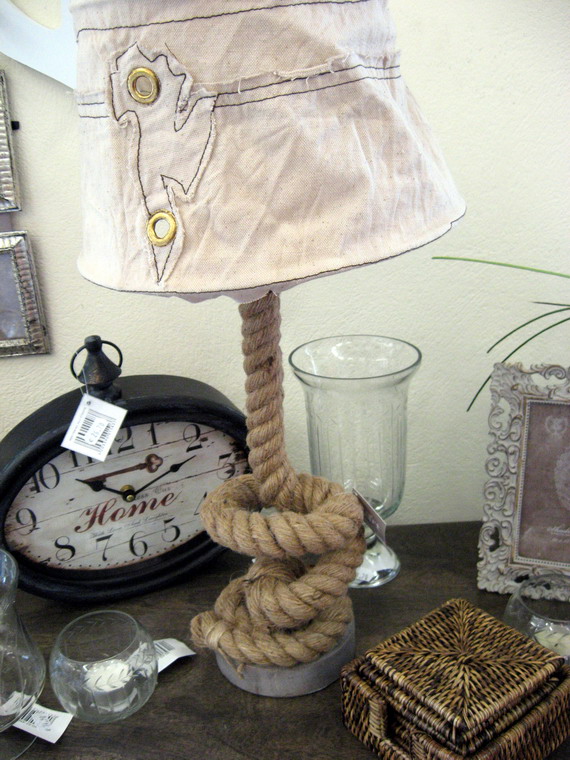
A rope and sailcloth lamp.

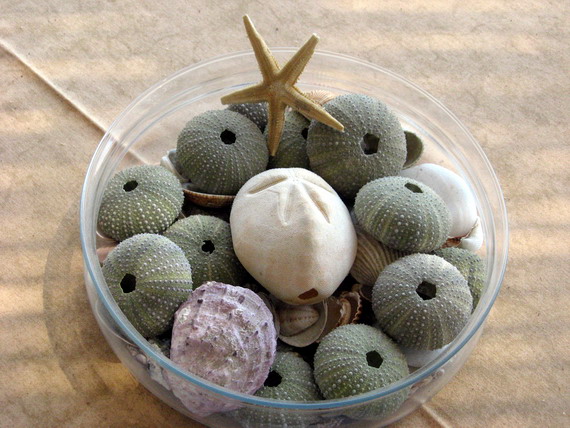
Table centre piece of sea urchins minus spikes, shells and starfish.

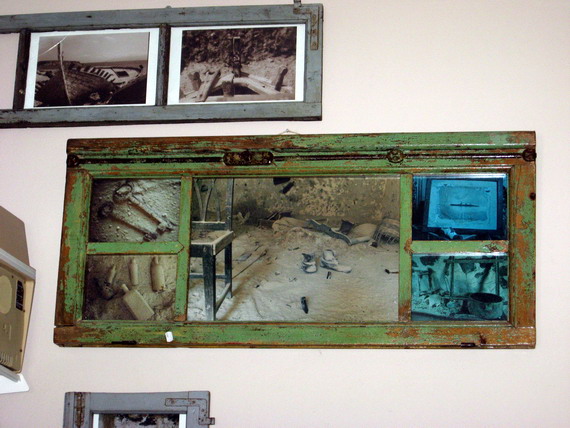
I found an antique/second hand shop which has some beautiful things in it but this one was right up my alley: old windows with photos in them.


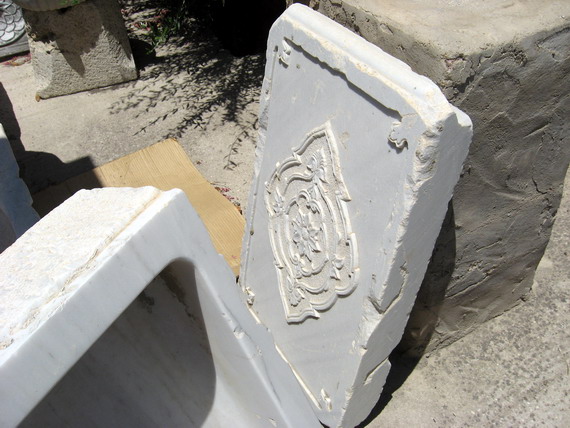
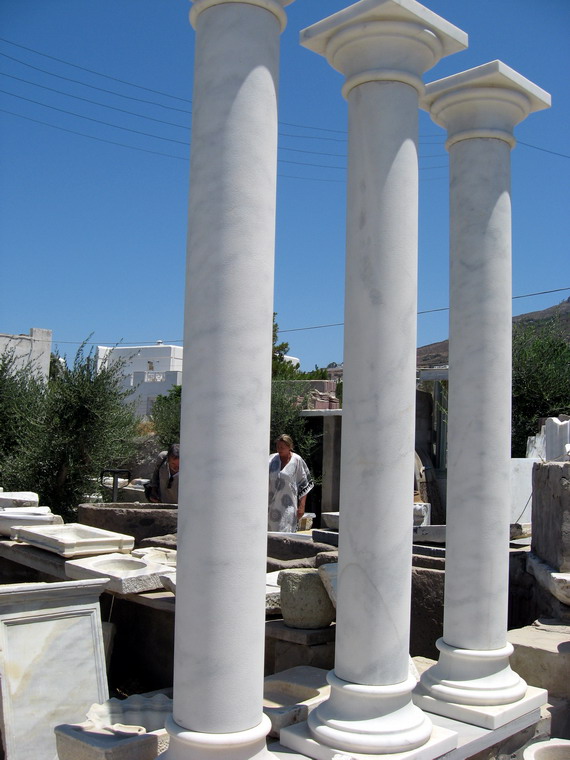
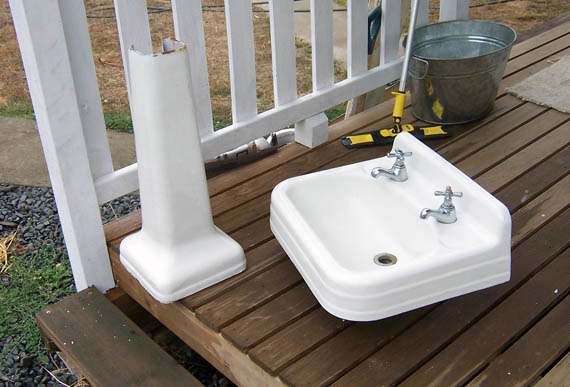
I even found a shop which sells marble things. Like a marble sink… why have a ceramic butler sink when you can have the real thing? And this slab of carved marble which you can put in your garden and run a tap through.

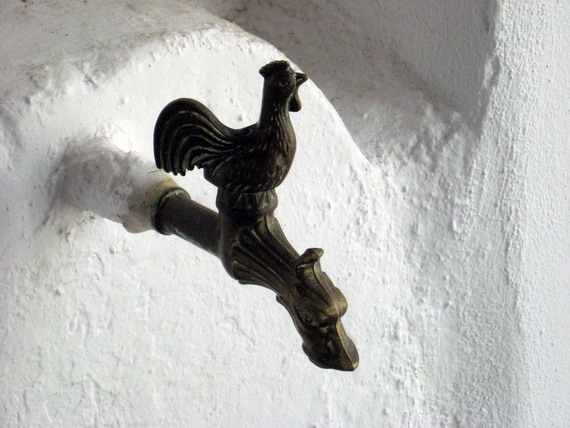
 A tap like this! Isn’t this a beauty?

Or, if you prefer, you can buy marble columns. Cause no house is complete without marble columns.


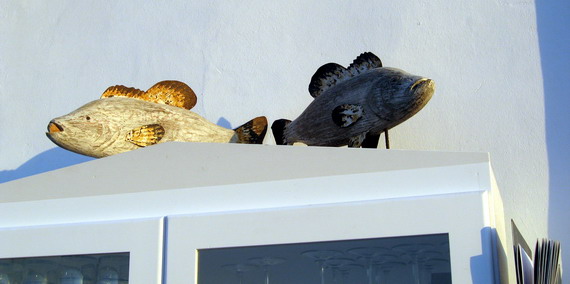
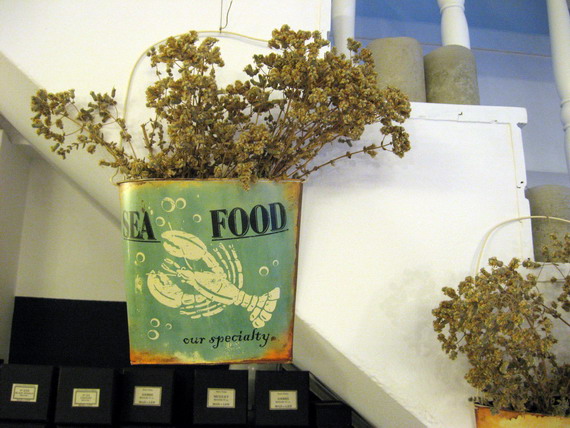
 Of course, there are tons of places which are done up beautifully whether they’re shops or cafes or restaurants. Sometimes its something simple like these fish at a taverna by the sea:

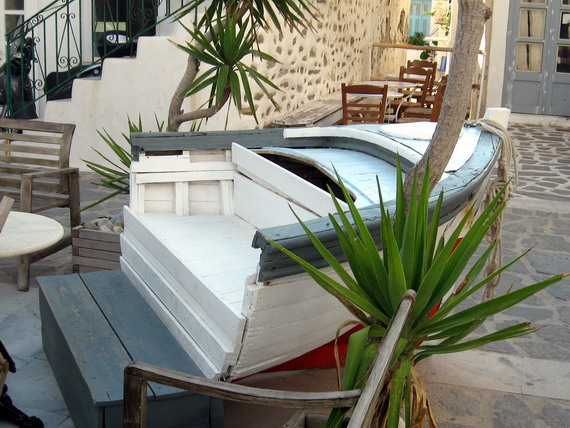
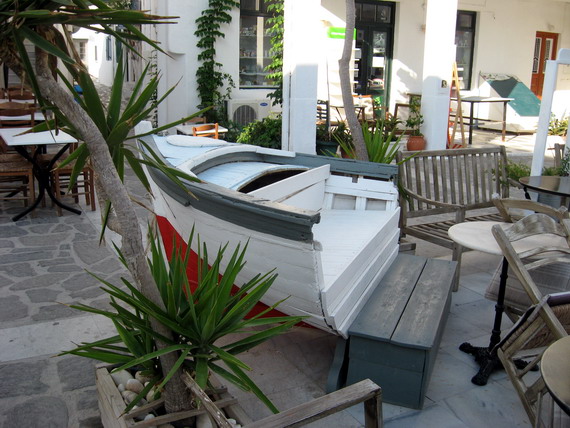
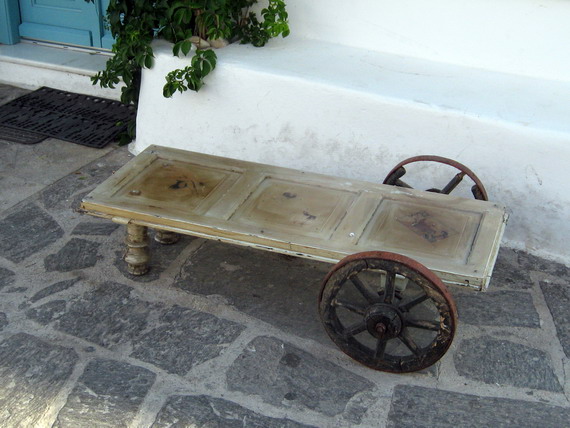
Sometimes its way more elaborate, like the boat/couch at this bar in Parikia.

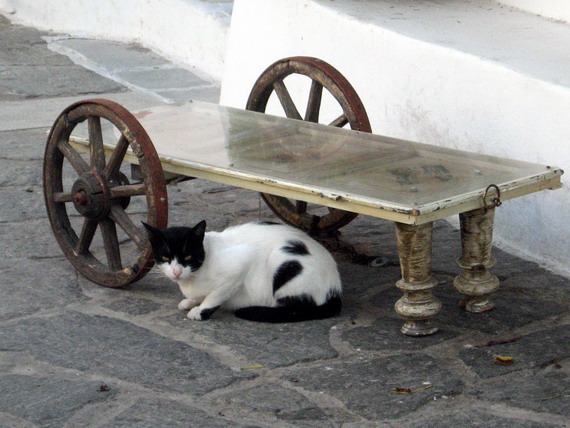
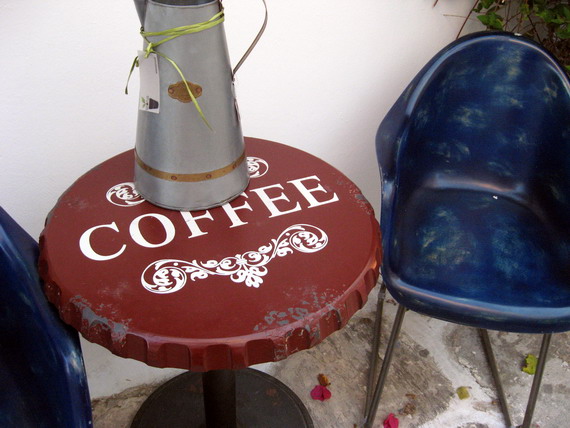
And these door coffee tables.

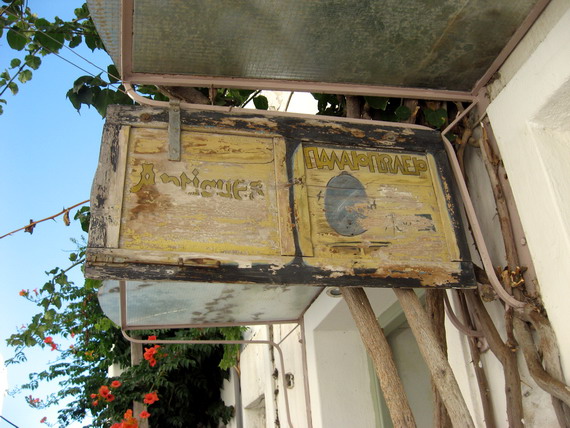
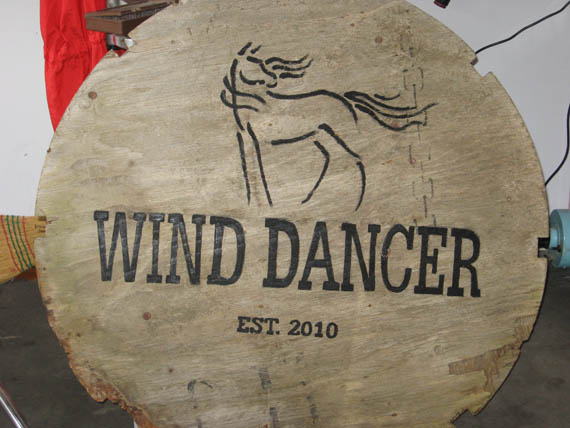
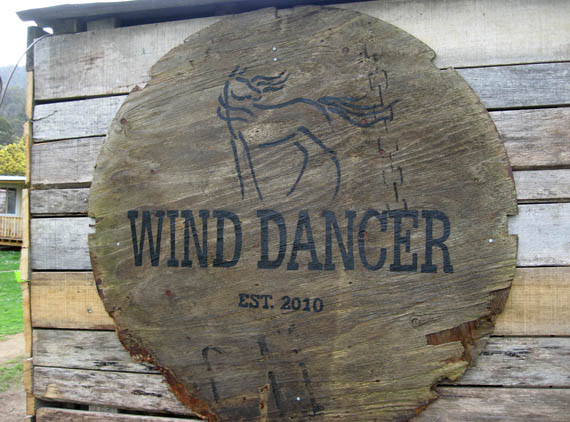
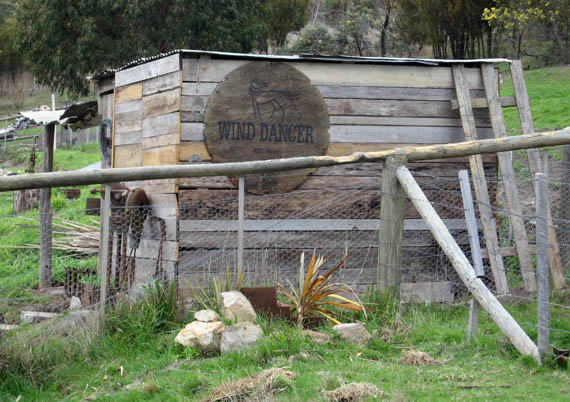
There just aren’t enough door or window signs though, like this one on a closed antique shop.


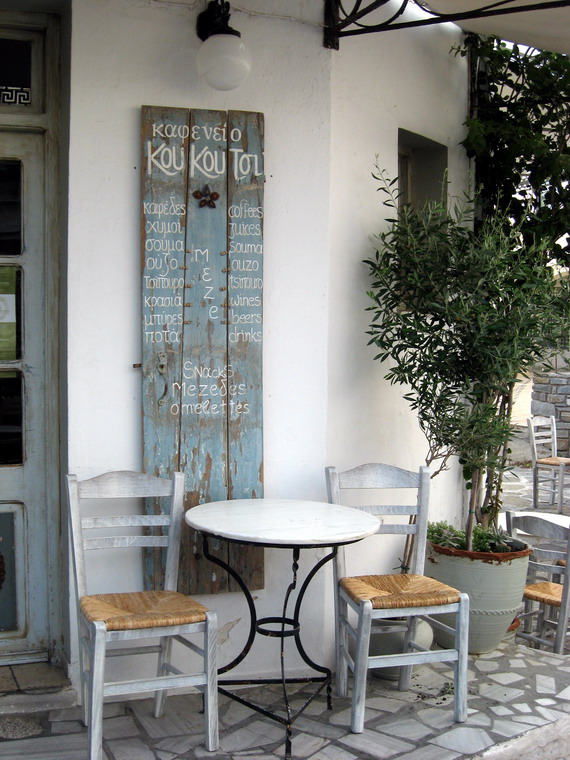
And I love this sign on a cafe.

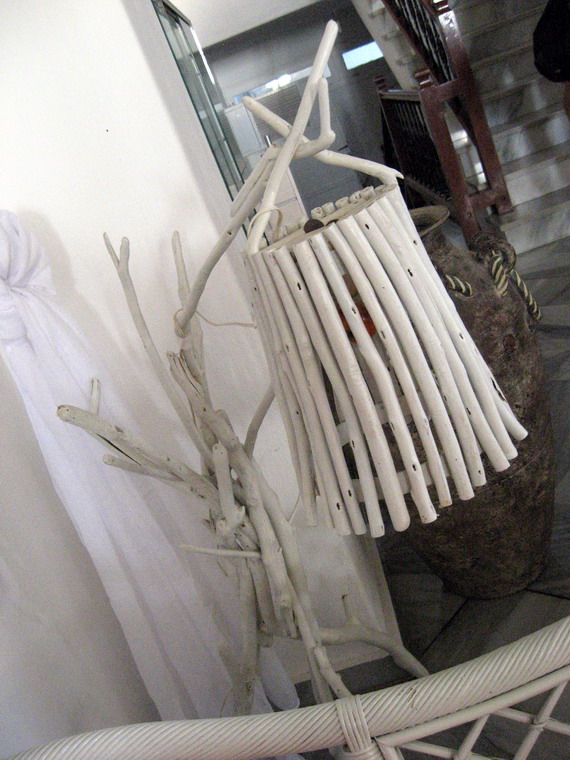
I haven’t been inside many hotels, but the couple I have been into have some interesting items in their lobbies and bars. Like this lamp …

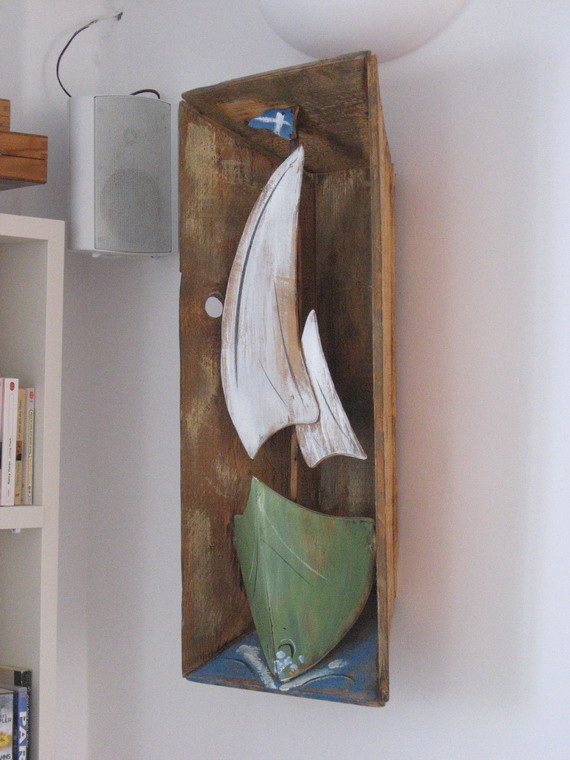
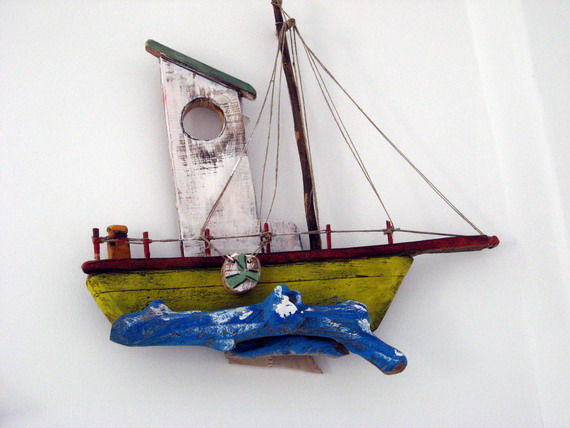
This wooden trough is now a frame for a wooden boat.

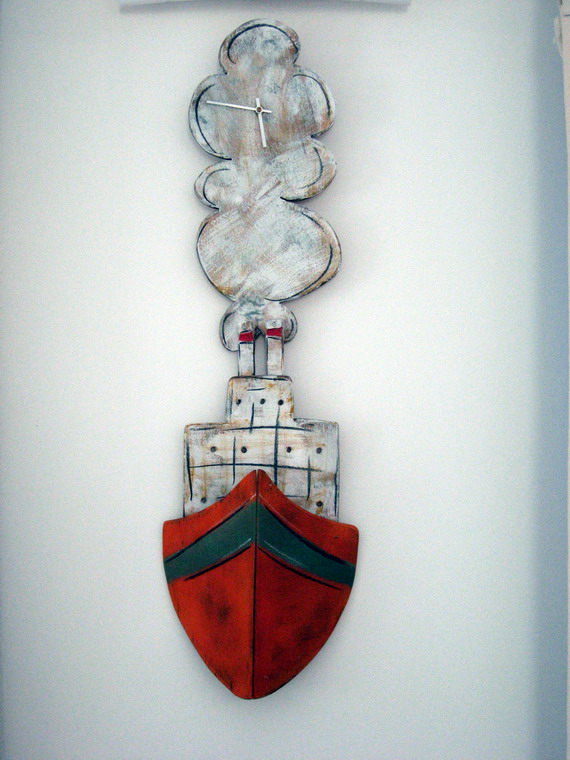
Obviously made by the same artist, this boat wall clock at the Paros Bay Hotel.

And a ton of these fishing boats.

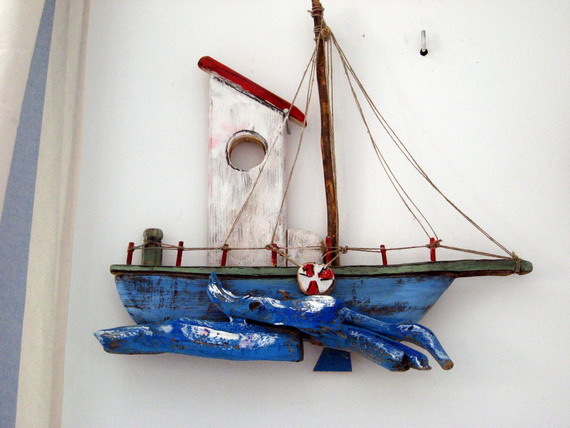
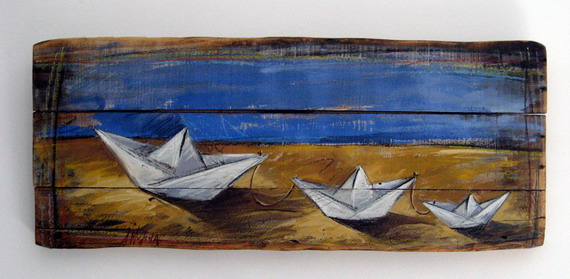
This is my favourite. I love the humour in the little paper sailboats.

A couple of little shops in Naoussa, a small town on the other side of Paros, have gorgeous displays. Right up my alley.


Closer to home, I found some interesting ways to deal with the small issues life throws at you. This is my uncle’s solution to the wind taking his umbrella along with the small table.

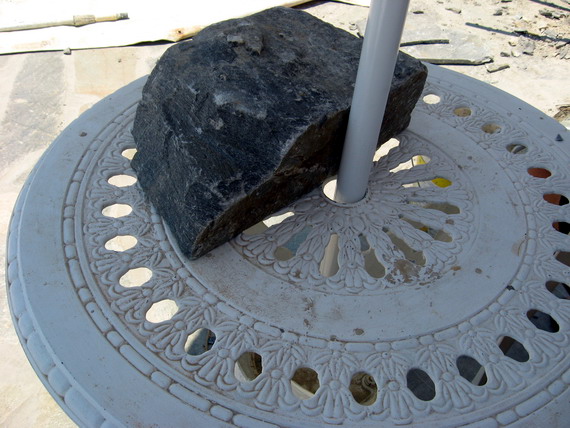
It might take up a bit of table space, but it works.

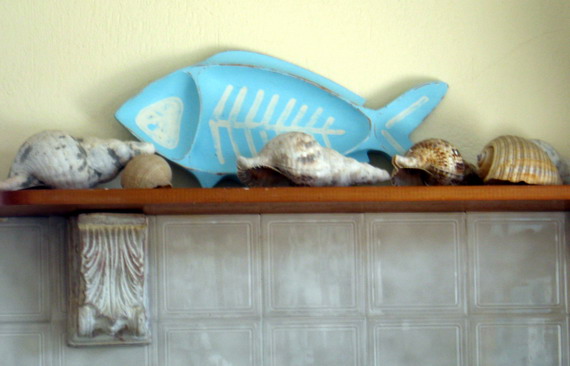
My fish bowl has a new spot among the shell collection in my aunt Flora’s kitchen.

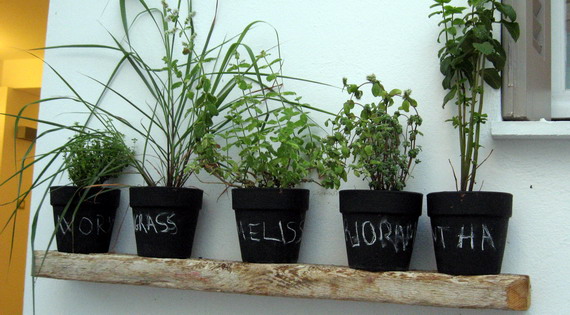
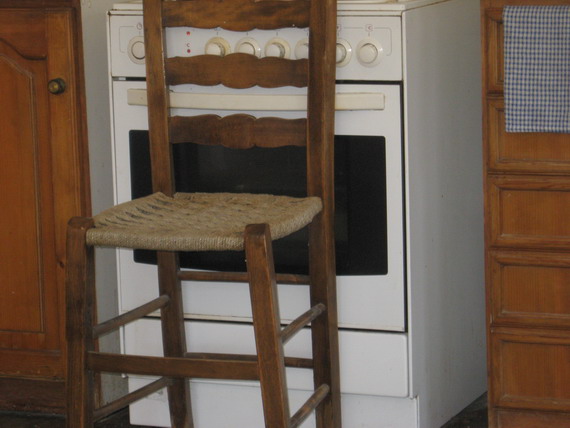
The oven in the main house has a dodgey door, so the kokones (a name we call the aunts) have found a simple solution.

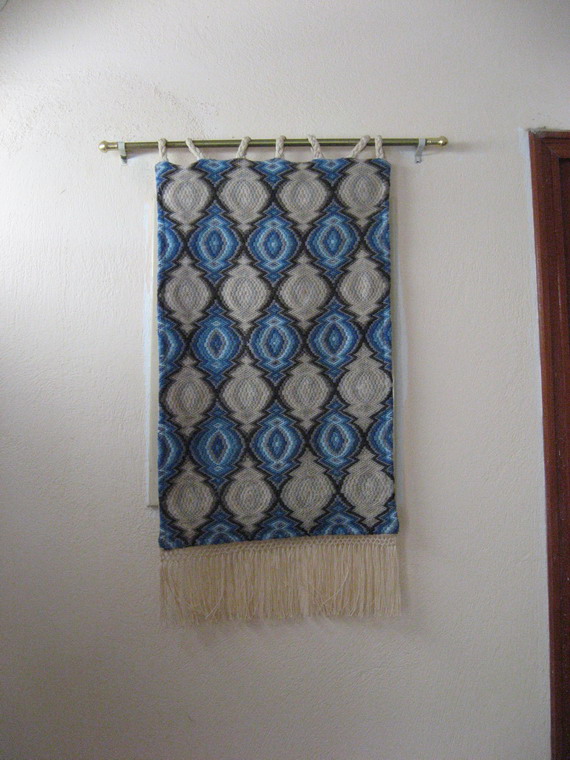
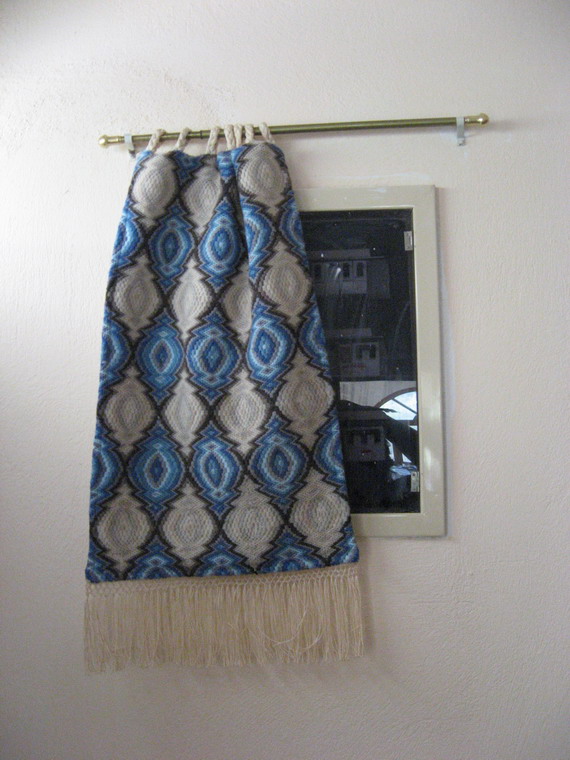
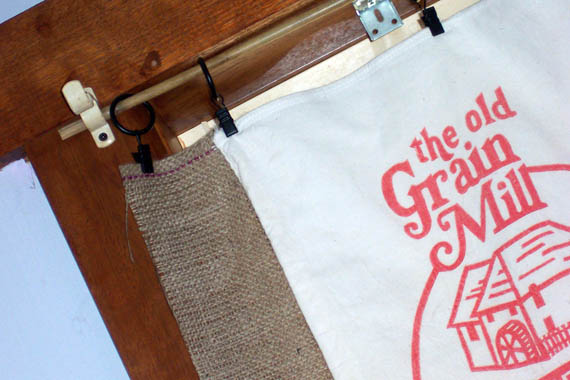
Aunt Marisa has found a cute way to cover the electricity panel in the hallway using a hand woven mat.

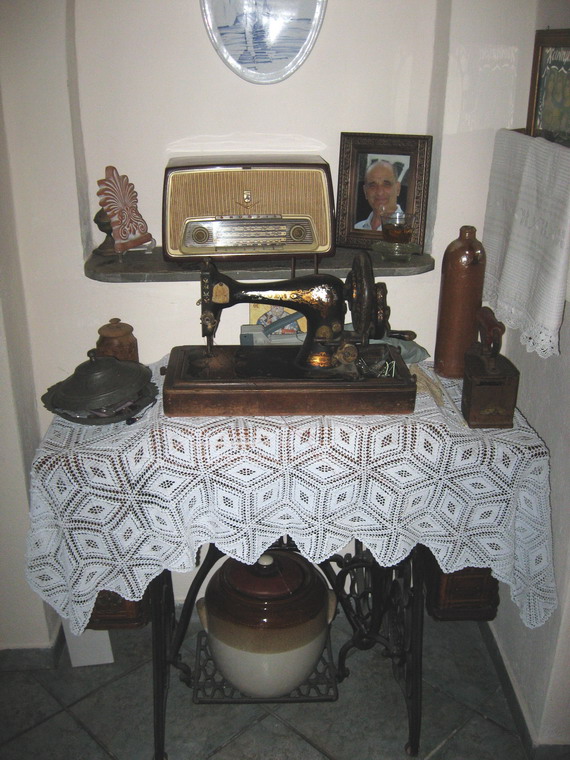
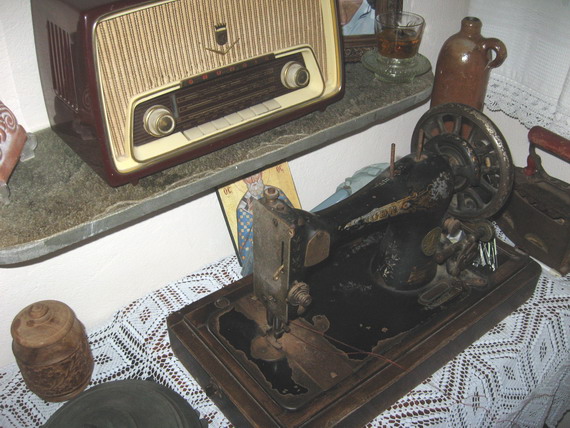
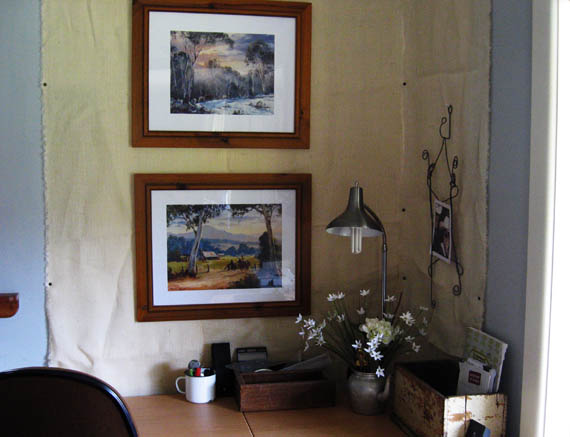
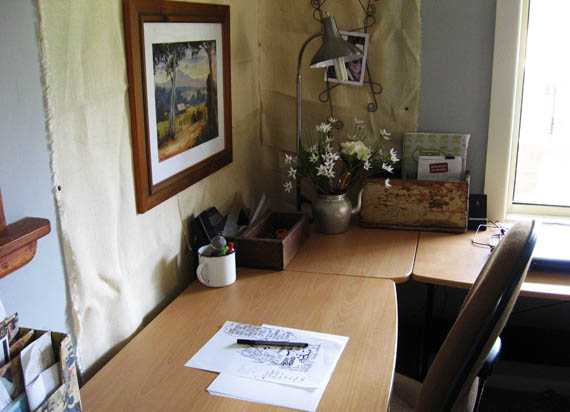
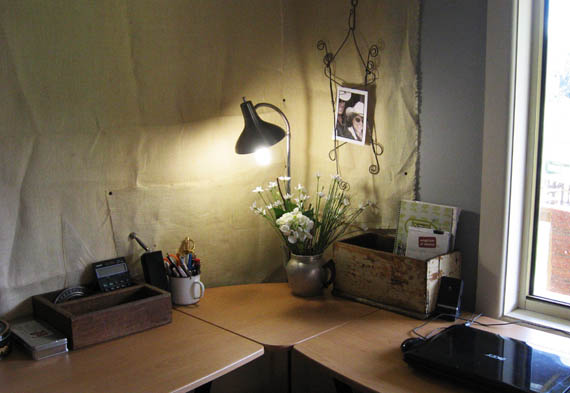
In her house a little down the road, my aunt Dora has a small corner where she keeps her ancient sewing maching, which she still uses, and a few items from her mother’s house.

You can always tell a greek house, cause there is always an icon somewhere in it. I now have my own icon, my very first. My aunt Xeni gave it to me. I’ll have to find a spot in my home for it when I get back. My decor will be shabby-greek…

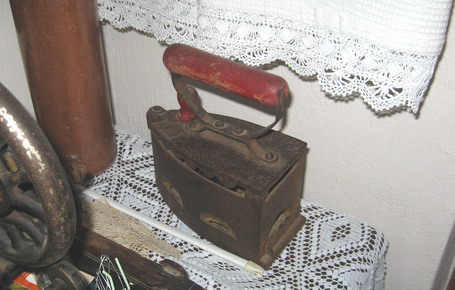
Love the old irons with the big base to hold hot coals.

z

project wardrobe room DIY

We have a small room in this house. A really small room. Big enough for a single bed, a chest of drawers and a wardrobe but not much else.
We’ve used it as Wayne’s wardrobe room since we moved in, with a single bed just in case we overflow with visitors.
It was always a mess.
Wayne owns too many clothes for one wardrobe, a cupboard, a chest of drawers… and this house.
He owns too many boots and shoes for any normal human being except Imelda Marcos.
I’ve been sick of that room pretty much forever and I’ve been dying to make it into a walk in wardrobe with as much hanging space as I could fit into it.
So, I finally put Project Wardrobe Room into action. I decided the easiest way to make a wardrobe was to start with something someone else had built.
I like the industrial look of hardware shelving so I was looking for nice galvanised metal shelf units meant for workshops. Unfortunately the better/bigger/taller ones are made with powder coating these days. Darn.
So, I adapted. Instead of galvanised metal I went with grey walls, black units and white shelves. (And salmon carpet…) 
I bought 2 hardware shelf units on sale a couple of weeks ago. 
I also bought 2 thick towel rails with the matching attachments.
Working towards Project Wardrobe Room, a few weeks ago I donated the single bed. Then I promptly replaced it with other bits of furniture …which I managed to get out of the room last week. 
I started pn Saturday. 
Step 1: I opened the boxes with the shelf units, removed the mdf shelves and painted them antique white USA using the paint I’d bought for the woodwork in Fentonbury.
Step 2: Paint the walls.
I wanted to paint it grey, but I was going to stick to not spending any more money on this project than I already had. I searched my paint tins and found I still had about 1/3 tin of the dark grey I used on the living room feature wall. I mixed in about 1/4 of the light beige I’d used on my woodwork and added a bit of ceiling white for that extra lightness to get a shade of grey I kinda liked.
Then I painted the two walls I could access cause the third wall still had a big heavy wardrobe full of clothes, a large chest of drawers and a cupboard, all chockablock full of clothes, draped with clothes, ties, belts and scattered with shoes and boots.
Once on the wall the paint looked more blue than grey. (NB. My monitor is stuffed and I can’t seem to get it back to the colour balance I had before. Everything looks more blue than normal on here right now.)
Anyway, it must be the light in this house… or the salmon carpet, but greys tend to look blue-ish in here. The ‘grey’ I picked for the living room looks like light blue.
Step 3. Put together the units. I glanced at the instructions then proceeded to put the units together using one of Wayne’s old cowboy boots as a rubber mallet. 
I cut a piece of vinyl left over from the mud room for the bottom shelf – easier to clean when dirty boots inevitably leave their mark. I also turned the top shelves upside down so you see the white side, not the unpainted mdf side.
Step 4: Find the towel rails and fittings. Search and search and search. Get annoyed, then angry. Have a cup of coffee and then finally locate them in the last place you thought to look.
Step 5: Swear at the idiot who used sticky tape to hold the two rails together. Then swear some more at the idiots who stick labels on their products with glue strong enough to glue King Kong to the empire state building. Use eucalyptus oil to get the label and gunk off.
Step 6: Figure out where the rails needed to go in order to hold the shirts and jackets, then screw them in place – screwing directly onto the mdf shelving. This bit was like a step aerobics class, involving as it did a lot of up and down the stepladder after dropped screws, dropped rails, dropped end caps.
My exercise for the week.
Step 7: Remove all clothing from the wardrobe and stack it on the shelves and hang it on the rails – shirts on top, jackets on the bottom. Boots on the bottom shelves. Discover that there’s no way on earth all the shirts will fit on these 2 rails and put some back into the wardrobe. That left me with an empty cupboard which I pushed, pulled and manhandled out onto the deck for removal later (Wayne! I have a job for you!)
Step 8: I moved the chest of drawers closer to the wardrobe and moved an old timber chest I had in the bedroom into the wardrobe room. This will hold Wayne’s swag (aussie sleeping bag for camping).
I like the feel in the room. So much more organised. Neat. How long it will stay that way is anyone’s guess.
Last touches: I vacuumed. I put in a brighter globe (does anyone else hate those energy saver light globes which take ages to light to their fullest?). I removed the granny light cover that was there and am planning to replace it with something a little more interesting.
Still to do: A different curtain for the window. The light fitting. The other wall. There are suit jackets and pants, more shirts and many shoes that still need to find homes in the new look wardrobe room. Do I keep a chest of drawers to hold underwear and handkerchiefs or do I go with more of the same shelving and rails with baskets to hold the small stuff… there-in lies the question. 
Thoughts?
Now I’m left to clean up the disaster in the living room and put away the 1 tonne of washing I finally folded.
Phew.
Wayne’s reaction?
“You done good.”
“So, do you like it?”
“Yeah.”
A man of monosyllables.
But he likes it. It sure beats the kitchen chalkboard fiasco of 2013… which is still fresh in my memory as I’ve only removed half of the chalkboard so far.
z

Shared at:

DIY Show Off


blindingly blue chairs

 
Yesterday we picked up my new adirondack chairs.
When I chose the colour for them I wanted them dark dark navy blue. Deep and rich. I took home swatches and compared and deliberated…
And I STILL got it wrong!
Does this look like rich dark blue to you?
To me it looks like a vibrant cobalt blue.
This is what the swatch looks like:

Sigh. It looked dark blue to me.

On the chairs: vibrant blue. Greek island blue.

Not that there’s anything wrong with that… just, its not the blue I was going for. And it cost a ton as well cause its an ultra deep base. AND I have a ton of it left over.

It might be the fact that I chose gloss paint and the surface of the chairs is slightly ridged. They’re made out of treated pine so they can be left outside in the weather and not get ruined. That’s also why I chose gloss paint… easier to wipe bird poop off.

Still, I guess I can live with them for now. Maybe if I put the over on the dam side of the porch, where there’s no roof and they’ll be exposed to the sun and rain, they’ll dull down a bit.

I love them… They’re great chairs. Really comfy and well made. But so bright! Ugh. Maybe I should have just stuck to white. Can’t go wrong with white….
You may have noticed the flour sacks making another appearance as cushions. Can’t leave them outside when we’re not home though. Romeo would use them as chew toys and Montana and Barney would sleep on them. White and dog prints don’t mix well.
I found this cute little ex wire birdhouse. It used to have some sort of fibre stuff on it but that’s long gone. There’s still some bird poop on it though. I love the wonkiness of it. I’ll be doing something with this soon.
Meanwhile I mentioned shopping, did I not? Well, lately I’ve been on a mission to get a sink into the mud room. Outside the toilet.
The toilet is small and cause of the way the door swings and the window, there’s no space for a tiny sink in there. Plus Wayne has huge hands, can you imagine him trying to wash his hands in a sink the size of an espresso cup?
I’ve never minded the fact that our toilet is off the mud room (it used to be outside!), but I’ve hated that in order to wash your hands after using the ‘facilities’ you have to walk through the mud room, through the entry/pantry area, through the kitchen, into the hallway and into the bathroom. Now (well, soon) we’ll be able to wash our hands right after doing our business. What a novel experience for us!
So, in my quest for the perfect sink I looked at quite a few online. I looked for 2nd hand of course. I found a nice looking ensuite sized one for $30 but wasn’t sure without seeing it. I found a really nice looking pale blue cast iron and enamel one nearby but when I tried to go see it, turned out the house was on top of the mountain and I almost had a heart attach when my wheels started to spin on a tight uphill bend.
My car doesn’t have good traction.
See, I’d arranged for our plumber to come over this morning to do some work and fit the new sink while he’s here. Plus the new gooseneck tap for the kitchen sink. I hate low taps in kitchens. Bad enough I only have a single tub sink but to have a low tap as well was like adding insult to injury.
I lived with it for 2 years. It was time.
In the end, with the plumber’s visit looming and no sink to be found, I dragged Wayne to Bunnings yesterday and had him pretend to wash his hands in a couple of smaller sinks to try them out. (He loved that!)
I ended up buying a pretty little squarish sink for $99, plus whatever for the tap.
Then we traipsed off to visit Anna, pick up the chairs her husband made, give her the painting I’d done, had a swim etc. While having fish and chips for lunch at Opossum Bay, I noticed a note in the window which said “pedestal sink, good condition $20, see John” and an address just around the corner.
Everyone started to tease me. I’d spent over $100 on my sink and I could have gotten that one, etc.
Don’t mess with me. They didn’t think I’d go…
I did.
John was the sweetest stooped little old man, he showed me the sink in his shed, telling me it came from the bungalow in his back yard which the kids had renovated and replaced everything old with new stuff. He said he hadn’t wanted to advertise it but a sign in the shop was enough, he only need to find the “right person, someone just like you who loves old things”.
So I bought it.
Being me, I also bought a solid timber door he had in the shed. It was right behind the sink. I looked at the sink, said I’d come back with the trailer and get it and btw, would he sell me the door? We think it might be huon pine. Great value at $20!
The sink isn’t plumbed in yet, (I had cleaned it, but dirty boots got it!) we forgot its a public holiday and when the plumber came up he couldn’t buy the bits and pieces he needed to finish the job. He’ll be back tomorrow. Meanwhile I undercoated the back wall so it would be easier to paint later.
The timber in that area is old timber from piles we found in the paddock. Wayne re-used all the best bits to line out that room. I’ll need to re-undercoat it to stop the wood stains from coming through, but it should be ok.
By tomorrow afternoon we’ll have a usable sink in the mudroom. 
Yipee!
z

Shared at:

Beyond The Picket Fence  

{almost} no sew curtains

I did tell you I was on a roll didn’t I? Weeks of very little from me, then suddenly I just can’t seem to shut up about the things I’ve made and done!

Do you remember when I found a ton of old cotton flour and bank deposit bags at an op shop ages ago?

Most of them are from the 80s, but that one with the woman holding a cake on it is in pounds so I figure it has to be from the 60s before Australia went metric.

At first I thought I wanted to make cushion covers out of them, but some are pretty old and the shape doesn’t really lend itself to a cushion unless you trim the image (no way) or lie the cushion sideways (not ideal).

I also thought they’d make great (interesting) curtains for my ugly kitchen.

A talking point type of thing, if you will.

So first thing I did was sort out how many bags I’d need for each window. I have two windows in the kitchen. One is tall and narrow, the other is tall and a bit wider. The first looks out to the front yard but is positioned in such a way that you cant really see out of it much, sandwiched as it is between the cupboards holding the microwave and the stove/rangehood.

The bigger one looks out into the mud room now that we’ve enclosed that tiny porch.

I won’t go into what I’d LIKE to do with the kitchen layout and window placement…. I won’t…

The tall narrow window gets the full HOT afternoon sun and had a venentian blind on it… very necessary if you didn’t want the kitchen to become a furnace on days like today. However the venetian blind was broken and I wanted it gone.

It was peach.

Need I say more?

I decided it needed a full curtain – 4 bags, 2 across and 2 down. I ironed them and sewed them together on my trusty ancient Singer sewing machine (bought for me by my father at a Trash and Treasure market about 20 years ago – well done dad!)

Using some small curtain clips I’d bought from ebay (cause the only place I found them locally was insanely expensive) I suspended them from the window sill using some old curtain hooks and a stick of bamboo I ripped out of a screen….

Ok. I didn’t have a curtain rod which would fit so I improvised!

On the other side of the room I had put up a hanging rail to hold the frying pans and some totally useless/display only bits and pieces. I only needed a short curtain to cut out some of the glare but still allow us to look out the window to the front gate if we bent over the sink, leaned to the left and carefully pressed our faces to the window all while avoiding braining ourselves on the sharp cupboard corner.

Don’t you love the layout of our kitchen? I know Wayne does. You’ll recognise him. He’s the one with the band aids all over his head.

Hm. Not quite right… It was lacking something (and I don’t mean how crooked it is… I fixed that.)

The main problem, as you can see on the narrow window, is that the curtain looked see-through with the strong sun behind it.

I couldn’t leave it like that. Not in this heat. So I grabbed this girl’s best friend – burlap!

I cut a piece of burlap slightly larger than the flour sack curtain I’d made, clipped it all together and voila! Much better!

I did the same with the other window too, only this time I cut the burlap longer so it would go behind the rail and cover a bit more of the unsightly mess in the mud room.

Not bad for an almost no sew project. Basic and easy.

Just the way I like it!

z


Shared at:

What we accomplished Wednesday at Green Willow Pond

Beyond The Picket Fence

The Girl Creative


home is where I hang my hat

Its way too hot to be doing much today. They’re predicting 35 degrees in Hobart and that means at least a couple of degrees hotter in the Derwent Valley.
Life on the farm has been going well, if you don’t dwell on the fact that we’re seriously close to running out of water and desperately need rain.
And we don’t grow crops. We only have 3 horses feeding on about 11 acres of pasture. And we have bore water so we can water at least parts of the pasture every day and keep the horses in fresh water.
Progress on the house painting is slow. I’ve been lucky enough to have the help of a friend from the mainland. I met Basia when she was a real estate agent, she sold my house in Melbourne for me before I moved to Tasmania in 2003. We stayed in touch and she visits almost every year. Till now she’d only ever visited Tasmania to hike and cycle, stopping in with me for a day or two at the end of her trip.
This year Basia came over to pick cherries and look for other work so she’s been staying in my house in Fentonbury. She’s the best guest ever – she’s always doing stuff! On her various visits she’s done tons of gardening, this time she’s helped paint the house on two long days, fixed curtain tracks and hemmed curtains for my house in Fentonbury.
On Saturday she came over and we painted the north and east sides of the house – all that’s left to do now is paint the top bits (including the underneath of the roof) on 3 sides, topcoat the window frames and paint rails on 2 sides.

Ok, that’s not a small job, but its manageable. The majority of the work has been finished. I’ll do the rest over a few weekends, providing the weather doesn’t suck isn’t too hot.
Meanwhile I’m on a roll of some kind… I’m itching to do things. This happens to me every now and then. This time I’ve concentrated the feeling on doing something in the kitchen.
I have an ugly kitchen. At least its ugly in my opinion. The people who put it in loved it. 
I dream of a country kitchen… all white on white, with some minty green or aqua, antiques and rustic items on display…
Over the last year I’ve been trying to make it more Zefi-friendly in small ways that don’t include knocking down a wall, putting a bigger window in a more appropriate spot (which will mean moving the hot water cyclinder), putting in a new sink, moving the stove, putting in more drawers and getting rid of those horrible corner cupboards who’s doors keep falling off their hinges, getting a new, not blue laminate, benchtop…  

One of the things in this kitchen is the huge pantry cupboard. Its handy. Sure. But its a big flat blob of white laminate. I’ve been thinking of making it into a big flat blob of chalkboard….

Here’s my vision thanks to the miracle of Photoshop:
Nice huh?
Ok… nice for Zefi!
This morning, among other things, I removed the handles and filled one of the holes. I have some cute little knobs I want to use.
Stay tuned…

Shared at:

Motivate Me Monday at Keeping it Simple

DIY Show Off

The Girl Creative


house painting progress – slow

Why is it that things always take so much longer than you anticipate?

I’ve been painting pretty much all day. Six hours at least. And I haven’t even finished the first coat of the short side of the house!

I started off by finishing the top right hand corner of the mud room under the porch where I had to stop when it started raining the other day, then moved along painting the whole south side of the house.

I filled my paint bucket 3 times, telling myself that when I finished the 3rd refill I’d quit for the day. I really thought I’d have it all done by the time I finished the 3rd bucket. I only took one quick break to have some chocolate when I realised how hungry I was and found there was nothing I could have a quick snack of in the fridge. I forgot about the twiggy salami sticks. I just had those now. 

I was sure I’d finish the whole side within my 3 bucklet limit, but as it turns out I didn’t. I was THIS close!

But by the time I got to the end of the paint in my little bucket I was absolutely buggered. My arm is killing me, I have callouses on my middle finger where I rest the brush and my legs are sore me from balancing precariously on the ladder.

I need a higher ladder…

Sigh.

I’m exhausted.

I don’t mind the actual work. I quite like painting. Plus I had Jeffrey Deaver and Lincoln Rhyme to keep me company as I painted (audio books have saved me on many occasions!) But man, the time!

I guess using a 2in brush doesn’t help.

(I tried using a bigger brush, 3in, but the weight of it was harder to handle with my sore arm.)

So, what do you think? The colour is strangely lighter than the sample I’d painted on the walls inside and outside the mudroom to live with for the last year to be sure its what I wanted for the house. Perhaps it will darken with the 2nd coat. Still, I think its ok.

Later on I might consider painting the small timber shed you can see behind the house and the garage a darker shade of this grey.

I wish the roof was dark grey, not that blue. But what can you do? I ain’t getting up there to paint that!

z

heart tray

How pretty is this tray with its heart handles? When I found it in an op shop it was all pine and looked heavy and chunky. Not that there’s anything wrong with chunky. I like chunky. I love chunky sport shoes, I love chunky bracelets. But this tray just looked like something you’d hit a burglar over the head with, not serve tea on. And so un-pretty…
But the hearts. And the solid wood. I couldn’t go past that.
So I did what any self-respecting DIY-er would do – I painted it. Sanded it. Painted it using a chalk paint of my own mixing, lightly sanded it again to create a smooth satin feel you can’t get enough of touching.
Heavy no more. Chunky it might be, but its also light and pretty now.
It may still come in handy as a weapon of self protection, but you’d think twice about using this pretty tray to pound someone on the head.
I like it when things work out, don’t you?
z
Shared at:

Homespun Happenings

office accomplished

I can’t wait to see Wayne’s face when he sees his new work space tomorrow!
So, you want the nitty gritty?
This morning when I woke up, I found I could barely walk. So sore! But I cowboy-ed up and got on with it.
After 2 cups of coffee and a breakfast of Weetbix (the breakfast of champions apparently) I was up to facing the mess I’d made in the living room.
First thing I did was mix up some more putty for the patched hole and apply it. Since its under the desk I’m not fussed about finishing it. That’ll be a job for when I paint the living room.
I had an unpainted corner to deal with.
I did what every DIY person would do… I looked around at what I had that I could use. The easiest thing I found was 3 metres of burlap.
Using upholstery tacks (leftover from my kitchen chair makeover), I tacked the burlap to the wall. I had to cut and overlap a bit to cover the entire area, but I think it looks ok.
I then had to put together my old office desk. Its one of those corner units, made up of two separate desks joined together by a triangular piece.
I found the triangle piece and the metal joining strips. Naturally I’d lost the screws to put it all together.
Of course I didn’t have any screws fat and short enough to do the job. I had to improvise.
I drilled new holes to fit the thinner screws I had on hand… then made little screw and nut kebabs to shorten the length of the screws so they wouldn’t come up out the top of the desk.
I never said I did things right. I just said I got things done.
After much wrestling with desk parts and crawling around on my knees, I got the desk together. And while I was down there I untangled all the cables and put Wayne’s computer, printer and speakers back together again.
At least I hope I did….
I got a whimsical wire frame Wayne made for me (as inspired by Pinterest) and put it on one wall. I put the floor lamp in the corner behind the desk, and a vase of flowers. Not sure how Wayne will like that!
I also brought in a couple of boxes I’ve been using in the shed for my tools. This gorgeously chippy box used to hold my framing equipment. It now holds Wayne’s notebooks and sketch pads.
This timber tool caddy used to hold my smaller tools. It now holds rulers and pens.
I’ve also moved an old bookcase into the living room for books and paperwork. I’ll take photos of that when I finish it.

So, lets review:

Before:

After:


You can see the first stage of the makeover here.

z
Shared at:

TDC Before and After

Beyond The Picket Fence

when the cats away

As usual, I had big plans for this weekend. 
Its Grand Final weekend so Wayne has gone to his friend’s house to watch the game and do the male bonding thing.
It was my big chance to do something I’ve been thinking of doing for a while now. We have (had!) a big cupboard in the corner of the living room which I used as my linen cupboard.
In the living room.
Who thought that would be a good place for a linen cupboard?
To make matters worse, it was brown, varnished MDF. Not exactly pretty enough to make me want to keep it!
A few weeks ago when I opened the door to take out clean sheets, the front piece of cornice fell off and broke in half. It was like a sign – the cupboard had to go!
So, with Wayne and his rolling eyes away for the weekend I thought I’d tackle it.
I didn’t get any before photos cause I didn’t think of it, but I started last night (Friday to those of us in the Southern hemisphere).
I started by pulling the doors off the cupboard (man those suckers are heavy!), then removing the last strip of cornice still clinging on. I was able to get the cornice off without breaking it, and the doors off without crushing any toes.
I removed all the screws from the inside of the cupboard which fixed it to the bottom frame, the wall and the outer side, totally planning to dismantle it and just move it out. I discovered that the cupboard itself was one complete piece, with a ‘veneer’ of MDF on the side which matched the doors, a frame which it sat on, and a bit of a strip where it met the wall.
The ‘veneer’ side was stuck to the wall with silicone gap filler. I had to get rid of that, then use a hammer to loosen it, again managing to get it off without crushing any toes.
 I got the whole cupboard off the wall with immense difficulty. Not only was it heavy, it was also very tight. I had to inch it forward on the bottom frame, then try to work it off and onto the ground without totally damaging the ceiling. You can see the scrape marks where I didn’t quite succeed.
What I was left with was an expanse of unpainted wall and ceiling, with plaster bits stuck where the cornice used to be, and gaps that would need sealing up. And mouse droppings. Lots of mouse droppings.
This is the frame the cupboard sat on. No carpet underneath of course. And a hole in the wall behind the packing tape.
About halfway through the removal progress I began to have second thoughts. I wondered if I could/should leave the cupboard there, open it up to shelves maybe. It didnt look too bad all white and much brighter than the brown it was with the doors. But I decided to go ahead and remove it, however instead of pulling it apart, I’d keep it intact and move it to the tiny back entry as my pantry.
So I had to put half the screws back in.
My plan is to put my corner office desk in that corner so Wayne has a much bigger space to work. He never used the office so I’ve claimed it as my space and he has a desk in the living room. For now, I’ll put in my desk and later I hope to make him a much nicer desk, something with character.
Anyway, once I got the cupboard off the frame I had to figure out how to get it out of there. The ceiling in that part of the living room is really low.
Actually, we have 3 ceiling heights in the living room. Originally it was 2 separate rooms, with a later extension. Why they didn’t redo the ceilings to match I have no idea. But there you have it. A low ceiling plus a lower beam meant I couldn’t get the cupboard out unless I lay it down on its back, then onto its side to push it to the entry.
Good plan.
I started to lie it down when it broke in half, almost crushing me underneath it.
Ok, it didn’t BREAK in half. It was 2 pieces, joined together. It just came apart at the weakest spot.
On the bright side, it was now 2 pieces making it easier to move!
I lay each piece on its side, then slowly pushed them from the living room, across the tiny hall, around the corner in the kitchen and into the tiny dark entry.
I put the frame down first, then wriggled the biggest piece of the cupboard onto it. Then, using a ladder and my body as a counterweight, I managed to slide the top piece up and sit it on top. Again, using a push, slide and counterbalance technique, I got the smaller piece into place.
So high school physics wasn’t a total waste of time!
I then screwed the bits together and to the bottom frame. I even managed to put a few screws into the wall behind to keep it stable.
It makes the fridge look tiny now, doesn’t it? ONE DAY I plan to knock out half the wall from that tiny entry into the kitchen, making the kitchen an L shape and making that pantry area part of the kitchen. It’ll remove the rabbit warren feel of the back of the house and bring the fridge into the kitchen.
Most country houses here in Tasmania use the back door as the front door. Our front door is on the other side of the house. Sort of silly really, but thats how it is. To enter our house you have to come into the mudroom (which we added on), go through the tiny dark entry/pantry, then into the kitchen.
For now,  I’ve just made the tiny entry into a real pantry.
The house is a mess, stuff piled everywhere. I grabbed a few things I’d taken out of the old wardrobe I was using as a pantry and put them on the shelves. I’m planning to leave the shelves open, not adding doors. I’ll see if Wayne can remove the hardware. My arm is already killing me and I dont really want to be trying to remove them using a screwdriver.
 
 But I wasn’t done. I couldn’t leave the holes in the ceiling or the floor. Firstly its cold today and there was a lot of cold air coming in. Secondly, it was like a mouse superhighway judging by the droppings.
I’ve never done anything like this before and its a really bad job. However, it doesn’t really matter. One of these days, when we win lotto, I’ll get the whole living room ceiling redone. Till then, I just needed to get the holes patched up.
I used the cornice which had come off (or fallen off). I only had to trim down one piece and it turns out, cornice is easy to cut. The problem was with putting it up. I know you’re not supposed to use nails, but seriously, after trying to get it up using liquid nails* and failing, I decided what the hell. I can paint over nails.
*I broke my caulking gun. Then I couldn’t find the new one I’d gotten as a spare. I had to go borrow one from Wayne’s garage!
I couldn’t get the plaster blobs off the ceiling. They’ll need sanding off. Ugh.
I got lucky with the skirting board. I was going to use anything at all, just to cover the holes, but I found some matching stuff in the casita. I even managed to cut it to fit into the corner!
After everything was glued and nailed in place, I used gap filler to fill in any gaps. I’ve left it all to dry overnight and tomorrow I’ll sand back and re-fill any spots that need re-filling. Like the hole I patched.
Now, I know its not the prettiest job I’ve ever done. Its messy and ugly. There are plaster globs on the ceiling, missing carpet in the corner, the skirting is uneven where it goes from carpet to timber. But I don’t mind. It will do for now. I can’t paint the walls cause I don’t have paint for it, besides I want to repaint the entire living room. And I plan to remove the carpet when I can too.
So, I’m tired. Its been a huge day.
Tomorrow is another day with more work!
z

the woodshed finished!

Its finished! Mission accomplished. This September break, we made over the woodshed!
The last finishing touches went on on Monday, the last day of our break.
I made a couple of signs for the shed (what is it with me and signs lately? I have this unhealthy obsession…)
I made a small ‘Woodshed’ sign which I put into the center of the barbed wire wreath.
I also made a special sign –
When we moved here, we named the farm Wind Dancer after Wayne’s special horse. I always wanted to make a sign for the gate and never got around to it. Then while we were making over the woodshed I found this old round piece of plywood. I’d seen it many times before – its been there since we bought the farm after all. Its old, weathered and broken in spots. 
It was perfect.
I wanted it to look like a very old sign. Like you’d see in an old garage or something.
I had to print out the words on lots of bits of paper and I cut them out like a stencil. Using charcoal, I drew the letters and horse in, and then painted it.
Unfortunately, when I coated the sign with polyurethane to protect it from the weather (cause now its a sign I don’t want it rotting or washing away in the rain) it darkened. Varnish always darkens the colour of timber.
This is how it looks when you come up our drive now. The fence ruins the look a bit, but we can’t do much about that. (You can see where Wally has been gnawing on the fence posts!)
Wayne has finished the last wall – on the right. Its a half wall. He won that arguement. Actually, it made more sense than leaving it open on that side. Now we can toss wood in and it won’t just bounce back out.
 The front and left side of the shed now has plants and rusty objects adorning it.
The ammo boxes are one of my favourite things. I found them at op shops over the years and have held onto them.
We’re both very proud of our ‘new’ woodshed.
z

Shared at: 

Knick of Time
DIY Show Off
 
Homespun Happenings