DIY – kitchen chairs make over


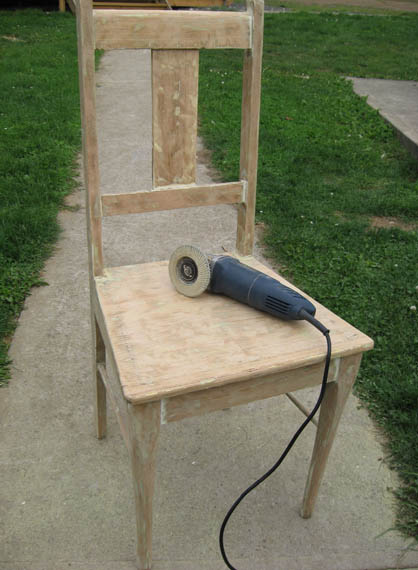
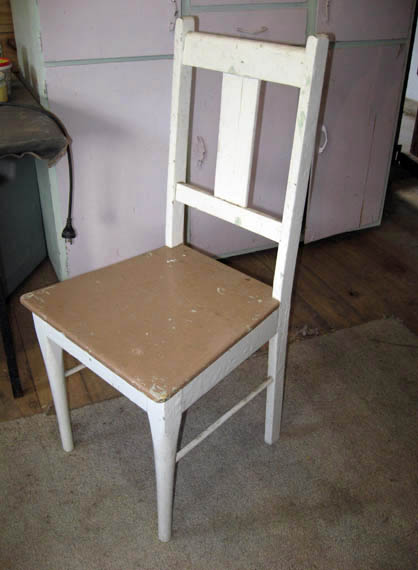
This is the story of a couple of chairs found at tip shops looking very sad and very ugly. I got this first chair for $1! I couldn’t believe it! When I saw it I thought for sure they’d want something like $15 for it. At least. I’d seen similar chairs in much wobblier condition for $25 each at one of the other tip shops. This one was nice and sturdy. When I got the sales person’s attention I asked about a couple of other items I was interested in, then offhandedly asked about the chair, sure I wouldn’t want to pay their price for it. When she said $1.00 I had it in my car before she could change her mind.
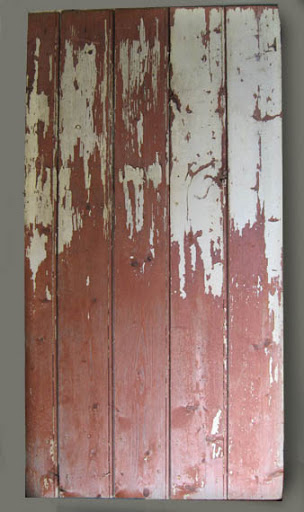
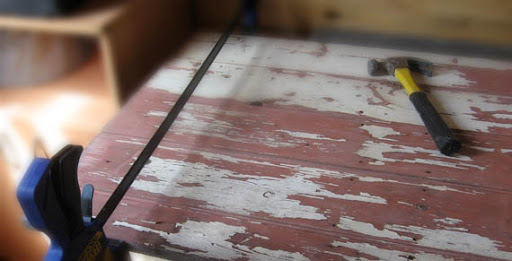
It was painted in layers of oil paint which I found where almost impossible to get off using the sander.
So, I got out my trusty angle grinder with the sanding attachment and made short work of all those layers of paint.
I then decided to stick with the two toned theme on the chair and painted it Limed White, with a pale blue seat… And hated it.
I quickly repainted it. This time I used a mix of my own making. I never used to do this, but I have a good friend who is forever taking liberties with paints and mixing up her own tints. My biggest fear is that I’ll find a colour I love and run out mid-job with no way to recreate it.
I soon got over my fears though and was happily mixing up colours for all I was worth. Almost everything in my way got a coat of paint on it over the last 2 weeks.
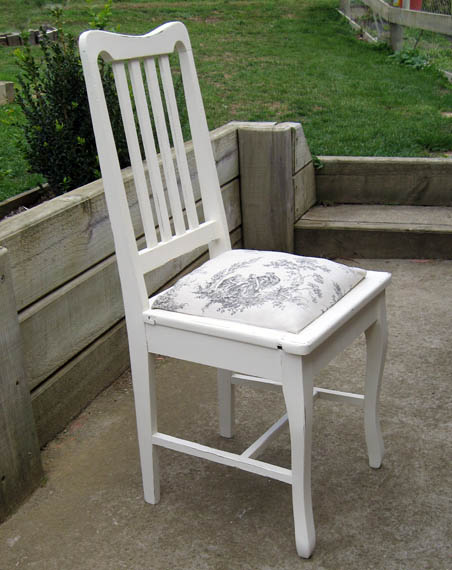
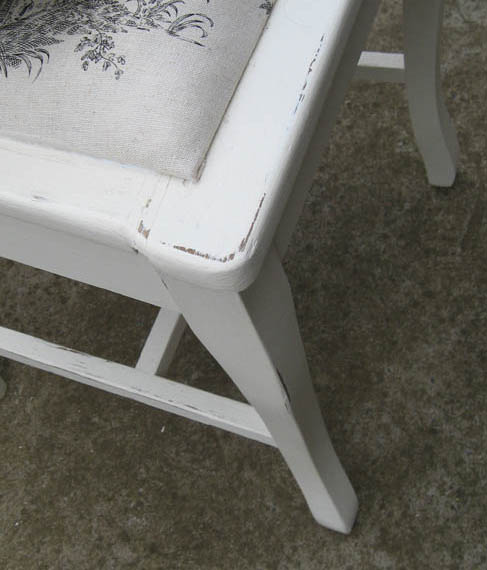
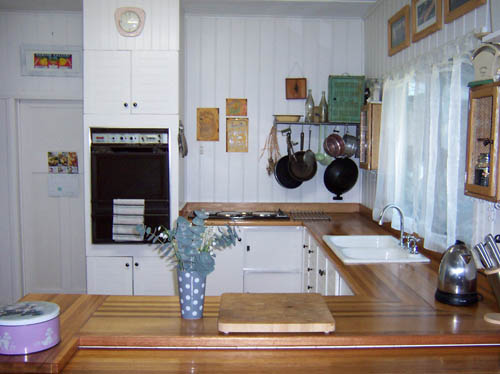
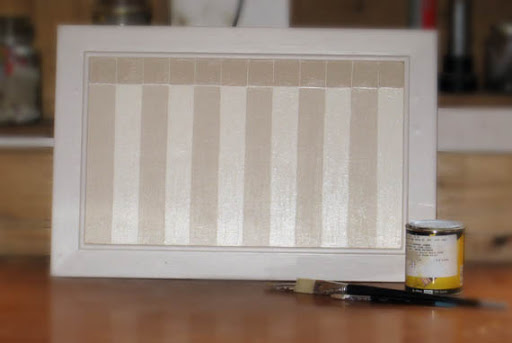
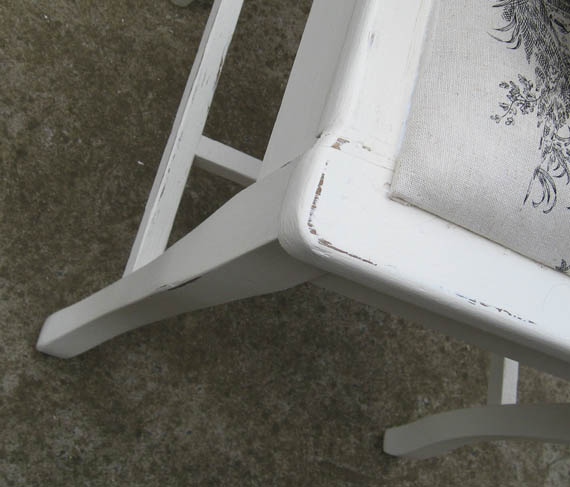
I finished up with a chair in a pale rich creamy white which I love. Its similar to the colour of the kitchen table. Once the chair was finished I gave it a quick sand, exposing a few spots on ‘wear’ areas, then I gave it a wax with some clear beeswax. I love the smell of that stuff and the soft gloss it gives to things. I’m totally new to furniture wax and this is the first time I’ve tried it. I read about it on the DIY blogs I’ve been reading lately and thought I’d give it a try.
After all, try everything in life once, and the good things twice.
The other chair in this little story is a dining chair from a set of 3 I got at a different tip shop for $5 each. These poor little chairs were sitting in the rain on the day I saw them. One had a broken back so I knew I had to rescue them. The pic below is of one of the chairs, the one with a missing slat, not the broken backed one or the horribly upholstered one. They had the best 50s style vinyl on them, marred by paint splatters, but gorgeous.
 
This is the horribly uphostered one. With a broken and splintered seat due to having nails pulled and hammered in quite a few times over the decades.
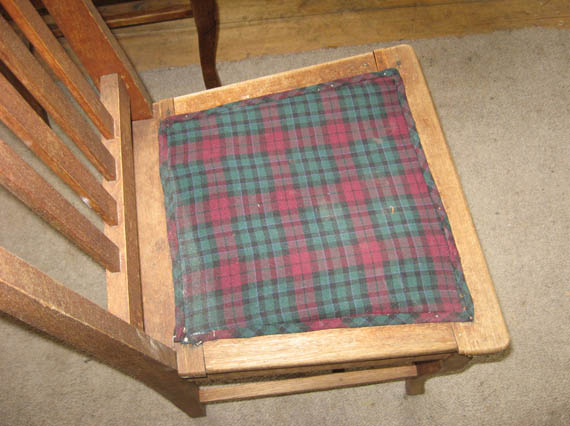
I thought I’d tackle the upholstered one first, thinking it might be the easiest one to start with – plus I needed to find a way to repair the broken back and fill the other chairs where timber was missing… 
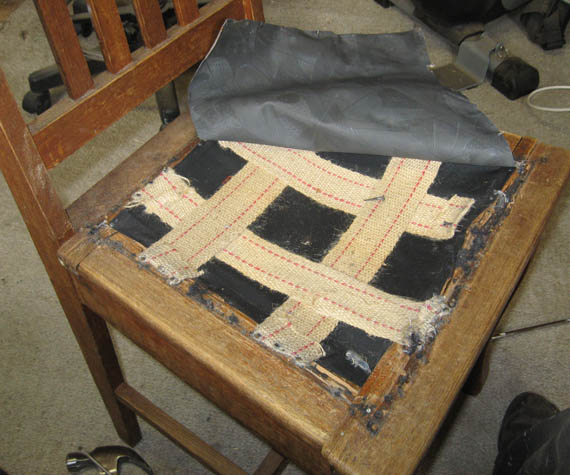
I ripped off the check fabric and nails, found wadding and the original vinyl being used as a kind of backing. Plus lots of nails and splintered wood.
So, first things first, I painted it – white of course. This time I used my favourite stand-by Antique White USA. Once the painting was finished I gave it a quick sand and wax. I cut a bit of masonite to cover the hole and nails I couldn’t remove or hammer in below ‘ouch’ stage.
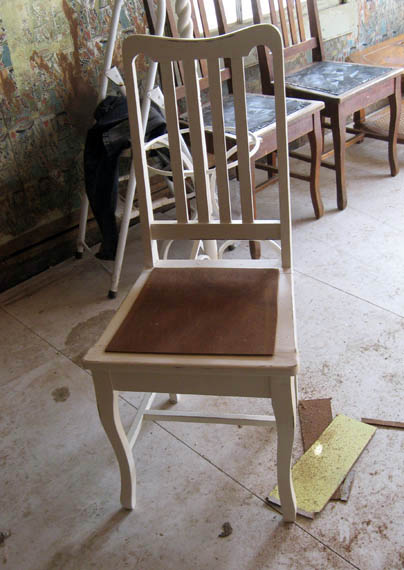
Then I upholstered it. 
I’ll spare you the gory details. It wasn’t pretty.
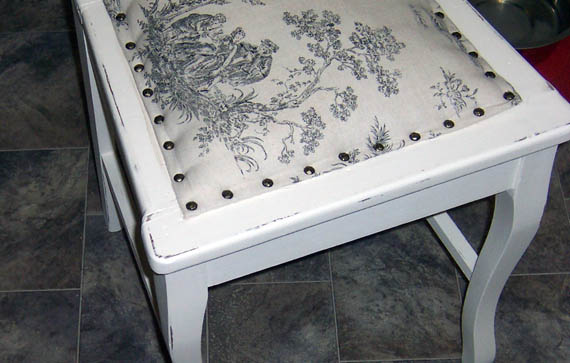
I’ve only tried upholstering something once before in my life – using a staple gun. This time I tried my hot glue gun. That made it easier, but my corners leave a lot to be desired. Here’s a photo far enough away as to hide the imperfections.
In the spirit of not spending any money if I can avoid it, I used things I had on hand. Paint I had on hand, offcuts of masonite I found in the casita, some toille fabric remnants I’d found a couple of months ago in the clearance bin at Spotlight, and some wadding I also found among my collection of ‘stuff that’ll come in handy one day’.
(I’ll come clean: the wadding came out of stuffed toys the dogs ripped apart. I knew I kept it for a reason!)
All in all, I love my new kitchen chairs!

 They now sit proudly in the kitchen, awaiting the arrival of their not-quite-matching mates.
I have more of the black and white fabric and a complimentary fabric in cream and burgundy which I plan to use to make a cushion for the hard chair, maybe for all the chairs…
I just love doing this stuff!
z

ps. I just added upholstery tacks to the padded chair and its really finished it off nicely.


Shared at:

DIY Show Off

if there’s no rest for the wicked, what does that make me?

Even when I’m supposed to be taking it easy, I’m doing something. I just can’t stop. I’ll stop for a cup of coffee but I’ll read a book or check mail while I do it. I watch TV but half the time I also work on a craft project, brush or caress a poodle. Before I got a PVR I used to read a book during the ads.

Point in case, the vase above. This used to be an empty coffee can. I collected some old gum tree bark and used the hot glue gun (I love my hot glue gun) to glue the curls of bark to the tin. They look amazing…. just like cinnamon sticks. This is only a preview. I have plans for this vase… stay tuned.

Another thing I worked on while watching TV over the last week was a birdhouse. We now have two birdhouses hanging off the trellis in the yard. I promise I’ll take better photos one of these days but I was so eager to hang it up and see what it looked like in its ‘natural environment’.

This too was made from an old coffee can. Wayne helped by cutting out the door for me and making a roof out of some old rusty tin. Great isn’t it? I love the little twisted wire ‘hooks’ he made to hold the roof on.

All I did to improve this birdhouse was to glue sticks to it to cover the tin. I’ve temporarily hung it off an old horse bit we have on the trellis. Kinda cool.

So, besides all that, now that the kitchen table is done, what have I been doing? Well. On Monday I found out that the tenants had vacated my house in Fentonbury. I had given them notice as I discovered that its very stressful and not at all easy to sell a house while its rented out. The only thing to do was to take the house back and move myself back in so I can have the house looking the way I like to have it: neat, tidy, clean, maintained… and gorgeous.

Not that the tenants were bad… they were fine to start with and to be honest I never had an problems with them till I decided to sell the house. From the minute I notified them of my intent to sell they became the tentants from hell. I wont go into details, all I can say is that it could have been way worse. I’ve seen the horror stories. We lost a sale because of them, but the house is ok… Nothing some cleaning and TLC can’t fix.

I’m so glad to have my house back. Its been a really hard thing for me to let go of this house. I think its because I didn’t sell it but decided to rent it. I confess I’m a control freak… I like things done my way. And seeing my house not being maintained the way I would myself… well… it was hard to deal with. If I’d sold it it would have been someone else’s house, no longer mine to worry about.

When I sold my house in Melbourne I moved away so I didn’t see what the new owners did or didn’t do. When I did visit Melbourne and drove by one day a couple of years later I was disappointed that the new owners didn’t seem as house proud as I was… but it was no longer my house, so it wasn’t my problem.

My advice is this (and I really wish I’d given myself this advice a year ago): don’t rent your house. Not if you’re attached to it… if you want to move on, sell it. Being a landlord sucks.

But enough of that. I had been talking about my week. It started with learning the house was vacant on Monday, then having to take a day off on Tuesday to go and inspect it with the agent to be sure all was ok. From there things just got busier and busier. Tomorrow is Good Friday, so with having Monday and Tuesday off its been a short week for me… short but not quiet! My week included finding the vinyl I want in the mud room, taking chainsaws in for a service, grooming 2 new dogs, working, picking Merrill up from the airport, visiting the tax man, shopping and taking Montana to the vet to be spayed.

Yes… My baby girlie is in the living room right now, sore and miserable. She won’t eat even though I chopped up some leftover sausages and a chicken schnitzel and tried hand feeding her. That’s ok. She’ll eat it in the morning I’m sure.

Thing is… I knew I didn’t want to breed Montana again. She only had the one litter but she had bad diarhea for weeks afterwards so I didn’t want to risk her health by having another litter. Plus, if I did  have another litter I’d have to keep a puppy and then I’d have to show it… and who has the time? and who has the money? Breeding Montana would mean airfares to the mainland for both of us, stud fees, and the cost of raising a litter. I sure don’t have money to spare right now.

So, even though I knew I wasn’t going to breed her again, I couldn’t bring myself to put a full stop on that part of my life. You know… just knowing that I could breed another litter if I wanted to, that my own line didn’t end there, well… it was reassuring.

But I finally decided it was time. Montana is 7.5 yrs old. I wouldn’t breed her again even if I wanted to at this age. So this morning I dropped her off and asked that the vet who spayed her also look at a small hard lump on her tummy near her last teats.

$565 later (yeah, you heard me!) Montana is spayed, all went well and the lump was removed and is being sent to be biopsied.

I was fully expecting the vet to tell me it was nothing. But here I am now… not even wanting to think anything other than positive stuff.

He said its a mammary tumour – of those 50% are benign and 50% not. Of the not, 50% are the type that spread, 50% aren’t. So, there’s a 75% chance this is nothing at all to worry about.

Fingers crossed. I try not to think that Pagan (her mother) died at age 9 of cancer. She was fine till one day she had diarhea and didn’t eat, the second day when things didn’t pick up they took her to the vet and the ultrasound showed she was full of growths in her abdomen. There’d been no indication.

Hopefully this is nothing at all. I couldn’t bare her being sick. I adore my baby girl. She is the most beautiful dog in the world.

Ok. Enough of that. It will all be fine. I’m going to go cuddle her for a while.

So, tomorrow I had planned to go up to Fentonbury to start the clean up of my house and yard. But I wont be… Wayne suggested that a day off wouldn’t kill me. Little does he know huh? I’ll stay here and look after my girlie, clean my car, do some work on my dining chairs, sort out stuff to take to Fentonbury, catch up on emails and computer work… that’s taking it easy!

I’ll leave you with some tip shop bottles I gave a ‘sea glass’ effect to using PVA glue and food colour (yep, you go it! another Pinterest idea). These will be going to the bathroom in Fentonbury as decor.

z

DIY – the kitchen table

Well, its finally done!!! The new/old table that I’ve been making over is finished! It only took about five weeks from the day I got it. Really. It would have been done sooner if I could have worked on it more solidly. As it was, it went from this:


to this:

Not bad eh?

Ok. So here’s the story. I’ve always dreamed of having a country kitchen. Our kitchen here is melamine heaven (ugh) and not really big enough for the big pine table I dreamed of. So I make do till I can afford to do the kitchen up. Up till now I’ve had my 60s kitchen table (and chairs as you can see above) in the kitchen and that worked fine. But I still wanted that timber table. I figure the rest of the kitchen will catch up one day soon…

As you know, I’m a tip shop/op shop addict. And on one of my trips I saw this table and thought ‘hey… I can do something with that!’

It had a horrible, broken top, a wonky leg and nails all over the sides.

All I saw was that it was solid tassie oak and I was going to replace the top anyway. I had plans to use the offcuts from enclosing the mud room to create a new top, but then I looked around me and found this:

And old shed door. Too small to use as a front door but still… I thought it’d come in useful one day. 🙂

I put it on top of the table and thought ‘eureka!’. I had my new table top.

I started by removing the bracing at the back of the door and the very old, very rusty hinges. I quickly found out that the slats were in pretty bad shape. I had to pull them apart, clean them up and re-glue them together. They still weren’t all that solid.

I sanded off the paint. I wanted to use the front of the door with the grooves between the slats. The slats were bent and uneven due to years of exposure to the elements. I had to sand a LOT to get the door more or less smooth and even.

Then I started work on the table. I turned it upside down and found it had a clever little ‘hold the top on’ system which I saved and re-used when I finished.

It had a nice solid oak frame which had originally held plywood covered with some kind of laminate which was long gone, only the glue remaining. I had to beat that out with a crowbar.

In the end I was left with the solid table top frame and the table legs.

I worked on straightening up the wonky leg and sanding back the peeling paint off the legs. I wasn’t too fussy about getting it perfect. I’m after a country look after all. Worn and loved, not pristine.

Next came attaching the top frame to the legs with glue and nails, then the new top onto that.

And sanding.

Lots of sanding.

I got to use the new belt sander for the first time. That sucker sure can pull. Almost pulled me over the table top first time I turned it on.

 Eventually, I got to where I thought I was finished. Then I sanded some more.

The table was only about 19-20mm wide with ragged edges. Even after I cut the worst of them off with my circular saw I still needed to edge it to make it look neat. Plus make it look thicker. Nothing like a nice thick table, right?

I got some pine strips as edging. They were 40mm wide. Great, but too much overhang underneath. I didn’t want to risk anything catching onto the edge and pulling it off. So I had to cut down some strips of timber to put behind as extra support for the edging.

Sorry, no photos of that. It was dodgey looking.

Once the edging was on I had to sand it again cause my joins left a bit to be desired.

I learned to work with furniture from a guy who makes rustic pieces. I basically learned to sand using a grinder … need I say more?

I used some clear silicone stuff to fill the big holes. Big mistake. Sure, it worked on the holes, but that stuff was horrible. I tried to fill the gaps with it (cause who wants to lose crumbs in cracks in the table?) and I got it all over the surface of the table. I got my fingers covered in it for one thing, but I couldn’t remove it. And when I went to sand it off it only made a kind of greasy smear. Yuck.

Note the clever trick I picked up from a friend: use a balloon stretched over the tip to keep the silicone from drying out.

I had to find a way to get the smeared silicone off, or at least minimise the mess… so I rubbed some burnt umber artists acrylic onto the table around the cracks where the smears were. I like it. I love burnt umber. I use it to give my ‘distressed’ items a more distressed look.

Then I looked at the table top, before applying polyurethane, and thought ‘Hmmm. It needs something.’

I found a graphic I liked on the Graphics Fairy website, printed it out but couldn’t blow it up to the size I wanted to tranfer it onto the table. I had to do it freehand.

I ruled up lines, then drew the letters on with a pencil. I then used a brown marker to draw on the type. I ain’t a signwriter. It came out ok, but not quite as authentic as I would have liked.

 
So I attacked it with the sander, rubbing it down, making it look like it had worn off. I probably went overboard with the rubbing, and perhaps the black marker would have looked better, but when I tested it on a scrap bit of timber the brown sanded better than the black.

Finally it was time to paint and lacquer the table. I sat the table up on some tap bits (like the skirts you put under tap fittings) so that I could paint the legs all the way to the bottom without having to worry about then sticking to newspaper (a tip off Pinterest)

I tried another tip I got off Pinterest: the elastic band to stop drips. Have  I mentioned how much I love that site?

I had to do three coats of polyurethane, sanding lightly with 240 grit paper between coats (cause thats what the instructions said). I gave the legs 2 coats of a creamy white paint I mixed up using some leftover cream and a bit of Antique White USA. Once it was dry I gave the legs a light sand to show a bit of wear, then moved it into the kitchen!!!

Next project… the chairs!

z

Shared at:

Knick of Time
DIY Show Off

I’m on fire!

Yep! I’m SuperWoman! This weekend I managed to get to a ton of my current projects. And it feels good!

Since I plan to blog about each project in more detail when they’re finished, I thought I’d share a sneak peak just cause I’m so pleased with myself.

Above is our new/old front door. This is stage 3 of the door. Its now had the hardware removed and have been sanded on both sides (the other side being mostly orange).

I also got started on the three dining chairs I got for $5 each. Above is one of them, with a 50s vinyl seat and a missing back slat. One other has the same seat and all its slats. And the third had a fabric badly replaced seat which I have removed and have started the process of restoring.

I also started on another chair. This one cost me $1 from the tip shop. I know! I couldn’t believe it! You never see these old chairs (in sitting safe order!) for that much. I had to grab it. I had some trouble getting the 104 layers of paint off it, but I managed and now its ready for a fine sand and paint.

Then there’s the new/old kitchen table. The one where I replaced the stuffed up top with an old shed door. That needs more work but the basics are done. I’m so excited.

But don’t think I was slack and stopped there! I worked on a birdhouse, a vase, our firewood box, made muffins, entertained, worked on horses, did the requisite multiple loads of washing and groomed a dog. (Not my own fuzzy faced beasts unfortunately. I had to draw the line somewhere!).

So, I feel good as I go into another week of work.

z

e.t. phone home

Today, finally, was a productive day. We’ve been so busy lately with work and visitors that it seems my life has become anything but productive.

After a run to the hardware store for some plywood for the mudroom floor and a good start to 5 loads of washing (where on earth do that many clothes come from?) I got to do some real work!

As opposed to work for someone else, or computer work.

Firstly we got to do some work with Dancer. She’s been very wary of lifting her back feet – she leans onto Wayne and snatches them away in fear of losing her balance. Today we tied her up and, using a rope and some cuffs (technical horse training gear), worked on lifting her legs – Wayne in the danger zone and me on the other side of a post hanging onto the rope.

We were both thrilled with how she went. After a few minutes of panic at being cornered and having rope around her legs she started giving her legs and letting Wayne lift them forward and back. Excellent work! Not a single kick. When we first got her she’d let fly every spook she got. Tomorrow we hope the farrier is able to trim her back feet for the first time.

After giving her an apple and lots of pats, I got to work sanding an old feed box Wayne had which we’ve decided to use as our firewood box. Its going to live on the front porch which is exposed to the weather (no roof on that part yet!) so the box needed a new coat of paint to protect it from the elements. I gave it a quick sand and put on the first of 2 coats of paint. What colour you ask? Antique White USA of course. Mainly cause I have tons of the stuff in exterior (and interior) paint. I’ll finish that off tomorrow and I’ll get my trusty man to fill it with firewood. 

I got the new/old front door out onto the little porch of the casita and sanded the inner side. I’d already removed the hardware so I was able to sand it pretty well and remove all the old flaking white paint. I then chipped away at all the glue and broken glass on the panel bits so we can put in new glass.

Once I decide on a lockset and handle for the door I can bog up the unwanted holes and paint it! Oh… and then get the glazier to put in new glass of course.

Still, I was very excited by my work.

While I was out there sanding for what seemed like hours, using my left hand as the main sander hand to spare my right (which is a problem hand with its constant aches and pains) I wondered where Wayne had got to. I knew he was around somewhere but I couldn’t see him and I couldnt hear him. When he’s working in the shed I can usually hear him hammering away and swearing. Today there was a strange silence.

Ok. I’ll go with the flow. I did my work on the door, brought in the washing, got onto the computer to check mail. And then I heard Wayne calling me.

You know how you can always tell by the sound of a dog’s bark what they’re barking at? For instance, you can always tell if its a stranger at the gate, someone on the road, the horses at the fence, or a chicken in the yard – and you respond accordingly.

This afternoon when I heard Wayne calling for me I knew he had something to show me.

When I went outside this is what I saw:

Wayne’s obviously been playing with his welder. Isn’t it gorgeous? So cute in its aggressive little way.

I love it when Wayne gets to be creative.

I better go have a shower and rest up my arm. Tomorrow is another big day. Hopefully I can move my other projects along a bit further, or, dare I even dream it… finish one of them!

z

DIY – paint it white

Since this last week has been flat out work-wise and I don’t have anything new to share, I thought I’d share my kitchen make-over in my house in Fentonbury.

It wasn’t the first house I rennovated, that prize goes to my house in Melbourne. But unless I can find the photos for that rennovation it will forever remain a mystery.

The house in Fentonbury however, was recent enough that I have all the photos on cd so I get to bore you with how I managed to take my kitchen from this

to this

When I bought the house I fell in love with it despite the fact that I hate pine. I loved the space of the kitchen. And I loved the white old country style sink.

Ok… so it didn’t have a drainboard, and, when you don’t have a dishwasher, you kinda need a drainboard. But I solved that problem by buying a plastic drainboard from Howard Storage World. Problem solved.

To be honest, I’d much rather have that sink here, now, instead of the single tub double drainboard sink we have in our current kitchen. I hate that.

Anyway, first thing I did when I moved into Fentonbury was to change the tap in the kitchen. I hate those low taps which you can’t get the kettle or a big pot under unless the sink is empty (who’s sink is always empty? Not mine…)

I put in a nice, high gooseneck tap. I have no memory of how I actually did it so I can do it again here, but I did do it myself.

So… here are some photos of what it looked like when I first moved in. Full of packing boxes to start with…

Then tidier, but oh so dark with all the pine…. From the living room, which was all white back then, the kitchen looked like a gloomy cave even though it had a skylight.

The breakfast bar was really wierd. It was low so that you had to use normal chairs to sit at it, not stools… which meant you were really low compared to the bench.

(The ‘rail’ to the right of the photo isn’t built-in… it was my cot side solution to keeping dogs out of the living room at the time.)

Among other things, there were 3 cupboards that didn’t have doors. On the plus side, my microwave fit perfectly into one of them!

Luckily, the floor was perfect.Polished tassie oak floorboards. I didn’t need to do anything to that.

Another plus – the bench top was gorgeous. Also tassie oak. Beautiful.

I did a few little things to make the room look better till I got the courage to take the plunge and really change things. I removed the little shelves from one side of the sink and moved them to the large blank wall on the breakfast bar side. I added a few more shelves to display my collectables and to hold the coffee and sugar.

I put an Ikea bathroom/towel metal shelf above the corner near the stove to hang pots from. And I put an old bathroom cabinet I’d re-done and repurposed on the wall to hold spices.

The cabinet is solid tassie oak with a king billy pine door that I found at a tip shop for about $5. That’s before they started charging like bulls. I removed the old mirror from the door, sanded back all the old paint to expose the timber. I put a solid tongue and groove back onto it. Added clear glass to the front door and a hand made handle, and voila! Gorgeous spice cabinet!

I’ve always loved the look of painted timber on walls. The only thing which was holding me back from painting the kitchen walls and cabinets was the thought of all that sanding!

Then I thought about ESP (I had used this stuff in Melbourne to paint an old laminated kitchen dresser and I loved the finished product).

So, instead of sanding, I simply wiped on and wiped off the ESP, then painted.

I used Antique White USA for both walls and cabinets. I changed the ugly plastic white handles with some simple black knobs cause they were cheap enough and weren’t brass. I don’t like brass.

I removed the small shelves (relocated them, a couple of them went next to the pantry to hold cook books) and added one large shelf to hold display items. I put another of my bathroom cabinet makeovers (this one with a bird wire door and a metal back) on the large blank wall to hold coffee, tea, sugar etc.

I also raised the breakfast bar. Since the bench overhung on both sides, I couldn’t put the breakfast bar at the same level as the benchtop. I considered leaving it off completely, but then had second thoughts. I just moved up the brackets holding it in place and so there was a small step down to it. I never got around to getting proper matching stools for there…

I made a large frame from old dado rail to hold an old poster I’d bought off ebay many years ago. Below I was testing out how it would look by putting it on a box on the breakfast bar… Very technical.

I added some tin signs over the stove (no rangehood, so many old Australian houses don’t have rangehoods).

Still no doors on those cabinets. The problem was working out how to make doors cause of the position of these cabinets… considering I was making them without professional help. I just didn’t think I could make doors to match the existing ones. No wonder the previous owners had left those cupboards door-less.

I tried curtains but I hated them. Yuck. I lived without doors for a long time till I found the solution.

What I did was make a simple flat door for the microwave cupboard and swing it so it opened toward the oven. I decided flat doors would work fine, flat doors being way better than no doors, right?

I then made sliding doors for the corner cupboard under the stove and the cupboard on the other corner where position made it impossible to hang outwards opening doors. I bought some MDF, cut it to size, got some metal ‘tracks’ and made myself some sliding doors.

Ok… I know I’m not exactly making sense here, but one day while browsing in a hardware store (I do that a lot) I saw these square U shaped metal things. They came in long lengths and looked just the right size to hold a 6mm MDF sheet. I tested them and sure enough, they did. I have no idea what they’re meant for, but I bought a few pieces of the metal, cut them and glued them onto the shelves inside the cupboard.

On the corner cupboard above, where the doors could slide back into the corner I only needed one track top and bottom for each door. On the other side, where the doors had to overlap so you could only open one side at a time, I had to make the tracks double, one for each door so they could slide past eachother.

I painted the new doors the same colour, added the same knob to the flat door but I used sash window openers to the sliding doors.


I considered using the fabric I bought on Paros while over there on holiday a couple of years ago to make curtains for the kitchen. But I realised this fabric would be too thick for the amount of light coming in through that window. I’m glad I didn’t use them there now as I have put them in the bedroom here and they’are perfect for there! They add a touch of Greek island to our room and make me smile.

I needed something thinner. A friend gave me some old tab topped organza curtains which I cut and hemmed and they worked perfectly. They let in all the light and blurred the view just enough.

I can’t give you an idea of cost for the kitchen update but it was cheap. I didn’t need to replace appliances or move anything. I just gave it a facelift the only way I could – with paint and imagination.

Lots of fresh white paint, some new doors, new knobs, a new tap, some personal touches and I had a kitchen I loved.

z

memory like a sieve

Used to be, years ago, I had a reputation as being the only one in our family who always remembered to send birthday cards and maintain contact with friends far away.

That was back when we wrote letters using actual pen and paper!

Now that I have Facebook, email, mobile phones and technology at my fingertips I can’t seem to remember anyone’s birthday. Not Wayne’s, not even my own at times. Its like once technology stepped in, my brain stepped out.

So, when I saw this birthday calendar idea on Pinterest, I thought I must make one!

Birthday calendar

However, I couldn’t just copy that one. I had to make my own. I gave it some thought, decided how I was going to do it, then did something completely different.

Only kidding. My first plan had been to find a nice old frame, buy some pinboard material, then paint it up and use pins to add birthdays.

What I did was based on that but adapted when I found an old framed corkboard at a tip shop a couple of weeks ago.

As usual, I didnt take any photos of the ‘before’… Trust me. It was pretty ordinary. It was a lavender painted frame with corkboard in the middle. Nothing special and with a few flaws in the frame.

And I apologise for the bad photos. I was having a bad photo day.

Step 1: I undercoated the whole thing, cork and frame.

Step 2: I painted the cork a light beige colour I had in a sample pot. Twice.

Step 3: I painted the frame limed white from another sample pot. Twice.

Step 4: After the paint had dried I drew a grid, having divided the width of the corkboard into 12 parts, and then drew lines across as well to create boxes. Not so easy when you’re mathematically challenged, the calculator is in the house and you’re too lazy to go up and get it.

Step 5: I painted each of the squares in a darker colour, leaving a fine line of cream showing through between them. I had to paint them twice as well.

Step 6: I painted every second line a different shade, again, thank you sample pots! Two coats.

I then remembered that I didnt actually need boxes, just stripes. So I painted over the lines.

Step 7: I wasn’t too happy with the shiny look of the paint so I sanded it back a bit. It took the shine off on the corkboard which was good. Then I sanded back the frame a bit too. It allowed some of the lavender to show through, as well as some of the timber. That’s fine as I planned to use other colours on the calender.
 

Step 8: I used my brand new stencil to paint the letters for each month. I used a dry brush and burnt umber artist acrylic to achieve a sort of uneven finish.

Step 9: I sacrificed one of my many paint swatch catalogues, cutting up the colours I liked. Using a black marker and my diary for reference, I started putting a number (for the day) and a name of each swatch. I then used some cool pins I’d bought at Officeworks last week to pin each birthday into the corresponding month.

Step 10: I found a spot to hang it where I might see it and be reminded of upcoming birthdays before I have to apologise for forgetting!

 I’m pretty pleased with myself. Thats one of my ‘Things I want to try when I have the time’ items off my list! Only about 546 to go…

However, I did manage to do a few other things over the weekend despite the miserable weather. It poured. Not as bad as the floods in NSW, but it rained enough to flood our toilet again.

I’m kinda over wading in to go to the loo.

I think the guys managed to fix the problem on the weekend by putting in a new long sheet of corregated roofing iron. I’m glad. I did manage to refrain from asking why this wasn’t done in the first place…

I was polite and thankful.

So, this is what I did: I organised my workshop! Its now neat and clean and organised and I can use it. I hung all my paint brushes and scrapers etc with jute string onto an old rake head.

I screwed two old drawers to the wall as shelves and screwed jars to the top to hold odds and ends. I put a trestle table between the windows as a work bench. This used to be the shearing shed, as you can see the fences are still partly there. We decided to keep them.

I have an old office desk as an extra work bench on the other side and some old kitchen cabinets to hold tools and ‘stuff’.

When there aren’t enough shelves an old coffee table on top of the cabinet creates that extra space! I have old crates under the table (framing tools in one, crafting odds and ends in the other) and a collection of tins and other stuff on top for other projects I might do one day.

You can see the birthday calendar drying too! 🙂 That’s Step 1.

Well… my workshopWAS neat and clean for a day, till I started my next project – concurrent with the birthday calendar only a lot more optimistic. My new kitchen table! But more on that later.

z

the dog compromise

My dogs live in the house. They are part of the family. In Fentonbury they had their own bedroom but here they sleep in the living room, on the couch or armchairs. But then, they’re poodles and they don’t shed.

Wayne’s dogs shed. Lots.

I hate dog hair. I hate cat hair even more, but since I don’t have cats thats not an issue.

Ever since I’ve had dogs I’ve had containment areas for them in the house. In Fentonbury I had a combination of gates to keep dogs in or out of areas of the house. Nothing as banal as baby gates for this little chickie.

I made my own gates using materials I found or had on hand. Old shed doors, old doors, gates, crib sides. You name it, I’ve probably used it.

Here are some of my dog gates, both in Fentonbury and here at the farm.

First is the old door I brought over from Melbourne. This was the door on the bathroom in my house there. It had a large frosted glass panel in it originally. I replaced the door with a regular one and had this just sitting there. You can see it below on the room which was the dog’s bedroom.

One day I was walking down the street when I saw this old gate tossed on the pile to be collected by the council. I grabbed it of course. What self respecting DIY-er would let something like a wrought iron gate go to the tip?

I got the carpenter who was at my house putting in new door frames and a new floor to board up half the door and insert the gate into the middle of it. I LOVED it. Ok, so I didn’t do the hard work myself, but it was my idea! And I carried the gate, cleaned it and painted the door!

Its the perfect door for an area you want closed off – the dogs can’t get over it, under it or through it. It allows the warmth of the heater or the cool air of the airconditioner (I had one of those in Melbourne!) to circulate between the rooms. The dogs can see out and aren’t isolated if you close the door. Its the ideal door. Needless to say it comes with me from one house to the next.

Next are the old shed door gates. I have two of these which I made while living in Fentonbury. They’re only low which means they’re easy to step over. Yeah, that means that a dog can jump over them, but MY dogs would never do such a rude thing!

These gates were made by cutting down the shed door, sanding it back a bit and adding the big hinges and a gate latch. As you can see, they’re not very high but they do the job. I don’t have to worry about dirty dog pawprints on the sheets. Not that I mind so much… but these are the compromises you make when you live with a man who doesn’t really like dogs in the house. And we all know that ain’t gonna happen! So we compromise.

The next dog gate is one I custom made for my house in Fentonbury. It has an open plan kitchen/dining/living room. That meant that I wanted to be able to restrict the dogs to one or other of the spaces. Sometimes I wanted them out of the kitchen. Other times out of the dining room. Or out of the living room. So I came up with this idea to use some cot sides I’d gotten at an auction.

You know, one of those things I bought thinking ‘One day they’ll come in handy’.

First, I cut down the crib sides so there weren’t any large gaps. I joined them up using small hinges so that they formed a folding 4-panel ‘screen’. Finally I painted it antique white USA like the rest of the woodwork in the house and hinged it to the doorway between the kitchen and dining room.

I know you cant see it well in that photo but I can’t find any other photos. In this photo its folded up against itself out of the way. Cause of the hinges and latches I’d put in it could be moved and latched to either the kitchen bench or the other side of the opening between the kitchen and dining room, thus keeping dogs in or out of the spaces as needed.

Last, here is the last of the crib sides. I put it to use here on the farm as a way to keep Wayne’s dogs (the shedding ones!) from the couches. I did the same thing: cut it down to size, hinged it to the wall and added a gate latch to it. Here you can see Romeo and Montana modelling it for you. This is a higher gate and much harder to step over when you’re getting older…

I added a gate latch so it would close automatically when you pushed it behind you. As you can see, I got lazy. This one hasn’t been painted yet.

However there was a problem. This was the first gate I’d made which actually swung back to a wall. It would bang into the wall as you opened it and leave a mark there. Ugh. Not so good. Till today I piled a couple of cushions on the floor against the wall to stop the destruction of my paint job. Not the best solution.

This morning I got off my butt and did something about it. I took one of those foam holders I get when I buy a certain brand of soft pastel. I’d been eyeing them off for a while now thinking they were just the right size to make a ‘bounce pad’ for the gate latch.

Yep. Perfect fit. So I sliced one up, filled it with silicon glue and popped it onto the gate thingy. Now… if this stays on it’ll be the perfect solution.

Fingers crossed!

z

musings of a wandering mind

The other day while pooper scooping in the yard (something I dont do nearly as regularly as I should given we have 4 dogs who can poop BIG) I found myself thinking about the joys and responsibilities of owning dogs rather than having children.

For one thing, as I scooped the poop I couldn’t help but notice that I keep an eye on the dogs’ health / bowel movements by doing so. “Ooh, thats a nice firm one”… “Hmmm… a bit soft and dark, wonder who’s got an upset tummy” … “Ah, nice. White and crumbly. Just the way I remember dog poop from my childhood” etc.

I belong to a poodle discussion group (one of many I’ve been on through the years) and on there discussions about such things as dog stool consistency, shape and colour is a regular occurence. Disgusting, I know. But no more disgusting than, I’m sure, a mommy group discussing diaper contents. Which I’m sure they do.

See, owning a dog isn’t that different from having children. Dog mothers and baby mothers talk about the same things – poop, eating habits, cute things their baby (furry or otherwise) does. They brag, they carry photos to show off to everyone they meet. They talk about their babies incessantly.

See? No difference.

The difference is that eventually the child grows up, the amount of care needed doesn’t so much reduce, it changes. You may no longer need to feed and change diapers but you worry about them learning to drive, date, smoking, drugs, etc.

I dont have children, thus I’m an expert at how to raise them. 🙂

With dogs, they never grow up to independence. With them you have to pooper scoop for the entire length of their life. You’re responsible for feeding them, caring for them if they’re sick, ensuring they eat well and exercise etc. In other words, dog owners are stuck in that ‘young child’ phase for the 10+ years of an average dog lifespan.

At least with dogs you dont have to worry about them hating you when they’re teenagers, crashing the car or taking drugs. And you dont have to lose your figure to acquire them!

The biggest differences, however, surround the fact that as dog owners we can control our babies’ sex lives. We can legally, and without repercussions, get them neutered. If we breed them we get to pick their mate. On the other hand, I have never, so far in my life, heard of a mother having to pay a stud fee to some young buck’s parents in order to impregnate her daughter.

Or, which is way worse, having to ‘take matters into your own hands’ (literally) and act as stud master to your inexperienced son first time he mates, to help him find ‘it’.

Ewww.

I guess there are benefits to both types of children… I could do without the pooperscooping though. I’m  tempted to train them all to squat on the toilet…

Anyway, enough on that slightly disturbing topic. On to more fun stuff.

A few months ago I found this image in an old magazine. I did what any self respecting DIY-er would do. I ripped it out and put it in a folder of things I would love to try when I found the time.

I kept thinking I needed to find the right box. I started looking. And guess what? We had one in the casita! It was just the right size but it was filthy. It was full of straw and I think a cat had been using it as a bed. It was a home made crate, made with chipboard and with an old real estate sign from Canberra. Who knows how that got here!

First I cleaned it out. Scraped it out, disinfected it. Then I sanded down the edges where it was rough and uneven (someone had been gnawing on it) and I painted it. I dont have any ‘in progress’ photos as I didn’t think of it. I mixed up a colour using white house paint and acrylic paints. I mixed some yellow ochre into the white as I wanted it to be more cream than white, whiter than the cream on the sign, but closer to it than white would be. When the cream paint dried I rubbed in some burnt umber around the edges so it soaked into the dints and scratches.

I didnt have the same kind of magazine/newspaper to line the inside with, but I had tons of old poodle magazines dating back to the late 70s. So I used them. I used PVA glue to stick them down and painted them over with more PVA once they were dry to seal them. The old fashioned show poodle haircuts added the poodle touch and a bit of age to the box. As if it didnt look old enough as it was.

Then I bought some wheels off Ebay and screwed them onto the bottom. And voila! Coffee table/side table/rolling library!

I have a real thing for boxes. This is an old box I found at a tip shop somewhere which was missing one bottom slat. I asked Wayne to add another slat to it for me and he made me a lid for it too! He used weathered timber we had planned to burn when cleaning up around here, but wont ever burn since we use it for projects all the time. He hinged the lid with a couple of leather straps and made a wire latch for it too. I now keep some tools in it to keep them handy in the kitchen.

And then there’s the brilliant red box. This was another tip shop find. It was already red when I found it but missing a latch and handle. I dont have any before photos. I did take some but I cant find them.

Does anyone remember the box I made for Scooter’s ashes? I wanted something special for his ashes so I went and bought one of those little pine craft boxes from the hardware store. I primed it then gave it two coats of red. The red I bought was true red which was way too bright so I added black till I got the right colour.

Once the paint was dry I painted it with crackle medium, let that dry and painted the final red coat. Since I had red on red, you couldnt really see the cracks but I had a plan! Instead of letting an under layer of paint show through the cracks, I rubbed burnt umber into them. (Does that sound familiar? I do that a lot). I rubbed and then had to damped the cloth and remove the excess, cause trust me, there was a lot of it. It gave the box an old kind of grimy appearance. I loved it. It now sits in the bedroom on the dresser next to my old window/mirror.

Now back to the other red box. I loved the finish on the Scooter box so much that I wanted to do it again. Also, I spent $550 on an antique chinese dresser when we first moved here which is a similar deep dark red colour with aged cracks and I wanted to kind of match that.

Since the red box was already red I didnt need to undercoat or do much to it. I wanted the dints and scratches so I didnt sand either. I just painted it with the same red I’d used on Scooter’s box, mixing up a new batch so its a bit brighter. When the reds were dry I skipped the crackle stage and went straight to the burnt umber rubbing stage.

I decided not to put a closing latch on it its very heavy and there’s no way you’d lift it. I bought some small red wheels on Ebay, I think they’re a bit too small and too red but they seemed like a good idea at the time.

I asked Wayne to make a handle for it out of an old spoon and this is what he made. Excellent isnt i?

I am thinking rope handles on either side for pulling would be a nice addition…

I keep electrical bits in it, you know, all the extension cords, double adapters, timer switches etc that you always have lying around. I’ve used it as a temporary bedside table, but basically it just looks good with the bonus of being handy storage for those odds and ends I dont have a drawer for and dont want to go running to shed everytime I need something.

I’m currently working on a few other projects but really, its been so hot here that I’m too drained to do much at all other than lie on the couch and groan. They predicted 34 degrees C yesterday but it got up to 39-40C. Thats 104F! Same today. The house is a mess screaming out for a tidy. The To Do list sits here glaring at me accusingly and I sit and blog, thumbing my nose at the dirty dishes and washing to be sorted.

There’s a haze of smoke outside cause the wind and heat yesterday caused a few bushfires further up the valley. The plants are suffering and the poor roosters ran out of water halfway through the day. Lucky I checked and topped it up. I spent 1.5 hrs watering the garden and vegie patch yesterday evening.

I kept the dogs inside most of the day to keep them out of the heat. I did have 3 dogs to groom including 2 standard poodles (one being Little Zefi Munchkin from Pagan’s second litter). That coupled with the heat ensured I did nothing yesterday afternoon. I didnt even log on and thats saying something! I have an obessive attachment to my computer under normal circumstances.

I better go hang to washing out to dry (and get smoked) before it gets any hotter.

z

those voices…

Photo: Wayne’s cartoon for a friend’s 40th birthday yesterday.

We were invited to Sharon’s 40th birthday yesterday and Wayne did one of his wonderful cartoons for her. I matted and framed it. The joke is that her husband is making chairs out of horse shoes and it takes 69 shoes  to make one chair. Wayne’s work is great isn’t it?

It was a pretty good night. They had a band and the music was good. I had a few dances with Leslie, a friend and neighbour from Fentonbury. She loves dancing with me cause I can lead swing and she loves learning new steps. Sometimes I really miss my old dancing days… I used to love dancing so much that when I’d get to a venue and the band was playing I’d have to run in so as not to miss one precious moment of dancing. I wish one of my old dance partners would come visit and I could show people how its really done! sigh…

Meanwhile, its Sunday night and what am I doing? I’m sitting in front of the computer. I just cant help myself. I’ve become addicted to Pinterest. I thought it was bad enough when I added Facebook and blogging to my computer time, but now I’ve found Pinterest… Thank you very much Diane! I thought you were my friend!

My eyes are sore. My butt is chair shaped. And still, I cant tear myself away!

Not only that, I cant wait to try the one million, fourty three thousand and fifteen projects, decorating ideas and clever things I see there. I just need a bigger house and a whole lot more time!

I want to redo my kitchen, re-paint the house, landscape the yard, create secret garden spots, cut wine bottles in half, learn to crochet, felt a mouse, make chandeliers out of jars and old fencing wire, build a couch out of used pallets, and thats just the start of it!

I always knew there wasn’t enough time in my day, but now its worse!

I can’t stop my brain. I lie in bed at night and my brain is buzzing and ticking. Last night I couldn’t sleep cause of the voices inside my head, saying things like “I wonder if the cupboard in the bedroom will fit beside the fridge if I move the coats to the mud room once its finished and put the metal suitcase underneath it to hold shoes… and what if I moved the bookcase from one side of the living room to the other or will it be too wide? must measure it… and I still have that felt, I need to make mug warmers out of it, not to mention the rug I want to make out of old tshirts… must remember to go buy more tshirts…”

Its a curse I tell you!

For a minute today I thought I’d lost my notebook – the one I keep ideas in as well as my To Do lists. The thought of having to start a new list of To Do lists boggled my mind. Thankfully I found it. It was under the pile of ‘stuff to file’ on my desk.

But I’ve had a productive day. I’ve managed to cross quite a few things off my To Do lists today.

I say lists, plural, because I have more than one list. I found that having one list was just too hard. The list got too long and unmanageable. I’d look at it and my mind would go blank.

By breaking the list up into segments I’m able to ‘see’ more clearly what needs to be done. I have the lists sorted by area of the house or type of activity. ‘Kitchen’ ‘Deck’ ‘Sewing’ etc.

Today I tackled the sewing. Finally. The funny thing is that once I actually got started it didn’t take that long at all.

A lady who’s dogs I groom gave me some alpaca fleece when she had her boys shorn. It was sitting in bags in my workshop for ages. She said that she makes dog beds out of it every year for her dogs and they love it, so I decided I’d do the same.

Montana and Romeo (the poodles) sleep in the living room on the couch or armchairs as they don’t shed. Mischa and Barney have their own beds and, thanks to Barney, most of their bedding is in tatters.

Long story: when we first moved here Mischa and Barney were outside dogs. They had beds in the garage, then on the deck. When Wayne went to Adelaide on holiday I made a bed for them in the entrace and they’ve been sleeping in the house since. In fact we now have to pry Barney out of bed in the morning or to go out and pee at night.

I found a great, big old box at the tip shop. It was like a large drawer, about 3ft wide, 2ft deep and 7in high. It was painted a mauvey colour and was a bit rough. I sanded it back enough to remove most of the old paint but not totally, cleaned it up, then painted it a pale green. In order to give it a more interesting, aged, appearance, I wiped some of the paint off to expose some of the grain, giving it a limed appearance. I then gave it a couple of coats of estapol to seal it and make it easy to wipe clean.

Once it was finished I put it in the entrance, put in some dog beds and Mischa and Barney curled up together at night. Lately however Barney has claimed it as his bed and Mischa has been sleeping on a thin pad in the hallway. She really needed the new dog bed.

I found some old curtains I’d taken down from the dog grooming room in the casita. They’re lined fabric in orange. Tasteful. I cut off the tape, sewed them together, stuffed them with alpaca fleece (after picking the odd stick out of it) and voila: dog beds. Oh, I also put another cover on the outside. I stitched that closed as they both have a bad habit of taking covers off things. This way I can remove and change covers when they get dirty without then ruining the actual bed.

This is Barney’s bed.

And here is Mischa on her new bed. I am experimenting with a hessian bag I got from the tip shop. She seems to like it and I love the look of it.

It goes with my postal bag come laundry basket! This post bag was going to be thrown out so we gave it a home. Took me a while to figure out what I wanted to do with it but I love it. I put 2 hooks in the bathroom wall and hang it there. When its full I sling it over my shoulder and take it down to the washing machine. (Our bathroom is Ugly with a capital U. One day…)

The sewing extravaganza didn’t end there. Last week I went into an outlet store having a huge sale. Jeans for $10. You just cant go wrong at that price. I bought 3 pairs, one short and 2 long. Or they’re meant to be long. They’re just not quite long enough for me. You know what I mean… I’d have to wear them like those homeboys you see getting around with the top of their shorts (or more) showing and the crotch of their pants somewhere down between their knees. (What is it with that anyway?)

I had some samples of upholstery fabric which I was holding onto to do something with one day. That day came today. I cut it up, stitched a cuff and sewed it onto the bottom of one of the new pairs of jeans. Now I’m looking for another interesting fabric to do the other pair… paisley would be nice. I’ll be wearing this pair to work on Tuesday. I’ll let you know how it goes. 🙂

So I got a few things done today. But you see what I mean about crossing one thing off the list and adding another five? The dog beds were on the list. The jean cuffs were a new addition.

We took Ben up to Ashley to have him saddle broken. Or ‘backed’. He’s had a saddle and bridle on him and we’ve done plenty of work with him. Neither of us has had the guts to get on him. When he’s ready I’ll be going down for a few lessons on his back before bringing him home. Wally and Dancer have been unsettled over his absence.

I also rearranged the grooming room and cleaned it. Dog hair gets everywhere! I removed the lino from the toilet floor to allow the floor underneath to dry (if its not already beyond repair). We are now closing the door to the toilet but its almost impossible to get in cause Wayne has hung a tarp over it to keep rain out. And its been raining today. I did some washing and hung it out just in time for it to get wet. Eh. We have good clean rain in Tasmania.

All in all, its been a good day. I feel good. Hopefully the voices will be quiet tonight.

z