everything looks better with numbers (I finished the wardrobe room!)

Its been weeks since I last posted. I’ve been busy. Life just got out of hand. I’d come home from work and most nights I didn’t even want to turn on the computer and check emails. I think I had something like 144 email notifications from the blogs I follow.
When life gets too much, reading blogs is the first thing that goes. 
I’ve also been feeling a bit ‘ordinary’. My backs been sore and so I haven’t felt like doing much out of work hours. Just reading and watching TV.
And shopping.
I don’t even want to THINK about the money I spent on clothes lately.
To be fair, I don’t buy clothes often and I’ve really wanted a wardrobe makeover. I’m tired of looking boring and want to look nice, even if I’m not the weight I’d like to be. In fact I want to look nice despite the weight I am right now. No use waiting, right?
Speaking of wardrobe makeovers, however, I did a bit more wardrobe making over in Wayne’s wardrobe room this weekend.
I’d bought another 3 industrial type shelf units and was itching to get the room finished for him. Naturally I when I got the room ready I discovered I didn’t have a paint roller. 
So I skipped the painting part of the makeover and went straight to the wardrobe part. I figure I can paint later. Sometime. One day… maybe.
I did the same as last time, I had two 5-shelf units and I put two rods between them to create a double layer hanging space. This time around I added 5 canvas ‘crates’ for storage (socks, undies, etc) and, because everything looks better with numbers on it, I used a stencil to number them.
The numbers might help Wayne find things too… 
“Zefi, where are my socks?” 
“In box no. 2.”
So the room is finished now (well, other than the paint… and perhaps a blind where the curtain is right now, cause roses are just so masculine…). There are shelf units and double hanging space on both sides, a chest in the middle to hold sleeping bags and other such items, and shoe storage behind the door.
I had thought that if I’d made this room into a wardrobe room I could even put my own clothes in it.
Dream on.
Its chock-a-bloc.
I swear, if Wayne vacuumed I’d have to question his sexual orientation.
I moved the boring old pine wardrobe that was in there before, and the boring old pine chest of drawers, into our bedroom my my own clothes.
Cause now I have nice clothes I want to hang up, not just jeans, T-shirts and sweaters.
Naturally every night before I drift off to sleep now I’ll look at them and think about what I can do to pretty them up.
I wish we had bigger bedrooms….
z

wire light fitting

Over the last 2 weeks I’ve been working on this light shade for the wardrobe room that I posted about here.

I wanted something more industrial in feel to match the hardware shelves I used in the room so I looked around at what I had.

I found this fuddy duddy lampshade I’d picked up from somewhere. I’d already ripped off the granny pink frilly cover that came with it and was left with that glued on ribbon.

Have you ever tried to remove that stuff? It sets like concrete. I tried cutting it off and broke a small pair of scissors. I then tried slicing it off with a scalpel and broke that. I tried a stanley knife and cut myself.

In the end I soaked it in hot water for about two days and went back to scissors and eventually got it off.

Then I put it on the coffee table in the living room where I would do a bit of wiring when the mood took me. I had planned to add beads to it as well but only got as far as adding some small black ones randomly. I used a thicker black wire and thinner silver wire. I’m not sure if I’ll add crystals to it later or not.

I put it up on Sunday and I love the way it looks when the light is on, the pretty shadows it casts on the ceiling.

Meanwhile I’m suffering big time. I spent most of the day on Sunday gardening as I had to get some new plants into the ground before winter. Having problems with my right arm (RSI, carpal tunnel, arthritis, whatever) I tried to spare it and used the left for the heavy work: digging out gigantic weeds using a pick, taking the weight of the shovel, etc.

I put 2 blue plumbagos along the fenceline to hide the water tanks, 2 purple salvias to fill gaps along the front of the porch, 2 white gauras on the porch corner, 8 seedling snap dragons in a narrow bed on the driveway side of the house and 2 mexican orange blossoms on the ends of the trellis. I still have 2 pale yellow double banksia roses to plant and to relocate one of my hydrangeas. When they all grow (thinking positive here) it will look gorgeous.

I also put up some crates as window boxes outside the mud room with Wayne’s help cause by then my hands weren’t working that well.

As a result of all that work I have thumbs that are refusing to work. They’re sore and have no strength to grip much of anything at all.

Ugh.

Remind me never to garden again. Its bad for my health.

z

Shared at Knick of Time Tuesday

project wardrobe room DIY

We have a small room in this house. A really small room. Big enough for a single bed, a chest of drawers and a wardrobe but not much else.
We’ve used it as Wayne’s wardrobe room since we moved in, with a single bed just in case we overflow with visitors.
It was always a mess.
Wayne owns too many clothes for one wardrobe, a cupboard, a chest of drawers… and this house.
He owns too many boots and shoes for any normal human being except Imelda Marcos.
I’ve been sick of that room pretty much forever and I’ve been dying to make it into a walk in wardrobe with as much hanging space as I could fit into it.
So, I finally put Project Wardrobe Room into action. I decided the easiest way to make a wardrobe was to start with something someone else had built.
I like the industrial look of hardware shelving so I was looking for nice galvanised metal shelf units meant for workshops. Unfortunately the better/bigger/taller ones are made with powder coating these days. Darn.
So, I adapted. Instead of galvanised metal I went with grey walls, black units and white shelves. (And salmon carpet…) 
I bought 2 hardware shelf units on sale a couple of weeks ago. 
I also bought 2 thick towel rails with the matching attachments.
Working towards Project Wardrobe Room, a few weeks ago I donated the single bed. Then I promptly replaced it with other bits of furniture …which I managed to get out of the room last week. 
I started pn Saturday. 
Step 1: I opened the boxes with the shelf units, removed the mdf shelves and painted them antique white USA using the paint I’d bought for the woodwork in Fentonbury.
Step 2: Paint the walls.
I wanted to paint it grey, but I was going to stick to not spending any more money on this project than I already had. I searched my paint tins and found I still had about 1/3 tin of the dark grey I used on the living room feature wall. I mixed in about 1/4 of the light beige I’d used on my woodwork and added a bit of ceiling white for that extra lightness to get a shade of grey I kinda liked.
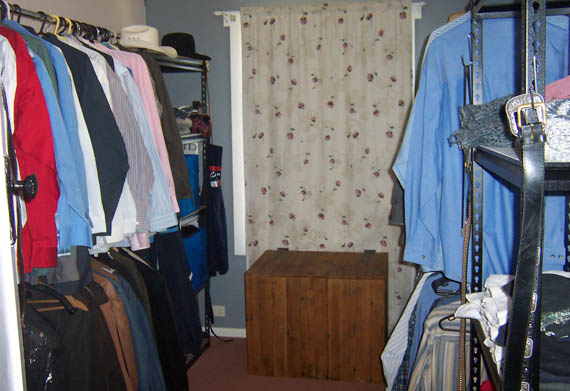
Then I painted the two walls I could access cause the third wall still had a big heavy wardrobe full of clothes, a large chest of drawers and a cupboard, all chockablock full of clothes, draped with clothes, ties, belts and scattered with shoes and boots.
Once on the wall the paint looked more blue than grey. (NB. My monitor is stuffed and I can’t seem to get it back to the colour balance I had before. Everything looks more blue than normal on here right now.)
Anyway, it must be the light in this house… or the salmon carpet, but greys tend to look blue-ish in here. The ‘grey’ I picked for the living room looks like light blue.
Step 3. Put together the units. I glanced at the instructions then proceeded to put the units together using one of Wayne’s old cowboy boots as a rubber mallet. 
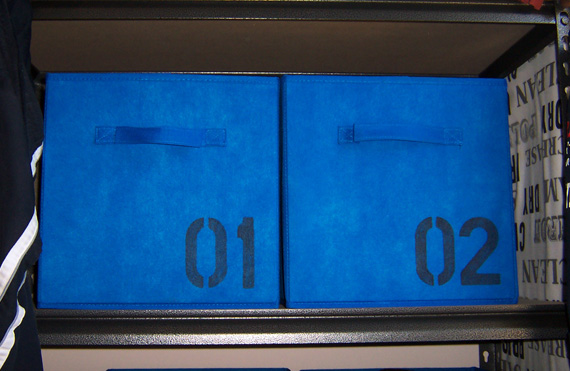
I cut a piece of vinyl left over from the mud room for the bottom shelf – easier to clean when dirty boots inevitably leave their mark. I also turned the top shelves upside down so you see the white side, not the unpainted mdf side.
Step 4: Find the towel rails and fittings. Search and search and search. Get annoyed, then angry. Have a cup of coffee and then finally locate them in the last place you thought to look.
Step 5: Swear at the idiot who used sticky tape to hold the two rails together. Then swear some more at the idiots who stick labels on their products with glue strong enough to glue King Kong to the empire state building. Use eucalyptus oil to get the label and gunk off.
Step 6: Figure out where the rails needed to go in order to hold the shirts and jackets, then screw them in place – screwing directly onto the mdf shelving. This bit was like a step aerobics class, involving as it did a lot of up and down the stepladder after dropped screws, dropped rails, dropped end caps.
My exercise for the week.
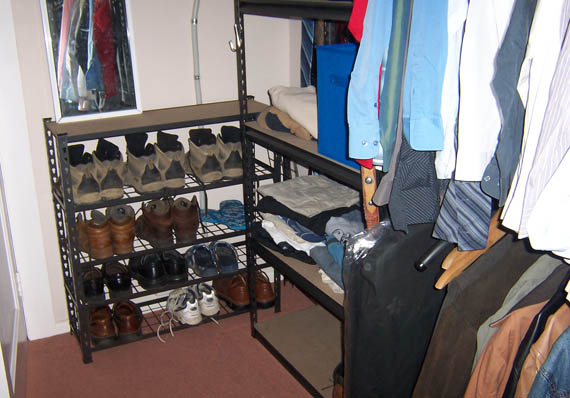
Step 7: Remove all clothing from the wardrobe and stack it on the shelves and hang it on the rails – shirts on top, jackets on the bottom. Boots on the bottom shelves. Discover that there’s no way on earth all the shirts will fit on these 2 rails and put some back into the wardrobe. That left me with an empty cupboard which I pushed, pulled and manhandled out onto the deck for removal later (Wayne! I have a job for you!)
Step 8: I moved the chest of drawers closer to the wardrobe and moved an old timber chest I had in the bedroom into the wardrobe room. This will hold Wayne’s swag (aussie sleeping bag for camping).
I like the feel in the room. So much more organised. Neat. How long it will stay that way is anyone’s guess.
Last touches: I vacuumed. I put in a brighter globe (does anyone else hate those energy saver light globes which take ages to light to their fullest?). I removed the granny light cover that was there and am planning to replace it with something a little more interesting.
Still to do: A different curtain for the window. The light fitting. The other wall. There are suit jackets and pants, more shirts and many shoes that still need to find homes in the new look wardrobe room. Do I keep a chest of drawers to hold underwear and handkerchiefs or do I go with more of the same shelving and rails with baskets to hold the small stuff… there-in lies the question. 
Thoughts?
Now I’m left to clean up the disaster in the living room and put away the 1 tonne of washing I finally folded.
Phew.
Wayne’s reaction?
“You done good.”
“So, do you like it?”
“Yeah.”
A man of monosyllables.
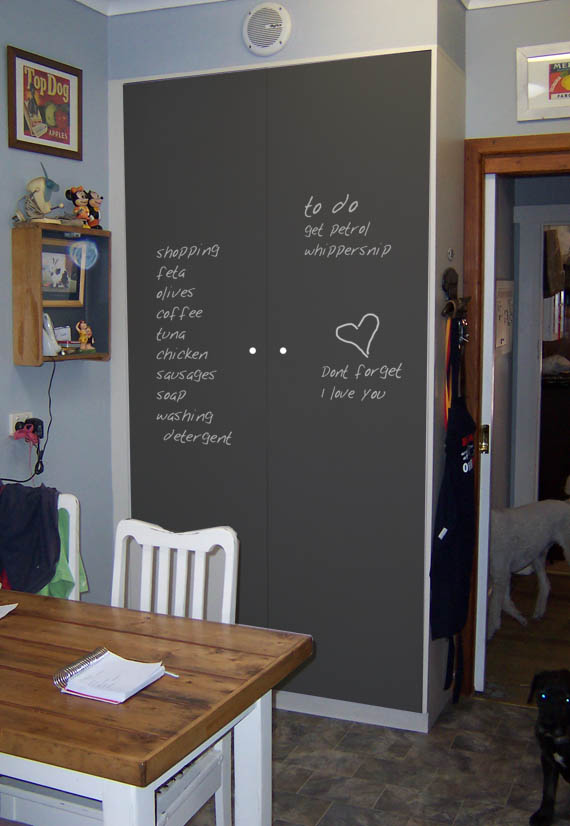
But he likes it. It sure beats the kitchen chalkboard fiasco of 2013… which is still fresh in my memory as I’ve only removed half of the chalkboard so far.
z

Shared at:

DIY Show Off


monumental fail…. kitchen chalkboard

I don’t fail in my projects often. I stall, I flounder, I re-evaluate… but I don’t often fail.

This project was a monumental, irrevocable, unadulterated failure.

I had planned to transform this:

Into this:

Simple, it seemed. Easy. Piece of cake.

I washed down the laminated doors of the pantry.

I smeared on a product called ESP for preparing surfaces to take paint. Tiles, laminate, metal, anything, without sanding.

Now, I’ve used this product before. Twice. Once many years ago in Melbourne when I painted the ugly dark wood laminate doors and drawer fronts of a gorgeous old 60s kitchen dresser. I wipe it on, wiped it off after 90 minutes, then painted it with a glossy oil based paint.

In Fentonbury I did it on the kitchen cabinets and walls which were all lacquered pine. Wiped it on, wiped it off, undercoated and topcoated in acrylic. This wasn’t as great a success. Perhaps cause the topcoat was acrylic and not oil paint. It chipped. Not too badly.

Then we have this:

Maybe its cause the tin of ESP was old… Maybe its cause I didn’t undercoat (I’m leaning towards that)… but the paint just wiped off! Even after 3 days.


Wayne hated it. Said it was like looking into the abyss when he sat at the kitchen table, why on earth would I put a black wall in a small kitchen.

Well… it seemed like a good idea at the time.

This morning I got up and saw this: 

No doubt about this project…

So, when (if) I find the energy I’ll climb on a chair and start scrubbing the paint off. Should be easy enough.

ha. ha. ha.

z

dragonfly windchime & other shiny things

I haven’t been doing much these last few weeks, but I ‘ve been messing up the living room with my wiring and beading so I could knock up a few more wind chimes for the local shop I sell through.
I do enjoy making these things as I watch TV, sorting through my boxes and collections of odds and ends till I find something which inspires me, then putting bits together to form something pretty.
As you know, I love rusty things, old things, crystal beads and shiny wire. A few weeks ago I bought my first couple of spools of coloured wire and I’m loving them!
This little dragonfly is made of a mix of silver wire, gold wire and silver beads. It sits on what I believe is the cover from an old car light I found in a tip shop. It makes the best sound when the wind jingles the tea spoons.
 
This heart is made from an old coat hanger bound with red and white lace and embellished with an odd collection of keys, crystal beads and a tiny sugar spoon.
A silver napkin holder makes this very loud windchime for those who like more of a chime. It consists of a collection of spoons, forks, orange glass beads, a large clear crystal and a tiny star cookie cutter.
More chimes to share soon, though I should really be concentrating on finishing the house painting. But that’s ok… I can wire and bead while I catch up on episodes of Dexter, The Walking Dead, Game of Thrones, Supernatural, CSI, Bones and Downton Abbey.
I have ecclectic taste in TV series.
z

{almost} no sew curtains

I did tell you I was on a roll didn’t I? Weeks of very little from me, then suddenly I just can’t seem to shut up about the things I’ve made and done!

Do you remember when I found a ton of old cotton flour and bank deposit bags at an op shop ages ago?

Most of them are from the 80s, but that one with the woman holding a cake on it is in pounds so I figure it has to be from the 60s before Australia went metric.

At first I thought I wanted to make cushion covers out of them, but some are pretty old and the shape doesn’t really lend itself to a cushion unless you trim the image (no way) or lie the cushion sideways (not ideal).

I also thought they’d make great (interesting) curtains for my ugly kitchen.

A talking point type of thing, if you will.

So first thing I did was sort out how many bags I’d need for each window. I have two windows in the kitchen. One is tall and narrow, the other is tall and a bit wider. The first looks out to the front yard but is positioned in such a way that you cant really see out of it much, sandwiched as it is between the cupboards holding the microwave and the stove/rangehood.

The bigger one looks out into the mud room now that we’ve enclosed that tiny porch.

I won’t go into what I’d LIKE to do with the kitchen layout and window placement…. I won’t…

The tall narrow window gets the full HOT afternoon sun and had a venentian blind on it… very necessary if you didn’t want the kitchen to become a furnace on days like today. However the venetian blind was broken and I wanted it gone.

It was peach.

Need I say more?

I decided it needed a full curtain – 4 bags, 2 across and 2 down. I ironed them and sewed them together on my trusty ancient Singer sewing machine (bought for me by my father at a Trash and Treasure market about 20 years ago – well done dad!)

Using some small curtain clips I’d bought from ebay (cause the only place I found them locally was insanely expensive) I suspended them from the window sill using some old curtain hooks and a stick of bamboo I ripped out of a screen….

Ok. I didn’t have a curtain rod which would fit so I improvised!

On the other side of the room I had put up a hanging rail to hold the frying pans and some totally useless/display only bits and pieces. I only needed a short curtain to cut out some of the glare but still allow us to look out the window to the front gate if we bent over the sink, leaned to the left and carefully pressed our faces to the window all while avoiding braining ourselves on the sharp cupboard corner.

Don’t you love the layout of our kitchen? I know Wayne does. You’ll recognise him. He’s the one with the band aids all over his head.

Hm. Not quite right… It was lacking something (and I don’t mean how crooked it is… I fixed that.)

The main problem, as you can see on the narrow window, is that the curtain looked see-through with the strong sun behind it.

I couldn’t leave it like that. Not in this heat. So I grabbed this girl’s best friend – burlap!

I cut a piece of burlap slightly larger than the flour sack curtain I’d made, clipped it all together and voila! Much better!

I did the same with the other window too, only this time I cut the burlap longer so it would go behind the rail and cover a bit more of the unsightly mess in the mud room.

Not bad for an almost no sew project. Basic and easy.

Just the way I like it!

z


Shared at:

What we accomplished Wednesday at Green Willow Pond

Beyond The Picket Fence

The Girl Creative


home is where I hang my hat

Its way too hot to be doing much today. They’re predicting 35 degrees in Hobart and that means at least a couple of degrees hotter in the Derwent Valley.
Life on the farm has been going well, if you don’t dwell on the fact that we’re seriously close to running out of water and desperately need rain.
And we don’t grow crops. We only have 3 horses feeding on about 11 acres of pasture. And we have bore water so we can water at least parts of the pasture every day and keep the horses in fresh water.
Progress on the house painting is slow. I’ve been lucky enough to have the help of a friend from the mainland. I met Basia when she was a real estate agent, she sold my house in Melbourne for me before I moved to Tasmania in 2003. We stayed in touch and she visits almost every year. Till now she’d only ever visited Tasmania to hike and cycle, stopping in with me for a day or two at the end of her trip.
This year Basia came over to pick cherries and look for other work so she’s been staying in my house in Fentonbury. She’s the best guest ever – she’s always doing stuff! On her various visits she’s done tons of gardening, this time she’s helped paint the house on two long days, fixed curtain tracks and hemmed curtains for my house in Fentonbury.
On Saturday she came over and we painted the north and east sides of the house – all that’s left to do now is paint the top bits (including the underneath of the roof) on 3 sides, topcoat the window frames and paint rails on 2 sides.

Ok, that’s not a small job, but its manageable. The majority of the work has been finished. I’ll do the rest over a few weekends, providing the weather doesn’t suck isn’t too hot.
Meanwhile I’m on a roll of some kind… I’m itching to do things. This happens to me every now and then. This time I’ve concentrated the feeling on doing something in the kitchen.
I have an ugly kitchen. At least its ugly in my opinion. The people who put it in loved it. 
I dream of a country kitchen… all white on white, with some minty green or aqua, antiques and rustic items on display…
Over the last year I’ve been trying to make it more Zefi-friendly in small ways that don’t include knocking down a wall, putting a bigger window in a more appropriate spot (which will mean moving the hot water cyclinder), putting in a new sink, moving the stove, putting in more drawers and getting rid of those horrible corner cupboards who’s doors keep falling off their hinges, getting a new, not blue laminate, benchtop…  

One of the things in this kitchen is the huge pantry cupboard. Its handy. Sure. But its a big flat blob of white laminate. I’ve been thinking of making it into a big flat blob of chalkboard….

Here’s my vision thanks to the miracle of Photoshop:
Nice huh?
Ok… nice for Zefi!
This morning, among other things, I removed the handles and filled one of the holes. I have some cute little knobs I want to use.
Stay tuned…

Shared at:

Motivate Me Monday at Keeping it Simple

DIY Show Off

The Girl Creative


upcycled baking tray sign

Dada!
As promised…. (drum roll) here is the better dog grooming sign!
This one was made using a rusty old baking tray which had seen better days – it began its life as an eager young tray, looking forward to doing its best, cooking oven fries and such. Then it started to lose its good looks and was banished to defrosting dog food. Things went from bad to worse when all the defrosting lead to corrosion and rust… causing it to be tossed out into the yard where it spent the last 2 years covering a hole its human meant to fill.
Then one day said human was thinking of making a sign and walked by the now much bigger hole and saw the poor rusty tray just lying there, waiting for the ultimate death (the tip). Suddenly life looked up for the old tray – it was brought inside, sanded within an inch of its life to get rid of the loose rust, then painted over with black rust guard paint to protect it.
But back to me…
When designing this sign on the computer (I use InDesign for all my type stuff) I found the best way to fit Dog Grooming and an arrow was to be a bit imaginative – hence the sideways ‘ing’. 
I think its cute.
Anyway, I used a symbol font for the pointing finger cause arrows are just too boring. Then I used Stencil as my font cause it kind of lends itself to being cut out… don’t you think?
I printed it out, cut it out using a scalpel (yes, you heard me… scalpels are so much easier to cut stencils with than stanley knives). I then traced the letters using a pastel pencil.
I used some of the enamel primer I am using on the house to fill in the letters, joining them up so they no longer look stenciled. I did this twice to get a smoother look.
I think it came up pretty well.
I asked Wayne to drill a hole on the handle to match the one that came with the tray and then he made 2 wire hooks to fix it to the fence near the front gate.
No one can miss it now!
z

Shared at:

Knick of Time

Beyond The Picket Fence

the dog room sign

 
I have a new ‘Dog Room’ sign!
When I’m grooming dogs I find that people who’ve never been to our place before will wander around the yard aimlessly, not knowing where to go. I used to have the blackboard on the front porch with instructions: ‘Dog grooming in the shed behind you’, but since I started painting the house the chalkboard has been moved.
I thought it was time I did what I’d always planned and put some signs up to direct people to the right place.
The first thing I did was consider what I had on hand which would I could use to make a sign. I had plenty of timber, but I also had this cute little wire thing I’d found at a tip shop which I thought would make a great wall hanging sign holder.
I have no idea what this thing was used for originally, unless it was to hang bananas on… I drilled holes in it and voila! A bracket to hang a sign off!
I also have quite a few of these old metal tool boxes. The smallest one I had was a perfect fit for the hangy bit thingy. 
(You only get the best technical terms here!)
So… since I was already painting the house and had the undercoat enamel tin opened, I used some of that paint to paint the letters on the metal box.
I had made myself a stencil (for a sign I’ll share tomorrow) so I simply re-used it to do this sign. For this sign I decided to shortcut the process. Instead of drawing the letters and then painstakingly painting each letter by hand as I did with the other sign (the neat one), I just painted over the paper carefully as you would a proper stencil.
Given I was using a paper stencil I’d cut myself and not a proper one, I had a bit of ‘leakage’ under the stencil. Not to worry. I wanted this sign to look a bit rustic. After all, its going on the side of a very rustic old house-come-shed-come-grooming-room/workshop/feed storage/laundry and whatever else we need it for.
You’ll notice the chippy paint on the old timber windows, the unpainted boards, the general aura of abandonment and disrepair…
Of course I had to hang the sign on the bracket. I only had one piece of chain I could pry open to attach on both ends. All my other chains are too heavy and too impossible for this job. So I improvised. I got some rusty old wire and made myself a hook for the other side.
It now hangs off the door frame (the entrance to the hydrobath room with the grooming room to the left) between my dying herbs in colander planters (you may remember them from this post when the herbs were new and still happy to be alive) and the four leaf clover Wayne made me out of rusty barbed wire.
PS: I cannot grow herbs. I’m going to put succulents in those baskets. Or plastic plants. At least I can’t kill them…
This is the view as you drive into our yard. I think people will get it. Don’t you? Especially with the new sign at the gate directing them to look that way.

Stay tuned for that sign tomorrow!

z

Featured at: 

Beyond The Picket Fence

Shared at:

Beyond The Picket Fence
Homespun Happenings

tea light chandelier

I had this idea that I’d like to try making a dangle which could hold a tea light and shine on its own light, not just rely on the sun hitting beads and crystals.

So when I found these tiny little glass craft bottles, I thought they’d be perfect for the job!
First I filled them with a mix of pink and yellow crackle glass beads and aurora borealis beads. Then I made little wire hooks for them.

I found a little cup shaped metal bowl in my junk collection and an old vegetable steamer. 
Put them together…
Perfect.
I tested it out with a tealight in it, just to see how it looks. 
Sort of like a cross between a spaceship and a jellyfish.
But it brings a smile to people’s faces when they look at it and go “Hey! That’s a vegetable steamer!”
Yeah. But with a difference!
z

Shared at:

Knick of Time Tuesday at Knick of Time
What we accomplished Wednesday at Green Willow Pond